
I will never forget the first time Heather Nichols sent me the preview files for this set. As soon as I opened them, it was just so… *Piney*! Rustic Snowflakes is held in this delicate balance between Rustic (as the name says) and whimsical. Heather has officially established her style as a stamp designer and I am loving every bit of it!
……………………………………………………………………………………………….
For my project today, I thought I would delve into another gift item. David has several siblings, most of which have families of their own. Each year I try to do a single FAMILY gift to each sibling branch. It is a lot easier than keeping up with each individual’s tastes, size or interests. Last year I came up with the idea to do ice cream sundae baskets. They were a big hit with everyone! The kids especially thought it was a special treat! Here are all the details of how I put mine together.
One of the most important parts of ice cream sundaes are the toppings! I designed a small box that holds four of our 4 oz. Round Clear Top Tins perfectly. I have attached a template outlining specific directions on how to make it. Super easy pattern to follow.
Download toppings_box_template.pdf

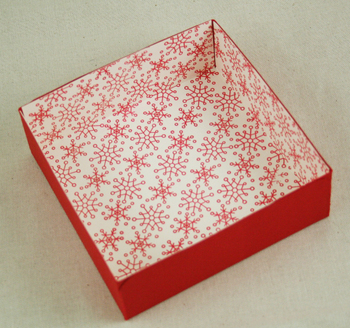
After I constructed the box, I made a liner to fit inside the bottom. I thought that this would add some sturdiness and serve as a decorative element as well. I created the liner by following the same template as the box bottom, only removing the corner tabs. I also scored just hair further inward. The liner is made from Vintage Cream cardstock and stamped repeatedly with the snowflake border image from Heather’s new Rustic Snowflakes set.
……………………………………………………………………………..
Here is the liner securely adhered inside the box bottom. I think it really makes the box look more polished, don’t you?
……………………………………………………………………………..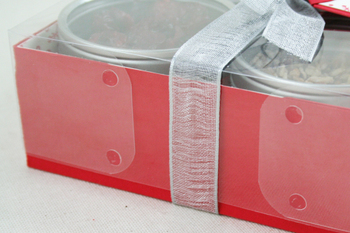
The lid of the box is created with a transparency sheet. After a little experimentation with different adhesives, I was happiest with mini glue dots. They were hardly noticeable and looked clean & professional.
……………………………………………………………………………..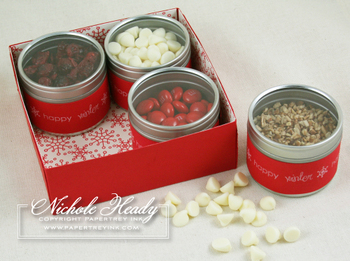
The tins were covered with a strip of Pure Poppy cardstock stamped with a row of different phrases & small snowflakes from this set in vanilla ink. I filled the tins with a variety of toppings that would be appropriate for a sundae. The four ounces that these tins hold will provide enough topping for at least six sundaes, so perfectly suited for an entire family! Yum!
……………………………………………………………………………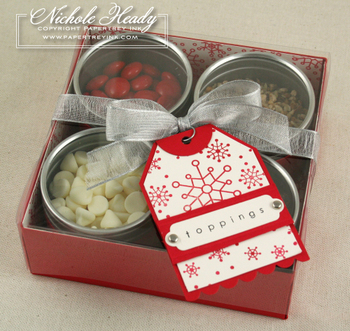
Here is the finished toppings box. I used the NEW! Silver Sheer Metallic Ribbon to tie around the box. The tag background was created with a few of the snowflake images from this set. I just love how easy it is to build patterns with this set. And the snowflakes stamp SO crisp & clean.
…………………………………………………………………………..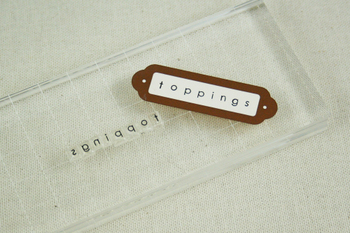
For the tag accent strip, I started by die-cutting the smallest Double-Ended Tag die from Vintage Cream cardstock. I left the cardstock in the die and used the opening as a means to perfectly center the phrase “toppings”, which was created with Simple Alphabet. (You can find a tutorial I did on how to best position the Simple Alphabet letters HERE.)
…………………………………………………………………………..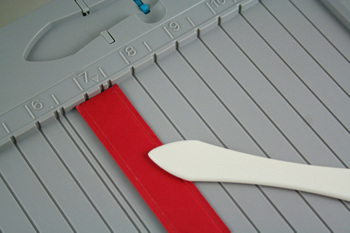
I cut a strip of red cardstock just a tad wider than my tag die and scored a line just a fraction from either edge using my Scor-Pal. This is a technique I find myself doing often. I just love the results.
…………………………………………………………………………..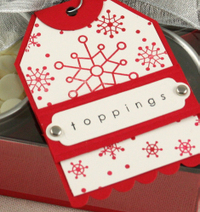
By layering the tag and the strip, I am able to create an easy accent that adds quite a bit of detail so the tag isn’t too visually *boring*!
…………………………………………………………………………..
Next up was the hot fudge! You can’t have a sundae without hot fudge! I picked up an 11.75 oz. jar of Smucker’s Hot Fudge Topping. It is as close to homemade as you can get from the supermarket! I wanted to dress it up a bit to make it more personal (and color coordinate of course!). I die-cut some muslin fabric using the Nestabilities largest Standard Scalloped Circle die. I stamped the fabric with Polka Dot Basics using Pure Poppy Palette ink. I also got some thin hemp twine out.
…………………………………………………………………………
I placed the fabric circle pattern side down. I then turned the hot fudge upside down and placed it in the center of the circle.
………………………………………………………………………….
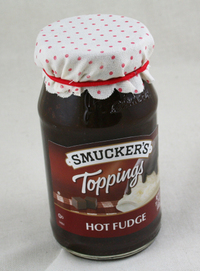
I gathered the circle of fabric around the neck of the jar and placed an elastic around it to hold it in place temporarily.
………………………………………………………………………………

I then tied the hemp around the jar, holding the fabric firmly in place, allowing the hemp to rest in the grove directly under the lid.
…………………………………………………………………………………..
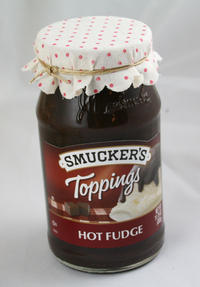
Remove the elastic and there you have it! A homier, customized version of Smucker’s Hot Fudge Sauce!
…………………………………………………………………………………
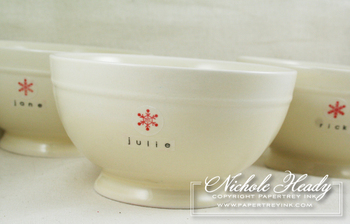
Something special needs to be included in this gift set to EAT these special sundaes out of, so why not some personalized bowls? I stamped one of the small snowflakes from this set in Pure Poppy onto one of Avery’s clear address labels. I punched out the snowflake using my 5/8-inch circle punch. The name was stamped onto a clear label using, once again, Simple Alphabet. It was trimmed with scissors. I adhered both labels to the bowl. Since I used Palette inks for the stamping, they are waterproof. With hand-washing, the labels ought to stay around for quite while, although probably not permanently.
…………………………………………………………………………………

Here’s the completed ensemble. I added a really nice ice cream scoop and assembled everything in this pretty little basket.
……………………………………………………………………………….

A cute little card was necessary to hold a gift card to the local supermarket for the recipient to use to buy the *best* ice cream, with no worries of what’s on sale! Much of the same design concepts used on the *toppings* tag were carried over to the card. A bit more of that Silver Sheer Metallic Ribbon was added to the side as an accent.
……………………………………………………………………………….
I hope you have enjoyed today’s project. Be sure to stop by tomorrow for a peek into another set that I have been just dying to share with you!
……………………………………………………………………………….
……………………………………………………………………………….
Be sure to stop by Heather’s blog to see a few more projects done using Rustic snowflakes.
Melissa has another look at her new set, that you won’t want to miss!
……………………………………………………………………………….
……………………………………………………………………………….
STAMPS: Rustic Snowflakes (available September 15th), Polka Dot Basics, Simple Alphabet
INK: Pure Poppy & Noir Black Palette inks, vanilla pigment ink
PAPER: Pure Poppy & Vintage Cream cardstocks
OTHER: Silver Sheer Metallic ribbon, Spellbinders Tag Trio & Large Standard Scalloped Circle die, 4 oz. Round Clear Top Tins, Bowls, scoop & basket from Wal-Mart.



Ice cream and stamping… two of my favorite things! This is a fantastic idea! Looks like a package straight from Williams & Sonoma.
I love this set already! What a great idea as well. Have a great day. Heather
Brilliant work & design. Simple yet elegant. Love it!
That set looks so good! The receivers will be delighted. TFS.
Eveline.
How beautiful, fun and practical.
this is adorable, I want to find such gift under my Christmas tree:)
What a great gift! Someone will be very blessed to receive this
What a nice gift & presentation! Can’t wait to see the whole set!
LeAnne
ohhh my word! This is one of the cutest things I have ever seen!!! YOu are a pure genious! I love lvoe lvoe it!!! And that set is just too stinkin cute! YOu never cease to amaze me!!!
That is so beautiful and clever! Gifts always have me scratching my head – your gift idea is truly inspired!
What a fantastic gift – I just love how you make everything special and coordinate everything!!
This is absolutely ADORABLE!! I love it and love the whole ‘family’ gift idea. Kids would certainly be over the moon with this! I can’t wait to try it!
WOW! This is all very impressive! Whoever received this gift is bound to be pleased!
Very creative 😀
Cindy
This is a wonderful idea for a Christmas gift for those hard to shop for families! Thanks so much for the great idea Nichole!
Wow, Nichole, you just keep coming up with more and more wonderful creations. I love Heather’s style and know that I’m going to be BROKE after this release!! 🙂
Blessings!!
Amazing!!
What a fabulous family gift!! Where on earth do you get these great ideas!?! Thank you so much for always providing such incredible inspiration!!!
TFS!!! I love this idea for family gifts. I have been debating things to do for the family since we also have a big extended family. I might have to make these for them. Again, TFS!!!
I love it! I think I may as well pre-order all of Heather’s sets now.:) Can’t wait to see the rest of this one.
LOVE this stamp set
Love the Ice Cream Sundae gift — too cute!
My bank account is in trouble — I think I am going to WANT IT ALL!!!
THat ribbon is gorgeous!! 🙂
Look forward to the 15th !!
I may have to steal this idea for family Christmas gifts 🙂
Charmaine
What a wonderful project.
I love it!!!
Wonderfu; project! Love the ideas with the fabric! Very elegant!
OH My Gosh, this project is fantastic. I just have to make this for a gift! And I know just who to do it for 🙂 What a great excuse to buy a new stamp set {wink} teehehehe
Sandy O
Nichole… I so wish you would open a store here on our town and offer classes.. I would come to all of them… thanks for all your fantastic ideas…
you are plainly, simply WONDERFUL! Love it!
wow i love love love this. I don’t know how i ran into your blog but this is so great
Wow! This is such a great idea for a wonderful and thoughtful gift for someone you love.
Thank you for sharing it with us!
Lisa
I LOVE this gift idea! I will be using it this Christmas
A really lovely idea, one I might have to try!