


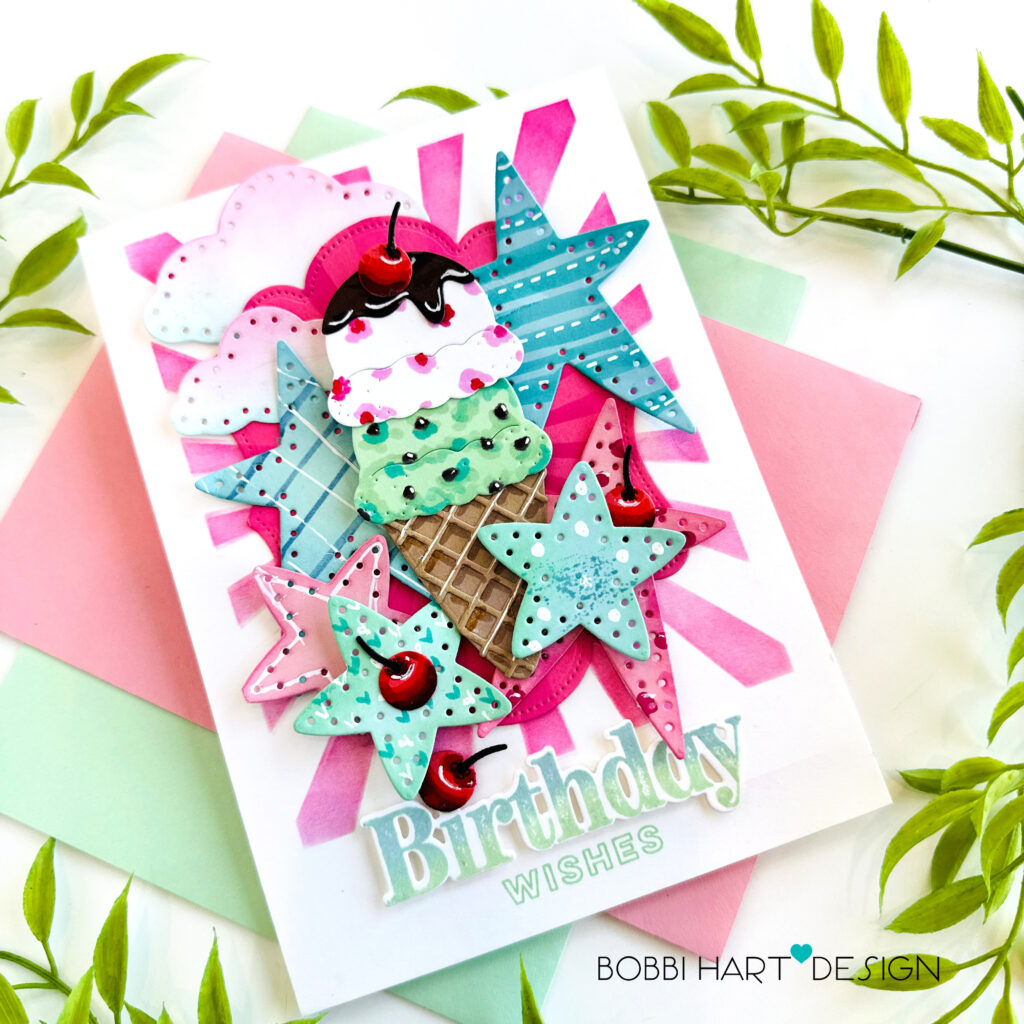
Nothing says birthday fun quite like a towering double-decker ice cream cone piled high with sweet treats! Today’s handmade birthday card features scoops of cool mint and strawberry ice cream, topped with luscious fudge, a bright red cherry, and plenty of whimsical charm. Behind the cone, playful stars and radiant sunrays create a festive backdrop that captures the joy and excitement of celebrating a special day. With its happy colors, nostalgic summer vibes, and delightful details, this card is sure to bring smiles and make any birthday feel extra sweet.
I’m using the following Papertrey Ink products:
This is Big Sentiments: Birthday and coordinating dies
Handmade With Love Mini stamp set and dies
Cardstock colors used: Stamper’s Select White, Classic Kraft, Sweet Blush, Berry Sorbet, Raspberry Fizz, Aqua Mist, Mint Julep and Dark Chocolate.
This card is 5″ X 7″ and uses a white card base made from Stamper’s Select White cardstock. Here are the step-by-step details for creating this card. Check out the REEL that accompanies this blog post here!
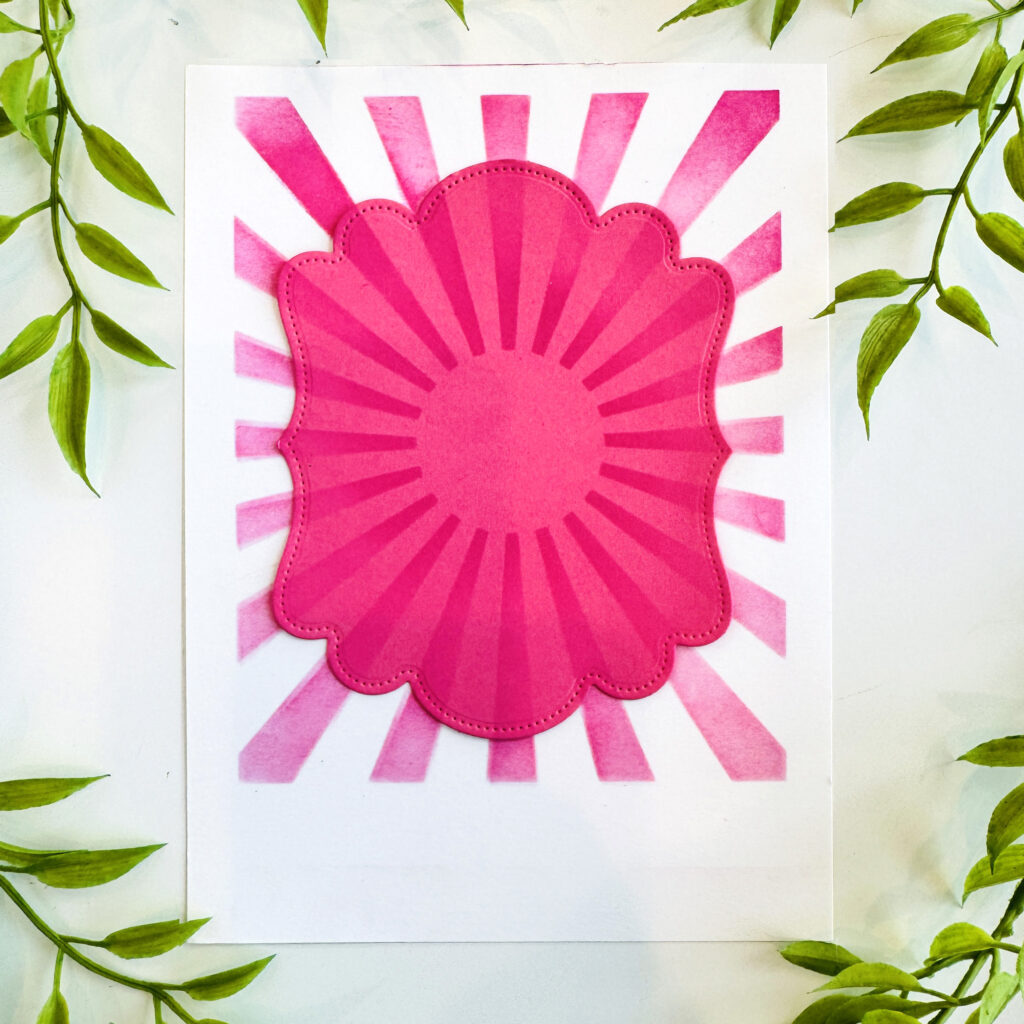
STEP 1: Die cut a frame from Raspberry Fizz cardstock using the largest die from the Love to Layer: Whimsy Die. Stencil the So Radiant Stencil sunrays on a 5″ X 7″ piece of Stamper’s Select White cardstock and the raspberry die cut, using Picked Raspberry Distress Oxide Ink and a blender brush. Attach the die cut to the front panel, aligning the stenciled sunrays.

STEP 2: Die cut stars, clouds and the ice cream cone using the Sweet Americana Die and the Starry Skies dies Add extra designs, lines and details on the the die cuts. Have fun with this! Make them whimsical, magical and/or personal! You could even add names, dates, etc. to them. Blend Picked Raspberry and Tumbled Glass Distress Ink on the clouds. Use markers such as Copic Sketch Markers and a white ink pen to add the lines, hearts and more to the cuts.
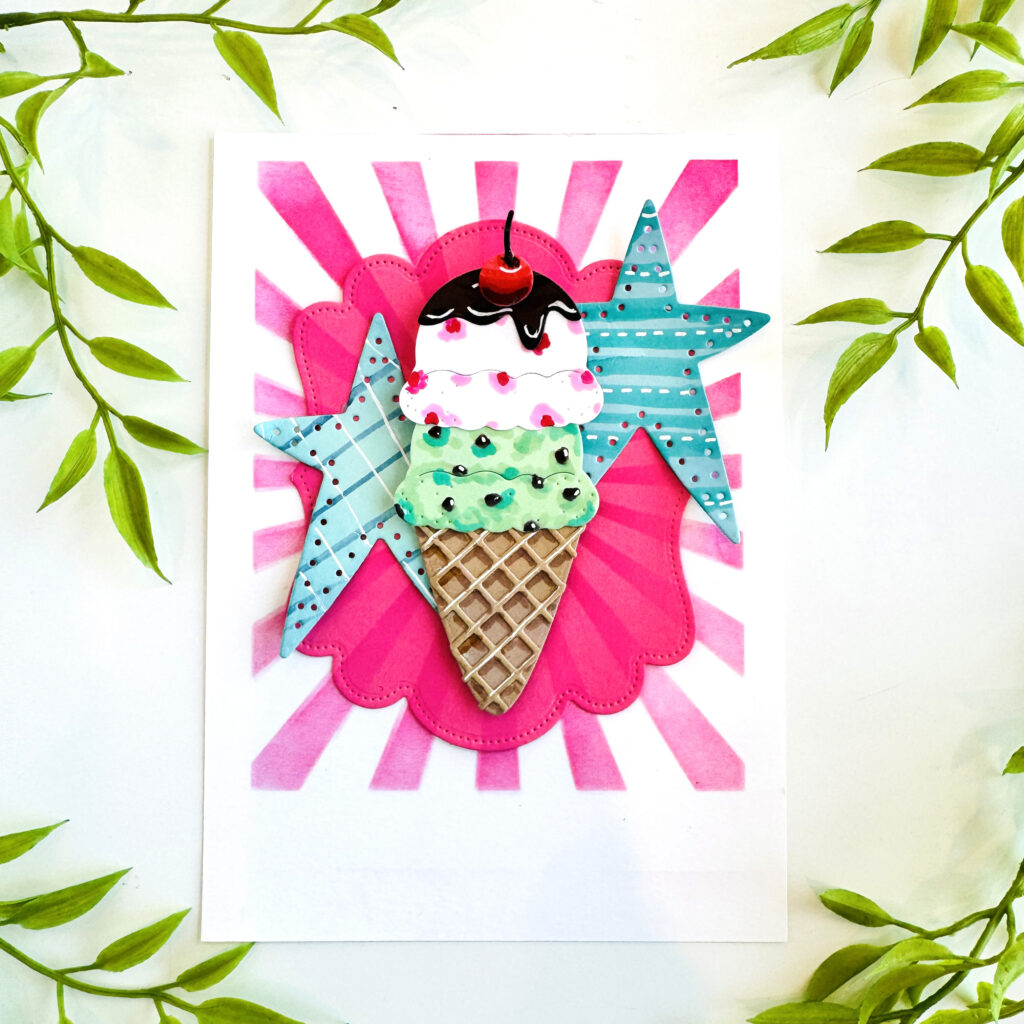
STEP 3: Assemble the double-decker ice cream cone. Layer and attach the cone, and bigger stars. Use foam tabs behind the cone to make it stand out from the background.
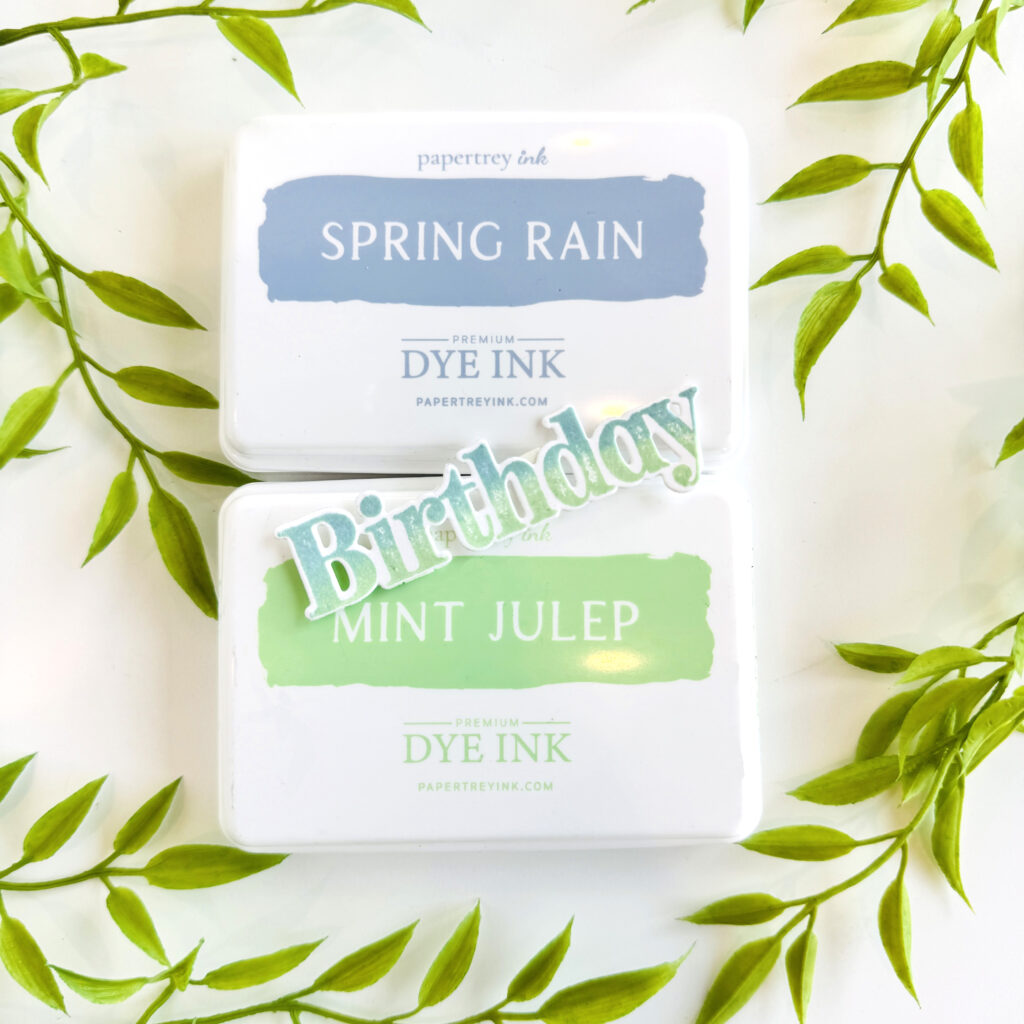
STEP 4: Stamp the “Birthday” word from the This is Big Sentiments: Birthday stamp set. Use Mint Julep and Spring Rain dye inks. Cut the word out using the coordinating die.

STEP 5: Add the additional smaller stars and clouds. Position the “birthday” word on the card. Before attaching the “birthday” die cut, stamp “wishes” from the same set in Mint Julep Ink right below the position. Attach the die cut using foam tabs. Color the cherries using Copic Sketch markers, R89, R29, R14 and a white ink pen for the highlight. Add the stems and attach the berries to the card front panel. Check out this REEL to see how to color the cherries.
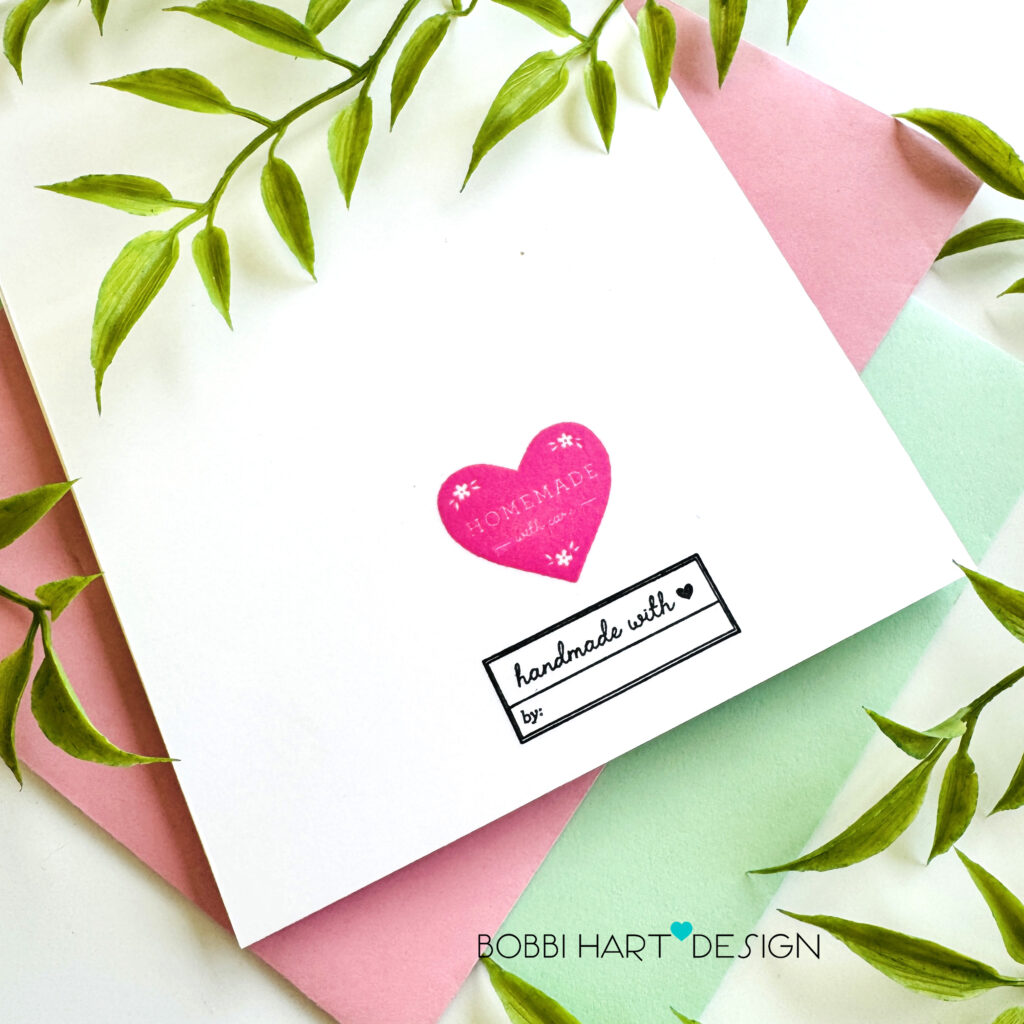
STEP 6: Score a 10″ wide X 7″ tall piece of Stamper’s Select White cardstock down the middle. Stamp the back of the card base using stamps from the Handmade With Love Mini stamp set (and dies.) Attach the card front panel to the base.
You can shop the entire collection here at Papertrey Ink! If you decide to place an order, please use the links in this post so that Papertrey Ink team knows what inspired you. I appreciate it very much. It helps me to continue to bring more ideas to you!
Thanks for stopping by today. If you want to see more ideas and inspiration from me, subscribe to my blog, BobbiHartDesign.com. I’ll send you updates on new posts! You can also find me on Instagram as @BobbiHartDesign and on Facebook as BobbiHartDesign.
Bobbi Hartmann Lemanski, Bobbi Hart♥ Design, Adding h♥art into every design
Leave a Reply