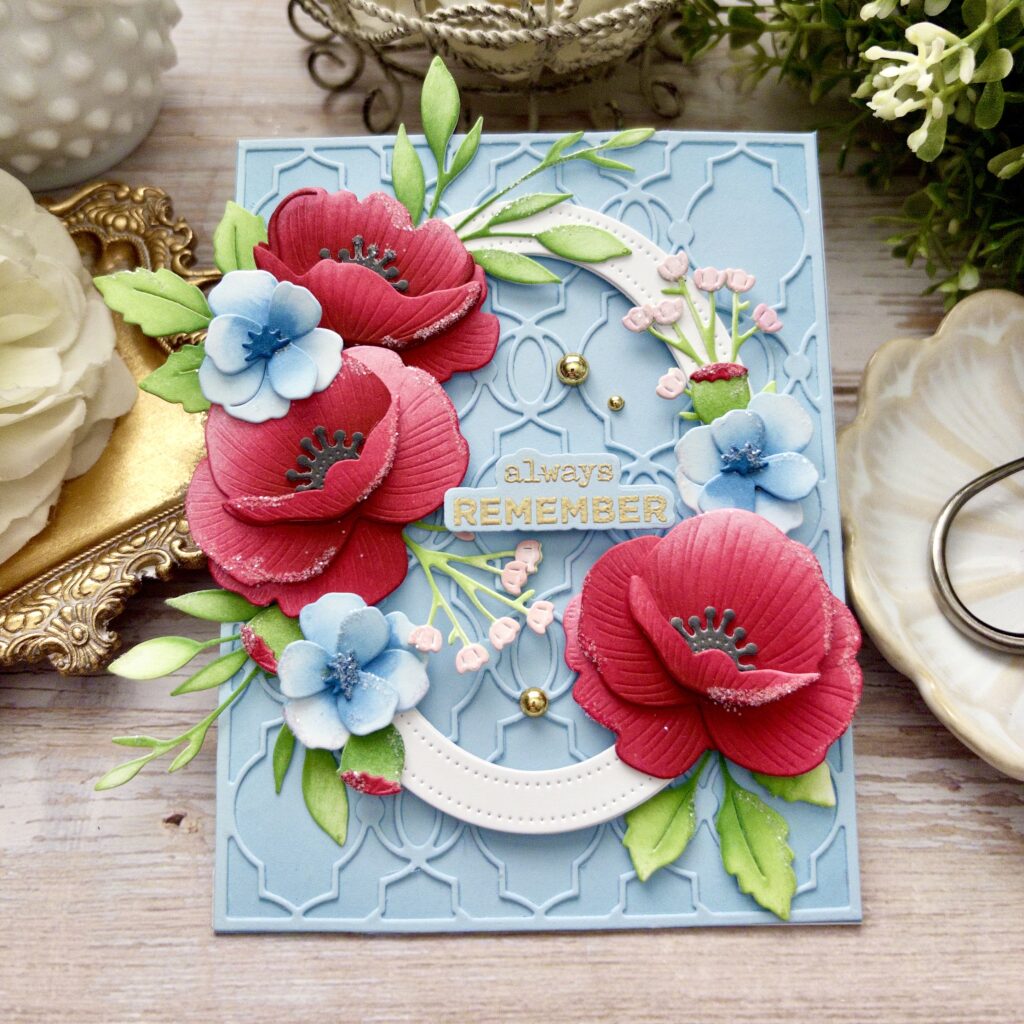
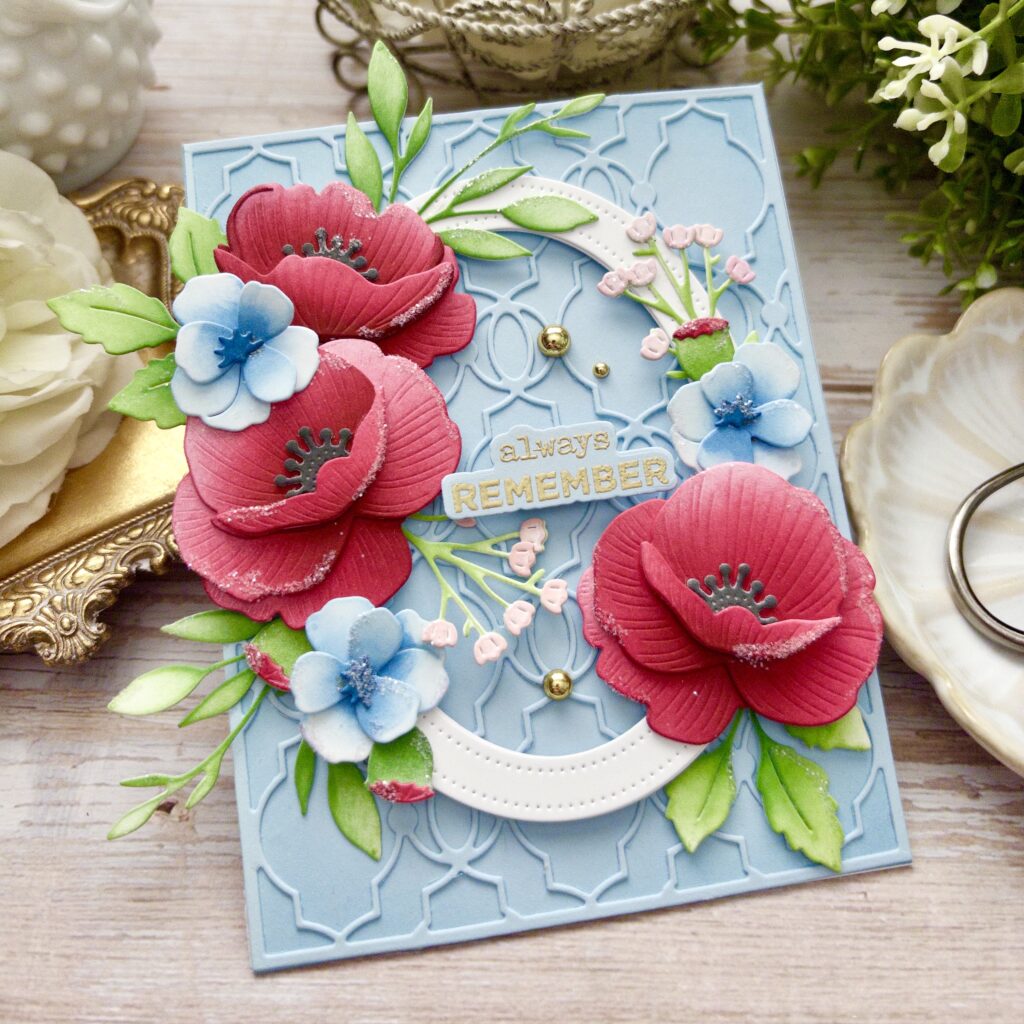
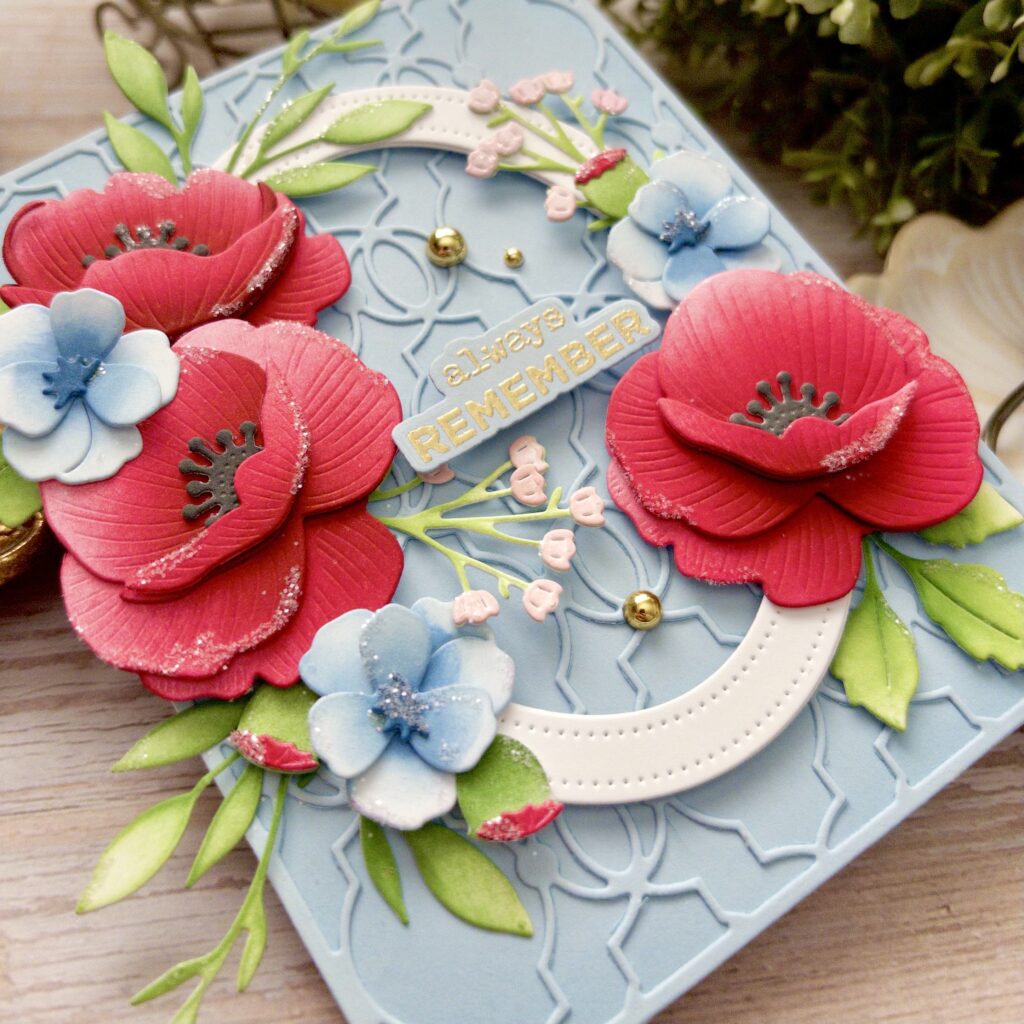
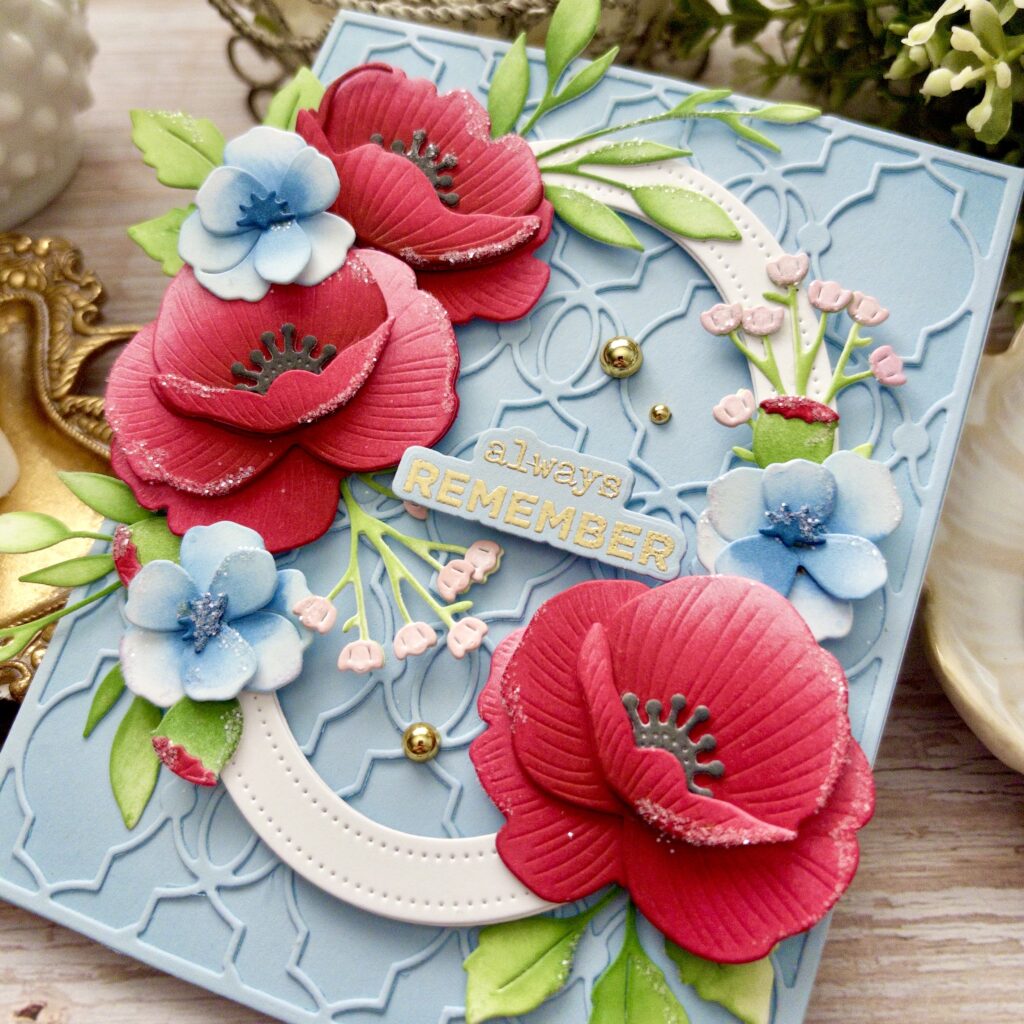
Kelly Lunceford combines bold florals with soft elegance in today’s stunning “Always Remember” card design. 🌸✨ Featuring the Into the Blooms: Poppy dies layered over the delicate Cover Plate: Ornate background, this project beautifully balances rich Pure Poppy and Scarlet Jewel blooms with soft Spring Rain accents for a striking yet graceful look. The layered oval frame creates the perfect focal point for the gold embossed sentiment from the Celebrate Freedom stamp set, while touches of glitter and gold drops add just the right amount of sparkle. From the dimensional flowers and blended foliage to the elegant monochromatic background, every detail works together to create a card full of beauty, warmth, and heartfelt encouragement.
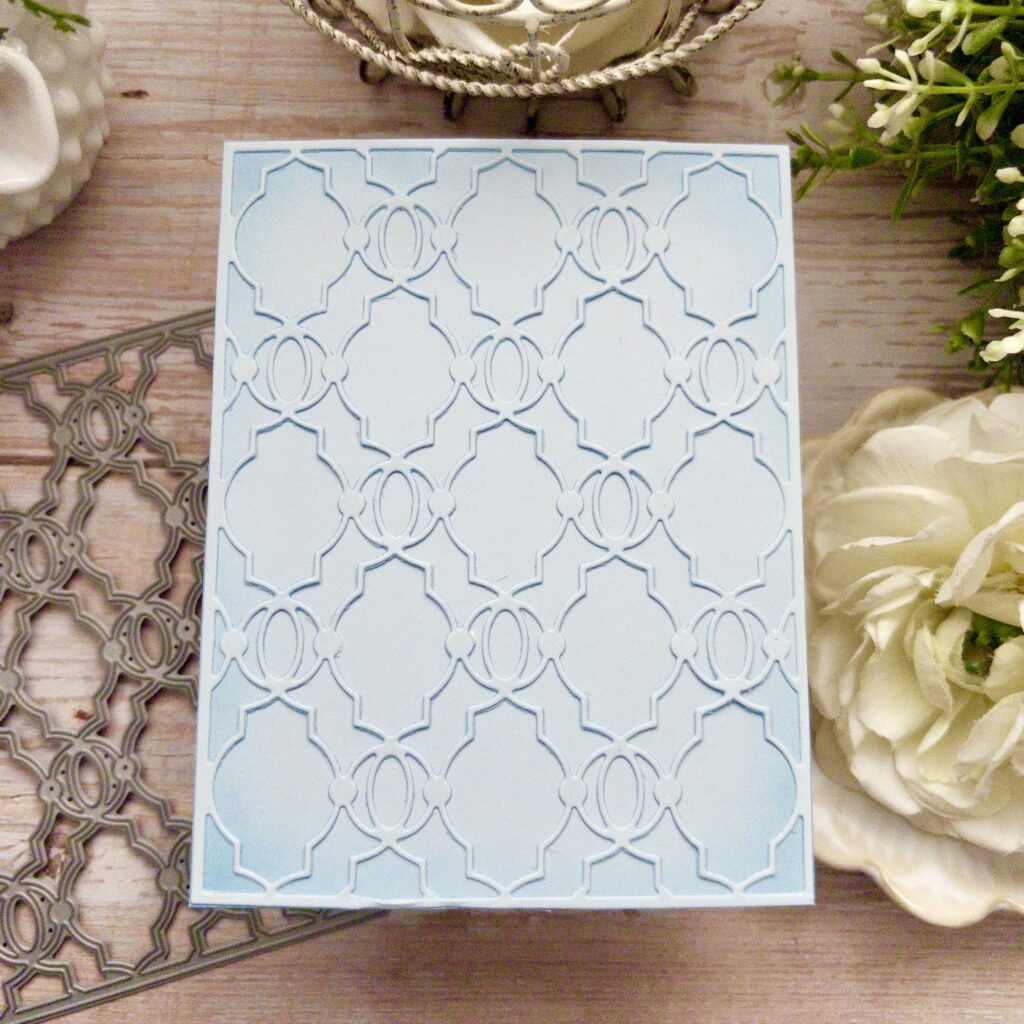
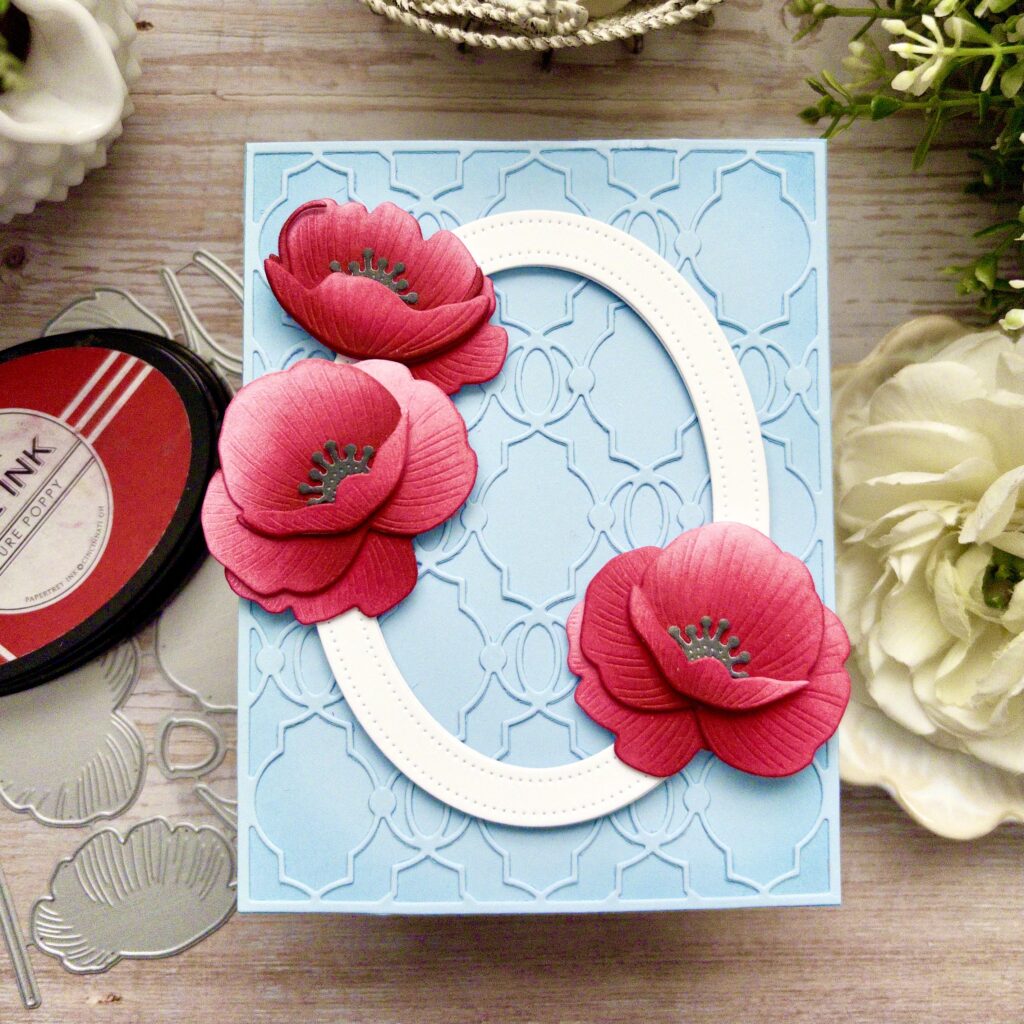
STEP 1: Blend Spring Rain ink around the edges of an A2 panel of Spring Rain cardstock.
STEP 2: Glue the Cover Plate: Ornate diecut to the panel using liquid glue.
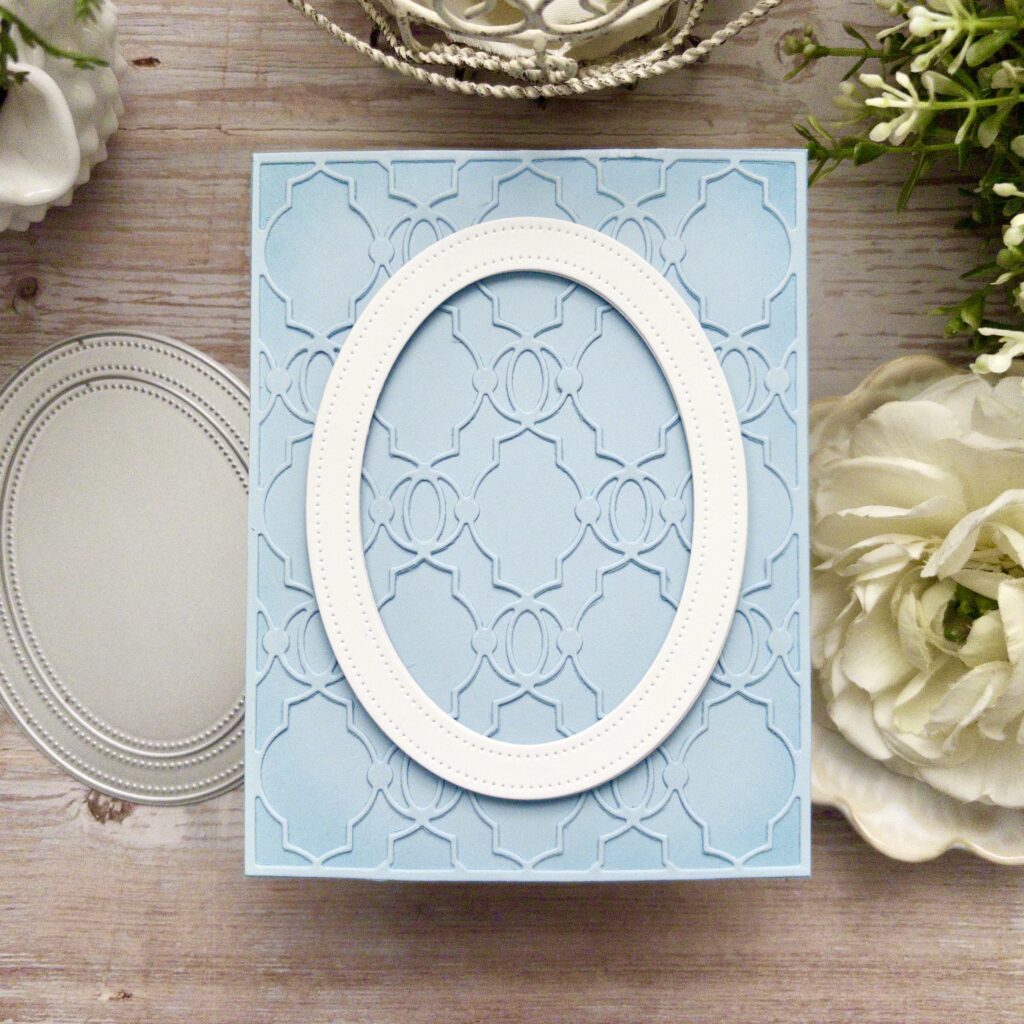
STEP 3: Cut two oval frames from white cardstock and glue them together. Attach them to the background using foam squares.
STEP 4: Cut the pieces for the poppies from white cardstock. Add the color using dye ink and blender brushes. Glue them together with foam squares and liquid glue and then attach them to the frame.
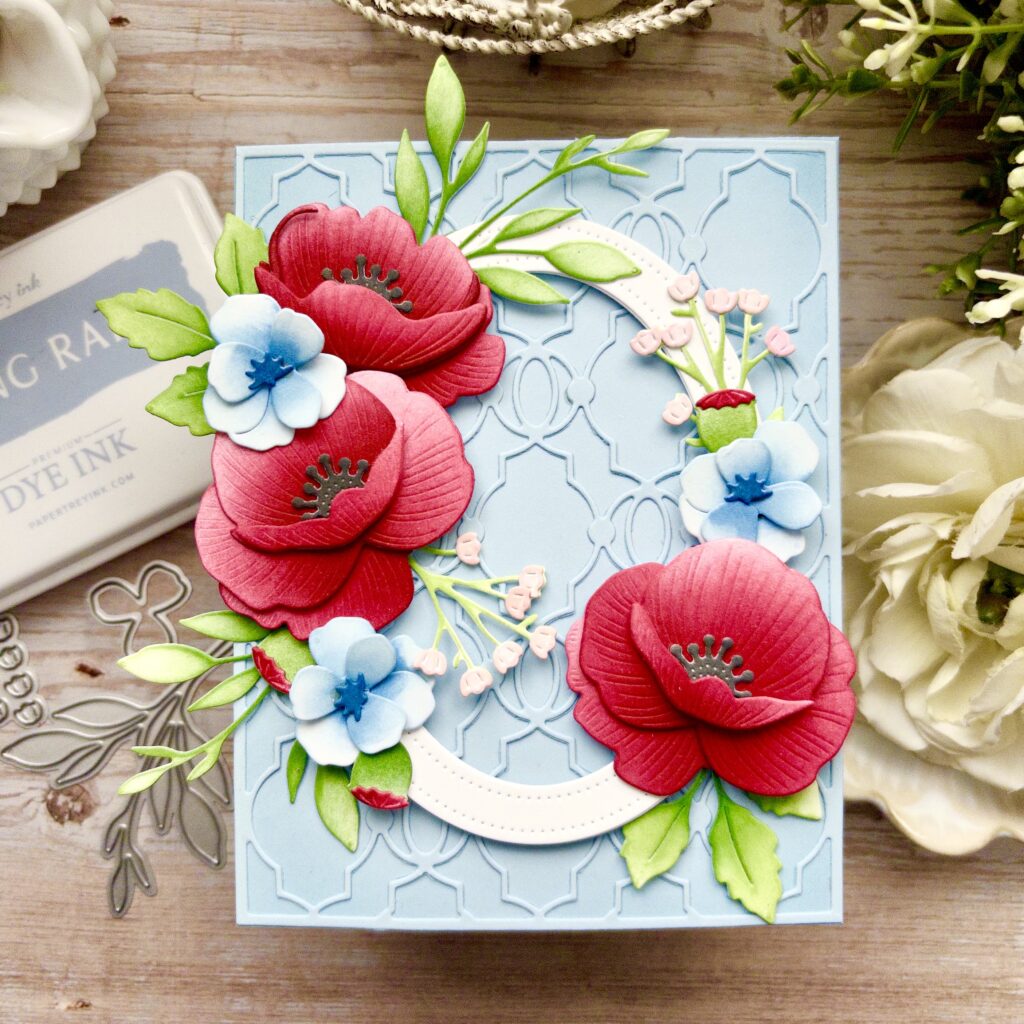
STEP 5: Cut the foliage and accent flowers and color them the same as the poppies. Arrange them on the frame using liquid glue and foam squares.
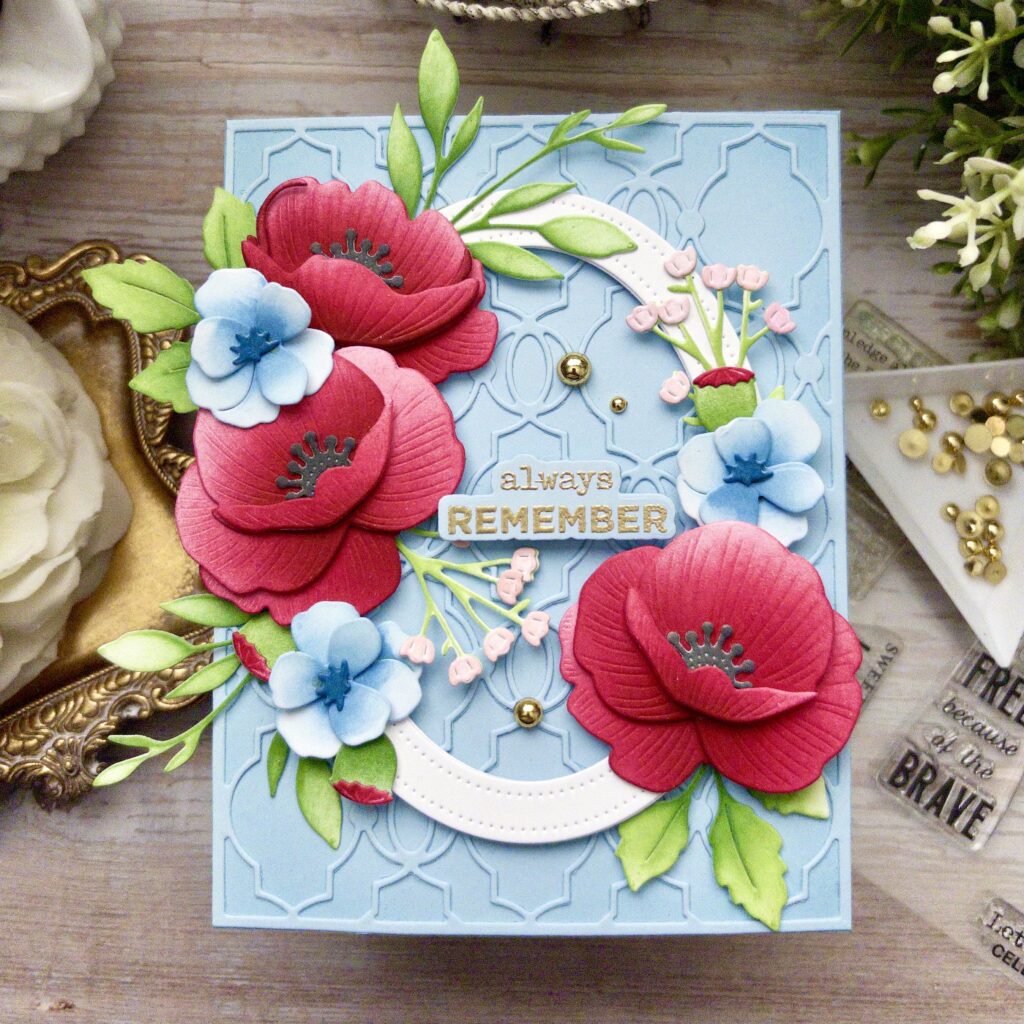
STEP 6: Heat emboss the sentiment using gold powder. Cut it out and then attach it inside the frame using foam squares. Add a trio of gold drops using liquid glue.
STEP 7: Apply glitter to the flowers and foliage using a two-way glue pen.
This project is a beautiful reminder of how layering, soft ink blending, and elegant details can transform a handmade card into something truly unforgettable. ✨ From the bold poppy blooms and delicate pressed flowers to the gold embossed sentiment and sparkling accents, Kelly’s design offers endless inspiration for sympathy cards, encouragement cards, or thoughtful everyday greetings.
Whether you’re recreating this exact look or using the techniques as inspiration for your own floral designs, this card is sure to leave a lasting impression. Be sure to tag Papertrey Ink on Instagram when you share your version — we’d love to see your creative take on this elegant floral project!
I love this card so much that I just bought the Into the Blooms: Poppies die set!
Carmen Nancesays
This card is stunning! Love the elegant texture from the coverplate along with the richly ink blended florals and glitter for added elegance. The color palette is beautiful. Thank you for the gorgeous inspiration and important reminder of this Memorial Day season!


Laura Corkill says
BEAUTIFUL!!! ♥
Donna says
Georgeous as always.
Larissa Heskett says
GORGEOUS!! 😍😍😍
kim burckhard says
The flowers look so dimensional and real!
DEBBIE ELLIOTT says
Fabulous!
Laurie Myers says
I love this card so much that I just bought the Into the Blooms: Poppies die set!
Carmen Nance says
This card is stunning! Love the elegant texture from the coverplate along with the richly ink blended florals and glitter for added elegance. The color palette is beautiful. Thank you for the gorgeous inspiration and important reminder of this Memorial Day season!
Barbara Berry says
Beautiful card with a pretty color combo.
M Carmen Rodriguez says
Beautiful card!
Julia Tomaine says
Gorgeous! I love every detail!
Kathy Montgomery says
I absolutely love the poppies and the tribute to our veterans!
My husband and father are veterans and this card is gorgeous!
Bo Gilmore says
That is absolutely gorgeous. I have that background die and I love it.
LizD says
Great card to remember all veterans. Thanks for sharing.
Paula J Fuller says
WOW! I love these flowers. I like the that there is a variety of sizes in the different flowers. I also love that background die. It is beautiful!
R Schneder says
Gorgeous! So many beautiful details. I love the touch of pink with the patriotic red, white & blue!