

This week’s Project Inspiration is designed by Bobbi Lemanski.
A little ink, a little heart—and a whole lot of beauty.
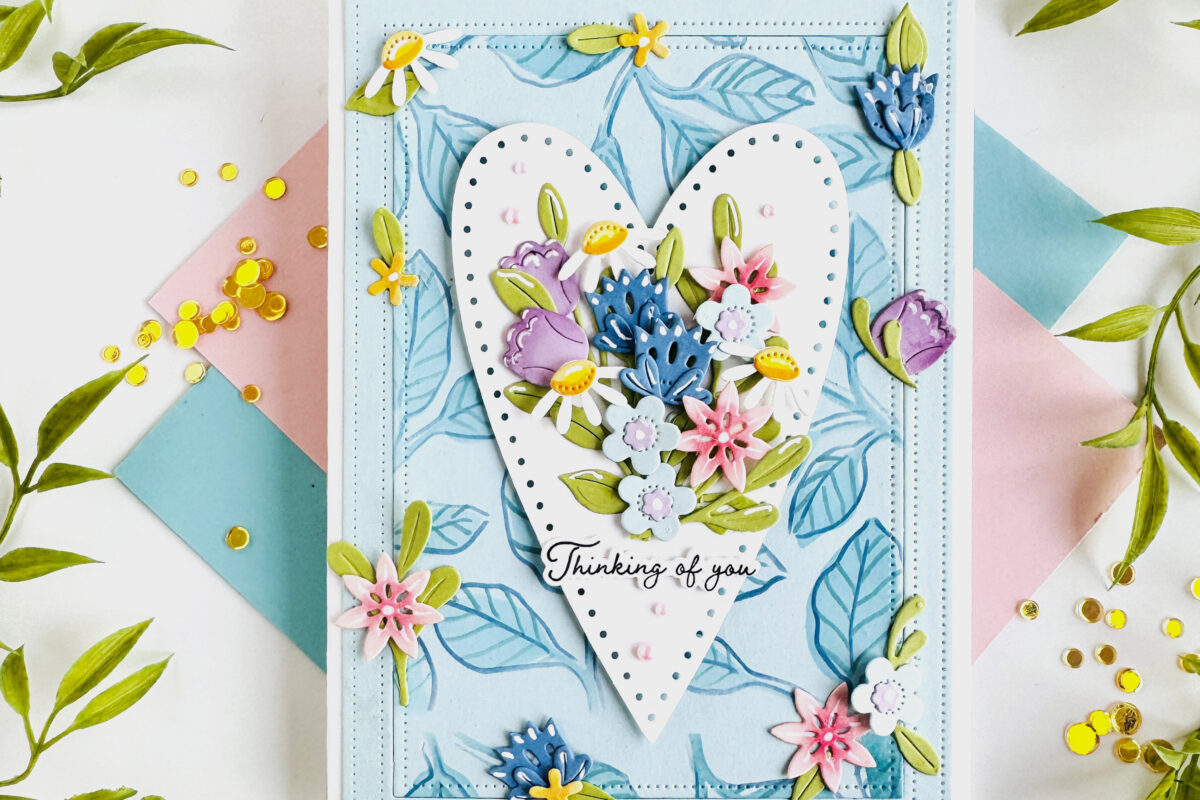
Bobbi Lemanski’s card, lovingly titled Raindrops, is a perfect example of how a single kit can spark so much creativity. Using the Pro Stamper’s Box: March, she blended bold florals with a dreamy wash of blue and delicate dimensional droplets to capture the feeling of a quiet, reflective moment. It’s the kind of card that not only says “Thinking of You,” but makes the sentiment linger.

STEP 1:
To create this A7-sized card, cut one panel, 5″ wide X 7″ tall from Stamper’s Select white cardstock for the front panel. Cut the card base 10″ wide X 7″ tall from the same white cardstock, score down the middle and set it aside.
Using the Watercolor Wonderful Stencil set, blend Tumbled Glass Distress Oxide ink onto the front panel using the largest stencil opening in the 3-layer set. Use a blending brush to apply the ink.

STEP 2:
Apply the next stencil layer of blue using Mermaid Lagoon Distress Oxide Ink and a blending brush.

STEP 3:
Apply the last stencil layer design (i.e., the droplets/dots) using Mermaid Lagoon Distress Oxide Ink (again) and a blending brush.
To make the stenciled designs appear more like water droplets and puddles from a fresh spring shower, enhance each one with added coloring.
Water Droplets
The steps in the photo show where to add shades of blue and gray to the dot. Some of these enhancements are super small, especially on the smaller-sized dots. (NOTE: The dot is extra large in the photo steps so can see the intricacies of the additions.) To make the larger water droplets look more dimensional, apply a larger, more saturated shadow at the bottom using C4. Blend out with lighter shades of a cool gray such as C2, C1, C0., etc. Use a white Gelly Roll pen to add highlights to the droplets to make the water seem more life-like and dimensional.
Puddles
To make the first two larger stenciled shapes appear to look more like puddles of water, add some light blue or gray shading below the outer perimeter around the bottom. This will give it more of a dimensional look. (See photo.)

STEP 4:
Stamp the stems and leaves of the flowers directly on the left side of the card front panel using Simply Chartreuse dye ink.
On another piece of white cardstock, stamp the blossoms using (1) Summer Sunrise ink for the flower’s base, (2) Canyon Clay for the line definition and (3) Pure Poppy for the accent color. Die cut the flowers using the coordinating dies

STEP 5:
Attach the flowers to the tops of the stems. Add a foam tab behind the forefront flowers to make them stand out a bit more.
Stamp a sentiment from the Pro Stampers Box in the lower righthand corner of the card front using True Black ink. Attach iridescent sequins using glue, to accent the flowers. Use Ranger Ink Glossy Accents to add water-like drops to some of the petals to finish the front. Attach the front panel to the card base to complete the card.

We’d love to see your take on this design! Don’t forget to tag us on Instagram @PapertreyInk or share your creations in the comments.
SUPPLIES:
STAMPS:
Pro Stamper’s Box: March (here’s a similar floral set: Into the Blooms Geraniums Dies)
DIES:
Pro Stamper’s Box: March(here’s a similar floral set: Into the Blooms Geraniums Dies)
STENCILS:
Watercolor Wonderful Stencil Collection
INK:
True Black, Pure Poppy, Summer Sunrise, Canyon Clay, Simply Chartreuse
CARDSTOCK:
Stamper’s Select White
OTHER SUPPLIES:
Ranger Distress Oxide Inks in Tumbled Glass and Mermaid Lagoon
Copic Sketch Markers B99, B05, B02, B01, B00, B000, C4, C1 or similar colors
Gelly Roll White Pen, Foam tabs, Iridescent Sequins,
Glossy Accents, Bee Creative Precision Tip Glue
Leave a Reply