

Hi everybody, welcome to our next episode of The Great Cover-Up!
Let’s get started!
I never seem to have enough Birthday cards in my stash! For today’s birthday card I went with a happy, feminine theme using the Into the Blooms: Roses, Into the Blooms: Dahlias, and the fun, new Pretty Patterns Stamp Set and Dies. I stamped the floral pattern in the Pretty Patterns Stamp Set in Hibiscus Burst Ink. I used the circles in the Pretty Patterns Die to die cut the stamped image and create a circle frame. The frame is easy to create by layering a smaller circle die inside a larger circle die.
The flowers are created by cutting all the parts from white cardstock and ink blending three colors of ink in the same color family. I added Stickles to a few of petals and leaves. The background is die cut with the Border Bling: Lots of Dots Die. I added Hibiscus Burst Cardstock behind the dot cutouts.
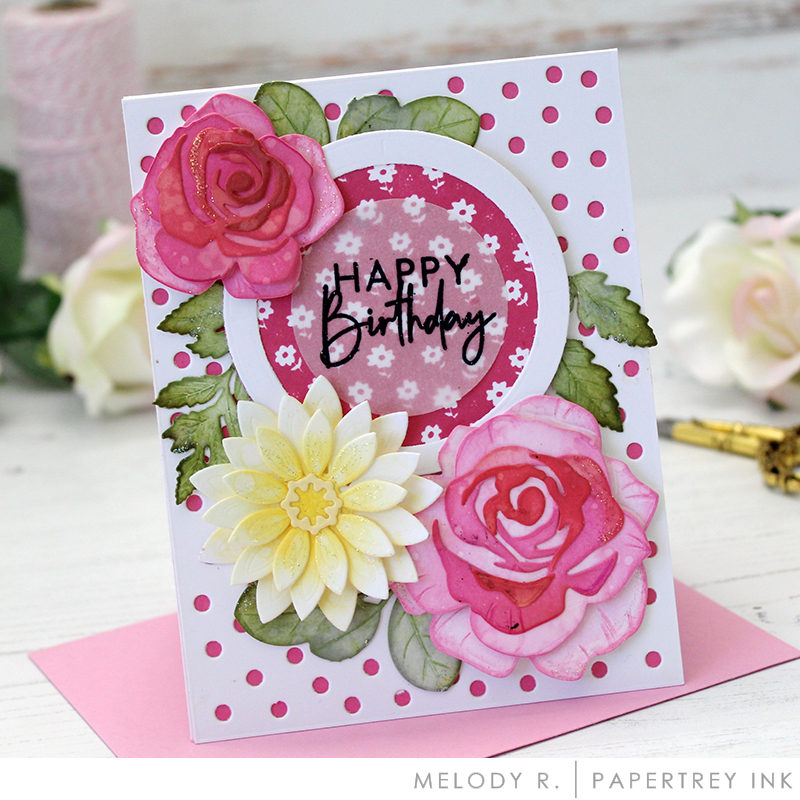

DIES: Pretty Patterns, Border Bling: Lots of Dots, Into the Blooms: Roses, Into the Blooms: Dahlia
INK: Lemon Tart, Sweet Blush, Lovely Lady, Hibiscus Burst, Mint Julep, Avocado, Versamark
PAPER: Stamper’s Select White, Hibiscus Burst, Vellum
OTHER: Black Embossing Powder, Stickles in Star Dust, Foam Tape
Die cut all pieces. I cut 7 of each flower to use for petals, in the rose, three of each tulip petal, three of each cala lily petal and about 10 leaves in both colors of green. Die cut the front and back of the floral wrap in Classic Kraft.

Rose- Fold one petal in half and wind it around a piece of floral wire for the center. Secure with hot glue. Glue the other petals from the outside to the center and add a drop of hot flue to either side. Gently overlap the sides to create a petal ‘cup’. Start by gluing three petals to the center covering all the way around and then three more on the outside. Offset each petal.
Tulip-Cut three pearl stems, hot glue them to the wire. Color them with a black Copic marker. Glue the three petals on, slightly pinching the bottom of each petal to create shape.
Cala Lily- Cut three pearl stems, hot glue them to the wire. Color them with a yellow Copic marker. Glue the three petals on, slightly pinching the bottom of each petal to create shape. Adhere leaves the outside of the flower.
Leaves-I cut several and glued them two to a wire stem. Use them to fill in the bouquet between and behind the flowers. The fuller the better.

Arrange the flowers in a bouquet, centering the stems withing the space of the wrap. Place a little hot glue under the stems. Trim with wire cutters. Hot glue the top of the wrap, lining it up with the back. Tie a ribbon into a beautiful bow cinching the middle a bit.

You can put this onto a card, add a peg to the back and use it for on embellishment on a letter board or just as a tiny bouquet.
OTHER: Felt: Sweet Blush, Melon Berry, Canyon Clay, Fine Linen, Classic Kraft, Pinfeather, Spring Moss, floral wire, hot glue


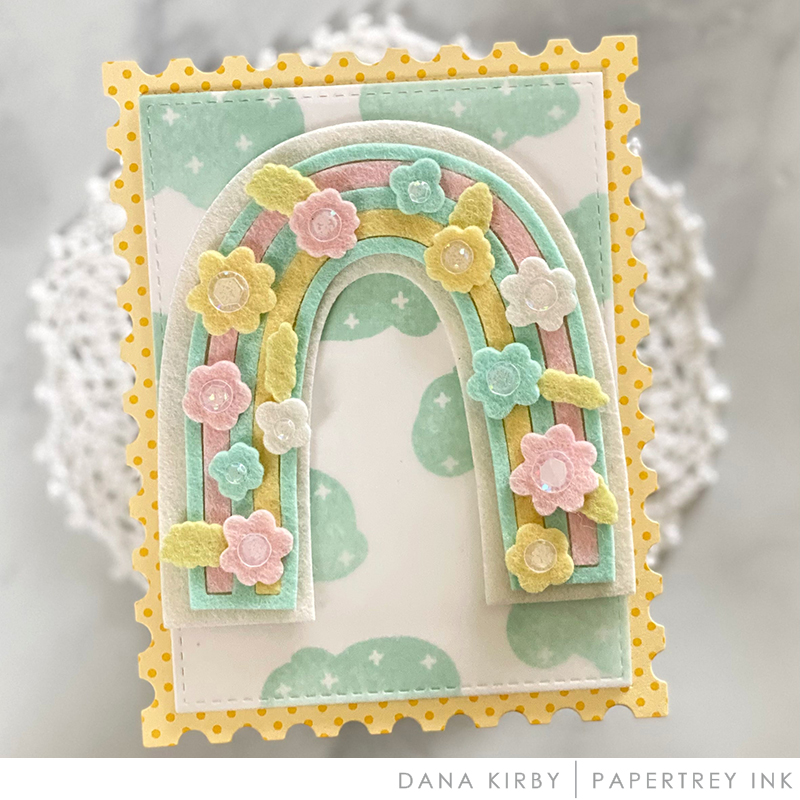

DIES: Rainbow Arches, Tiny Blooms, Playful Patterns, Simply Stitched A2 Vertical, Border Bling: Postage Frame
INK: Aqua Mist, Lemon Tart, Soft Stone
FELT: Vintage Cream, Aqua Mist, Sweet Blush, Lemon Tart, Spring Moss
PAPER: Linen- Fresh Snow, Rustic White
OTHER: Clear Sequins

PRIZE
One winner will be chosen at random to receive a $25 gift certificate.
RULES
To enter, participants are required to create a card with felt flowers using PTI/Ink to Paper supplies and Becky’s or Dana’s technique or your very own! Share your finished project via the link below. We can’t wait to see what you make!
Only ONE entry per person and the deadline is February 9th at 7am. This post will be updated with the randomly selected winner.
CHALLENGE
EDITED TO ADD THE RANDOMLY SELECTED WINNER

Congratulations, Lisa Schenck! Please send an email to customer service and provide them with your full name and the email address you would like your gift certificate sent to. Thanks so much to everyone for playing along!
Leave a Reply