

 Hello! You’re not mixed up–I’m a couple days later than normal with my Packaging Ambassador post! Sorry for the delay, but I wanted to bring you something a little special today, and I hope you’ll think it’s worth the wait!
I’ve been doing the Packaging post for about 2 years now and I’ve brought you many, many tags attached to many, many bags…but I haven’t ever documented the actual process of doing it. That’s why I decided to actually film a step by step tutorial to show you just how easy it is.
 I’ll share a few photos of the packages first and tell you about the stamps and dies I used to create them, and then you can watch the video of me putting it all together. I hope you enjoy this, even though it’s a bit different than usual!
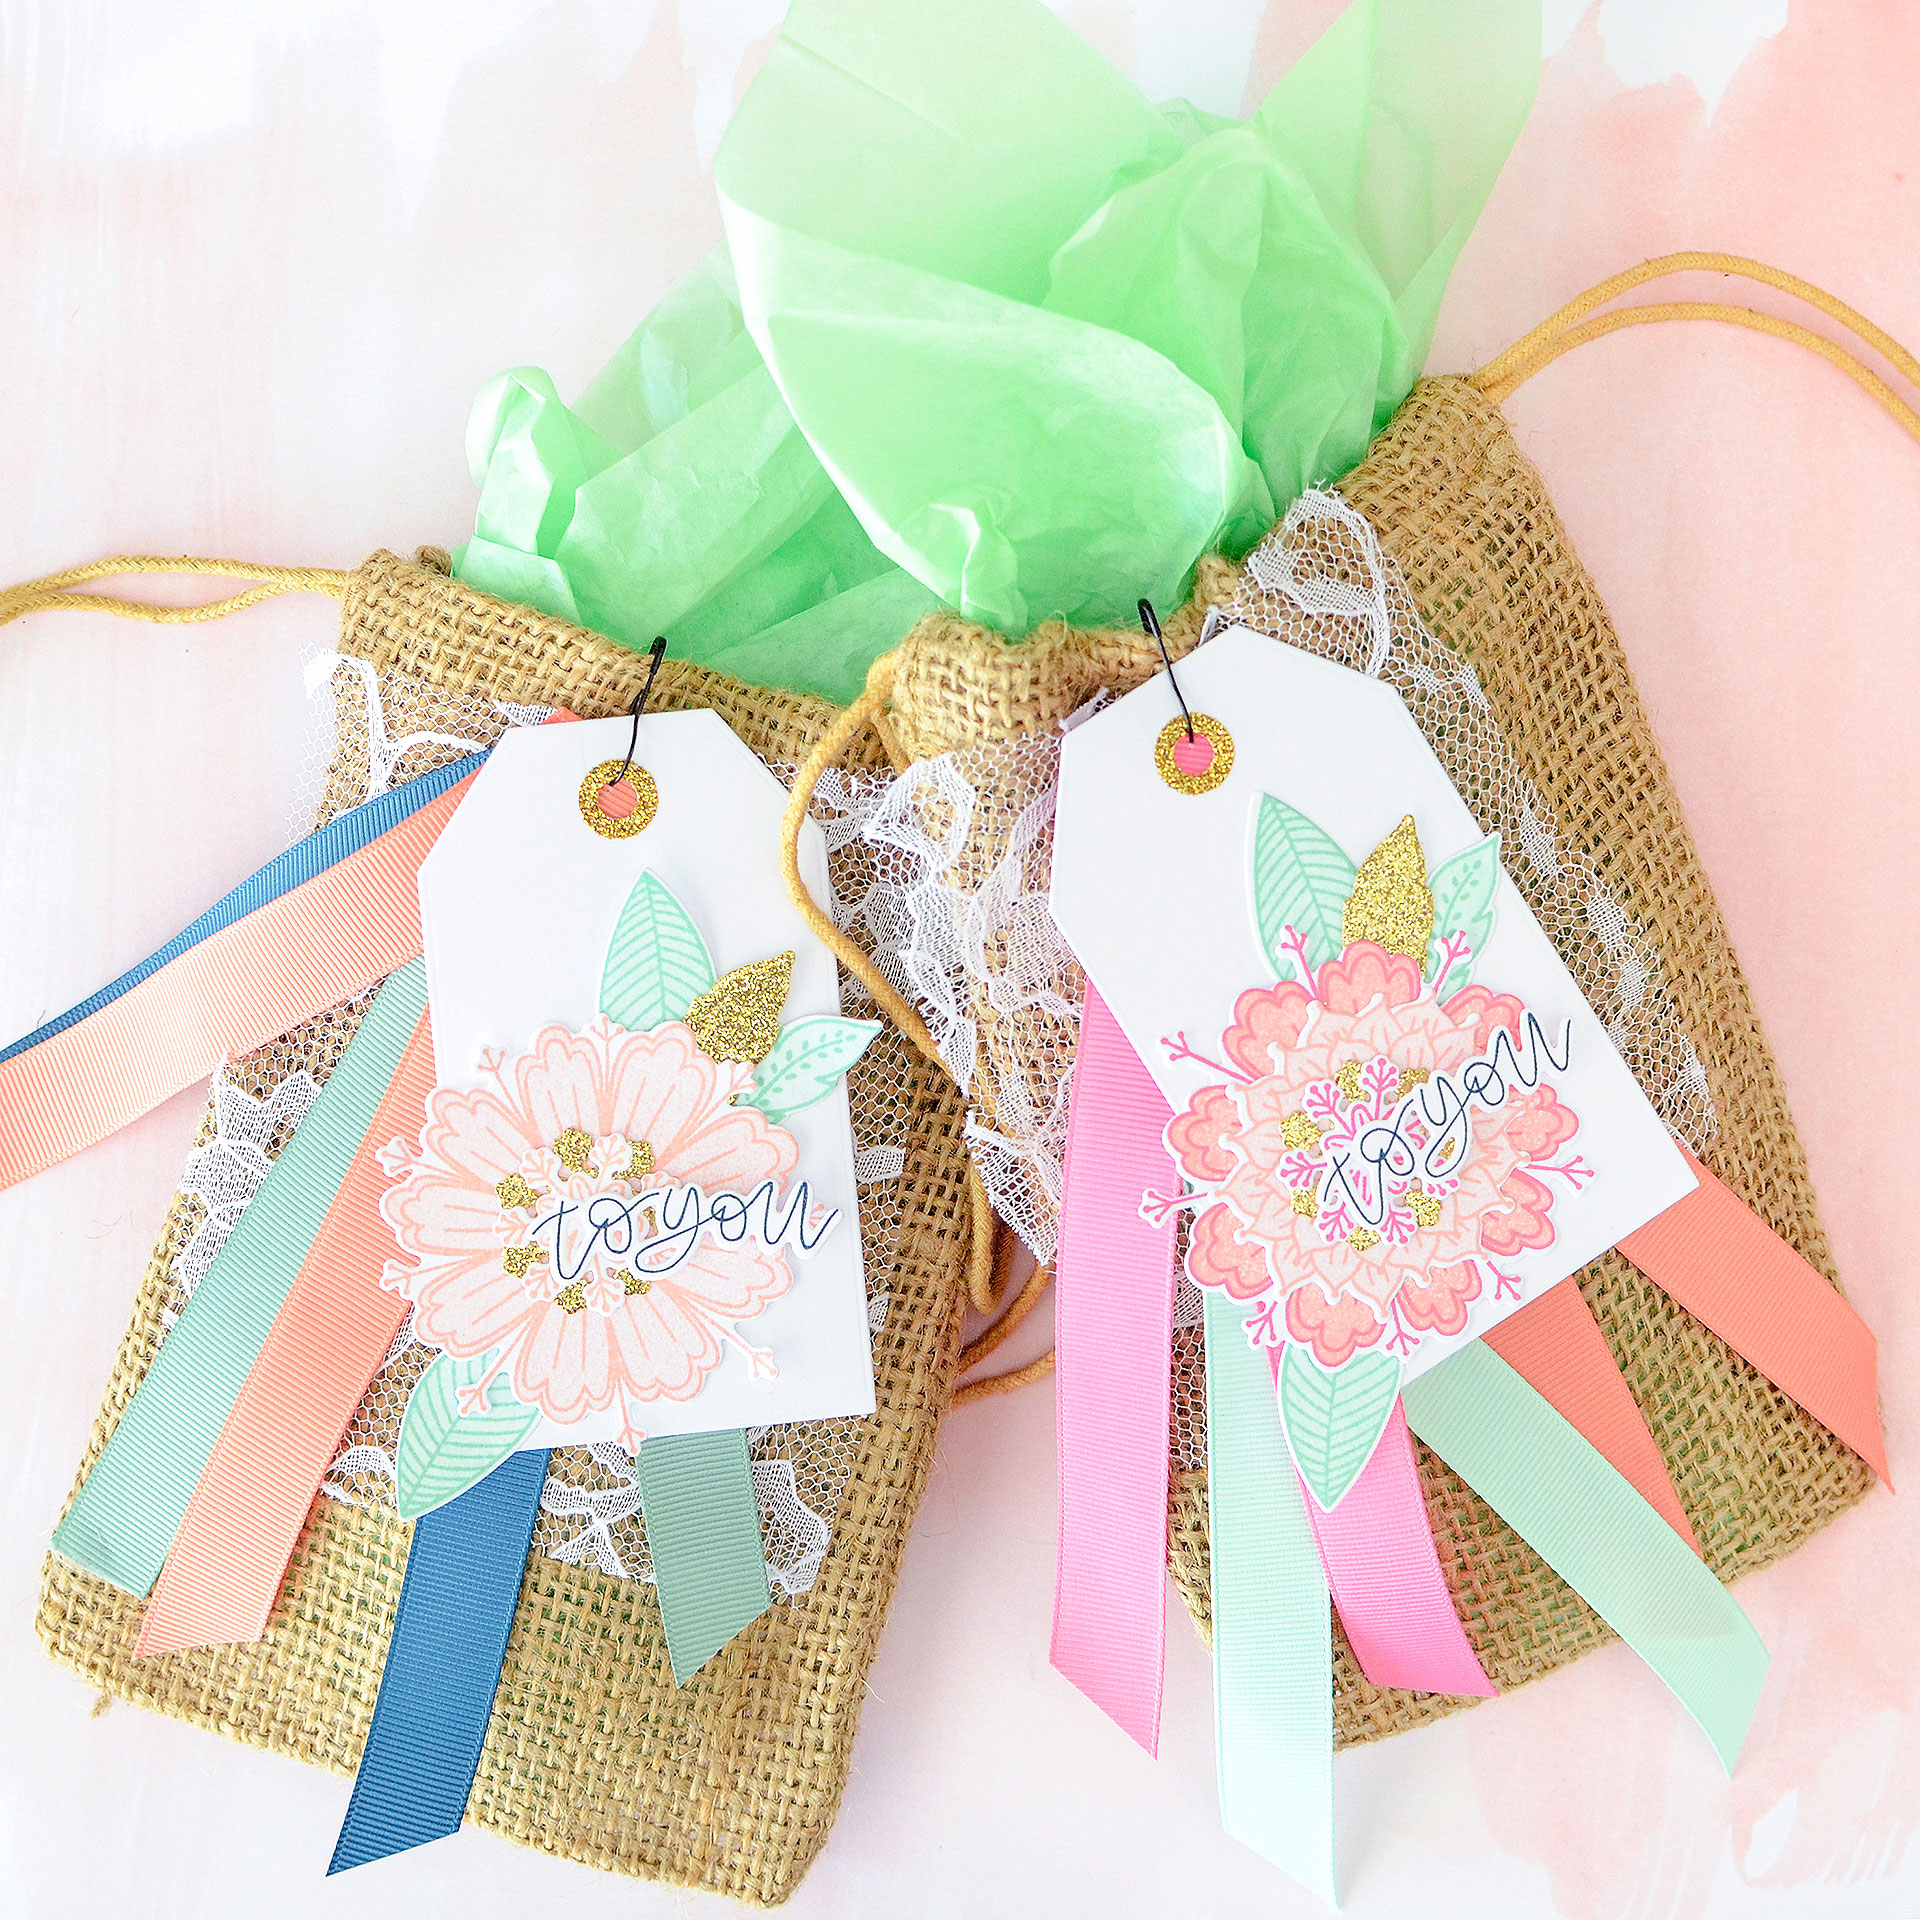
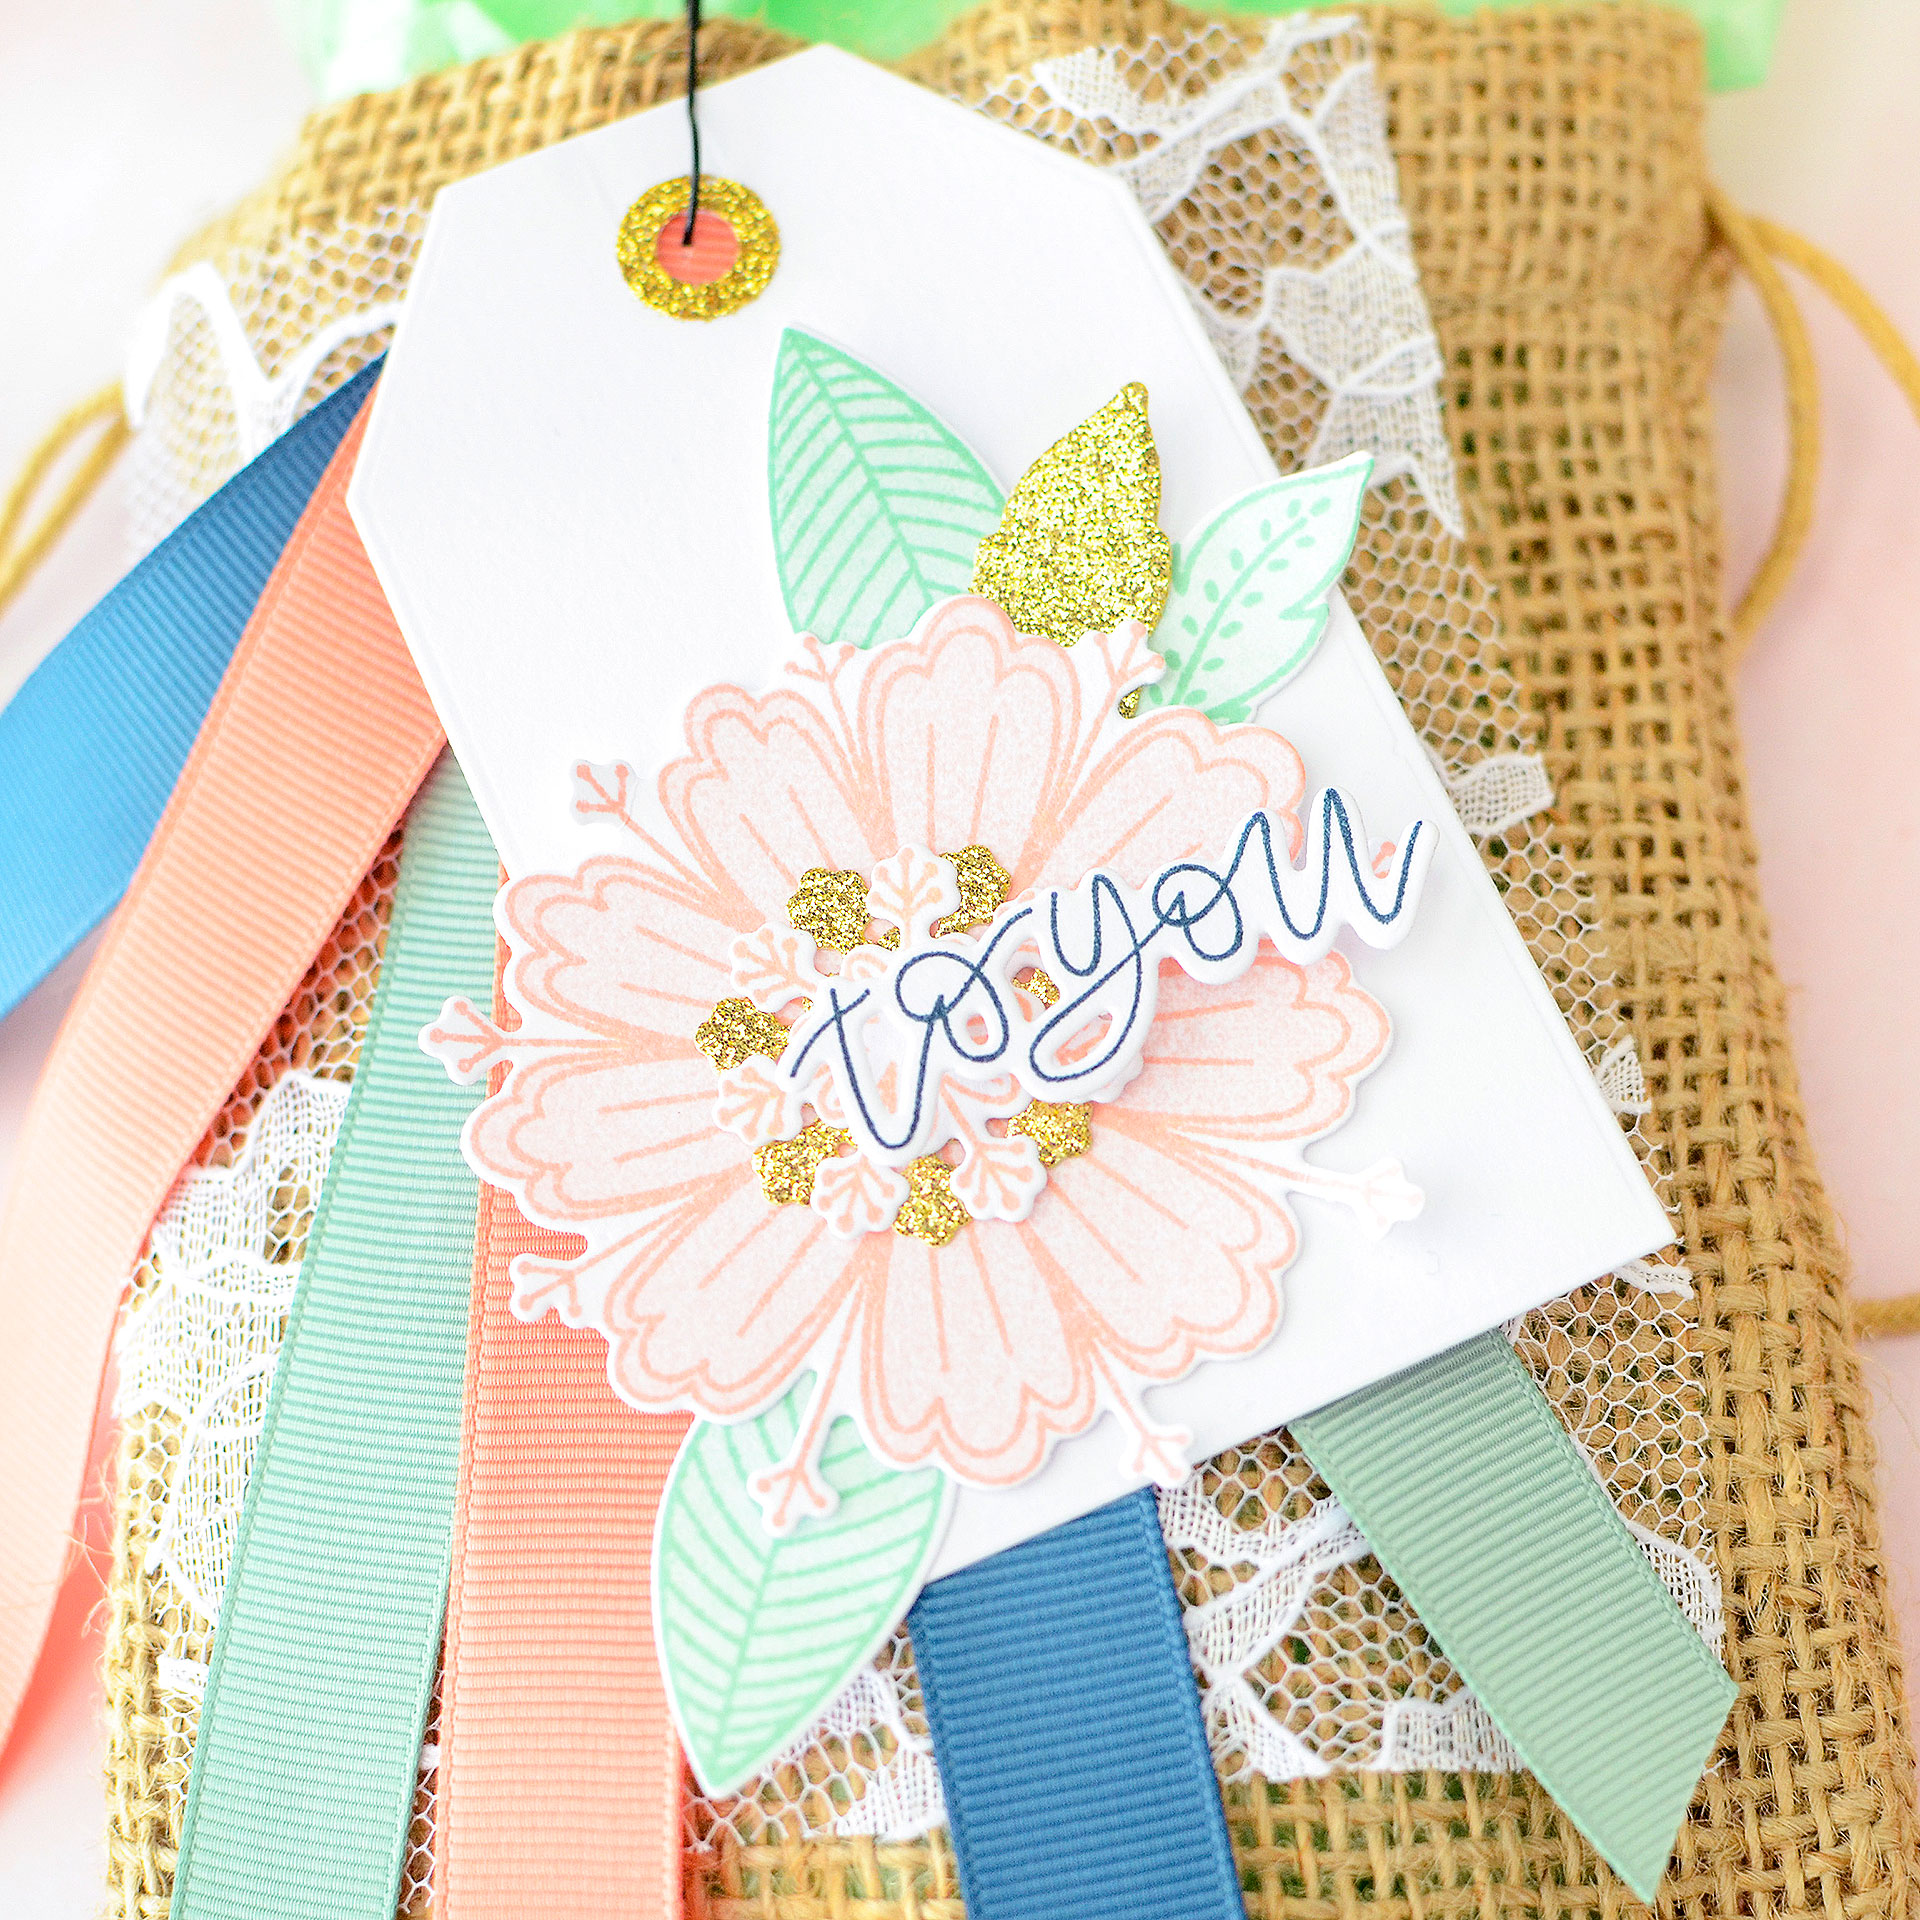
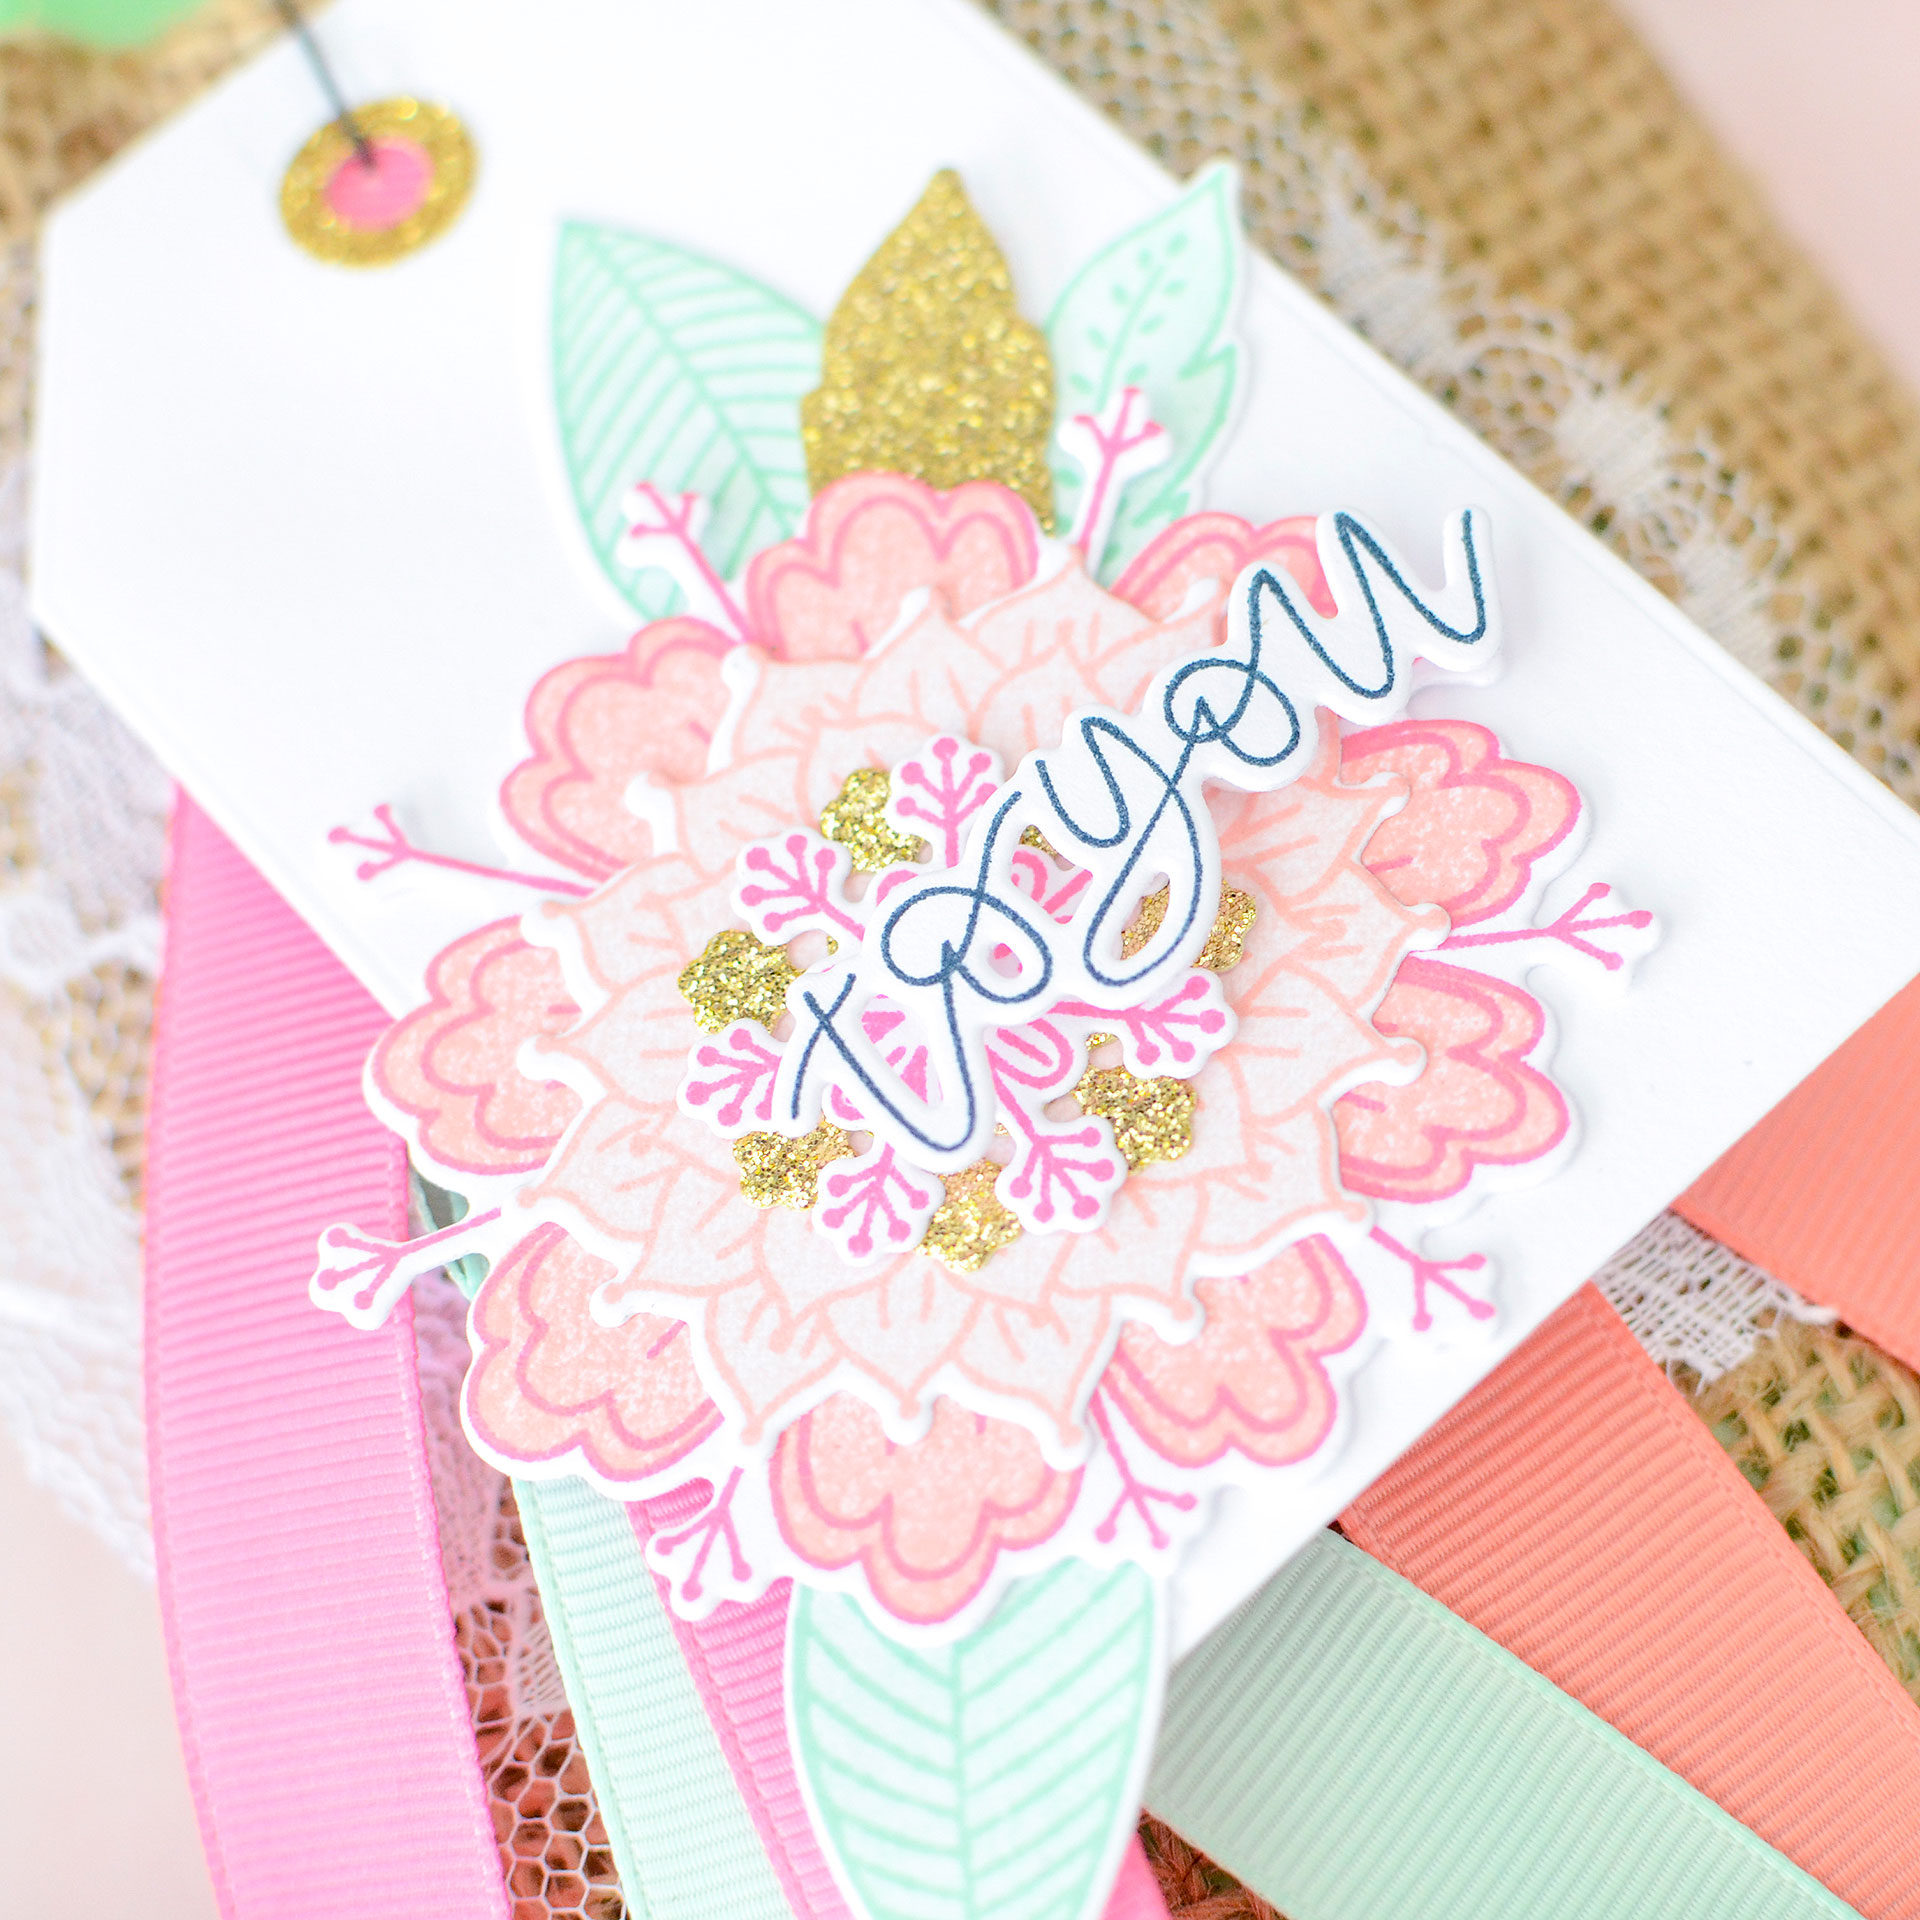
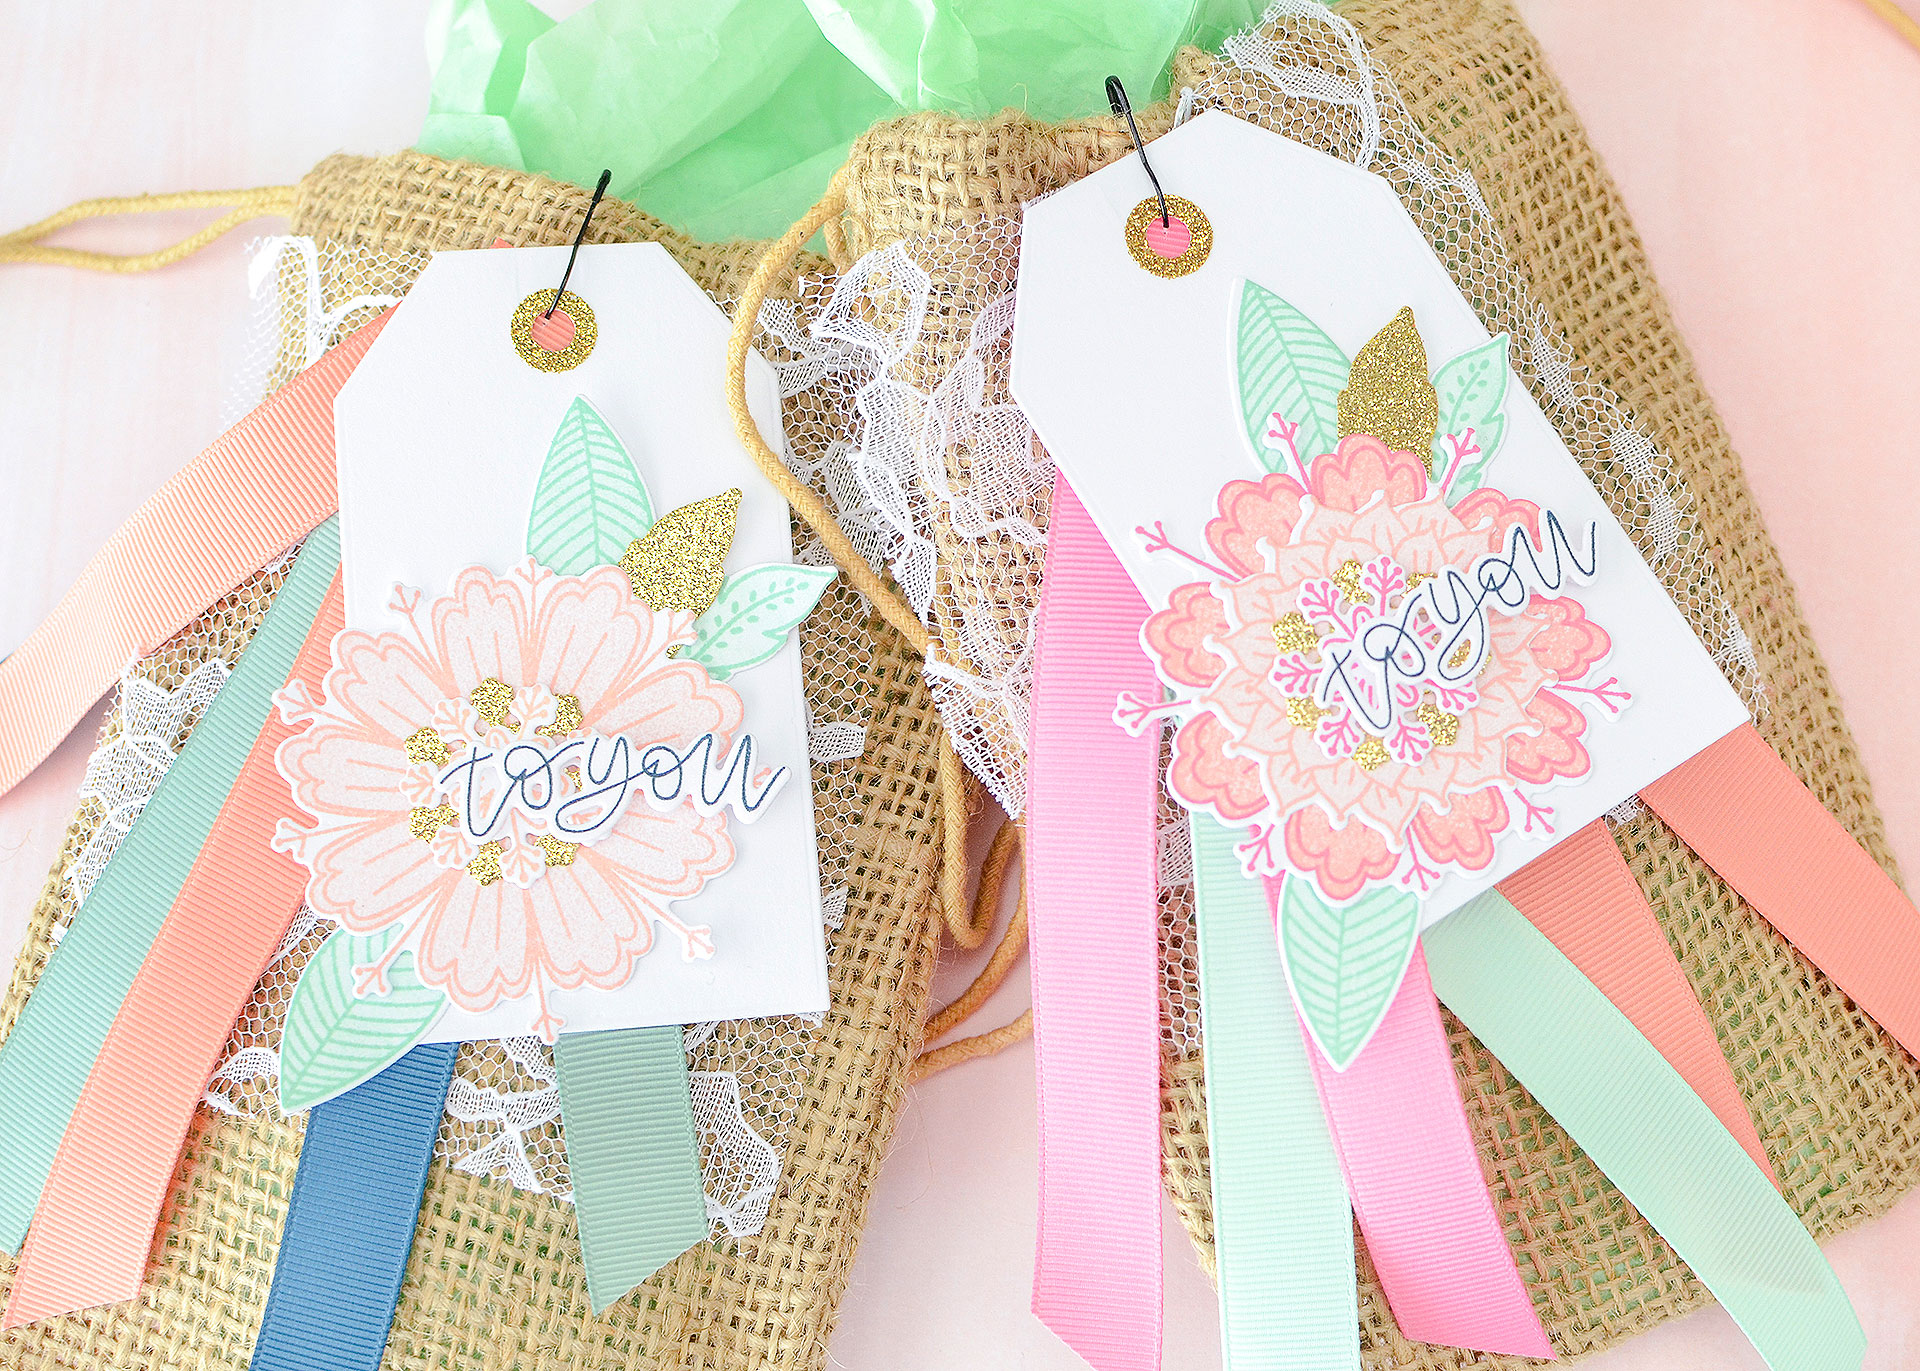
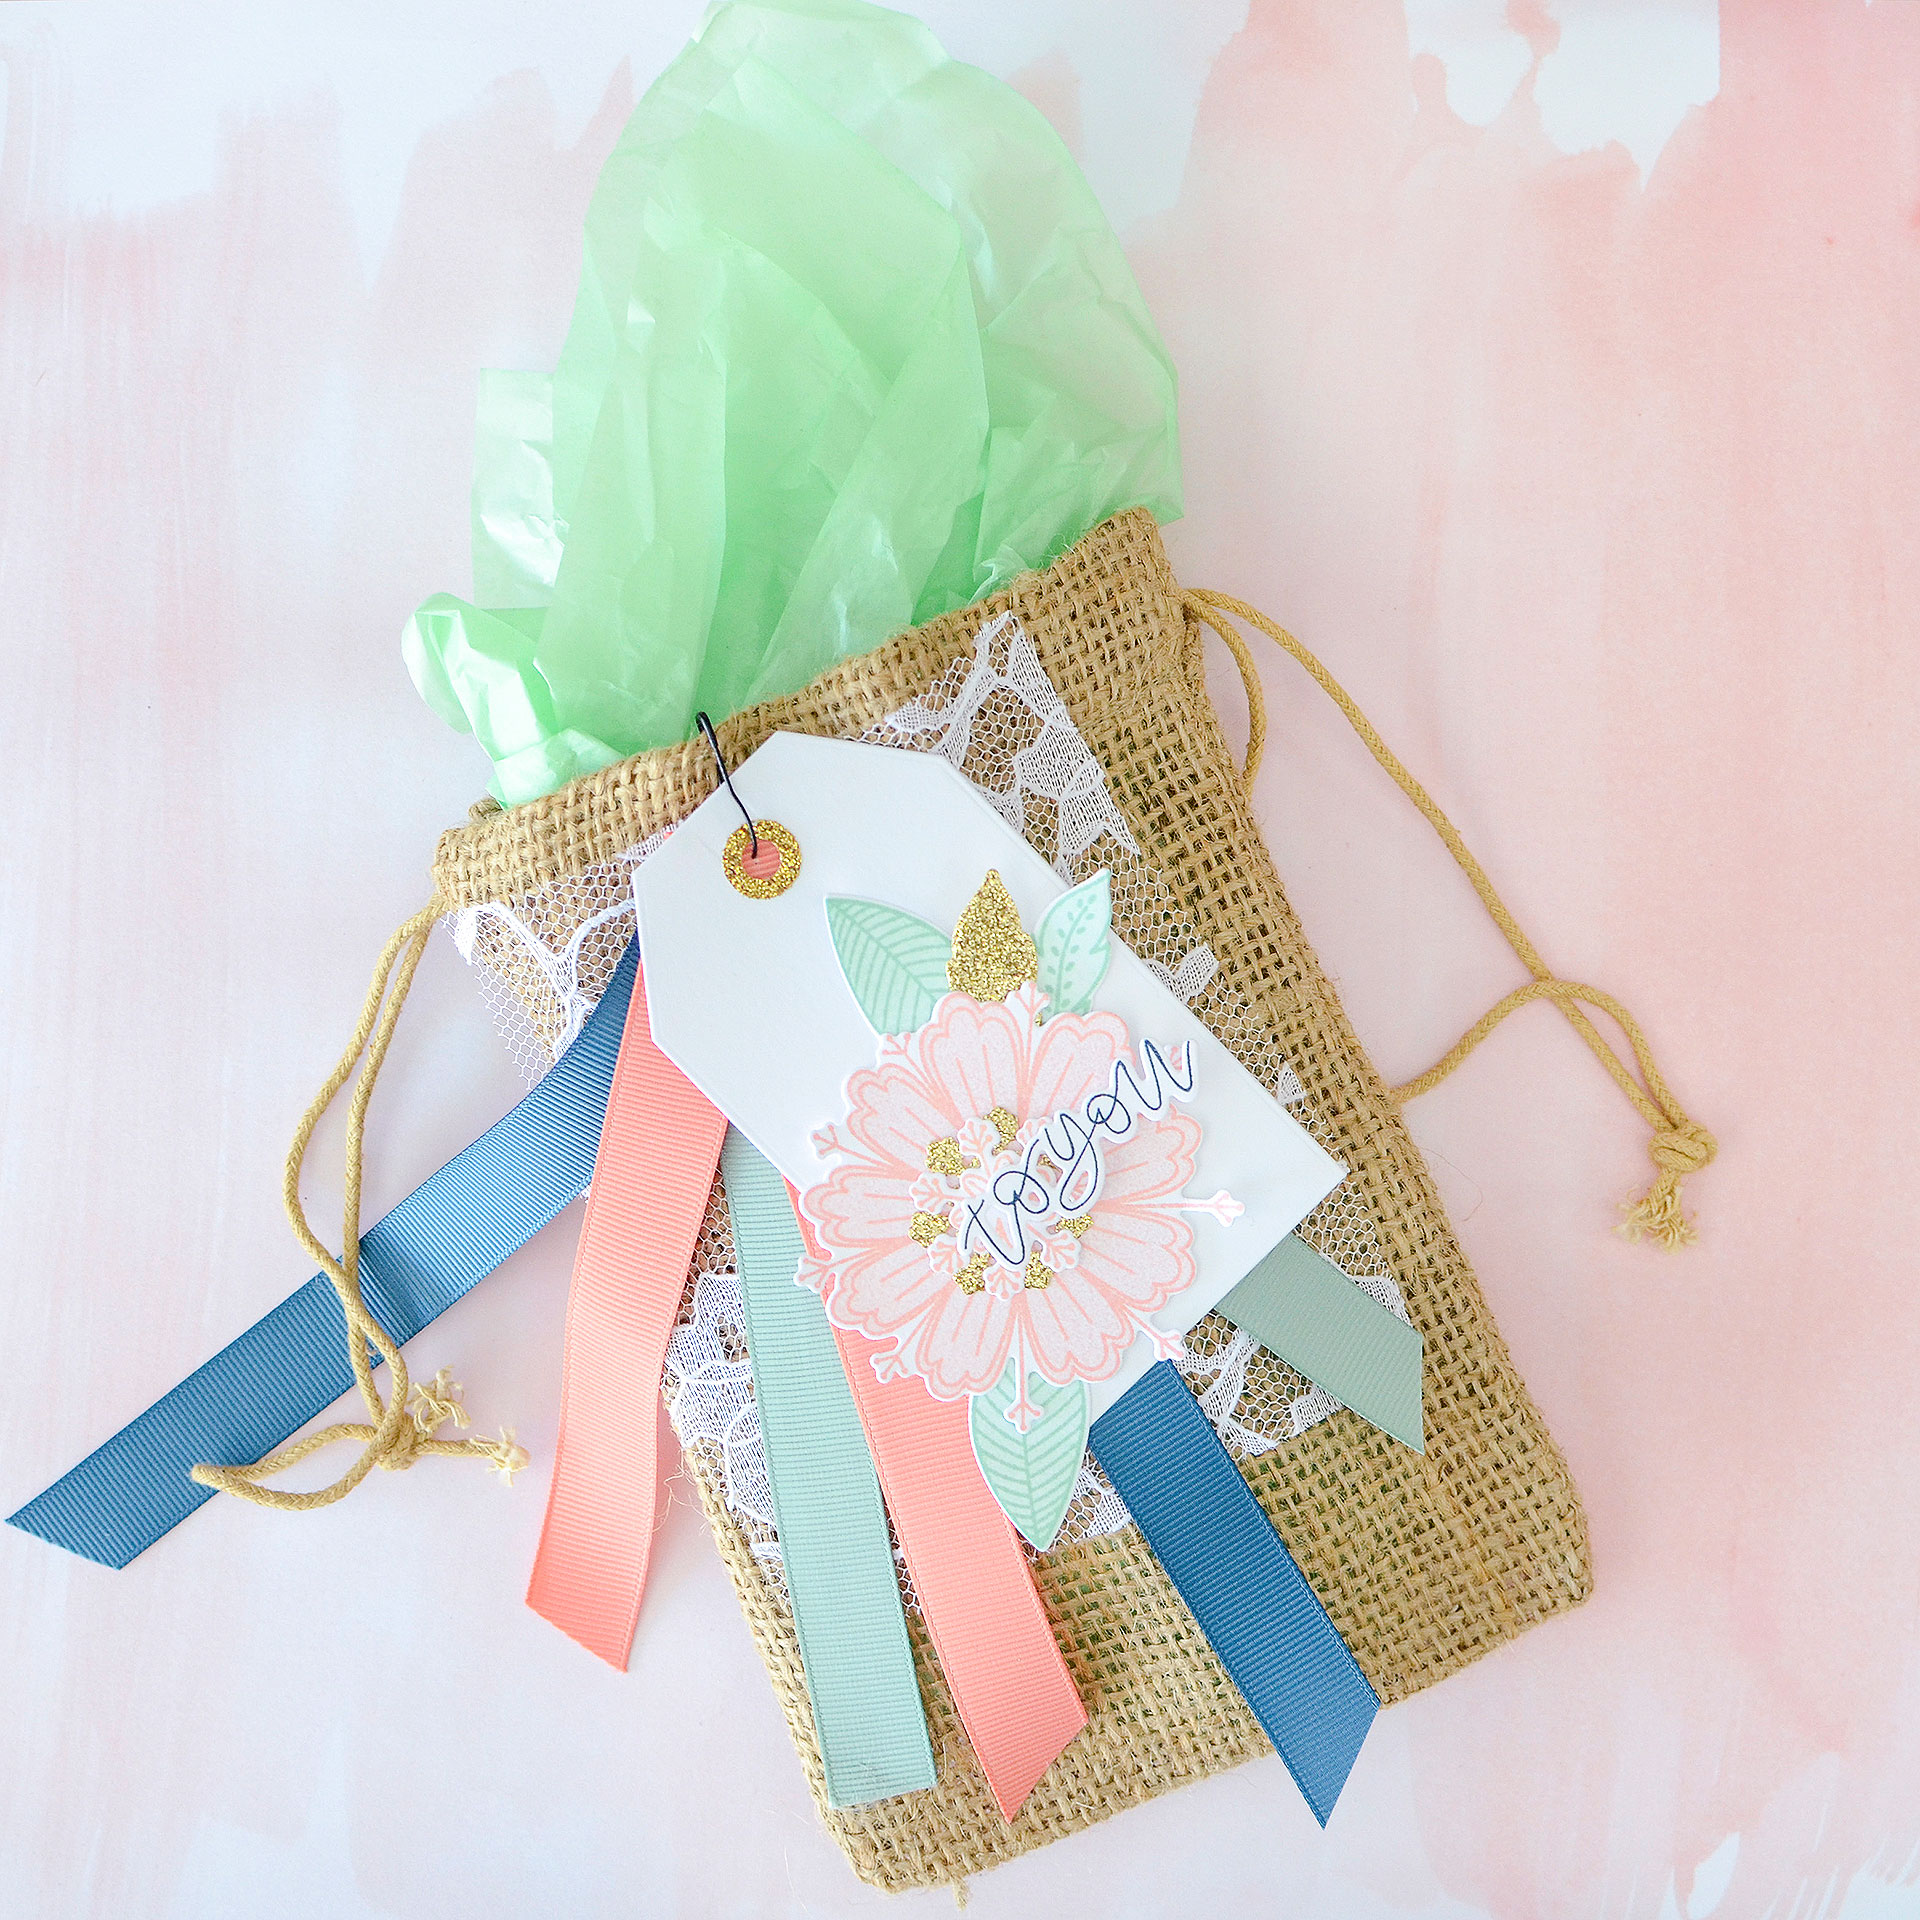
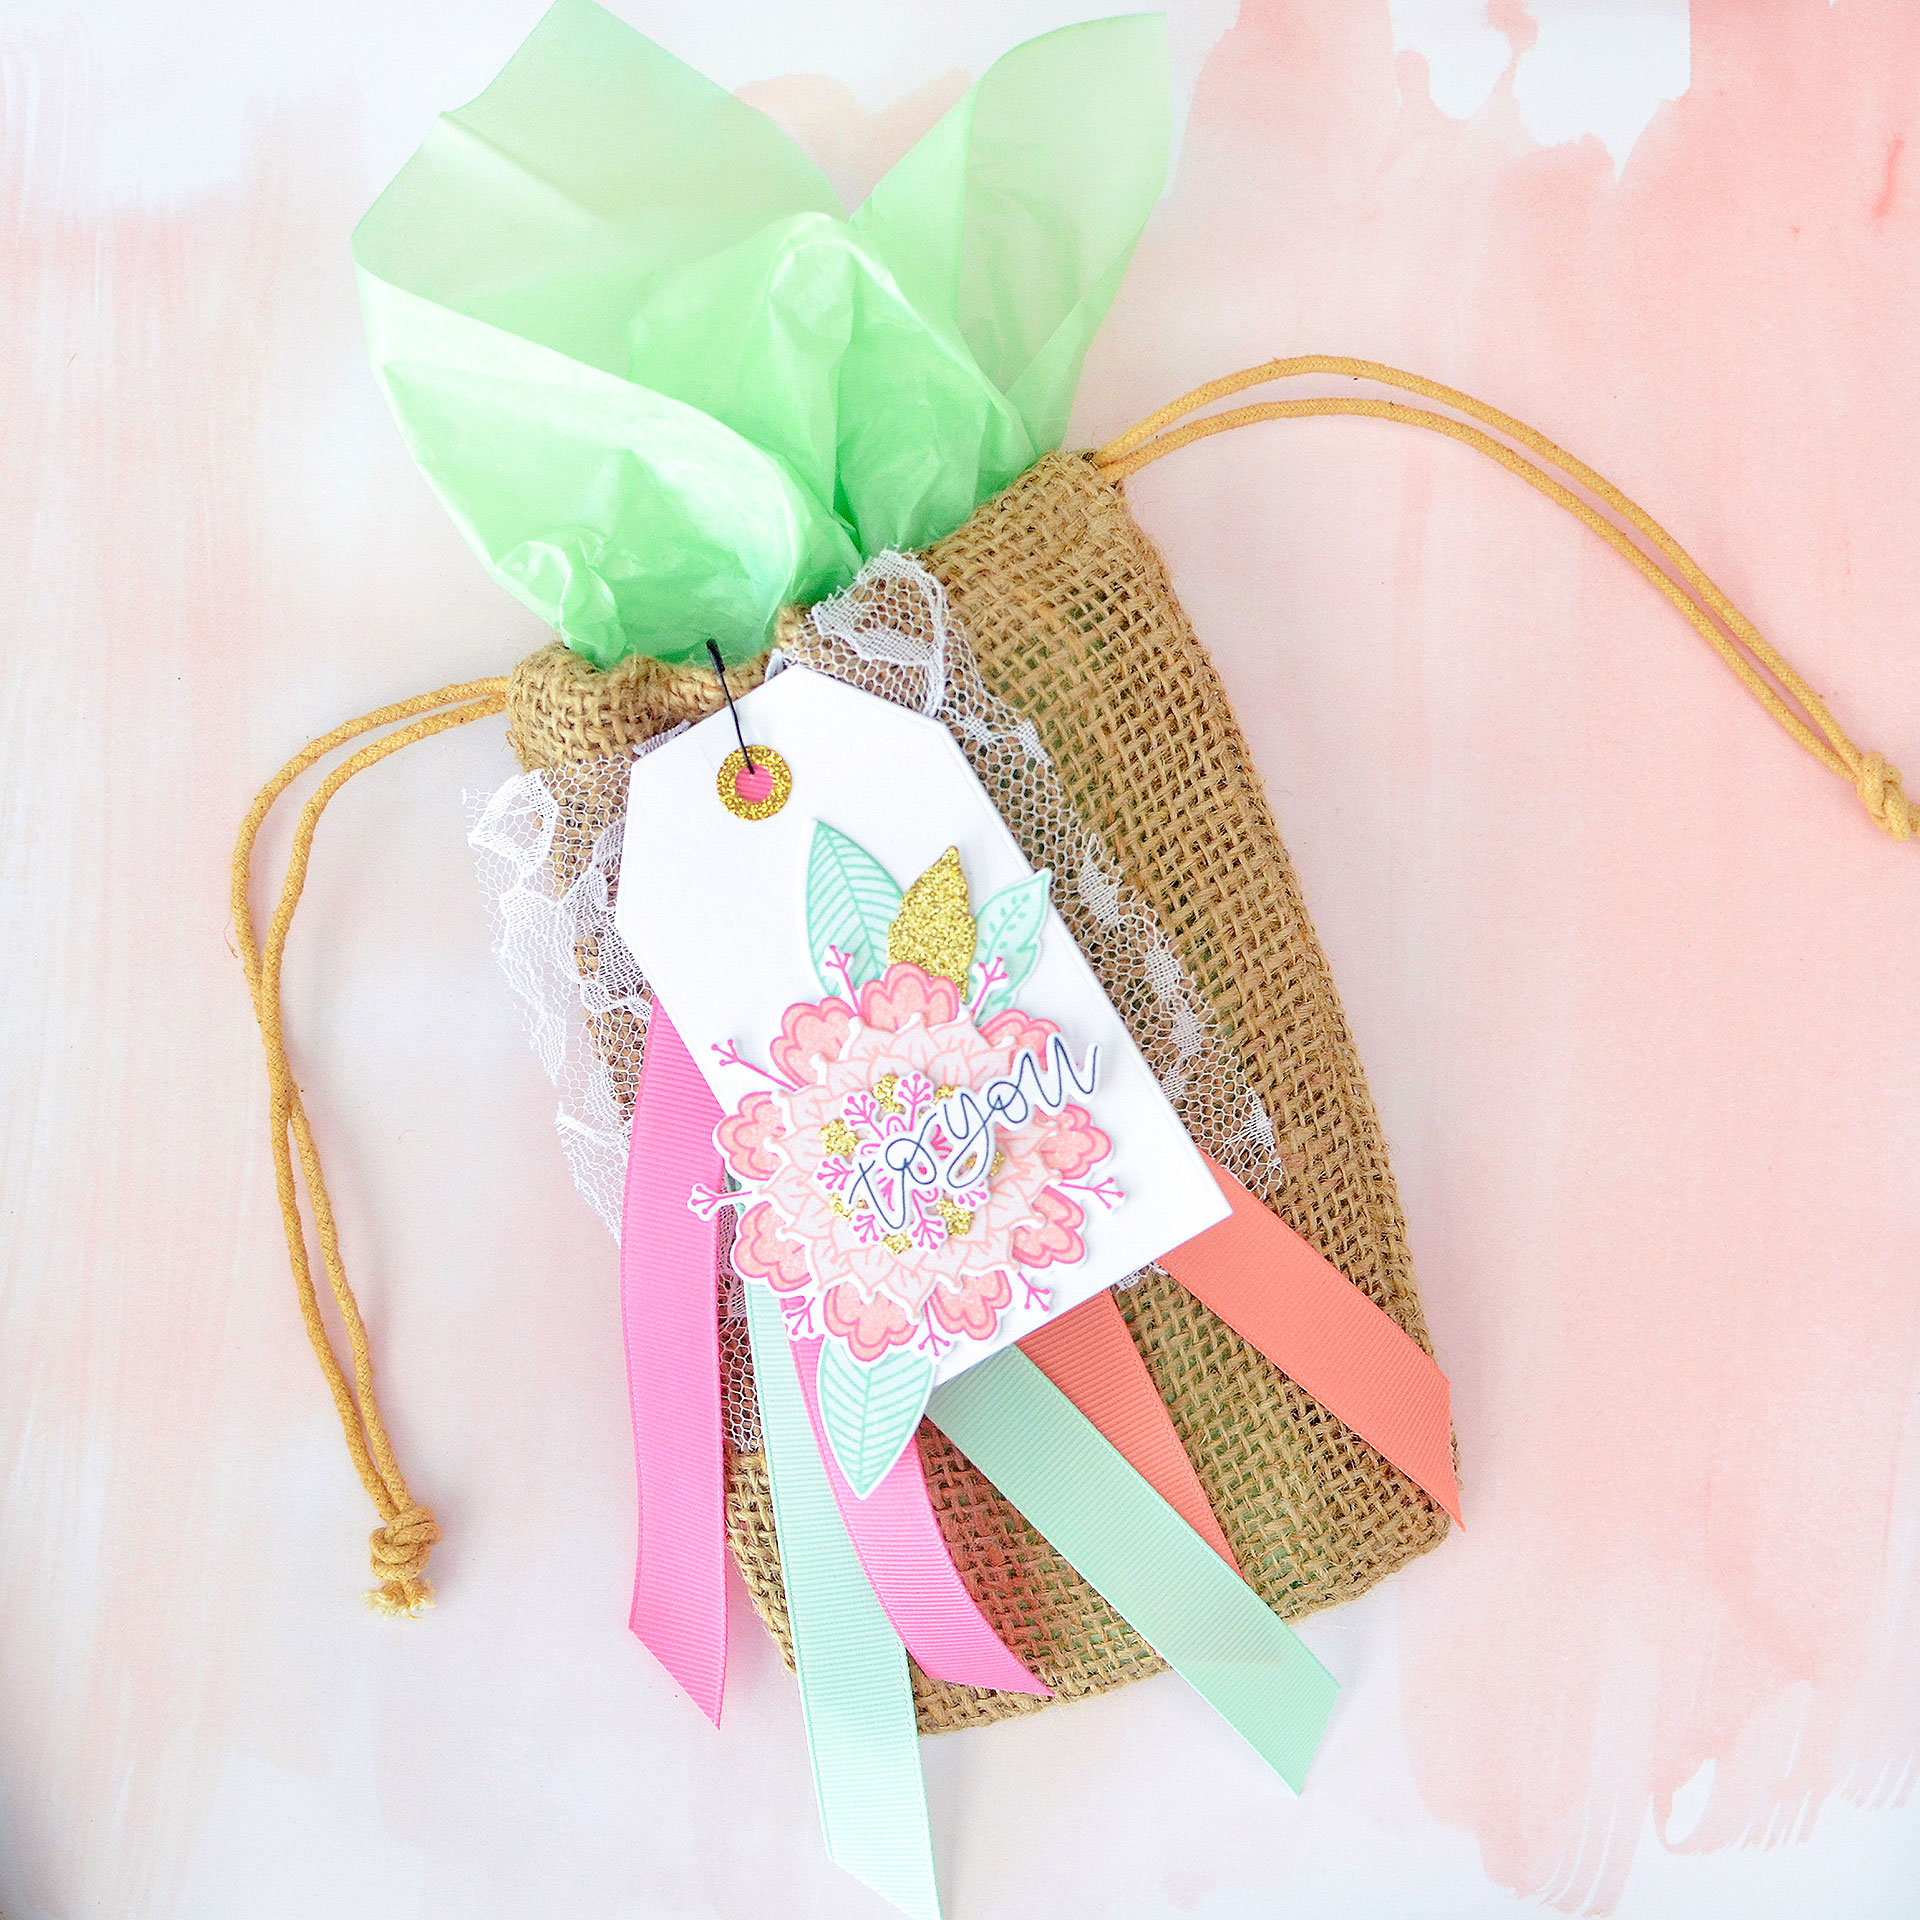
 I started by stamping and die cutting several flowers and leaves from the Together Forever Blooms collection. I’ve been on a Hibiscus Burst and Sweet Blush kick lately (have you noticed?), and to them I added Pale Peony and Melon Berry florals, as well as Aqua Mist leaves.
 For the leaves, I stamped the details (the outline) in Aqua Mist. To get the solid image, I inked up my stamp in Aqua Mist, stamped off once on scrap paper, and then stamped again over my detail image on cardstock. I love doing that technique–you double your ink colors and get perfectly matched pastels!
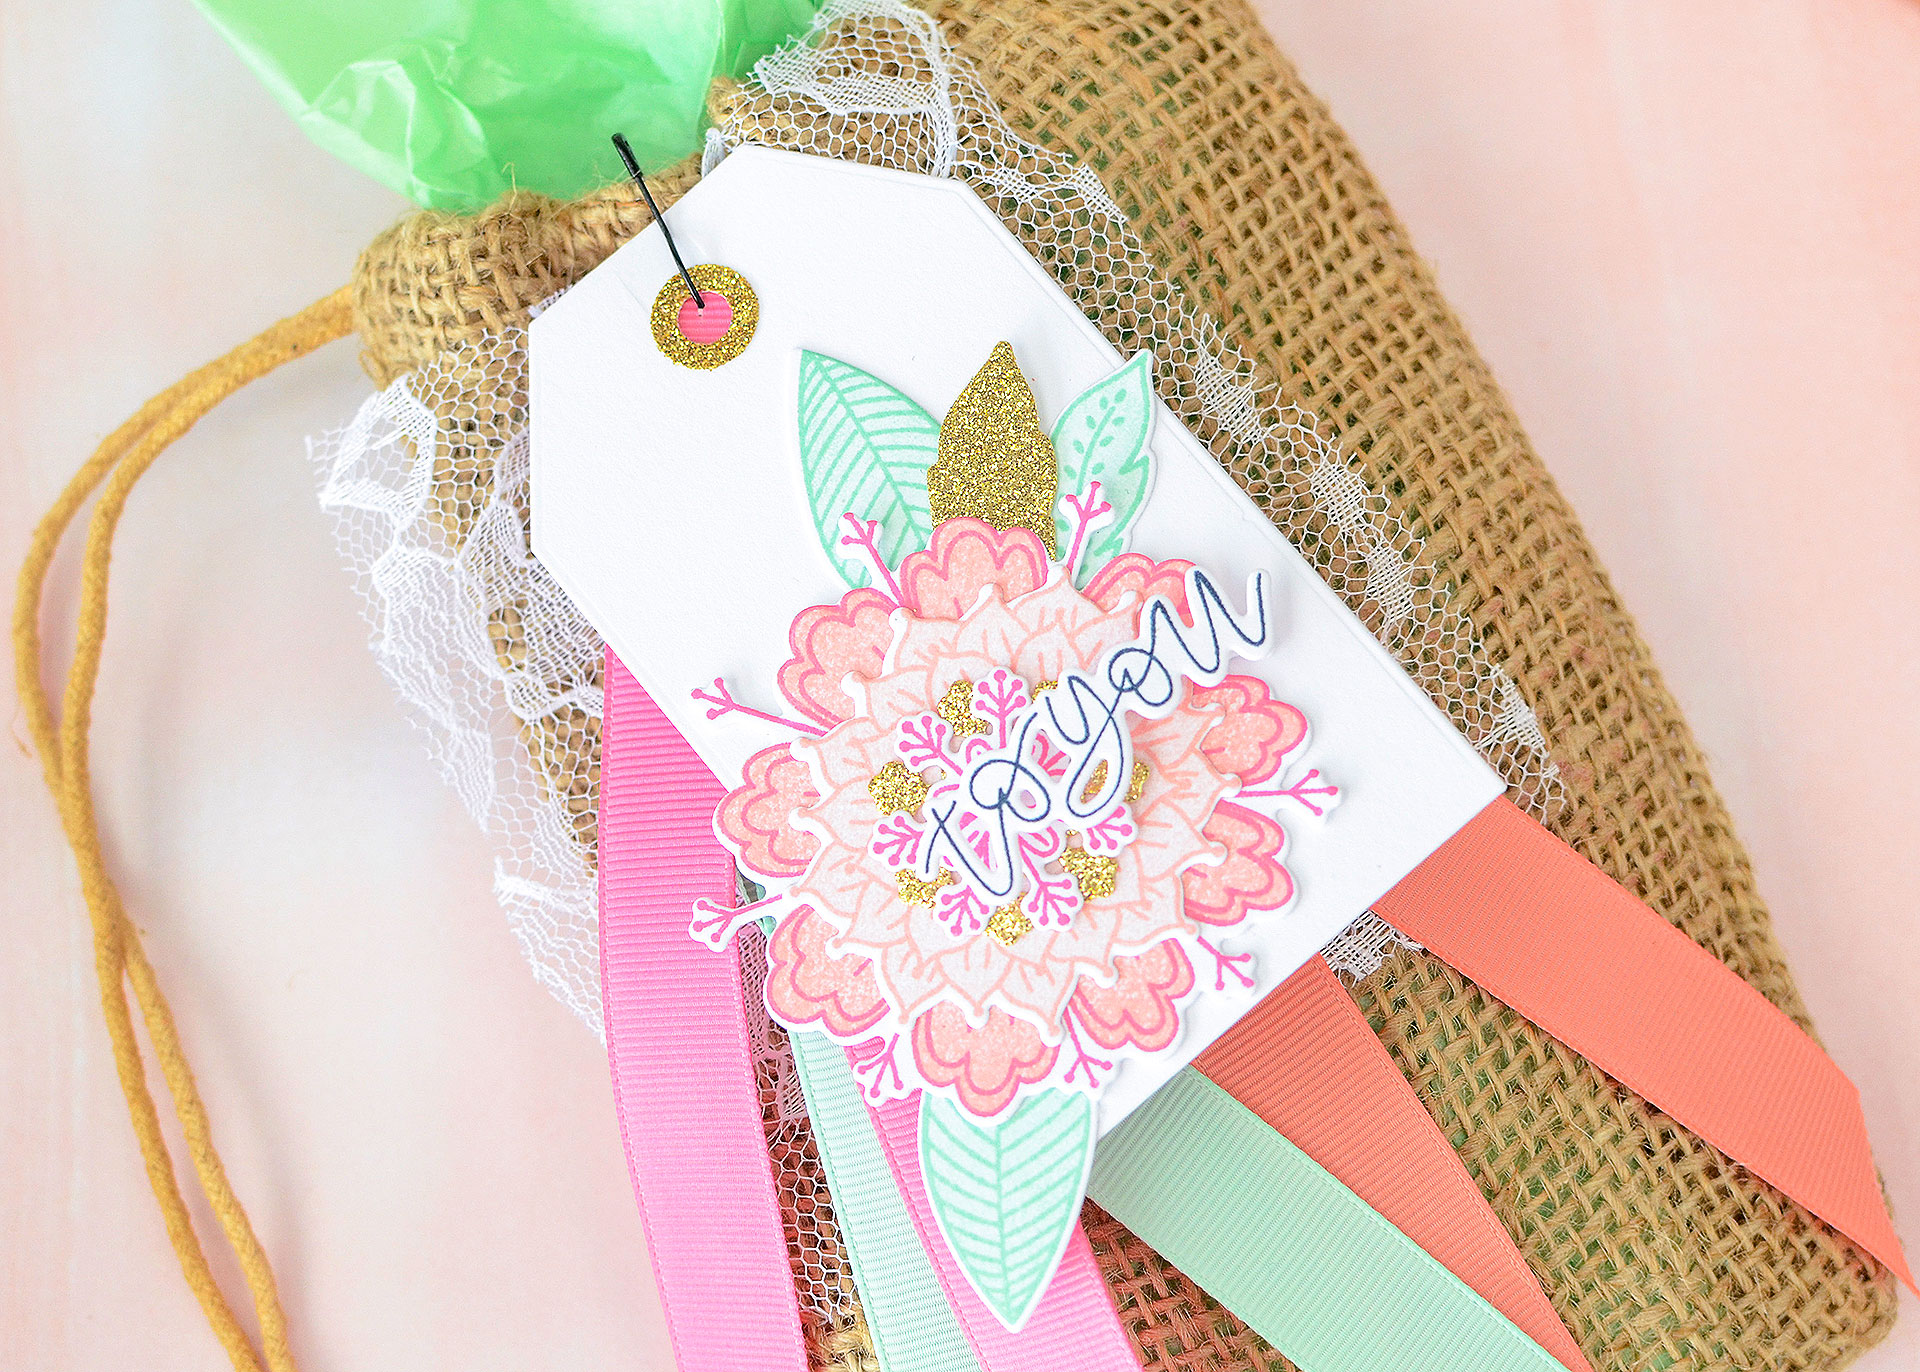 You can do the same thing for the bloom pieces, stamping the outline first in the darker version, then stamping over it in the lighter version. I also found it to be really helpful to line up the two-step stamps by stamping the outline first. When it was time to stamp the solid, I could see through it better than the outline for perfect placement, if that makes sense?
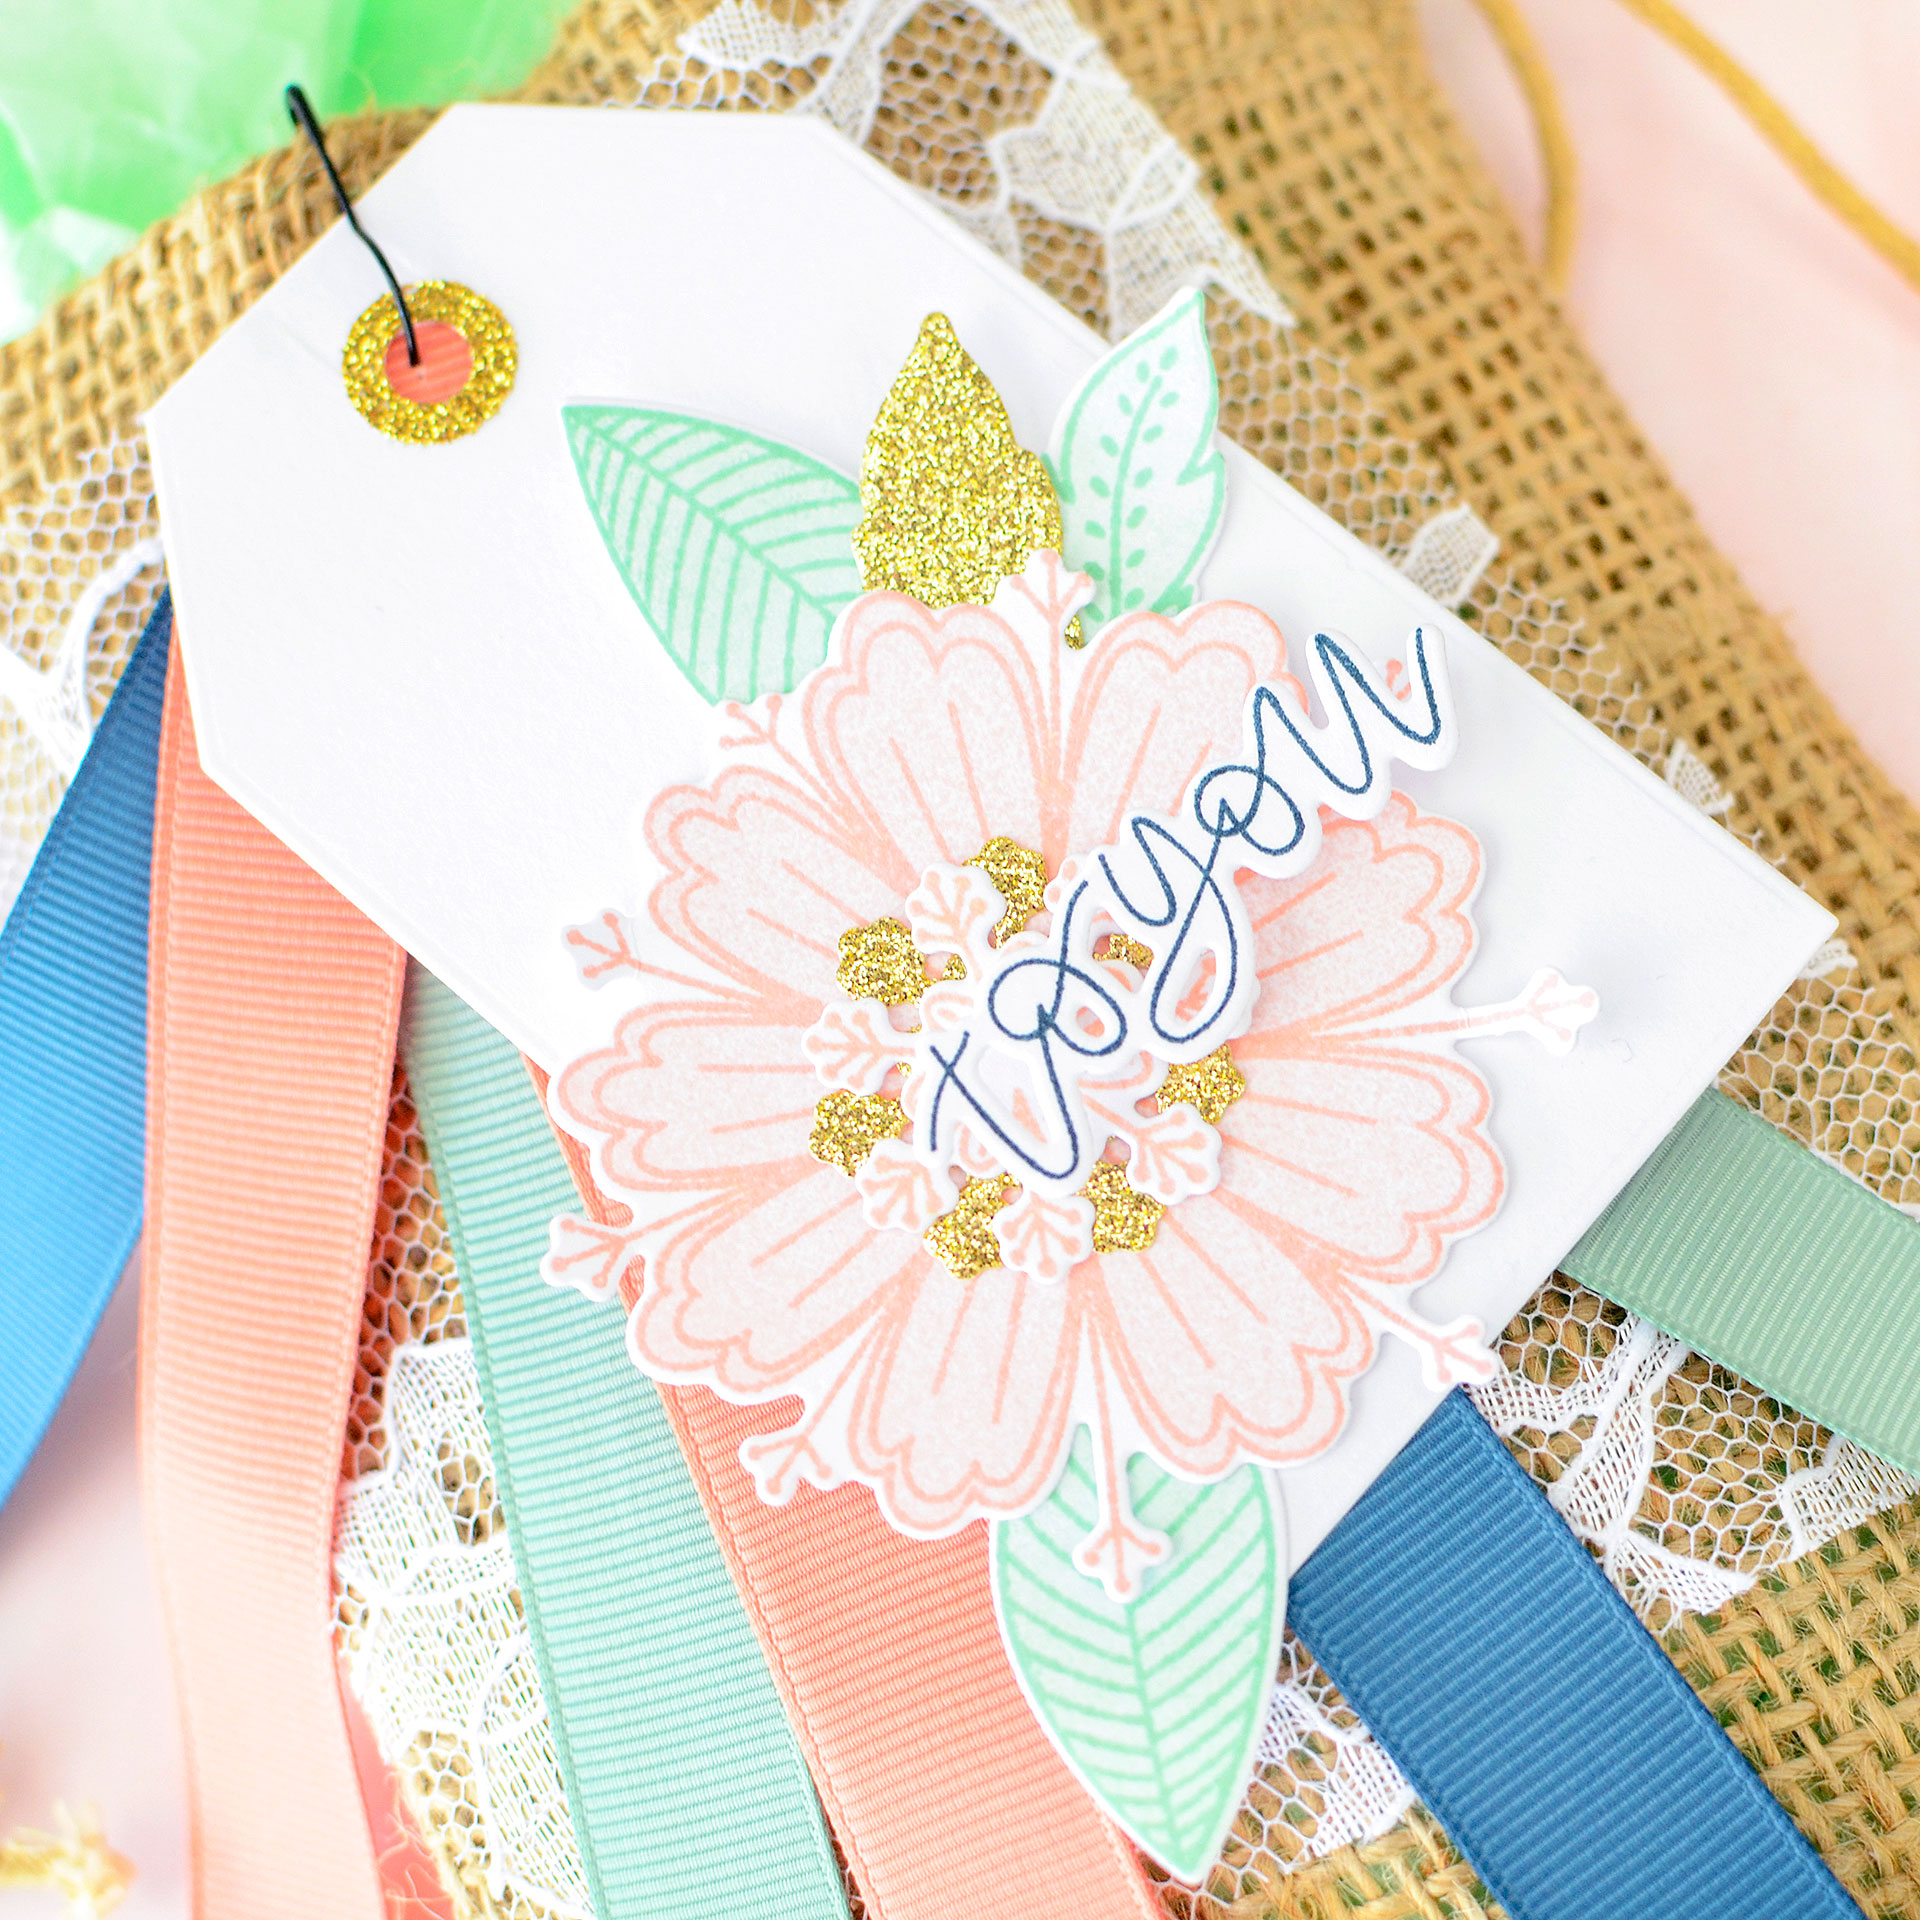 After stamping several images in varying colors, I die cut them for my tags. I also stamped and die cut a sentiment for each tag. I’m using ‘to you’ from the Your Beautiful Birthday set, but you can choose any message you’d care to use.
 My tags are simple Paper & Package Essential Tags–the largest one–cut from white stock and I added a circle hole reinforcement in gold glitter. I have a sheet of stickers for this, but they’re easy enough to replicate by cutting a 1/2″ circle in gold glitter paper (or any kind, for that matter), and then punching a 1/4″ hole in the middle. Adhere to the tag using the 1/4″ hole in the tag for guidance. Easy!
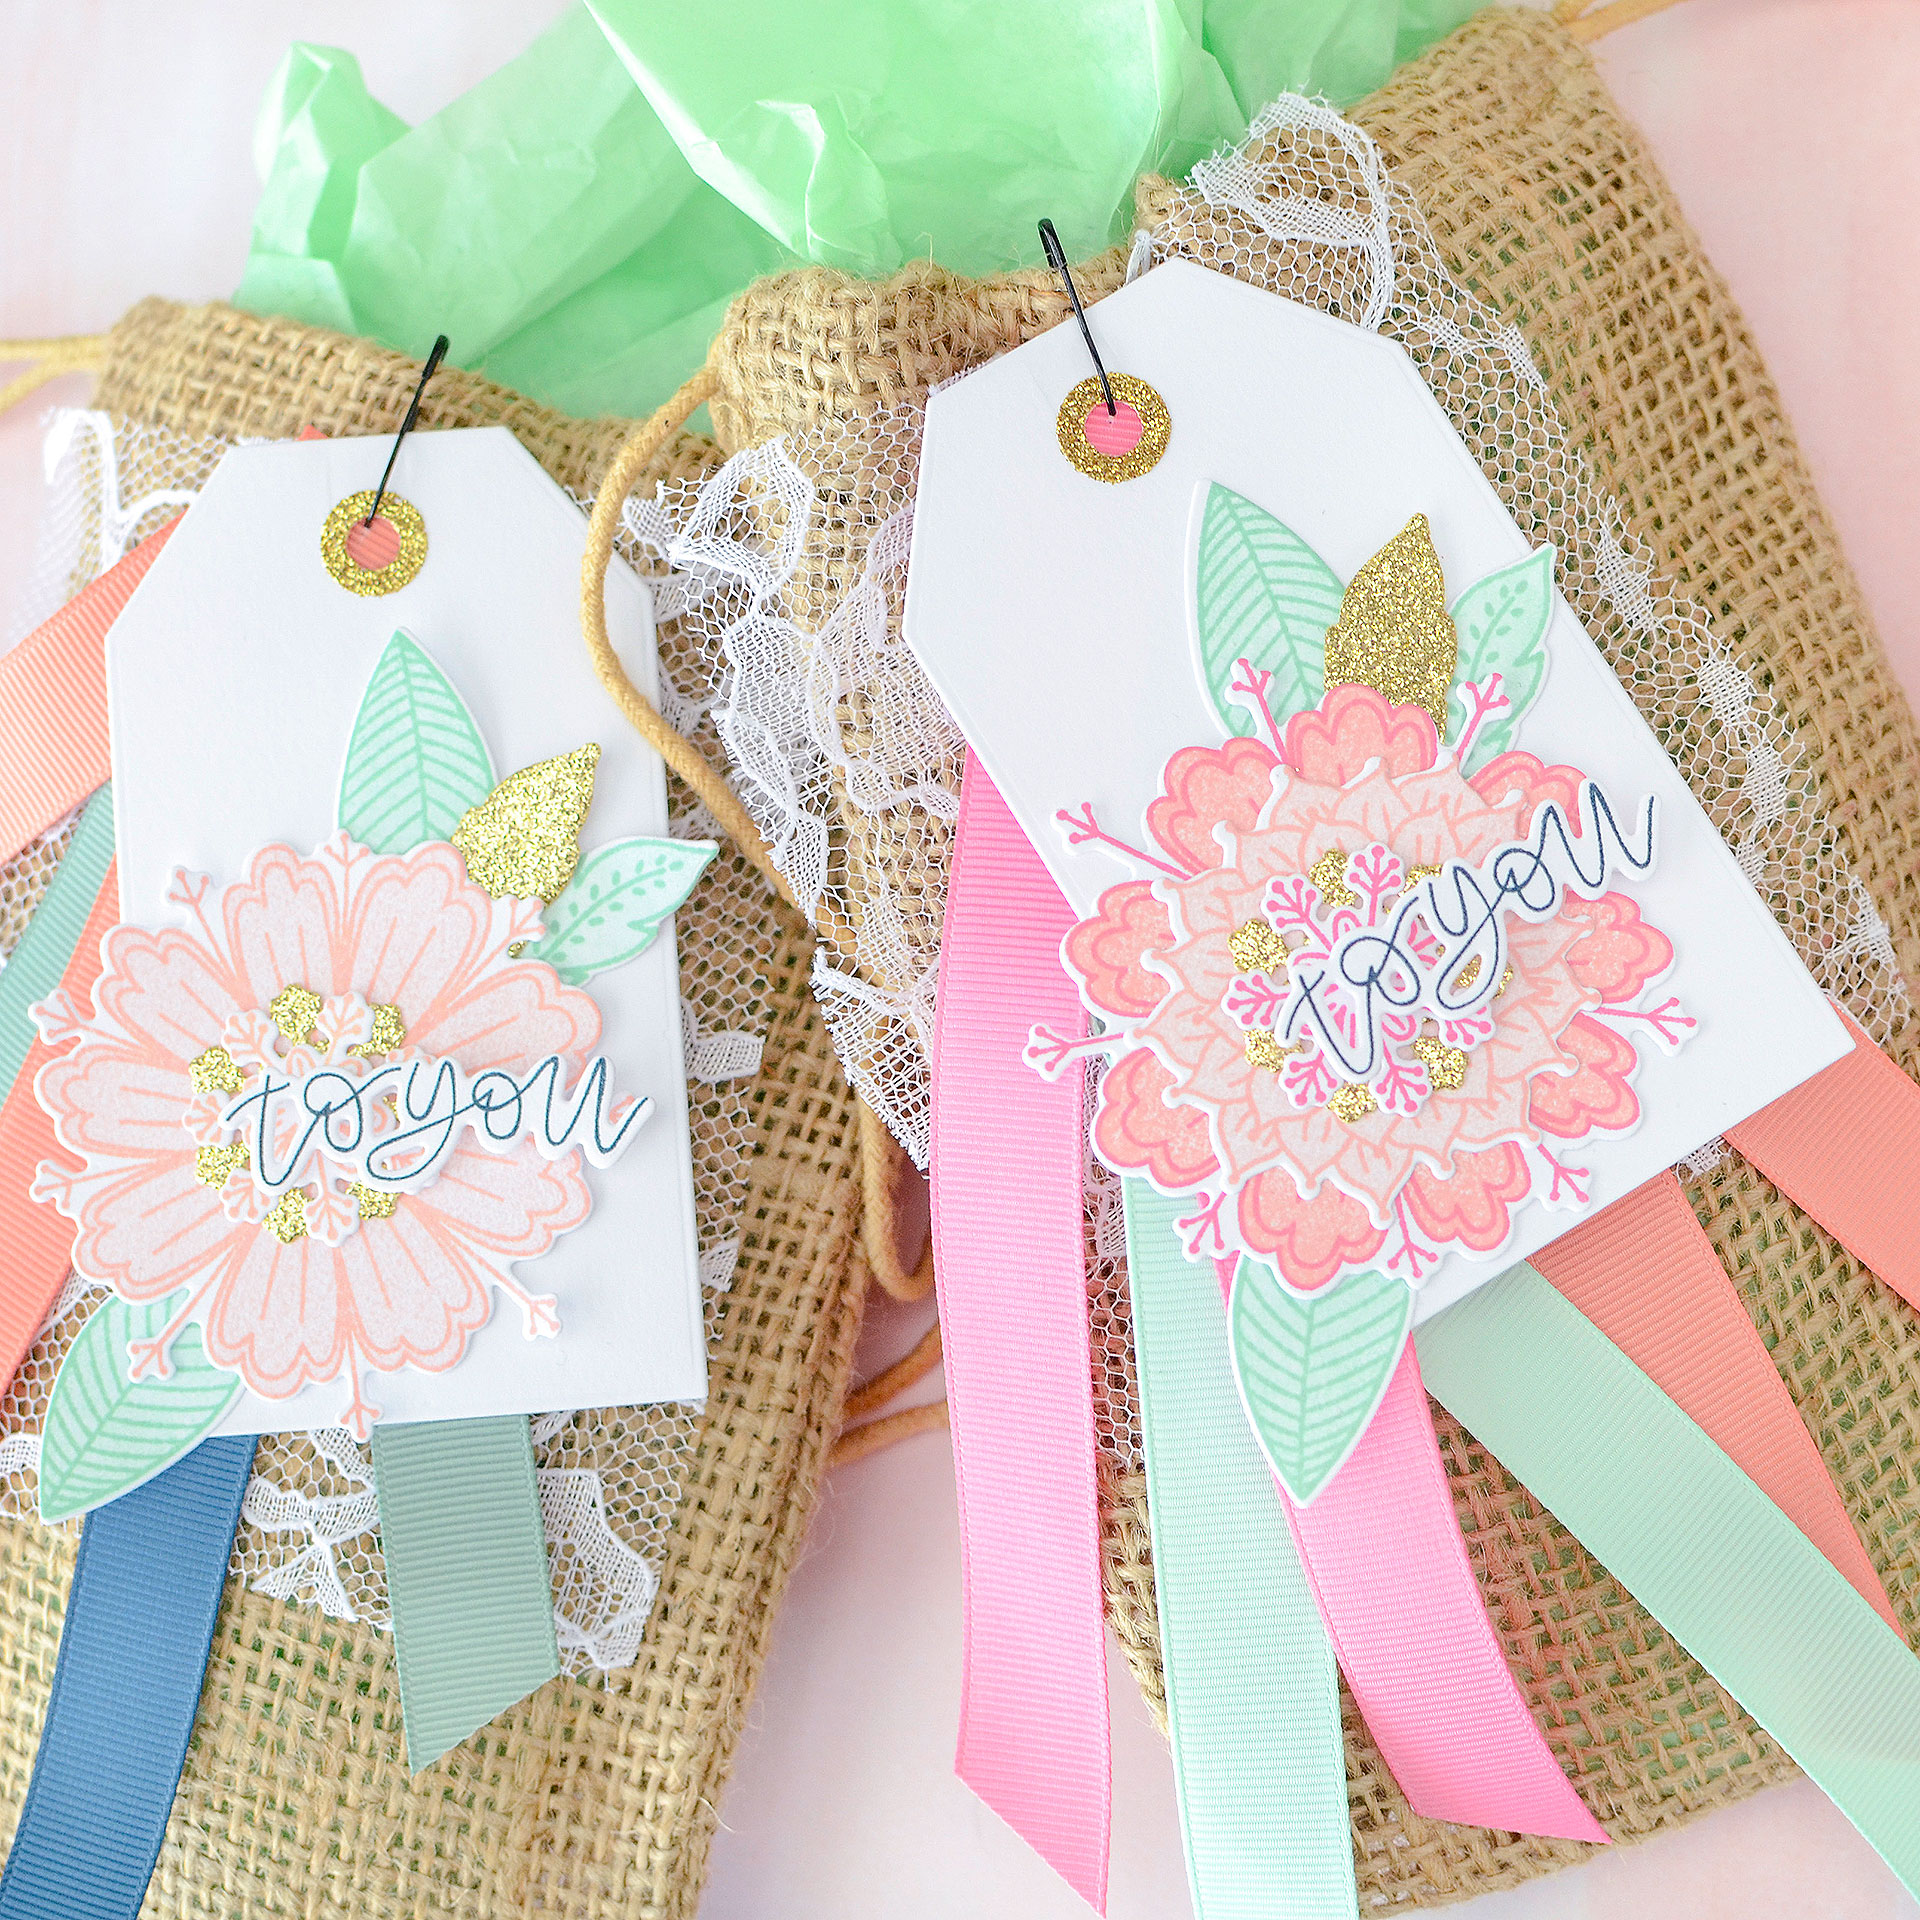 I’m shooting for a rustically feminine look today–pretty florals, shabby chic hues, a little gold, a little shine, and some burlap bags. I love these for spring and Easter and Mother’s Day gifting! You can purchase the bags in the PTI shop and a set of 3 is just $2.55 right now during the sale! That’s a great buy!
 All right, I’ve given you some background info…now it’s time to see how they came together. Enjoy!
What did you think? Not too difficult, right? I hope that you’ll try some of these for yourself!
 Thank you so much for waiting patiently for this post and for spending this time with me today. I can’t wait to get back here with you next month!
 STAMPS: Together Forever Blooms, Your Beautiful Birthday
INK: Sweet Blush, Pale Peony, Hibiscus Burst, Aqua Mist, Melon Berry, Dark Indigo
PAPER: Stamper’s Select White, Gold Glitter (American Crafts)
DIES: Together Forever Blooms, Your Beautiful Birthday, Paper & Package Essential Tags
OTHER: Burlap Bags, Grosgrain Ribbon (Hibiscus Burst, Melon Berry, Aqua Mist, Enchanted Evening), Calabash Safety Pins
Leave a Reply