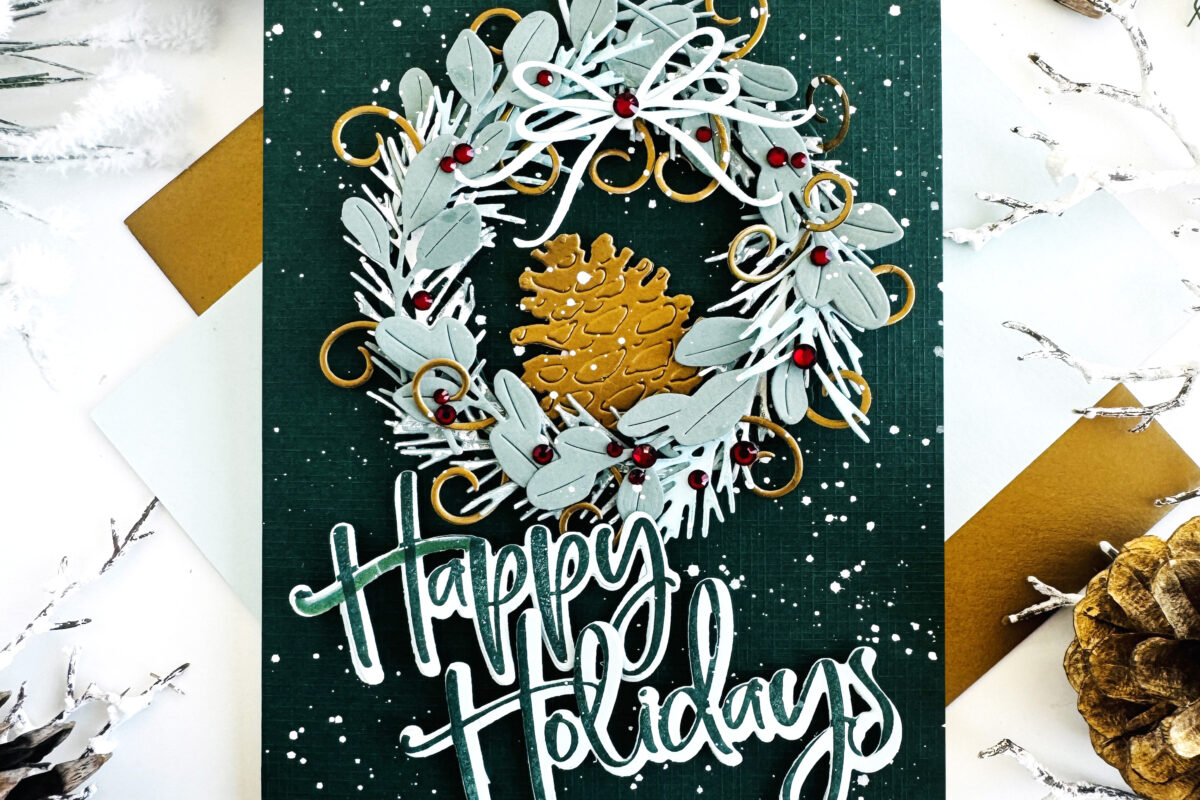



Rich greenery, shimmering gold accents, and a touch of snowy charm give this holiday design a festive and sophisticated feel! A lush, leafy wreath is dressed up with delicate gold swirls, sparkling red rhinestones, and a crisp white bow, with a metallic gold pinecone nestled in the center. Set against a deep Pinefeather green textured background, a sprinkling of white snow adds a wintry feel, while the elegant scripted “Happy Holidays” sentiment completes this festive design. It’s a classic Christmas look with just the right amount of sparkle and shine! My 5″ X 7″ card features the following Papertrey Ink products:
Into the Blooms: Holiday Bouquet dies
This is Big Sentiments: XL Happy Holidays stamp set and coordinating dies
This card is 5″ X 7″ and uses a white card base made from Stamper’s Select White cardstock. True Black Ink was used for all the black ink stamping including a sentiment inside. Here are the step-by-step details for creating this card.
Check out my REEL on Instagram at @BobbiHartDesign and watch this card come to life in less than 90 seconds!
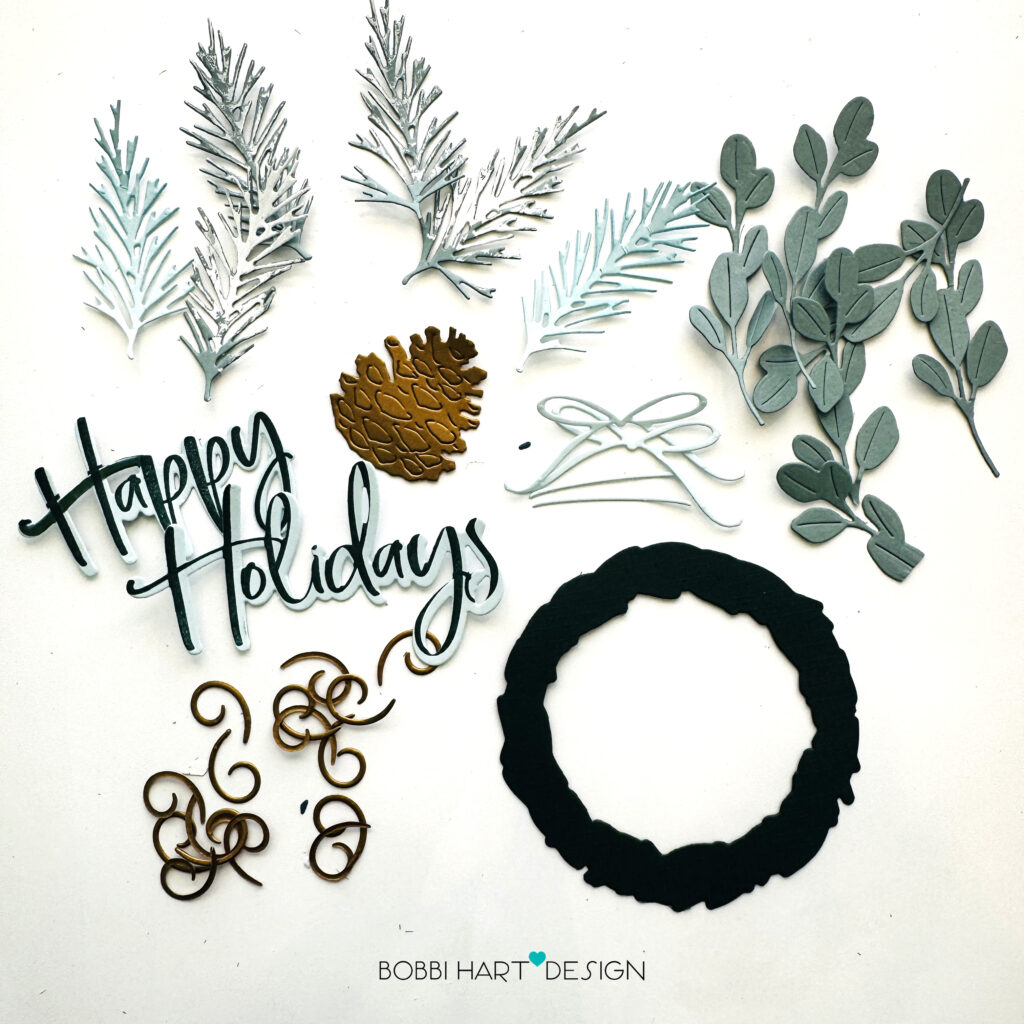
STEP ONE: Stamp “Happy Holidays” scripted sentiment using Pinefeather Ink on Coastal Blue cardstock using the This is Big Sentiments: XL Happy Holidays stamp set and coordinating dies.
Using dies from the Into the Blooms: Holiday Bouquet die set, die cut evergreens and greenery from Ocean Tides cardstock and Coastal Blue cardstock and the bow from white cardstock. Add white acrylic paint to the evergreen and leafy die cuts for a snow-covered look.
Die cut the wreath base from Pinefeather cardstock using a die from the Holiday Wreath die set, . Die cut the whimsical Build-a-Whimsical Tree swirly scroll cuts and the pinecone from the Into the Blooms: Holiday Bouquet die set from metallic gold cardstock.
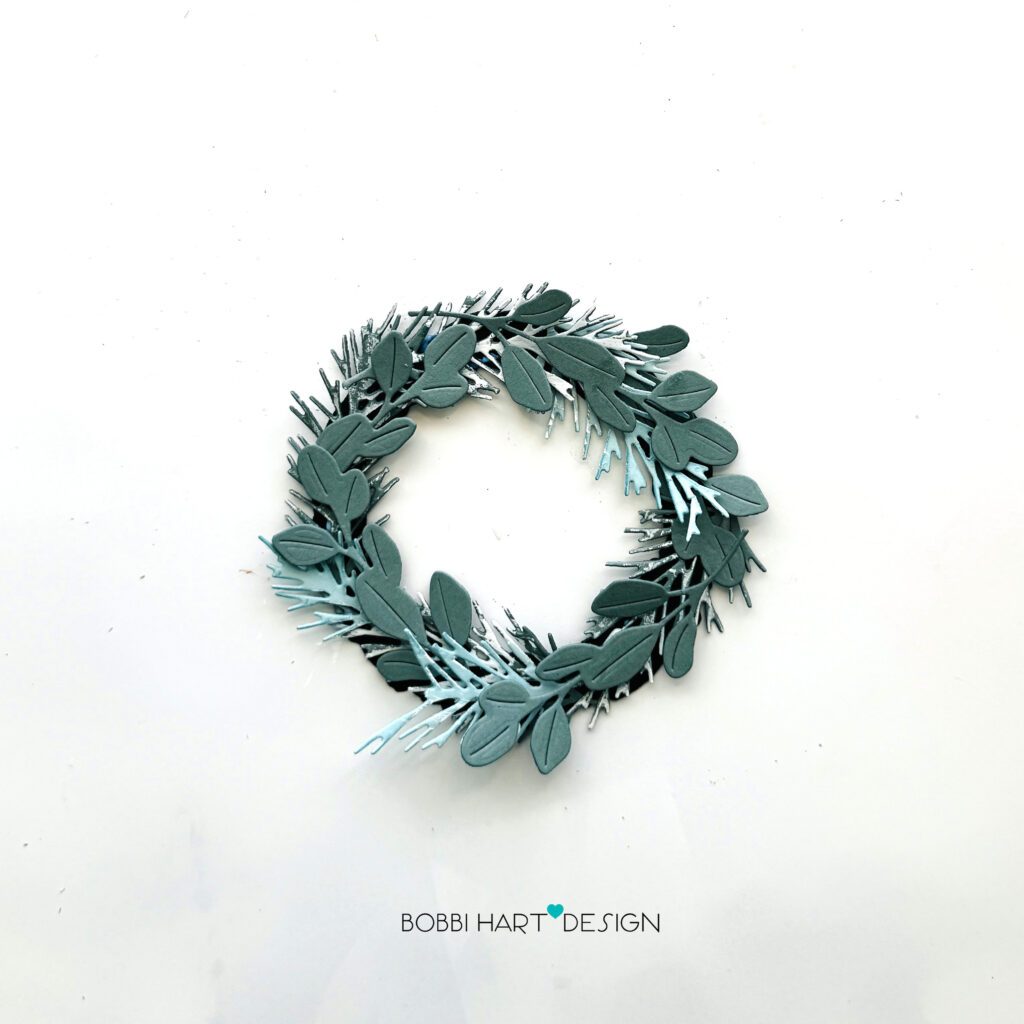
STEP TWO: Using the wreath base as a circular guide, assemble the wreath, placing the evergreens on the bottom layer and the leafy greens on the top layer. Shape and glue the leaves in a circular design to match the wreath base.
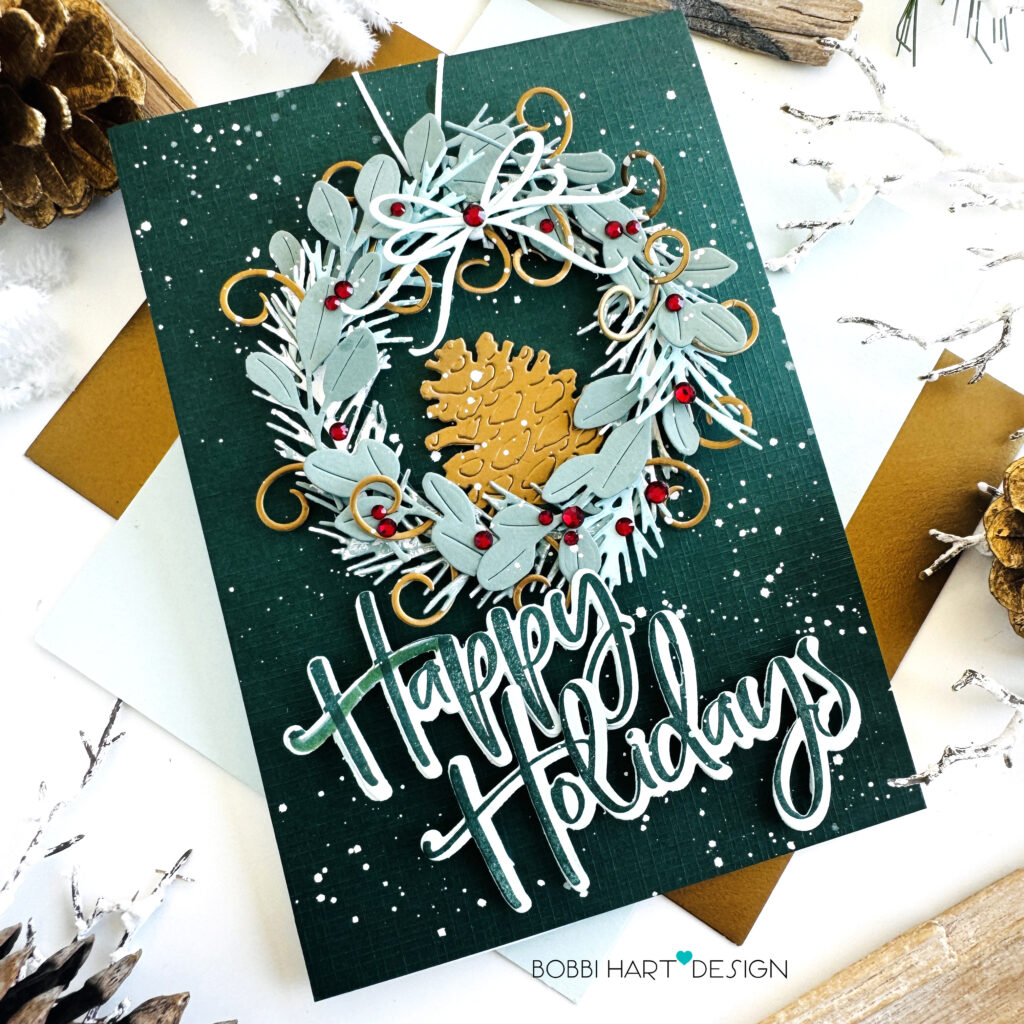
STEP THREE: Die cut a 5″ X 7″ card front from Pinefeather cardstock. Attach the wreath over the background in the upper half of the front using foam tabs to make it stand out from the background. Add the gold pinecone to the center. Attach the metallic scrolls around the wreath. Attach the white bow at the top of the wreath. Use two of the bow strings to create a “V” design above the bows as a way to hang the wreath.
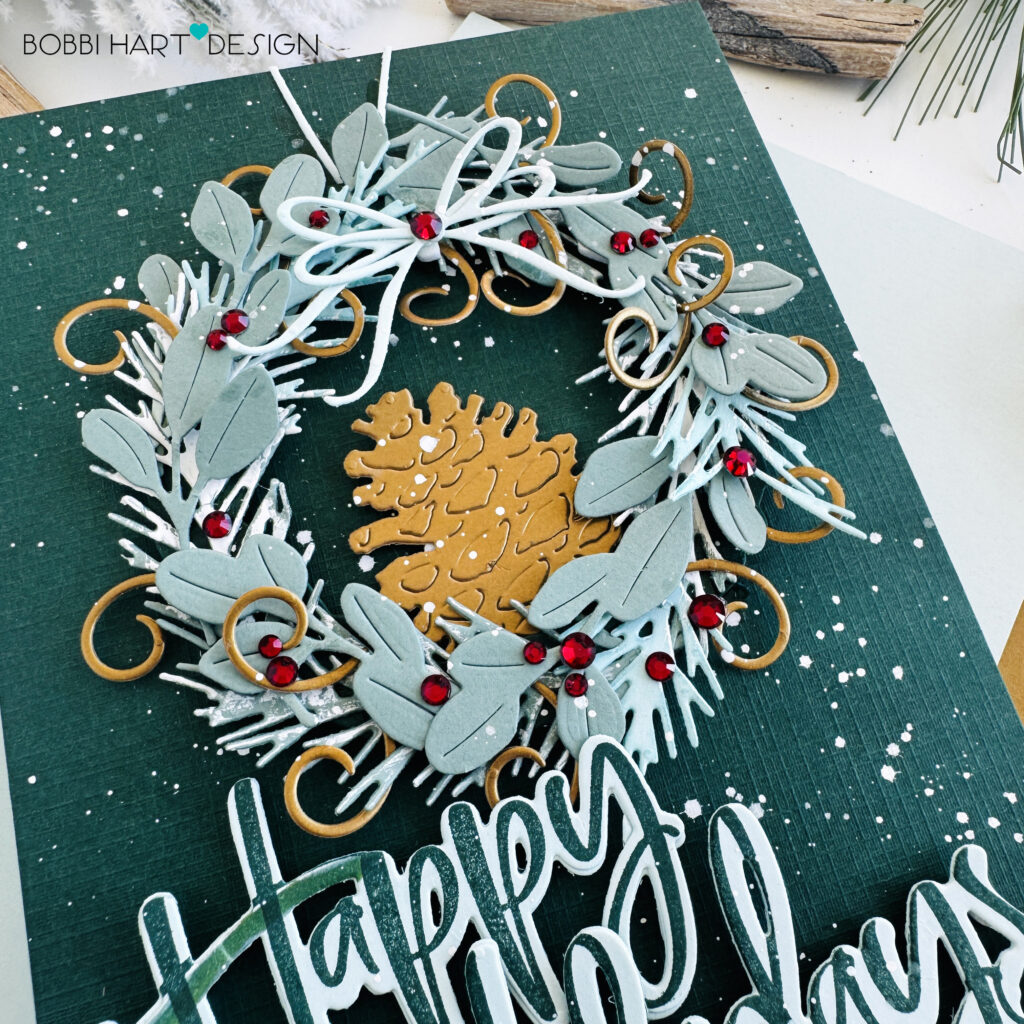
STEP FOUR: Attach the “Happy Holidays” sentiment using foam tabs, right below the wreath. Splatter the card front with white paint. Allow time to dry. Add red gem stickers to the wreath for sparkle. Attach the card front to the card base to complete the card.
Check out my REEL on Instagram at @BobbiHartDesign and watch this card come to life in less than 90 seconds!
You can shop the entire collection here at Papertrey Ink! If you decide to place an order, please use the links in this post so that Papertrey Ink team knows what inspired you. I appreciate it very much. It helps me to continue to bring more ideas to you!
Thanks for stopping by today. If you want to see more ideas and inspiration from me, subscribe to my blog, BobbiHartDesign.com. I’ll send you updates on new posts! You can also find me on Instagram as @BobbiHartDesign and on Facebook as BobbiHartDesign.
Bobbi Hartmann Lemanski, Bobbi Hart♥ Design, Adding h♥art into every design
Leave a Reply