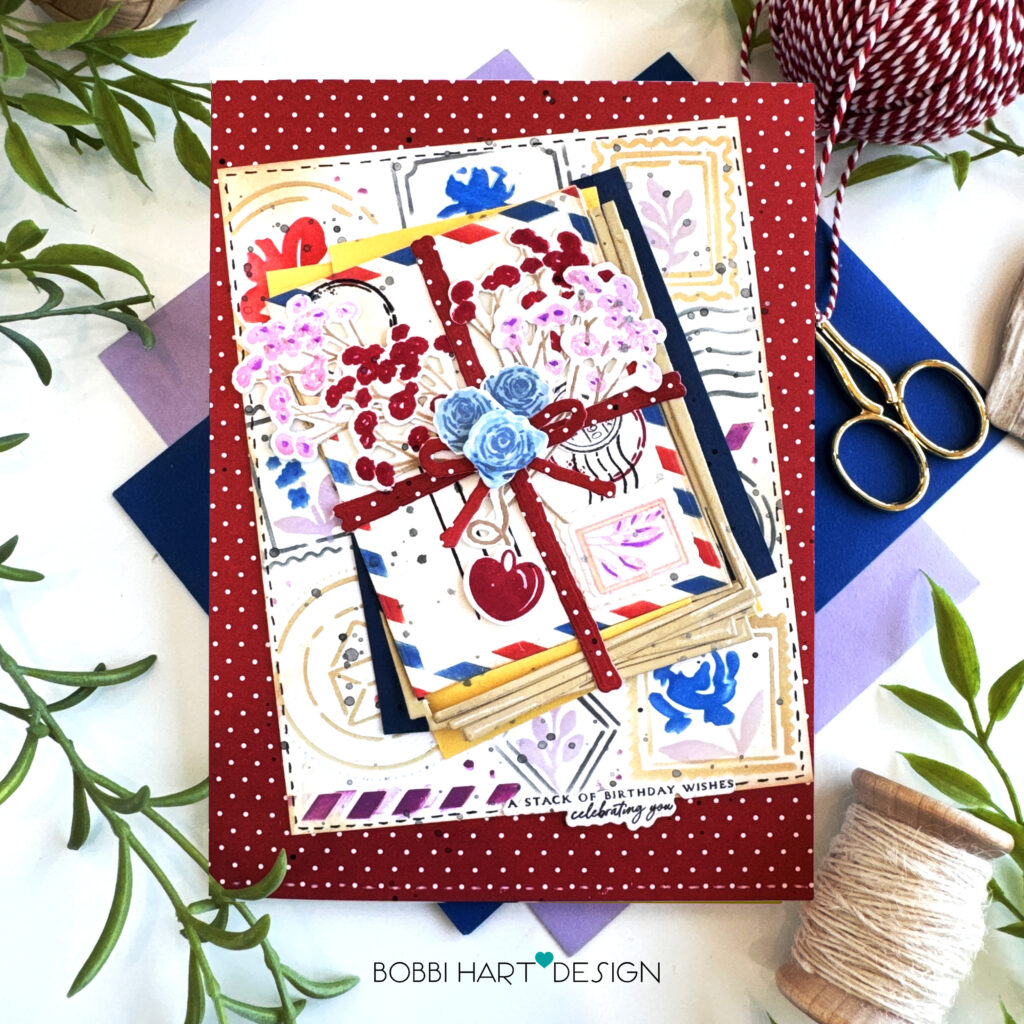
There’s something timeless about a stack of vintage letters tied together with bold blooms and charming little details. This handmade card captures that sweet charm with a layered design featuring a bundle of mail adorned with delicate flowers in rich shades of red, violet, and blue. The combination of floral accents, classic postal elements, and softly aged details creates a card that’s perfect for sending heartfelt wishes for birthdays, thinking-of-you notes, or just because. This 5″ X 7″ card features the following Papertrey Ink products:
Stacked Mail Stamp Set and coordinating Stacked Mail Die Set
Stacked Mail Stencil Collection
Bitty Dot Basics Patterned Paper
Cardstock: Stamper’s Select White and Vintage Cream, Classic Kraft, Enchanted Evening and Harvest Gold
Inks: True Black Pure Poppy, Classic Kraft, Blueberry Sky, Spring Rain, Enchanted Evening, Lavender Moon
This card is 5″ X 7″ and uses a white card base made from Stamper’s Select White cardstock. True Black Ink was used for all the black ink stamping. Here are the step-by-step details for creating this card.
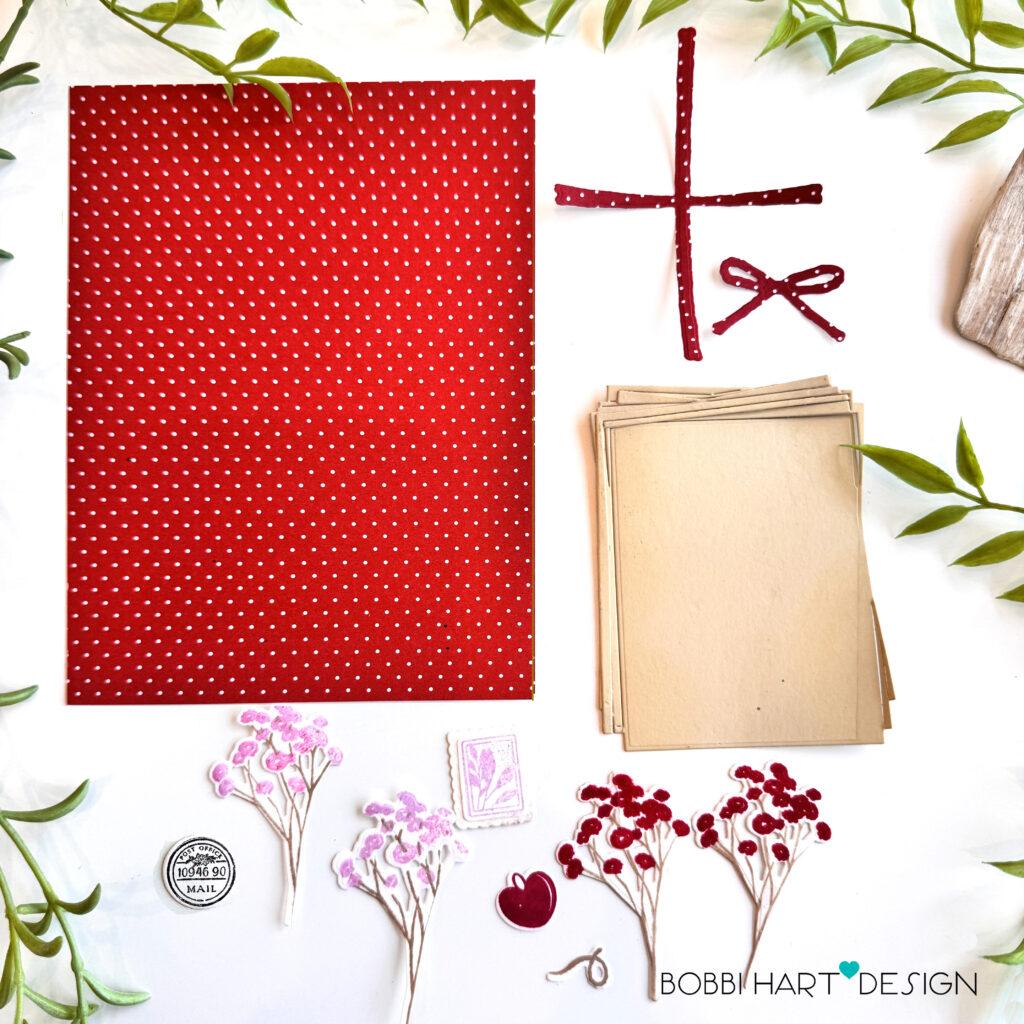
STEP 1: From Bitty Dot Basics Patterned Paper, cut a 5″ X 7″ piece for the background of the card front panel. Apply ink around the edges to age the paper such as Distress Oxide Ink Black Soot or Classic Kraft ink. Die cut the bow and twine from the same paper using the Stacked Mail Die Set.
Stamp / die cut the following items using the Stacked Mail Stamp Set and coordinating Stacked Mail Die Set:
Florals, postage stamp and heart charm using Classic Kraft, Pure Poppy and Lavender Moon ink on Stamper’s Select White cardstock
Stack of letters – Die cut from Classic Kraft cardstock. Shadow the edges using Classic Kraft ink.
Postage and Postmark Stamp – True black on Stamper’s Select White cardstock
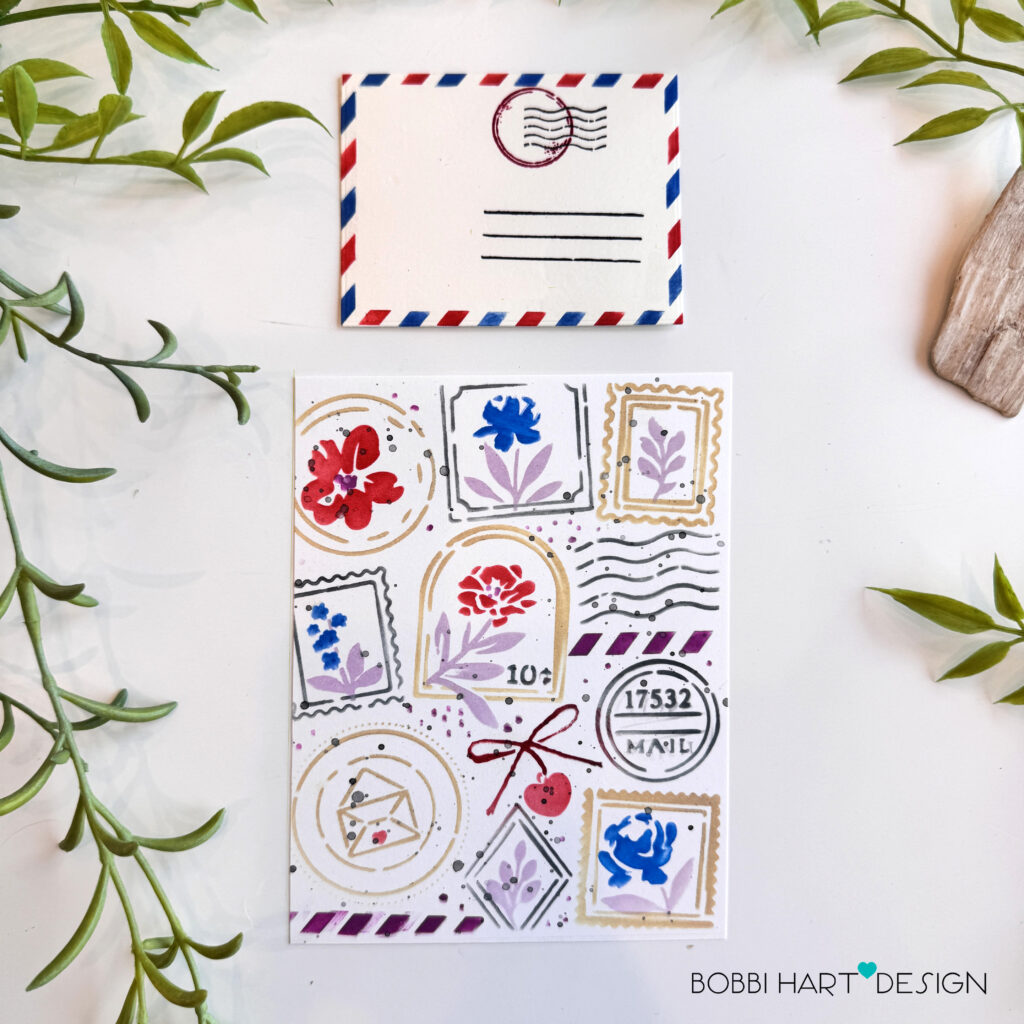
STEP 2: Using the Stacked Mail Stencil Collection, stencil the two layers of the red and blue border on Vintage Cream cardstock. For easy blending, use Distress Oxide Inks in Candied Apple and Prize Ribbon. If you prefer to use dye inks, use Pure Poppy and Enchanted Evening. Stamp additional details on the envelope using stamps from the Stacked Mail Stamp Set.
Using the Postage Stencil Collection, stencil the designs of the six stencil layers on a piece of Vintage Cream cardstock using True Black Pure Poppy, Classic Kraft, Enchanted Evening and Lavender Moon inks. Trim to 4-1/4″ X 5-1/2″. Optional: Use Distress Oxide Inks instead of the dye inks.
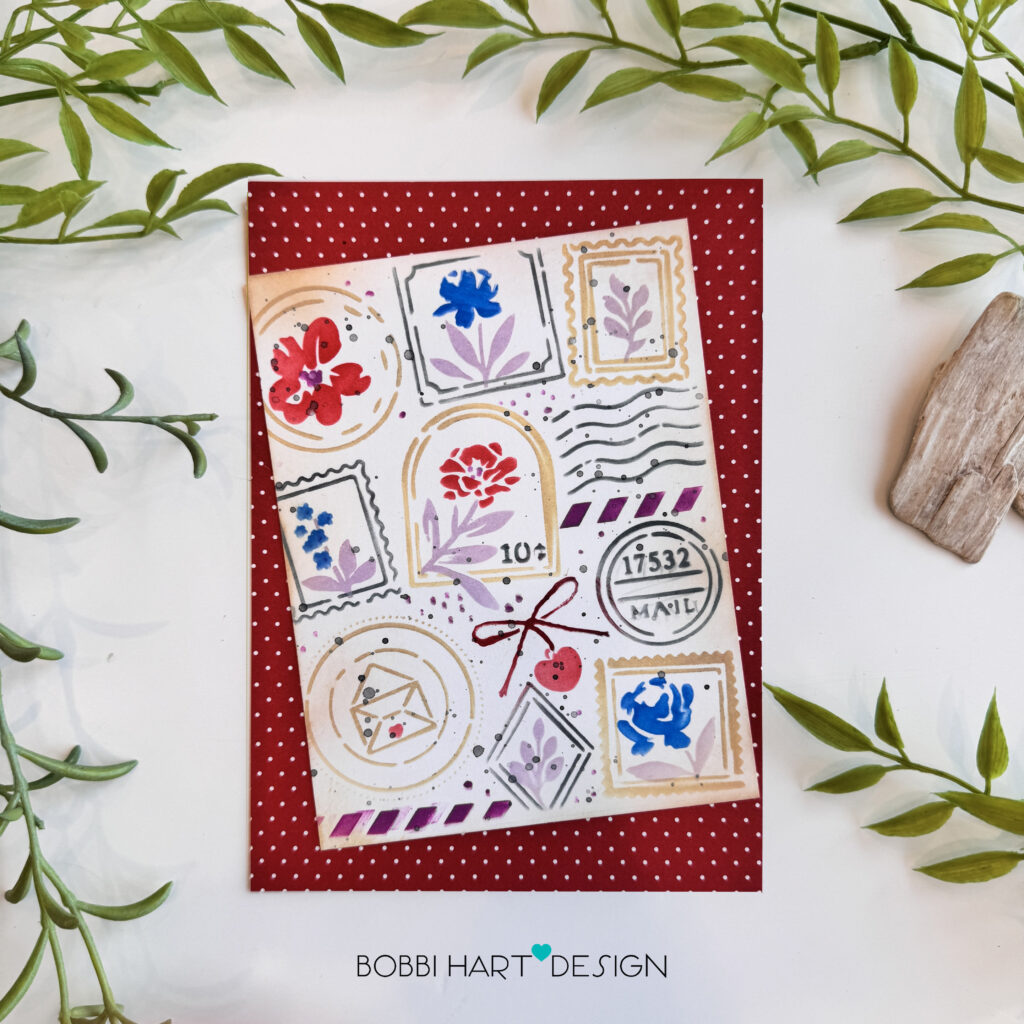
STEP 3: Blend Classic Kraft around the edges of the stenciled cardstock for a more aged appearance. Layer the postage stenciled cardstock piece over the red/white background, positioning it at an angle.
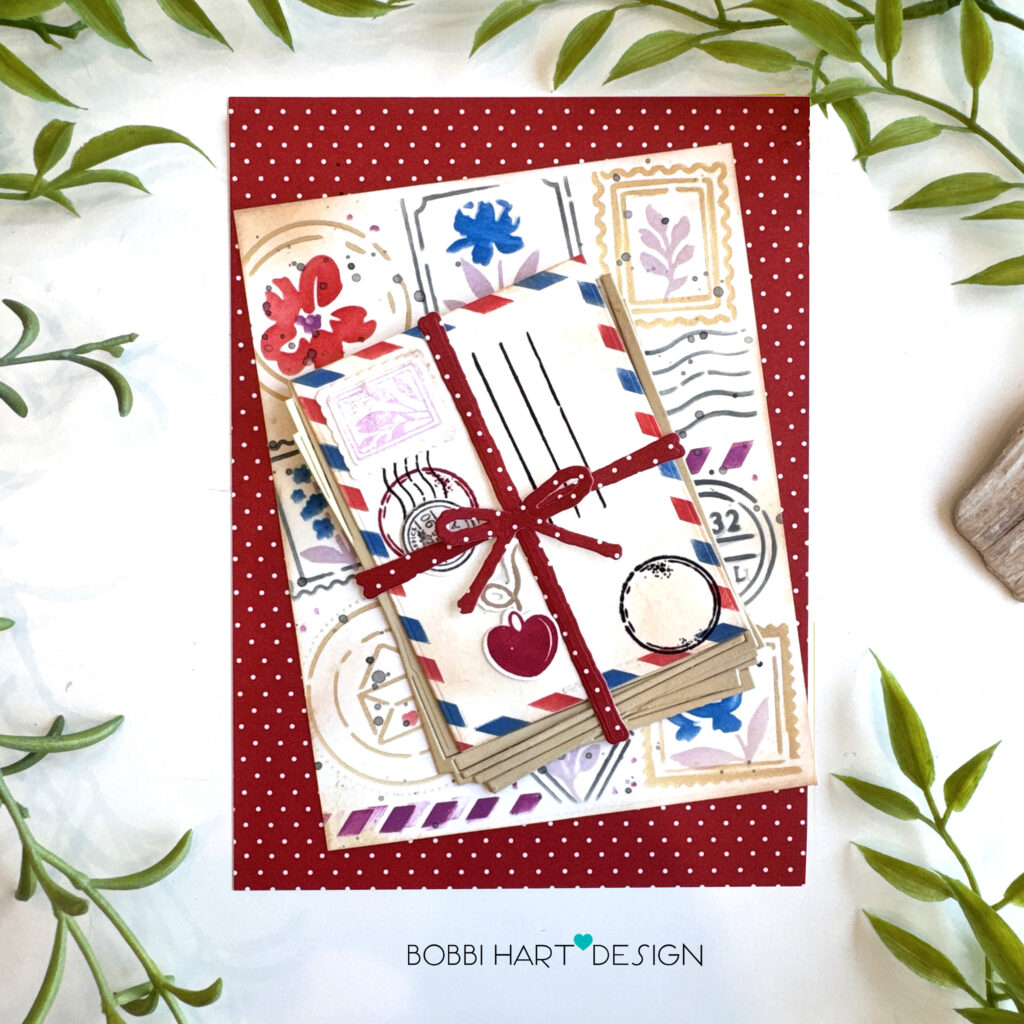
STEP 4: Blend Classic Kraft ink around the edges of the stenciled letter for a more aged appearance. Layer the stenciled cardstock over the “stacked” letters. Attach the ribbons/strings, bow and heart pendant and string and layered postage stamps and attach over the card front at an angle.
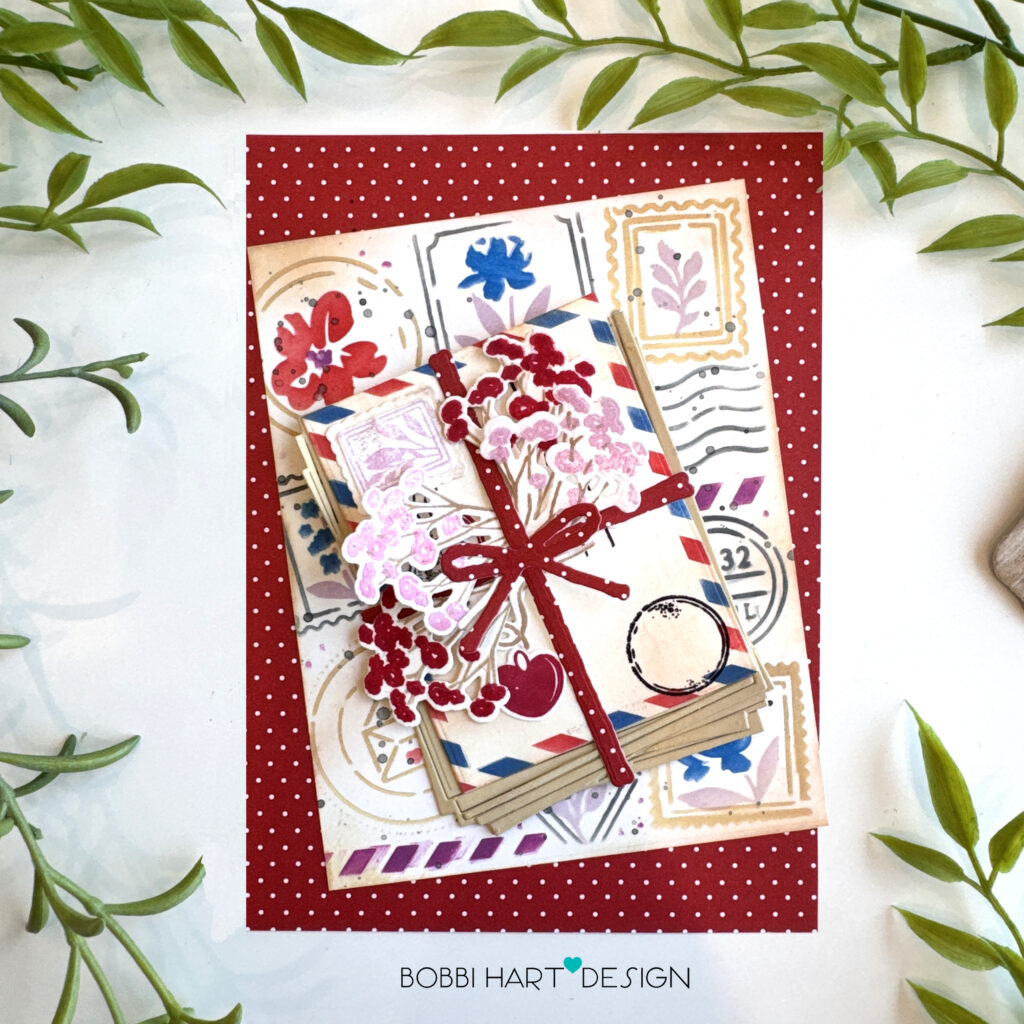
STEP 5: Attach the flowers, tucking the stems behind the string/ribbon.
STEP 6: Add additional strips of colored cardstock to create more depth in the stack. Use Enchanted Evening and Harvest Gold for more contrast. These can be small pieces that just show on the sides/top/bottom.
Using the Stacked Mail Stamp Set and coordinating Stacked Mail Die Set, stamp and die cut three rosettes using Spring Rain ink for the base layer and Blueberry Sky ink for the detailed layer. Attach the rosettes over the bow using foam tabs to make them stand out.
Stamp and attach a the sentiment using the Stacked Mail Stamp Set and coordinating Stacked Mail Die Set, True Black Ink on Stamper’s Select White. Attach the card front to a white card base measuring 5″ X 7″.
You can shop the entire collection here at Papertrey Ink! If you decide to place an order, please use the links in this post so that Papertrey Ink team knows what inspired you. I appreciate it very much. It helps me to continue to bring more ideas to you!
Thanks for stopping by today. If you want to see more ideas and inspiration from me, subscribe to my blog, BobbiHartDesign.com. I’ll send you updates on new posts! You can also find me on Instagram as @BobbiHartDesign and on Facebook as BobbiHartDesign. Bobbi Hartmann Lemanski, Bobbi Hart♥ Design, Adding h♥art into every design
Leave a Reply