• Skip to primary navigation
  • Skip to main content
  • Skip to primary sidebar
  • HOME
  • SHOP
  • BLOG
  • TEAM

Papertrey Ink Blog

Clear Stamps, Dies, Paper, Ink, Kits

  • HOME
  • SHOP
  • BLOG
  • TEAM

Wildflower Wreath Stamp Set & Die + Build-A-Bumblebee Die + Build-A-Ladybug Die + This is Big Sentiments: Strength Stamp Set & Die + Regal Flourish Frame Hot Foil Plate + Love to Layer: Top Notch + Brushstrokes Stencil Collection

Teapot Floral Card Perfect for Mailing by Bobbi Lemanski

Project Inspiration: Blooming with Love – A Sweet Mother’s Day Card by Brenda Noelke

Project Inspiration: To the Beautiful Couple

February 9, 2025      Papertrey Ink      Leave a Comment

Designer: Kelly Lunceford

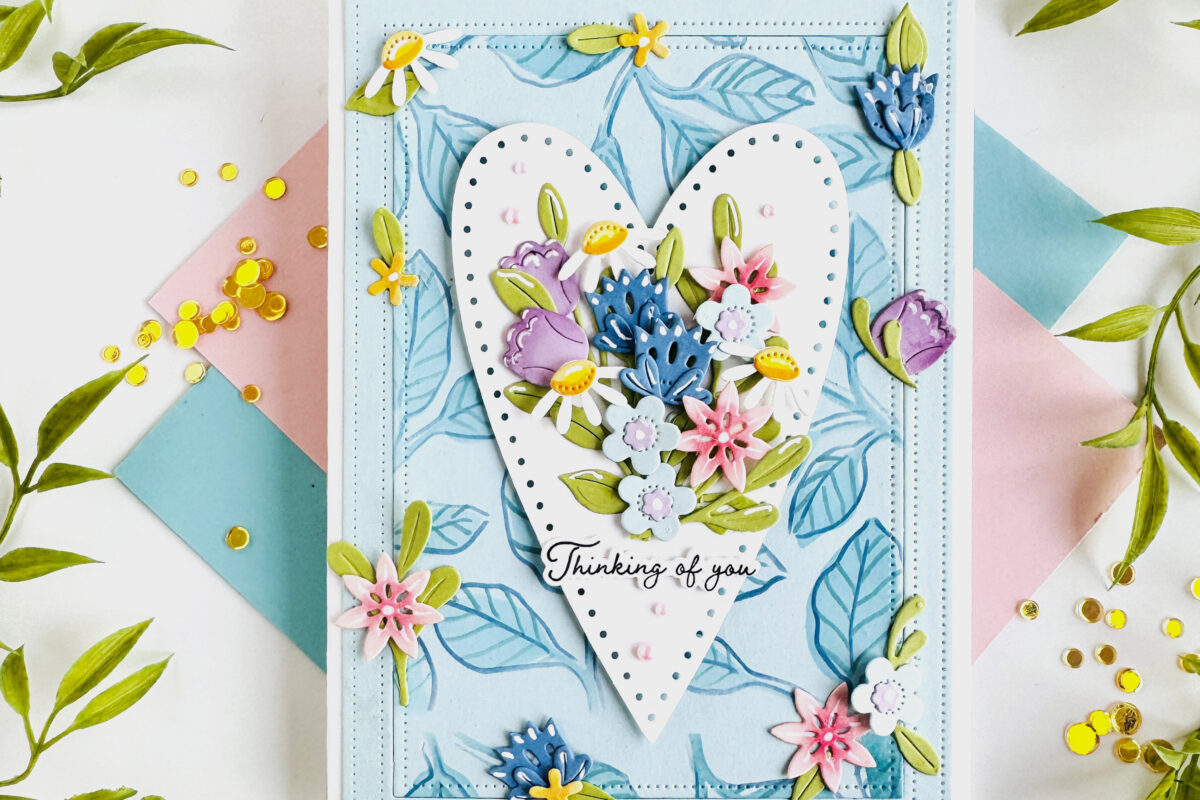
The transition from Christmas crafting is always bittersweet, but these stunning new stencils and dies from our latest release made it effortless! I had so much fun using the new Into the Blooms: Wreath dies to add beautiful accent florals, stepping this card up to the next level. Follow along for a step-by-step breakdown of how this heartfelt card came together!

Ready to try it yourself? Here’s how she made it!

STEP 1: 

Stencil the pattern at the top and bottom of an A2 panel using the At the Bottom Stencils.

STEP 2: 

Trim the panel down to 4” x 5 ¾” and softly blend Sweet Blush ink around the edges for a soft, warm glow.

STEP 3: 

Die cut the Extravagant Floral Frame twice out of white cardstock and glue them together for added dimension. Lightly blend green and pink ink along the edges for extra depth.

STEP 4: 

Die cut the medium and small hearts from the Love to Layer: Rounded Hearts die set. Stamp the sentiment from the You Are Loved stamp set in True Black ink onto the smaller heart. Use foam squares to layer them together.

STEP 5: 

Layer all elements together to begin assembling the card.

STEP 6:

Die cut the leaves and flowers from white cardstock using the Into the Blooms: Wreath dies. Use blender brushes and ink to add color, bringing them to life.

STEP 7:

For extra realism, use a stylus and a foam mat to shape the flowers and create soft, dimensional petals.

STEP 8:

Arrange the flowers and leaves around the layered heart using a combination of foam squares and liquid glue for varied depths. Add a touch of glitter for sparkle and Moonshine Sequins for an elegant finishing touch!

Supplies Used:

Stamps: You Are Loved

Ink: Sweet Blush, Green Parakeet, New Leaf, Lovely Lady, True Black

Paper: White, Pale Peony

Dies: Extravagant Floral Frames, Love to Layer: Rounded Hearts, Into the Blooms: Wreath

Other: Glitter, Moonshine Sequins, At the Bottom Stencils

Reader Interactions

Leave a Reply

Your email address will not be published. Required fields are marked *


Primary Sidebar

FACEBOOK

Papertrey Ink

Categories

Archives

Categories

Recent Posts

  • Wildflower Wreath Stamp Set & Die + Build-A-Bumblebee Die + Build-A-Ladybug Die + This is Big Sentiments: Strength Stamp Set & Die + Regal Flourish Frame Hot Foil Plate + Love to Layer: Top Notch + Brushstrokes Stencil Collection
  • Teapot Floral Card Perfect for Mailing by Bobbi Lemanski
  • Project Inspiration: Blooming with Love – A Sweet Mother’s Day Card by Brenda Noelke
  • Project Inspiration: Where Flowers Bloom Card by Melissa Phillips
  • Project Inspiration: Sending Love and Hugs Card by Kelly Lunceford

Copyright © 2026 · Papertrey Ink.