


Hi everybody, welcome to our new feature What do I do with this? For this challenge our designers will get to try out some of these new tools and share the projects they created using them. We’ve got some fun, new things coming to the Papertrey Ink store and our designers will show you how to use them so you’ll be comfortable incorporating them into your card-making and gift-giving. Stay tuned for exciting and creative things coming your way! We want to share what our designers love with you, and this gives you a first-hand look into their crafty-faves!
This month we are working with WOW embossing powders which are now available in the store. Click HERE to see the selection of WOW embossing powders we are not carrying!
Let’s get started!
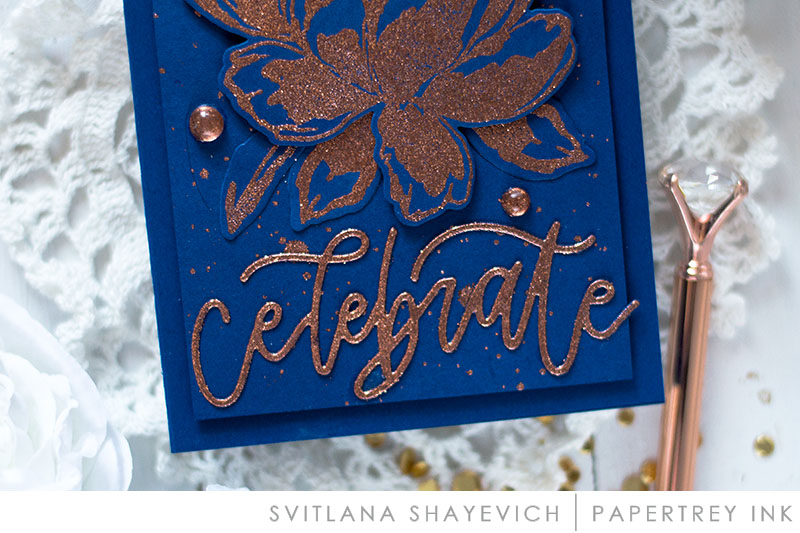
- For the focal element I heat embossed the flower and leaves using WOW! Metallic Copper Sparkle Embossing Powder onto a Perfect Match: Enchanted Evening Cardstock and die cut them using matching dies. The stamp set has 3 stamps for each flower and 2 leaves, I only used the middle ones for this project.
- To create the front panel I added water splatters onto it, poured embossing powder on top and heat set it. Embossing powder particles stuck to wet areas allowing to create embossed sparkles. Water won’t hold embossing powder as well as embossing ink, if your heat gun blows them off a cardstock – try to heat set by heating the cardstock from the back side.
- The sentiment I die cut using a die from the To Die For Sentiments: Birthday Die Set out of the Perfect Match: Enchanted Evening Cardstock and covered it with heat embossing as well.
- The front panel is foam mounted onto a card base of the same cardstock using black adhesive foam squares. Same adhesive is used to pop up the flower. The leaves and sentiment are adhered using liquid adhesive.
- To accentuate the card I create my own “copper” clear droplets. I took several clear droplets, inked their back side with embossing ink, dipped into the embossing powder and heat set them. After that I adhered them onto the card.
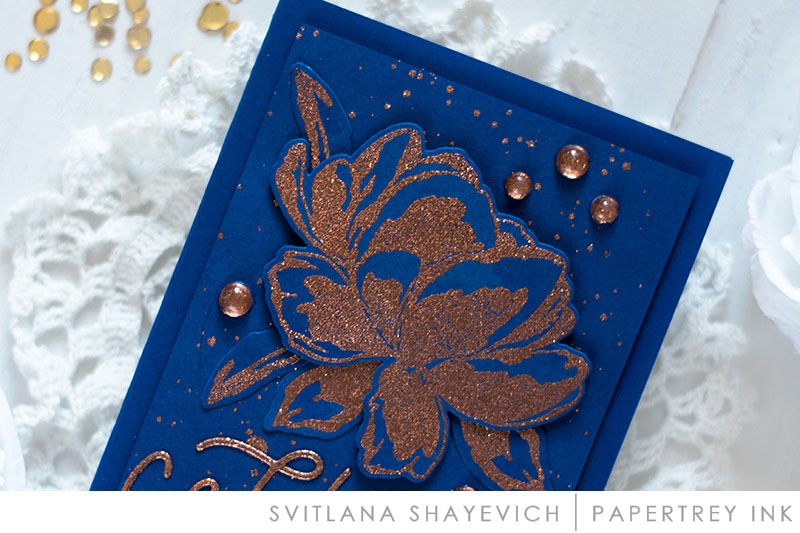
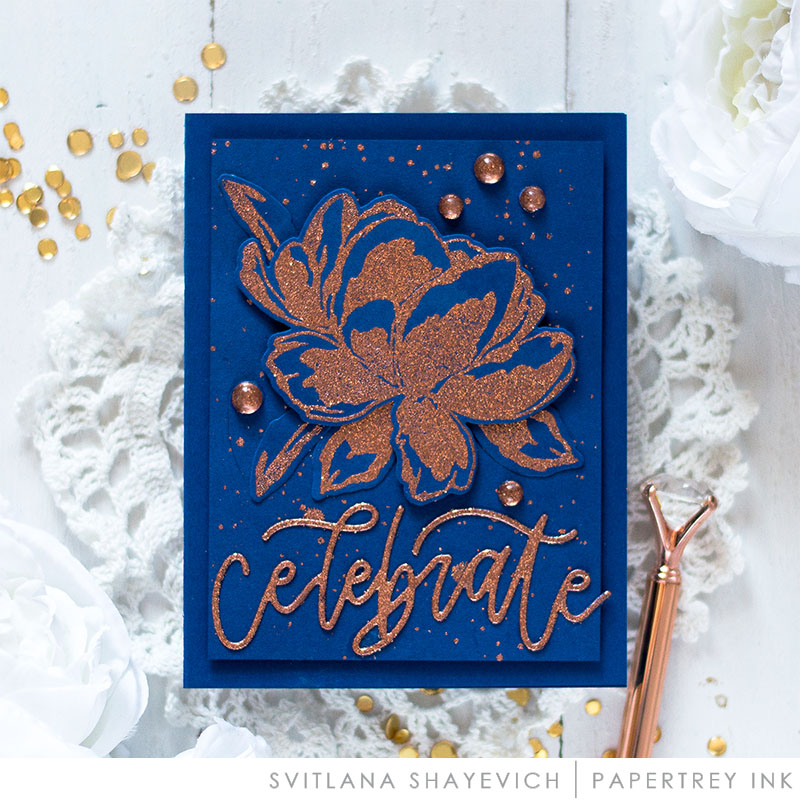

STAMPS: Lush Bloom
PAPER: Perfect Match: Enchanted Evening
DIES: Lush Bloom, To Die For Sentiments: Birthday
OTHER: WOW! Metallic Copper Sparkle Embossing Powder, Clear Droplets
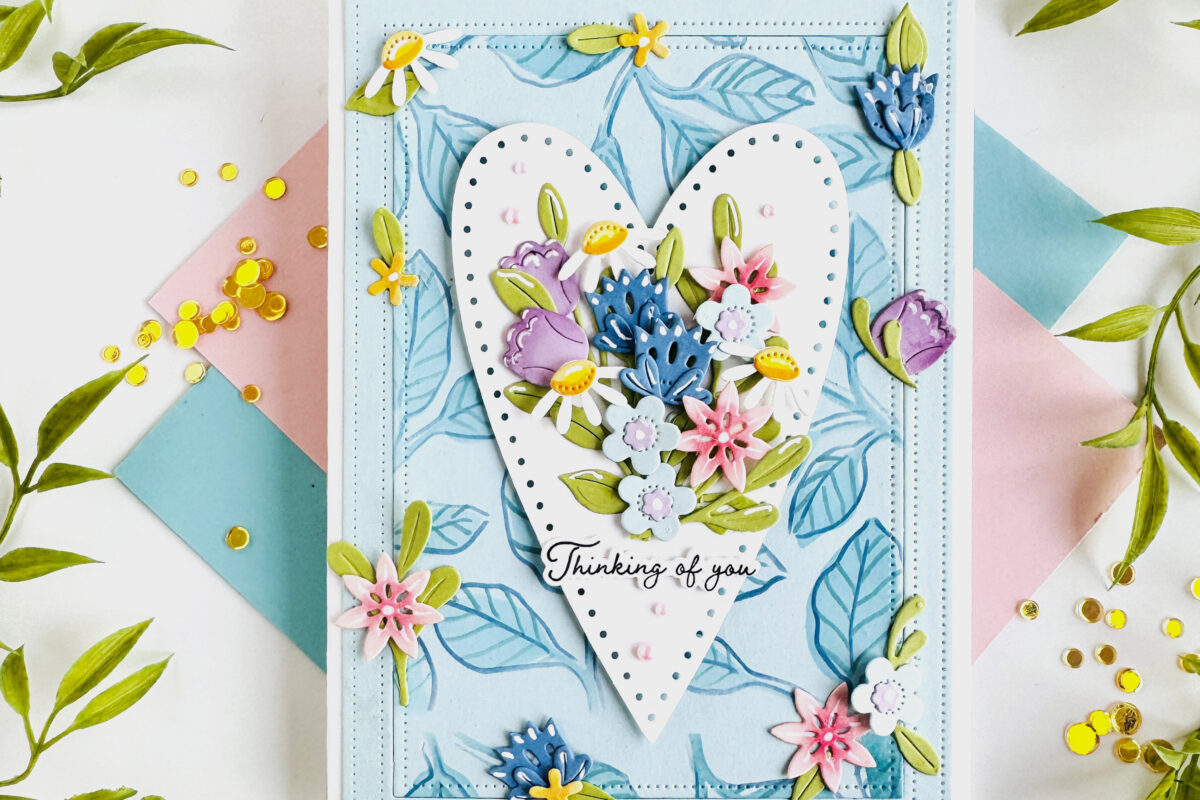
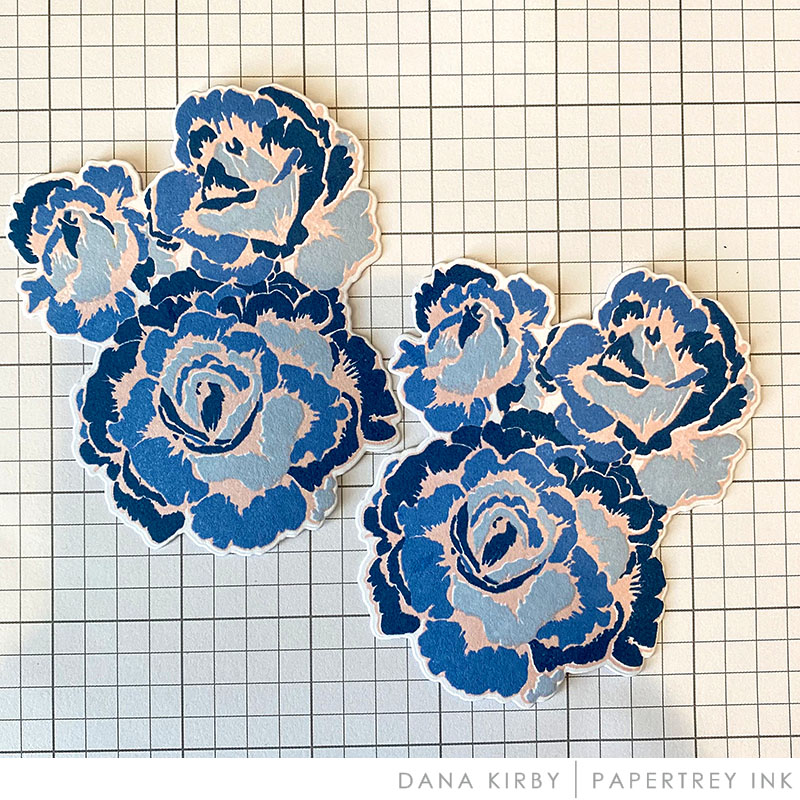
- Stamp Enchanting Roses outline image in Sweet Blush ink. Use your Misti to stamp. Leave everything lined up to use again later (see photo).
- This first impression (outline) allows you to line everything up when you are stamping your layers.
- Use a second Misti to stamp the layers (blues) of the Enchanting Roses set.
- Use your first Misti to restamp the outline image of the Enchanting Roses floral cluster in VersaMark ink. Since you didn’t remove your outline stamp from before, everything is lined up and you will get a good impression. This step will cover the Sweet Blush ink.
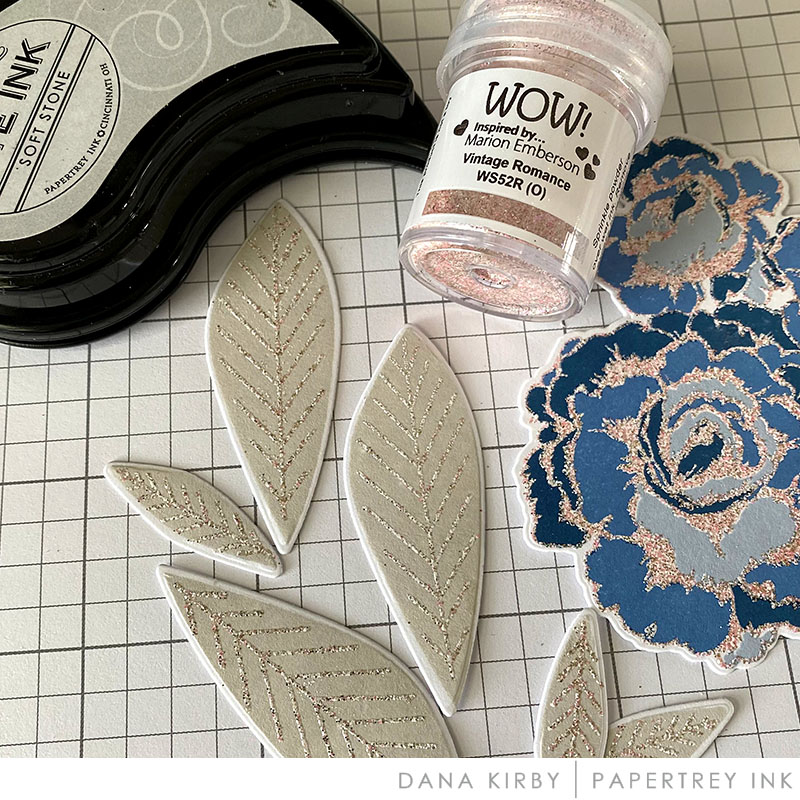
- Add Vintage Romance embossing powder to your image and heat set it with a heat gun.
- Stamp your leaves in Soft Stone ink.
- Stamp the leaf veins in VersaMark ink and add Vintage Romance embossing powder to the leaves.
- Attach your floral image to your card panel with foam adhesive.
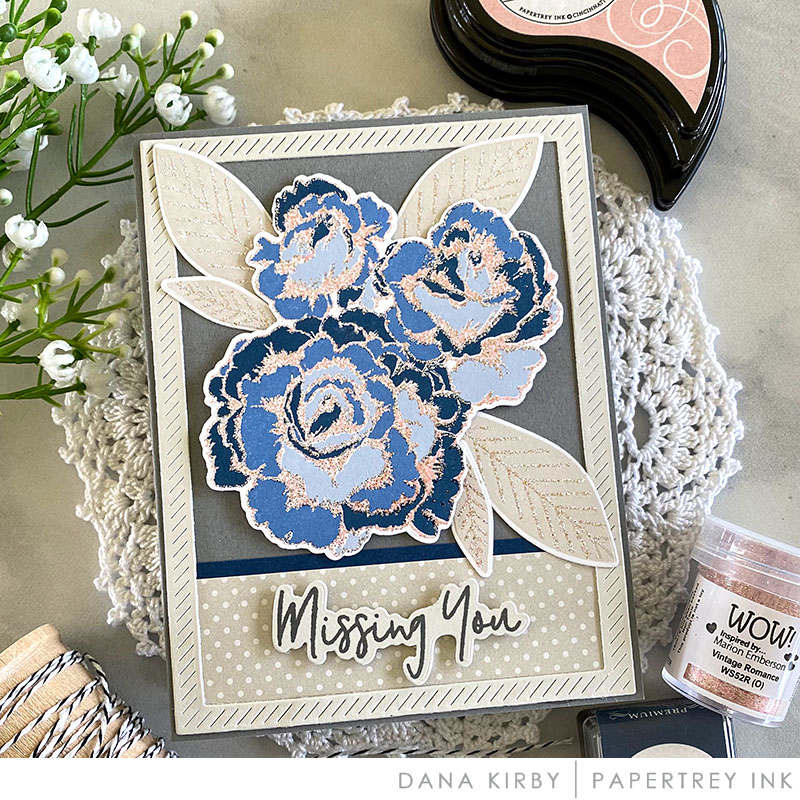

STAMPS: Enchanting Roses, Essential Sentiments
DIES: Enchanting Roses, Essential Sentiments, Skinny Frames Diagonal Border
INK: Sweet Blush, Spring Rain, Blueberry Sky, Enchanted Evening, Soft Stone, Weathervane, VersaMark
PAPER: Weathervane, Enchanted Evening, White, Bitty Big Soft Stone
OTHER: WOW Embossing Powder Vintage Romance

PRIZE
One winner will be chosen at random to receive a $25 gift certificate.
RULES
To enter, participants are required to create a card using embossing powder using PTI/Ink to Paper supplies. Share your finished project via the link below. We can’t wait to see what you make!
Only one entry per person and the deadline is March 29th at 6am. This post will be updated with the randomly selected winner.
CHALLENGE
EDITED TO ADD THE RANDOMLY SELECTED WINNER
Congratulations, Betty N! Please send an email to customer service and provide them with your full name and the email address you would like your gift certificate sent to. Thanks so much to everyone for playing along!
Leave a Reply