


Hi everybody, welcome to our next episode of The Great Cover-Up! This weekly feature is all about how to create shaped card blanks and resist background. Today Suzie and Julianne are your guides in The Great Cover-Up so enjoy!
Let’s get started!
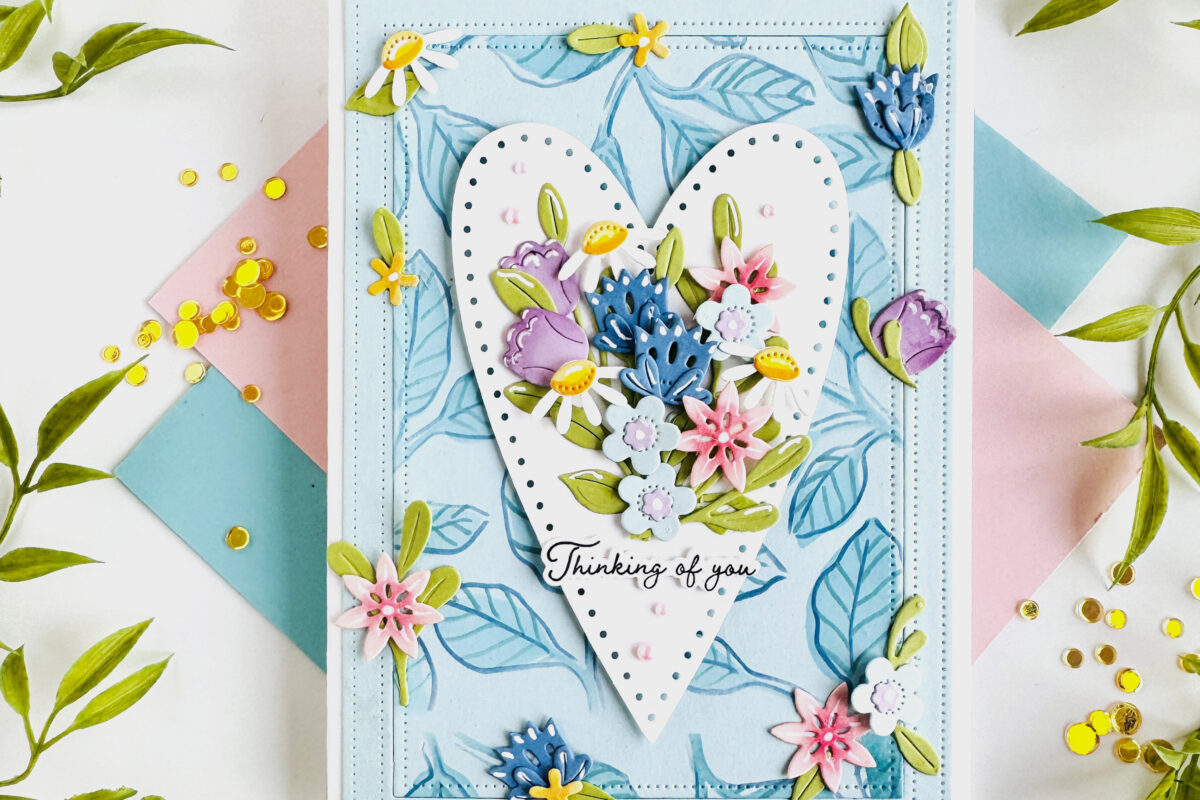
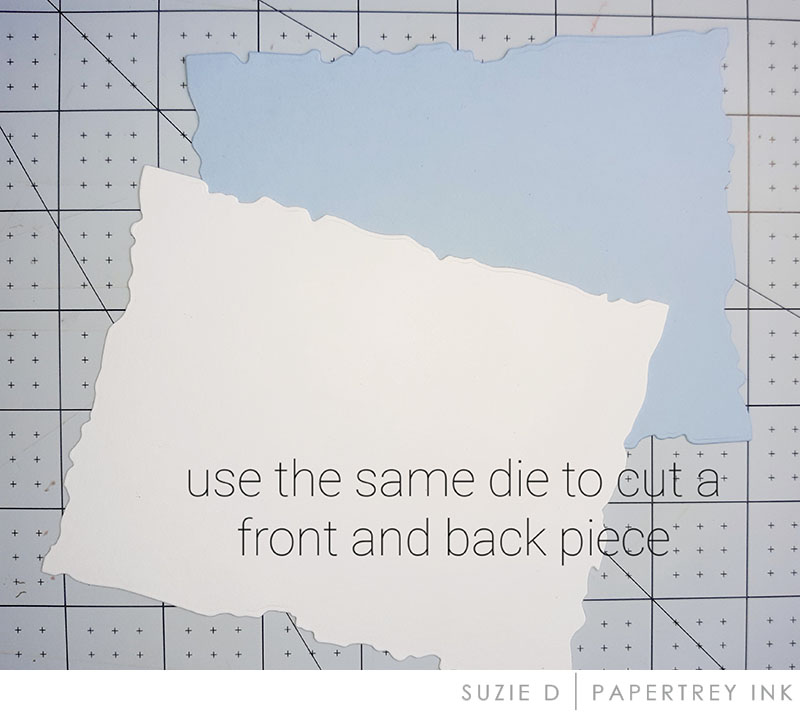
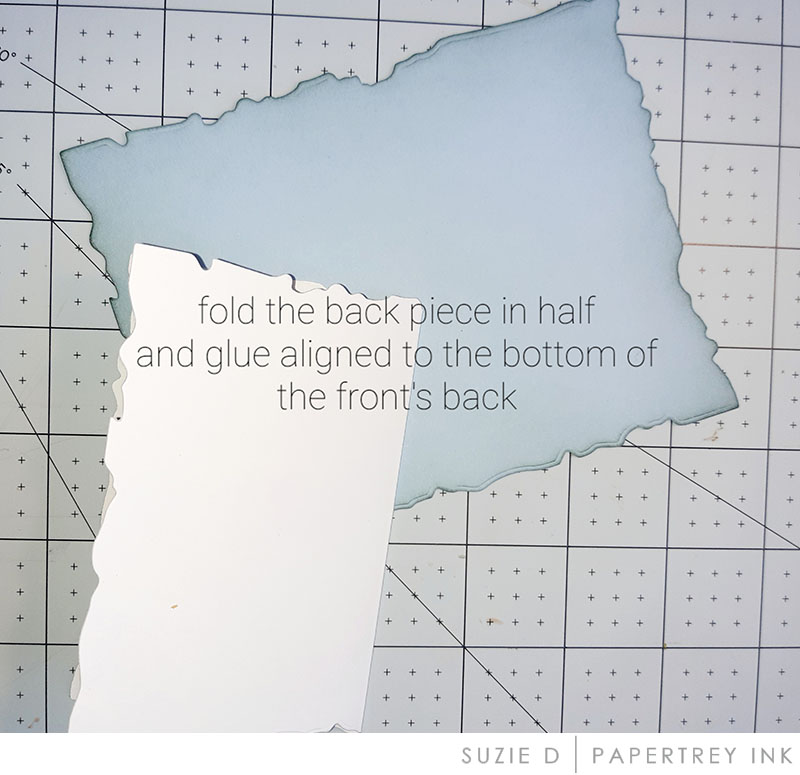
Sometimes you just cannot find the right size or shape card blank. Just make your own using layering dies! I have used the same layering die set to create my background mount and then card shape.
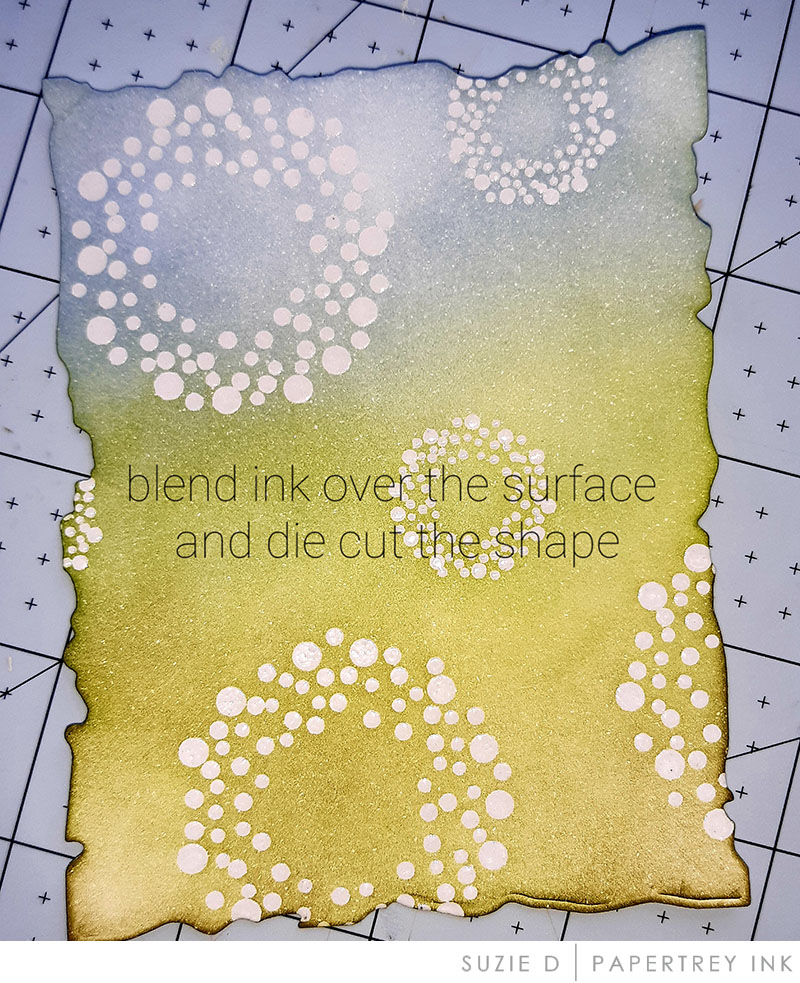
I love creating depth and dimension to my backgrounds and die cut images. Using the resist technique of stamping in clear pigment Ink, heat with clear embossing powder and then ink blending over the top creates a wonderful background with a WOW factor..no pun intended!
Ink the edges of die cuts with a complimentary ink colour to create the illusion of shadow ..works every time!


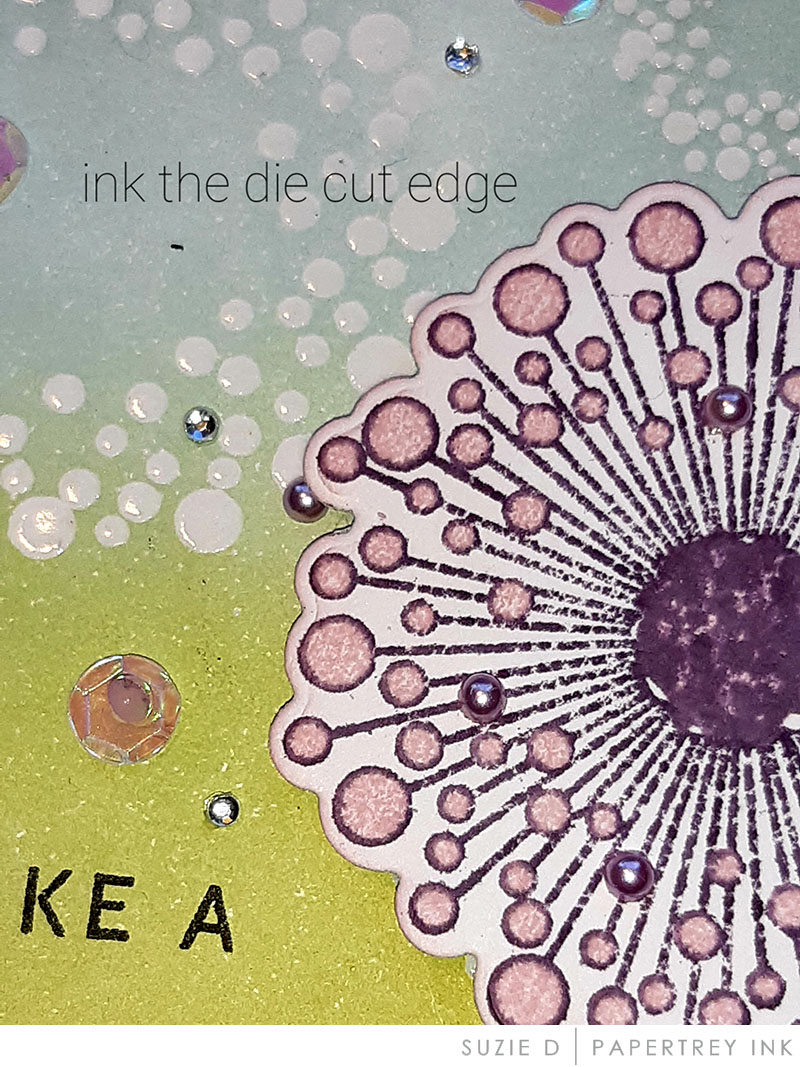


STAMPS: Dandelion Wishes,
DIES: Dandelion Wishes, Love to Layer: Torn Edges
PAPER: White
INK: Stormy Sea, True Black, Lavender Moon, Amethyst Allure, Spring Rain, Green Parakeet, Prairie Grass
OTHER: WOW! Embossing Powder Clear
So what happens when you make a mistake? The first thing that comes to my mind is how can I fix this, how can I work with what I have?
I started out by stamping the flying by butterfly stamp set onto some Bristol smooth watercolor cardstock using versafine onyx black ink and heat embossed it with clear embossing powder. I colored in my image with my Karin Brush marker pros with the colors gold, amber, orange red and black.
I started out created two ink blended backgrounds, but when I used one of my panels and ran it thru my die cutting machine with the Danity Deliveries frame die, my die shifted and ruin my panel. I thought about creating a new one but really didn’t want to, but had the second panel off to the side, so I decided I needed a change in plans and used the same die but this time I embossed the panel with the die to get a whole new look!
All the details can be found in my YouTube video here: https://youtu.be/qKBgH-XJ5so
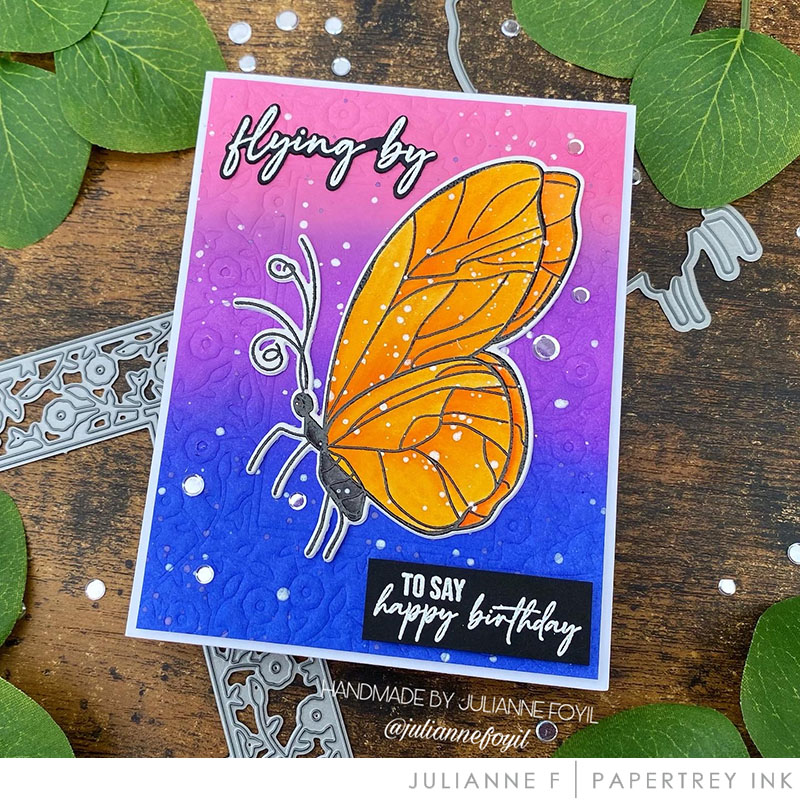

STAMPS: Flying By
DIES: Flying By, Border Bling: Dainty Deliveries Frame
OTHER: distress oxides – picked raspberry, wilted violet, versamark ink, white embossing powder

PRIZE
One winner will be chosen at random to receive a $25 gift certificate.
RULES
To enter, participants are required to create a card with a blended background using PTI/Ink to Paper supplies and Suzie and Julianne’s technique or your very own! Share your finished project via the link below. We can’t wait to see what you make!
Only one entry per person and the deadline is March 31st at 6am. This post will be updated with the randomly selected winner.
CHALLENGE
EDITED TO ADD THE RANDOMLY SELECTED WINNER
Congratulations, Sarah T! Please send an email to customer service and provide them with your full name and the email address you would like your gift certificate sent to. Thanks so much to everyone for playing along!
Leave a Reply