

Join Dawn McVey today as she shares some tips and trick for layering elements on your projects:
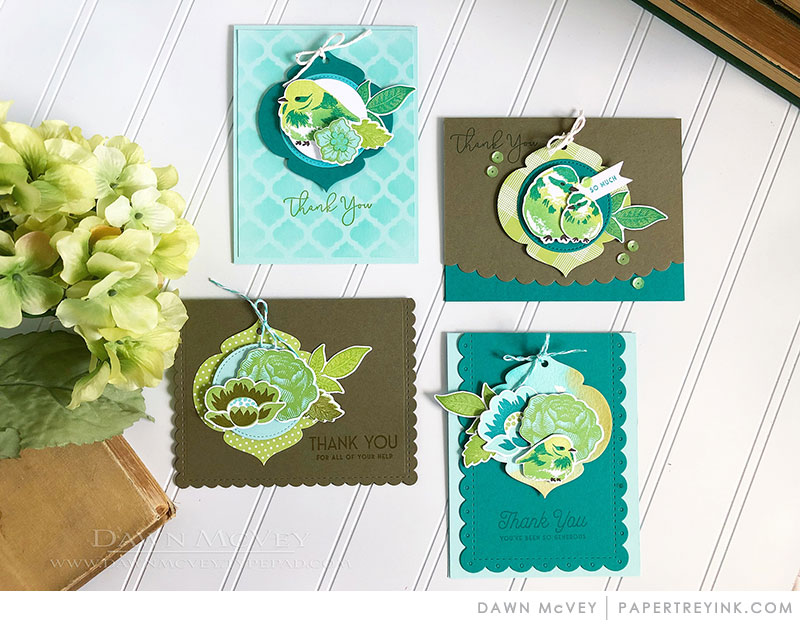
![]() “If you love the look of piling layers on cards but sometimes don’t quite know where to start, I’ve got a few tips for you today, for layering front to back. When my mojo decides to go missing, my favorite way to get it back is to just start stamping die cut images. This allows me to create a happy little stack of flowers, birds, etc., in a variety of color palettes without committing to any specific project at that time. I also love to die cut a pile of tags with a favorite tag die, from a variety of different colors and patterned papers. Once that’s all done, I’ve got a pile of embellishments and tags in all different colors and then I can sit down, perhaps during my next crafting session, sort them all out and start playing with layers! Pop over to my blog and I’ll tell you a bit about my “front to back layering” process!”
“If you love the look of piling layers on cards but sometimes don’t quite know where to start, I’ve got a few tips for you today, for layering front to back. When my mojo decides to go missing, my favorite way to get it back is to just start stamping die cut images. This allows me to create a happy little stack of flowers, birds, etc., in a variety of color palettes without committing to any specific project at that time. I also love to die cut a pile of tags with a favorite tag die, from a variety of different colors and patterned papers. Once that’s all done, I’ve got a pile of embellishments and tags in all different colors and then I can sit down, perhaps during my next crafting session, sort them all out and start playing with layers! Pop over to my blog and I’ll tell you a bit about my “front to back layering” process!”
 Supplies:
- STAMPS: Gran’s Garden, Stitching Garden, Brushed Birds, Sentiment Staples: Thank You
- INK: Aqua Mist, Hawaiian Shores, Tropical Teal, New Leaf, Limeade Ice, True Black
- PAPER: Stamper’s Select White, Aqua Mist, Hawaiian Shores, Tropical Teal, New Leaf, Limeade Ice Bitty Big, watercolor card stock
- DIES: Gran’s Garden, Stitching Garden, Brushed Birds, Tag Sale #12, Round Off Edgers, Noted: Scalloped A2, Double-Ended Banner, Noted: Scalloped Square
- OTHER: Stencil Basics: Quatrefoil, ink blending tools, Cotton Baker’s Twine, Zig Clean Color Real Brush markers, water brush
Leave a Reply