
Good morning, friends, and welcome to this month’s Stitching Focus! I’m Lizzie Jones, your Stitching Ambassador. Thank you so much for joining me today! Easter is coming up quickly, so this month I’m sharing a couple of mini treat baskets that I’m going to give to the kiddos in my life. I have both a felt version and a quicker cardstock version to share, but first, let’s take a peek at this month’s featured product.
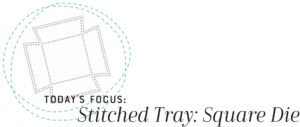
I wanted to make Easter treats for my nieces and nephew, so I started looking through my dies to see what I could could use to create a mini basket. After a brief search, I came upon the Stitched Tray: Square and the coordinating Trim Dies. I knew right away that I was on to something!

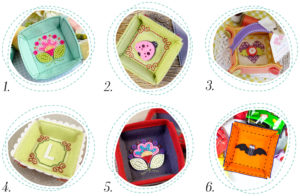
Kay paired the Stitched Tray: Square Die with the Stitched Folk Flower Die to create her mini tray. Her sunny color choices make her project so bright and cheerful!
Erin used the Stitched Monogram Frame: Square Die to add a pretty border around her Seasonal Stitching: Ladybug. It’s such a sweet and pretty way to embellish the bottom of her tray.
Melissa created an adorable sewing notions basket using the Stitched Tray: Square Die. She embellished her corners with buttons and added a stitched heart from the Phone Case Details Die Collection to the bottom of her tray. She even used Saddle Stitched Ribbon to add a handle to her basket. So cute!
I added scalloped trim to my tray using the Small Scallop Border Die. I decorated the bottom of my tray with the Stitched Monogram Frame: Square Die and the Sew Stylish Alphabet. I still love this little tray and use it all the time!
Erin added contrasting trim to her Folk Flower tray using the Stitched Tray: Square Trim Die. The bright Pure Poppy piping is so bold and it finishes the edges beautifully.
Ashley used the Stitched Bat Die to add some playfully spooky flair to her adorable Halloween treat tray. The google eyes she added really put the cute factor over the top!

I love giving our nieces and nephew little gifts at the holidays, so I thought mini Easter baskets would be just the ticket! It turns out the square tray is the perfect base for these itty bitty baskets.
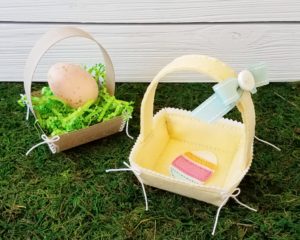
I began with the felt basket. I cut the tray from Lemon Tart felt. I also cut strips of Vintage Cream felt with the Pinking Shears Border Die to create the ric rac trim along the edge. I used White Tag Stock in between the layers of felt to give everything a sturdier, more reinforced feel.
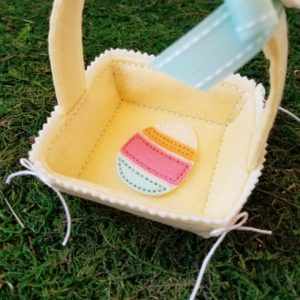
I decorated the inside bottom of the basket with the Seasonal Stitching: Eggs Die using Vintage Cream, Summer Sunrise, Berry Sorbet, and Aqua Mist felt.
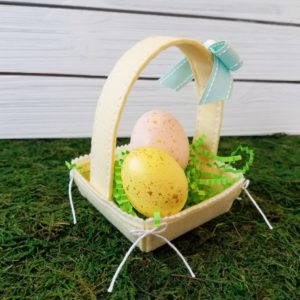
I used the Stitched Tray: Rectangle Trim to create the basket handle. It’s one and a half of the long pieces stitched together for a little extra length. You could probably get a similar length with two of the longer pieces in the Square Trim set.
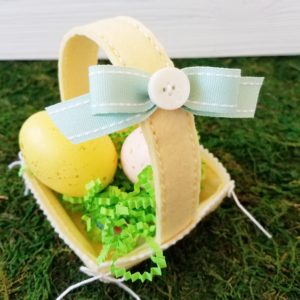
I covered the seam in the handle with a bow made from Aqua Mist Saddle Stitch Ribbon and a Vintage Cream Button. I simply hot glued the bow to the handle (rather than stitch it on).
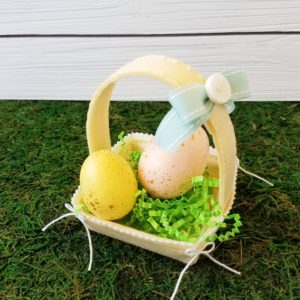
I absolutely love this thing! It turned out so cute and it’s just the right size for a little treat.
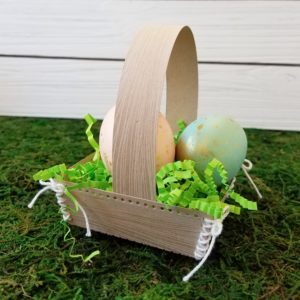
Just for fun, I decided to try a little basket made from cardstock instead of felt. I figured it might come together a bit more quickly, which is sometimes a necessity when time is at a premium (like at the holidays). I die cut the tray from Classic Kraft cardstock and just scored along the bottom holes to create a crease. Then, I stamped the sides with Background Basics: Woodgrain using Fresh Snow ink.
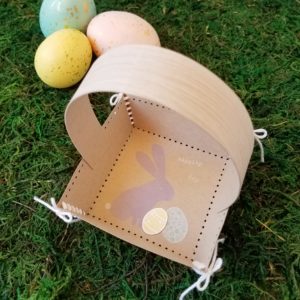
Then, I stamped the bottom of the tray with the sweet little bunny from Bunny Blessings. I stamped the bunny in Fresh Snow first and Winter Wisteria second to make the Winter Wisteria stand out better against the Classic Kraft background.
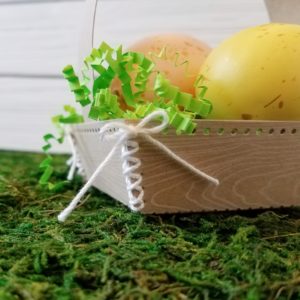
I stitched up the sides with white crochet thread and tied each side in a bow to add a charming detail to the corners. It’s not only cute, but functional too!
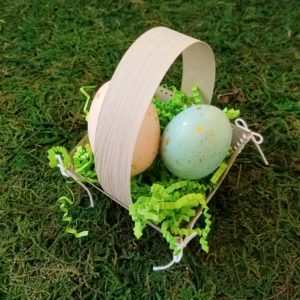
The handle is just a strip of cardstock stamped with the same woodgrain pattern. I adhered the handle to the inside of the tray with Scor-Tape to get a secure hold. I’m not worried about the handle coming loose because the basket isn’t really large enough to carry something heavy enough to cause a problem.
I’m giddy over these little baskets. I might just have to make them for the bigs I know in addition to the littles! Thank you so much for joining me this month. Enjoy the rest of the countdown!
Supplies:
Felt Egg Basket
DIES: Stitched Tray: Square Die, Stitched Tray: Rectangle Trim Die, Seasonal Stitching: Eggs Die, Pinking Shears Die
CARDSTOCK: White Tag Stock
FELT: Lemon Tart, Vintage Cream, Summer Sunrise, Berry Sorbet, Aqua Mist
OTHER: Aqua Mist Saddle Stitch Ribbon, Vintage Cream Button, DMC Embroidery Floss, White Crochet Thread, Hot Glue Gun
Woodgrain Bunny Basket
STAMPS: Bunny Blessings, A Bit More: Bunny Blessings, Background Basics: Woodgrain
INK: Fresh Snow, Winter Wisteria, Hawaiian Shores, Harvest Gold
DIES: Stitched Tray: Square Die
CARDSTOCK: Classic Kraft, Rustic White
OTHER: White Crochet Thread, Scor-Tape



Super cute baskets, Lizzie!
cute projects!
These are adorable!!
Cute!
Looks like it would be so fun to make!
Always look forward to these posts!!
What a cute and clever idea! I love these little baskets in both felt and paper. Thanks for the tip about using tag stock to reinforce the felt baskets. I will definitely be giving this idea a try!
These are adorable, Lizzie! I think you’re on to something even for the Bigs in your life. Where did you get those cool gold-splattered eggs? I “need” some!
Thank you, Kathy! The eggs came from Michaels. I couldn’t resist!
Super cute baskets, Lizzie! I never would have thought to add a handle to the trays. You are too clever.
TFS!