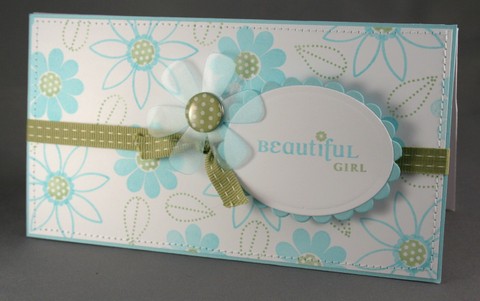
 Our floral set contains several images, all made to work well together so you are able to customize your artwork to suit both your needs and style. This card uses some patternd paper that I created using the various bits and pieces. Notice the fun polka-dot center for the flowers!
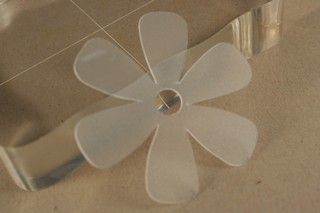 We will also be carrying these fun transparent flowers from Maya Road. They are made out of a material similar to the plastic used in creating stencils.
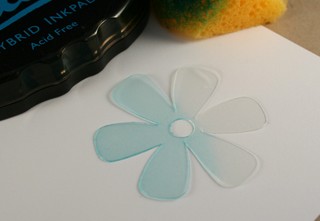 I discovered that if you rub Palette ink onto them in a circular motion, you can "dye" them the color of your choice. You know I am all about versatility!
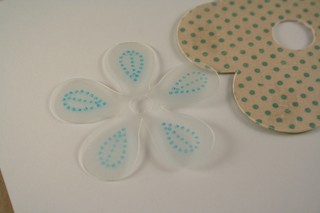 Amoung other things, you can also stamp on them or back them with patterned paper. Can you say limitless possibilities?!?!
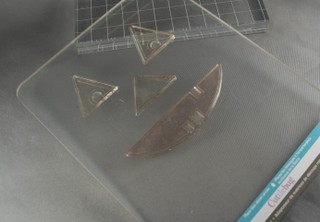 Our Halloween set is packed full of fun images too, 30 to be exact! The four I used on the main part of this project will probably be your favorite, though! Check it out! A larger than life jack-o-lantern face! And guess what!?!? They are ALL seperate, allowing you to arrange them tightly for a smaller application, or far apart for a larger project. You can stamp them individually if you like. OR you can take Emily Giovanni’s advice, and stamp them all at once by using a Cuttlebug plate as your block.
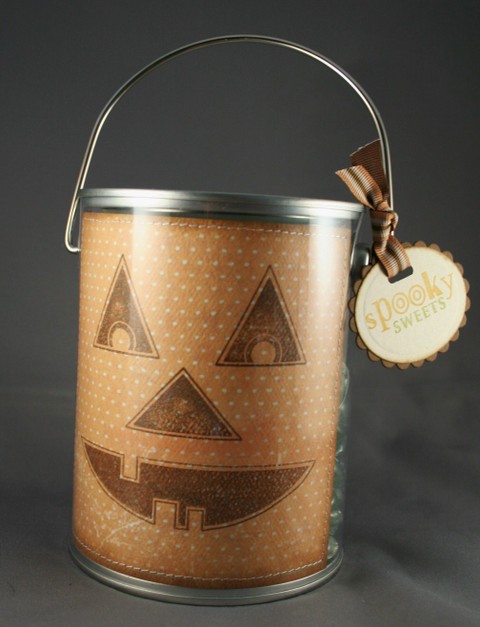 So this is the little trick-or-treat paint can I made. I loved how I was able to just insert the cardstock inside the clear can and not worry about adhering it. Oh, and by the way, we’ll be carrying the clear paint cans too, in three sizes to boot!
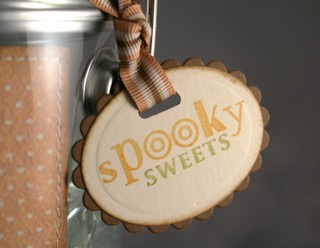 Here is a close-up of the tag (which uses the oval Nestabilities dies). "Spooky" is a seperate image from "sweets" so you can bring together two different colors from your project easily. There is also a "treats" stamp that coordiantes as well. Both "sweets" & "treats" fit perfectly between the tails of the p & y in Spooky! Ahhh, perfection!
Be sure to stop by tomorrow! This party is just getting started! I have some more fun projects to share!
BEAUTIFUL GIRL CARD SUPPLIES:
ink-Cool Caribbean dye ink from SU!, Aloe Vera VersaMagic, Cote d’Azure Palette Ink (for sponging on flower)
stamps- Papertrey Ink
paper- Cool Caribbean cardstock from SU!, stamper’s select white from Papertrey
other- ribbon from Stemma, flower from Maya Road, oval Nestabilities die-cuts, green polka-dotted brad from Making Memories
PUMPKIN PAINT CAN SUPPLIES:
ink- Burnt Umber Palette Ink, More Mustard & Old Olive dye inks from SU!, Brushed Corduroy Distress Ink from Ranger
stamps- Papertrey Ink
paper- Little One (orange polka dot) from Baby Bee Collection by Crate Paper, ivory & brown cardstocks from Prism
other- striped ribbon from We R Memory Keepers



these are great!…can’t wait for the release!! I love the huge pumpkin face…he will be a must have!! 🙂
Of course those are wonderful, can’t wait to see the rest of the projects. Great job!!
oh my gosh – I am in LOVE with that pumpkin face and his cute little tag!!!! :o)
These are great again.
Do you sell the slot punch used on your halloween tag? Would love to get hold of one.
The only problem I see it “fighting” with my 10-year-old DD over the cute Halloween images! Your sneak peaks are awesome and I look forward to them every month!
cutie! can’t wait!!!!!!
I am always amazed at your creativity!!!!!! Would you mind sharing what paper you used for the pumpkin tin, as well as, the ribbon you used? This is a must case project!!!!!!! I can’t wait to own the entire Papertrey collection. I keep sending my friends your way!
Thanks,
Beverly Elrod
EEK! I have to have this set (like you needed to twist my arm)
EGADS!~ Love it!
Stop! I don’t think i can afford to keep reading your blog! I Love Everything! Those cans are so cute and the coffee bags are a brilliant idea. You’re the best (sssshhhh……don’t tell my other blogger friends I just said that!!)
Judy
LOVE THAT PUMPKIN FACE!!!! Cute projects!!!!
OH man…. I am loving these sets! And the MR flowers!!! YAY!!!! Will you also carry their transparent albums????? Please say yes!!!!!!
Can you tell us how you made the green polka dot flower center please? Love your color combo.
Fabulous & FUN! – I love both projects here. Ida
WOW – these projects are already tempting me. Your sentiments are my favorite thing about PaperTrey – they are always so clean and easy to read but also very fun and trendy at the same time. I love the words so much that the images are always just a bonus when I buy the sets!
I’m willing to bet that your Floral set is going to be your best seller yet!! Gorgeous.
Once again Nichole, you have thought out every little detail. Your samples are adorable too! And your sentiments..love how they all fit into each other. You are SOO clever!!
You have always such nice cards and the visuals are good too. Do you know if it’s possible to order from papertrey if you are in europe but outside of united kingdom (in scandinavia)?
WOW! That is absolutely gorgeous. Is the 15th here yet?! Can’t wait to order! 🙂
Really excited about this new release! I try to stay away from flowers, because I have so many flower sets but this one is again so versatile that I must have it!!
Mercy goodness, this is unbelievable!!! I CANNOT WAIT for the release of the new sets! This is getting to be better than new Stampin’ Up catalogs!!! (and I’m totally serious!) TOO FUN, thanks for the great images!
I think I may go broke tomorrow. There is so many cool things to get
what a lovely card!! and am I totally silly being wow’d that you mentioned me in your post?!?!