Spellbinders Nestabilties are now available for purchase through Papertrey Ink
—> Charlene asked…How do I know if I should buy the small rectangle set or the large rectangle set. If I am seeing your side by side pictures correctly they all seem similar in size to me. I think I am confused on the sizes of each set of 5.
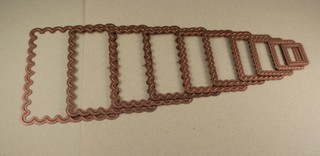 Here is a photo of both the LARGE & SMALL scalloped rectangle sets combined, from largest to smallest.
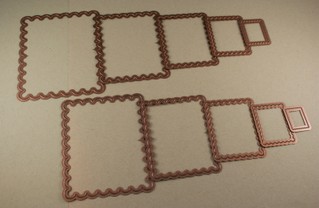 In order to seperate them into the LARGE and SMALL sets individually, I pulled EVERY OTHER die from the group, starting with the second to largest. The top row (which begins with the largest die) is considered the LARGE scalloped rectangle set. The bottom row (which begins with the second to largest die) is considered the SMALL scalloped rectangle set. So essentially, the two sets are very similar in the range of sizes they cover. It just means that if you own both sets, you have more intervals between the largest and smallest dies.
—> Karen asked…I know everyone is different and it’s probably hard to answer this – but if I could only buy one shape right now – which shape do you think is the most versatile? Which one do you use most – square, rectangle, oval or circle???
That IS difficult to answer! Here are my PERSONAL opinions on who the different shapes might appeal to…
CIRCLES: These are great for monograms & tags. I see myself using them most to coordinate with modern styles.
OVALS: Fantastic for matting an image, especially sentiments, since most are enlongated. This type of shape lends itself to more vintage or formal looks, I think.
SQUARES: Fun to use as mats for symetrical embellishments or images. The largest die makes a fantastic scalloped card. I think these shapes lend themselves to a more whimsical style.
RECTANGLES: A more classic, traditional look. I find myself using the standard rectangles with the embossed edge for my focal point images quite often. I like them because the work fabulously either horizontally or vertically, so it is almost a 2-for-1 deal.
I don’t know if that was helpful or not, but it is just my 2-cents!
—> Suzy asked… Will these work at all with the borders sets you just came out with?
YES, with just a few exceptions! I originally designed the Borders & Corners stamp sets to coordinate with the Marvy punches, put have found that they are a FABULOUS compliment to the Nestabilities Dies as well! Michelle has a cool tutorial —>HERE<— that illustrates how she matches up the stamps & dies.
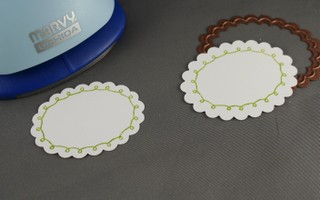 There is a doodled loop border in each Borders & Corners sets. It is intricately designed to place a "loop" in each of the individual scallops of the Marvy punches. The Nestabilities dies have more "humps" than the Marvy punches, so this SPECIFIC characteristic will not coordinate perfectly. BUT if you just use the die that is the next size up, it is large enough so that it doesn’t matter that there is not a "loop" in each scallop. (The photo to left shows the punched shape with the stamped border vs. the larger die-cut shape w/ border). It just acts as a standard frame.
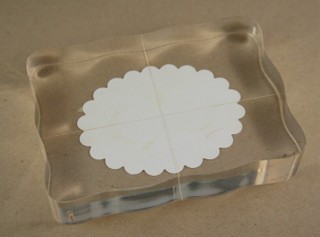 Borders & Corners Oval will coordinate perfectly with just a little bit of fiddling. The cool thing about acrylic stamps is the their flexibity and the ability to form them to fit your needs. The Nestabilities Oval Dies are slightly rounder in shape than the Marvy Punches. So to make the stamps work, you just have to manipulate them ever so slightly. The best way to do this is to die-cut you oval from scrap cardstock. Place it on your work surface and then put your block directly on top of it.
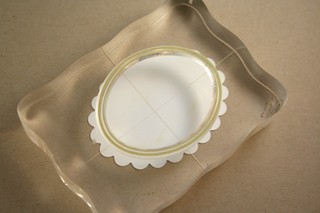 You can then take your stamp and hold it just slightly over the surface of the block and push in the sides just hair until it matches up with the shape of your die-cut. You can then lightly press it onto your block. Perfect match!
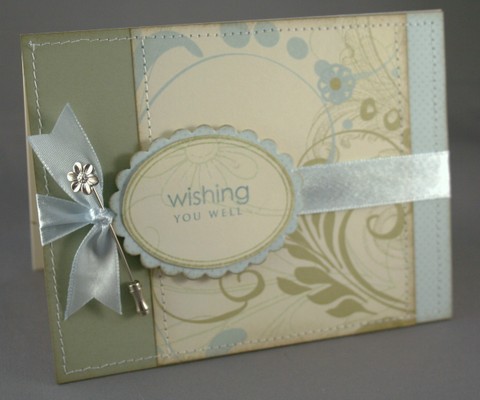 Here is a card I made using the oval border stamp along with the oval die-cuts.
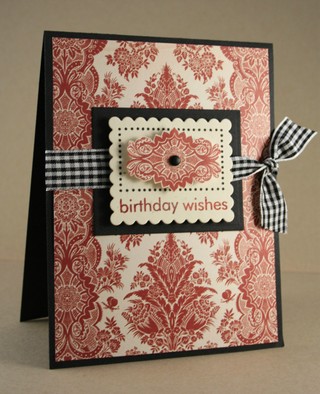 Borders & Corners Rectangles DO NOT coordinate with the Nestabilities Dies. They have different proportions and rectangle stamps can not be manipulated like the ovals. But that is not to say you can’t USE the Borders & Corners Rectangles with the rectangle dies! In this project I die cut my scalloped rectangle from ivory cardstock. I then stamped one of the rectangle borders towarrds the top of the die-cut.
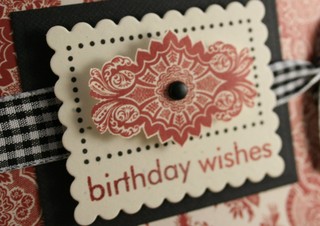 I love the space left open underneath the stamped border. It serves as the perfect little "nook" to tuck-in a sentiment, a row of brads, paper piercing, a line of rhinestones, knotted ribbons or some other embellishment.
Tomorrow I will be showing you the different MATERIALS you can use with these dies, so be sure to come back y’all, you hear!!!
ETA: The stick pin used on the Wishing you well Card is from Nunn Designs. I’ve had mine for ages, but I found them in stock —>HERE<—
WISHING YOU WELL CARD SUPPLIES:
Ink: Aegean Blue Versamagic, Pale Olive Memories Chalk Ink
Stamps: Faux Ribbon (sentiment), Borders & Corners Oval (frame)
Paper: Shenendoah from Vintage Home Collection by Webster’s Pages, small blue pindot from Scenic Route
Other: satin ribbon from Chatterbox, stick pin from Nunn Designs
BIRTHDAY WISHES CARD SUPPLIES:
Ink: Noir Black Palette, Cranberry Crisp from SU!
Stamps: Paper Tray (sentiment), Borders & Corners Rectangle from Papertrey Ink
Paper: Sophia from Foof-a-la, Black Beetle cardstock from Bazzill
Other: gingham ribbon from May Arts, black brad from Paper Studio



Both of these cards are GORGEOUS!!! I love them. TFS
The cards are wonderful as always………but I must say that I am so confused with all this…………LMAO. I am only 10% blonde, but I WILL figure it out. I may have to ask for help………..I feel a tug on my purse strings again. I will be watching…studying……LOL
Great cards, I really love these Nestabilities, they look like so much fun. I was just wondering where you go that wonderful stick pin to put on your card, it is sooo pretty.
Thanks Nichole! I got it now….”lightbulb”!!!
Great cards! Thanks for all of the wonderful info and ideas.
GORGEOUS cards as always!
This is great, but I have to admit to still being a little confused! LOl. Anyway, will the regular dies mat on the scalloped die? For example, if I order the LARGE set of scallop and regular circles, will the largest circle layer onto the largest scallop? KWIM? I should I order LARGE scallops and SMALL circles?
I hope this makes sense.
Nichole, you come up with the cutest designs!!! Thanks so much for sharing!
Would you know how much each shape set would weigh? Thanks! 🙂
What is the pre-order price?
I am not even reading about the nestabilities..LOL. I know I need them and THEN only THEN will I figure out HOW to use them *winks*.
Nichole, your cards are SPEC-FABULOUS, PHENOMENAL, truly inspiring.. I LOVEY LOVEY LOVEY them!
Keep up the good work girly girl
Mwah!
Em
Hi,
Love the cards! And I love your stamps too!
I read about the borders stamps and your suggestions on making them work with these. I was wondering if there was any chance that you’ll be making another borders set (same designs) that actually are tailored for these? I’m especially interested in a set for the rectangles.
Thanks!
Lyn
I’m a little slow!!! but I keep thinking about this blue and green card in your Dec 07 archives, where you explained the nestabilities. Where did you get that paper?????
thanks,
kathy