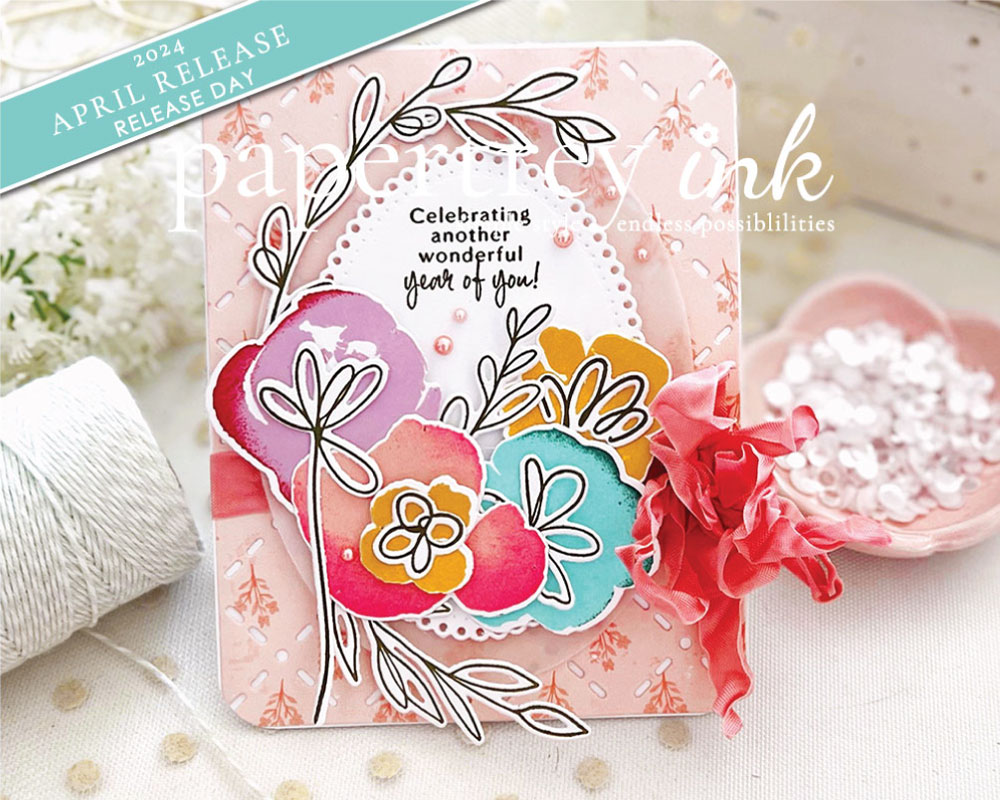
 Hello, PTI friends! Today is the 6th which means that it’s time for our monthly packaging date…BUT today is also World Card Making Day and I thought it would be a great idea to incorporate some cards into today’s post. I haven’t done any card packaging here this year so it’s only fitting to focus on some today, right?
 I also want to mention that while my post here will mainly feature the packaging with some brief looks at the cards I’m wrapping up, you can read more about them HERE on my personal blog. Be sure to stop by if you have a minute, there’s a fun little surprise, too!

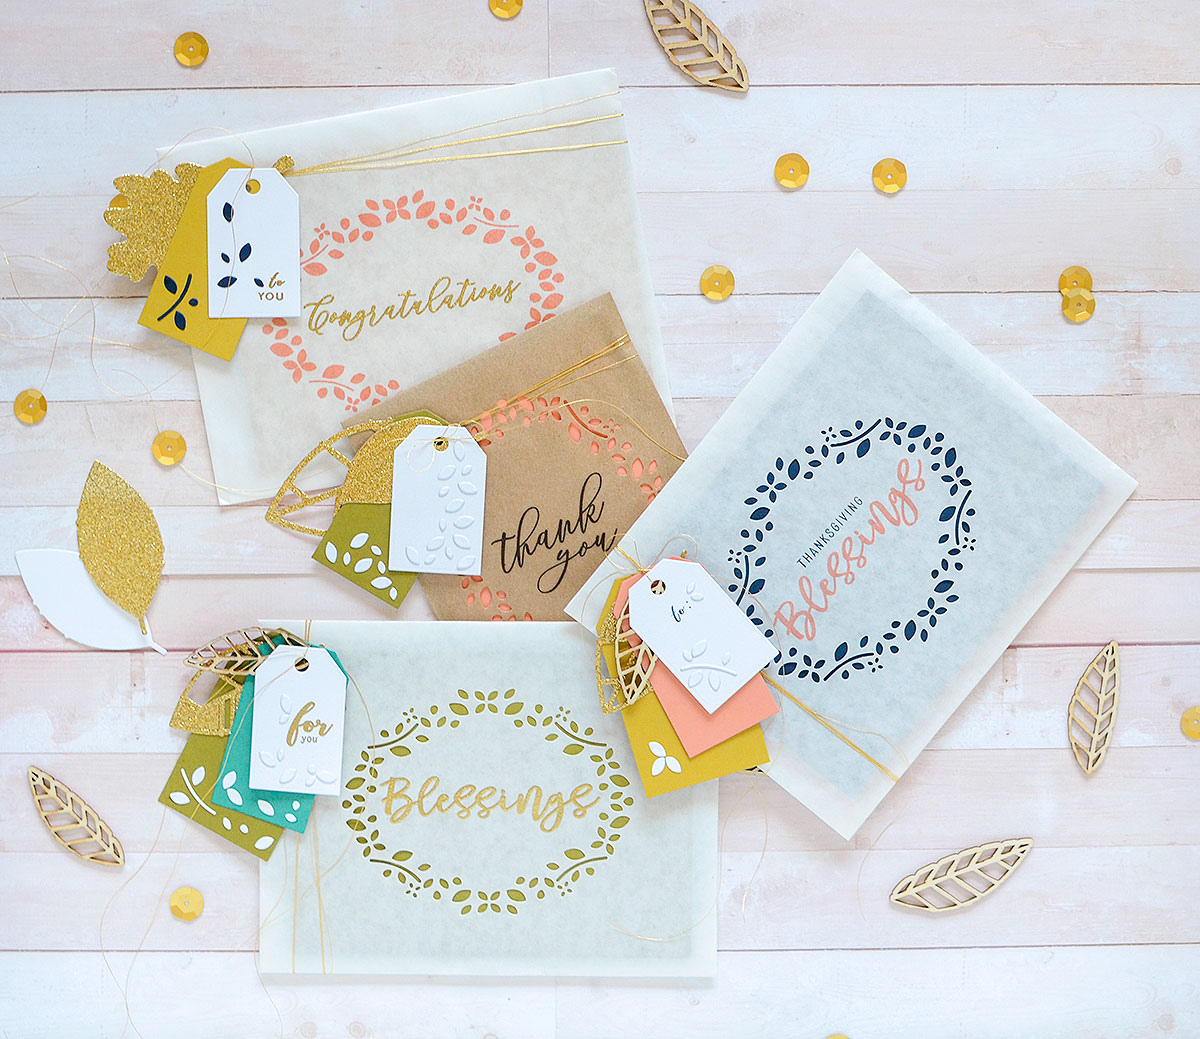
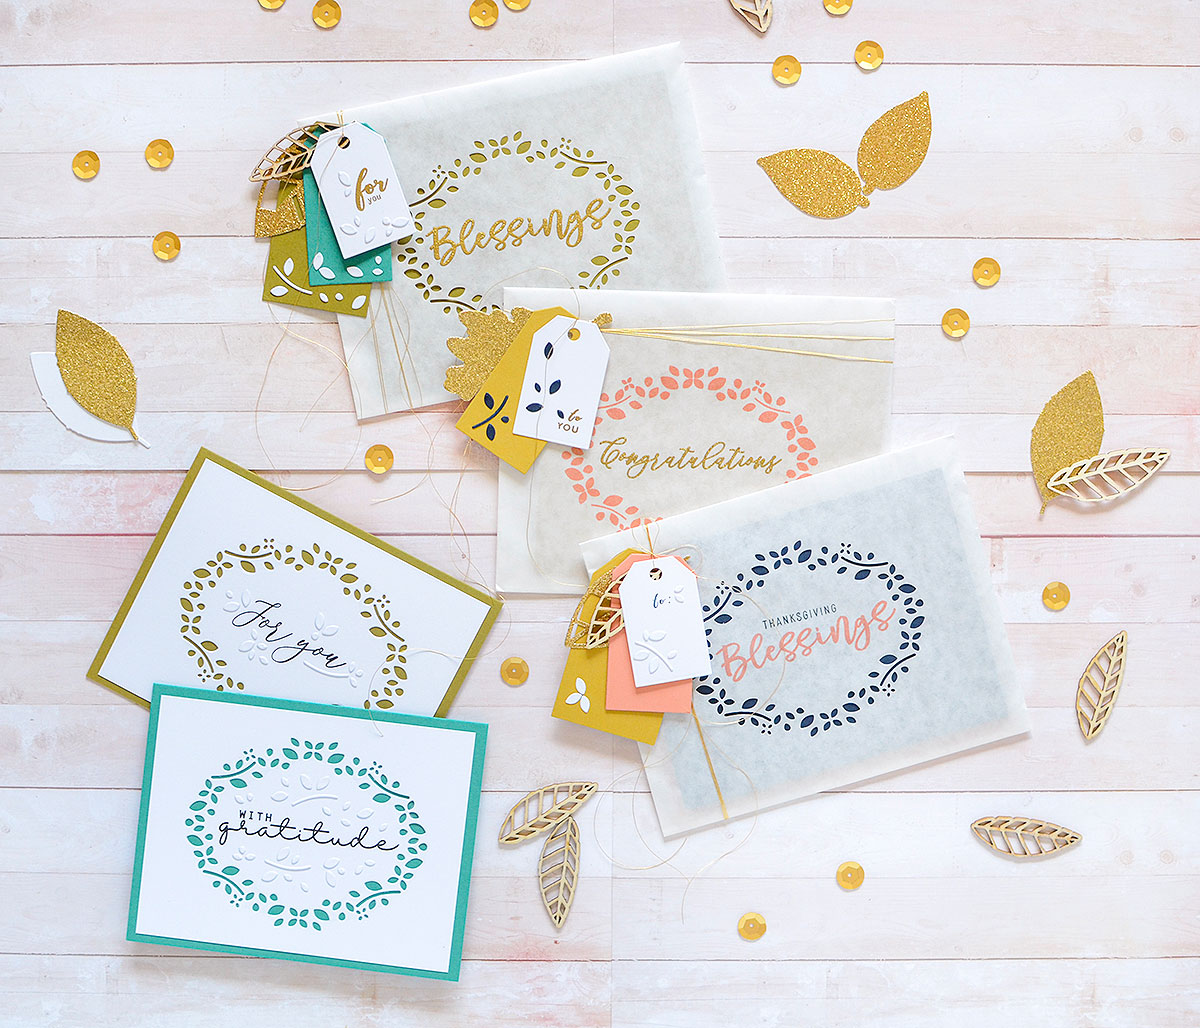
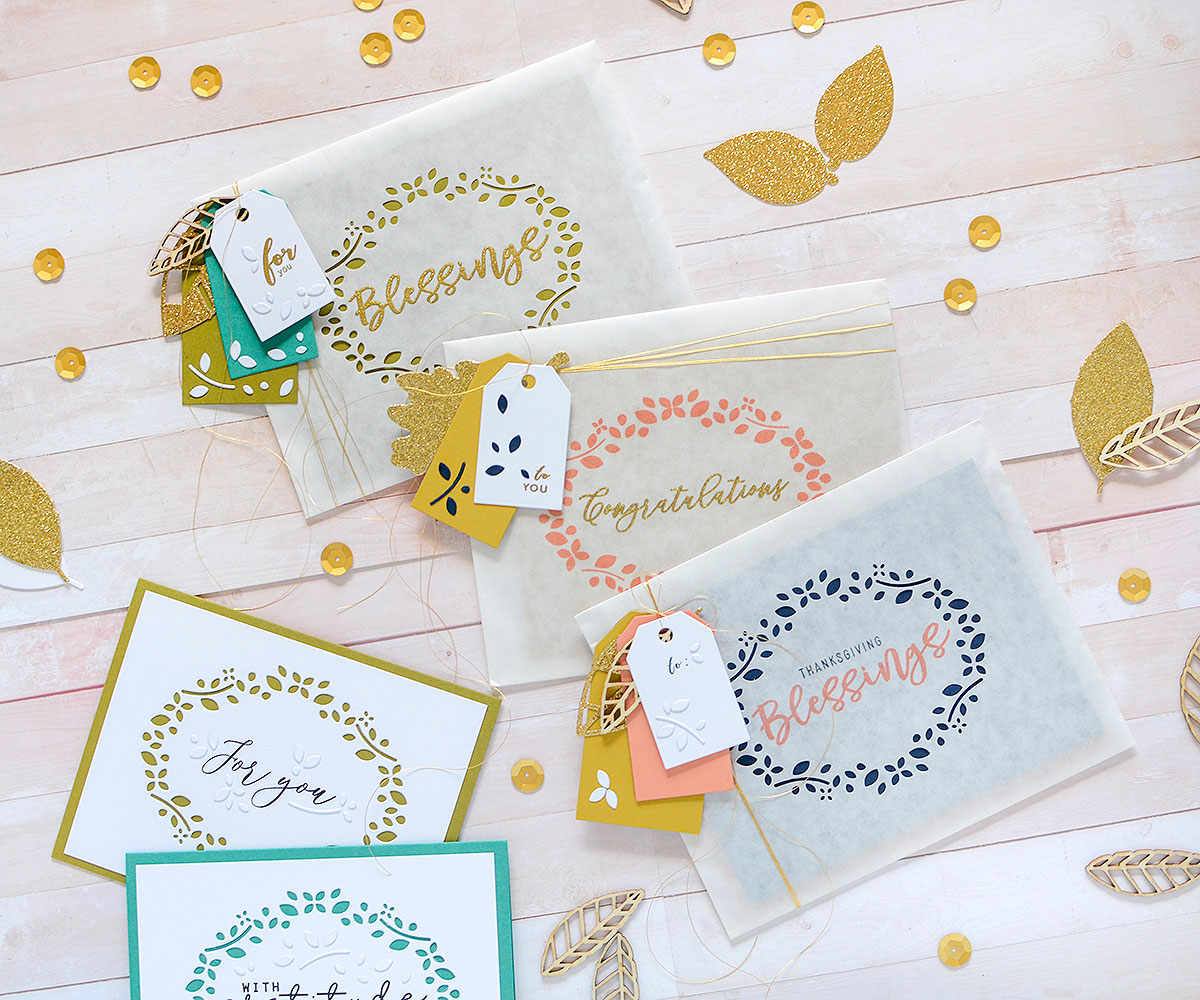
Onto today’s packaging! After 12 years of card making, I still think that giving a set of them as a gift is a nice thing to do. Most people can use them and appreciate them, and it’s a gift made with your hands and heart (which is the best kind of gift). While I love making the cards, for me, the best part of giving them away is creating the packaging, and this packaging is so easy, but so pretty!
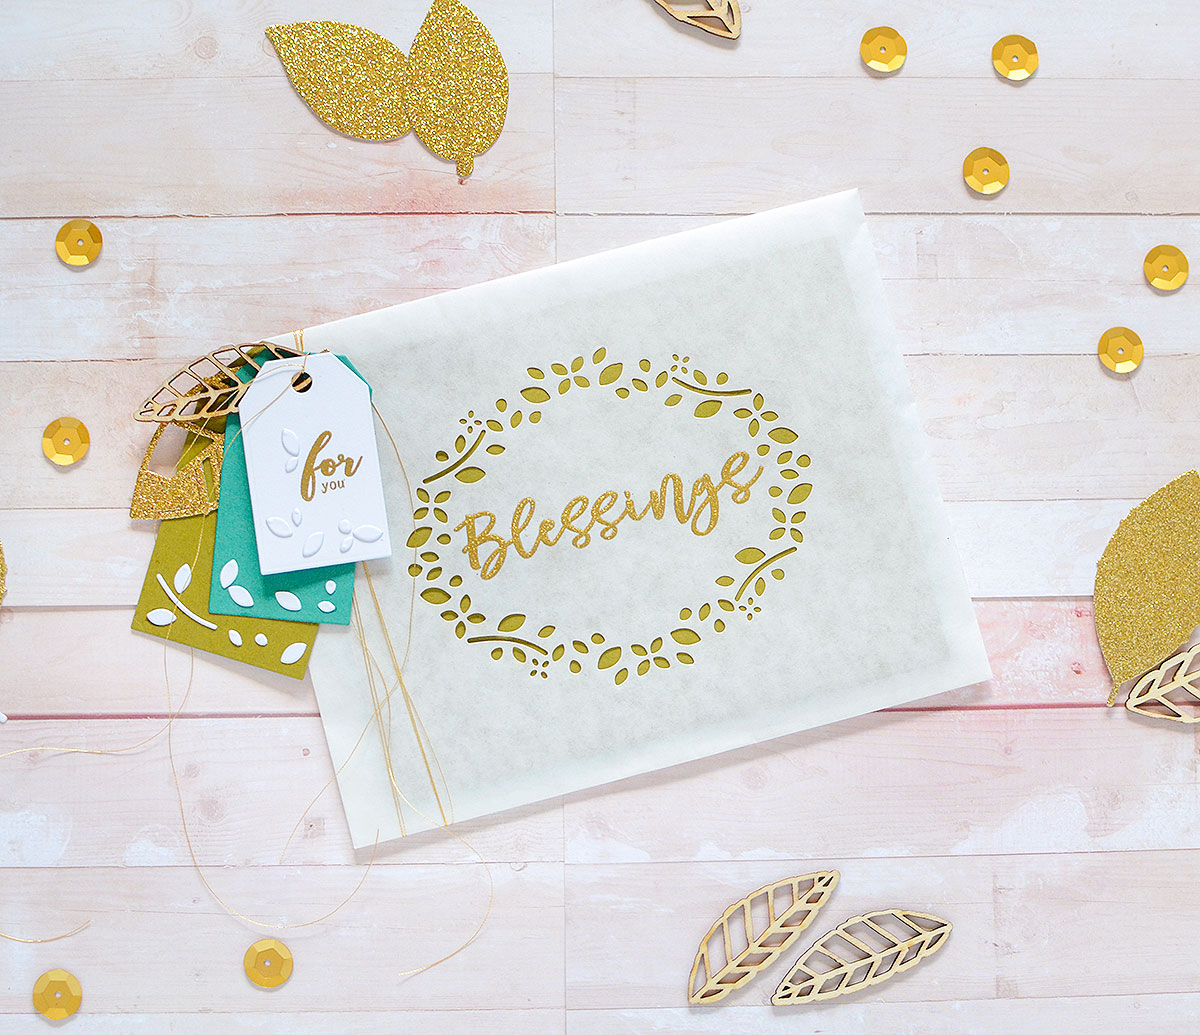
 I’m using paper bags and the Frame It Out: Many Blessings die. My bags are kraft and white flat paper bags, but you can use glassine bags, coffee bags, or nearly any bag that is large enough to accommodate the size of the die, which is 4″ W x 3 1/8″ H (but don’t forget that you can use it vertically or horizontally). The white bags I’m using for the first 3 examples measure 6 1/4″ W x 9 1/2″ H, and several A2-sized cards (5 1/2″ W x 4 1/4″ H) will fit in them. I chose the placement I wanted for the frame on the bag and ran it through my die cutting machine. It will cut through both the front and back of the bag, but if you only want it to cut through one side, try placing a piece of chipboard inside the bag to prevent cutting all the way through.
 I designed this die to be used anywhere on a project; and I had ideas like this in mind as I was creating it. It’s the perfect image for a quick card or tag–or packaging! After I cut out the frame, I chose a stamped sentiment to put inside it. The stamp set that coordinates with the die offers a few options for the messages, and You Made My Day, which is a set that released at the same time, also features phrases that fit within the frame. Aside from those, many of Papertrey Ink’s sentiments will work due to the large scale of the frame’s interior, so your possibilities are vast and varied!
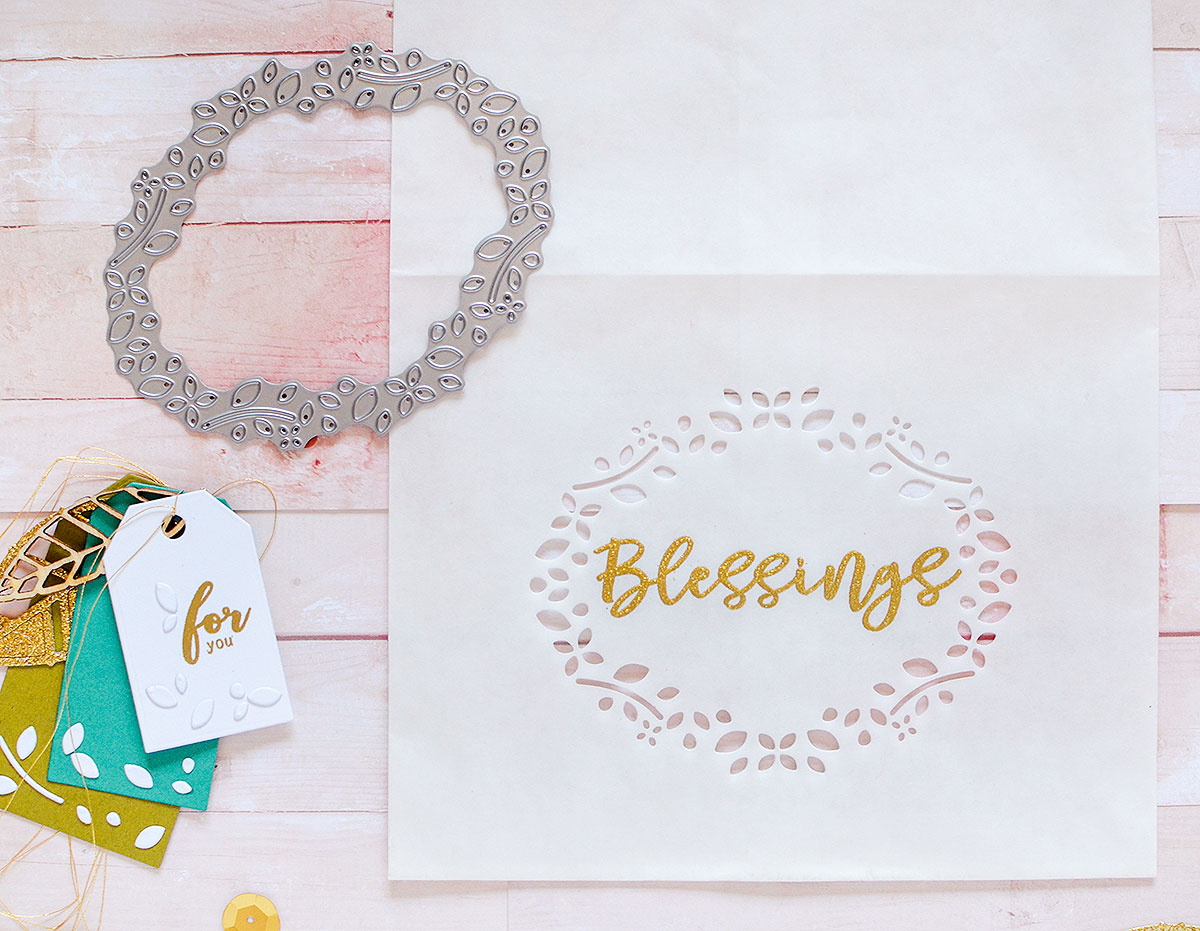 I chose the simple ‘blessings‘ for my first package of cards. I stamped it with Watermark ink and used Ranger’s Fine Gold embossing powder for an elegant look. If you’re using glassine bags, I recommend heat embossing due to the smooth surface.
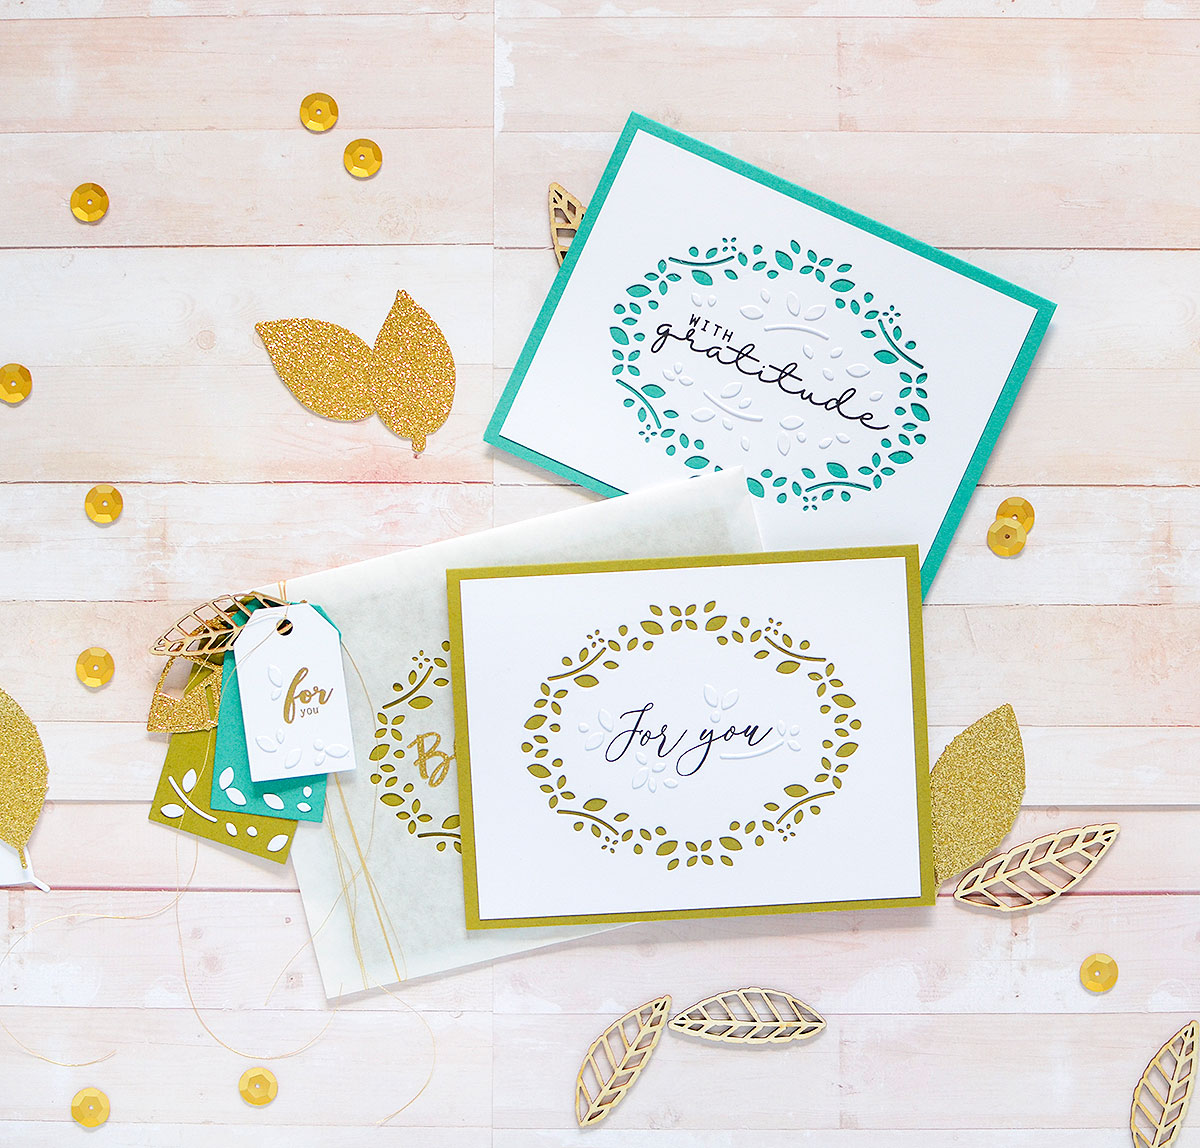
 I made a set of 4 cards to put inside this bag, featuring Tropical Teal and Ripe Avocado card stock bases. The cards I made have a simple elegance to them; I cut the decorative frame from white stock and stamped sentiments inside it with True Black ink. To dress them up a bit, though, I took the cuttings from the frame and adhered them around the sentiments. I love the way they turned out, but this ended up being a very time-consuming process!! Those tiny pieces are finicky!
 For more on the cards, you can visit the post HERE on my personal blog.
 By inserting the cards front to front, with the backs turned toward the outside of the bag, the colored card bases create a pretty background to the cut-out design, and I had this in mind when considering what color paper and ink to use. To seal the bags, I folded them over backward and sealed them with washi tape because it’s removable. Not wishing to cover up the die cut frame or sentiment, I shied away from ribbon this time and chose only gold metallic thread, which I wrapped around the bag a few times and tied off.

Leaves die cut from glitter paper are always a welcome option for autumn gifts (or even non-autumn gifts!), and I cut several tags from coordinating card stock to layer with the glitter and wood leaves. Similar to the cards inside, I used the intricate negatives from the frame pieces to decorate the tags. I used a Sakura glue pen and tweezers for securing these delicate parts. On the top tag, I embossed ‘for you‘ in gold to match the sentiment on the bag.
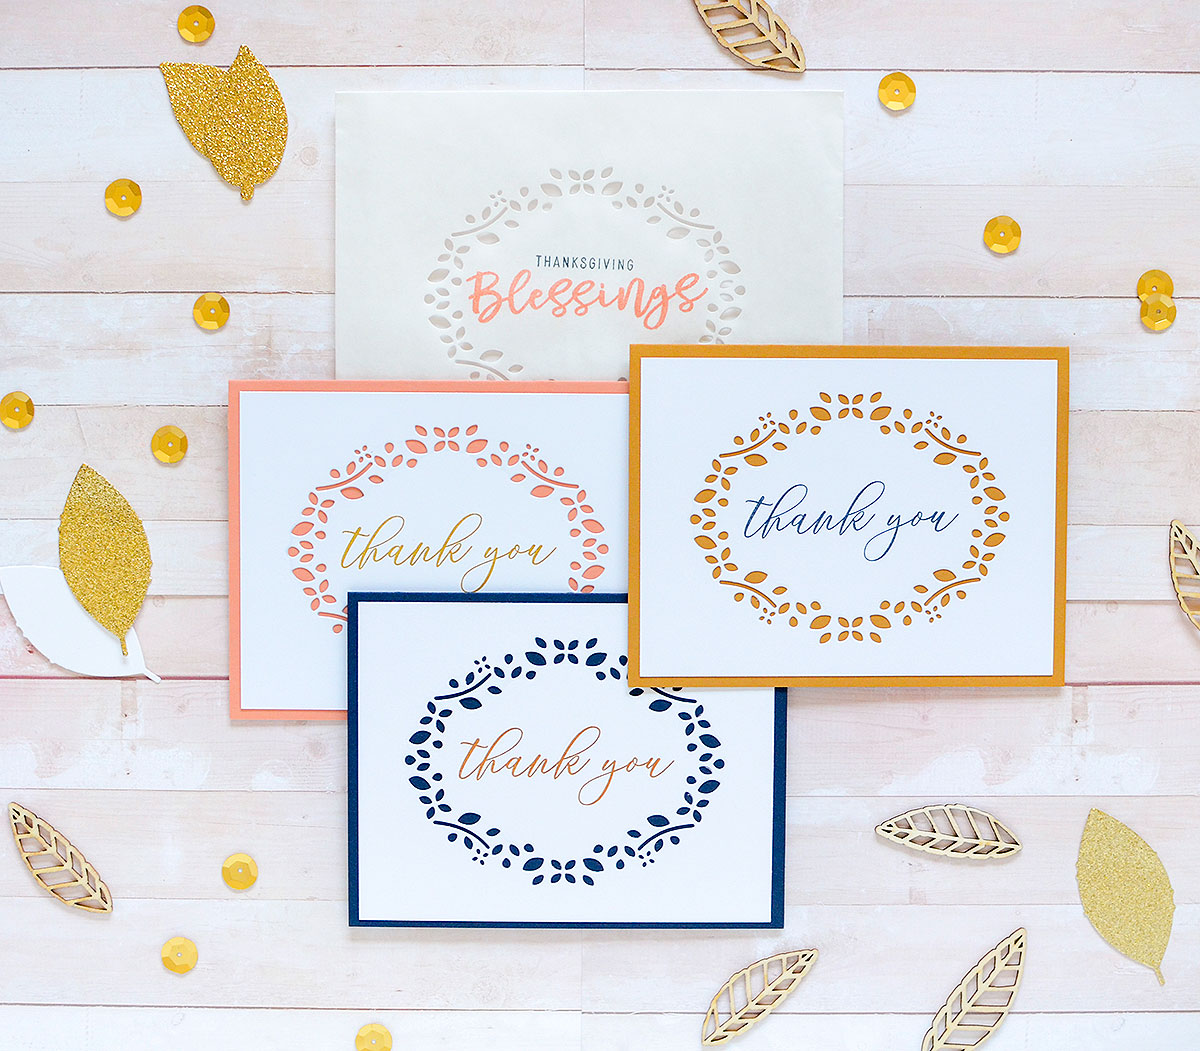 Applying many of the same principles from above, I made another set of cards; a trio of thank you notes this time.
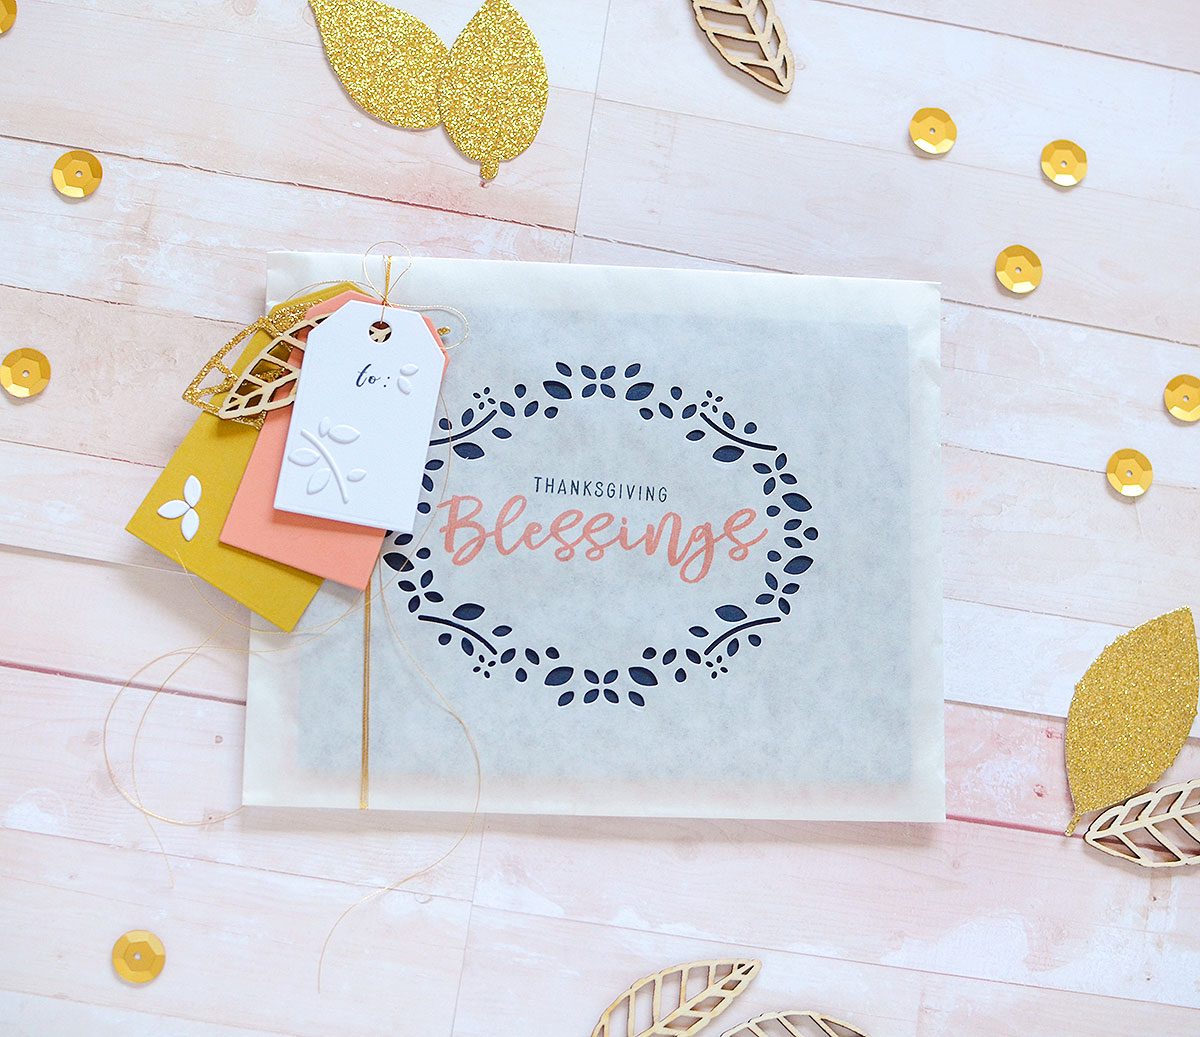 Instead of embossing on the package front, I stamped with Melon Berry and Dark Indigo inks. Those colors are represented on the inside of the package by way of card bases.
 The tags followed the same process as the previous set. I like to layer simple tags like the Essential Tags and Fillable Frames #9, which is great for the size in-between the small and middle Essential Tags. Feel free, however, to get fancier with your tags, either with stamping or by the shape; PTI has all kinds of tags so if my simply-shaped layering style doesn’t work for you, I bet you have a favorite PTI tag already!
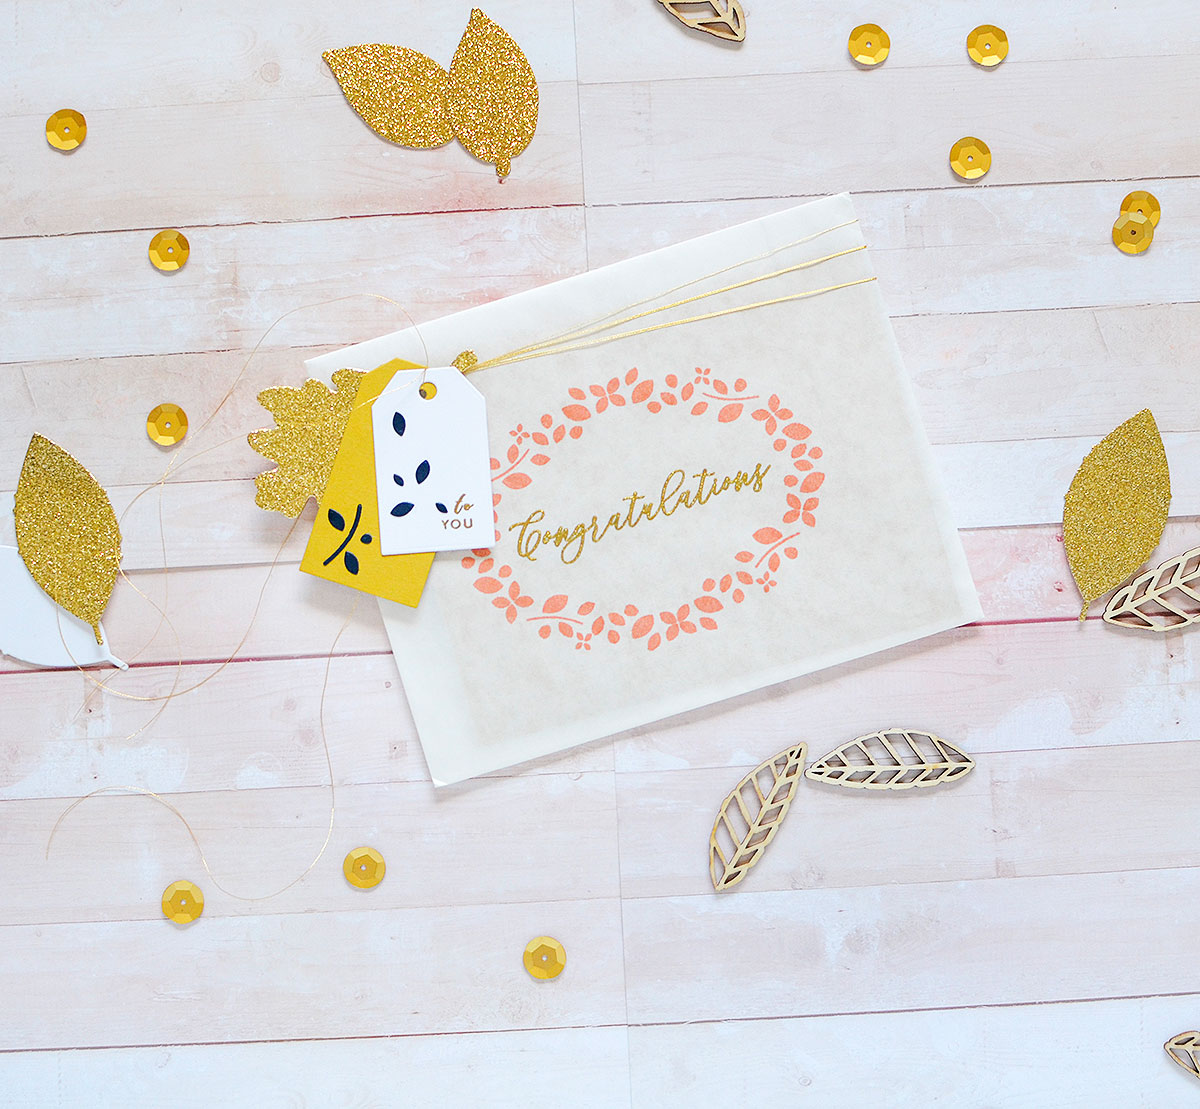 Sometimes, you can use a bag like this as an envelope for just one card. I created this wedding card and housed it in a stamped white bag. Instead of die-cutting the frame this time, however, I stamped it in Melon Berry ink. Even though the card is made from Saffron Spice and Dark Indigo, MB is a gorgeous companion to them, and looks so pretty with the gold embossed ‘Congratulations‘ that sits inside of it.
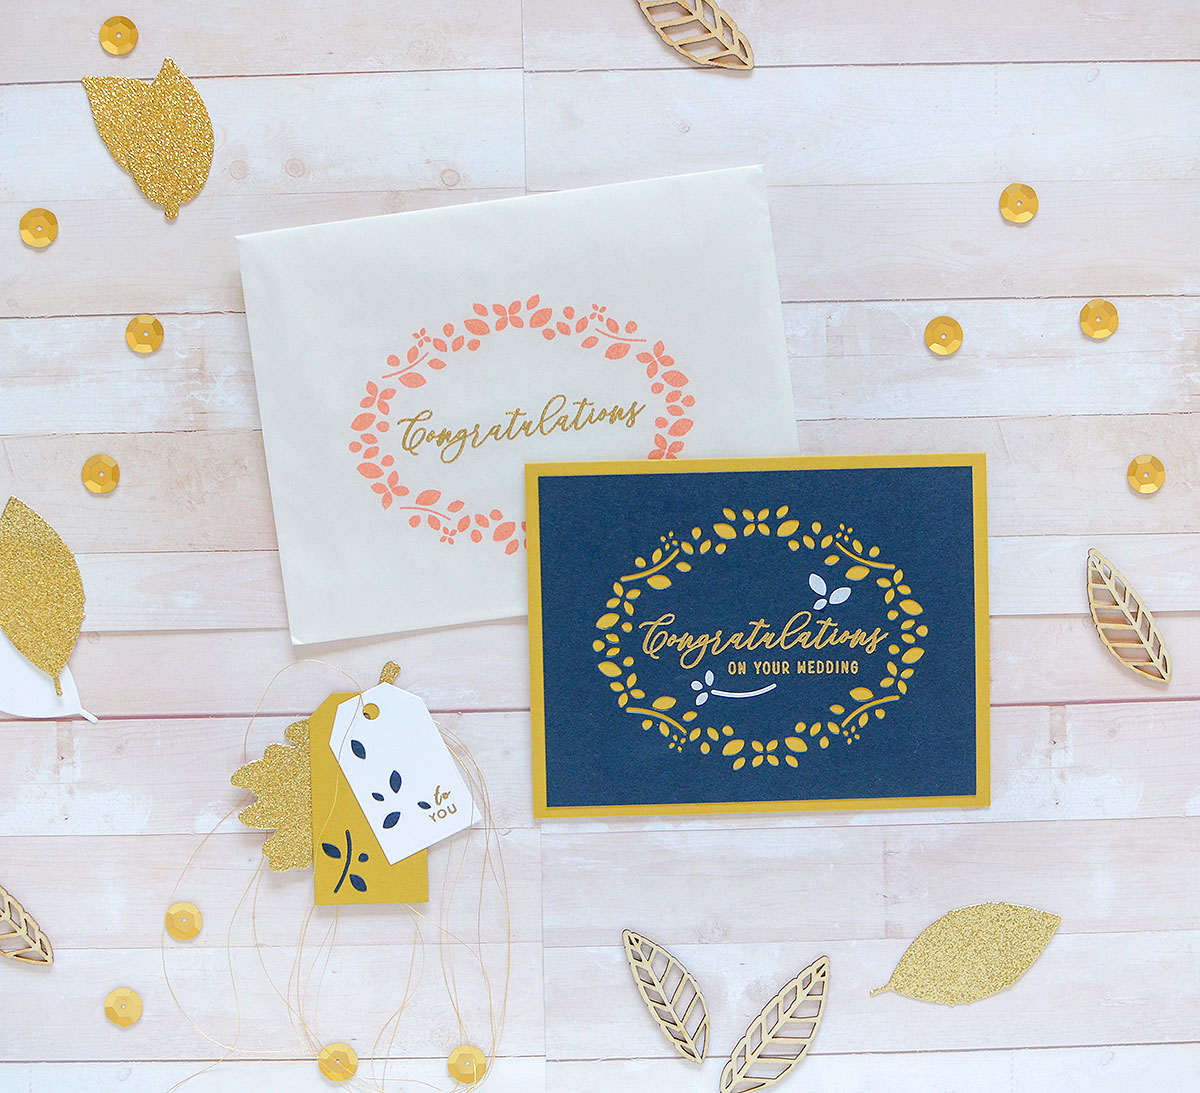
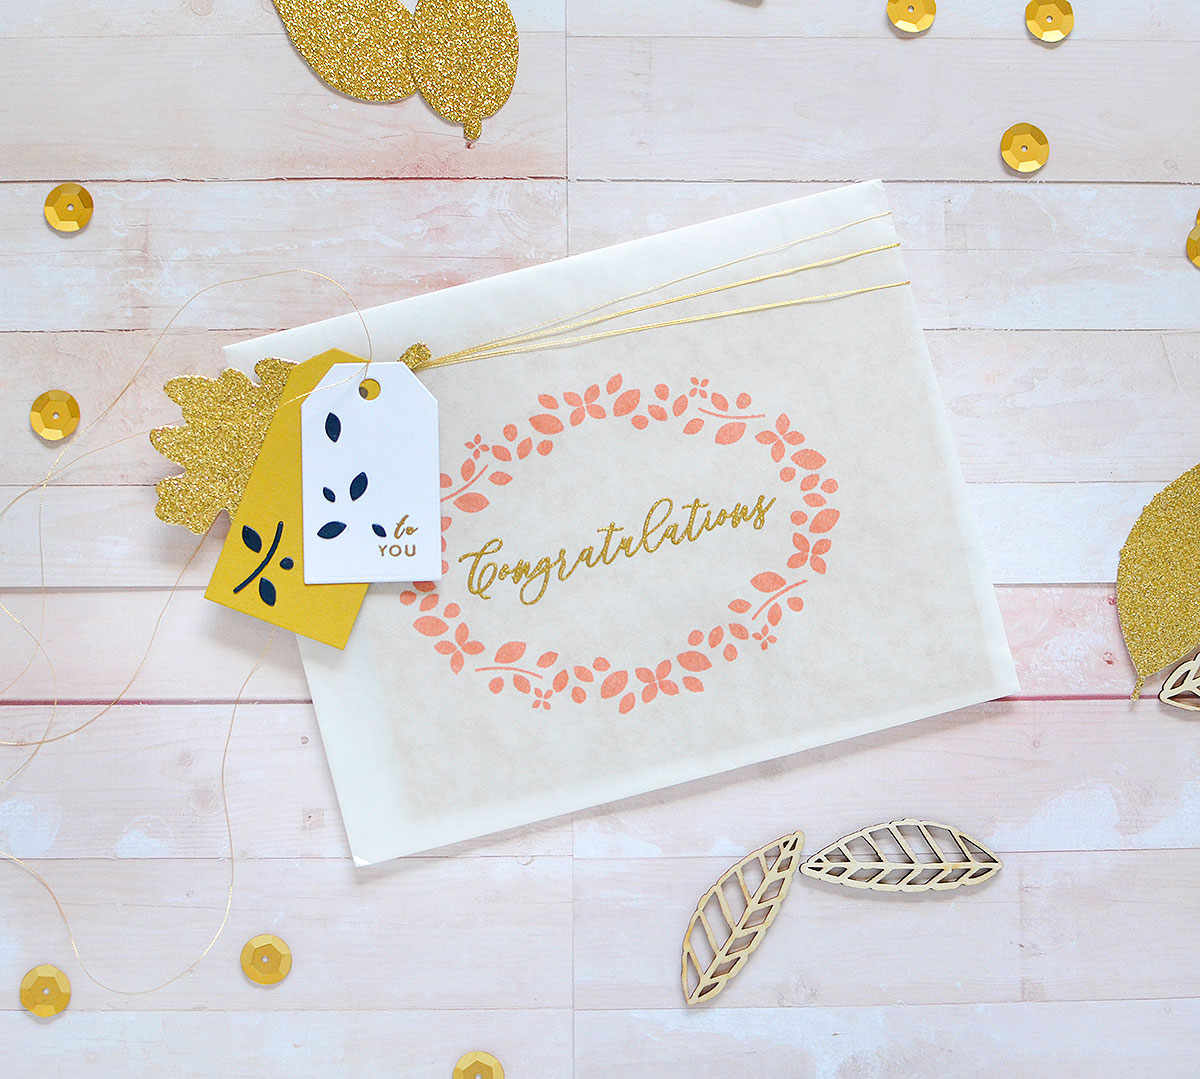 I slipped the card in backwards to avoid the dark front of the card being visible and creating overwhelm in the front. For the tags, I used a gold oak leaf and 2 tags. Instead of using the white petal elements, I used Dark Indigo (to match the card). Also, if you’d rather not take the time to mess with adhering the tiny pieces, you can stamp them instead, as single images are included in the stamp set.
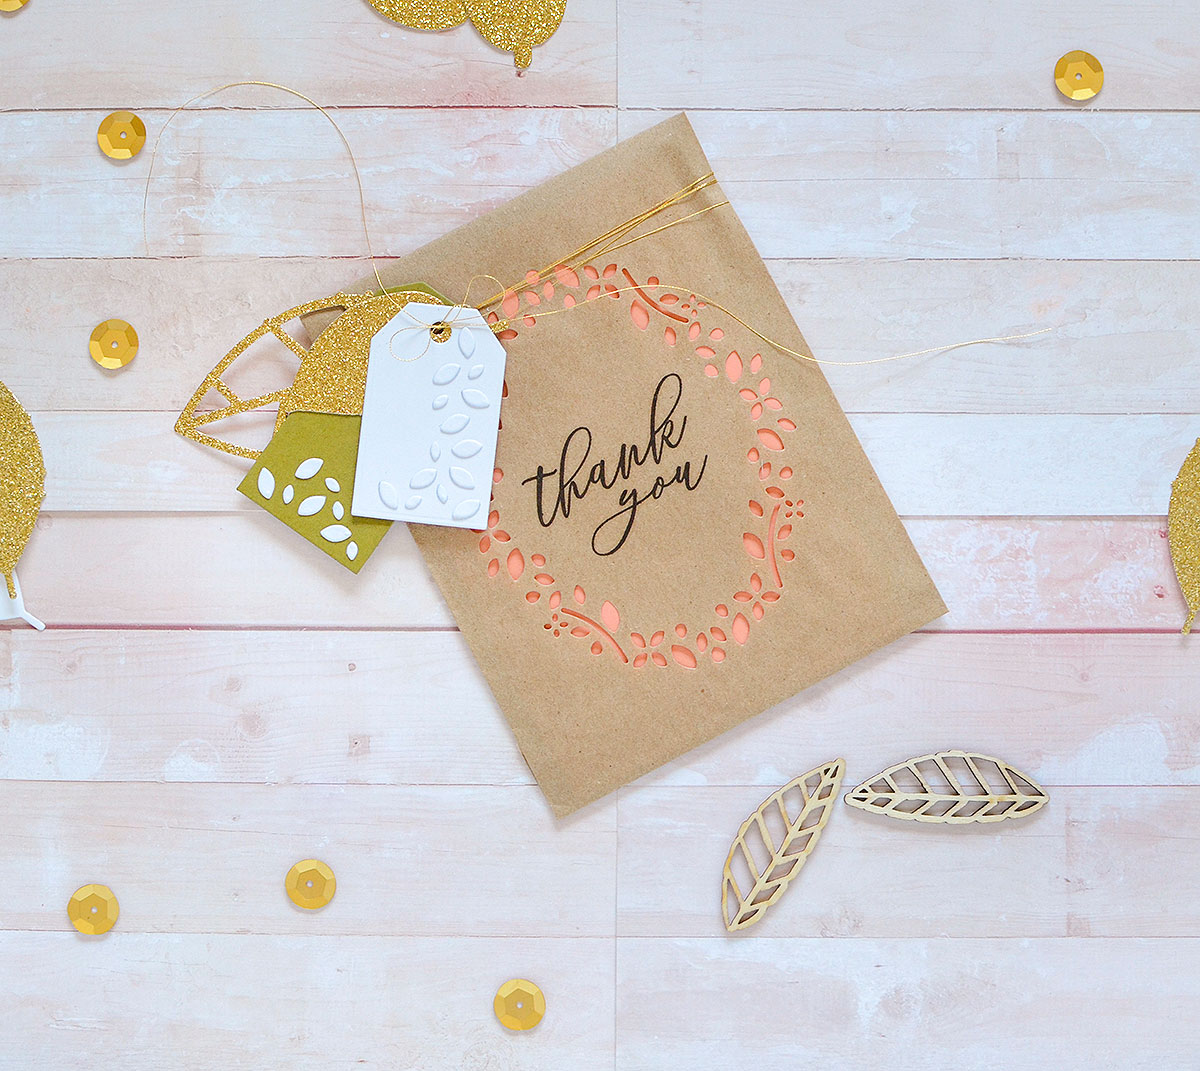
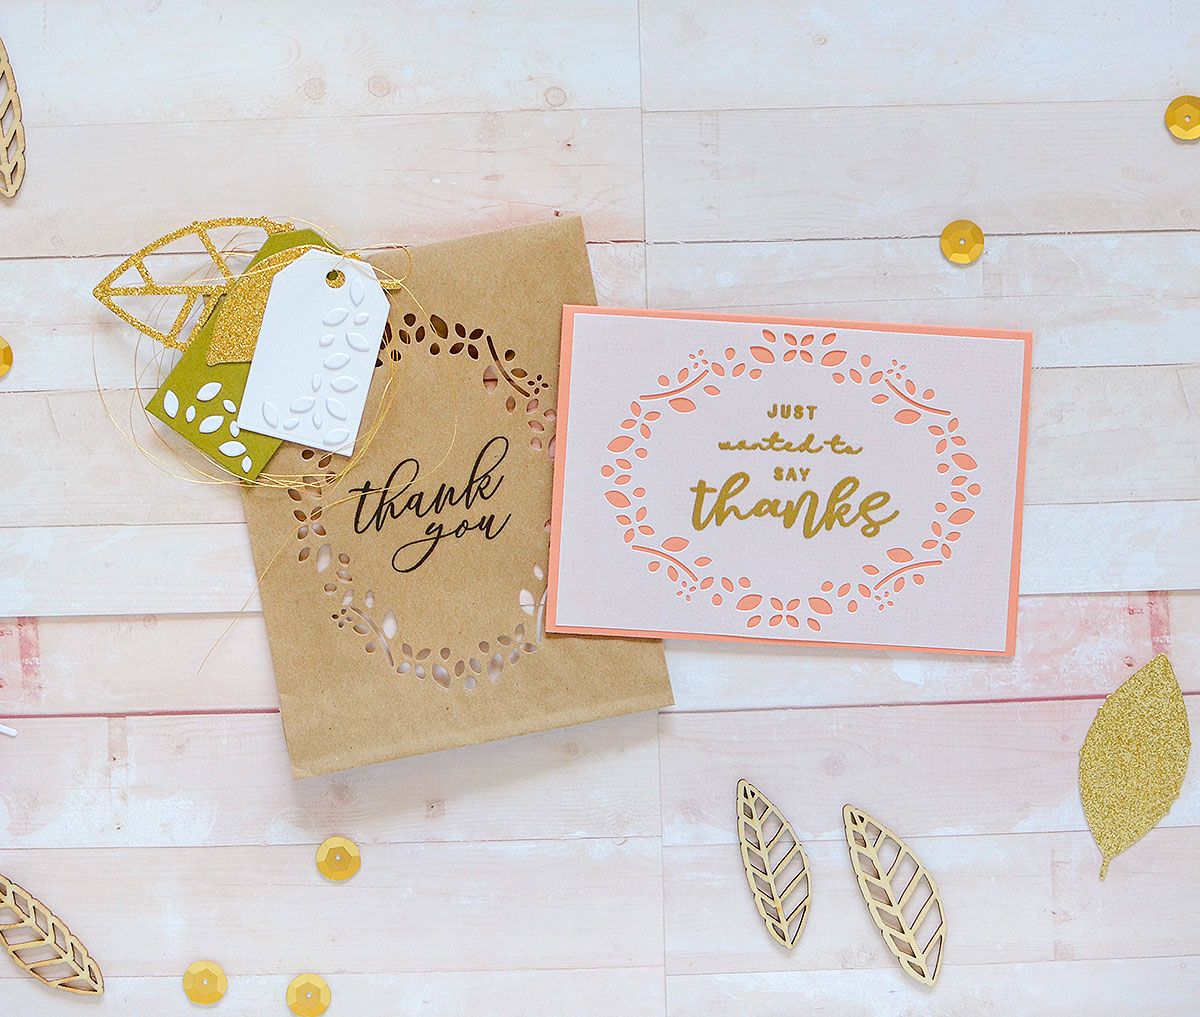
 One last package for you; it’s a small kraft bag, measuring 4″ x 6″ and I enclosed a 4 3/4″ W x 3 1/2″ H sized card in it. I die cut the frame vertically and stamped ‘thank you‘ in True Black ink inside of embossing it. There’s a sweet note of appreciation tucked inside this bag, and it’s wrapped up like the others with gold thread, pretty tags, and die cut leaves.
 I hope you enjoyed the post today, a tribute to WCMD 2018! If you don’t have bags, the same technique will also work on regular envelopes, too. If you need bags, be sure to grab some large glassine or coffee bags from the PTI shop. And don’t forget to head to my blog for a closer look at the cards featured in today’s post.

Stamps: Frame It Out: Many Blessings, You Made My Day, Good Tidings (kit)
Ink: True Black, Melon Berry, Dark Indigo, Saffron Spice, Honey Nut, Watermark
Paper: Ripe Acocado, So Saffron, Melon Berry, Dark Indigo, Tropical Teal, Honey Nut, White, Linen Vellum
Dies: Frame It Out: Many Blessings, Leaf Silhouettes, Leaves, Essential Tags 1, Fillable Frames #9
Other: White paper bags, kraft paper bags, glitter paper, Ranger embossing powder, gold thread

Very clever use of products! I especially love that you used the cut-outs on your cards and tags … such a pretty detail!
I like very much the leaf-tag combination, very pretty.
Beautiful ideas.
Beautiful as usual, love your ideas.
Gorgeous cards, Rebecca.
Beautiful cards and packaging.
Gorgeous cards!!! And I absolutely LOVE the way you packaged them up!
Lovely! I would have never thought to use the little cut out pieces for embellishment! Will have to keep them next time I use this die!
I just love Frame It Out: Many Blessings Die ~ it really looks so pretty on your packaging AND those beautiful cards, Rebecca! What a sweet idea to paste The leaves from the die onto your projects ~ thought it was embossing!
What beautiful gift sets in pretty packaging, Rebecca! Now I want to make some for friends and family. TFS!
What great projects! Not sure which I like best – the cards or the packaging. 🙂 Both are great. I’ve had these stamps and dies on my wish list but I think it’s time to add them to my cart. Thanks for the inspiration!