


Hello, friends! This is Yana Smakula and I am excited to bring you my monthly video tutorial for Papertrey Ink from the “In The Studio with Yana” video series. I am sharing video tutorials on the 24th of each month, you can catch previous episodes HERE.
 In this month episode I’m sharing simple to make and quick to mass produce Modern looking Stationery-like stamped cards. All of mine say Just a Note, but the sentiment can be adjusted to anything else. These can be Miss You, Happy Birthday or other cards.
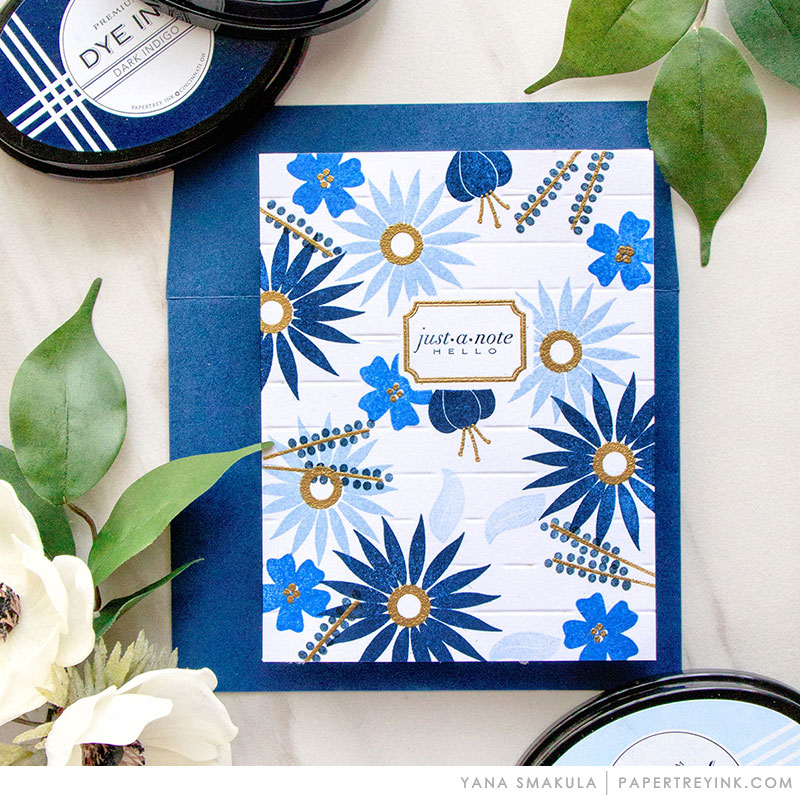
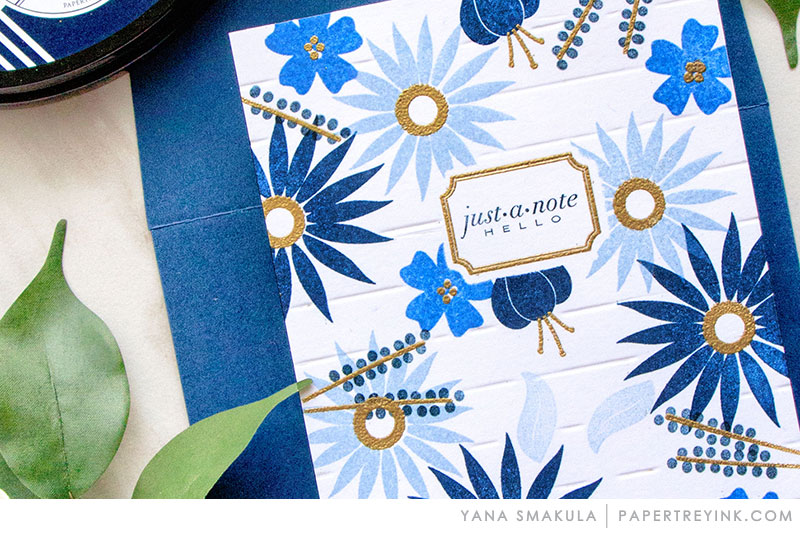
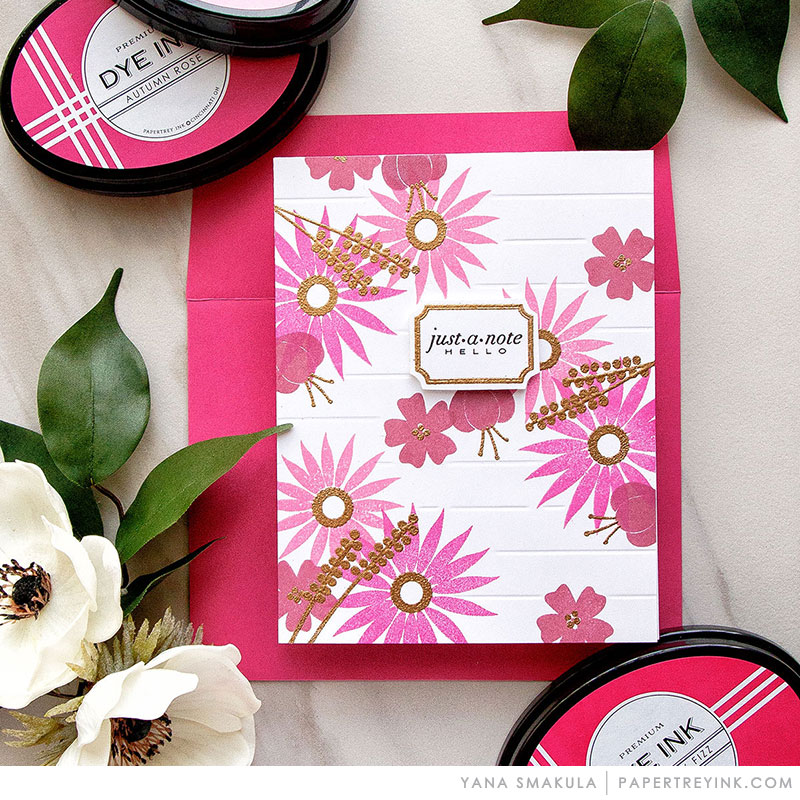
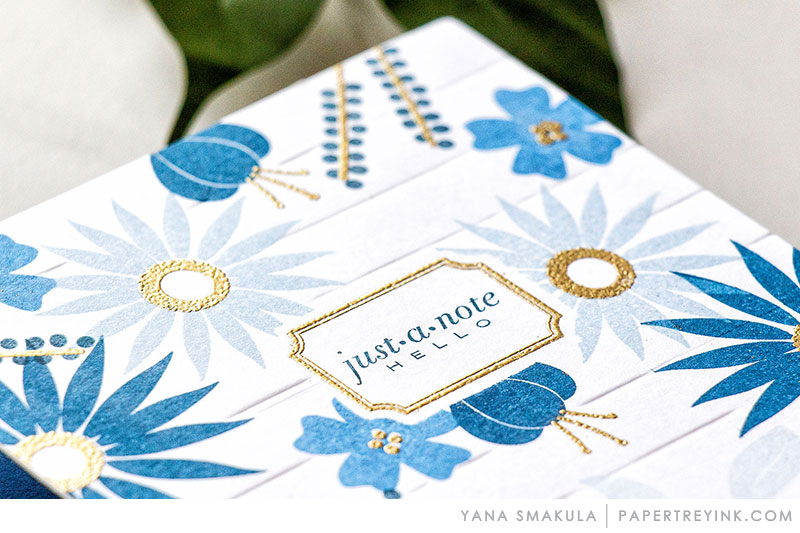
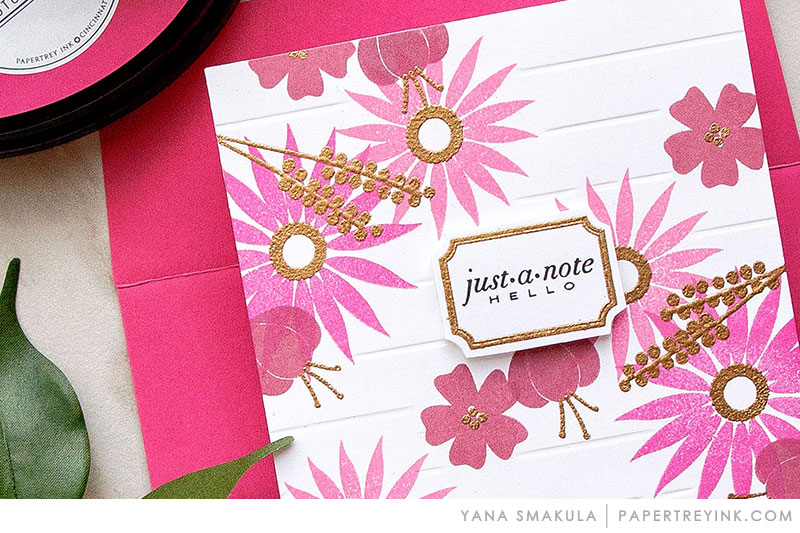
This basic design can have many variations and adaptations to it. If you look closely you’ll see that there’s faint dry embossing on my stamped panel – there are horizontal lines in between the stamped flowers. You can chose to add those or not and keep your card just stamped.
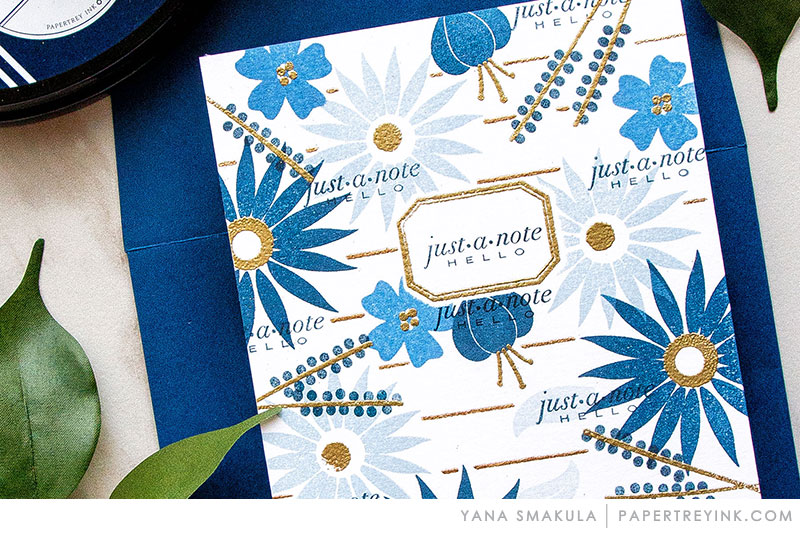
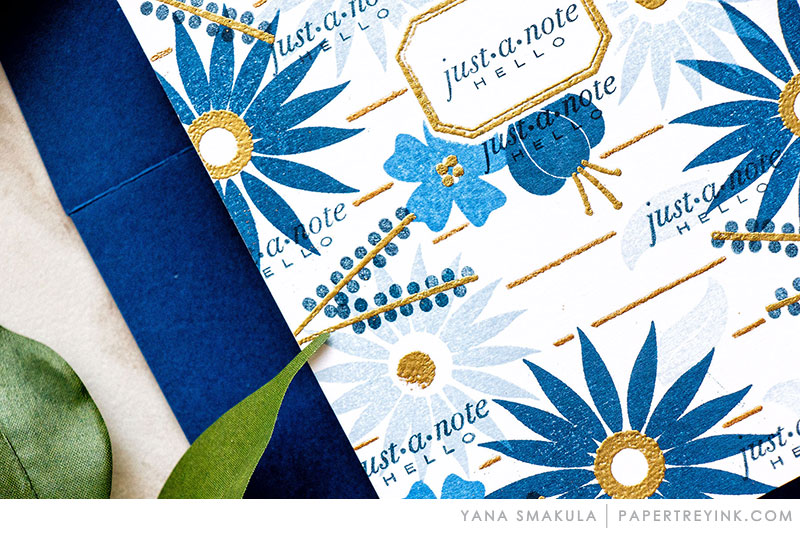
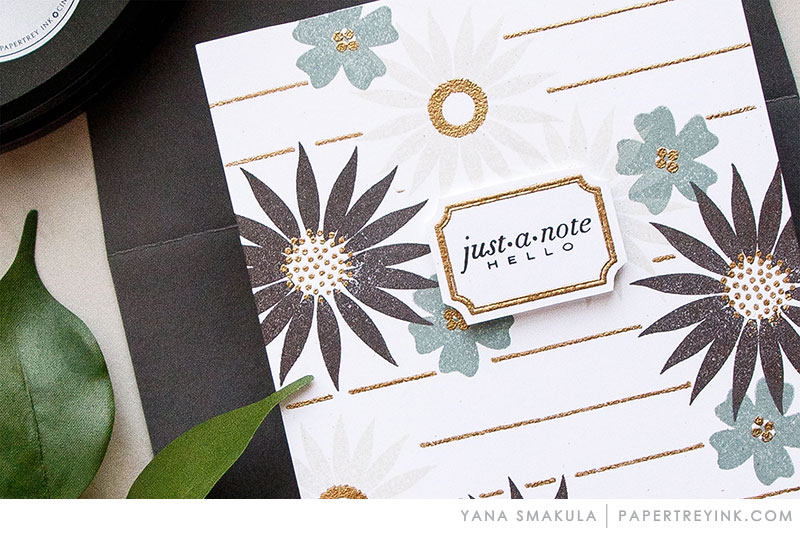
 Here’s another card where the lines aren’t stamped, but heat embossed in gold adding a lot of interest to the otherwise simple card.
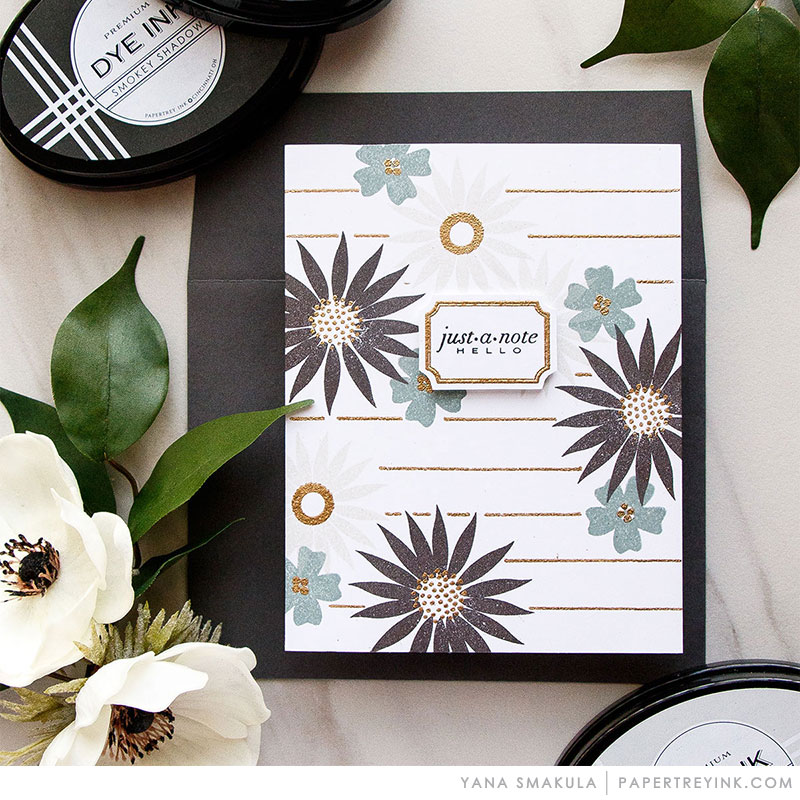 This monochromatic design can be done using various colors of ink. I’ve stamped two cards in blue, one in pink and another one in gray. I also have a set of brown ink pads and purple ink pads sitting on my desk – I’m anxious to play with them as well.
It’s helpful to have at least 3 colors of ink, better yet 4 to have great results. For my blue cards I used Spring Rain, Blueberry Sky, Dark Indigo and Enchanted Evening. For my pink and gray cards I used only 3 ink pads – Hibiscus Burst, Autumn Rose and Raspberry Fizz; Soft Stone, Stormy Sea and Smokey Shadow.
 I started working on my cards by masking the sentiment area first, since I was planning to make one layer cards I didn’t want to add another layer onto my card (the pink and gray cards weren’t masked and the sentiment panel was foam mounted on top). I used a die from the Little Labels die set and cut a label out of thin paper, I used removable adhesive and adhered it onto my white cardstock panel cut to 4 1/4 x 5 1/2″ to create a mask.
 I don’t like stamping directly onto the base of my cards when I am making one layer cards and prefer to stamp on a panel and later adhere that panel onto the card base. I picked several floral images from the Flower Power stamp set and assigned each flower a color of ink to make it easier to stamp. I stamped 3 large flowers and used just the Enchanted Evening ink color for all 3.
 You can stamp patterns like this one using many other images, not just flowers. In one of my videos I shared earlier this year I used I used Palm Prints stamp set to create a tropical pattern. Be sure to watch that video to get more pattern stamping ideas.
Flowers from the Flower Power set in a way are layering images – there is additional detail layer, one layer for each of those that you can stamp in another color of ink. Since I was going for a monochromatic look I used embossing powder instead for my details.
 If you have trouble coming up with patterns to stamp it’s helpful to look up some images online, for example a floral dress or a floral notebook and try and recreate that pattern using the stamps that you have. Of course you won’t be able to make the exact same pattern, but it is a very good exercise that will help you become more confident and skilled when stamping backgrounds like this one.
 Once my stamping was done I removed the mask and heat embossed a frame for my sentiment, also stamped the sentiment itself using darkest blue. At this point my panel already looked fantastic, but I wanted to spice it up even move.
You can use one of your embossing folders or embossing dies and dry emboss the entire panel, but I wanted to add selective dry embossing and only dry emboss the sections that don’t have any stamping.
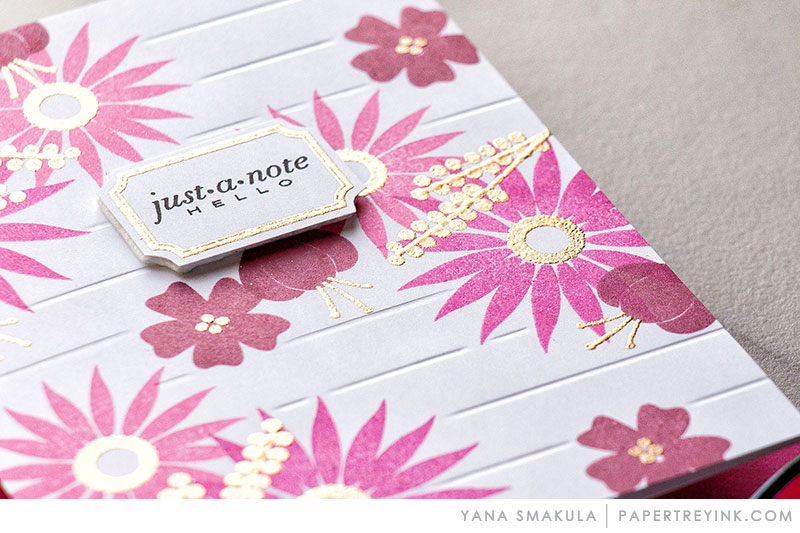 I’ve been loving this technique lately and all you need to do this is a scoring board and a bone folder. I added score lines going horizontally at half an inch intervals and I avoided the areas with the stamping and heat embossing.
I didn’t add dry embossing to every card. Instead I used an embossing pen and added heat embossing with the help of embossing powder. I used the same idea but simply drew lines with en embossing pen instead of leaving visible dry embossed indentations in my paper, added embossing powder and heat set it.
 I have to say that I love both of these looks, but adding the embossed lines vs. the dry embossed lines is much easier on the wrist. It does take a good amount of pressure to dry emboss, so you might find it tiring especially if you try to do multiple backgrounds at a time.
Have fun stamping!
Supplies:
- STAMPS: Flower Power, Little Labels,
- INK: Spring Rain, Blueberry Sky, Dark Indigo, Enchanting Evening, Hibiscus Burst, Autumn Rose, Raspberry Fizz, Soft Stone, Stormy Sea, Smokey Shadow, Versamark
- PAPER: Stamper’s Select White
- DIES: Jar Labels 2
- OTHER: Scor-tape, Hero Arts Gold & Brass embossing powders, heat tool, anti-static powder tool, scoring board, bone folder
Leave a Reply