Welcome back to another day of inspiring projects from the Papertrey Team, highlighting many of the new products from the month of April!
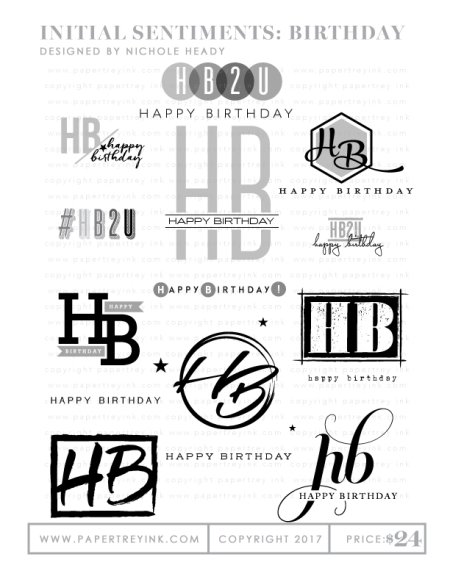
Initial Sentiments is now available in the store HERE.
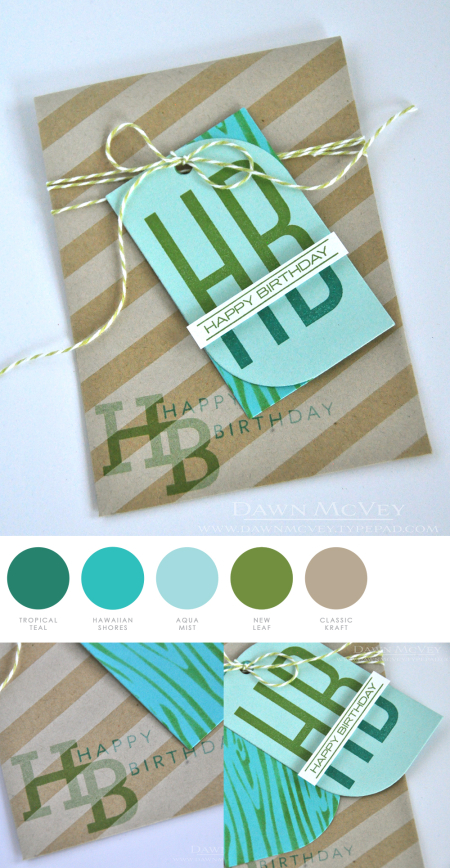
To see more from Dawn McVey, CLICK HERE.
- Die cut two tags. Sponge Ink on back layer through woodgrain stencil.
- Stamp HB on top tag.
- Stamp "Happy Birthday" sentiment on separate strip. Cut out and adhere on tag.
- Stamp additional HB & sentiment on bag front.
- Wrap twine around bag and tie tags on.
- STAMPS: Initial Sentiments: Birthday
- INK: Tropical Teal, New Leaf
- PAPER: Stamper's Select White, Aqua Mist, Hawaiian Shores
- DIES: Made With Love Tags 3
- OTHER: Woodgrain Metal Stencil, baker's twine, paper bag (Target)
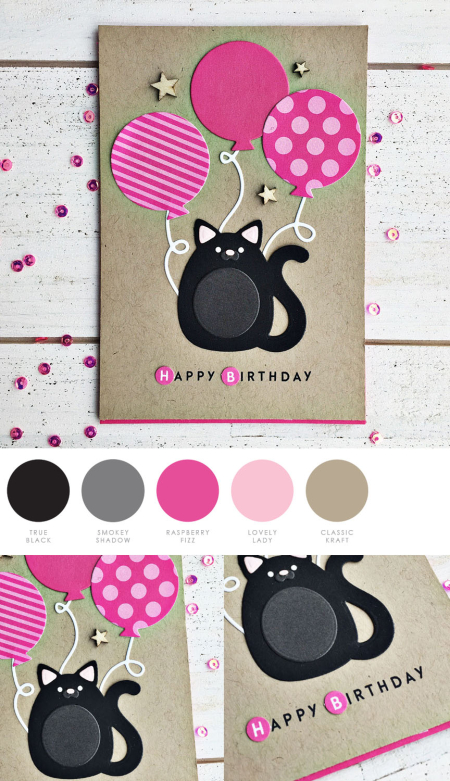
To see more from Heather Nichols, CLICK HERE.
- Die cut and assemble a cat using the Kay’s Critters: Cuddly Cat dies. Die cut three balloons from Raspberry Fizz papers and three balloon strings from white cardstock.
- Attach the cat and balloons to a piece of kraft cardstock.
- Stamp the birthday sentiment in black ink under the cat. Stamp the “h” and “b” circles onto white cardstock with Raspberry Fizz ink. Attach them to the sentiment that is stamped under the cat.
- Attach the kraft cardstock piece to a Raspberry Fizz card base. Add some wooden stars around the balloons.
- STAMPS: Initial Sentiment: Birthday
- INK: True Black, Raspberry Fizz
- CARDSTOCK: Stamper’s Select White, kraft, Raspberry Fizz, Smokey Shadow, True Black, Sweet Blush
- DIES: Kay’s Critters: Cuddly Cat, Birthday Style, Balloon Strings
- OTHER: 1/4” circle punch (EK Success), wooden stars
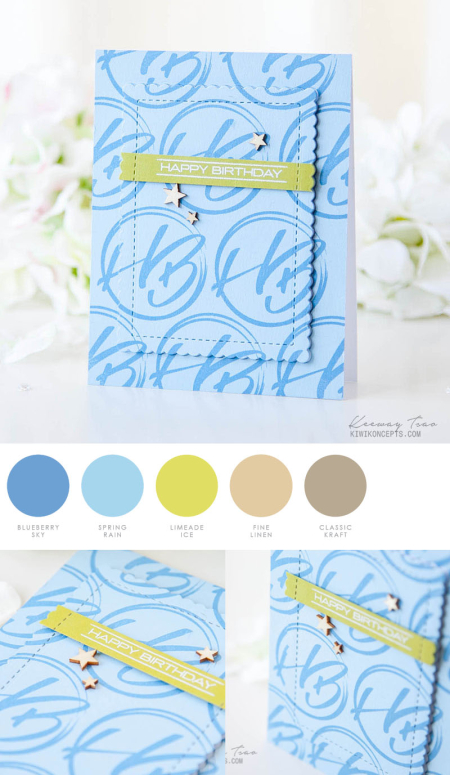
To see more from Keeway Tsao, CLICK HERE.
- On spring rain cardstock, stamp the circular HB stamp in repeated pattern with blueberry sky dye ink. Draw some pencil guidelines if you want perfection!
- Die cut scallop frame from the stamped background.
- On new leaf cardstock, heat emboss happy birthday sentiment in white. Trim to a strip, then die cut with scallop frame to get the same edges.
- Adhere the frame of the stamped background to your base card first, Then adhere the inside rectangle over fun foam to get an elevated dimension.
- Adhere sentiment strip on center rectangle with foam tape.
- Add some embellishments for a final touch. Wood veneer stars is used here.
- STAMPS: Initial Sentiments: Birthday
- DIES: Mix & Mat: Scallops
- PAPER: Spring rain, New leaf
- INK: Blueberry Sky
- OTHER: Wood veneer stars, Fun foam, Versamark ink, White filigree embossing powder
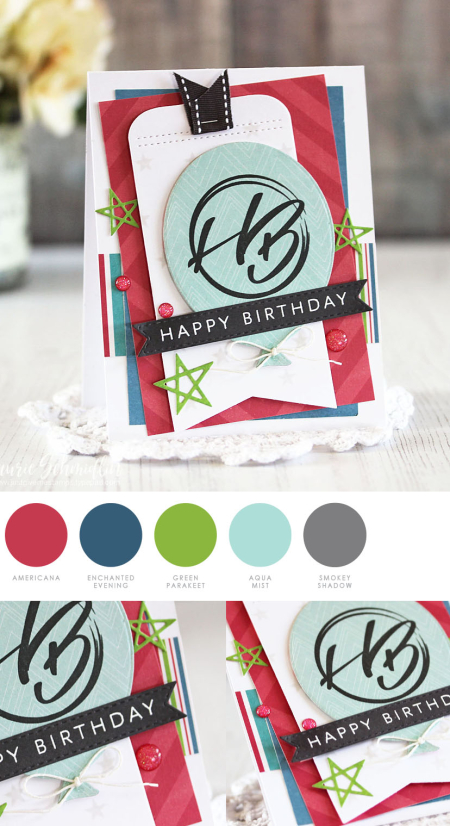
To see more from Laurie Schmidlin, CLICK HERE.
- Die cut ballon and stamp large, circular HB image
- Die cut bookmark, stamp small star all over
- Die cut sentiment banner, emboss sentiment
- Die cut stars
- Cut card base and small patterned paper layers
- Adhere all layers together using dimensional foam under bookmark
- Add string, ribbon, and epoxy dots
- STAMPS: Initial Sentiments: Birthday
- DIES: Tag Sale: Quilted, Shaker Shapes: Balloon, Small Sketched Stars, Basic Bookmark 2
- INK: Smokey Shadow, Soft Stone, Versamark
- PAPER: White, Smokey Shadow, Patterned Paper
- OTHER: White embossing powder, Smokey Shadow Saddle Stitched Ribbon, Epoxy dots, Mini stapler
To see more from Melissa Phillips, CLICK HERE.
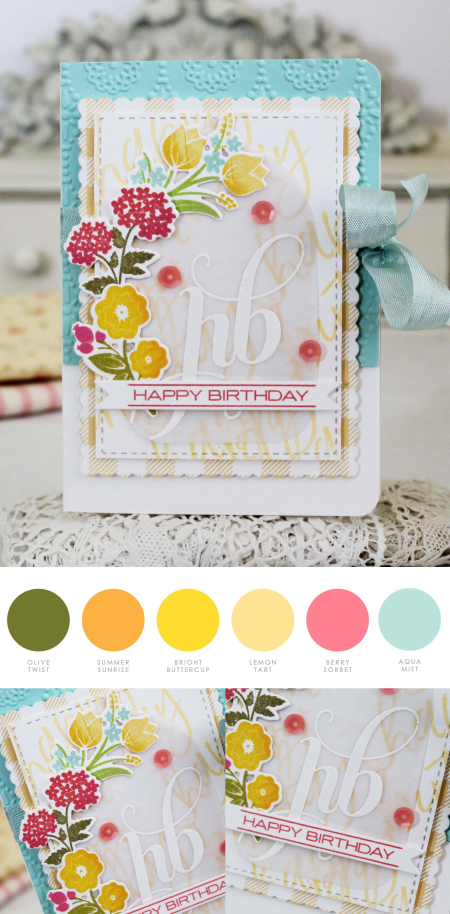
- Create an A2 card base from Fresh Snow Linen cardstock. Cut a block of Aqua Mist cardstock to fit top portion of card and adhere. Round right corners.
- Using the Mix & Mat: Scallops dies, die cut Chicken Scratch Gingham paper and Fresh Snow Linen cardstock.
- Attach a strip of ribbon across card and tie in a bow on right.
- Adhere Chicken Scratch Gingham die cut to center of card.
- Stamp Pen & Ink sentiment, on a diagonal, across Fresh Snow Linen center block. Adhere to center of bottom layer.
- Die cut tag from vellum. Stamp sentiment in watermark in on tag and heat emboss using white embossing powder. Adhere to center of card.
- Stamp sentiment on die cut banner and adhere to card.
- Die cut Bitty Bouquets, stamp, and adhere to left side of tag.
- Embellish with sequins to finish.
- STAMPS: Pen & Ink, Initial Sentiments: Birthday, and Bitty Bouquets
- INK: Aqua Mist, Lemon Tart, Green Parakeet, Berry Sorbet, Hibiscus Burst, Bright Buttercup, Simply Chartreuse, Spring Moss, Summer Sunrise
- TOOLS: Mix & Mat: Scallops, Tag Sale #2, Bitty Bouquets
- PAPER: Aqua Mist, Fresh Snow Linen, and Chicken Scratch Gingham
To see more from Stephanie Gold, CLICK HERE.
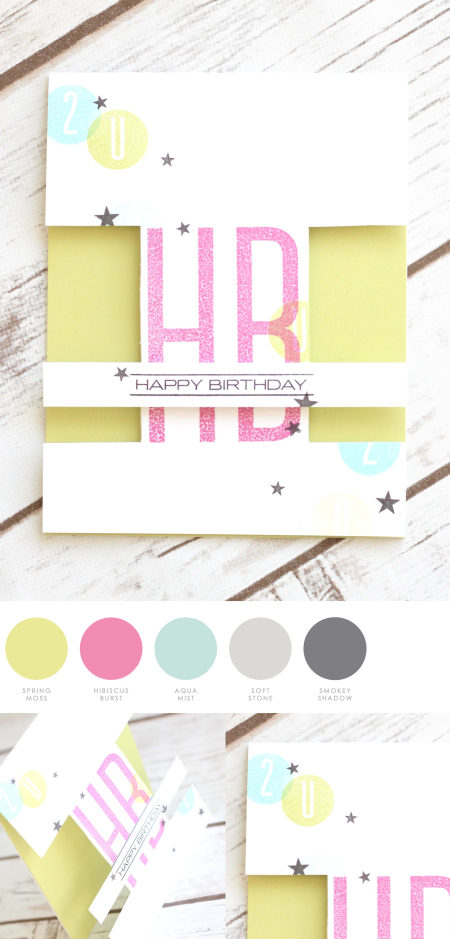
- Stamp the large “HB” in Raspberry Fizz ink onto a white card base.
- Using sharp scissors, cut out the sides of your card base on each side of the “HB” stamp.
- On a separate strip of white cardstock, stamp the “happy birthday” sentiment in black ink.
- Using Limeade Ice, stamp the “2” circle stamp multiple times from the top left of the card, down to the bottom right. Repeat with the “U” stamp in Hawaiian Shores ink.
- Stamp stars in multiple sizes in Smokey Shadow ink throughout your card.
- Adhere your “happy birthday” strip to the middle of the “HB” using dimensional adhesive.
- Adhere a full panel of Limeade Ice cardstock to the inside of the card.
- STAMPS: Initial Sentiments: Birthday
- INK: Black, Smokey Shadow, Raspberry Fizz, Limeade Ice, Hawaiian Shores
- PAPER: Stampers Select White, Limeade Ice
To see more from Wanda Guess, CLICK HERE.
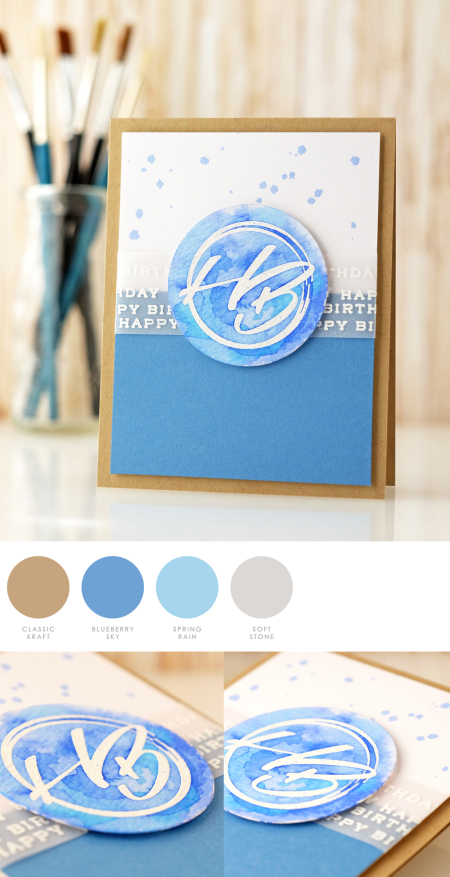
- Heat emboss small happy birthday sentiment repeatedly on vellum to create border.
- Stamp HB on watercolor paper and heat emboss. Watercolor using Distress inks.
- Splatter ink onto background.
- STAMPS: Initial Sentiments: Birthday
- PAPER: Stamper's Select White, Blueberry Sky, Classic Kraft, watercolor paper, vellum cardstock
- INK: VersaMark, Distress (Blueprint Sketch, Peacock Feather)
- OTHER: White Embossing Powder
CLICK HERE to see the original Release Countdown past for Initial Sentiments: Birthday.
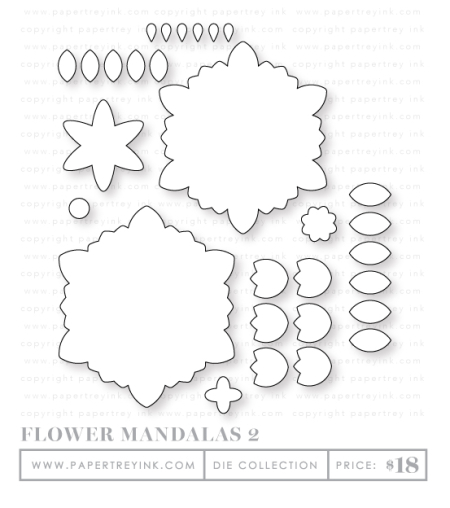
Flower Mandalas 2 die collection is now available in the store HERE.
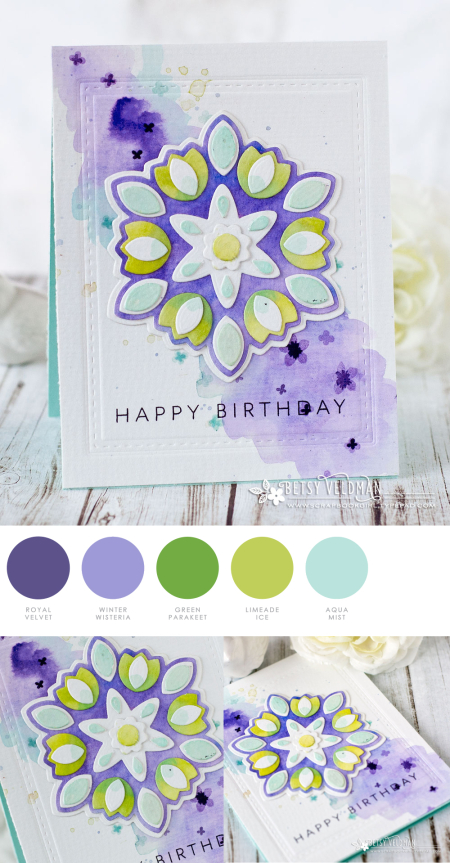
To see more from Betsy Veldman, CLICK HERE.
- Diecut all of the Flower Mandala pieces from watercolor paper. Use reinkers and a damp brush to add color to the pieces. Assemble.
- Use reinkers to do a bit of watercoloring on a panel of watercolor paper. Allow to dry.
- Stamp a few of the small flowers from the Bloom & Grow stamp set.
- Emboss the stitched rectangle using the largest die from the Noted: Scalloped A2 die collection and the embossing mats.
- Adhere mandala and stamp sentiment. Adhere finished panel to an Aqua Mist card base.
- STAMPS: Initial Sentiments: Birthday, Bloom & Grow
- DIES: Flower Mandalas II, Noted: Scalloped A2
- INK: Amethyst Allure, Royal Velvet, Aqua Mist, Limeade Ice, True Black
- PAPER: Aqua Mist
- OTHER: Watercolor paper, embossing mats
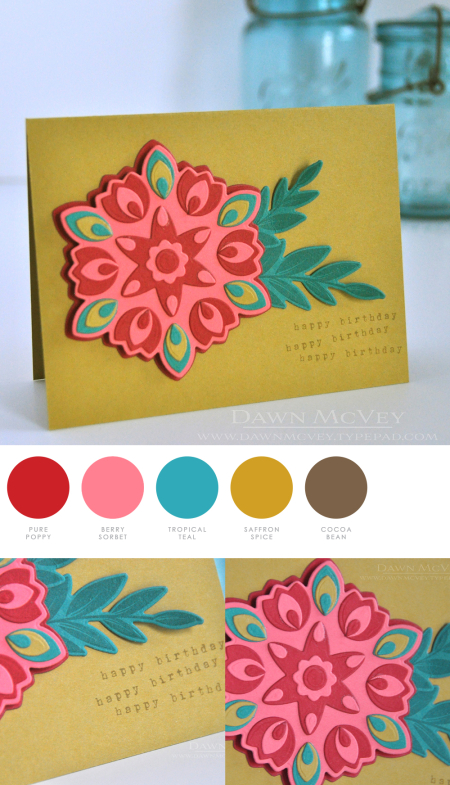
To see more from Dawn McVey, CLICK HERE.
- Die cut mandala pieces and adhere together with liquid glue.
- Die cut leaves and stamp with coordinating images.
- Adhere mandala and leaves to card front.
- Stamp sentiment three times on card front.
- STAMPS: Gran's Garden, Initial Sentiments: Birthday
- INK: Saffron Spice, Tropical Teal
- PAPER: Saffron Spice, Tropical Teal, Berry Sorbet, Pure Poppy
- DIES: Flower Mandalas 2
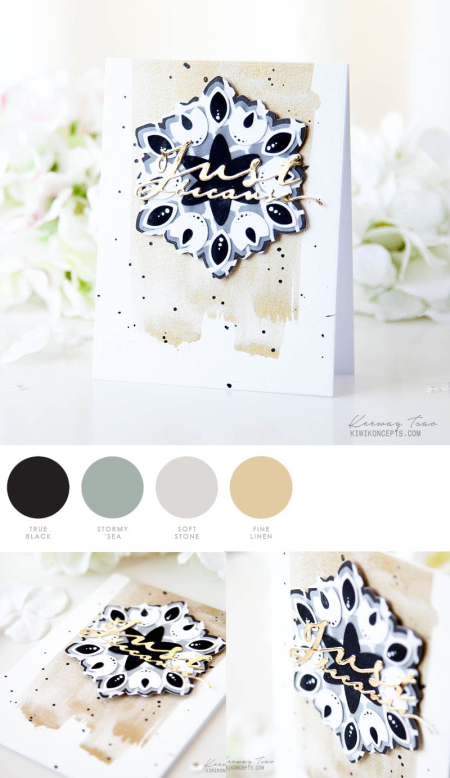
To see more from Keeway Tsao, CLICK HERE.
- Die cut largest mandalas out of pattern paper; Die cut the smaller mandalas out of vellum
- Die cut remaining patterns for the mandalas out of white and black cardstock
- Glue together the mandalas pieces and use white gel pen to add some details
- On watercolor paper, paint vertical strips of gold watercolor paint. Once dry, add black watercolor splatter.
- Die cut sentiment out of luxe gold metallic paper.
- Assemble card together with mandalas adhered with foam tape and sentiment adhered directly to your mandalas.
- DIES: Flower Mandalas II, Scripted
- PAPER: Stamper’s Select White, True black, Linen vellum, Luxe gold, Lovely lace paper collection
- OTHER: Watercolor paper, Gold and black watercolor
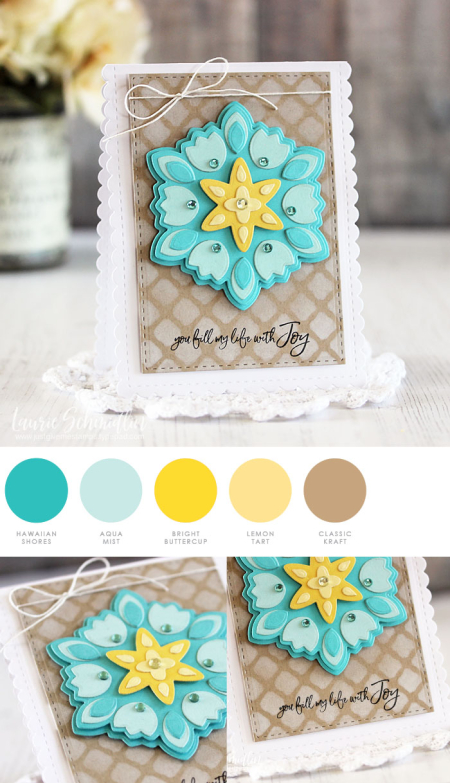
To see more from Laurie Schmidlin, CLICK HERE.
- Die cut flower elements and adhere together
- Die cut kraft background and stencil pattern using white ink
- Stamp sentiment
- Die cut card base
- Tie string around kraft base
- Adhere all layers together using dimensional foam. Add rhinestones.
- STAMPS: Pen & Ink
- DIES: Flower Mandalas II, Noted: A2 Scalloped Vertical
- INK: White, True Black
- PAPER: White, Kraft, Aqua Mist, Hawaiian Shores, Lemon Tart, Bright Buttercup
- OTHER: Stencil (MIM: Lovely Lace), String, Rhinestones
To see more from Lizzie Jones, CLICK HERE.
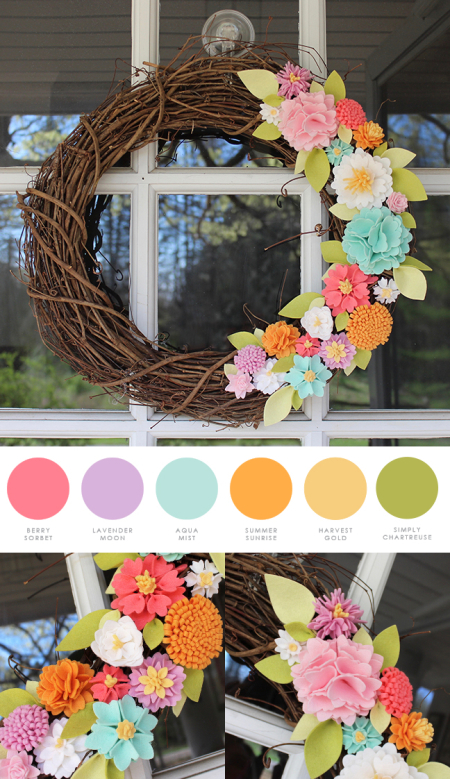
- Die cut an assortment of flowers from a variety of felt colors.
- Use hot glue to assemble the flowers. Die cut a variety of leaves. Use hot glue to pinch the bottom edges to create a pucker and give the leaves dimension.
- Arrange the flowers to a grapevine wreath and adhere with hot glue. Tuck the leaves between the flowers and also adhere with hot glue.
- High five yourself.
- FELT: Vintage Cream, Harvest Gold, Sweet Blush, Berry Sorbet, Aqua Mist, Summer Sunrise, Lavender Moon, Simply Chartreuse, Spring Moss – Papertrey Ink
- DIES: Flower Mandalas II Dies, Flower Mandalas I Dies, Easter Grass Die, Leaf Silhouettes Die, Happiness In Bloom Leaves Die – Papertrey Ink
- OTHER: Hot Glue; 18” Grapevine Wreath
To see more from Melissa Phillips, CLICK HERE.
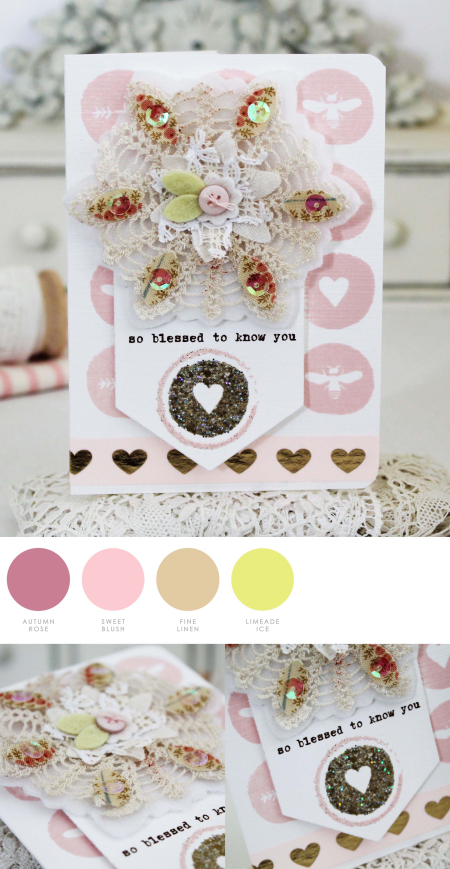
instructions
- STAMPS: Circled Symbols
- INK: Dark Chocolate and Sweet Blush
- DIES: Made with Love Tags Die 2 and Flower Mandalas II Die
- PAPER: Fresh Snow Linen
- FELT: Spring Moss and Vintage Cream felt
- OTHER: fabric, trim, gold and pink embossing powder, watermark ink, washi tape, sequins, button
To see more from Michelle Leone, CLICK HERE.
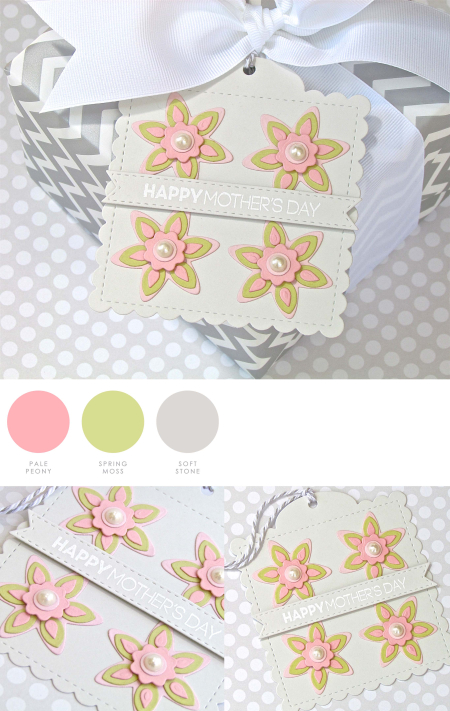
- Die cut Tag Sale: Quilted tag from Soft Stone.
- Die cut various flower pieces from Sweet Blush, Pale Peony and Spring Moss cs – layer and adhere.
- Die cut stitched banner from Tag Sale: Quilted. Stamp sentiment and emboss,
- Adhere flowers in each corner, add pearl accents.
- Adhere stitched banner with dimensional tape.
- Attached gray/white twine and attach to Mother’s Day gift (yay…done early!!)
- STAMPS: Keep It Simple: Mother
- PAPER: Soft Stone, Spring Moss, Sweet Blush, Pale Peony
- INK: Versamark embossing ink/white embossing powder
- DIES: Tag Sale: Quilted
- OTHER.: pearls, gray/white twine
CLICK HERE to see the original Release Countdown post for Flower Mandalas 2 die collection.
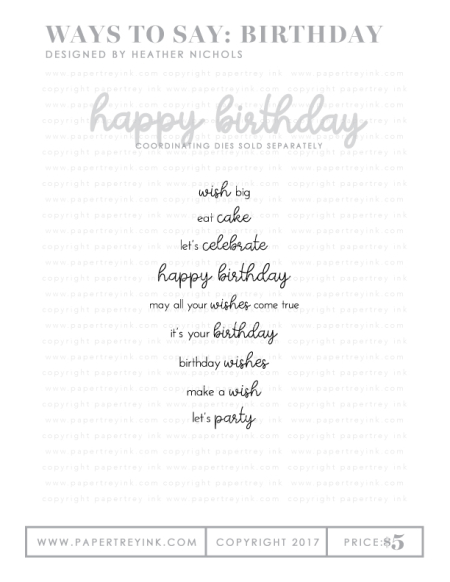
Ways to Say: Birthday is now available in the store HERE, and the coordinating dies HERE.
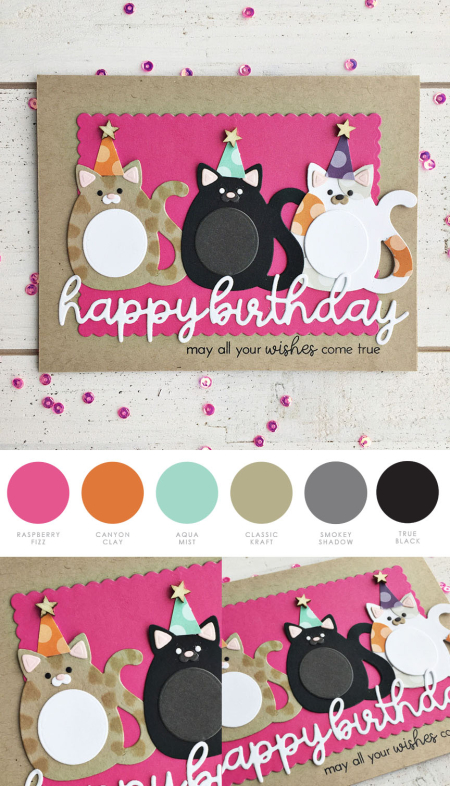
To see more from Heather Nichols, CLICK HERE.
- Die cut and assemble three cats using the Kay’s Critter’s: Cuddly Cat dies.
- On a kraft card base, add a scalloped mat in Raspberry Fizz that was die cut with the Mix & Mat: Scallops die. Arrange the three cats in a row across the card front.
- Add the “happy birthday” that is die cut from white cardstock using the Ways to Say: Birthday die underneath the row of cats. Stamp the “may all your wishes come true” sentiment in black ink under the die cut “happy birthday”.
- Cut triangles from patterned papers to create party hats for all of the cats. Attach a hat onto each hat and add a wooden star to the top of each hat.
- STAMPS: Ways to Say: Birthday
- INK: True Black
- CARDSTOCK: Stamper’s Select White, kraft, Raspberry Fizz, Smokey Shadow, True Black, Sweet Blush
- DIES: Kay’s Critters: Cuddly Cat, Ways to Say: Birthday, Mix & Mat: Scallops
- OTHER: wooden stars, Copic marker, 1/2” circle punch (EK Success)
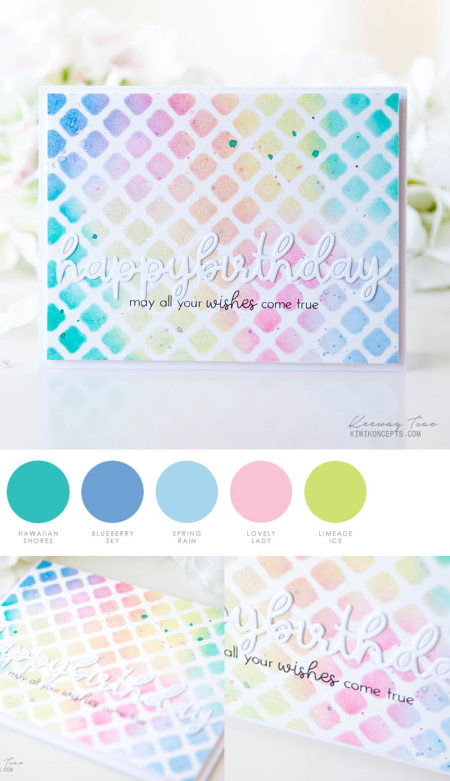
To see more from Keeway Tsao, CLICK HERE.
- On white cardstock, blend stenciled image with various dye ink colors
- Add some ink splatter with the same dye inks colors used
- Die cut sentiment in white. Leave the inner pieces in the die cut.
- Stamp second sentiment in black onto blended piece. Then adhere the die cut sentiment right above it.
- Size down your blended piece just by 0.25” top and bottom. Adhere to A2 white base card.
- STAMPS: Ways to Say: Birthday Mini
- DIES: Ways to Say: Birthday Die
- PAPER: Stamper’s Select White
- INK: Lemon tart, Tropical teal, Blueberry sky, Hibiscus burst
- OTHER: Lovely Lace Kit, mini blending tool
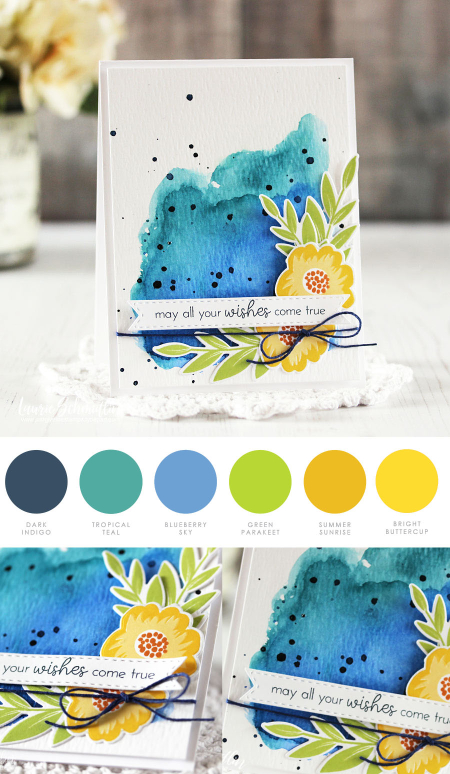
To see more from Laurie Schmidlin, CLICK HERE.
- Apply watercolor wash to background and let dry
- Splatter background with navy watercolor paint and let dry
- Stamp and die cut flowers
- Die cut banner and stamp sentiment
- Adhere flowers to card
- Adhere banner to card using dimensional foam
- Tie string
- Adhere watercolor background panel to A2 card base using dimensional foam
- STAMPS: Ways to Say: Birthday, Gran’s Garden
- DIES: Gran’s Garden, Tag Sale: Quilted
- INK: Dark Indigo, Bright Buttercup, Harvest Gold, Canyon Clay, Green Parakeet
- PAPER: White, Watercolor paper
- OTHER: Watercolor paint, String
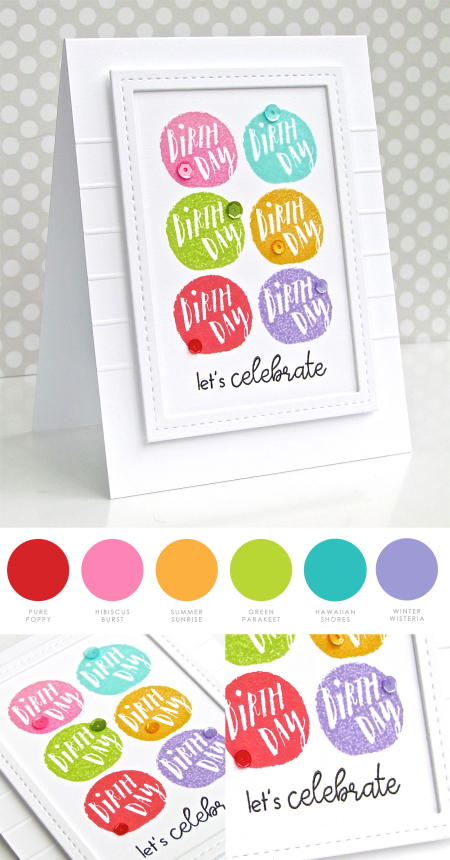
To see more from Michelle Leone, CLICK HERE.
- Create Stampers Select White A2 card base and score horizontal lines
- Die cut rectangular panel and stamp in multiple colors
- Add sentiment in black and heat emboss
- Adhere white fun foam to center panel and adhere
- Attach coordinating sequins with Matte Medium
- STAMPS: Way to Say: Birthday, Circled Symbols
- PAPER: Stampers Select White
- INK: Hibiscus Burst, Aqua Mist, Green Parakeet, Summer Sunrise, Berry Sorbet, Amethyst Allure, Versafine Black
- DIES: MIM: Shakers and Sprinkles-Rectangle die
- OTHER: Clear embossing powder, sequins
To see more from Stephanie Gold, CLICK HERE.
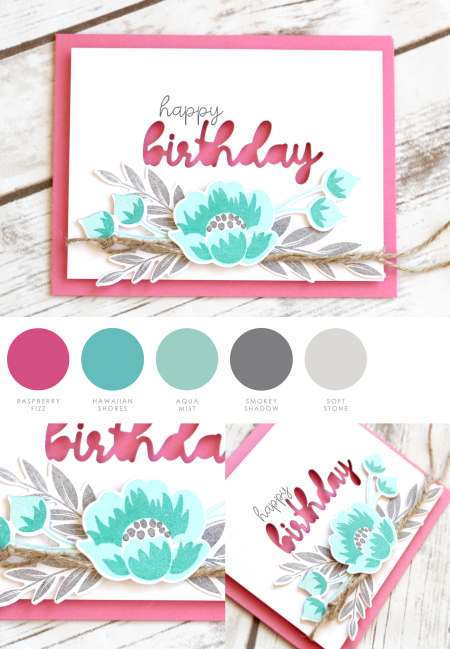
- Stamp step 1 of flowers from Gran’s Garden onto white cardstock using Hawaiian Shores Ink. Stamp step 2 of flowers on top using Tropical Teal Ink.
- Generation stamp leaves of flowers using Smokey Shadow Ink.
- Die cut all flowers and leaves with their corresponding dies.
- Cut a panel of white cardstock to 3.75 inches by 5 inches.
- Die cut the “birthday” sentiment in the center of the white panel.
- Stamp the “happy” from the “happy birthday” (using the masking technique) above the birthday die cut window.
- Adhere flowers and leaves below “birthday” on the white panel using dimensional adhesive.
- Tie a knot of natural twine around the white panel and flowers. Gently wrap ends around each other in a twisting design.
- Adhere white panel to front of Hibiscus Burst card base using dimensional adhesive.
- STAMPS: Ways to Say: Birthday, Gran’s Garden
- INK: Smokey Shadow, Hawaiian Shores, Tropical Teal
- PAPER: Stampers Select White, Hibiscus Burst
- DIES: Happy Birthday, Gran’s Garden
- OTHER: Natural Twine
CLICK HERE to see the original Release Countdown post for Ways to Say: Birthday.
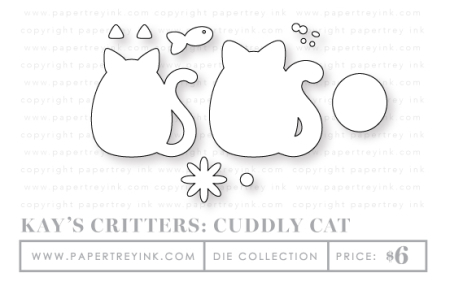
Kay's Critters: Cuddly Cat die collection is now available in the store HERE.
To see more from Heather Nichols, CLICK HERE.
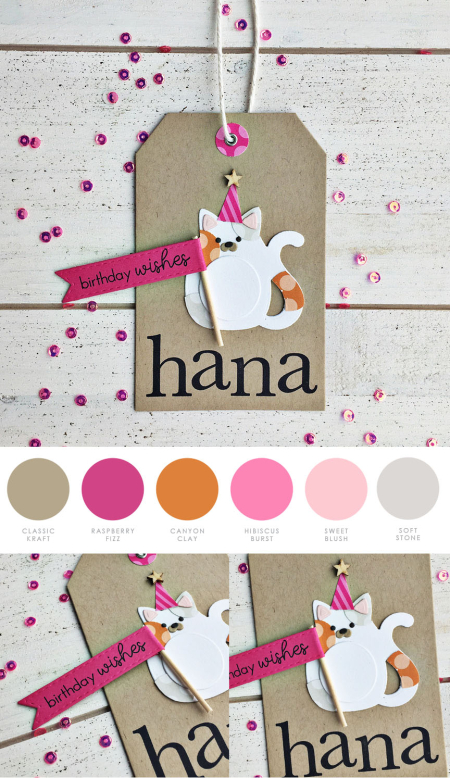
- Die-cut tag from kraft, stamp with name.
- Die-cut cat pieces from various cardstock and assemble.
- stamp birthday sentiment onto banner and attach to small toothpick.
- Assemble tag.
- STAMPS: Ways to Say: Birthday, Botanical Lowercase
- INK: True Black
- CARDSTOCK: Stamper’s Select White, kraft, Raspberry Fizz, Smokey Shadow, True Black, Sweet Blush
- DIES: Kay’s Critters: Cuddly Cat, Ways to Say: Birthday
- OTHER: wooden stars, Copic marker, 1/2” circle punch (EK Success)
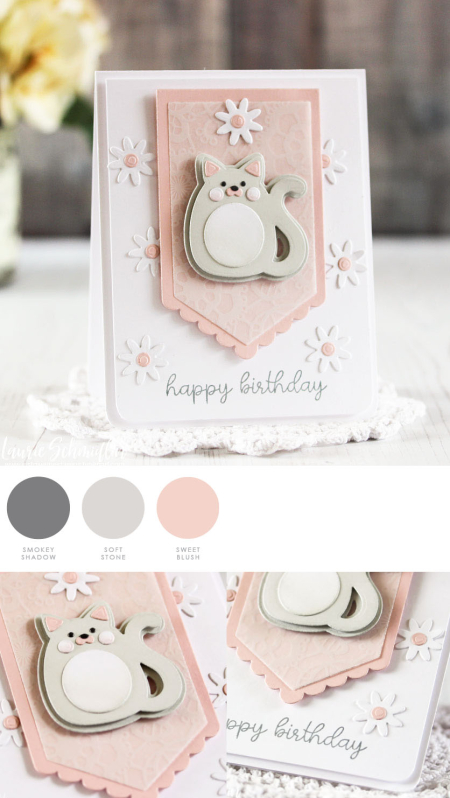
To see more from Laurie Schmidlin, CLICK HERE.
- Die cut cat and flowers
- Lightly sponge cat cheeks and stomach layers
- Assemble flowers and adhere to white cardstock layer
- Die cut tags and mount to background layer with dimensional foam
- Assemble cat and adhere to tag using dimensional foam
- Stamp sentiment
- Adhere background layer to A2 card using dimensional foam
- STAMPS: Ways to Say: Birthday
- DIES: Kay’s Critters: Cuddly Cat, Made With Love Tags 2
- INK: Smokey Shadow, Soft Stone, Sweet Blush
- PAPER: White, Sweet Blush, Soft Stone, Smokey Shadow, Patterned Vellum (MIM: Lovely Lace Mini Kit)
- OTHER: Corner rounder punch
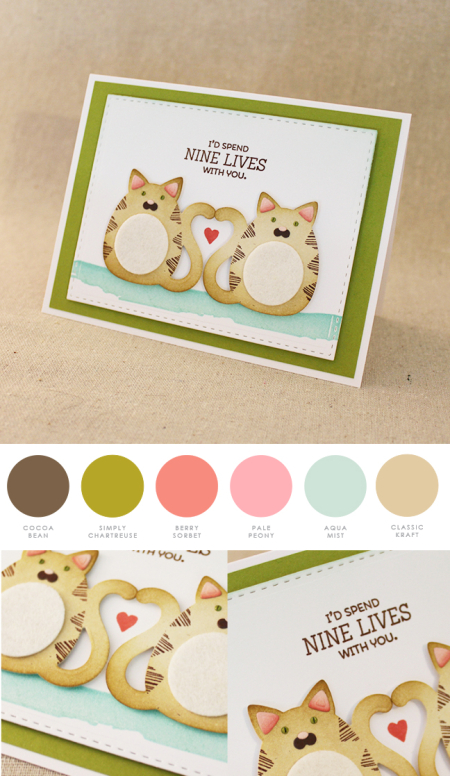
To see more from Lizzie Jones, CLICK HERE.
- Sponge Rustic Cream Cardstock with Classic Kraft and Cocoa Bean inks.
- Die cut cats (the backwards cat should be cut on a new plate to minimize cutting marks).
- Stamp cats with triangles from Sketched Shapes in Dark Chocolate ink. Add die cut features and felt bellies. Use a fine tip pen to create slits on the eyes and then cover them with glossy accents.
- Die cut Noted panel from white cardstock. Sponge a bit of Aqua Mist across the top and then stamp the watercolor swoosh along the bottom. Add depth with a bit of sponged Hawaiian Shores ink on the swoosh.
- Stamp heart from Circled Symbols and greeting from Everyday Cat Sentiments.
- Adhere Simply Chartreuse panel to a white card base. Attach Noted panel with foam tape before adding cats with more foam tape.
- STAMPS: Sketched Shapes, Watercolor Wonder, Circled Symbols, Everyday Cat Sentiments – Papertrey Ink
- PAPER: Rustic Cream, Simply Chartreuse, Pale Peony, Dark Chocolate – Papertrey Ink
- INK: Classic Kraft, Cocoa Bean, Dark Chocolate, Berry Sorbet, Aqua Mist, Hawaiian Shores – Papertrey Ink
- OTHER: Kay’s Critters: Cuddly Cat Dies, Vintage Cream Felt, Noted: Scalloped A2 Die Collection – Papertrey Ink; Foam Tape – Scotch; Xyron; Micron Pen
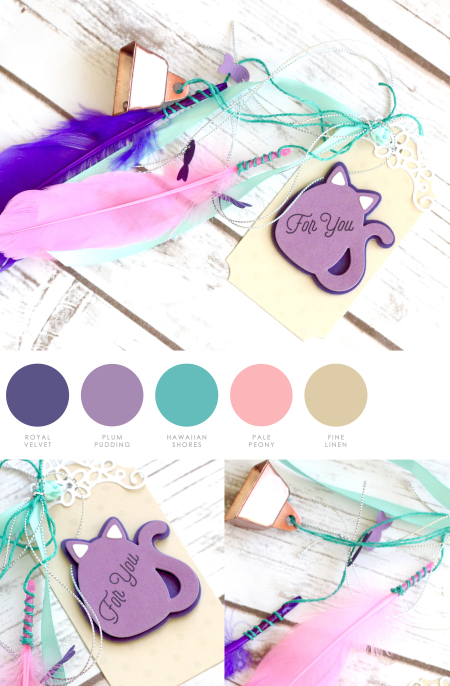
To see more from Stephanie Gold, CLICK HERE.
- Die cut tag from Fine Linen Cardstock. Stamp top and bottom with polka dot stamp from Made With Love set.
- Die cut corner lace piece from Lovely Lace Mini Kit from white cardstock. Adhere to top of tag.
- Die cut large cat outline from Royal Velvet Cardstock, smaller cat outline from Plum Pudding, kitty ears from white cardstock. Stamp “for you” from Made With Love onto Plum Pudding cat.
- Adhere cat outlines together using dimensional adhesive. Adhere ears to cat using liquid glue. Adhere entire cat to tag using dimensional adhesive.
- Die cut a few fish from Plum Pudding and Royal Velvet cardstock. Hang fish from twine through their eyeholes.
- Combine multiple different lengths and textures of ribbons to one piece of twine. Adhere items such as feathers and bells to ribbons. Attach the one piece of twine holding them together to the tag. This will make it easy to remove the cat toy once it’s given.
- STAMPS: Made With Love
- INK: Soft Stone, Black
- PAPER: Fine Linen, White, Royal Velvet, Plum Pudding
- DIES: Kay’s Critters Cuddly Cat, Lovely Lace Mini Kit, Made With Love Tag Set #1
- OTHER: Twine, Ribbon, Feathers, Bell
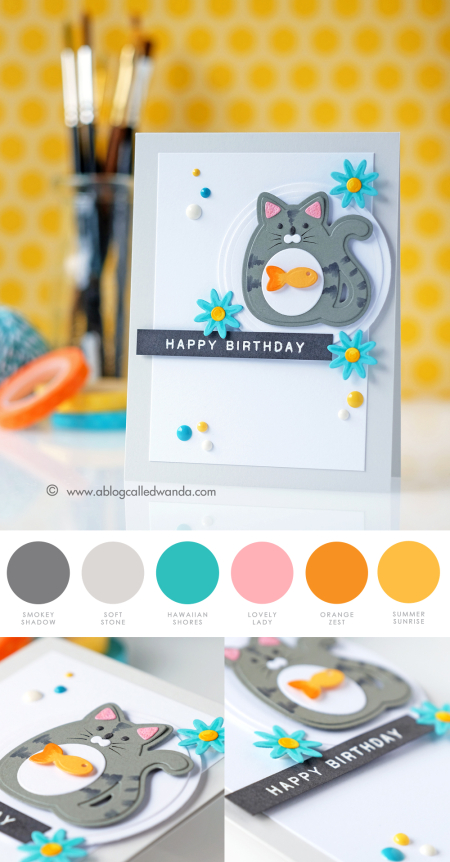
To see more from Wanda Guess, CLICK HERE.
- Die cut cat pieces and assemble. Add details to cat using Copic markers.
- die-cut flowers and centers, adhere together and create background.
- Heat emboss sentiment onto strip, adhere with foam tape.
- Assemble card, highlight certain areas with enamel dots.
- STAMPS: Initial Sentiments: Birthday
- DIES: Kay's Critters: Cuddly Cat dies, Nesting Circle dies
- PAPER: Stamper's Select White, Soft Stone, Hawaiian Shores, Bright Buttercup, Smokey Shadow
- INK: VersaMark
- OTHER: White Embossing Powder, Copic Markers, Enamel Dots
CLICK HERE to see the original Release Countdown post for Kay's Critters: Cuddly Cat dies.
Now that is what you call an inspiration PACKED post! Are any of these new goodies already on their way to your door? Which one are you most excited to use first? Is there a particular project from today that is really jumping out at you? A color scheme you can hardly wait to try? We have another full day of projects to share tomorrow morning, so be sure to stop by and visit!































Great stamps, I love the grans garden set, will look into it. The critters are cute
Gran’s Garden will definitely be in my next order; love the many ways it’s been showcased these last few days. Initial Birthdays should be here soon, and the inspiration for that set has been great, too!
OH MY GOODNESS! LOOOOVE IT ALL! It is hard to just pick one or two! EVERYONE did an AMAZING JOB on this post! I ADORE Melissa’s work… ALWAYS HAVE! Hi Melissa! 😉 AND, there are several things she used on her card that ARE on the way to my door! 😀 HAPPY ME! The Mix & Mat Dies & the Pen & Ink Sentiments! I also gained new appreciation for the Medallion Set with Lizzie Jones’ project! WOW! LOOOOVE the colors too! ;)JUST BEAUTIFUL!!!
SUUUUUUUUUUUUUUUPER cute and amazing cards and Projects..LOVE it ALL!
I can hardly wait to get Kay’s mandala and kitty sets in my mail – hopefully this weekend! Thank you for the extra inspiration!
Love the Hapapy Birthday die and add one. Grandmas garden is beautiful. Thanks for sharing the beautiful projects. Lizzie your wreath is gorgeous.
Today is the best inspiration day yet! I’m a dog person who’s excited to play with Kay’s cat dies! I can’t wait to get my new goodies.
Great inspiration!
What a great release day, I love all the new items! I also love the wreath that Lizzie Jones made, she should do a video on how to make the flowers, super cute idea!
Inspiration packed for sure!! The PTI design team is just amazing! Lately, I’m having fun with watercolor backgrounds, so Laurie’s ‘wishes’ card caught my eye right away. ♡
I was hoping for more Cuddly Cat cards and today’s cards are just super cute. You ladies are so clever and always use things in ways I would never think of. so much inspiration.
I’m loving all the ideas. I’m always so impressed with what the design team ‘designs’!!!
forgot to mention I love that you include the color combos with each project. it really sinks in when you see the colors lined up next to each other – so pretty. I think Wanda’s combo for her kitties is the one speaking to me the most today.