


Hello, crafters!! Brenda here with another project inspiration project to share with you today!!
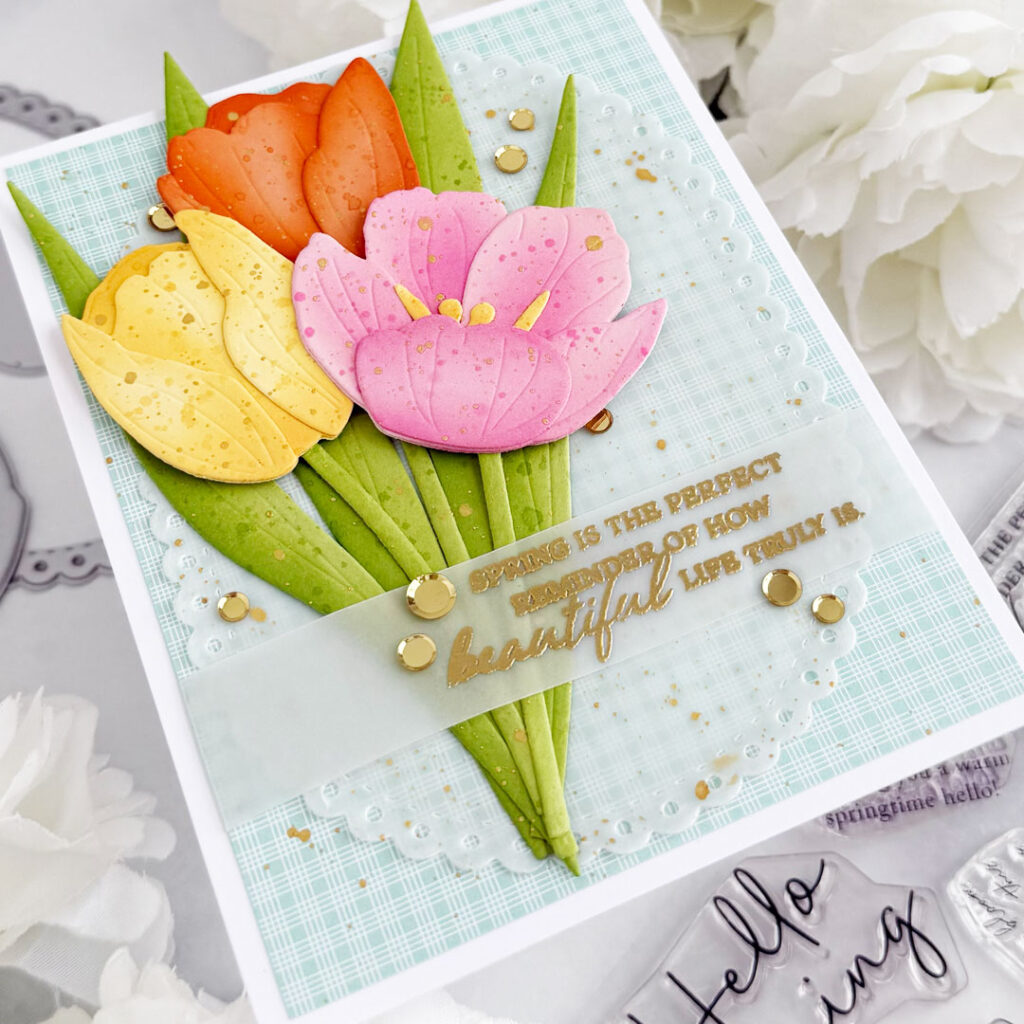
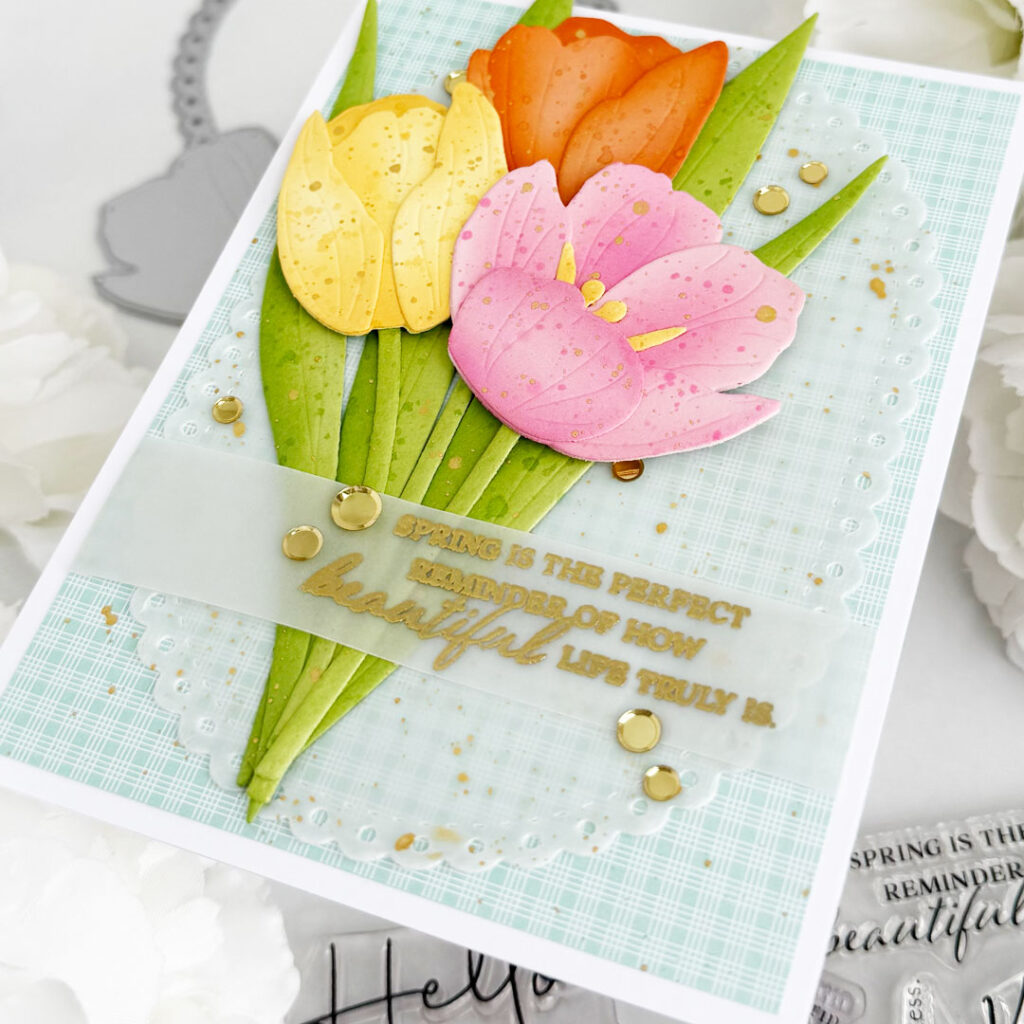
Tulips are the epitome of spring for me!! I can’t wait to see the foliage popping up out of the ground and knowing that the buds are soon to follow!! While I wait patiently for spring, I can create it anytime in my craft room!!
Supplies:
Stamps: Thoughts of Spring Sentiments
Dies: Into the Blooms: Tulips, Love to Layer: Scalloped Ovals
Ink: Pale Peony, Hibiscus Burst, Harvest Gold , Summer Sunrise, Canyon Clay, Melon Berry, New Leaf, Green Parakeet
Cardstock: Pale Peony, Lemon Tart, Melon Berry, Green Parakeet, Bitty Big: Aqua Mist
Other supplies: vellum, gold watercolor paint, Versamark ink, polished gold embossing powder, metallic gold confetti
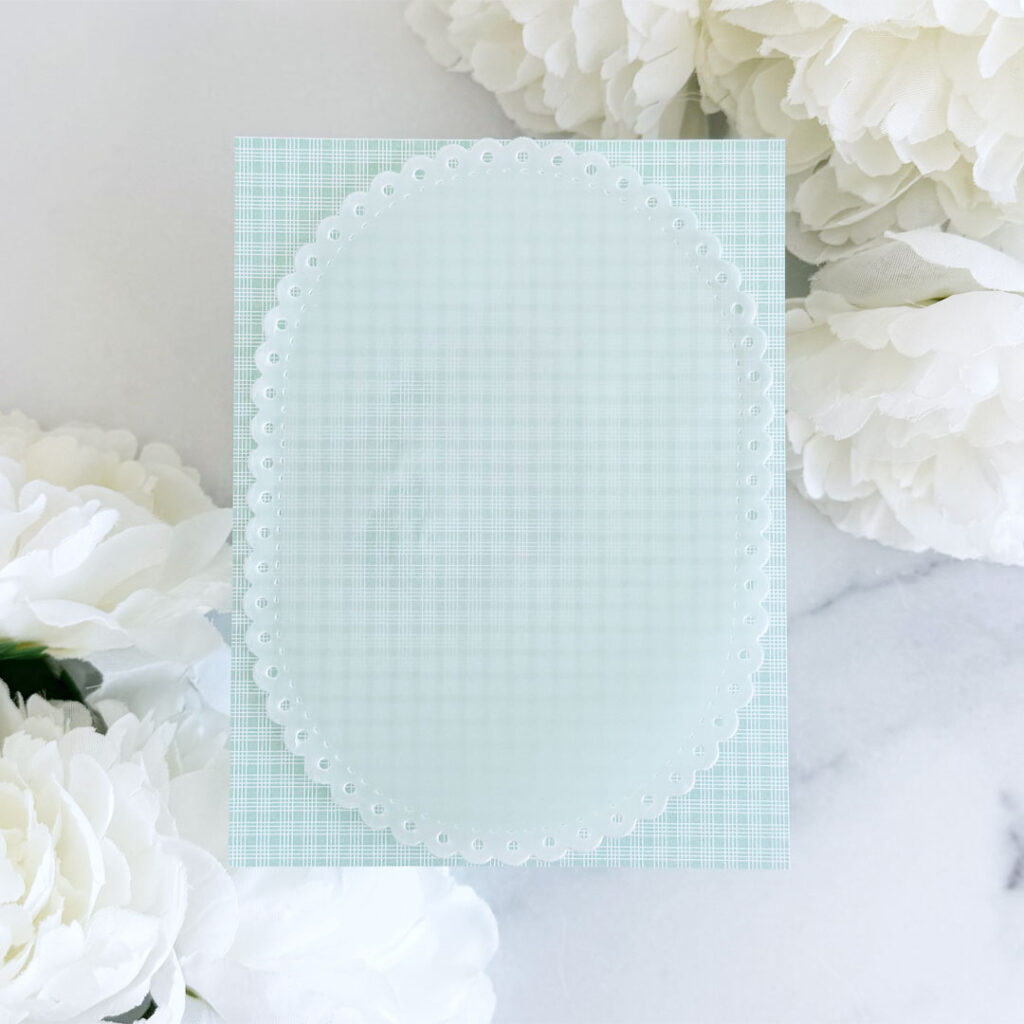
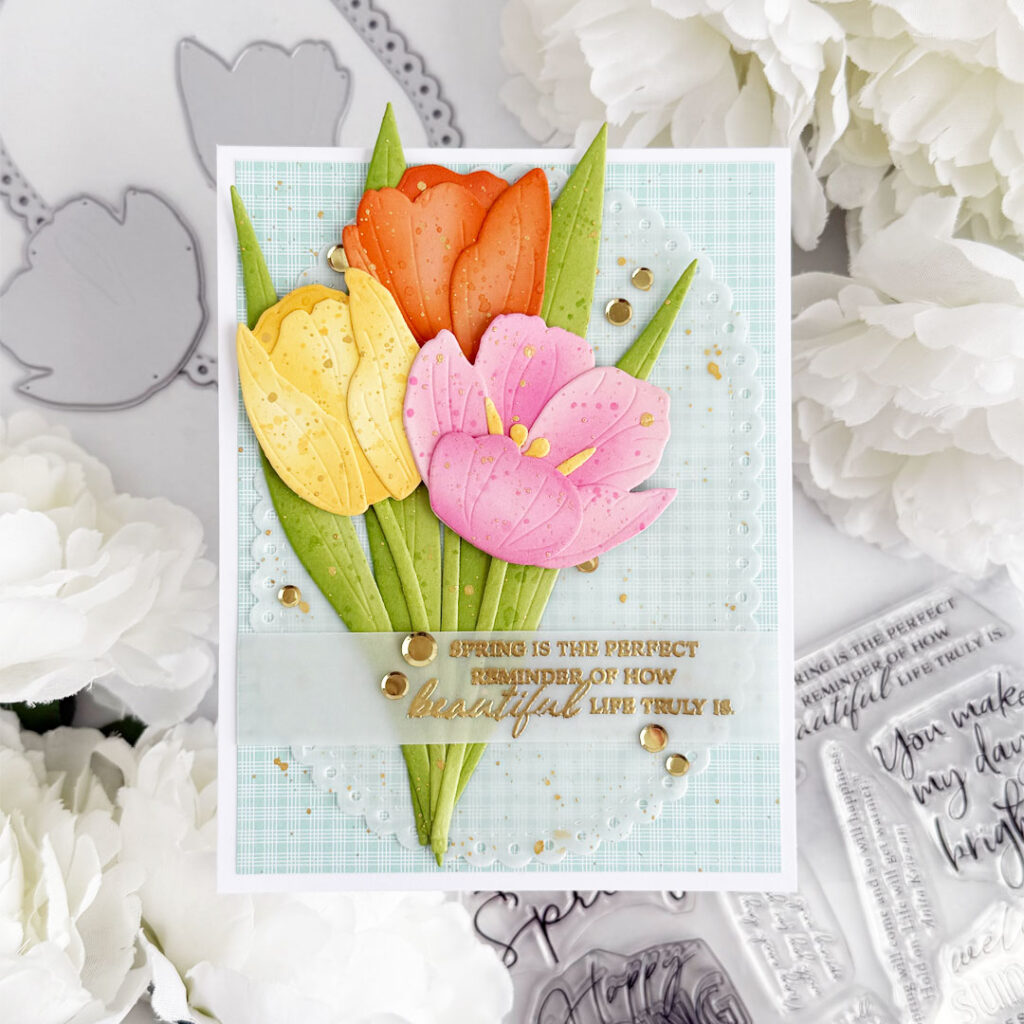
Step 1: Trim a panel of Bitty Big: Aqua Mist paper slightly smaller than A2. Die-cut the largest Love to Layer: Scalloped Ovals Die from vellum. Adhere it only in the center where it will be hidden by die-cuts.

Step 2: Die-cut the Into the Blooms: Tulips Dies from Pale Peony, Lemon Tart, Melon Berry and Green Parakeet cardstock. Add shading to the tulips with Hibiscus Burst, Pale Peony, Harvest Gold, Summer Sunrise, Canyon Clay and Melon Berry and the stems and foliage with New Leaf and Green Parakeet. I get a better blend by blending a darker ink color with the same color of ink as the cardstock. Splatter each of the die-cuts with the darker color of diluted ink. Once dry, adhere each of the tulips together then add to the background with a combination of liquid glue and foam squares.
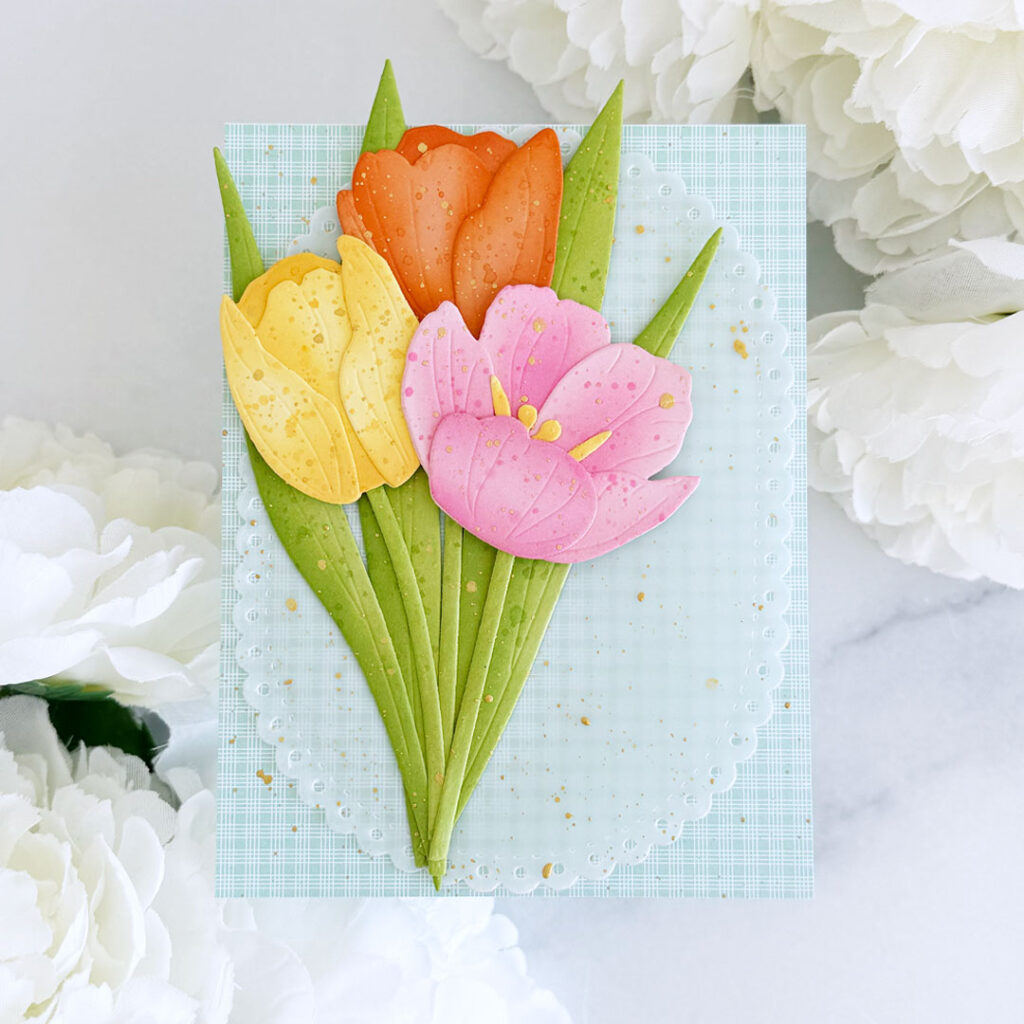
Step 3: Splatter the panel with diluted gold watercolor paint using a paint brush.
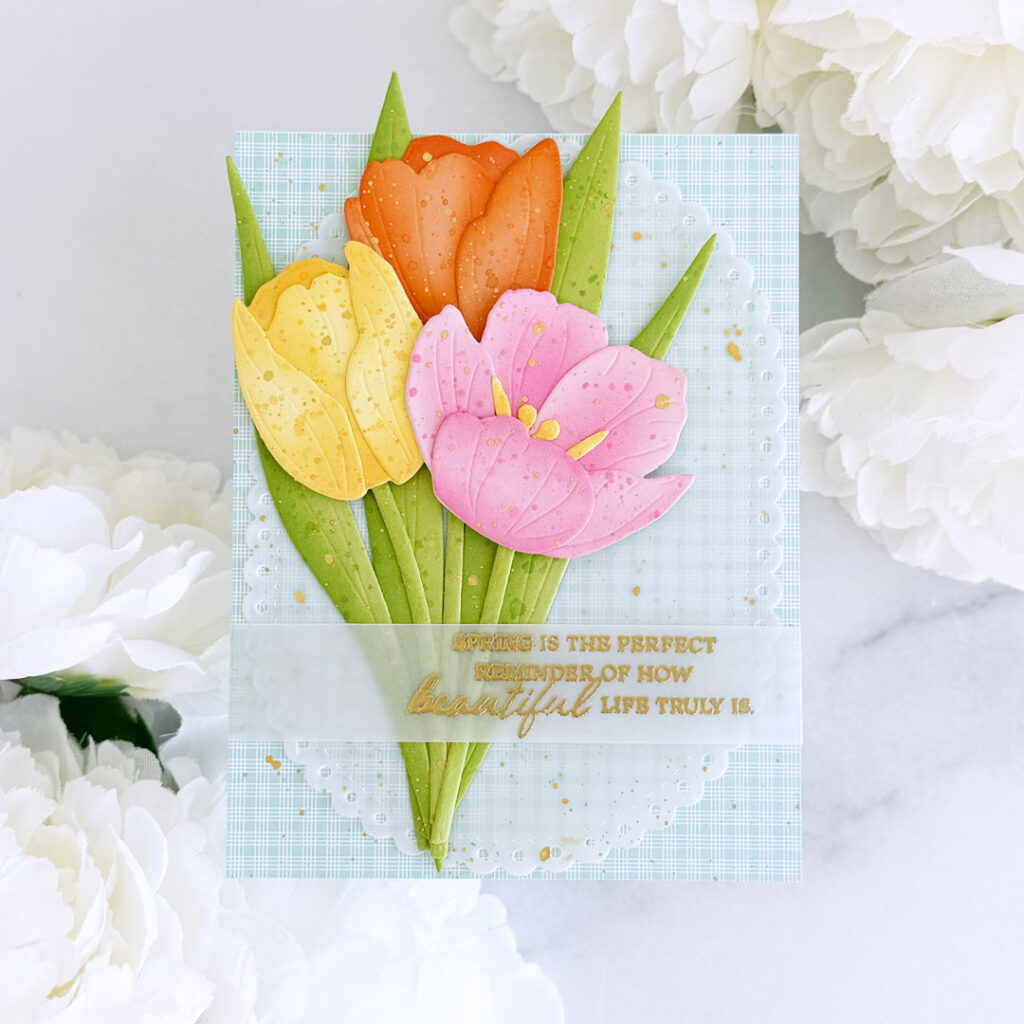
Step: 4: Stamp the sentiment, from the Thoughts of Spring Sentiments Stamp Set, onto a strip of vellum with Versamark and emboss with polished gold embossing powder. Wrap the strip around each side and adhere to the back of the panel.
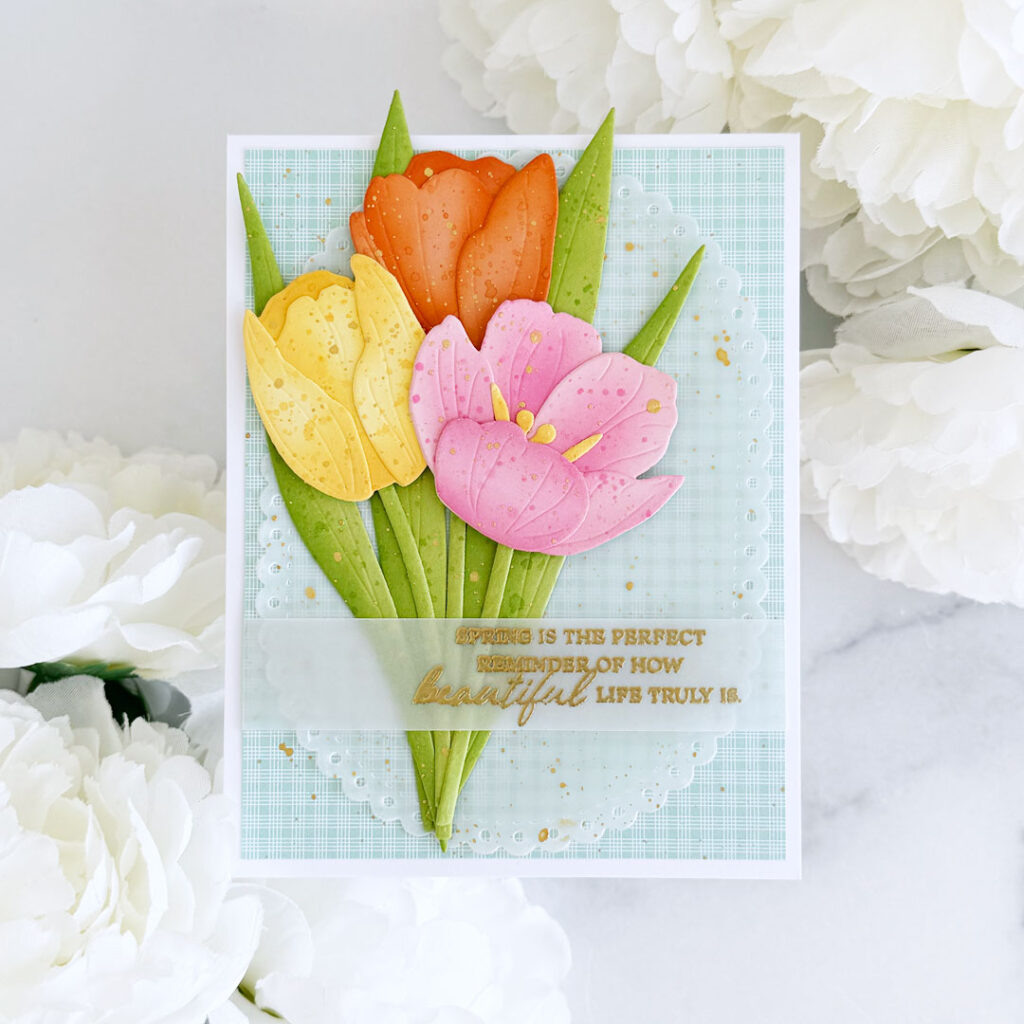
Step 5: Adhere to an A2 white card base using liquid glue.

Step 6: Sprinkle on metallic gold confetti to add a bit of shine and finish off the card.
That does it for me today!! I hope this brings a bit of spring to your day!!
Thanks so much for stopping by!!
Leave a Reply