


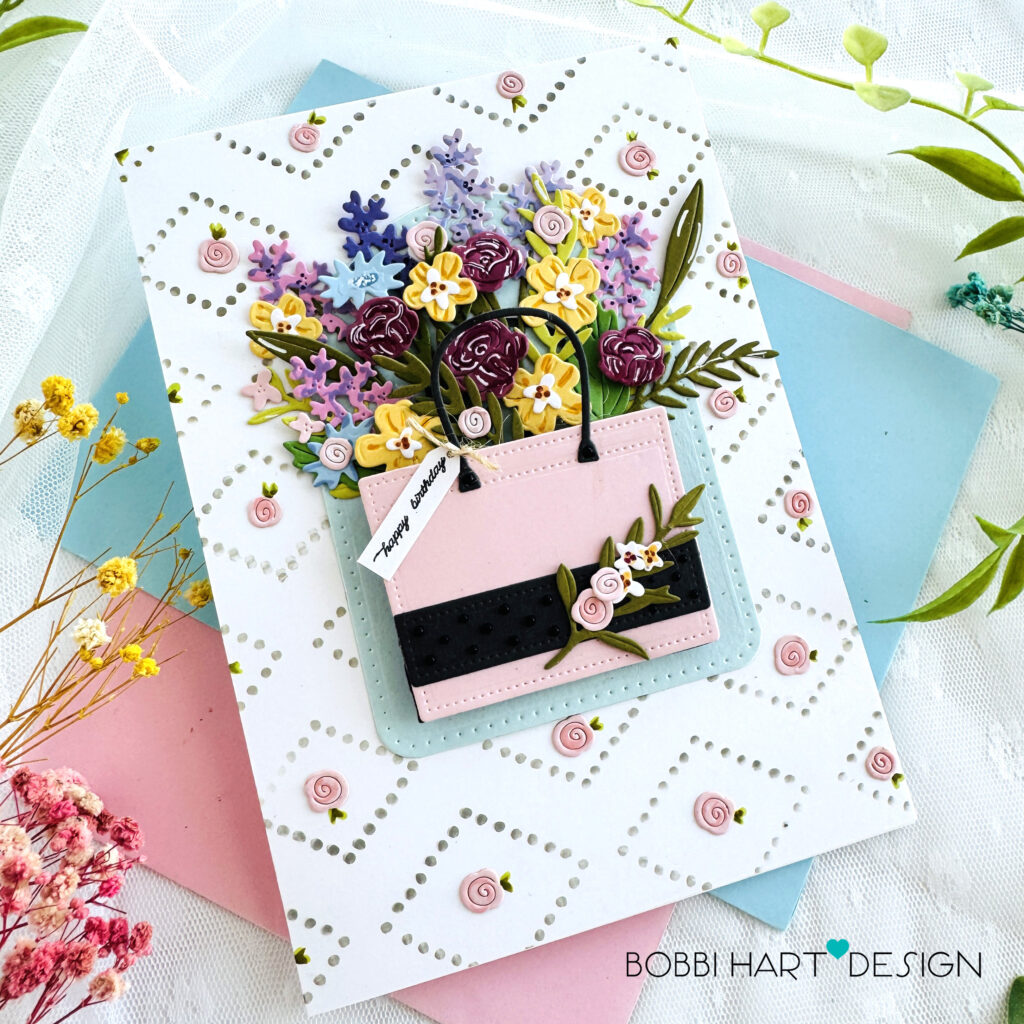
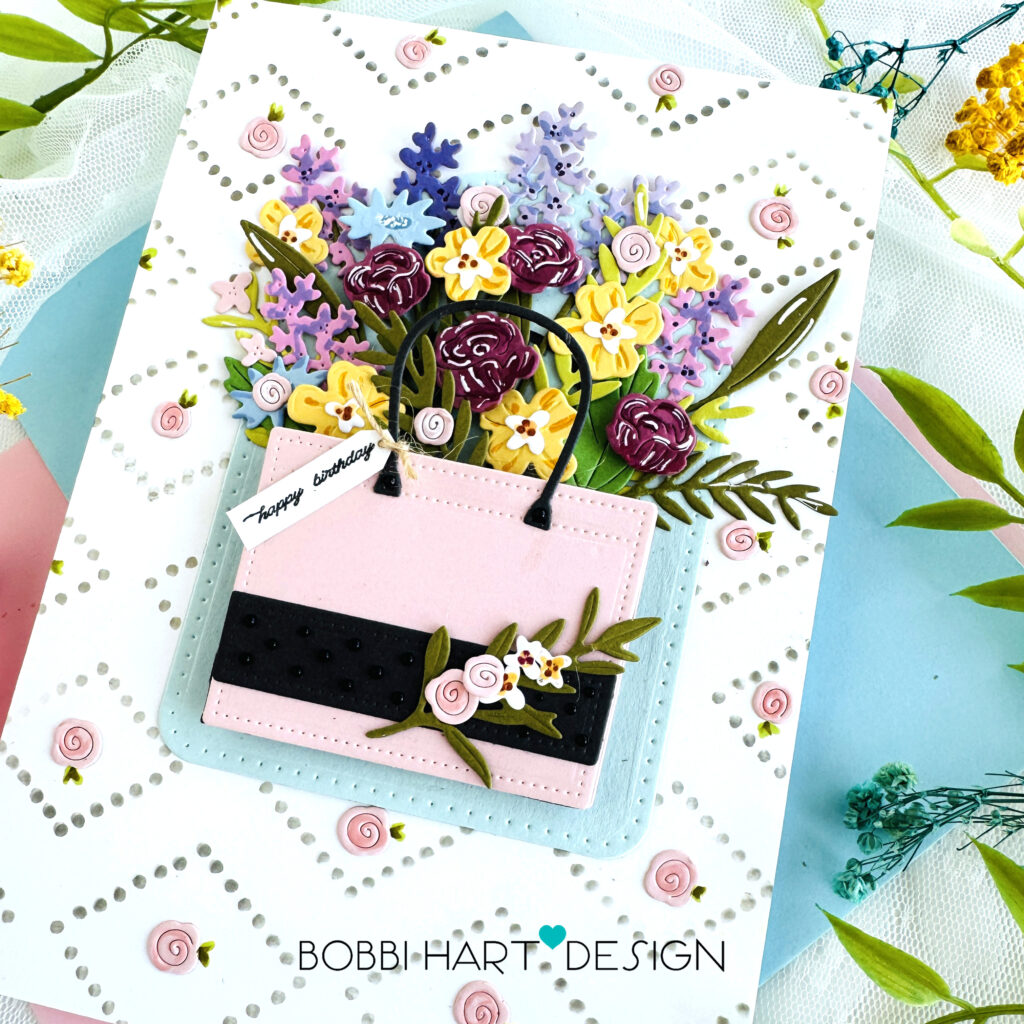
What could be better than a canvas tote full of fresh flowers? It reminds me of going to the Farmer’s Market in downtown Madison Wisconsin on an early Saturday morning in the summer. Fresh bakery goods, beautiful plants, squeaky cheese curds, delightfully filled cream puffs and vibrant organic garden florals… all beautifully displayed at the farmers’ stands located around the state’s capitol building. We take our canvas totes and select florals and food items to take home. What could be better than that? My 5″ X 7″ card features a tote full of vibrant florals just like my real one. I used the following Papertrey Ink products for this card:
Into the Blooms: Bag of Blossoms Dies
Dotted Diamonds Stencil Collection
This card measures 5″ X 7″ and uses a white card base made from Stamper’s Select White cardstock. True Black Ink was used for all the black ink stamping. Here are the step-by-step details for creating this card.
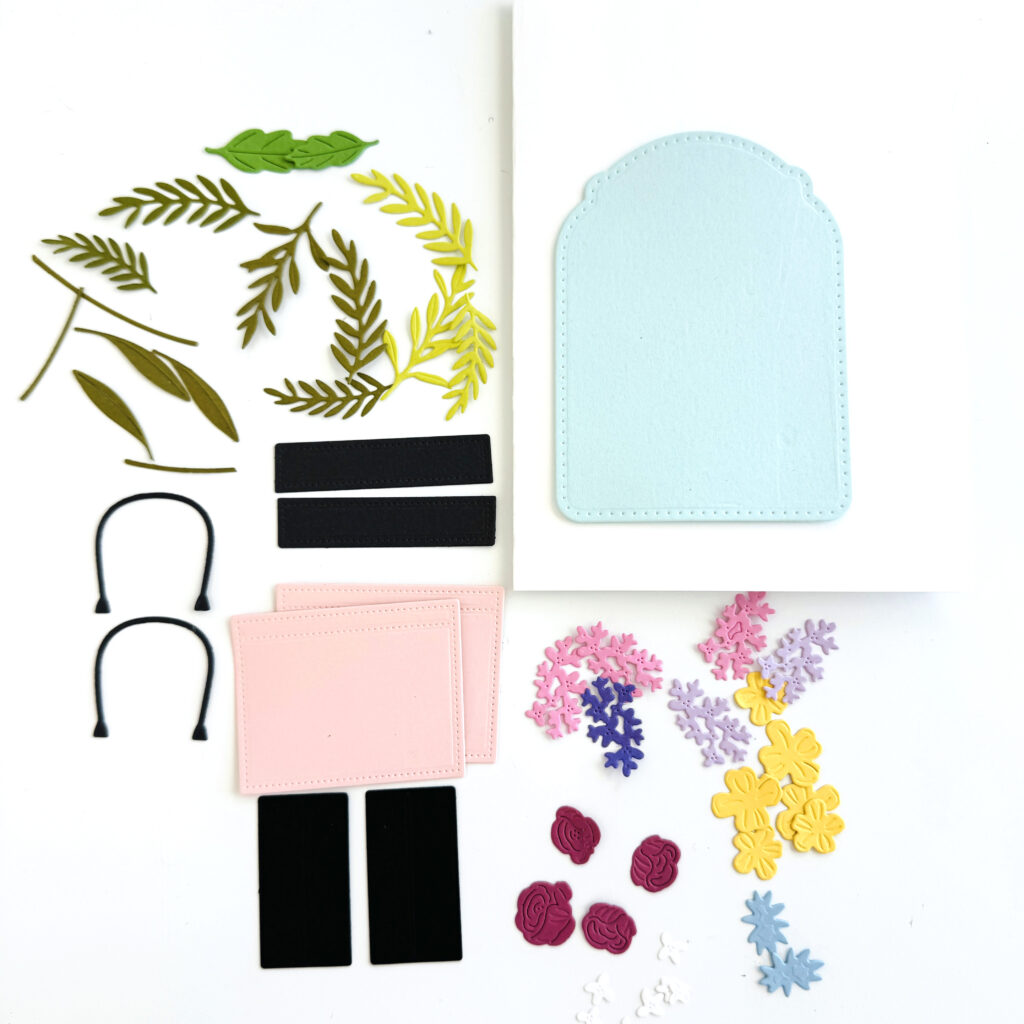
STEP 1: Die cut the tote and floral elements using the Into the Blooms: Bag of Blossoms Dies and the following cardstock colors: (Tote) Sweet Blush, Smokey Shadow and True Black, (Florals) Autumn Rose, Spring Rain, Lovely Lady, Lavendar Moon, Harvest Gold, Amethyst Allure, Stamper’s Select White (leaves) Ripe Avocado, Limeade Ice, New Leaf, (stitched label) Aqua Mist and a 5″ X 7″ card base made from Stamper’s Select White cardstock.
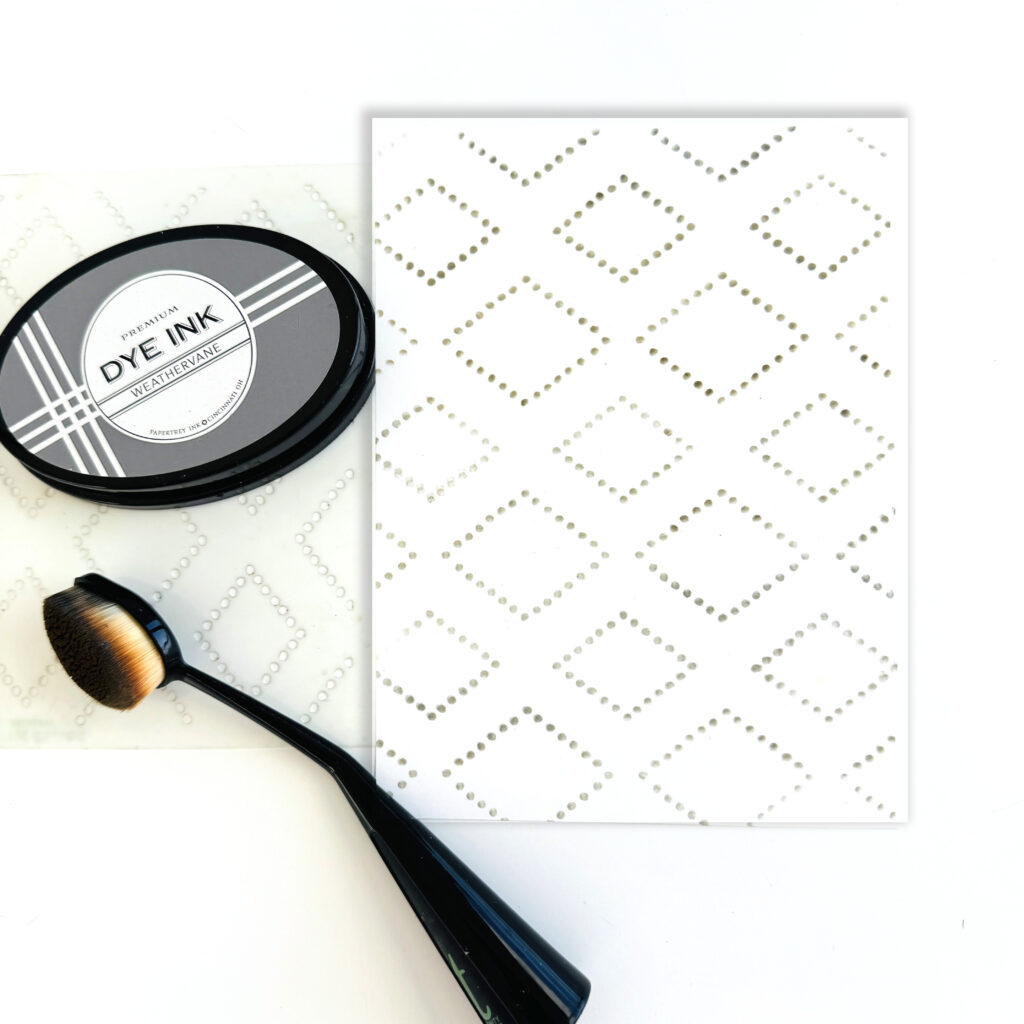
STEP 2: Cut a 5″ X 7″ card front panel from Stamper’s Select White cardstock. Stencil the diamond design using the Dotted Diamonds Stencil Collection and Weathervane Ink. Position the stencil in a landscape orientation to stencil the entire front, from the left to the right edges. Shift the stencil down to complete the lower half.
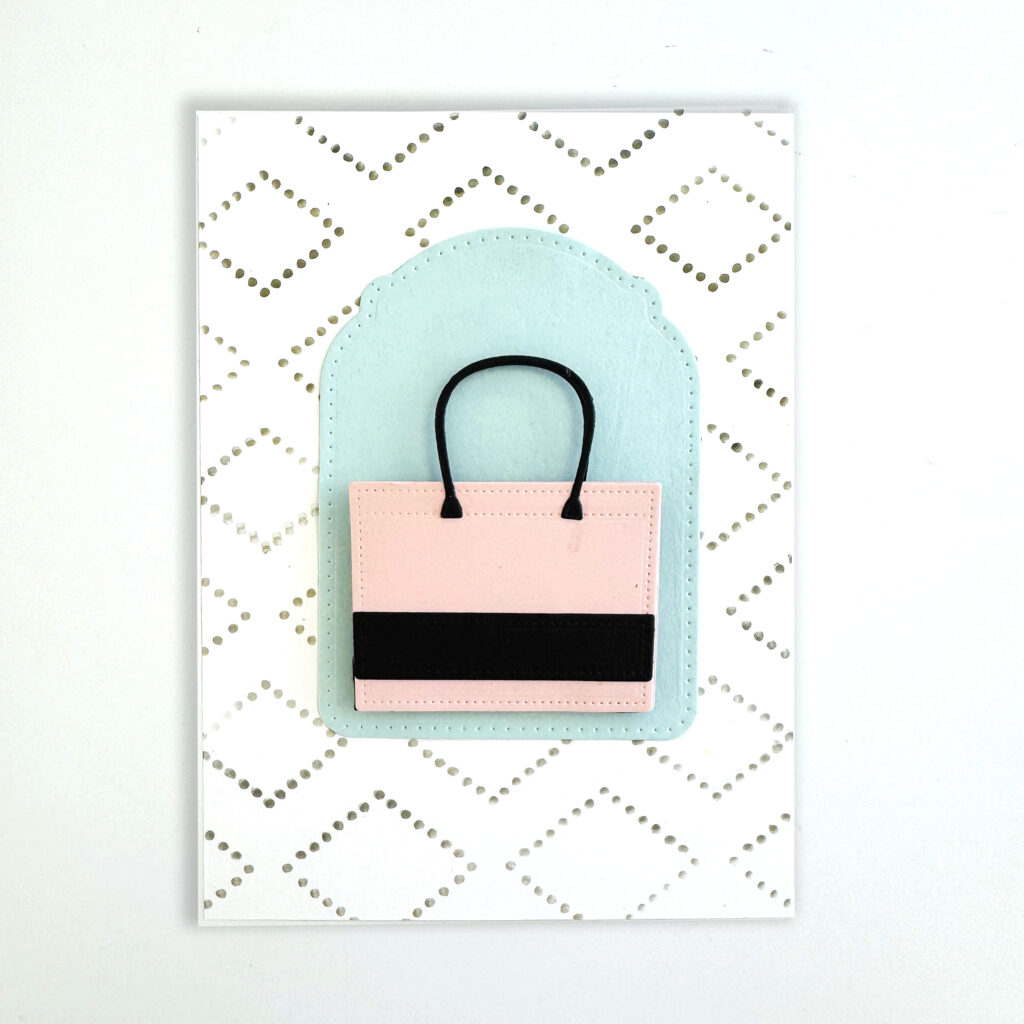
STEP 3: Attach the stitched aqua label to the front of the panel. Assemble the tote, adding the black gussets to the sides and attach it to the aqua label using foam tabs to make it stand out.
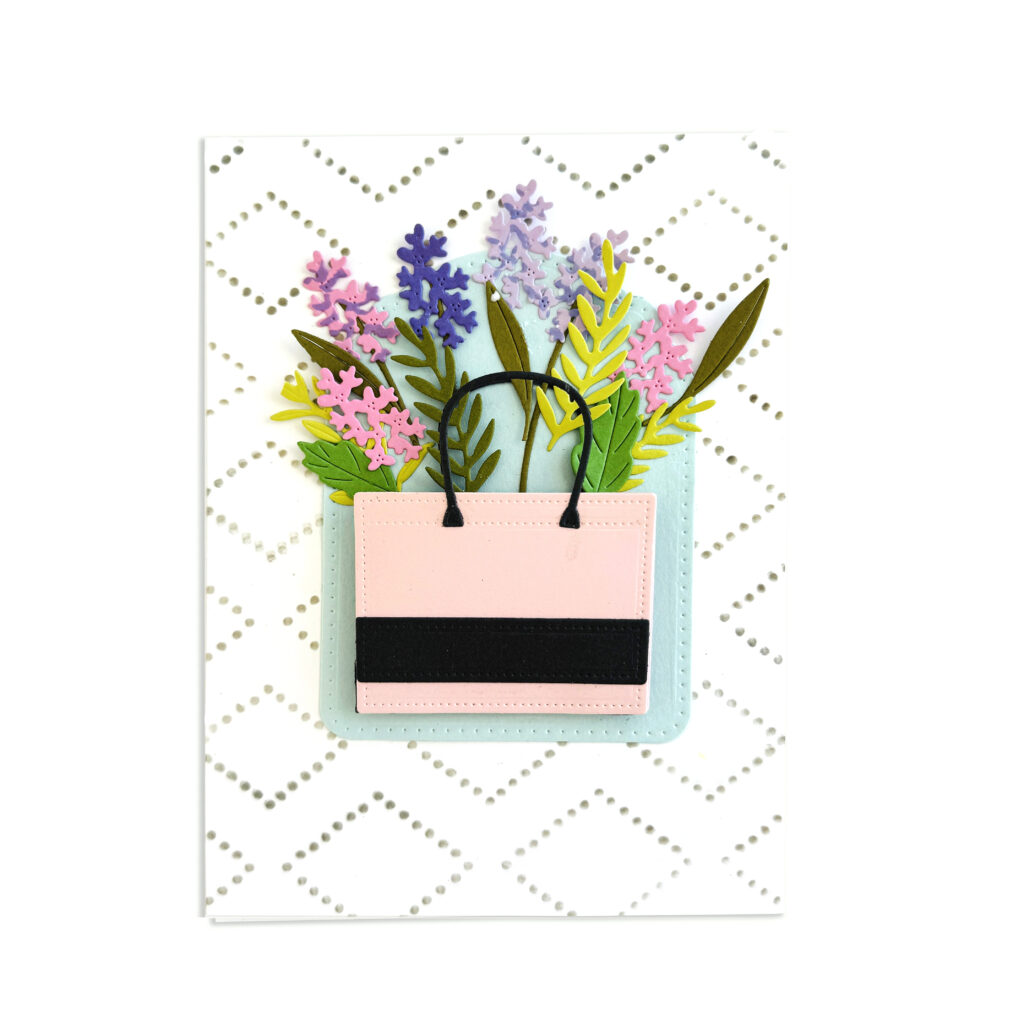
STEP 4: Attach the taller florals and foliage to the tote.
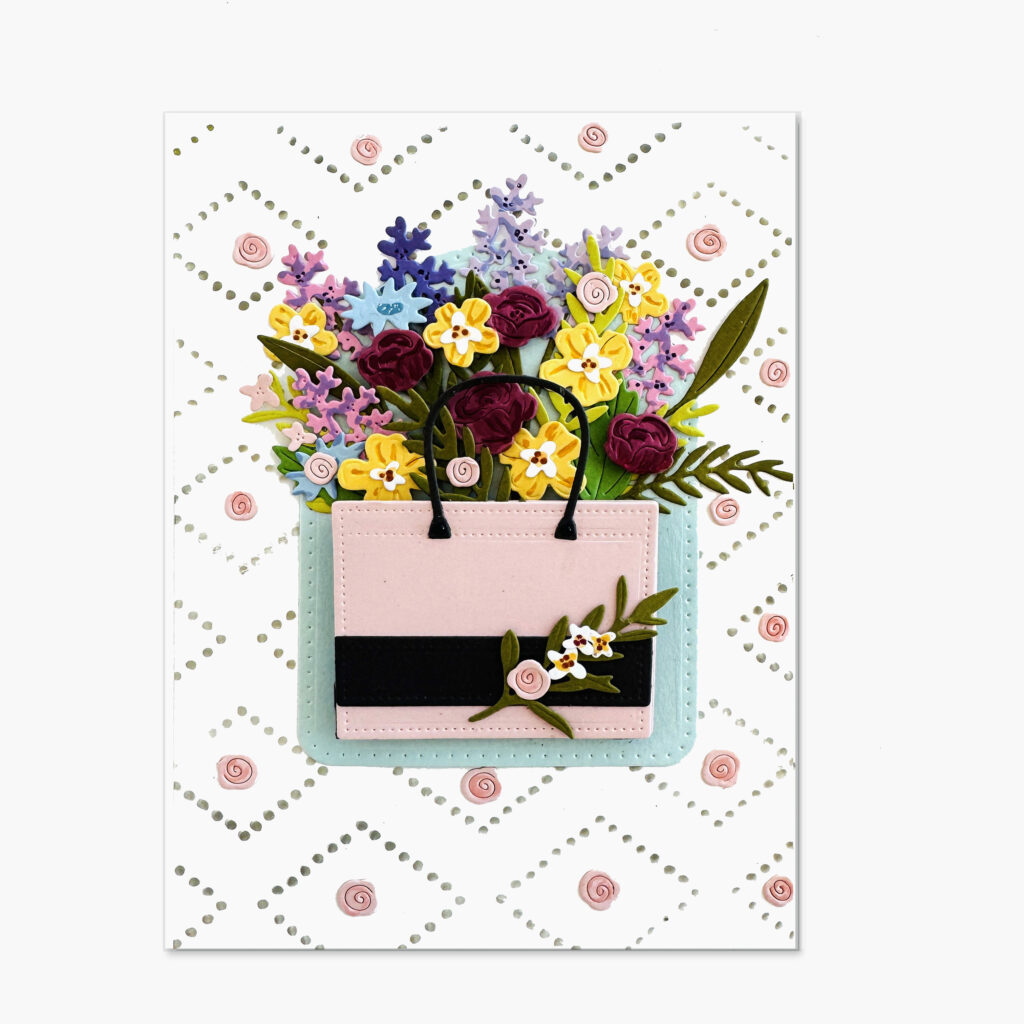
STEP 5: Attach the forefront florals to the tote. Add a stem of greenery and florals to the front of the tote. Glue in place. Die cut additional rose buds from the Sweet Blush cardstock and glue them inside the diamonds. Add some color to each one using a Copic R21 Marker or similar darker pink marker.
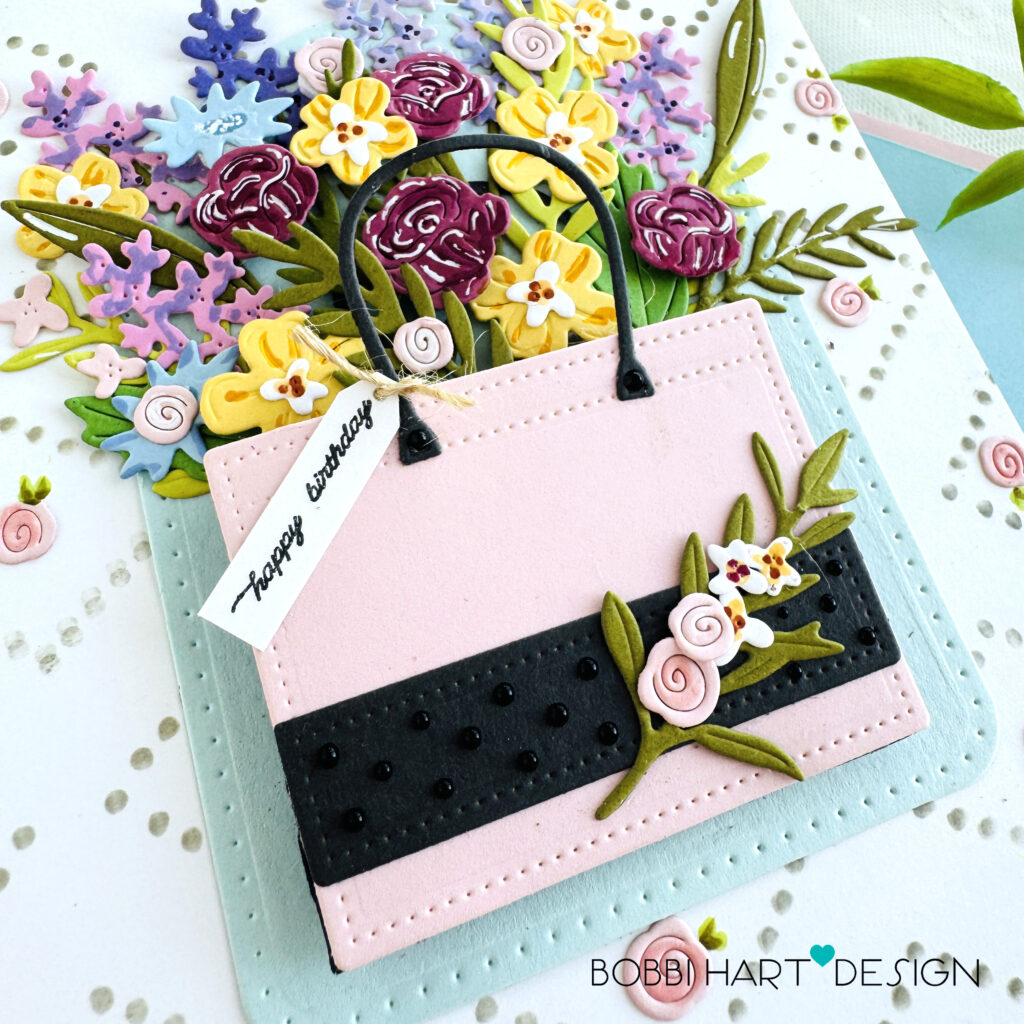
STEP 6: Add glossy Pearl Pen or Gem Sticker Dots in black to the black stripe. Stamp the “Happy Birthday” sentiment from the Floral Confections Stamp Set on white cardstock. Cut the sentiment into a tag shape using a paper cutter and snips. Punch a tiny hole and string twine through the tag and attach the tag to the tote’s handle. Use two green markers, a light and a darker color such as YG93 and YG03 to add tiny leaves to the tea roses inside the diamonds. I added shadows and highlights to the roses using a white Gelly Roll pen and a Copic RV69 to just add more brightness and dimension to the florals.
STEP 7: Add accent coloring to the florals to add highlights and shadows to make the florals more dimensional. Attach the card front to the white card base.
You can shop the entire collection here at Papertrey Ink! If you decide to place an order, please use the links in this post so that Papertrey Ink team knows what inspired you. I appreciate it very much. It helps me to continue to bring more ideas to you!
Thanks for stopping by today. If you want to see more ideas and inspiration from me, subscribe to my blog, BobbiHartDesign.com. I’ll send you updates on new posts! You can also find me on Instagram as @BobbiHartDesign and on Facebook as BobbiHartDesign. Bobbi Hartmann Lemanski, Bobbi Hart♥ Design, Adding h♥art into every design
Sharon Gullikson says
I like that you added little extra details to the dies. This is gorgeous
Colleen says
I love all the little details in this card! I’m off to order the supplies now!
Helen F. says
Beautiful tote full o’ florals! Lovely birthday card, Bobbi 🙂