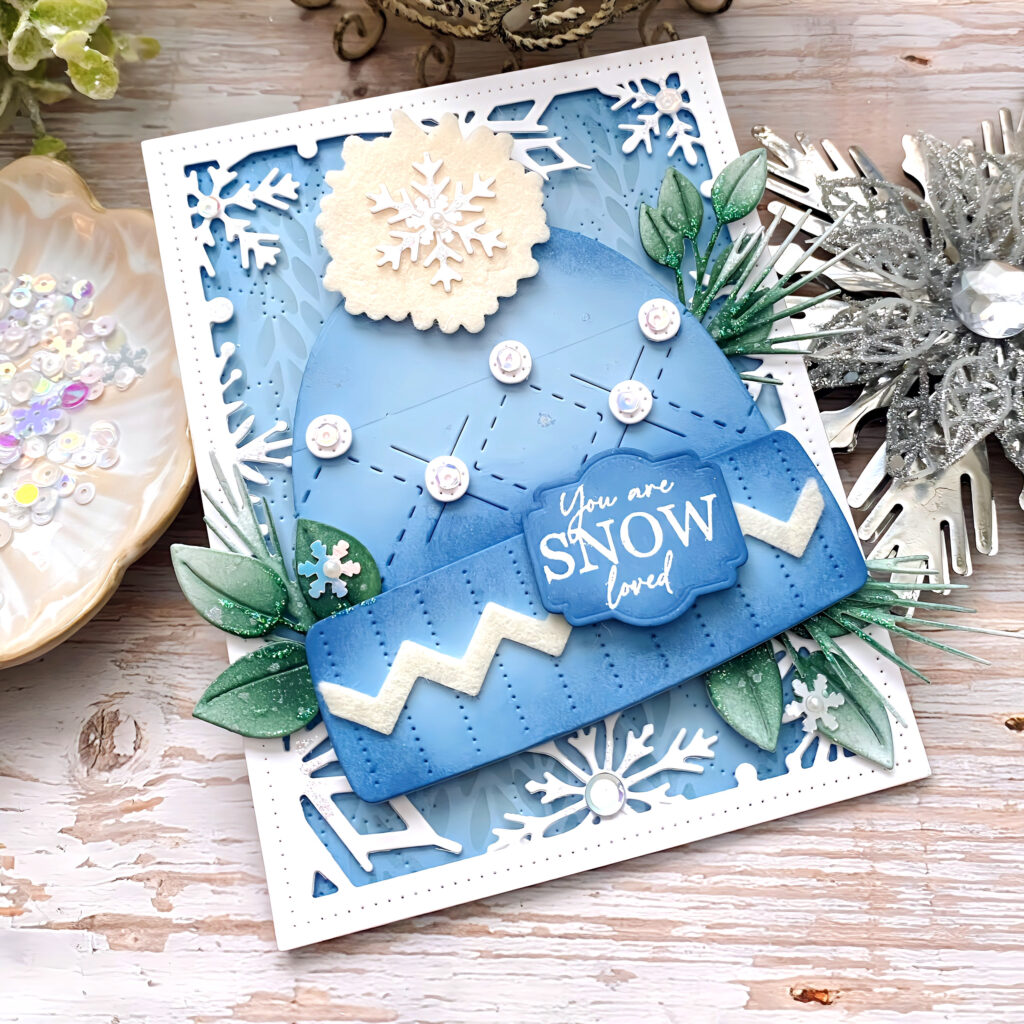
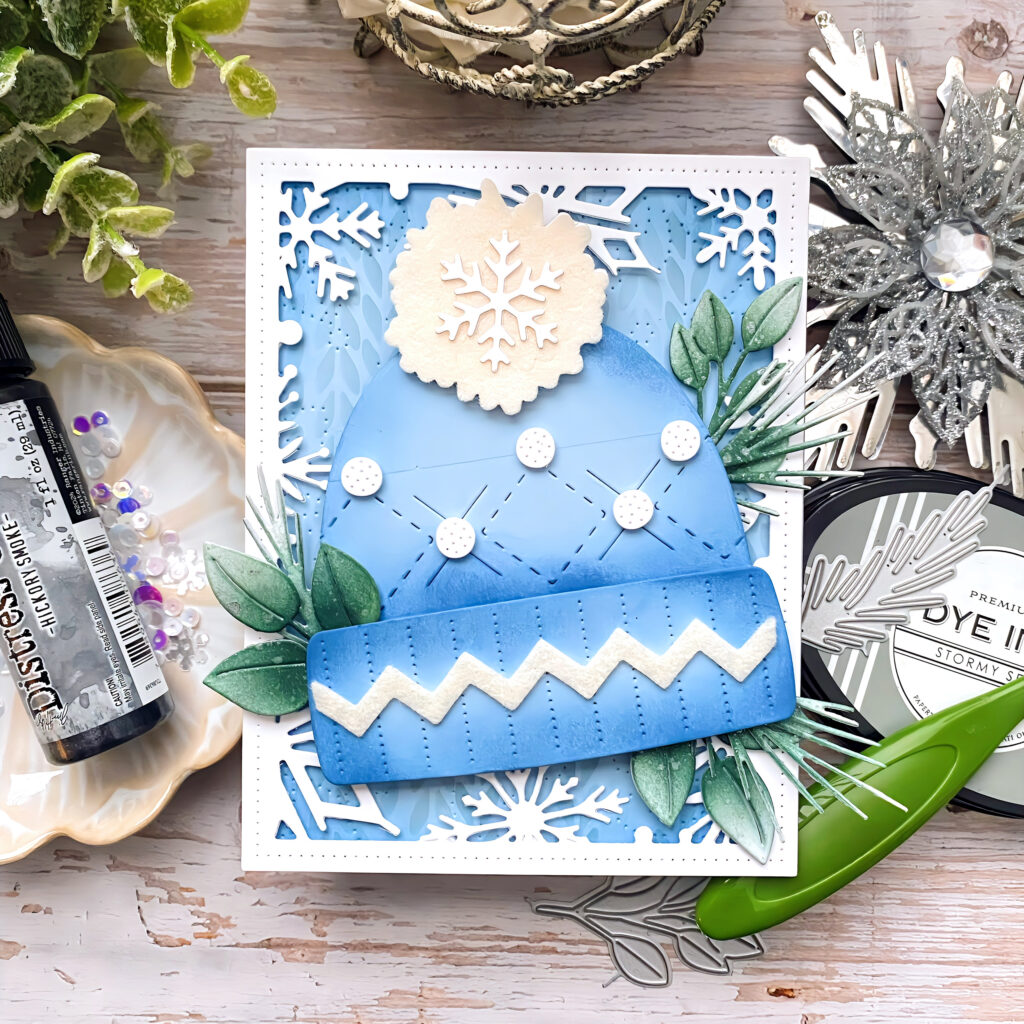
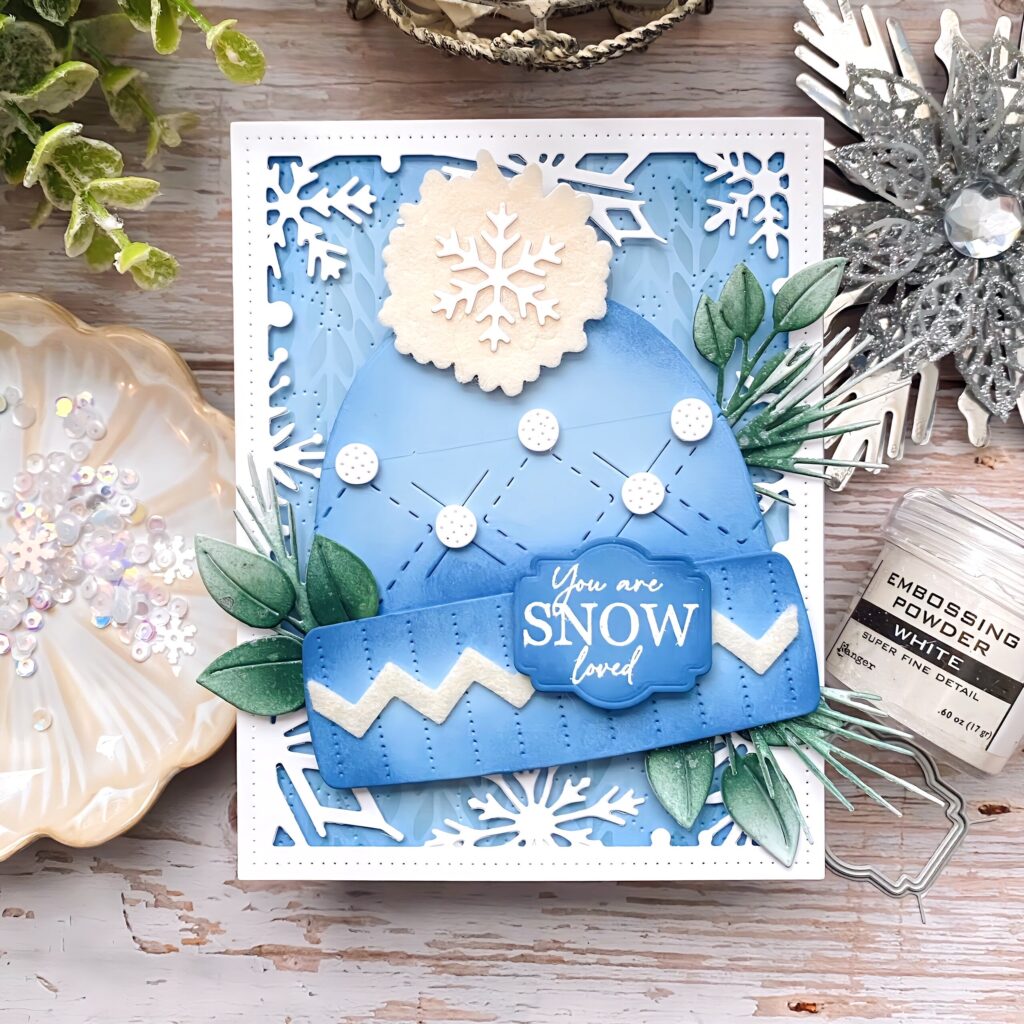
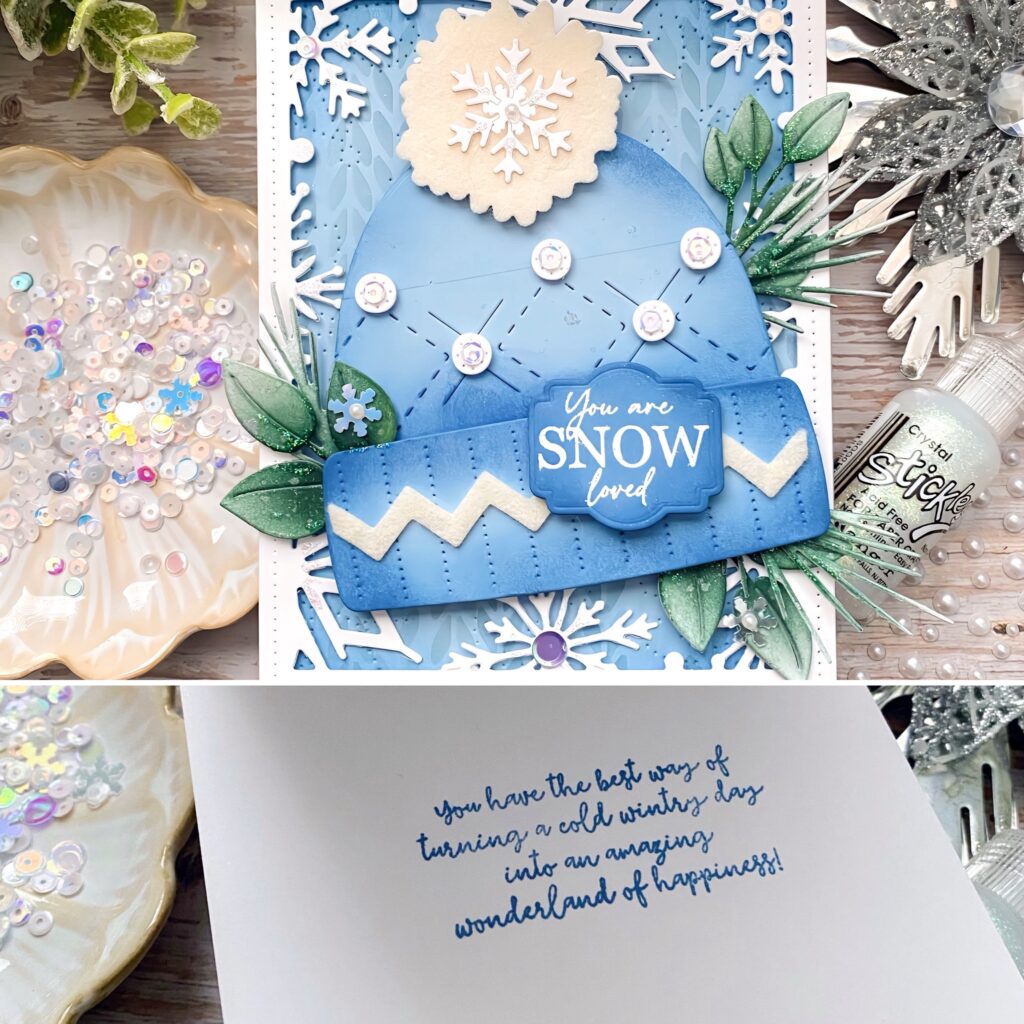
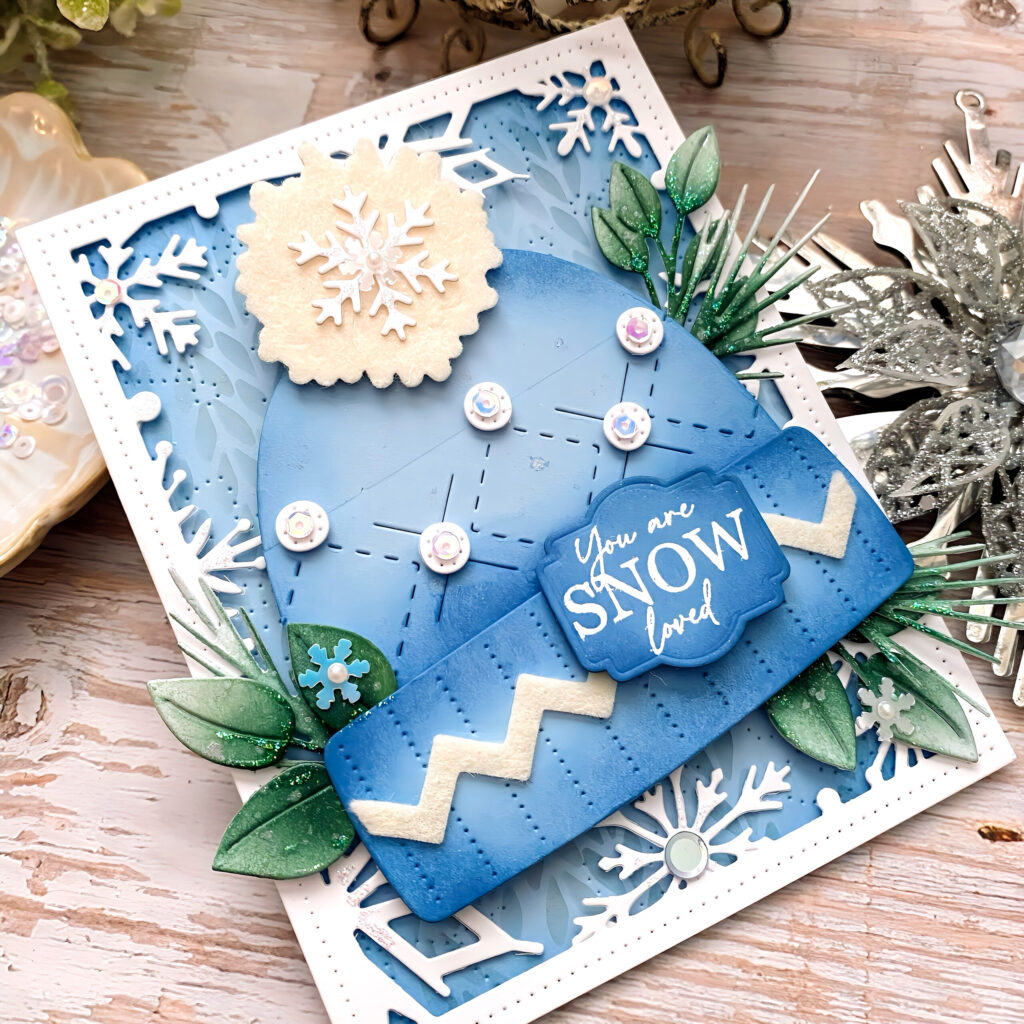
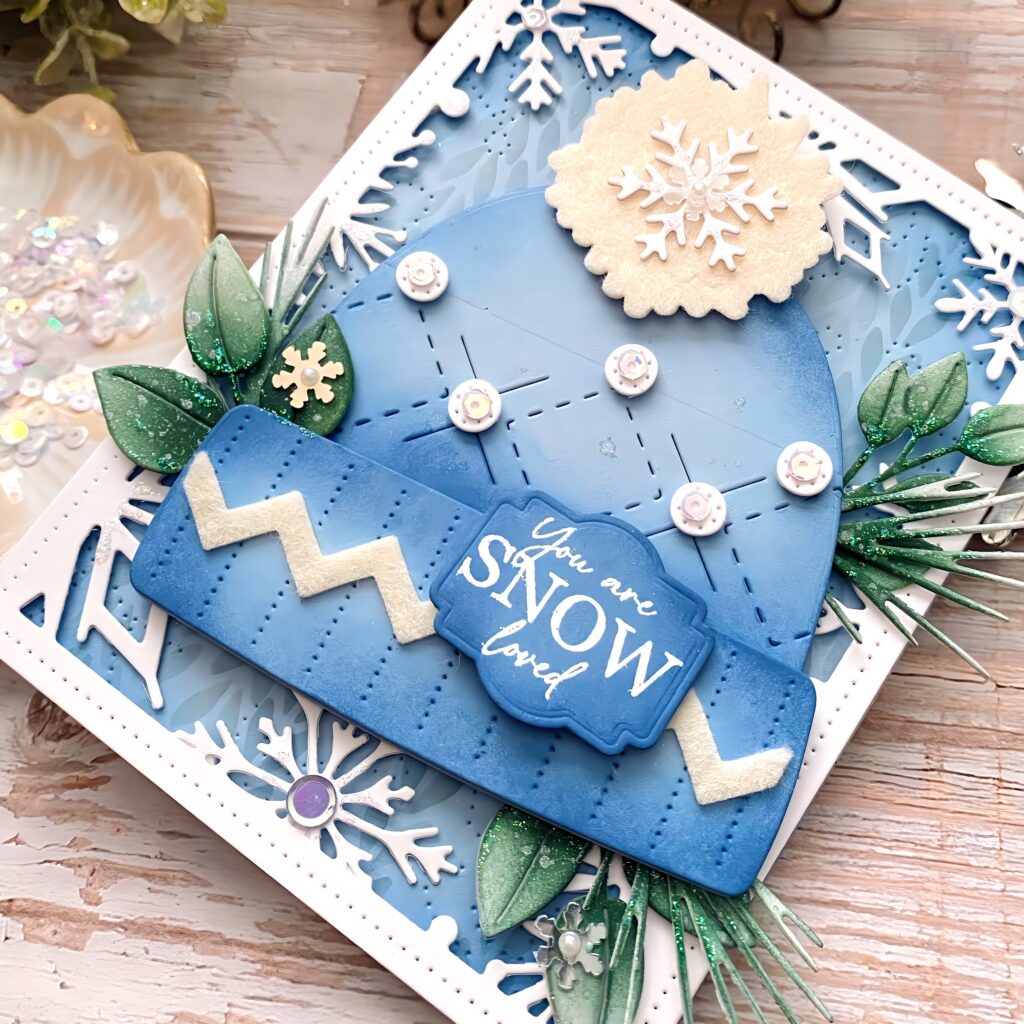
Kelly Lunceford proves that winter crafting doesn’t end when Christmas does with her You Are Snow Loved card, a cozy and heartfelt design filled with soft blues, snowy textures, and layered details ❄️💙 From the stitched snowflake background to the dimensional winter hat and greenery, this project captures the quiet beauty of the season and creates a card that feels thoughtful and comforting.
Kelly shares, “Just because Christmas is over, doesn’t mean you need to put all of your winter supplies away; winter has just begun! I love celebrating the season (no matter which one) and because we haven’t received any snow around here, I’m channeling all the snowy vibes I can! I had so much fun creating this snow-themed card that could be sent to anyone that’s been on your mind!”
SUPPLIES
STAMPS: Just Sentiments: Snow, Inside Greetings: Winter Wonderland
INK: Spring Rain, Blueberry Sky, Stormy Sea, Pinefeather, Versamark
PAPER: Spring Rain, Stamper’s Select White,
DIES: Build-a-Hat, Cover Plate: Let It Snow, Cover Plate: Stitched Snowflakes, Just Tags
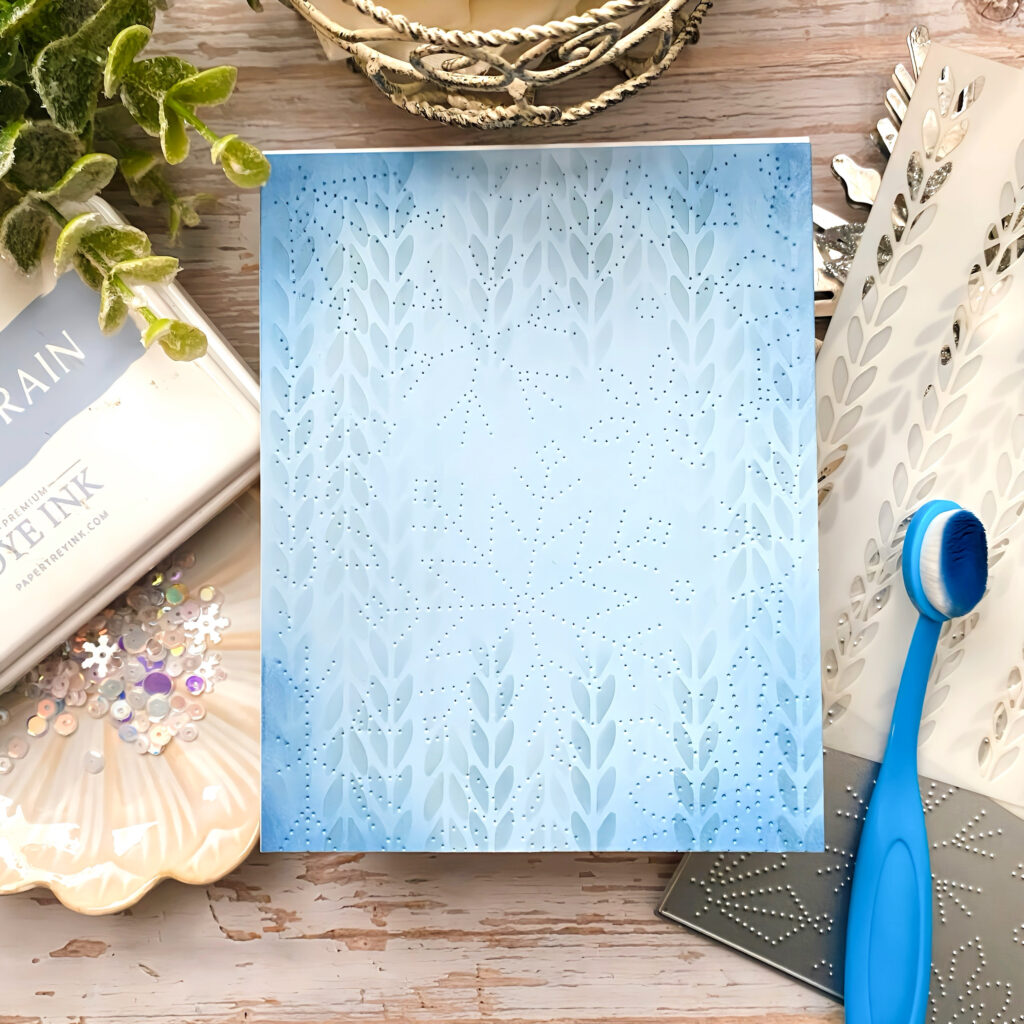
STEP 1: Cut an A2 panel of Spring Rain cardstock. Add the crochet stencil design with Spring Rain ink and then add the snowflake detail with the Cover Plate: Stitched Snowflakes Die. Add a little bit of Blueberry Sky ink around the four corners. Attach it to an A2 card base.
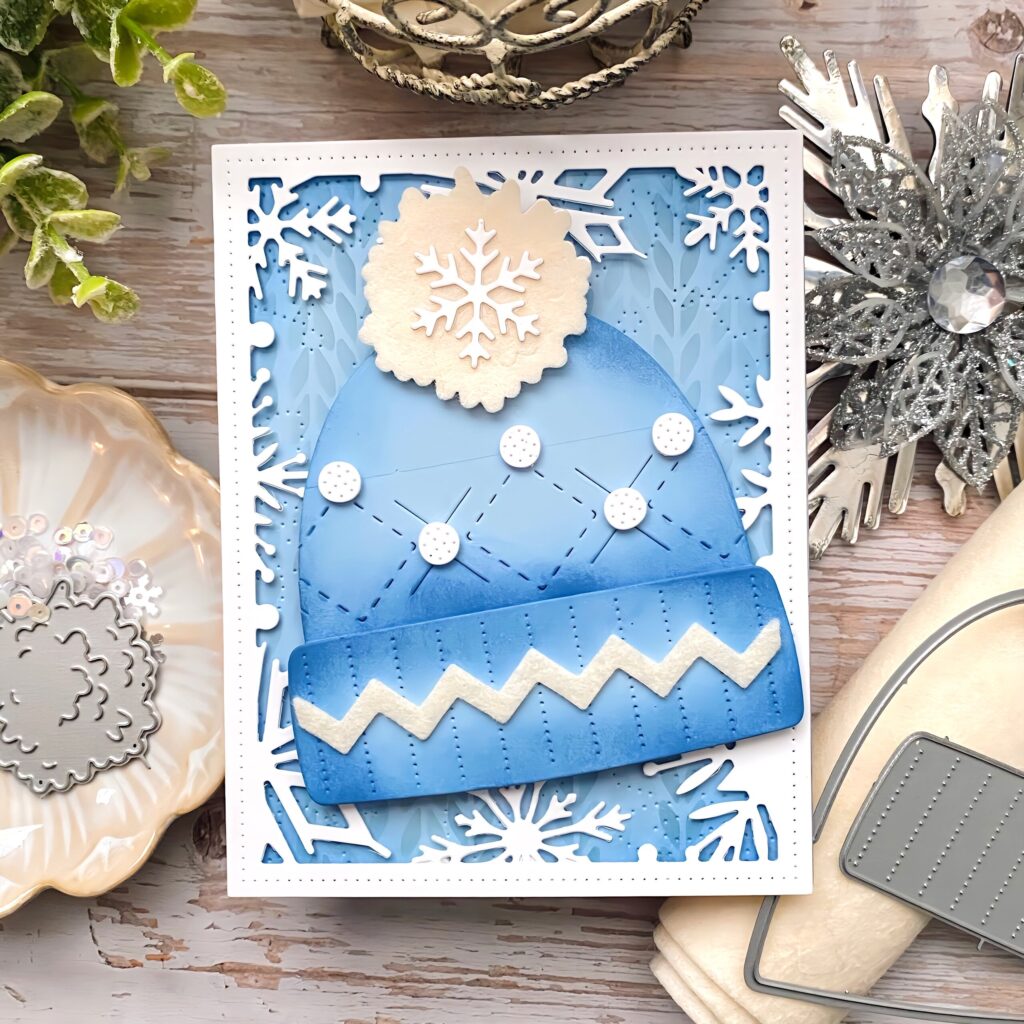
STEP 2: Cut the snowflake border from white card stock and attach it to the background using foam squares.
STEP 3: Cut the hat and all of the embellishment pieces and assemble it as desired.
STEP 4: Cut all of the greenery from white cardstock. Color it with blender brushes and ink. Spritz it with distress spritz, and attach around the hat, using foam squares.
STEP 5: Heat emboss the sentiment with white powder on Blueberry Sky cardstock. Cut it out using the Just Tags die. Add some ink around the edges for depth and dimension. Attach it to the card using foam squares.
STEP 6: Add sequins, pearls and stickles for a sparkly, snowy shine! Spritz the entire thing with Shimmer Spray-Sparkle. Add an inside greeting of your choice! I chose to use one from the Inside Greetings: Winter Wonderland Stamp Set.
This project is a lovely reminder that winter cards can be just as meaningful long after the holidays have passed ✨❄️ Whether you’re sending a note of encouragement, warmth, or simple kindness, this design shows how winter supplies can continue to shine all season long.
Be sure to tag Papertrey Ink or share your version in the comments, we’d love to see how you bring your own snowy inspiration to life 💙


Helen F. says
Oh what a sweet card, Kelly! Love this design for winter card-giving occasions! 🙂