


Hello, crafters and cardmakers!! Brenda back with you today!! I love how products from the latest release can be used to create elegant or whimsical wedding cards!! I normally create A2 cards, but I decided to take advantage of the real estate from the In Frames: Big & Tall Die Set to combine several goodies to create this fun, whimsical wedding card!! I couldn’t resist that little car in the Wedding Classics Stamp Set!!

Supplies
Stamps: Wedding Classics, Big Inside Greetings
Dies: Home Is Where the Heart Is, Wedding Classics, Big Inside Greetings, Heirloom Hearts, Love to Layer: Laced Edges, In Frames: Big & Tall Rectangles, Build-A-Bouquet (pink centers of small flowers)
Ink: Pale Peony, Blueberry Sky, Harvest Gold, Weathervane, Fresh Snow
Cardstock: Soft Stone, Blueberry Sky, Pale Peony, Spring Rain, Lemon Tart, Mint Julep, Vintage Jadeite, Stamper’s Select White
Other supplies: Baby’s Breath Stencil Set, Star Dust Stickles, foam tape, liquid glue, vellum, small iridescent pink heart embellishments, matte silver baubles
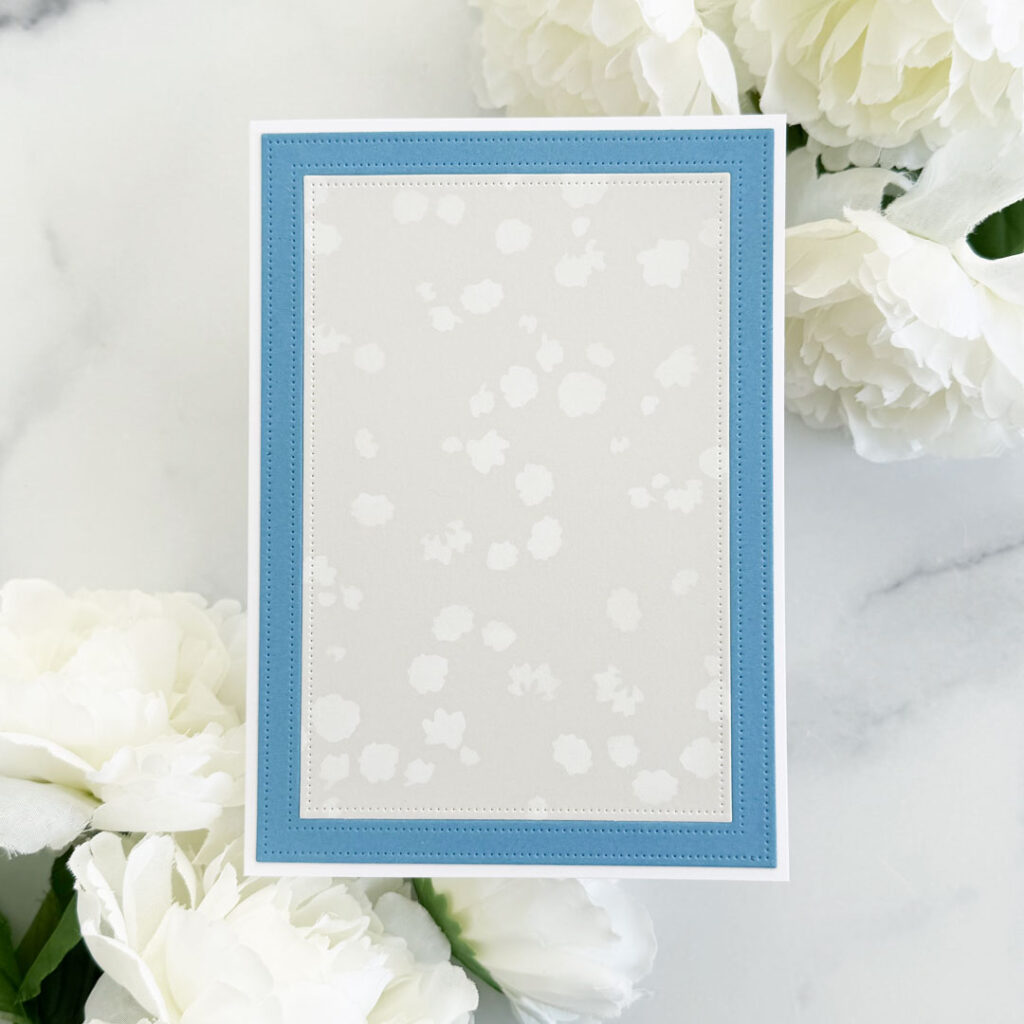
Step 1: Die-cut the In Frames: Big & Tall Dies from Soft Stone and Blueberry Sky cardstock. Stencil the first layer of the Baby’s Breath Stencil only onto the Soft Stone panel with Fresh Snow ink and a sponge dauber. I repositioned the stencil several times to fill most of the panel. (Pigment ink takes a bit longer to dry, so set it aside for a while or dry it with a heat tool.) Use liquid glue to adhere the panel and frame to a 5″ x 7″ white card base.
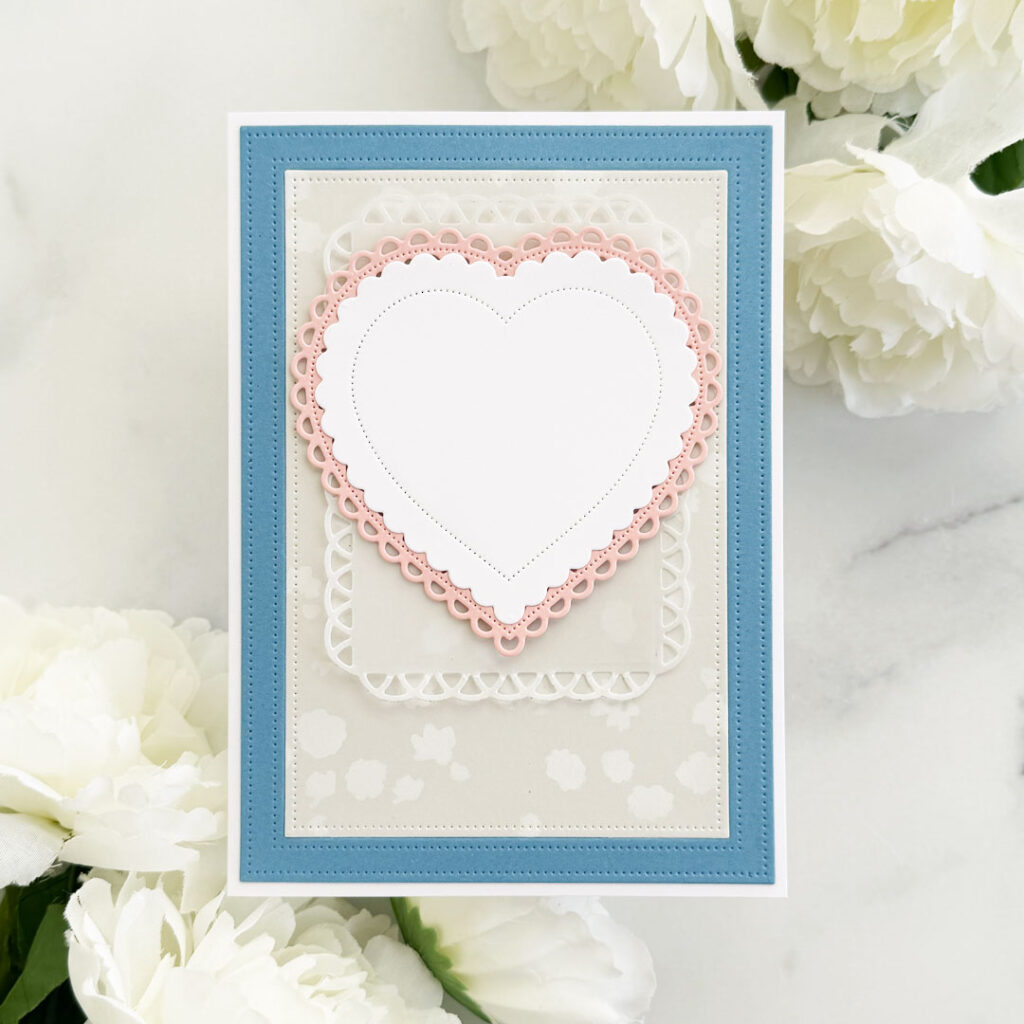
Step 2: Die-cut the largest die in the Love to Layer: Laced Edges Die Set from vellum and two of the hearts in the Heirloom Hearts Die Set from Stamper’s Select White and Pale Peony cardstock. Layer and adhere together then adhere toward the top area of the front of the card.

Step 3: Die-cut the house, trees, bushes and clouds from the Home Is Where the Heart Is Die Set from Soft Stone, Blueberry Sky, Pale Peony, Spring Rain, Lemon Tart, Mint Julep, Vintage Jadeite and Stamper’s Select White cardstock. I wanted small centers for the centers of the flowers on the bushes so I used a die from the Build-A-Bouquet Die Set to cut those out of Pale Peony cardstock. Adhere all the elements together, then arrange and adhere to the heart with liquid glue.
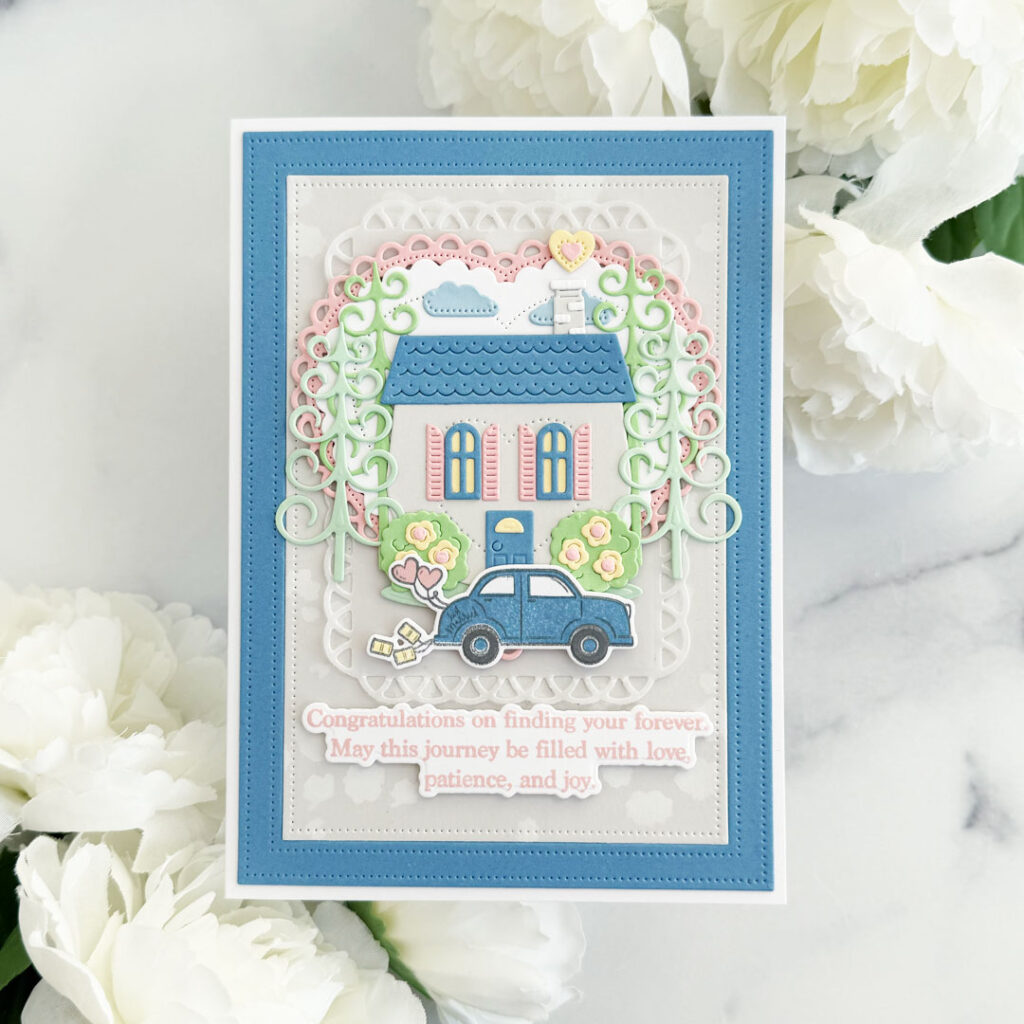
Step: 4: Stamp the car from the Wedding Classics Stamp Set onto Stamper’s Select White cardstock with Weathervane, Blueberry Sky, Pale Peony and Harvest Gold inks. Die-cut with the die from the Wedding Classics Coordinating Dies. Stamp the sentiment from the Big Inside Greetings Stamp Set onto Stamper’s Select White cardstock with Pale Peony ink and cut out with the Coordinating Die. Pop up the car and sentiment with foam adhesive.

Step 5: Add Star Dust Stickles to the centers of the flowers, a pair of small iridescent pink hearts next to the sentiment and one to the heart above the chimney and two matte silver baubles to the wheels of the car.


Isn’t that little car the perfect addition?!? I just love it!!
Thank so much for stopping by today!! Have a great Sunday!!
Leave a Reply