


Hi friends! With Valentine’s Day just weeks away, I have hearts on the brain! Roses are red and make great hearts to celebrate the love in your life. I’m using the following Papertrey Ink products for this valentine card:
My 5″ X 7″ card features the following Papertrey Ink products:
In Frames: Big & Tall Rectangles dies
This is Big Sentiments: Definitions of Love Stamp Set and coordinating dies
Cardstock: Stamper’s Select White, Sweet Blush, Pale Peony, Pure Poppy, New Leaf
Ink: Fine Linen
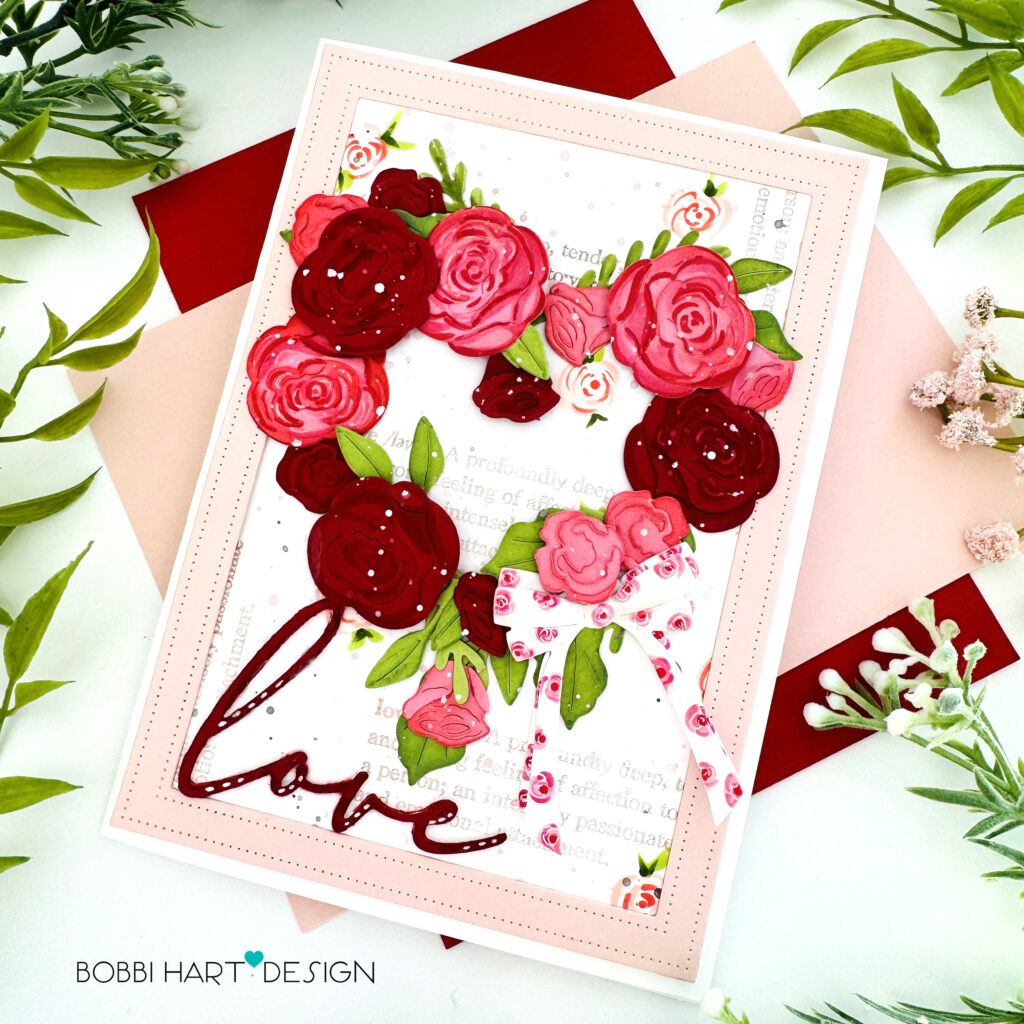
This card is 5″ X 7″ and uses a white card base made from Stamper’s Select White cardstock. Here are the step-by-step details for creating this card made for a special couple!

Step 1: Stamp the “love” definition from the This is Big Sentiments: Definitions of Love Stamp Set in Fine Linen on a 4-5/8″ X 6-5/8″ piece of Stamper’s Select White cardstock. Splatter black and a light pink / blush watercolor paint over the front panel and set it aside to dry.
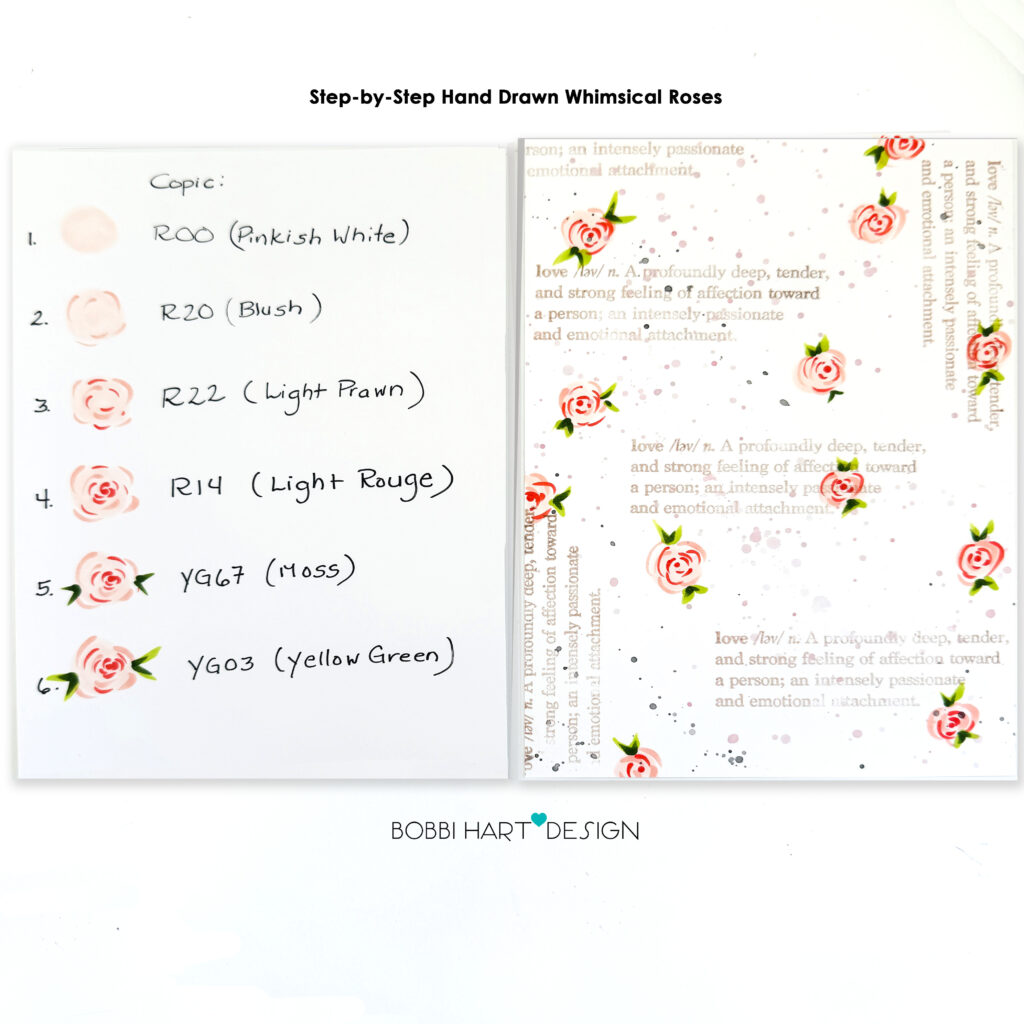
Step 2: Add hand drawn roses randomly, over the splatters and love definition stamped images. Follow the guide above for simple, whimsical roses using Copic and/or other markers.
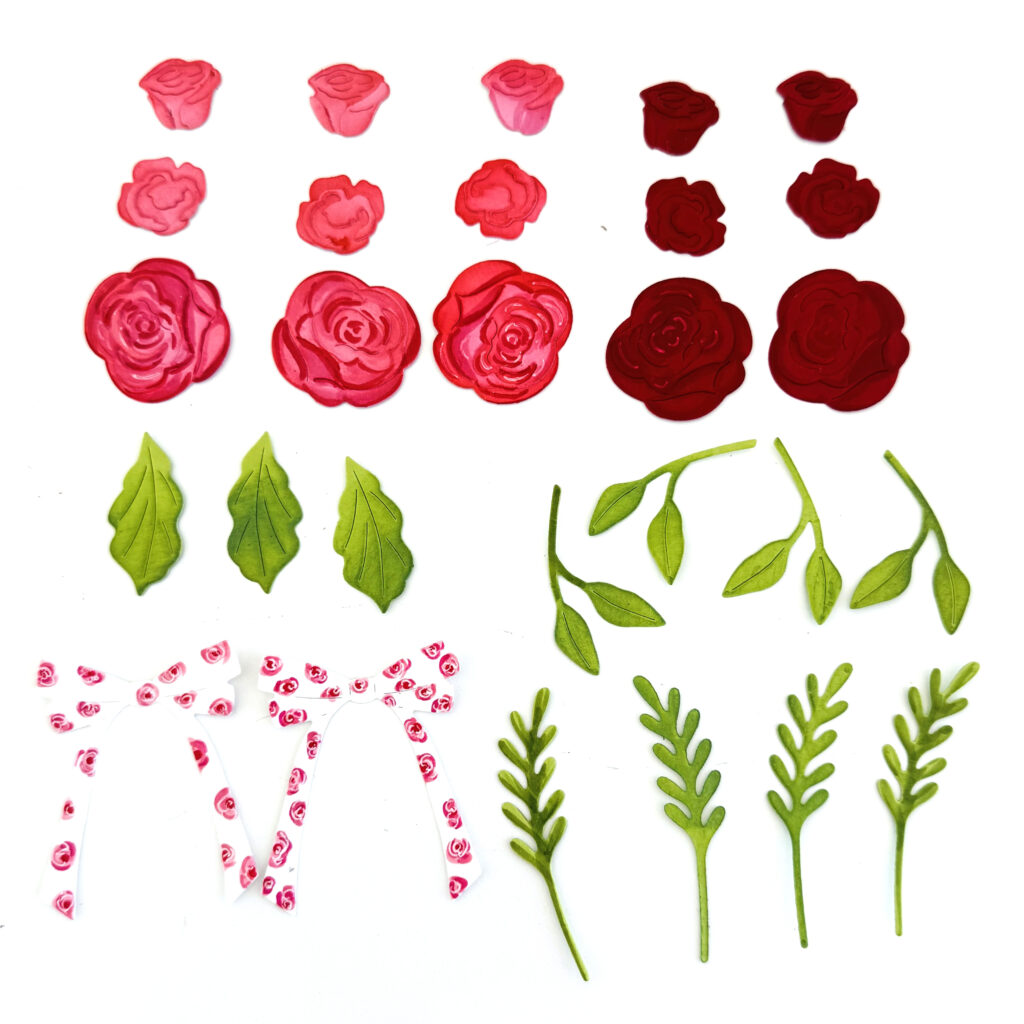
Step 3: Die cut the roses, leaves and bows from the Build-A-Bouquet Dies set. Use Pale Peony and Pure Poppy cardstock for the roses, New Leaf for the leaves and Stamper’s Select White cardstock for the bows. Using the same bow design, add rosettes to the white bows. Shade the roses and leaves using Distress Oxide Inks in Mowed Lawn and Kitsch Flamingo inks and blender brushes.
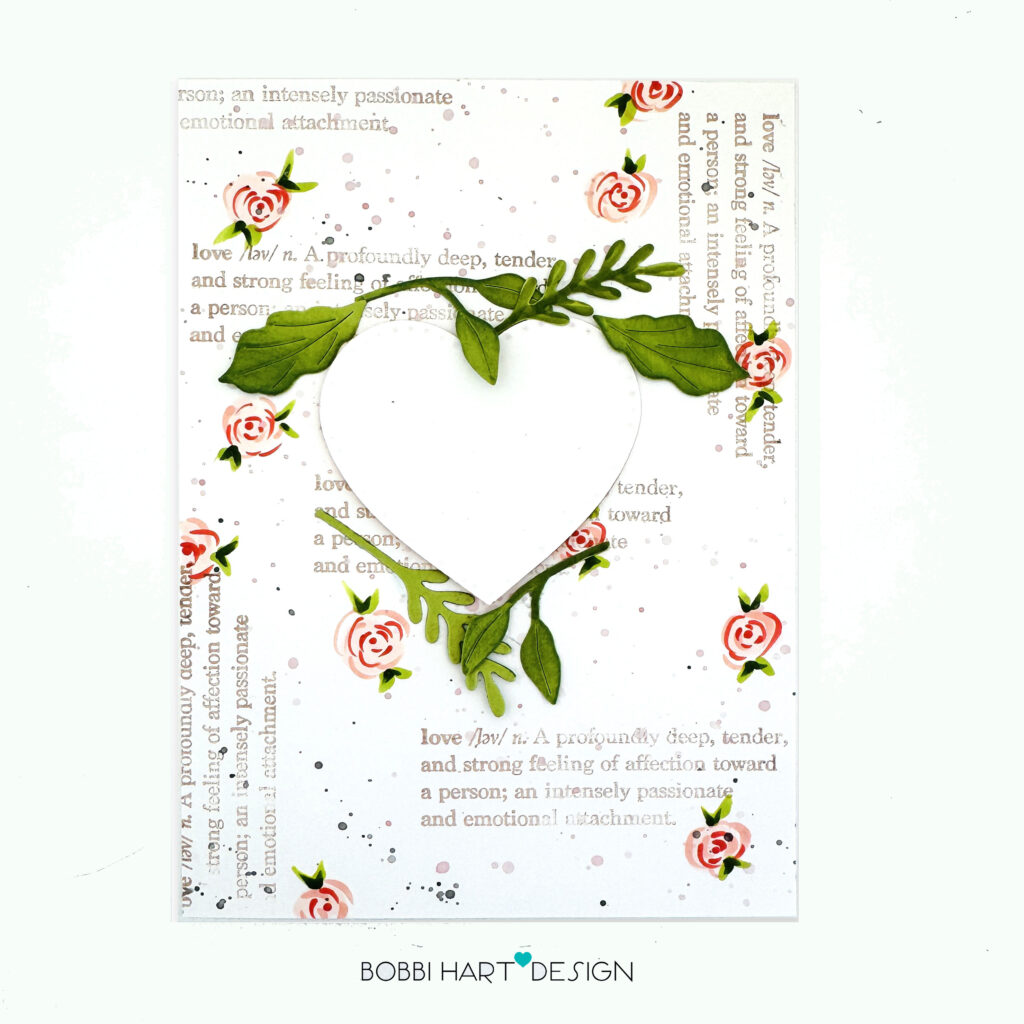
Step 4: Die cut a heart shape using the basic heart shape from the Heirloom Hearts die set. This will be the guide to designing the heart. Using repositionable tape, begin to attach some leaves, following the heart pattern to create the perfect heart shape.

Step 5: Attach the die cut roses, filling in as needed with leaves, blossoms and buds. Use foam tabs under a few of the roses to make the heart dimensional. Add the bows to the lower right section of the heart.

Step 6: Attach a border die cut from Sweet Blush cardstock using the A7 rectangle die from the In Frames: Big & Tall Rectangles dies. Cut three “love” scripted words from Pure Poppy, glue the three layers together and attach to the lower left corner, inside the stitched frame. Splatter white ink over the florals.
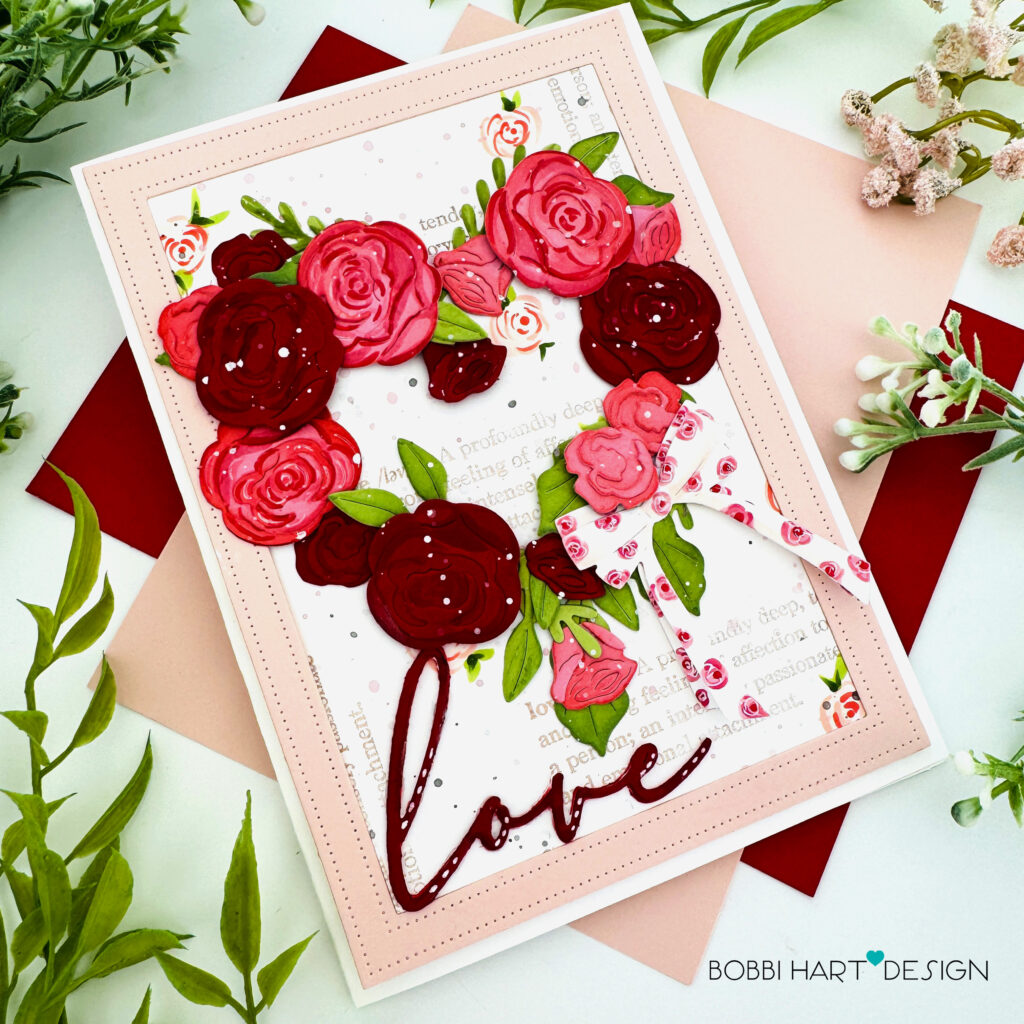
Step 7: Add some white highlights to the letters. Attach the front panel to an A7 card base made from Stamper’s Select White cardstock.
Thanks for stopping by today. If you want to see more ideas and inspiration from me, subscribe to my blog, BobbiHartDesign.com. I’ll send you updates on new posts! You can also find me on Instagram as @BobbiHartDesign and on Facebook as BobbiHartDesign. Bobbi Hartmann Lemanski, Bobbi Hart♥ Design, Adding h♥art into every design
Karen M says
Beautiful card! Love the rose heart design and the colors, etc!
Bobbi Lemanski says
Thank you, Karen!