Kelly Lunceford brings timeless holiday charm to today’s Project Inspiration with a beautifully decorated Christmas tree created using the Serene Evergreens Die. 🌲✨ Set against a soft gingham background, this design blends classic colors, layered foliage, and elegant details for a look that feels both festive and nostalgic. From the dimensional bow to the sparkling embellishments, every element comes together to celebrate the magic of decorating for the season.
Kelly shares, “The Serene Evergreens Die has become a fast favorite; versatile and easy to use with amazing results! I had so much fun decorating this little tree, getting it all ready for Christmas! The touch of gingham gives it an old fashioned feeling with a hint of nostalgia, which is always my favorite!”
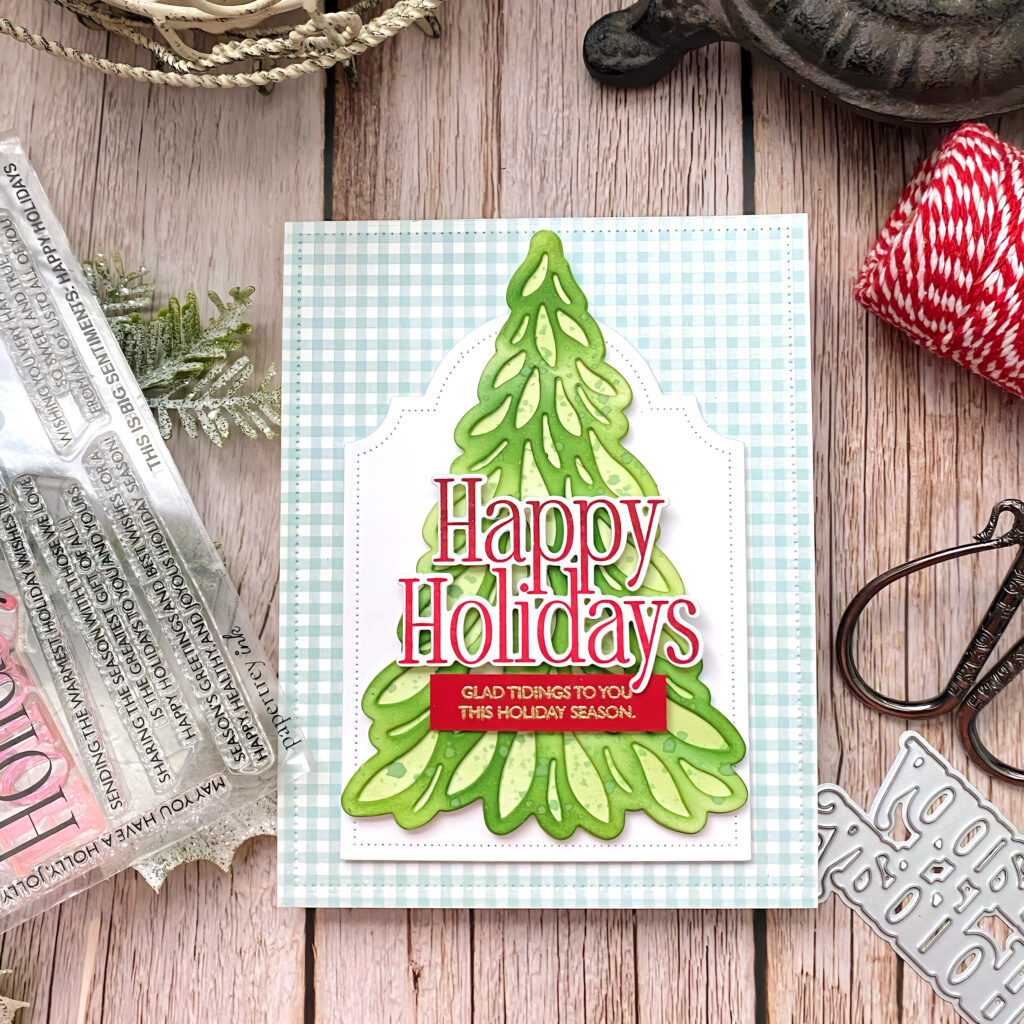
STEP 1: Cut an A2 panel of blue gingham paper. Use the largest pierced die included in the Nesting Basics: Pierced Rectangles Die to add the pierced detail. Glue it to a top folding A2 card base.
STEP 2: Cut the largest mat included in the Reflections: Isaiah 40 Die from white cardstock. Add it to the background using foam squares.
STEP 3: Cut the pieces for the tree. Add some ink and some ink splatter for additional detail. Glue the pieces together. Attach it to the mat using foam squares.
STEP 4: Die cut and stamp the sentiment and attach it to the tree with foam squares. Heat and boss, the companion sentiment in gold and add it to the bottom, using additional foam squares.
STEP 5: Cut the bow, glue it together and add some ink over the top. Attach it to the top of the tree using foam squares.
STEP 6: Cut and color all of the foliage using ink and blender brushes. Give it a good spritz of distress spritz and attach it in the corners and around the tree.
STEP 7: Add gems and shimmer spray as the finishing touch!
This project is a beautiful reminder of how a single die can become the foundation for endless holiday creativity. 🎁✨ Whether you love classic Christmas colors or enjoy adding your own twist with pattern and texture, the Serene Evergreens Die makes it easy to create a tree that feels truly special.
We would love to see how you decorate your own holiday trees, so be sure to tag Papertrey Ink or share your projects in the comments and spread a little Christmas cheer with us. 🎄💚


Cathy jo Corso-Plank says
LOVE this card!! Absolutely Beautiful!!