


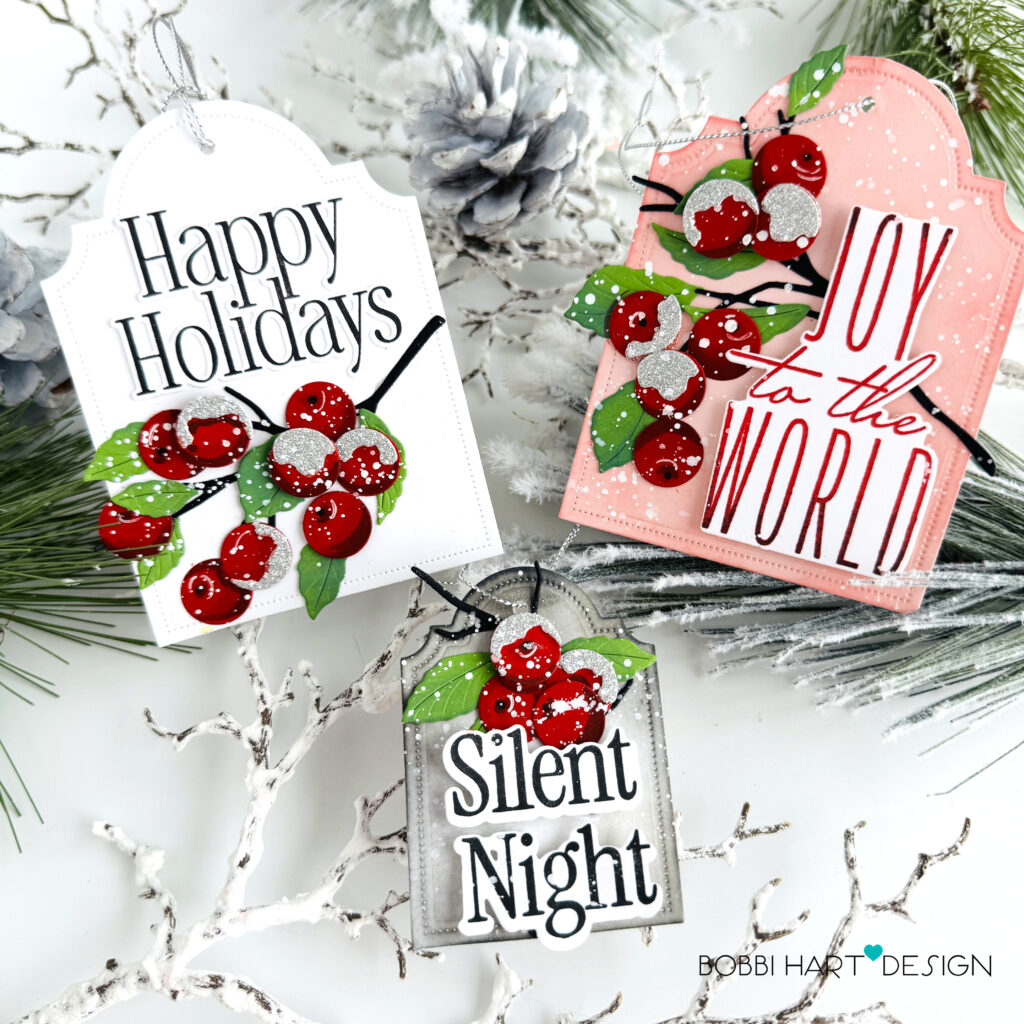
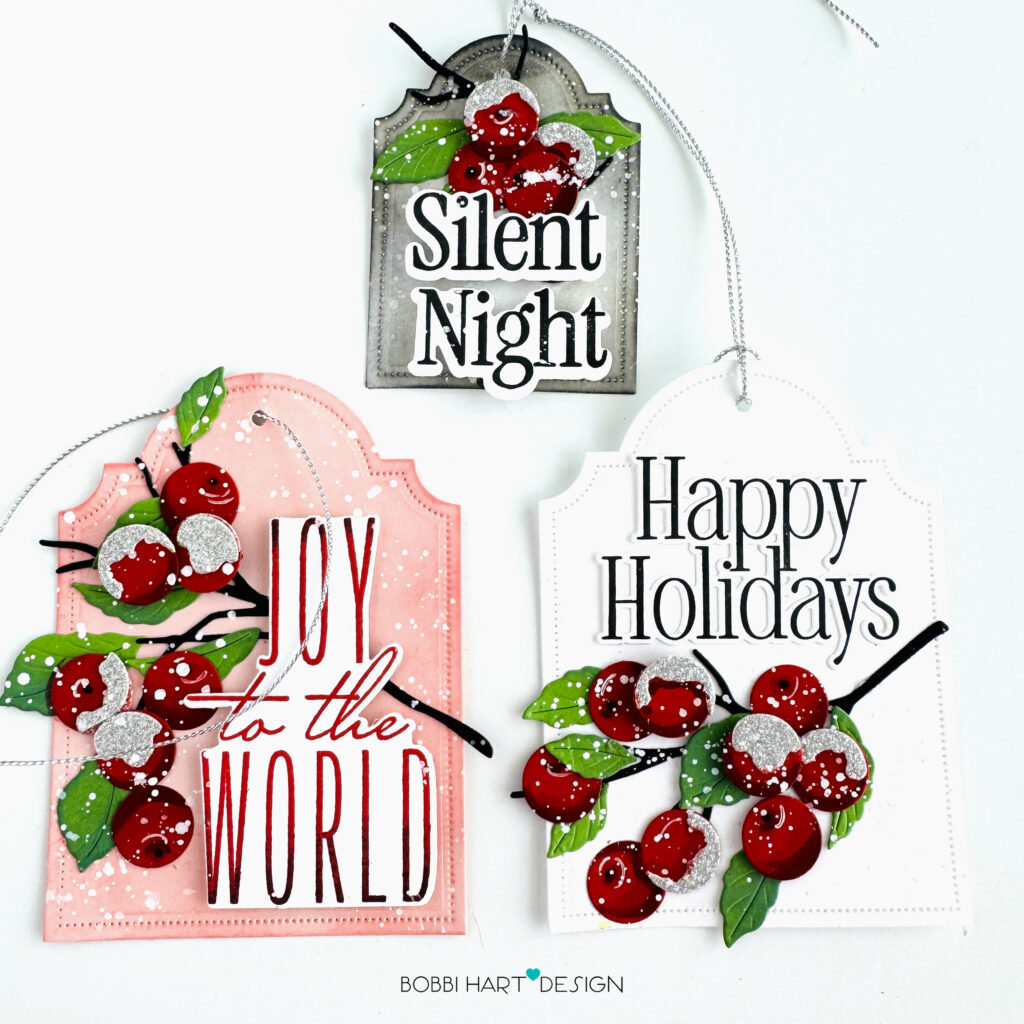
Hello Papertrey Ink friends! Bobbi here with some very merry and berry tags for the holidays! I love making tags. It gives that handmade feel to a purchased gift. I had a friend tell me that she still has last year’s holiday tag hanging on her mirror. It makes her happy to look at each morning. Today, I’m sharing three tags using the same stamping supplies. I hope you like them!
I’m using the following Papertrey Ink products:
Into the Blooms: Bold Berries Die
This is Big Sentiments: Silent Night Stamp Set and Coordinating Dies
This is Big Sentiments : Happy Holidays Stamp Set and Coordinating Dies
The Bigs Christmas Sentiments Stamp Set and Coordinating Dies
These tags use Stamper’s Select White cardstock for the base unless noted. True Black Ink was used for all the black ink stamping. Here are the step-by-step details for these delightful and merry, berry tags…
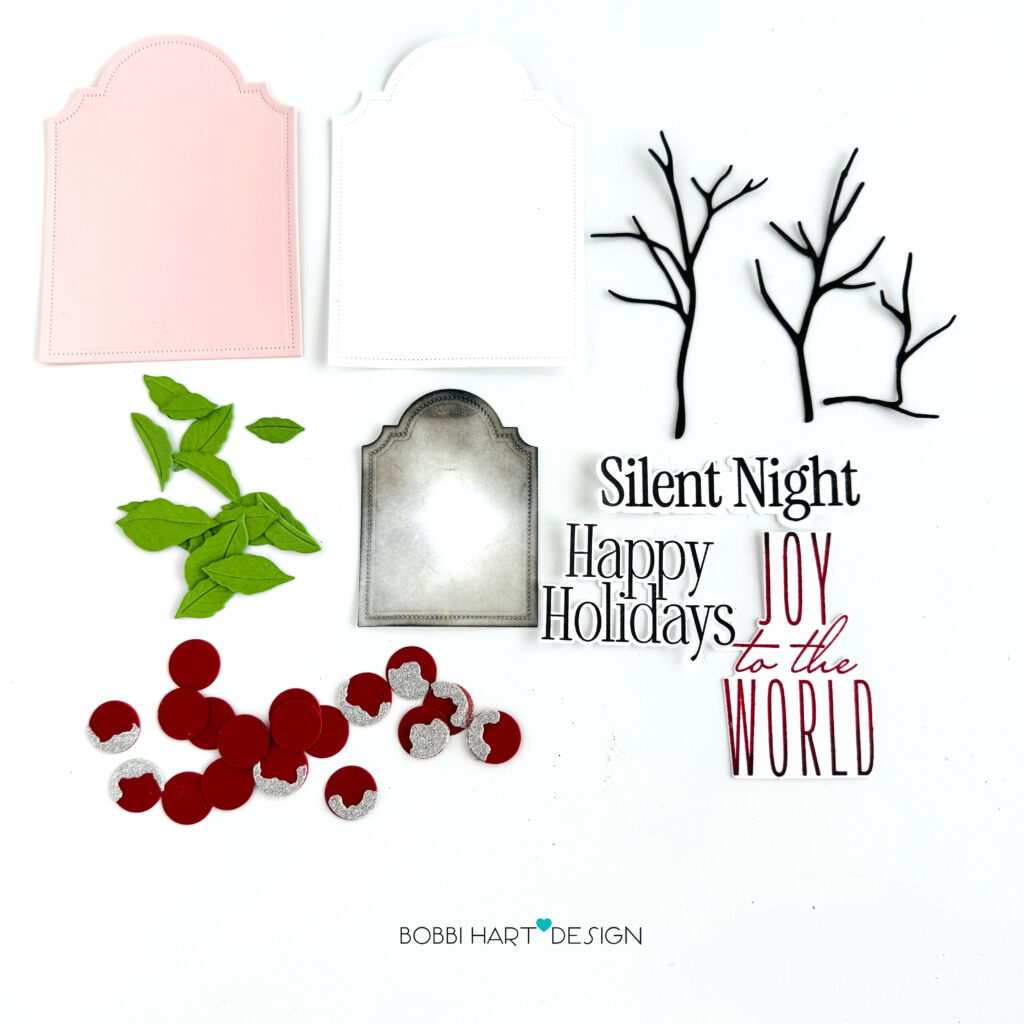
STEP 1: Die cut the following:
Reflections Isaiah 40 Die tag bases from Stamper’s Select White cardstock (large and small dies) and Sweet Blush cardstock (large die, only). Using Black Soot Distress Oxide Ink and a blender brush, blend black ink around the perimeter of the small tag for a “silent night” dusk look.
Die cut Into the Blooms: Bold Berries Die branches from True Black cardstock, berries from Pure Poppy cardstock (3 sets), snow caps from a silver glitter cardstock (5 sets) and leaves from New Leaf cardstock (3 sets). Attach the silver glitter caps to the red berries. Leave some red berries without snow caps.
Stamp and die cut the sentiments using This is Big Sentiments: Silent Night Stamp Set and Coordinating Dies, This is Big Sentiments : Happy Holidays Stamp Set and Coordinating Dies, The Bigs Christmas Sentiments Stamp Set and Coordinating Dies using True Black Ink and Pure Poppy Ink. Use both colors on the “Joy to the World” by stamping first in Pure Poppy and then just touching the top and bottom stamp edges with the True Black ink pad for a two-tone effect. It helps provide weight to the very thin font. Die cut the sentiments using the coordinating dies.
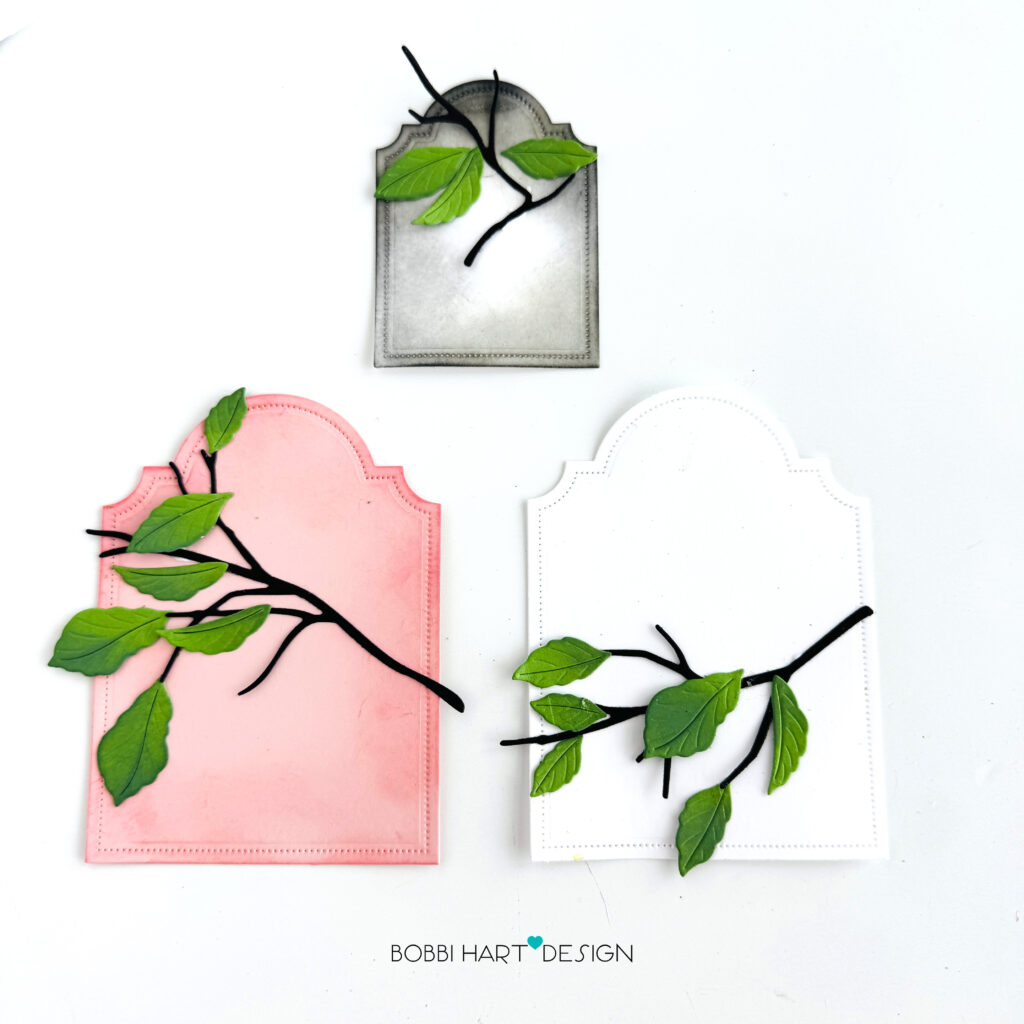
STEP 2: Using a blender brush, blend Worn Lipstick Ranger Distress Oxide ink around the edges of the pink tag. Blend Rustic Wilderness Ranger Distress Oxide Ink on the leaves to make them more realistic and dimensional.
Begin to assemble the branches by gluing the branches and leaves on the tags, leaving some general space for the sentiment die cuts.
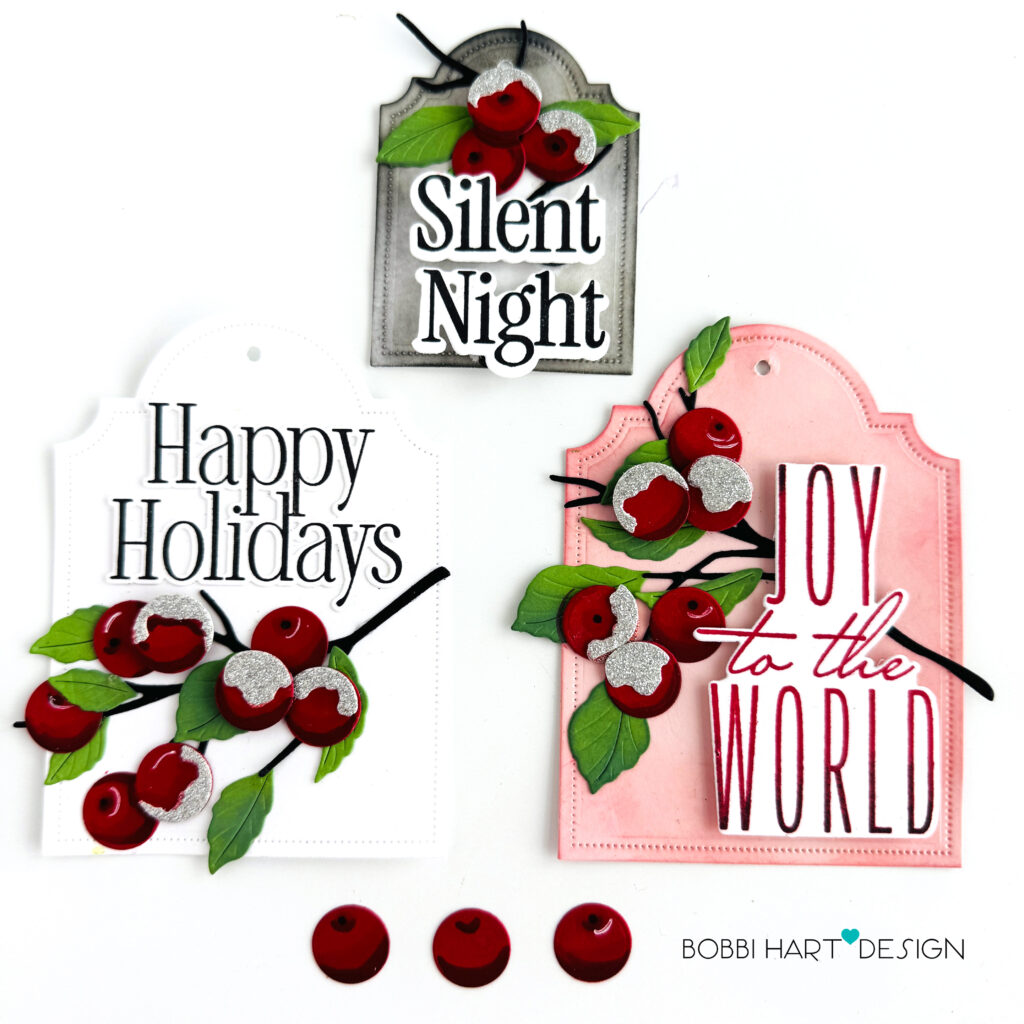
STEP 3: Add the sentiments using glue on the skinnier lined, “Happy Holidays” sentiment and foam tabs under the chunkier “joy to the world” and “silent night” die cuts.
Using Copic Markers (or similar), add shading and highlights to the berries to make them appear rounded and dimensional. Use R89 at the base and by the seed, followed by R29 above and around the darker shade. Use an R14 to blend the colors if needed. Add a white highlight at the top of each using a white Gelly Roll Pen. Shading and highlighting makes a big difference in the look of the berries. See above to show how the berries transition with each step.
Add the berries to the leafy branches, adding snow capped berries here and there. Pop up some of the berries using a small tab under the berry. This will offer more dimension in the berry clusters.
STEP 4: Splatter white paint over the tags and berries. Cover the sentiments with a sticky note if you prefer them to be clean. Set aside to dry.
Punch a hole at the top of each tag and add silver string to the tags to finish the look.
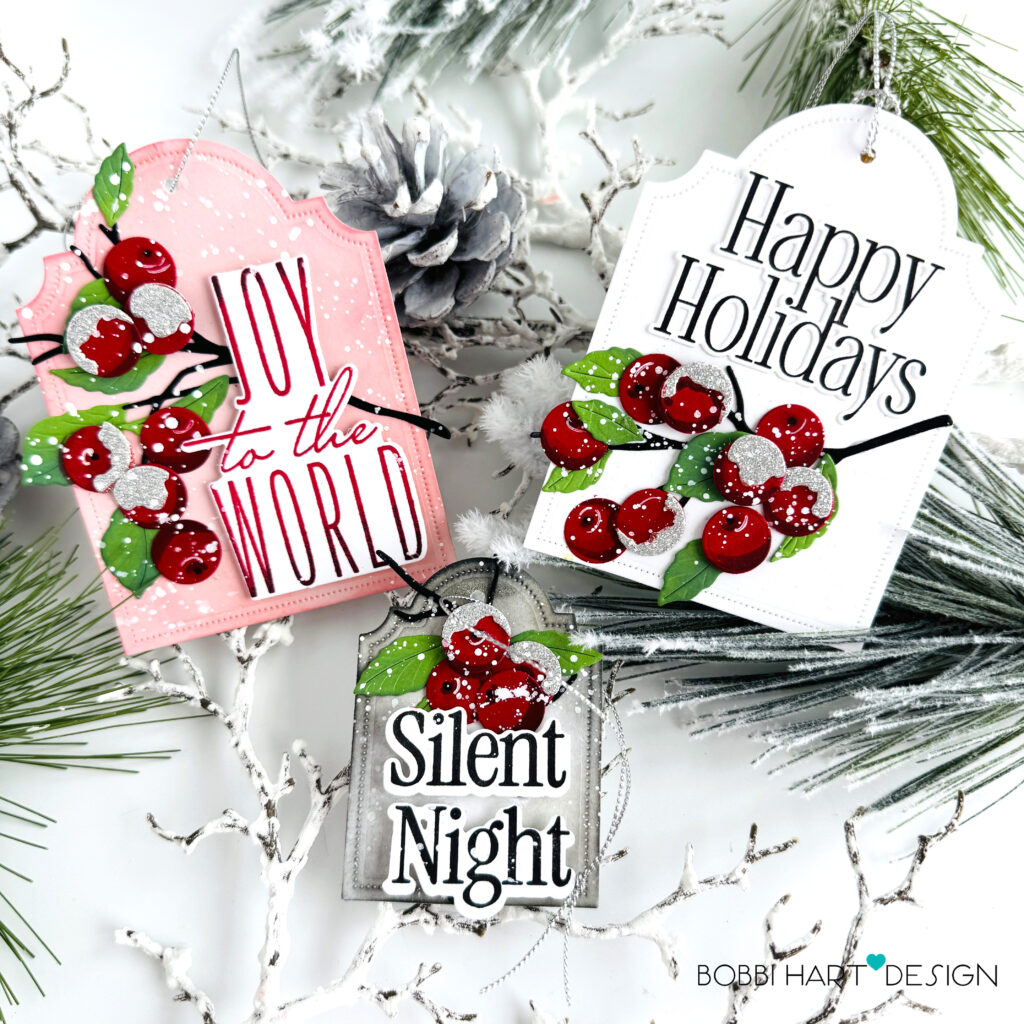
Here’s a look at each tag up close:

Happy Holidays Tag
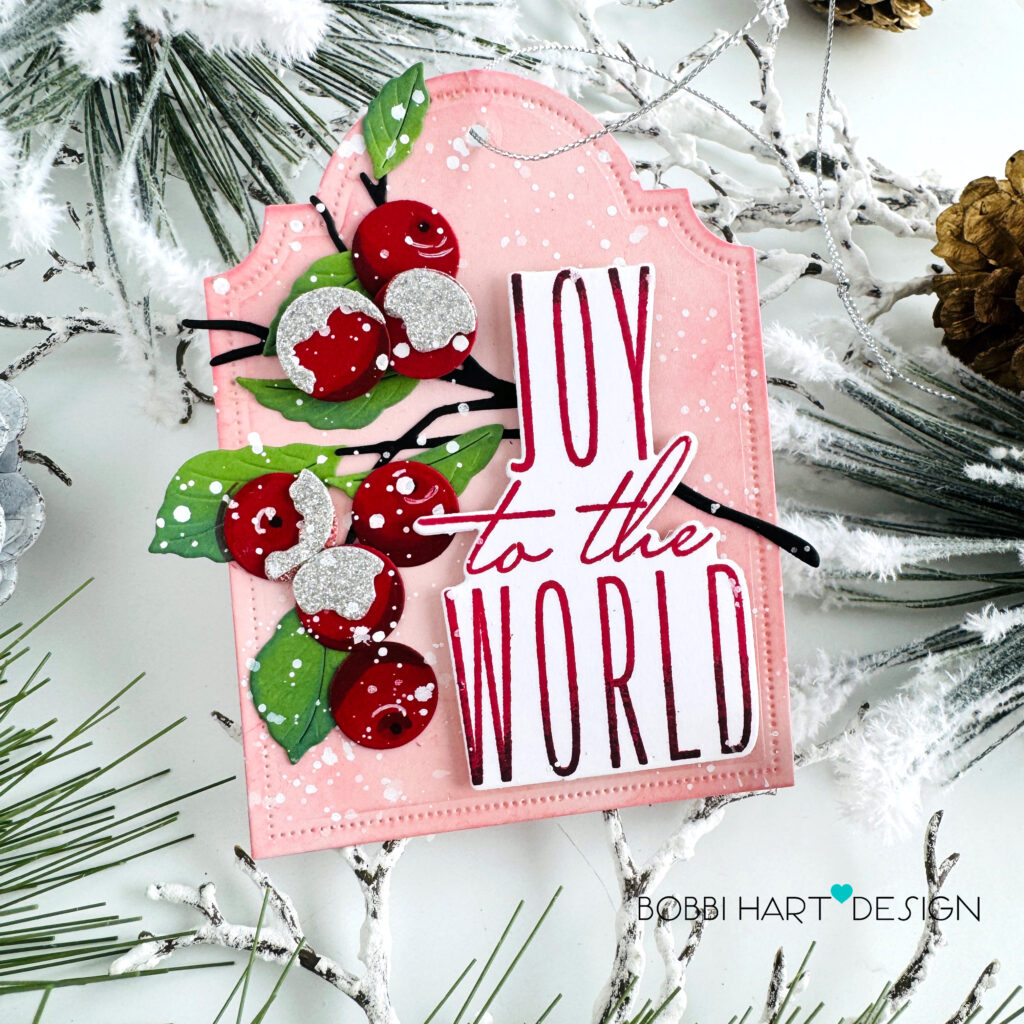
Joy to the World Tag
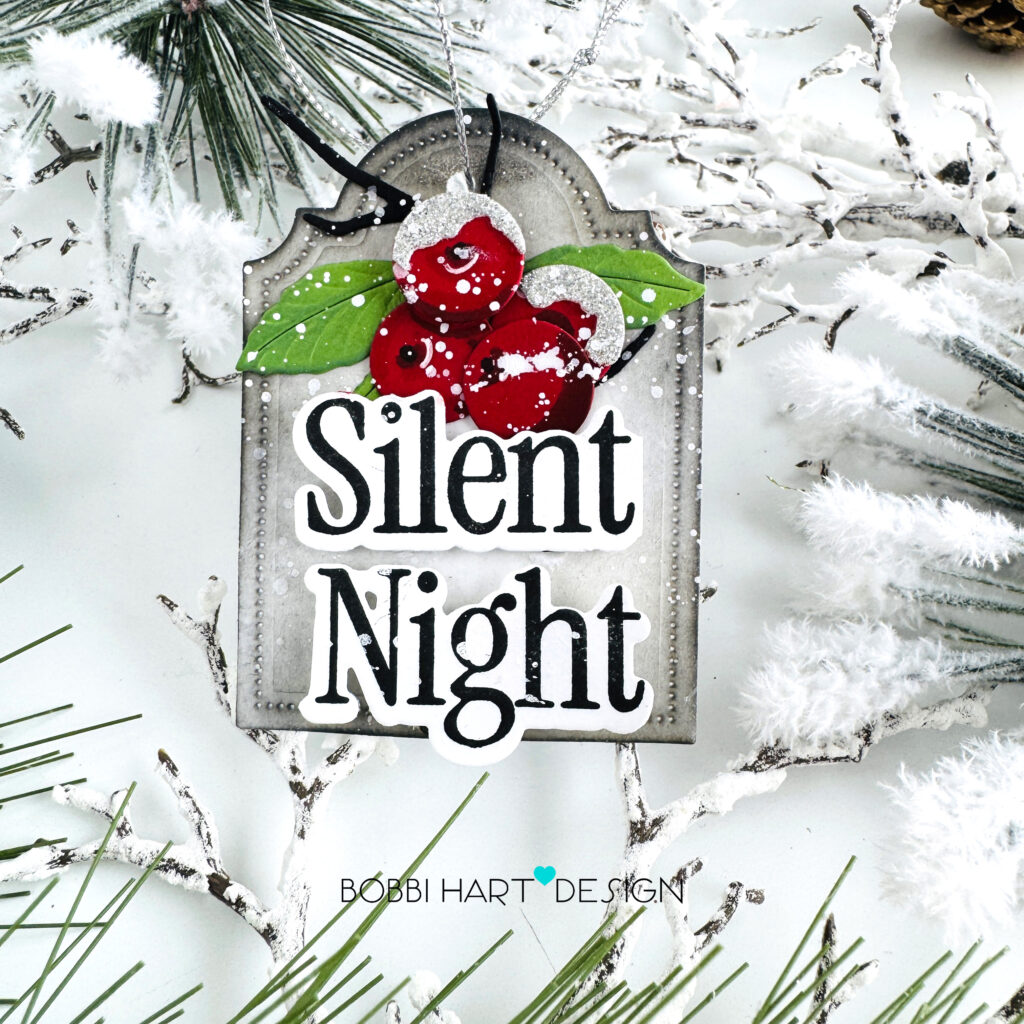
Silent Night Tag
A photo of the set of trio tags below. These tags would be pretty on any pink, red, kraft, white, silver or gold papers. I hope you give these a try! You still have time before Christmas to make them!
You can shop the entire collection here at Papertrey Ink! If you decide to place an order, please use the links in this post so that Papertrey Ink team knows what inspired you. I appreciate it very much. It helps me to continue to bring more ideas to you!
Thanks for stopping by today. If you want to see more ideas and inspiration from me, subscribe to my blog, BobbiHartDesign.com. I’ll send you updates on new posts! You can also find me on Instagram as @BobbiHartDesign and on Facebook as BobbiHartDesign. Bobbi Hartmann Lemanski, Bobbi Hart♥ Design, Adding h♥art into every design
Helen F. says
Gorgeous Tags, Bobbi! Love these large Berries!!
Della says
So pretty.