


The Christmas Wishes stamp set is adorable, but it doesn’t have to be used with jus the tree in the set. Think of the possibilities… an ornament, a snowflake, mistletoe, a wreath and so much more! Here’s how I changed this set up for this card. I’m using the following Papertrey Ink products:
Christmas Wishes stamps and coordinating Christmas Wishes dies
Cover Plate: Elegant Ornament dies
Step-by-Step Instructions
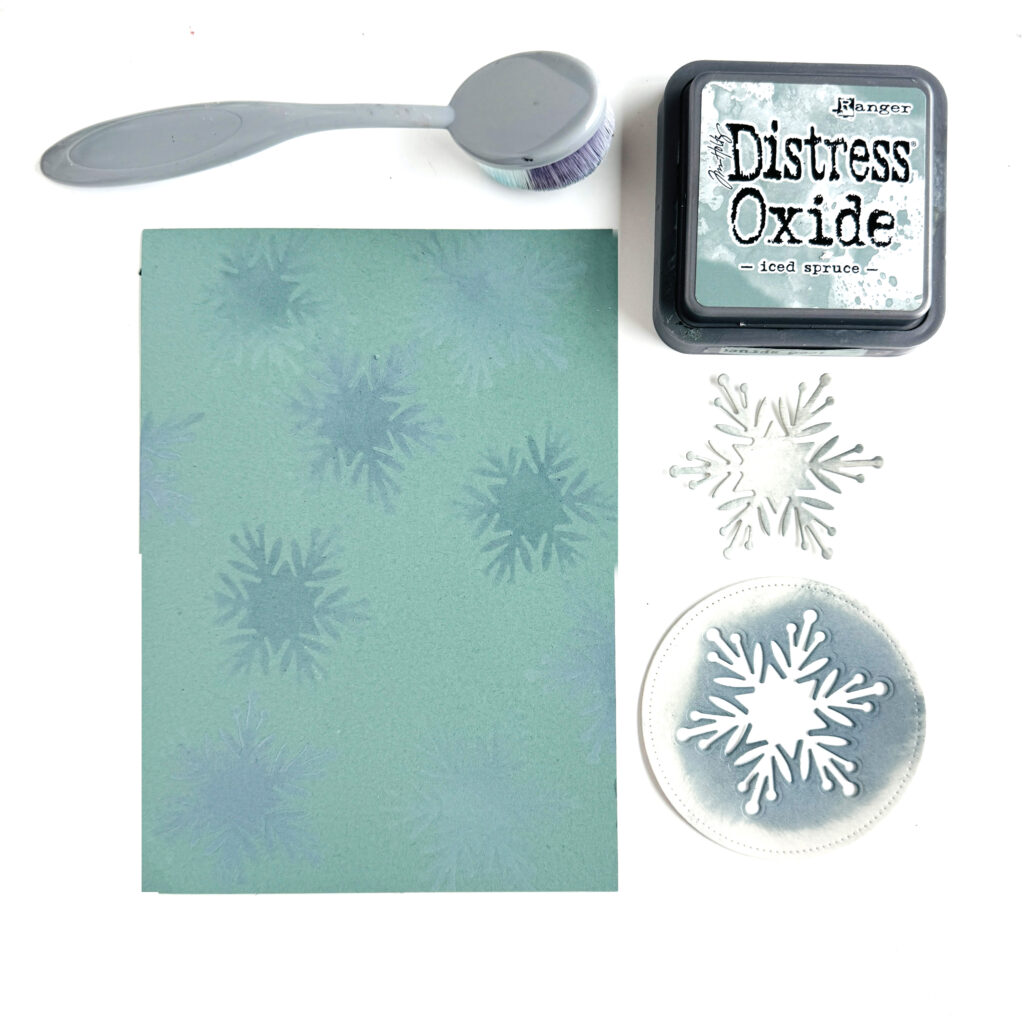
STEP ONE: Die cut a 5″ X 7″ card front panel from Ocean Tides cardstock. Die cut a large snowflake out of a Soft Stone cardstock using the Holiday Tags: Let It Snow dies to create a stencil for the card’s background. Using a blender brush and Distress Oxide Ink in Iced Spruce, add snowflakes to the card front panel. Blend the same ink around the edges of the snowflake cutout.
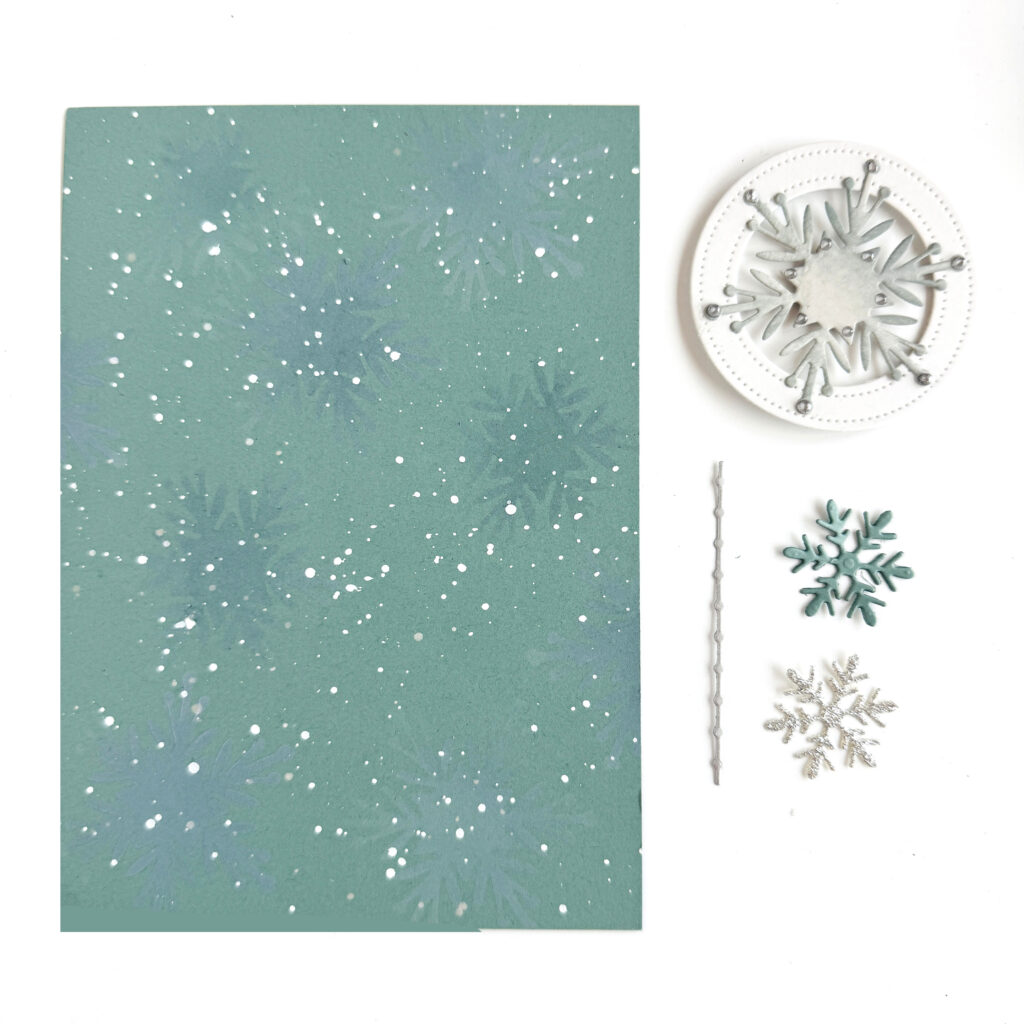
STEP TWO: Splatter white paint over the inked snowflakes. Set aside to dry. Die cut the ornament hanger from the Cover Plate: Elegant Ornament dies from silver metallic cardstock. Die cut a circle frame using the In Frames: Circle dies. Adhere the larger snowflake to the circle frame. Add Silver Metallic Pearl Pen to the snowflake tips and set aside to dry. Die cut smaller snowflakes from silver glitter cardstock and Ocean Tides.

STEP THREE: Stamp the Christmas Wishes arched sentiment on Stampers’ Select white cardstock using VersaMark Watermark pad. Emboss in silver using silver embossing powder. Die cut the sentiment using the coordinating Christmas Wishes dies. Add additional die cuts behind the letters to make the the sentiment arch stand out. Die cut the Circle Frame from Soft Stone cardstock.
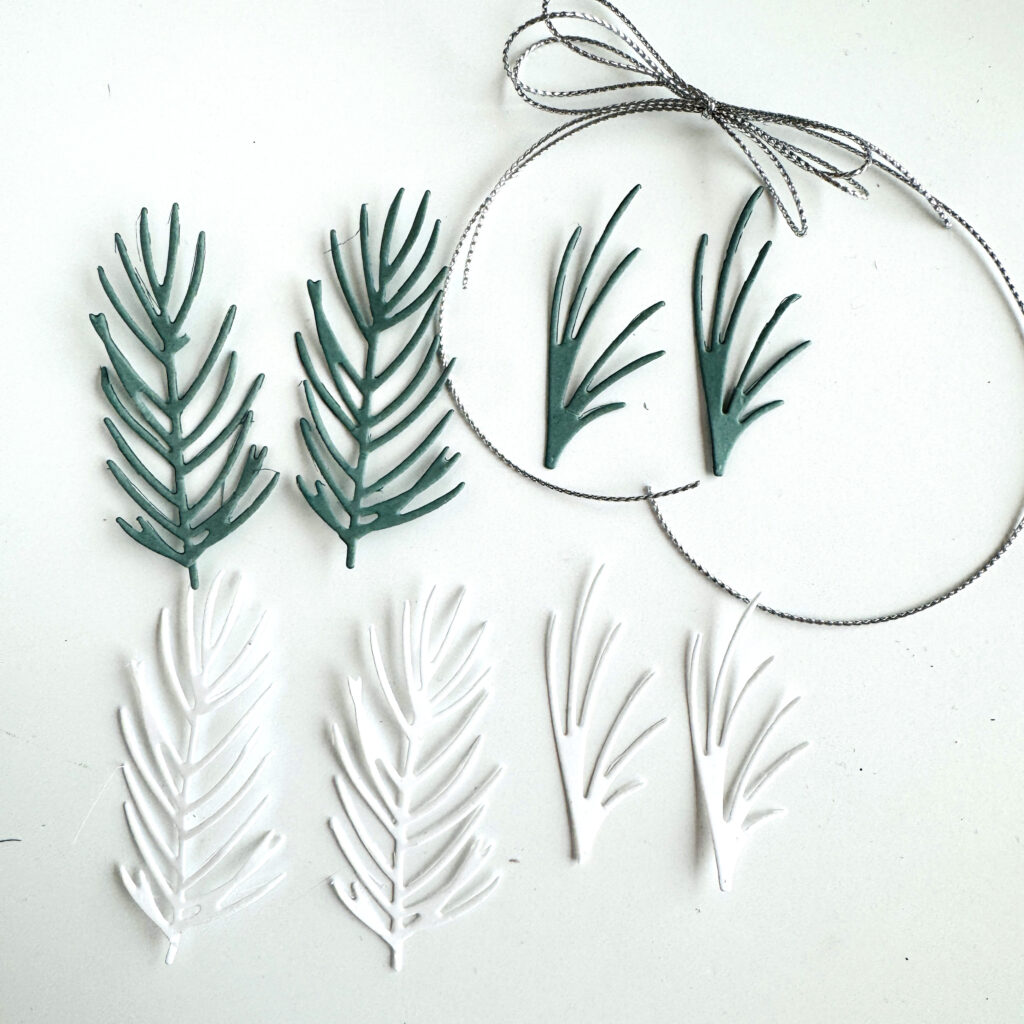
STEP FOUR: Die cut pine branches from the Christmas Sprigs dies in white and Ocean Tides. Using metallic silver string, make a bow.
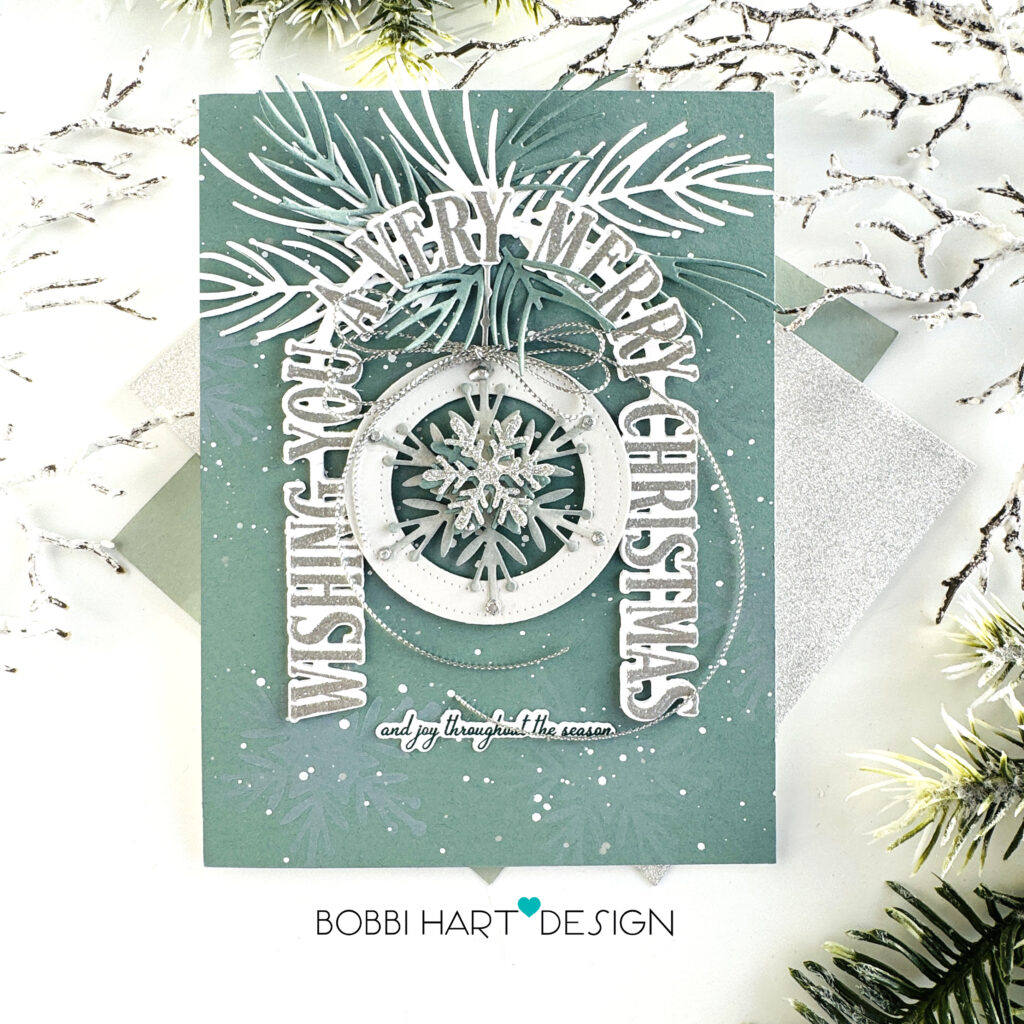
STEP FIVE: Attach the arch sentiment using foam tabs. Add the branches behind the sentiment at the top. Add the ornament hanger, circle frame, and bow. Layer the snowflakes, putting the glitter snowflake at the very top. Stamp, die cut and attach the “and joy throughout the season” sentiment at the bottom of the arch.
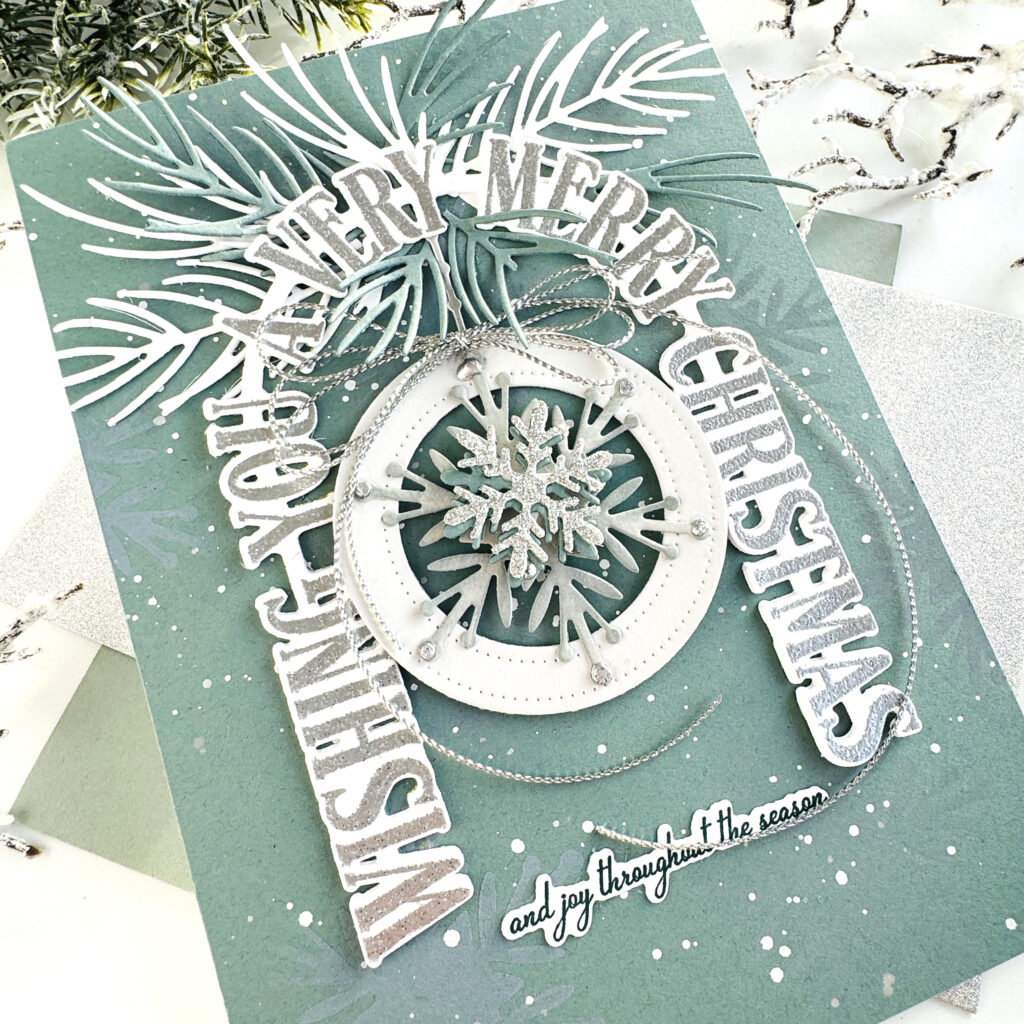
Here’s a closeup of the snowflake ornament. The layers of colors add depth and dimension to the card design.
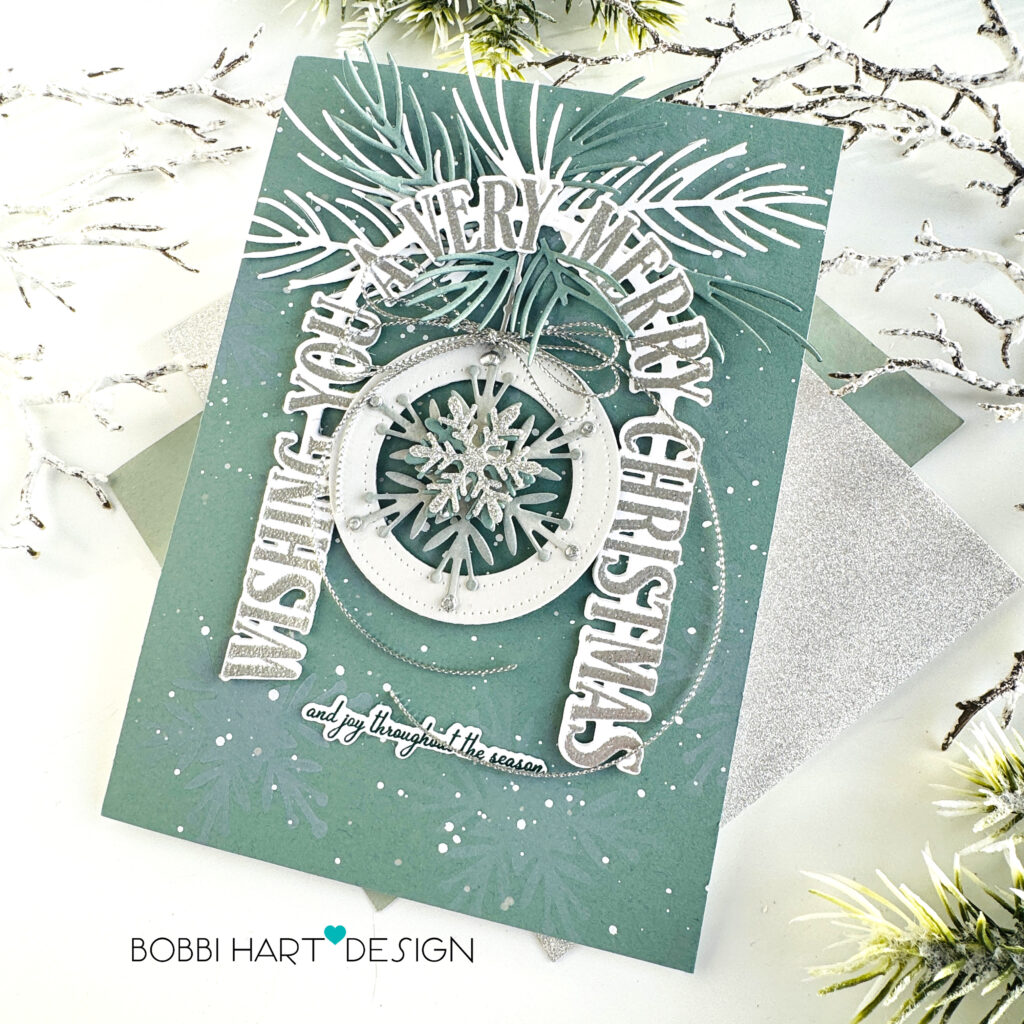
This card is sparkly and pretty and ready to send! Thank you for stopping by today! You can shop the entire collection here at Papertrey Ink! If you decide to place an order, please use the links in this post so that Papertrey Ink team knows what inspired you. I appreciate it very much. It helps me to continue to bring more ideas to you!
Thanks for stopping by today. If you want to see more ideas and inspiration from me, subscribe to my blog, BobbiHartDesign.com. I’ll send you updates on new posts! You can also find me on Instagram as @BobbiHartDesign and on Facebook as BobbiHartDesign.
Bobbi Hartmann Lemanski, Bobbi Hart♥ Design, Adding h♥art into every design
Sandy Kay says
Can’t wait to receive this set and make this card!
Helen F. says
Ooohh, this is so pretty! Love the color scheme, Bobbi
Diana says
I find myself drawn to the color,scheme and curved sentiment. Nice job