


Hello Papertrey Ink friends. I’m having so much fun with these new holiday sets in the September release. Today, I’m sharing a very vibrant and contemporary holiday card featuring the Twelve Days of Christmas. I’m using the following Papertrey Ink products for this 5″ X 7″ card:
Twelve Days of Christmas Title die
Twelve Days of Christmas stamp set and coordinating dies
Nutcracker Magic stamp set and coordinating dies
This card is 5″ X 7″ and uses a white card base made from Stamper’s Select White cardstock. True Black Ink was used for all the black ink stamping. Here are the step-by-step details for creating this card.
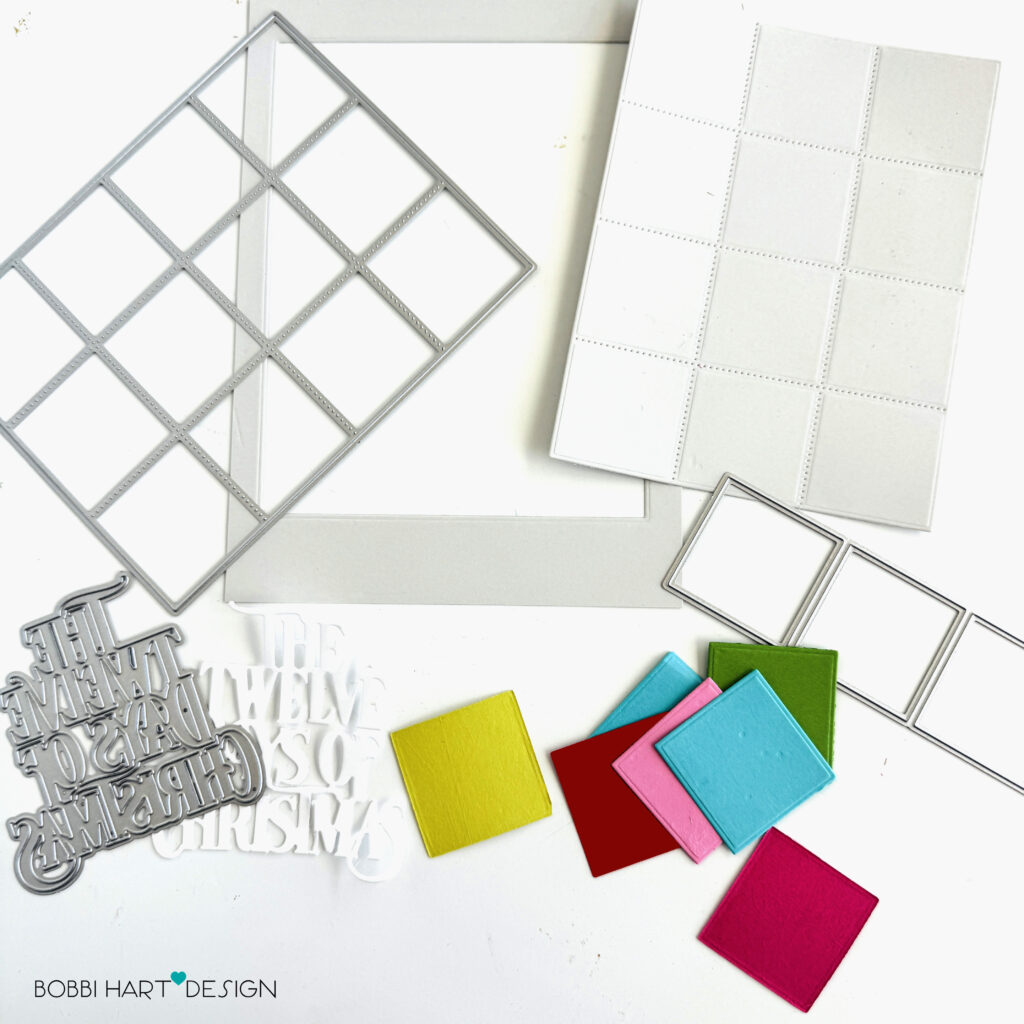
Step 1: Using the Twelve Days of Christmas coordinating dies, die cut twelve individual colorful squares using Pure Poppy (2), Lovely Lady (1), Raspberry Fizz (2), Hawaiian Shores (3), New Leaf (2) and Limeade Ice (2). Die cut the large grid from a 5″ X 7″ piece of Soft Stone. Die cut the title from white cardstock using the Twelve Days of Christmas Title die.

Step 2: Lay out the colored squares in a pleasing pattern of color. Stamp each one using Versamark Watermark Ink Pad using the Twelve Days of Christmas stamps. Emboss with white embossing powder and heat set. Tip: Use a small watercolor brush to wipe off any extra powder on the squares and use a tweezer tool to hold the cardstock while heat setting. It will keep your fingers from getting too hot!
Cut two of the titles from white cardstock.
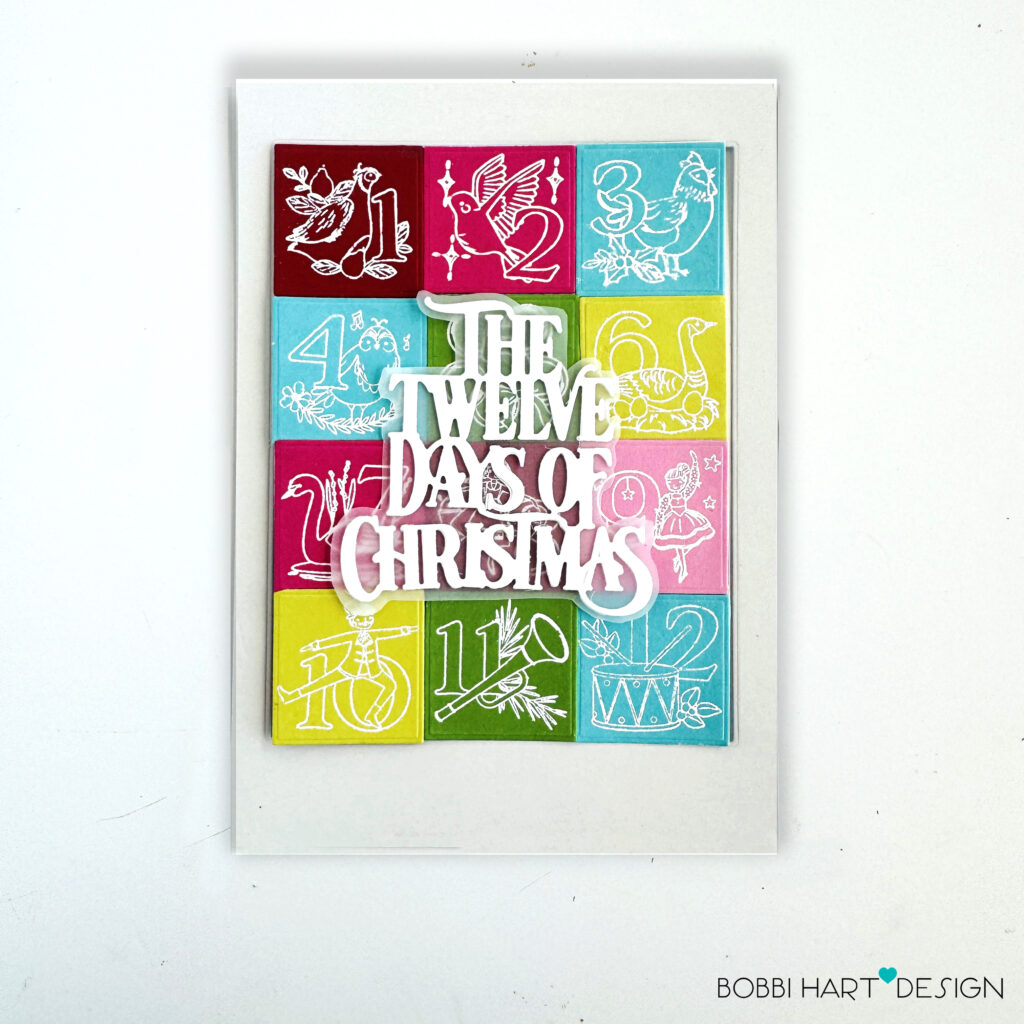
Step 3: Attach the embossed squares to the grid and adhere/glue in place. Place the grid back in the 5″ X 7″ front panel.
Layer the title die cuts together and add a piece of vellum to the back of the die cuts. Hand cut the vellum, keeping a small border of vellum around the outside edge.
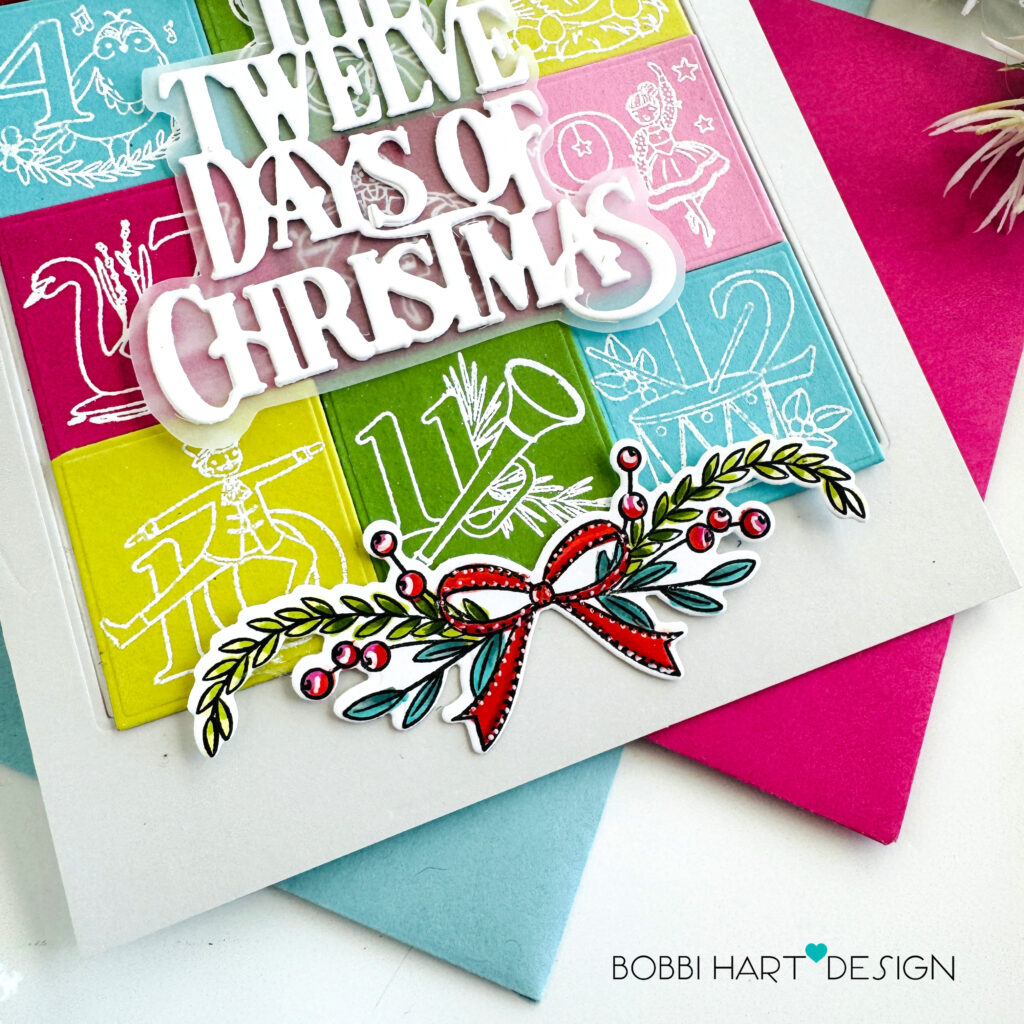
Step 4: Stamp the larger swag in black ink on white cardstock using the Nutcracker Magic stamp set. Die cut the swag using the coordinating dies. Color the swag using the following Copic Markers: R24, RV55, YG67, YG03, BG72, BG13, R24, R14, and a white Gelly Roll pen. Attach the swag to the bottom of the grid design.
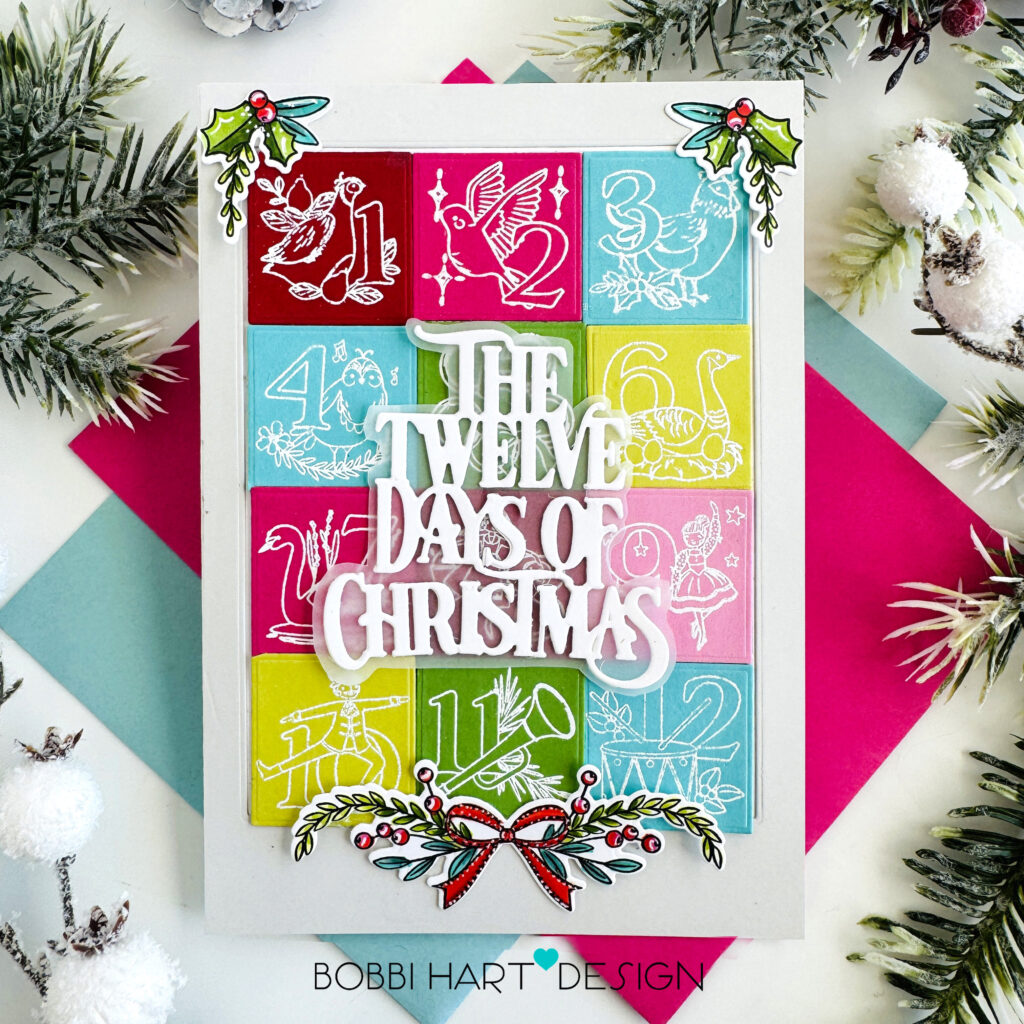
Step 5: Do the same as step 4 using the smaller swags from the Nutcracker Magic stamp set and coordinating dies. Attach to the upper right and left corners.

You can shop the entire collection here at Papertrey Ink! If you decide to place an order, please use the links in this post so that Papertrey Ink team knows what inspired you. I appreciate it very much. It helps me to continue to bring more ideas to you!
Thanks for stopping by today. If you want to see more ideas and inspiration from me, subscribe to my blog, BobbiHartDesign.com. I’ll send you updates on new posts! You can also find me on Instagram as @BobbiHartDesign and on Facebook as BobbiHartDesign. Bobbi Hartmann Lemanski, Bobbi Hart♥ Design, Adding h♥art into every design