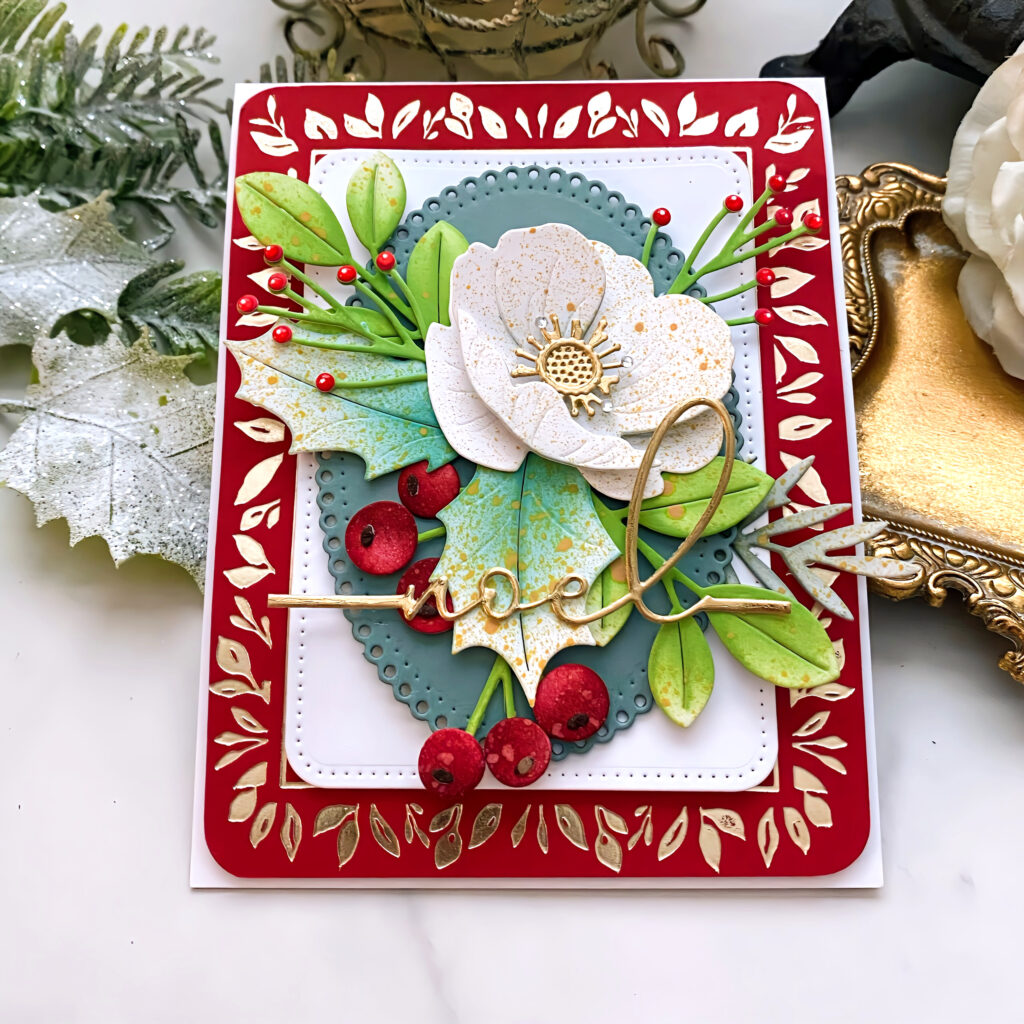
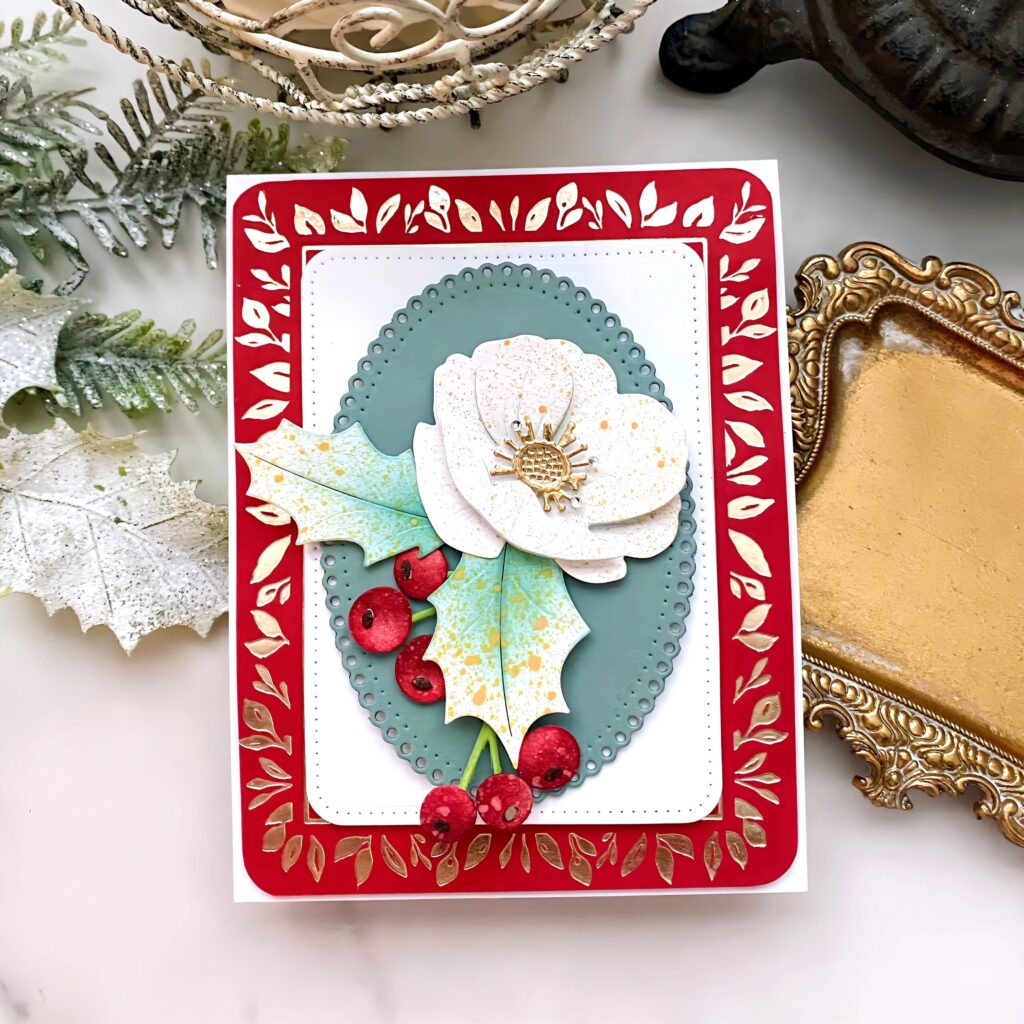
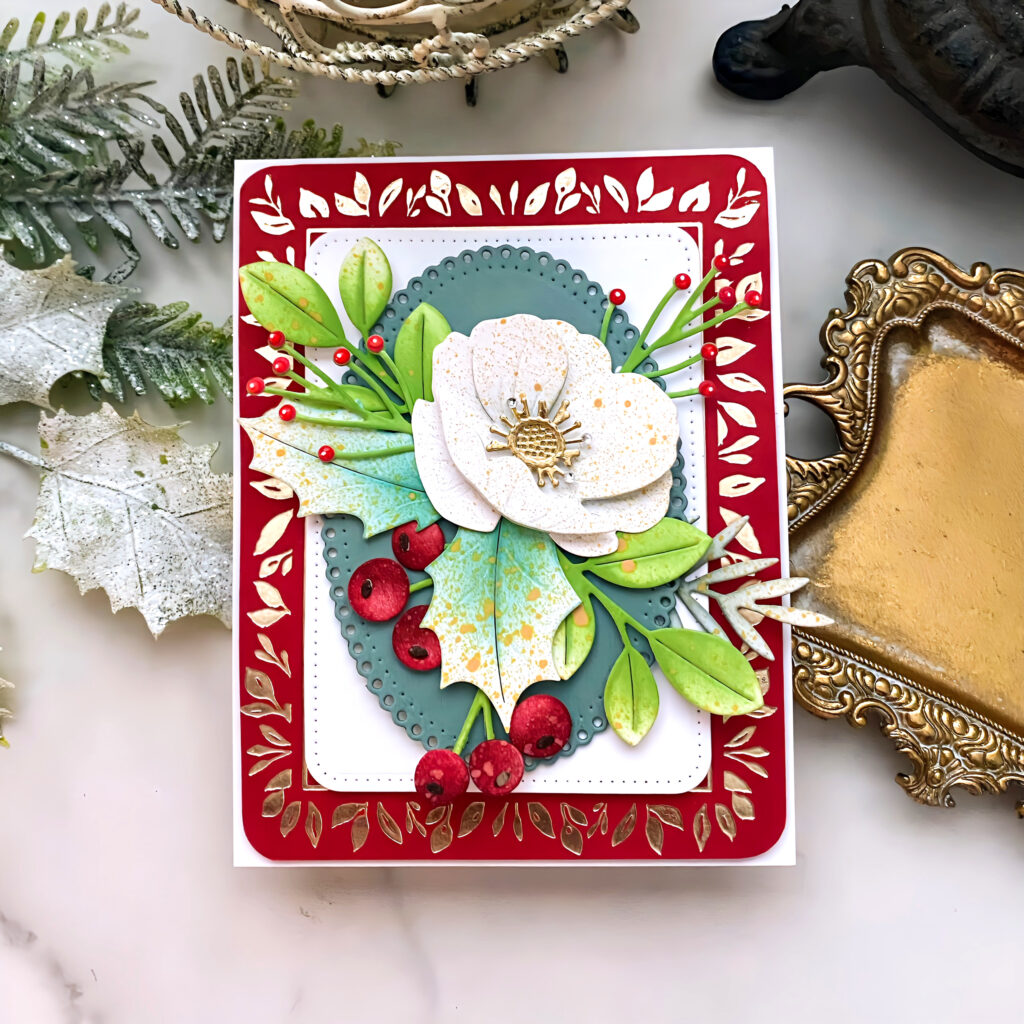
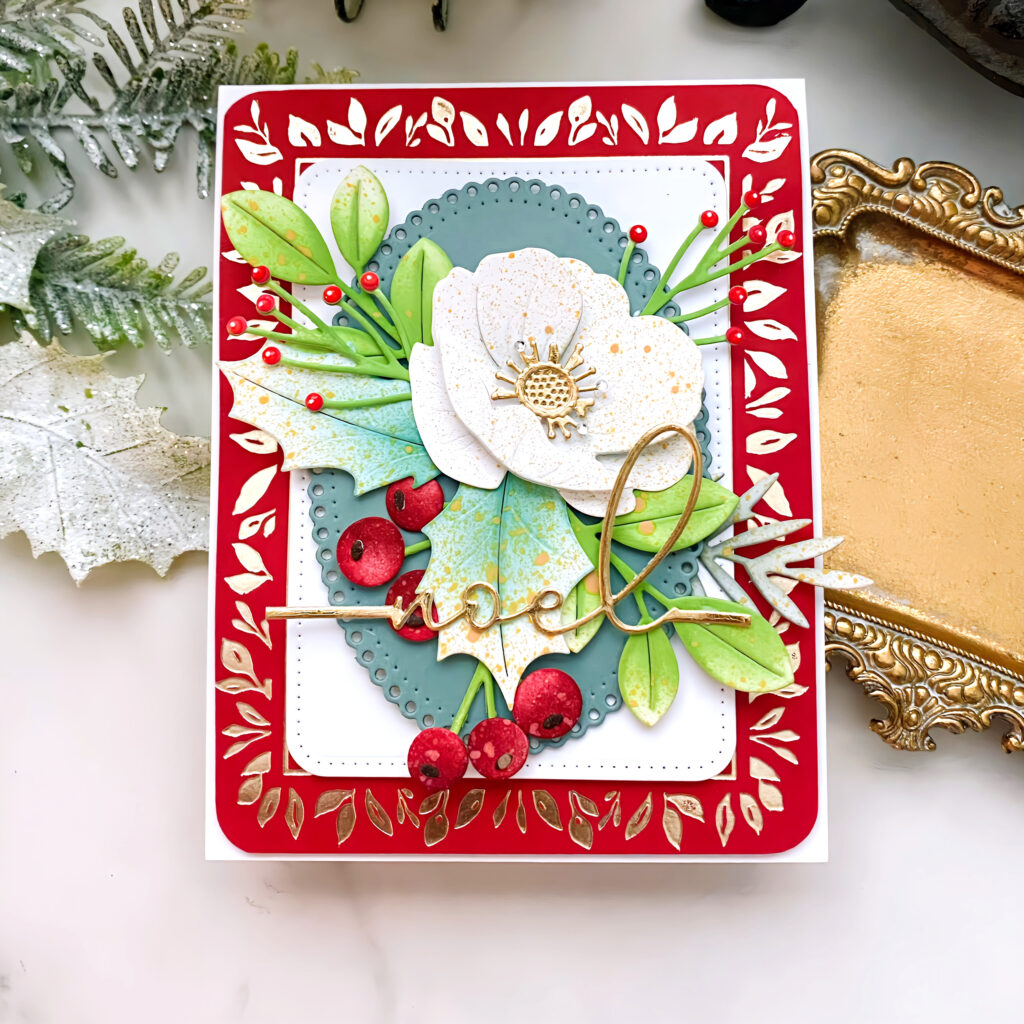
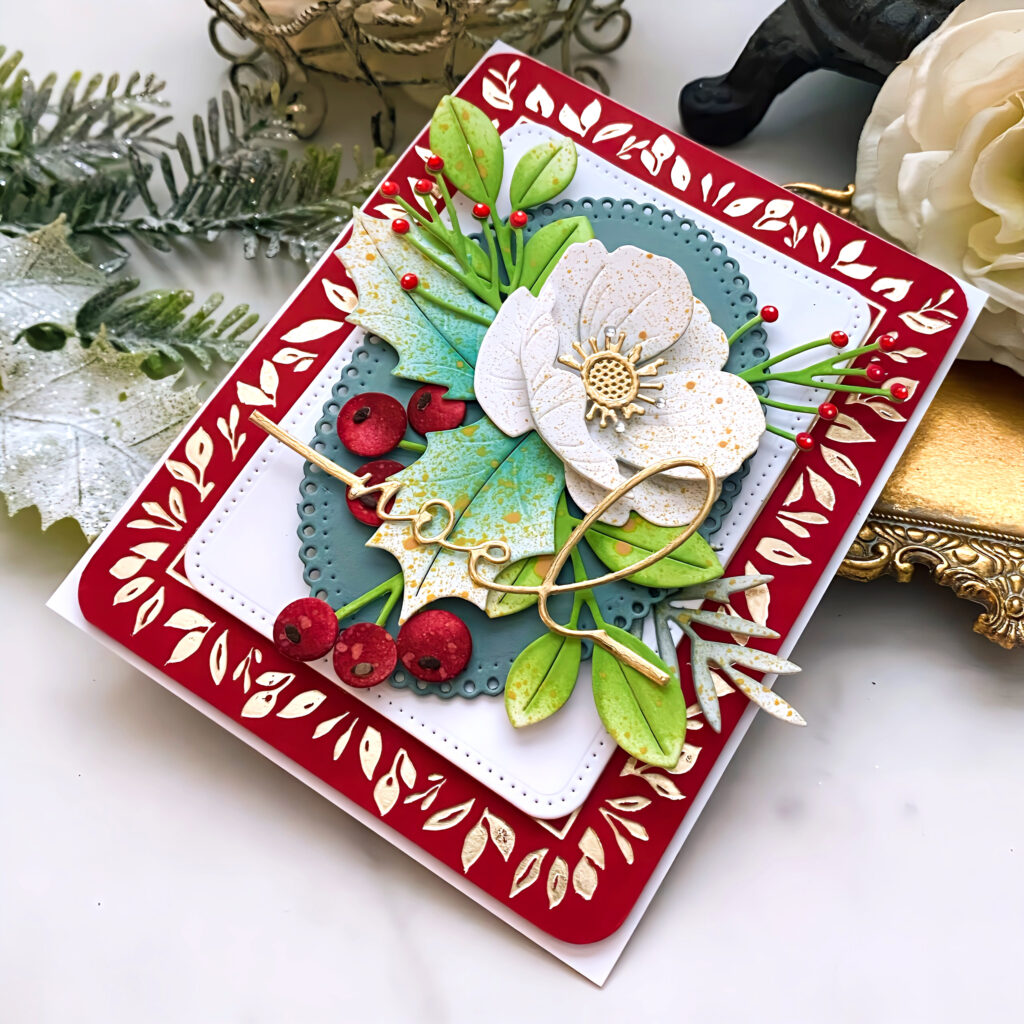
Kelly’s holiday design captures the magic of Christmas with elegant layers, festive greenery, and golden accents that shimmer with seasonal warmth. From the delicate white bloom to the bright berries and lush leaves, every detail nods to the beauty of the season.
Kelly shares, “the sights and sounds of Christmas are what make the season so magical! There’s no denying the florals and greenery we see throughout the season help enhance the magic! I chose to use some of my favorite holiday supplies to bring this Christmas card to life!”
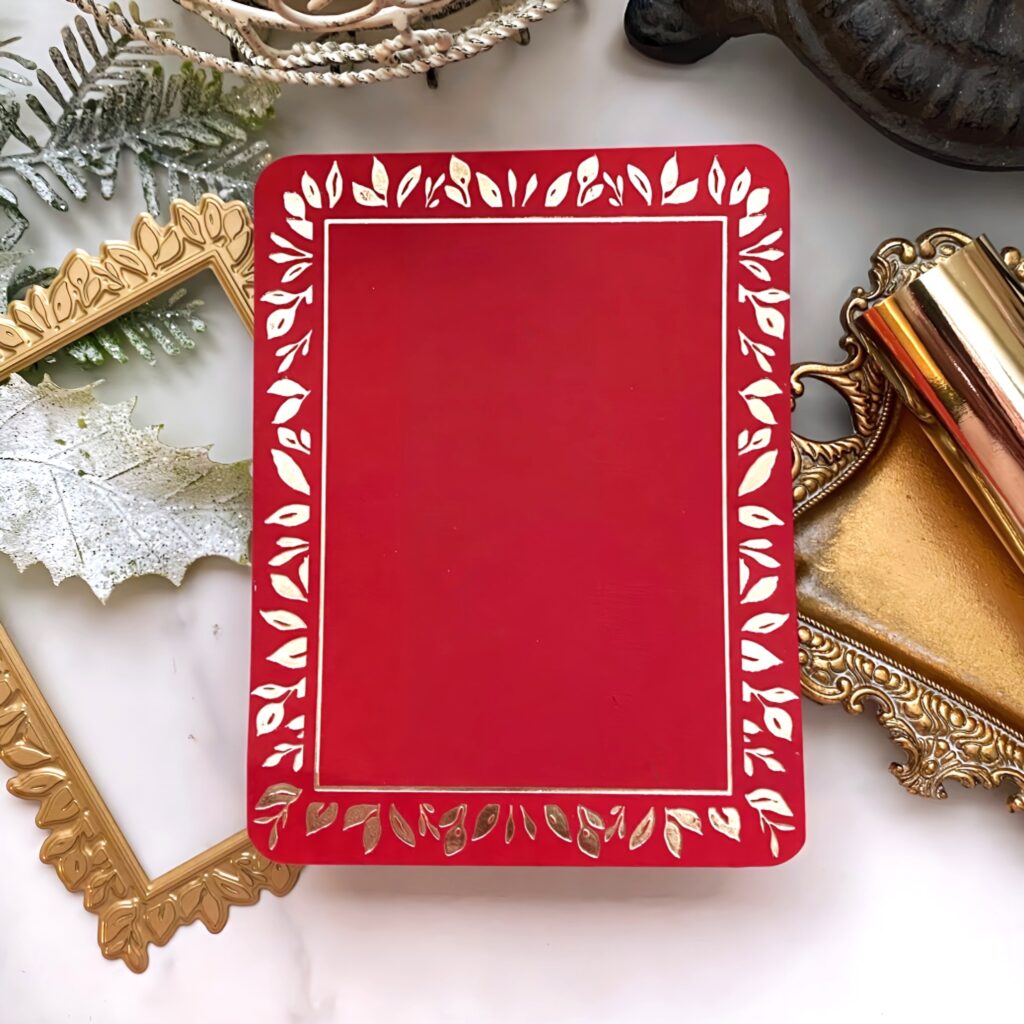
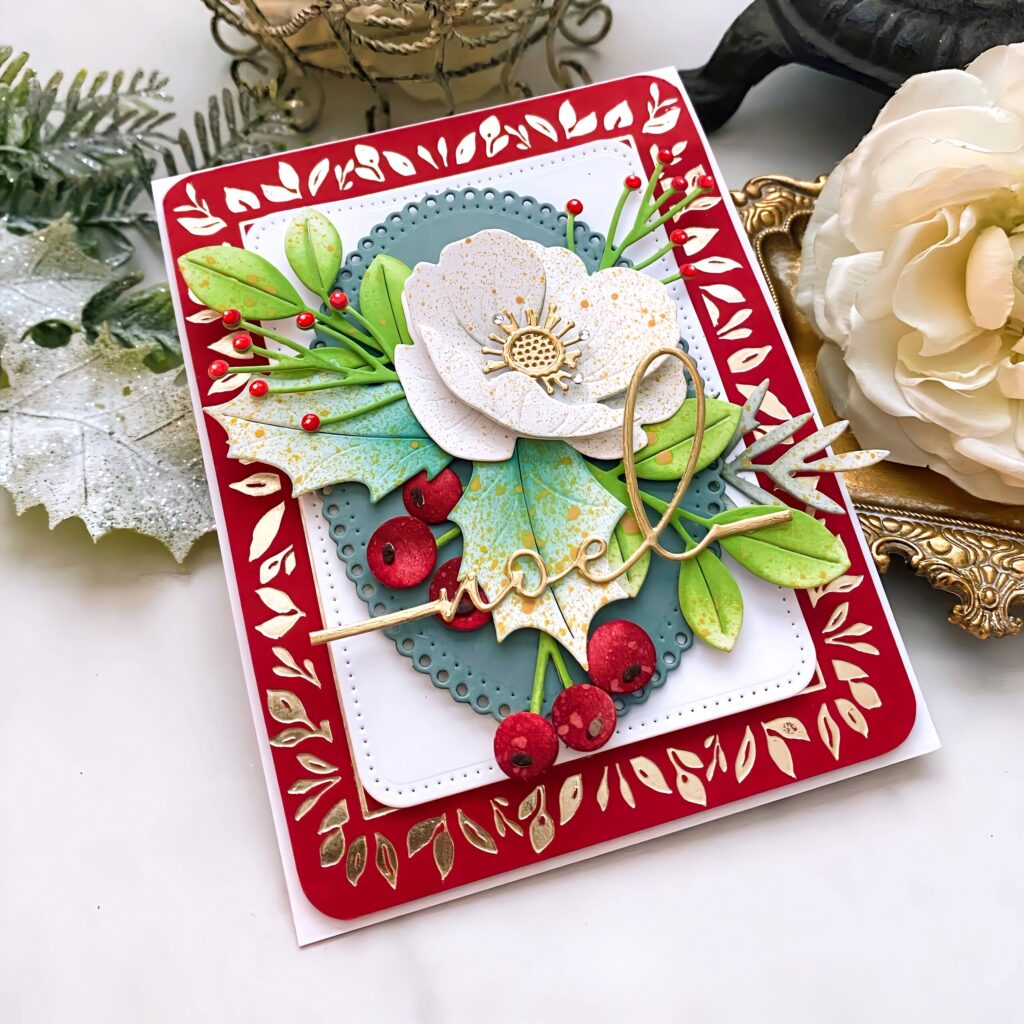
Step 1: Hot foil a panel of Pure Poppy cardstock using the Fresh Greens Hot Foil Plate with champagne foil. Trim it along the points of the widest leaves until it is equidistant on all sides. Use a corner rounder punch on each of the four corners.
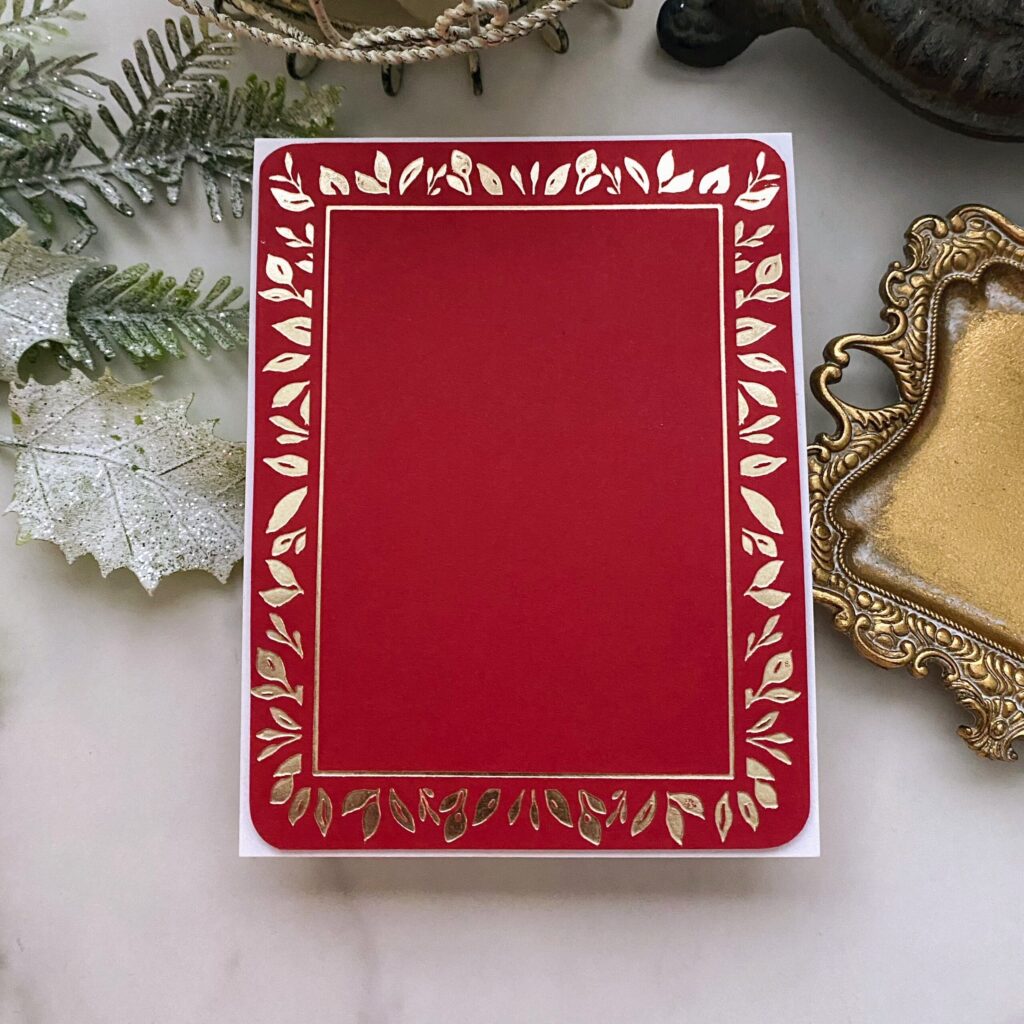
Step 2: Attach the foiled panel to an A2 card base using foam squares.
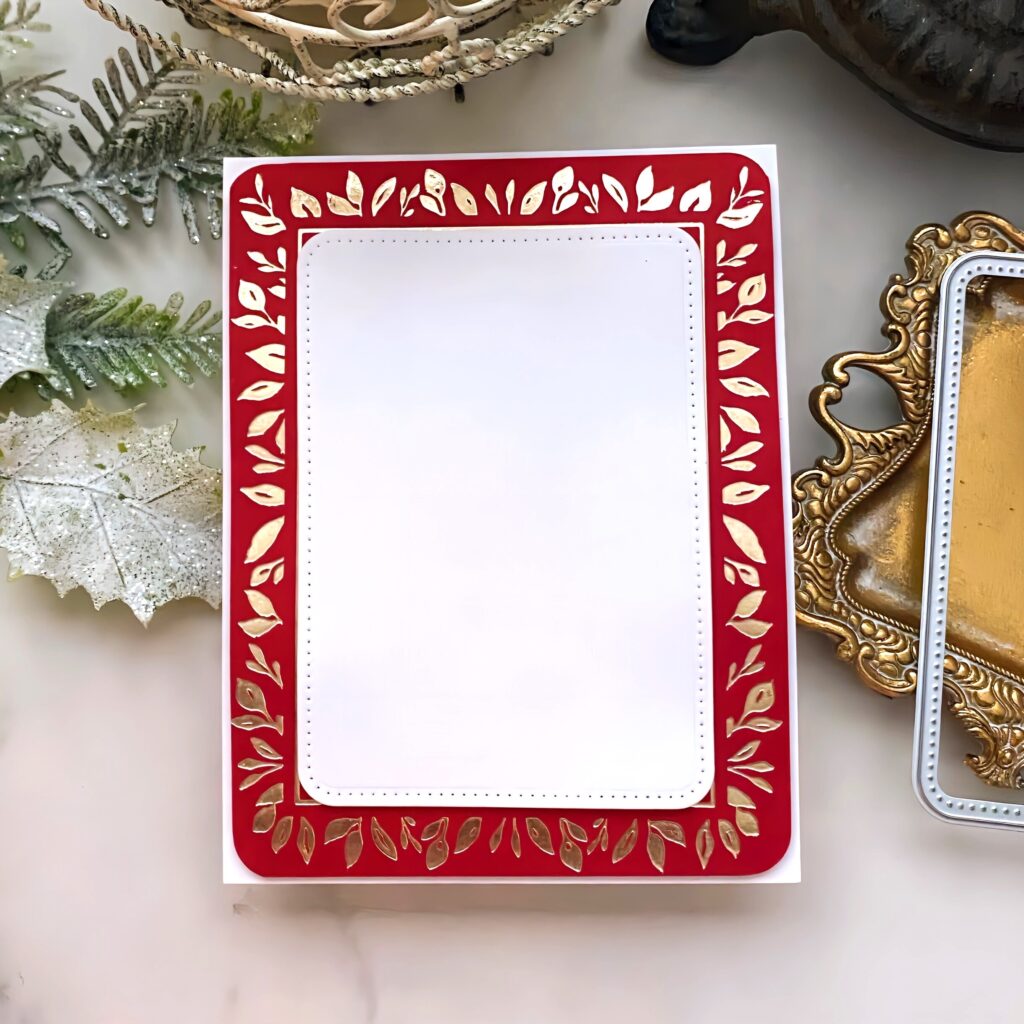
Step 3: Cut the rectangle panel from Waite card stock and attach it to the foiled panel using foam squares.
Step 4: Cut an oval from Ocean Tides cardstock and attach it to the rectangle using foam squares.
Step 5: Cut and color, all flowers and foliage and color them with blender brushes, and ink. I took a page out of Melissa’s book and spritz everything with distress spray. Arrange the flower, leaves and berry sprig in a triangle.
Step 6: Add in additional foliage and berries using foam squares and liquid glue until you are satisfied with the arrangement.
Step 7: Cut the sentiment from gold card stock and adhere it over the floral arrangement using liquid glue.
This project is a beautiful reminder of how seasonal details—florals, berries, and a touch of foil—can turn a simple card into something extraordinary. 💌
We hope Kelly’s design inspires you to create your own version of Christmas magic and share it with us on Instagram or in the comments!
Reader Interactions
Comments
Beverly Murphysays
This is my favorite card….. partly because I think I could make it and it would look good, and partly because I believe it’s just beautiful! I love floral cards, even for Christmas, and this one is gorgeous! Thank you for creating it so that I may copy it!
Jane Boothsays
I absolutely LOVE this card! It reminds me of my grandmothers Christmas china, I believe by Spode called Christmas Rose❤️ I have always been partial to ‘Hellebore’ or ‘Lenten Roses’! I cannot wait to be able to get some of the newest release!
Debra Kaysays
I love this layout! This hit foil plate has me hooked on putting the machine on my Xmas list this year, even though my husband and I don’t typically buy each other gifts. It’s stunning! The flower and holly and berries add the perfect pop to the card. ❤️
Jill Boglesays
Love this! The floral and colors are perfect for Christmas!
The layout is lovely and I can make it work with supplies I have.


Beverly Murphy says
This is my favorite card….. partly because I think I could make it and it would look good, and partly because I believe it’s just beautiful! I love floral cards, even for Christmas, and this one is gorgeous! Thank you for creating it so that I may copy it!
Jane Booth says
I absolutely LOVE this card! It reminds me of my grandmothers Christmas china, I believe by Spode called Christmas Rose❤️ I have always been partial to ‘Hellebore’ or ‘Lenten Roses’! I cannot wait to be able to get some of the newest release!
Debra Kay says
I love this layout! This hit foil plate has me hooked on putting the machine on my Xmas list this year, even though my husband and I don’t typically buy each other gifts. It’s stunning! The flower and holly and berries add the perfect pop to the card. ❤️
Jill Bogle says
Love this! The floral and colors are perfect for Christmas!
The layout is lovely and I can make it work with supplies I have.