


Hello, friends!! Brenda Noelke back with you today for another project inspiration card!! Do you have one of those sets that you HAVE to pull out every year for the holiday season?!? The Into the Blooms: Poinsettia Die Set is that product for me!! I just love it so much!!

I wanted to create a light and airy feel, so I added a couple of vellum layers to the top of the poinsettias!!
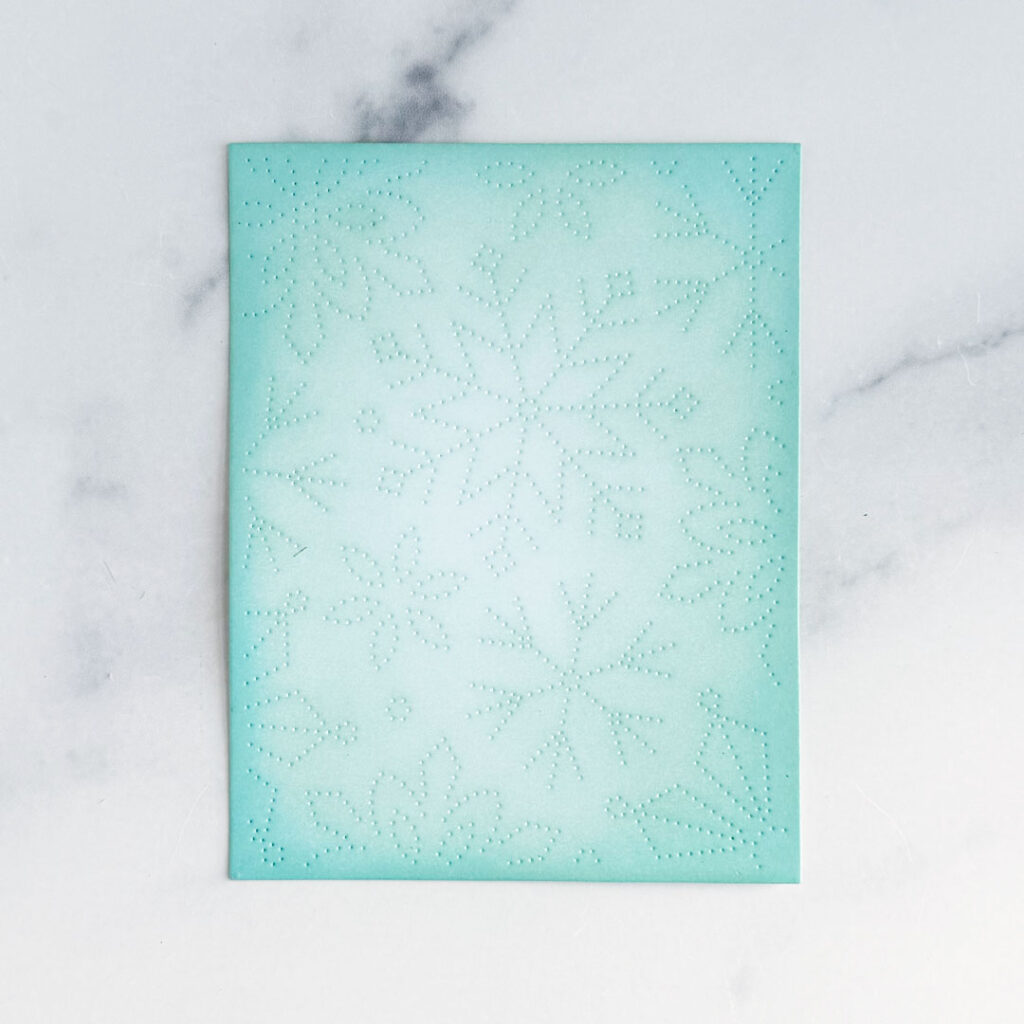
Step 1: Die-cut the Cover Plate: Stitched Snowflakes Die from Stamper’s Select White cardstock. Blend Aqua Mist and Hawaiian Shores ink onto the panel with a blending brush, darker around the outside and lighter in the center.
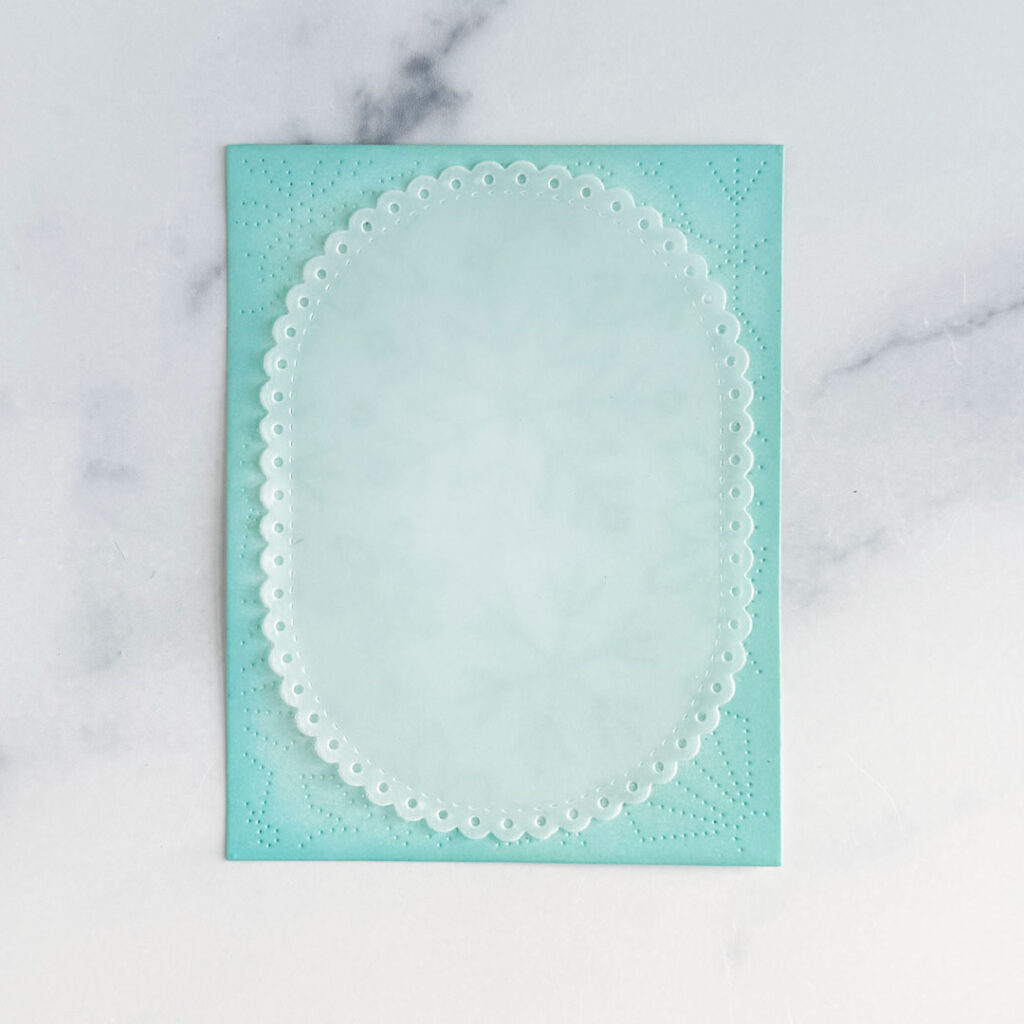
Step 2: Die-cut the largest die in the Love to Layer: Scalloped Ovals Die Set from vellum and adhere to the background panel, adding glue only in the center.
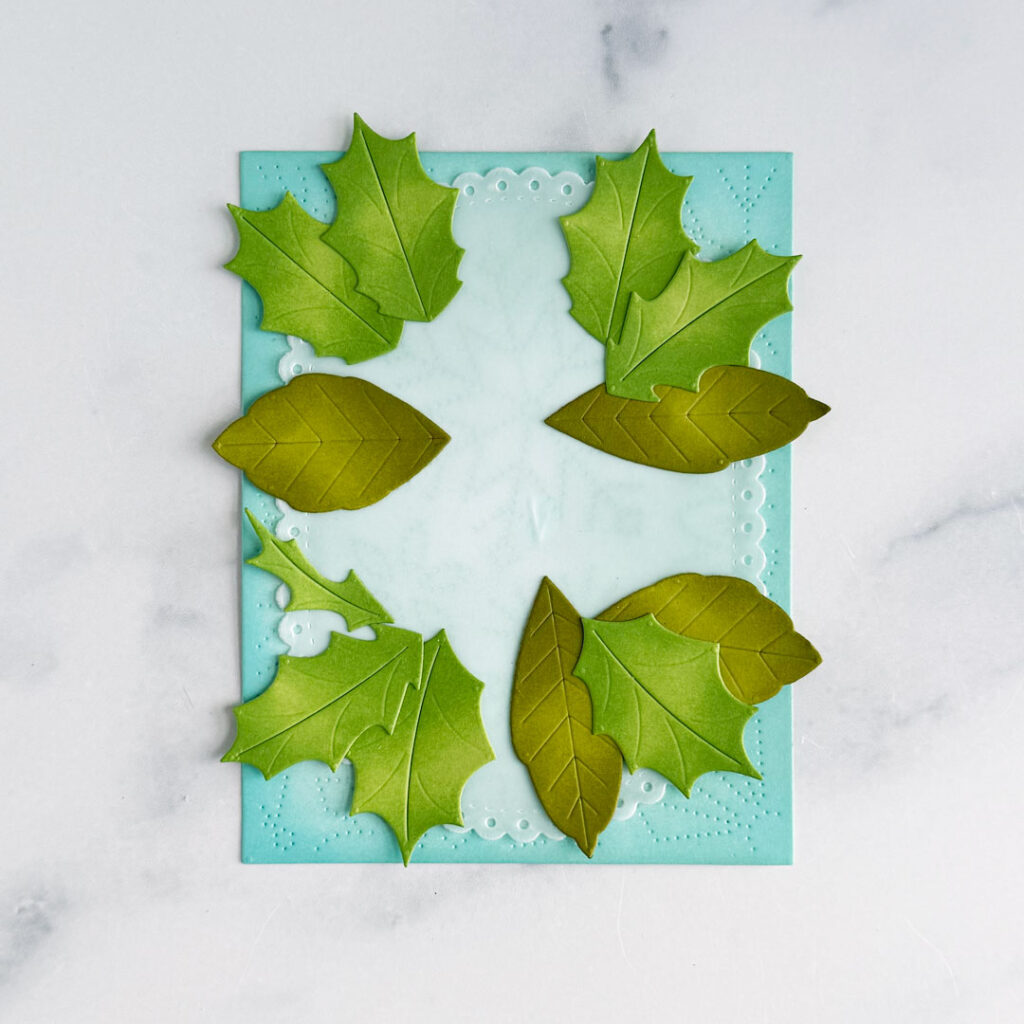
Step 3: Die-cut the leaves in the Into the Blooms: Poinsettia Die Set from Simply Chartreuse cardstock and the leaves from Into the Blooms: Holly Die Set from Green Parakeet cardstock. Use blending brushes to add shading to the leaves with Ripe Avocado and New Leaf ink.
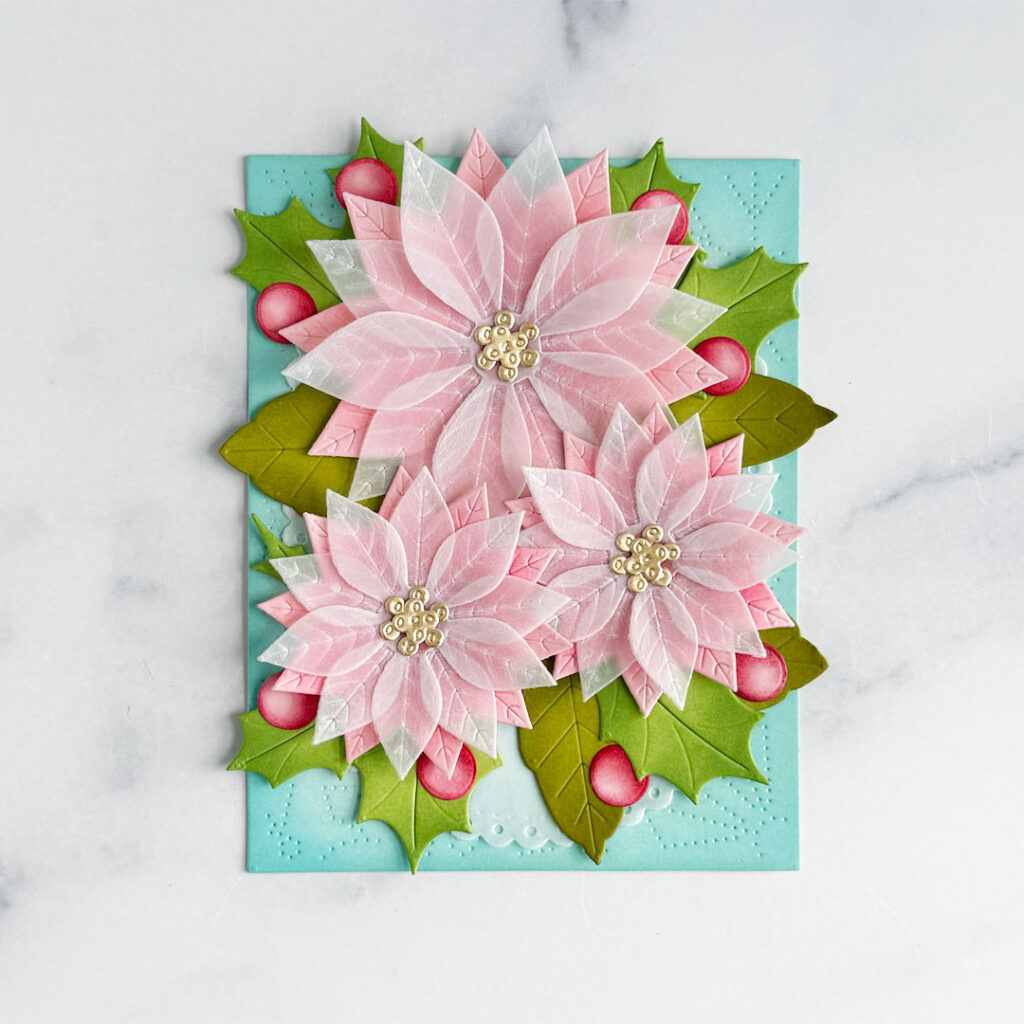
Step: 4: Die-cut the poinsettias from the Into the Blooms: Poinsettia Die Set and berries from the Into the Blooms: Holly Dies from Pale Peony cardstock. Add shading with Pale Peony and Pure Poppy ink. Die-cut the poinsettias from vellum and the centers from matte gold cardstock. Stack and adhere them together, then adhere to the background with foam squares. Splatter with diluted white bleed-proof ink and a paintbrush.
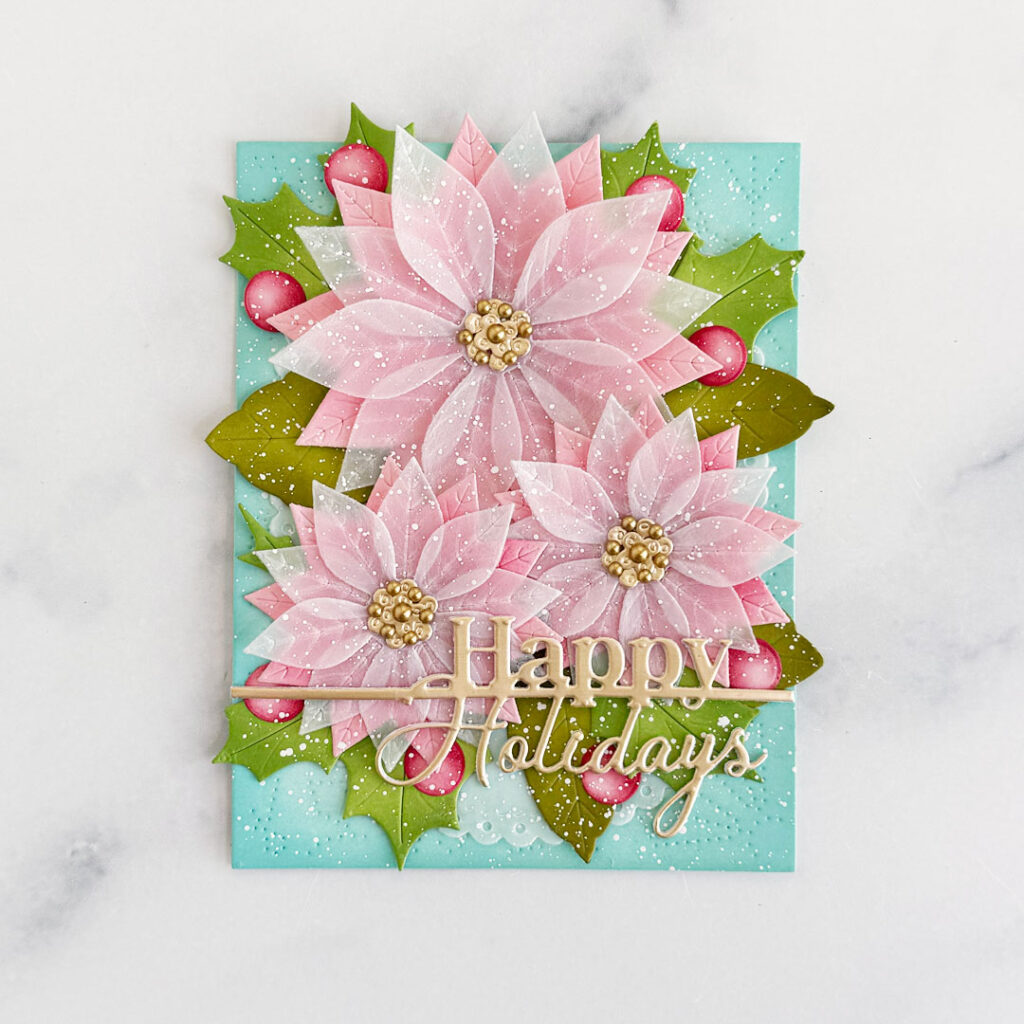
Step 5: Die-cut the sentiment in the Line It Up: Christmas Die Set once from matte gold cardstock and three times from Stamper’s Select White cardstock. Stack and adhere the die-cuts together with liquid glue, then adhere across the bottom and trim the excess from each side. Add matte gold pearls to the centers of the poinsettias.
That does it for me today!! I appreciate you taking the time to stop by!!
I hope you’re enjoying the countdown to the October release!! It’s incredible!!
Have a great day!!
Supplies
Dies: Into the Blooms: Poinsettia, Into the Blooms: Holly, Line It Up: Christmas, Love to Layer: Scalloped Ovals, Cover Plate: Stitched Snowflakes
Ink: Pure Poppy, Pale Peony, Aqua Mist, Hawaiian Shores, New Leaf, Ripe Avocado
Cardstock: Pale Peony, Green Parakeet, Simply Chartreuse, Stamper’s Select White
Other supplies: Dr. Ph. Martin’s bleed-proof white ink, Tonic Honey Gold mirror cardstock, vellum, matte gold pearls
Linda c says
Beautiful!
Laura Corkill says
There are so many words bouncing around in my brain, trying to express my awe for this gorgeous card.
abrash says
What a work of art! This card is gorgeous!
Leslie Longoria says
Wow, this is such a beautiful elegant card! All the details bring this card together. I like the color of your background and the choice to add velum leaves on the poinsettia with the gold centers and beads. The white splatters finish the elegance. Bravo!!
Jane B says
This card is stunning! I love how vellum was used for some of the poinsettia leaves and the soft colors make this card a standout.
Deb Wagner says
So stunning! The vellum pointsettia are lovley and together with the complementary teal enbossed background really highlight the card. Love the pop of bling in the gold pearled flower centers. This is amazing!!
Holly says
Wow!!!
Greta H says
Absolutely stunning creation! I’d put this card in a frame!
Diane Witt says
This is an absolutely stunning card!! Thanks for the step by step directions!!
Jane Booth says
What a beautiful card! Love the vellum poinsettias!!!
Carole Ferguson says
This is gorgeous! I’m not usually into pink poinsettias, but there is no other way this card could be made to be this beautiful. Thank you for sharing.
Jan Thomas says
Stunningly beautiful. Love it’s softness
Susan Mediterraneo says
What stunning card. The pink poinsettias are delicate yet make a bold statement on the card . Fabulous job!
Norma says
In a word…elegant! I love the softness vellum brings to this card. It takes the traditional look of poinsettias and brings them up to date. The normal red and green holly in the background and the pink and vellum poinsettias on top makes it a bit more contemporary. What’s not to love about this stunning card?
Lissette Long says
Simply Stunning, Brenda! Thank you for reminding us how beautiful using vellum can be. I love the blue background too. Gorgeous card. I might have to CASE the card next year with some slight changes. Thank you for the inspiration!
Jeanne Townsend says
Absolutely gorgeous 💕
I love working with vellum, I am in love with this creation!
Iris Nelso says
What an amazing way to display poinsettias. It adds another dimension to how we view the ordinary red and white poinsettias we are use to seeing. This card just took my breath away, all I can say is stunning. You have raised the bar for Christmas card making this season, thank you for sharing this masterpiece.
Kimberly says
Gorgeous poinsettias
Elayne Catey says
This is stunning, I can’t stop looking at it.
Birgit Norton says
This is stunning! I love the use of vellum on this beautiful card.
Donna Brown says
Absolutely stunning…..love all the elements especially the use of vellum…everything pulls all together in this card to make it a standout!
Danielle says
Love Love ❤️ the poinsettia die, hope it comes back in stock with this new release!?!? So exciting!!
Lori Beseke says
Fabulous! Love this poinsettia die & making it with vellum is just so soft & pretty!
Linda Sodano says
This card is my favorite with the pink poinsettia.
Kim F says
This card is elegant and the color choice is lovely.
Cheryl Palmer says
I Absolutely LOVE this card, So Much!!!
Kay Ahlberg says
I love the use of vellum in Brenda’s card creation and her color selection. The poinsettia is gorgeous!
Vera Yates says
Simply stunning!
Nellie says
Such a beautiful card. Love how you’ve used the vellum to add softness. Beautifully put together.
Nicki says
Absolutely gorgeous card!
Susan Baker says
Stopped me in my tracks…so beautiful!!! The colors, the choice of materials, EVERYTHING!!!!! Hands down-my favorite. Thanks for posting!
Malinda Price says
Absolutely beautiful! Love the vellum on top of the pink petals! Love the color choices too!
Eyvonnia McCraryTaylor says
I’m still in awe 🥰with this card!
Cathy says
This card is definitely my favourite. So soft and love the pinks.
Cynthia Blackwell says
Picture framer
Joan Lucht says
Beautiful!!
Nancy Munroe says
Beautiful! Love this!
Barb says
This is an absolutely beautiful card. Love it.
Sue says
This is so beautiful! Good work!
Patti says
That is the most beautiful card. I have seen this year. So elegant.
Honey Cruz says
I’m totally in love with this card. I just ordered 2 sets of these because I’m hoping to mass produce. Can’t wait to start crafting. Thank you for the inspiration.
Jean Buller says
Gorgeous card!! I can’t stop looking at it! Thank you for sharing!