Project Inspiration: Wrapped in Happy Holidays by Kelly Lunceford
Winnie Cate Ignacio
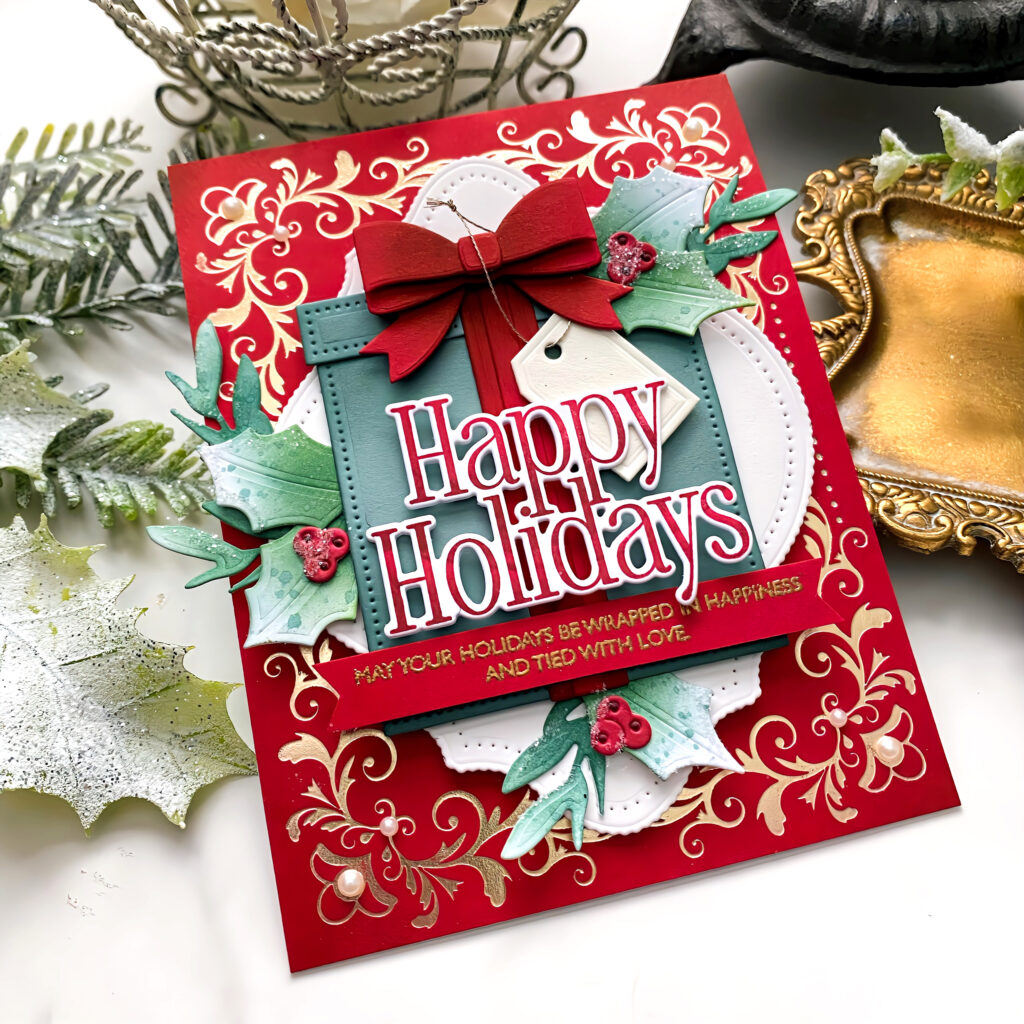
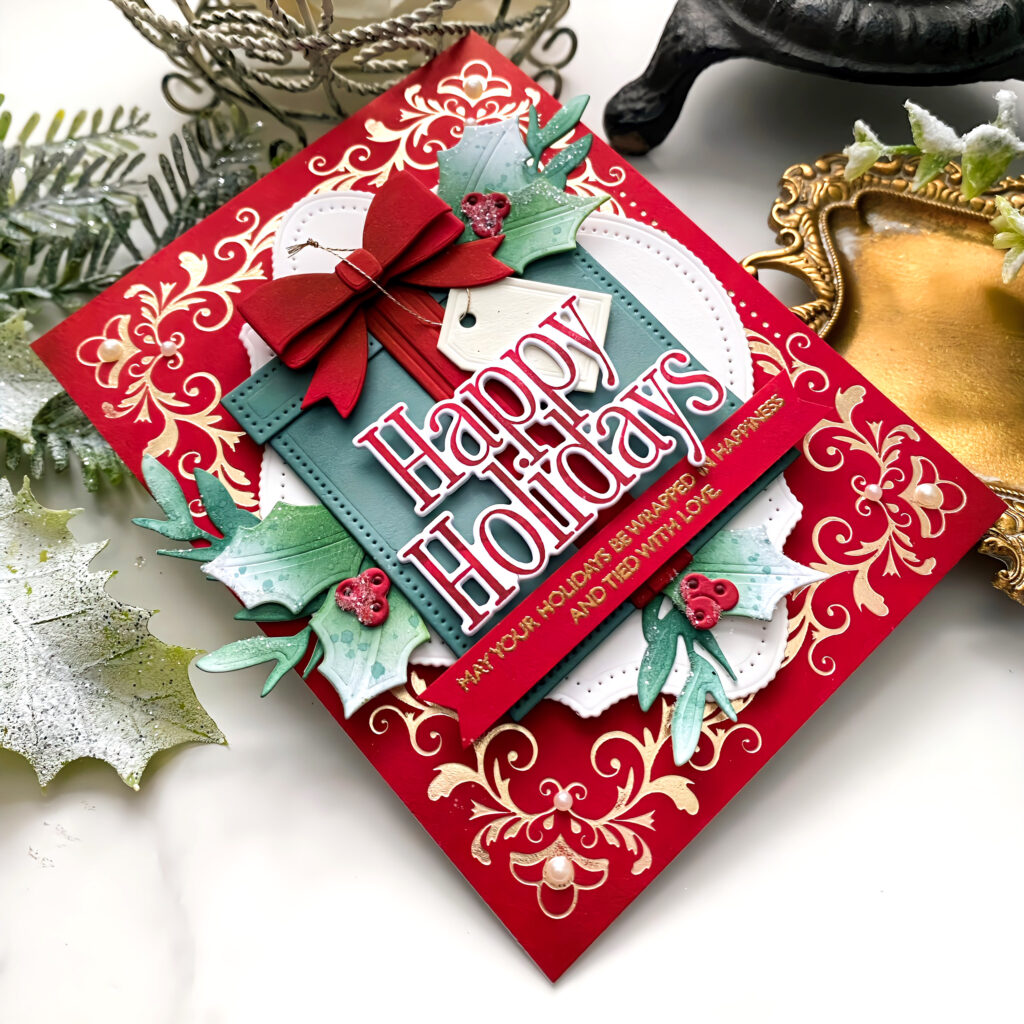
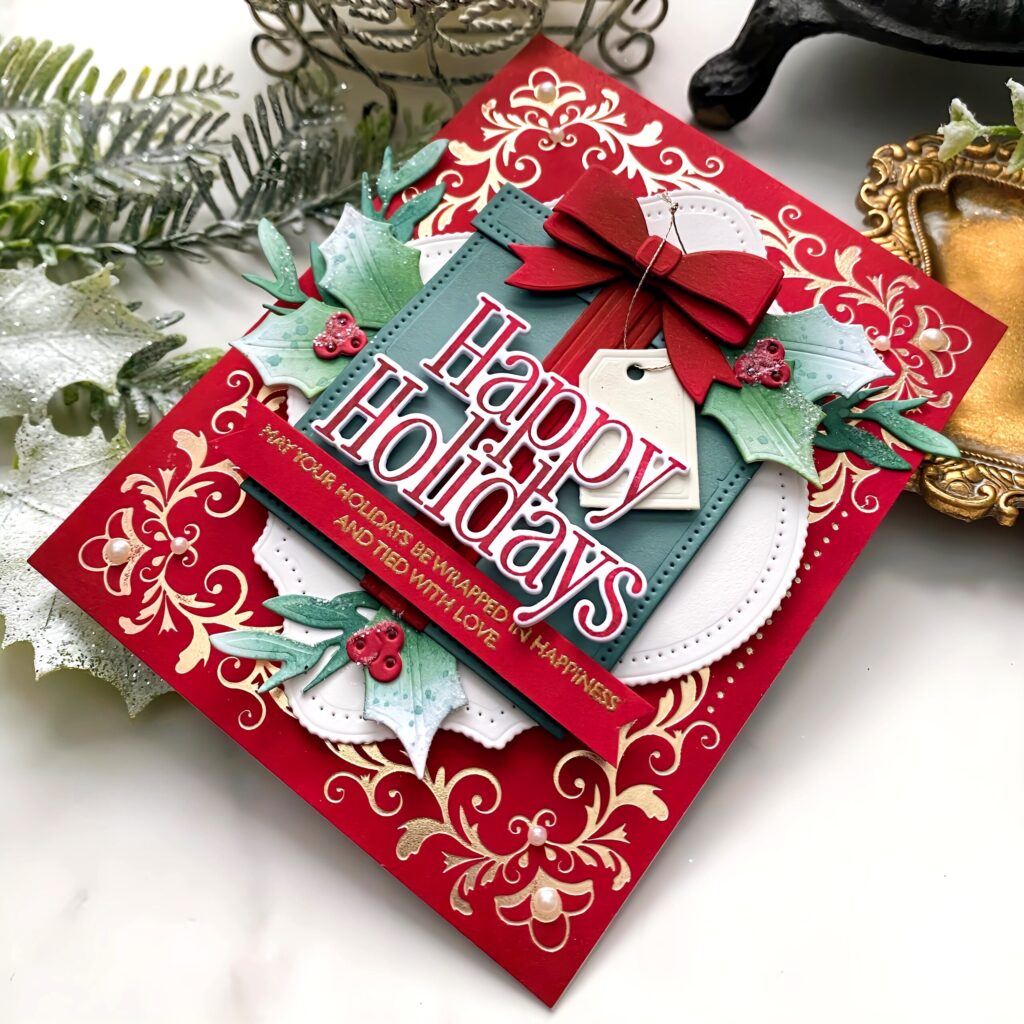
Kelly’s holiday design is all about letting the sentiment take center stage. With festive colors, elegant foiling, and layered details that mimic a beautifully wrapped present, this card captures the joy of the season in the most heartfelt way.
Kelly shares, “I have a really bad habit of leaving the sentiments on my projects as an afterthought. Often times I will reach for a sentiment and realize it doesn’t make any sense with the card I have just created! Ha ha! Has that ever happened to you? During the latest release, I really wanted to use this particular accent sentiment, but noticed how cute it would be with a card featuring a Christmas present! So, for today’s card, I let the sentiment take center stage and relate directly to the subject matter on the card! This was such a fun card to create, and my challenge to you is to carefully select a sentiment that will send your project in a specific direction and don’t leave it as an afterthought, like me (wink)!”
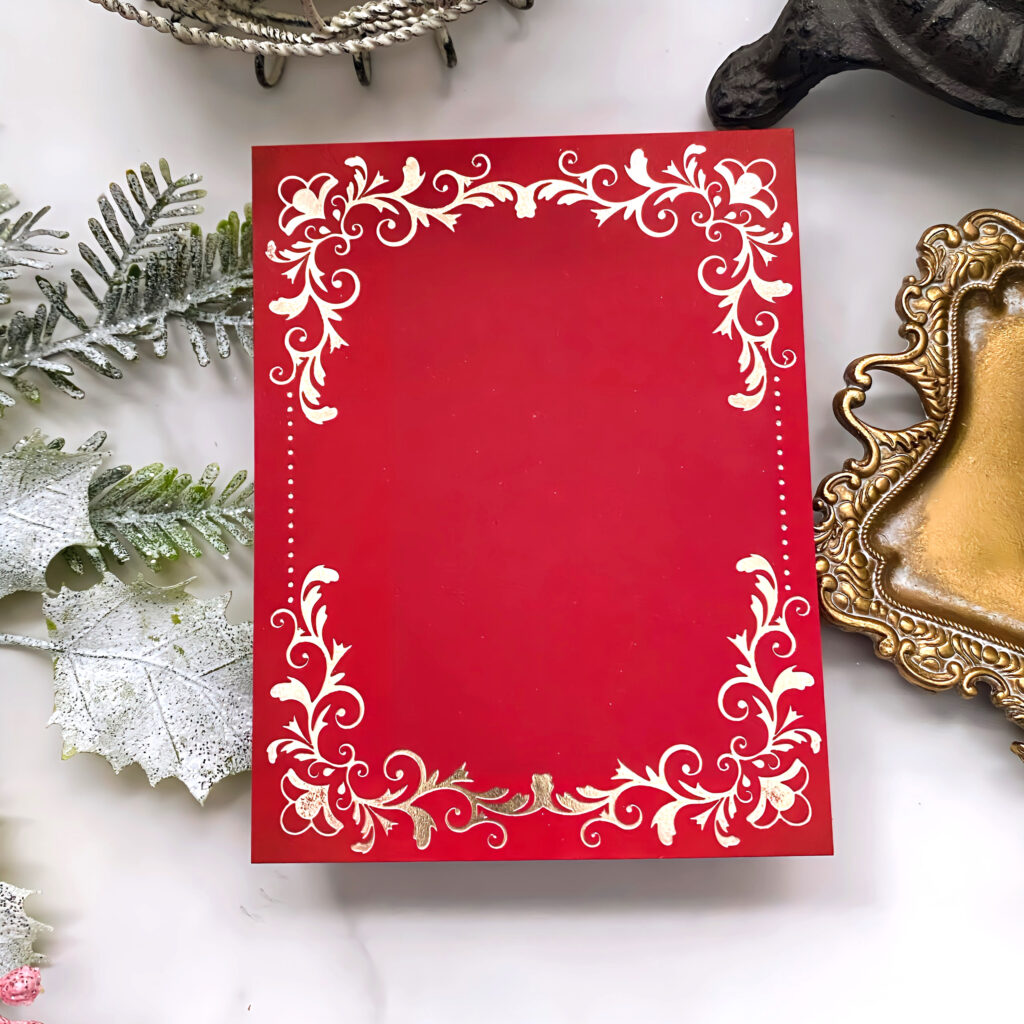
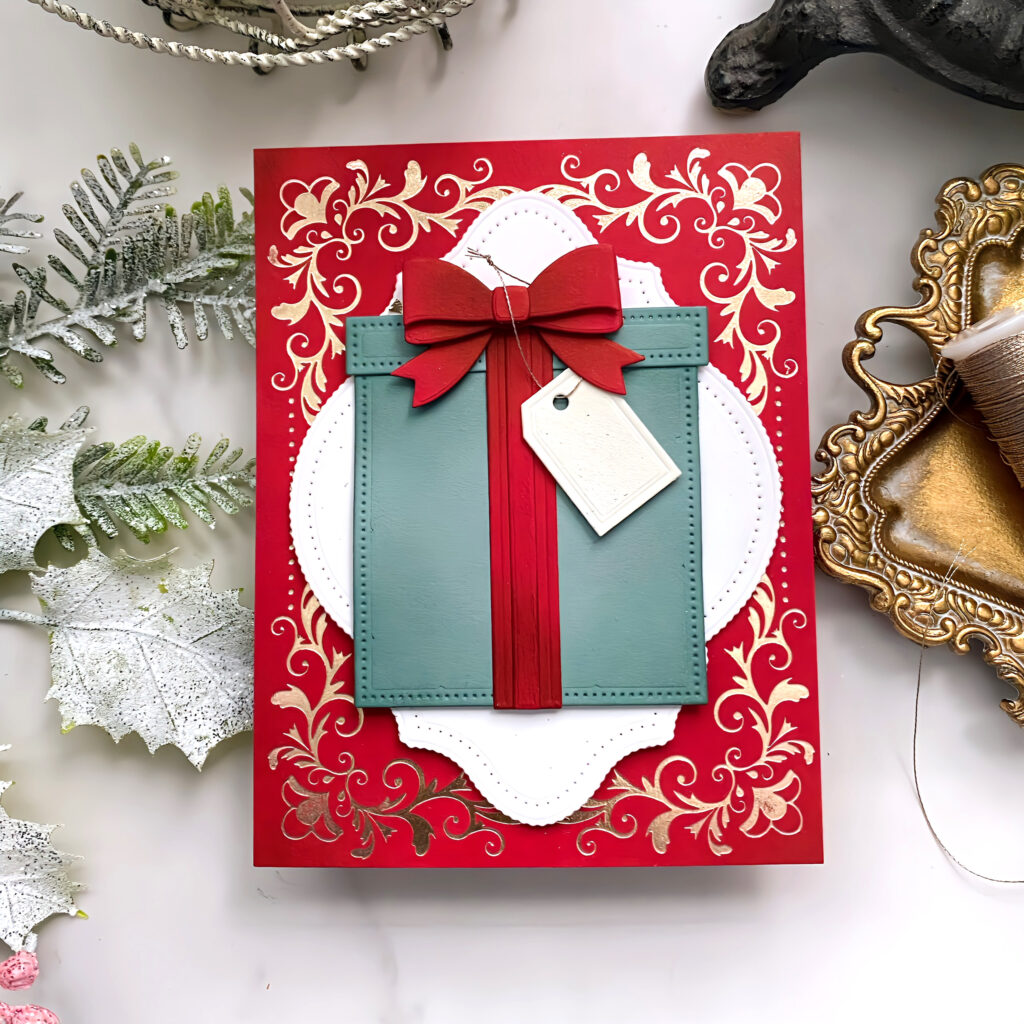
Step 1: Cut an A2 panel of Pure Poppy card stock and hot foil it using champagne foil. Attach it to an A2 card base.
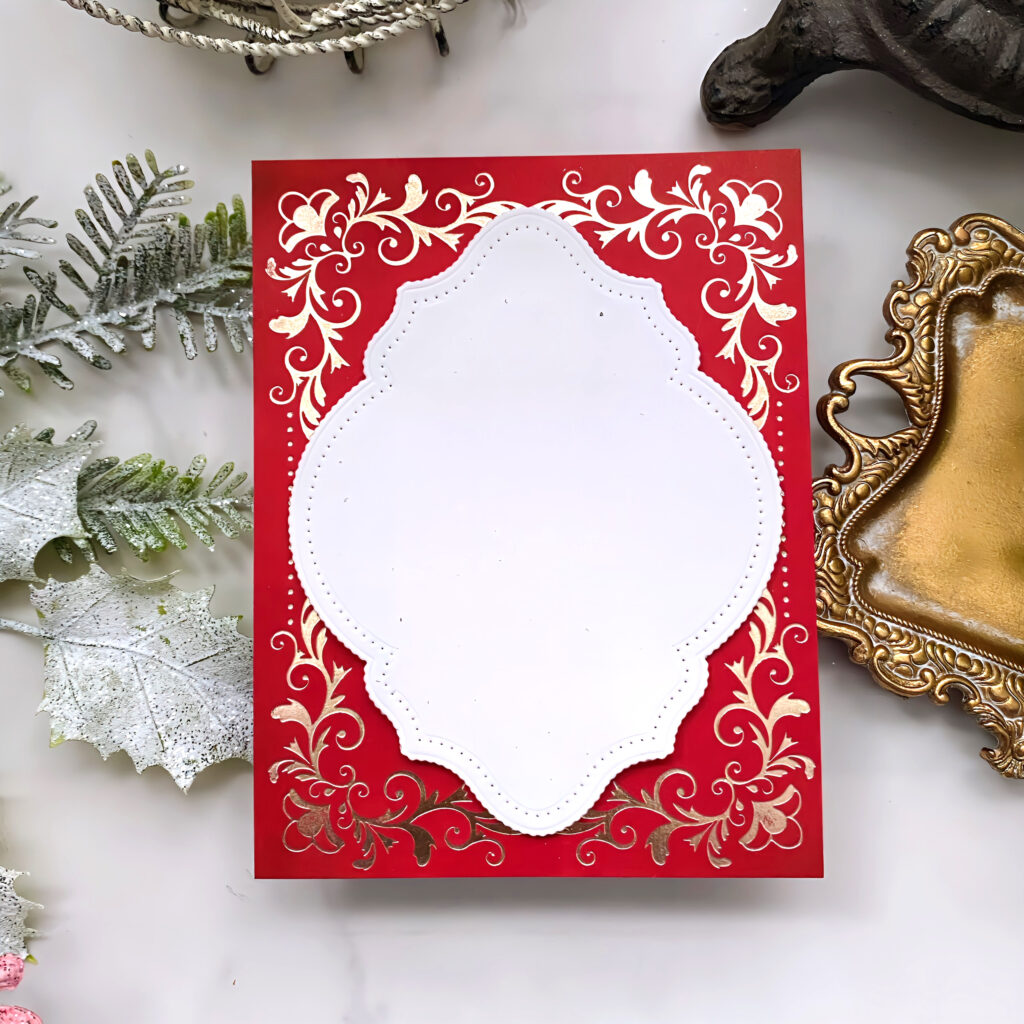
Step 2: Cut the focal layer using the largest die included in the Love to Layer: Garnished Edges Die from Rustic White cardstock.
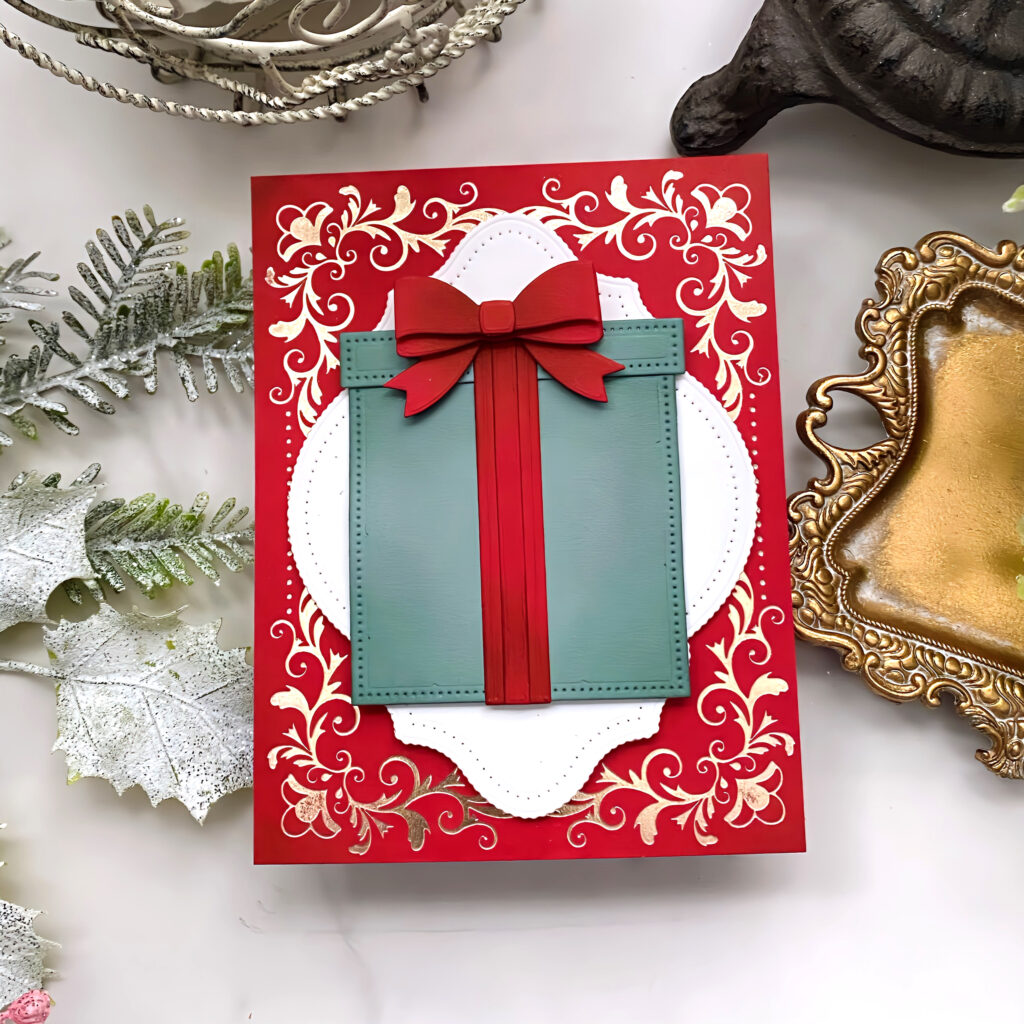
Step 3: Cut all of the pieces you will need for the present and assemble it using liquid glue and foam squares. Add some shading to the edges with the same color ink as card stock. Attach it to the card using additional foam squares.
Step 4: Cut the tag from Rustic Cream card stock and loop some metallic thread through the hole and knot it. Adhere it to the gift around the bow and secure with a foam square.
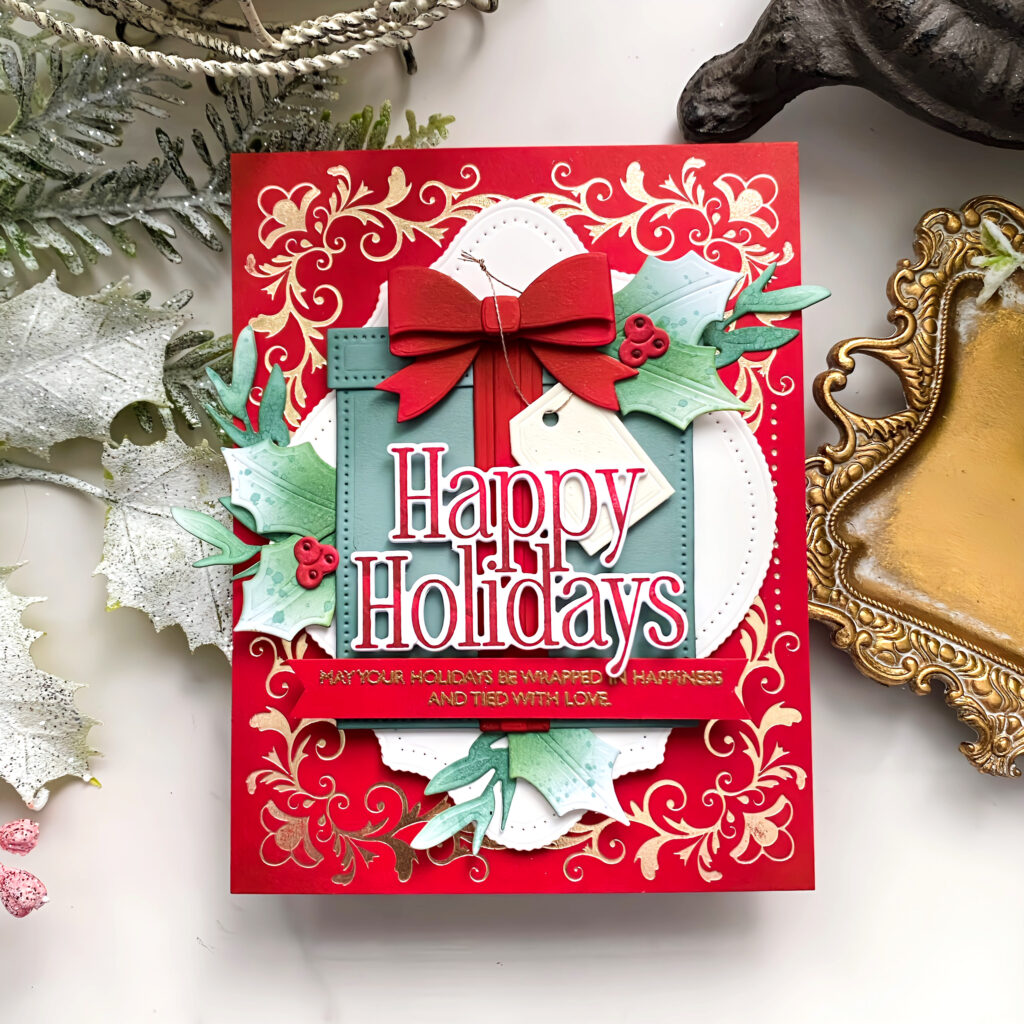
Step 5: Cut and color foliage and berries and attach it around the present.
Step 6: Die cut and stamp the larger sentiment. Heat emboss the accent sentiment and attach to the gift.
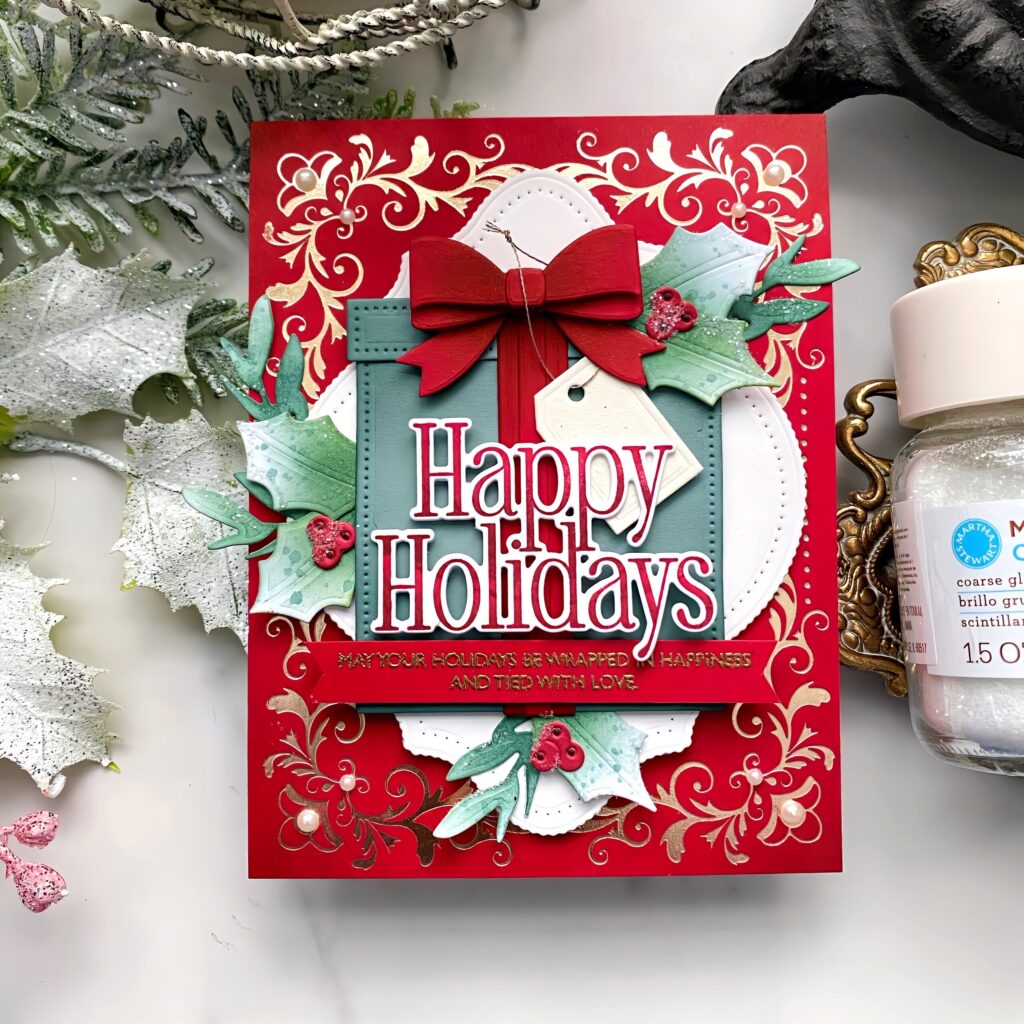
Step 7: Add adhesive pearls in the corners on the foiled design
Step 8: Add glitter to the foliage and berries.
Kelly’s design is a wonderful reminder that sometimes the sentiment can guide the entire project. 🎁✨
We’d love to see how you let your favorite holiday greetings take center stage, tag us on Instagram or share your creations in the comments!