


Hello, friends and happy Sunday!! Brenda from mypapercutcreations.com back with a fun Halloween card to share with you today!!
The Pumpkin Slices and Tall Pumpkin Slices Die Sets from the latest release are so versatile!! They can be used on elegant fall cards or fun, whimsical Halloween cards like I did today!! The jack-o-lantern dies included in the Pumpkin Slices Die Set give you even more options!!
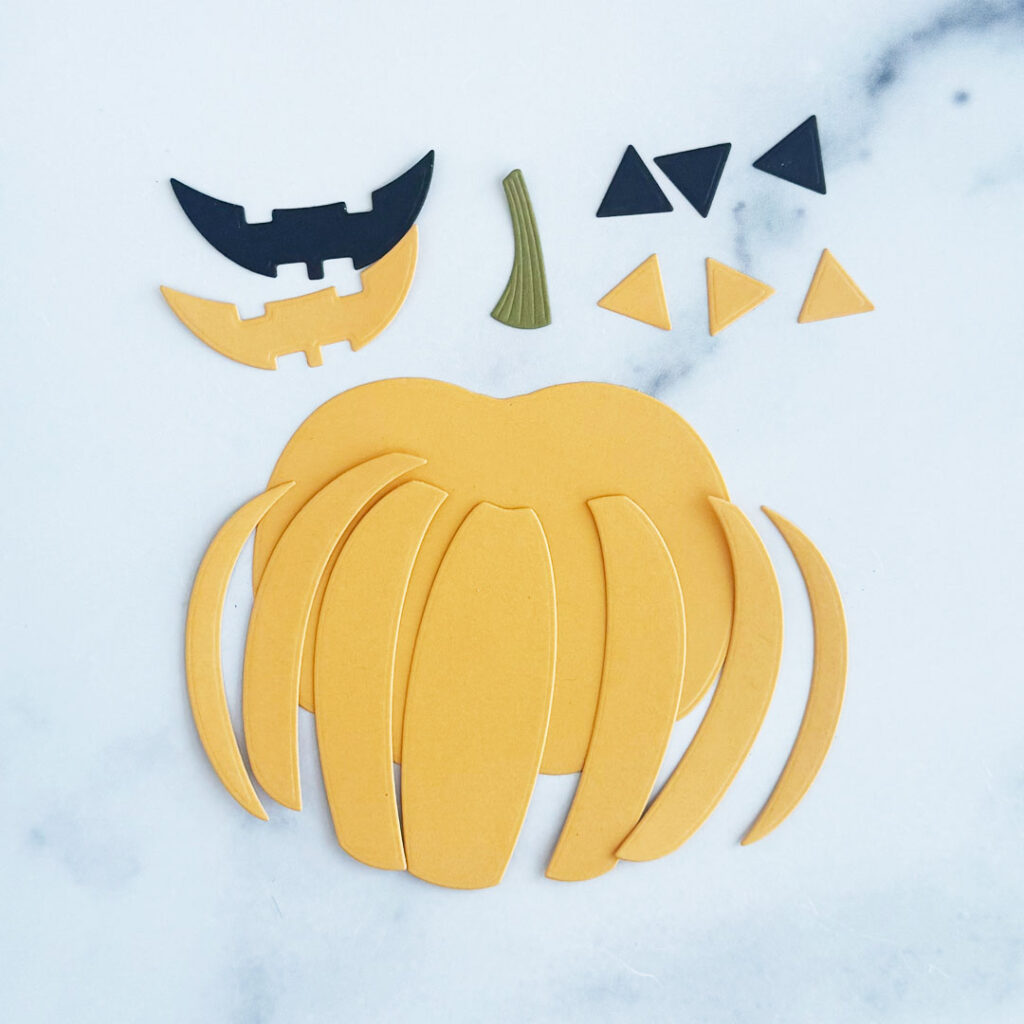
Step 1: Die-cut the Pumpkin Slices Die Set from Summer Sunrise, Ripe Avocado and True Black cardstock.

Step 2: Add shading to the pumpkin slice die-cuts with Summer Sunrise, Canyon Clay and Terracotta Tile inks. Add a bit of Ripe Avocado ink to the stem. Adhere all the pieces together with liquid glue, then splatter with diluted Canyon Clay ink.
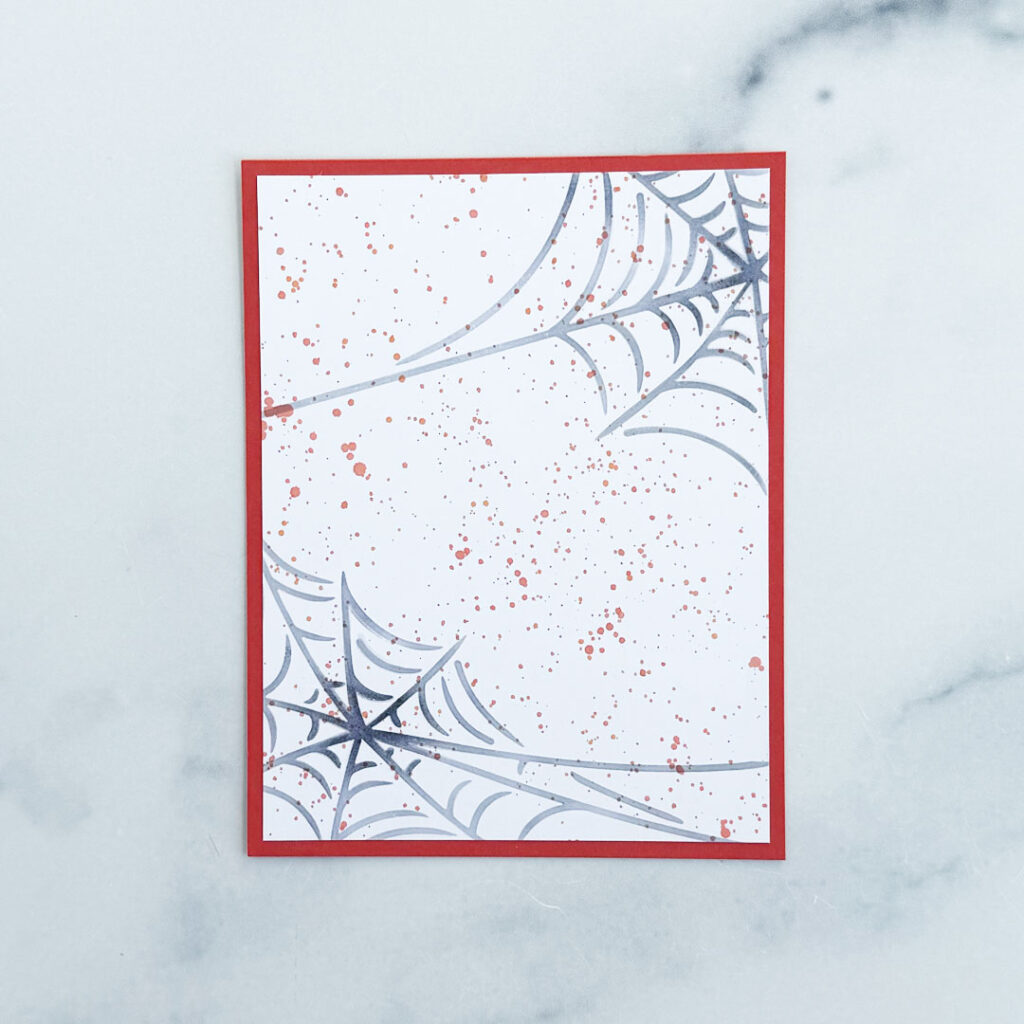
Step 3: Stencil the Spider Web Stencil onto a panel of Stamper’s Select White cardstock with Weathervane ink. Splatter with diluted Terracotta Tile ink. Once dry, trim and adhere to an A2 panel of Terracotta Tile cardstock.
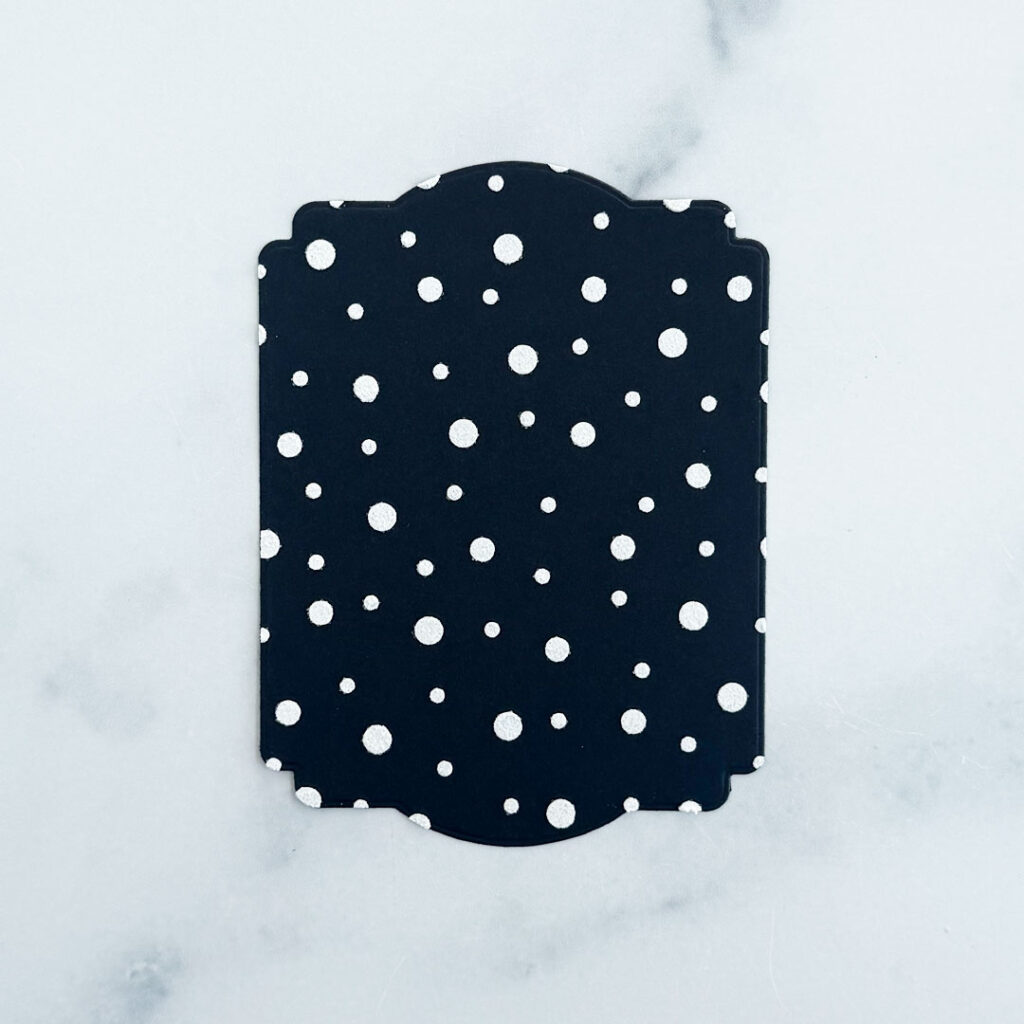
Step: 4: Die-cut the largest die in the Mat Stack: Happy Halloween Set from True Black cardstock. Apply texture paste through the polka dot stencil in the same set.

Step 5: Blend Terracotta Tile ink onto a piece of Orange Zest cardstock, heavier at the bottom and fade out toward the top. Die-cut the “Happy Halloween” die in the Mat Stack: Happy Halloween Set from the orange panel and four times from Stamper’s Select White cardstock. Stack and adhere one white layer behind the orange one and the other three white layers together with liquid glue, then slightly offset the white layers behind the orange one.
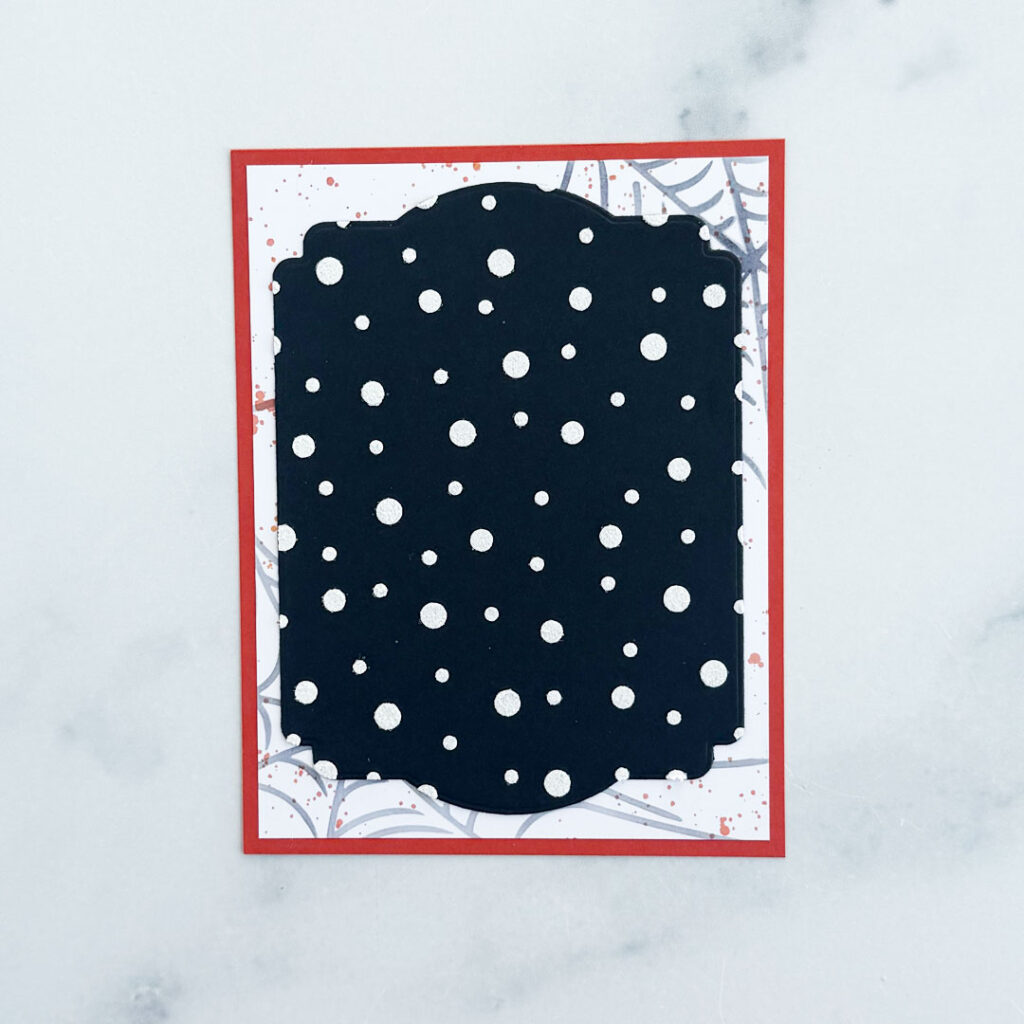
Step 6: Adhere the black die-cut to the background with liquid glue.
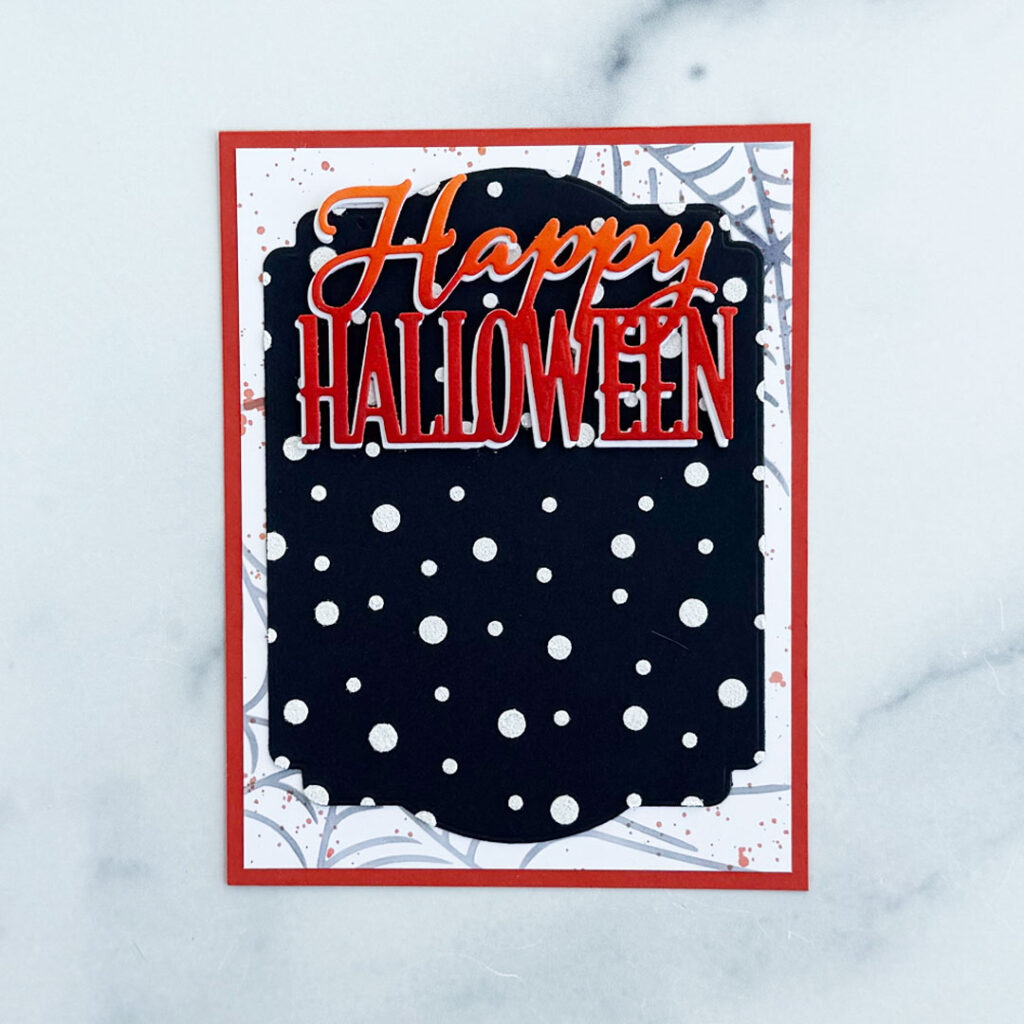
Step 7: Adhere the sentiment, also using liquid glue.

Step 8: Adhere the pumpkin toward the bottom of the card with foam tape.
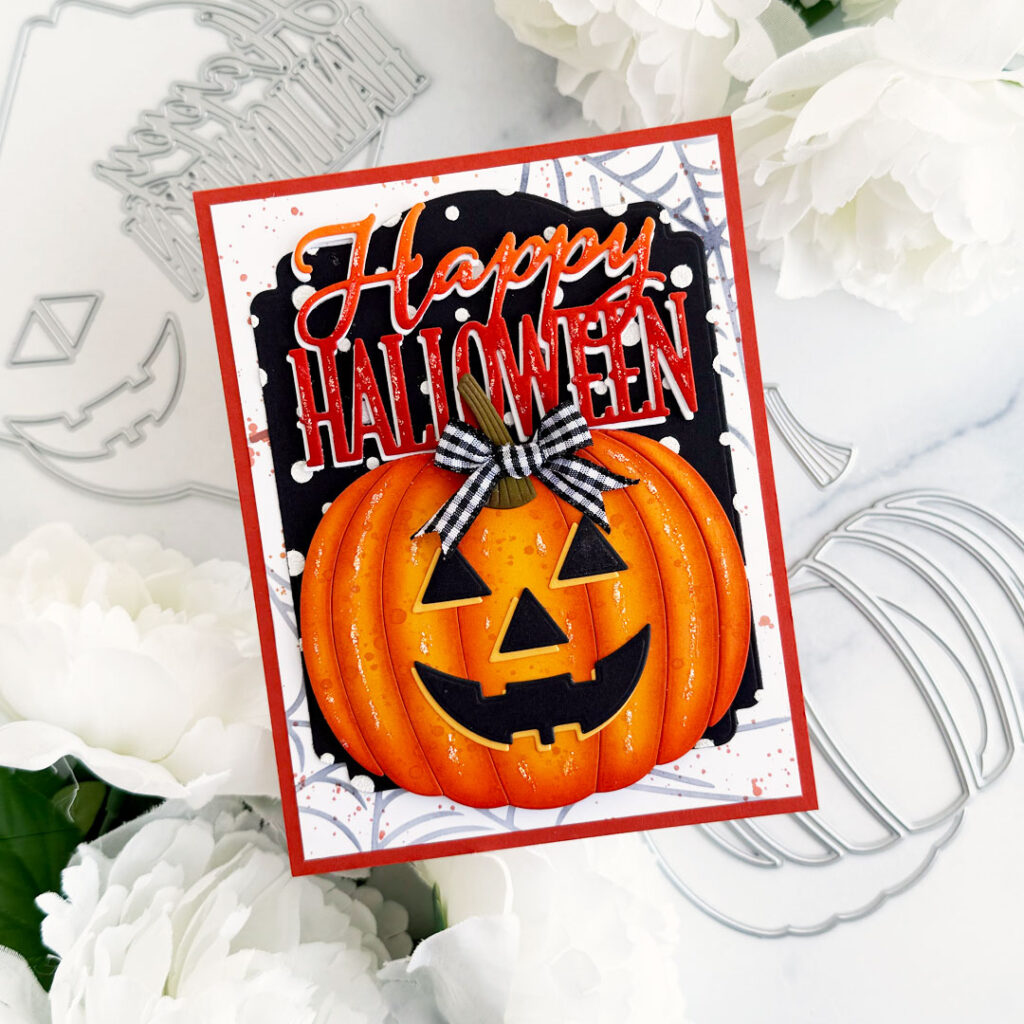
Step 9: Apply Frosted Lace Stickles to the pumpkin and sentiment. Tie True Black 3/8″ gingham ribbon into a bow and adhere to the pumpkin with a glue dot to finish off the card.
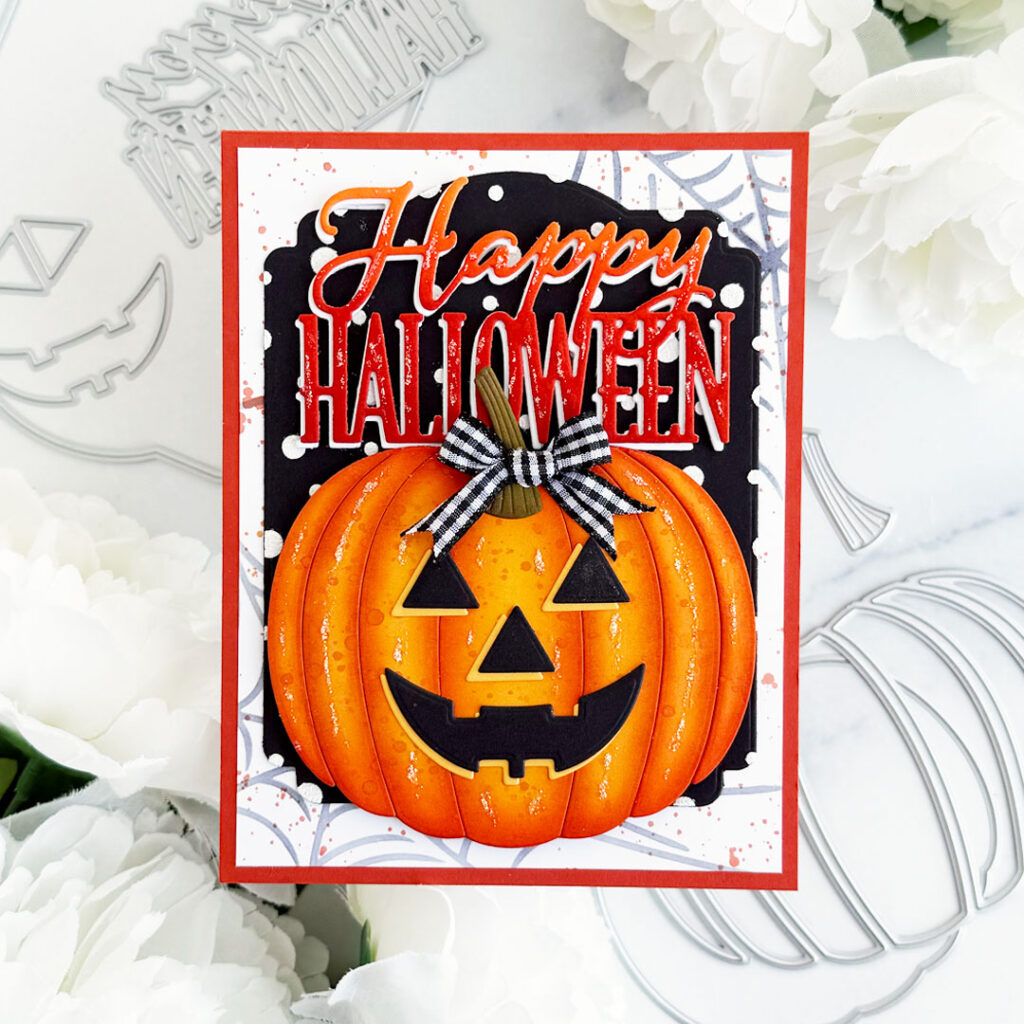
Such a fun Halloween card!! I love how it came together!!

Be sure to check out the entire August Release in the Papertrey Ink Shop!! The brand new September release will be available on Tuesday, September 23rd at noon EST!!
Thanks so much for stopping by!! Enjoy the rest of your weekend!!
Leave a Reply