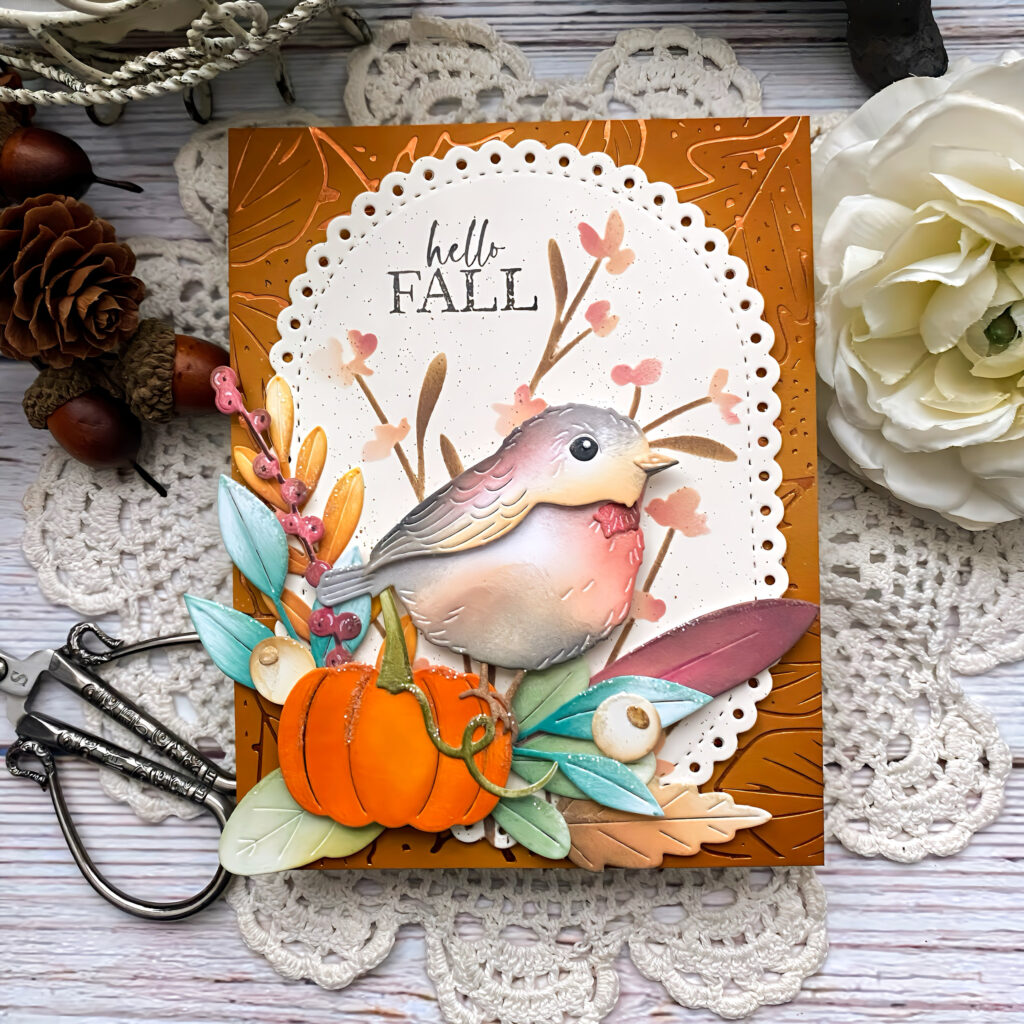
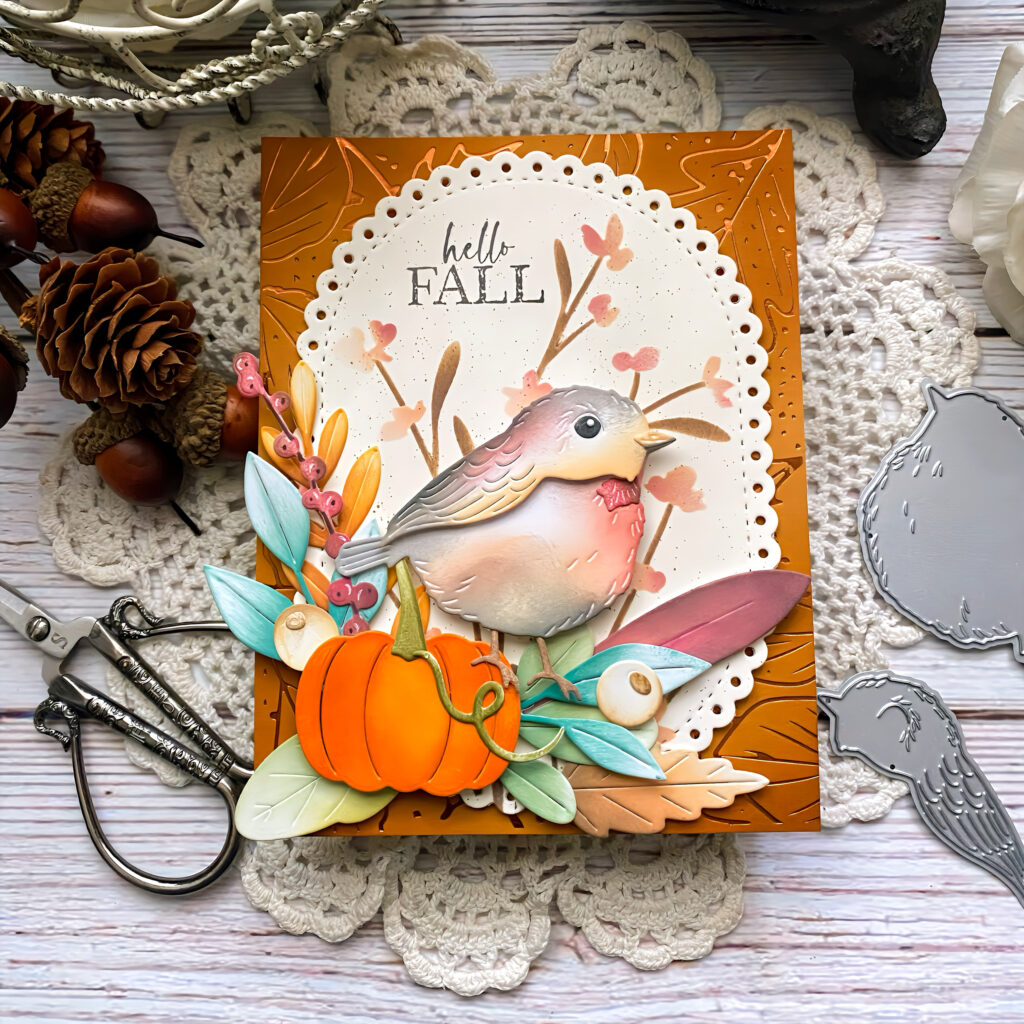
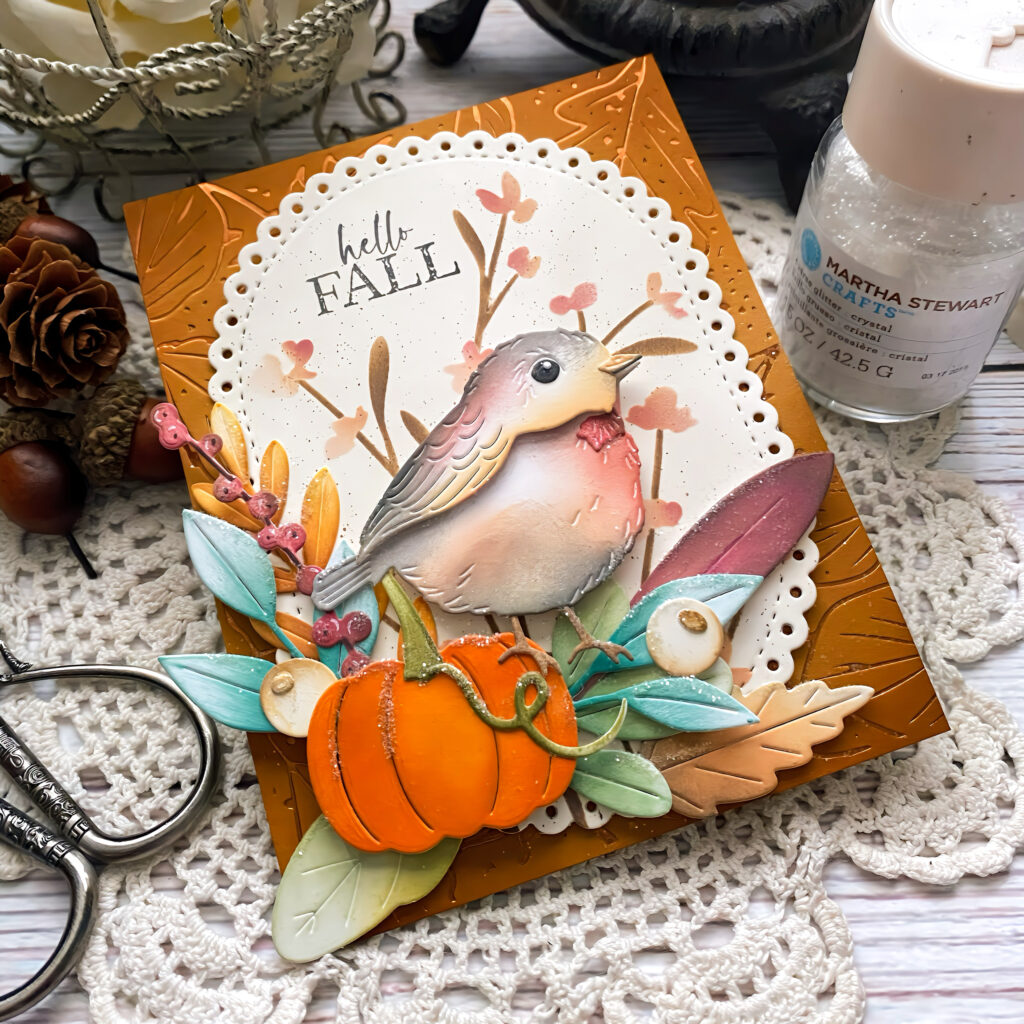
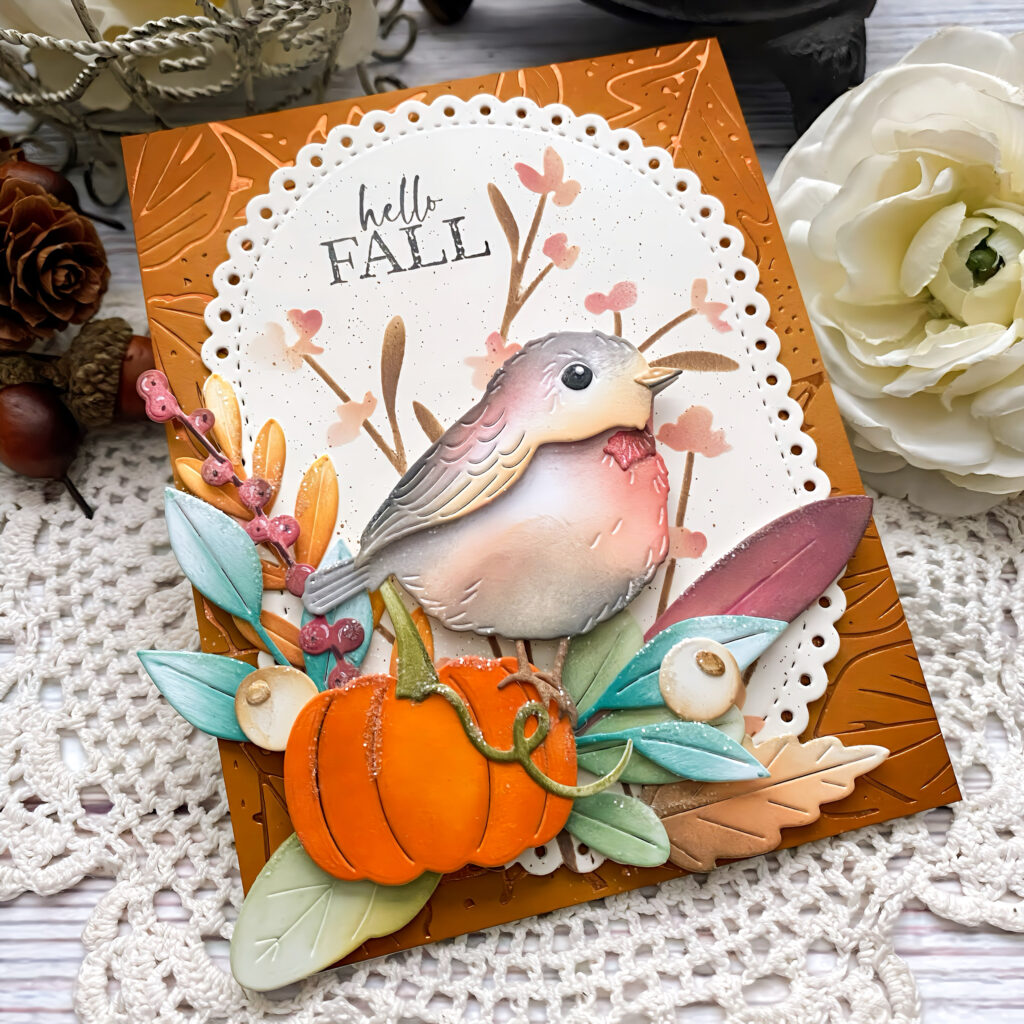
Autumn always brings fresh inspiration to the craft table, and Kelly’s newest card reflects that beautifully. By combining older products with new products, she’s created a design that highlights the season with warmth and thoughtful detail.
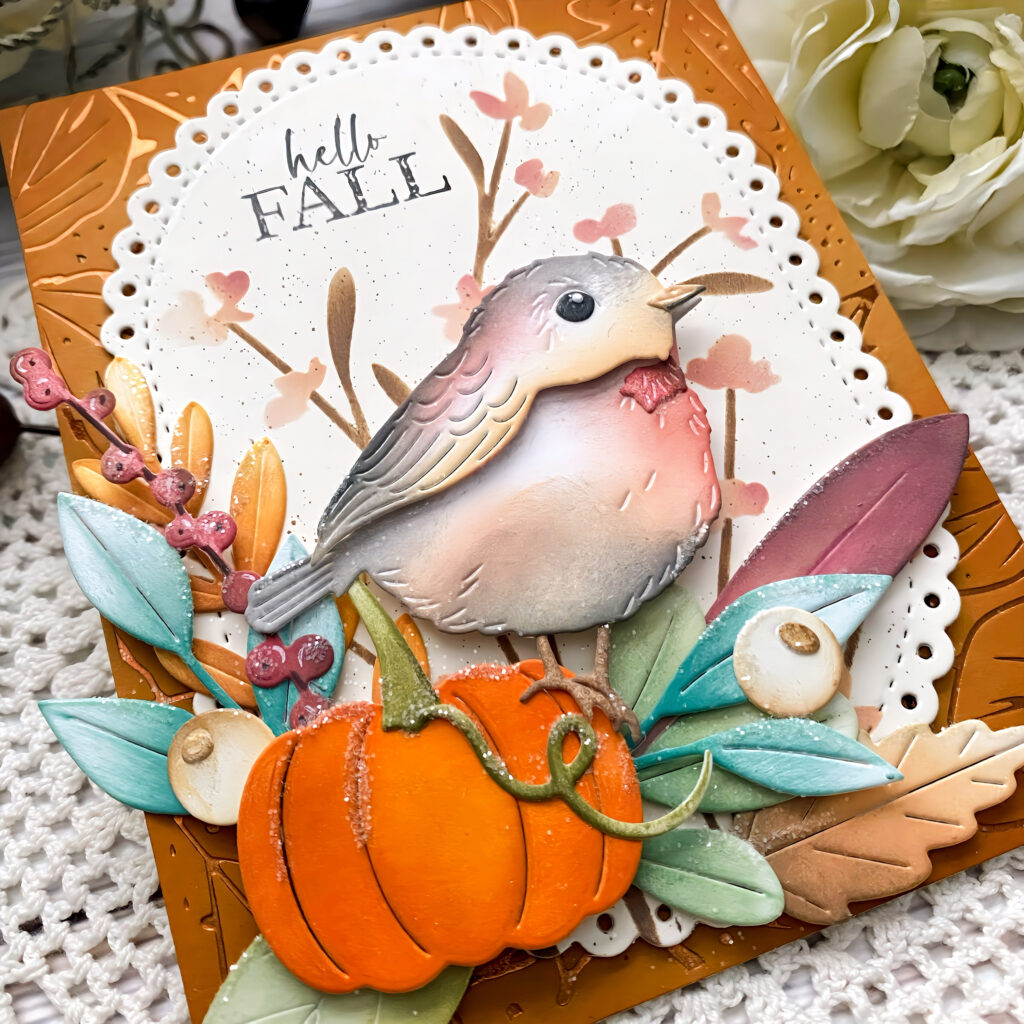
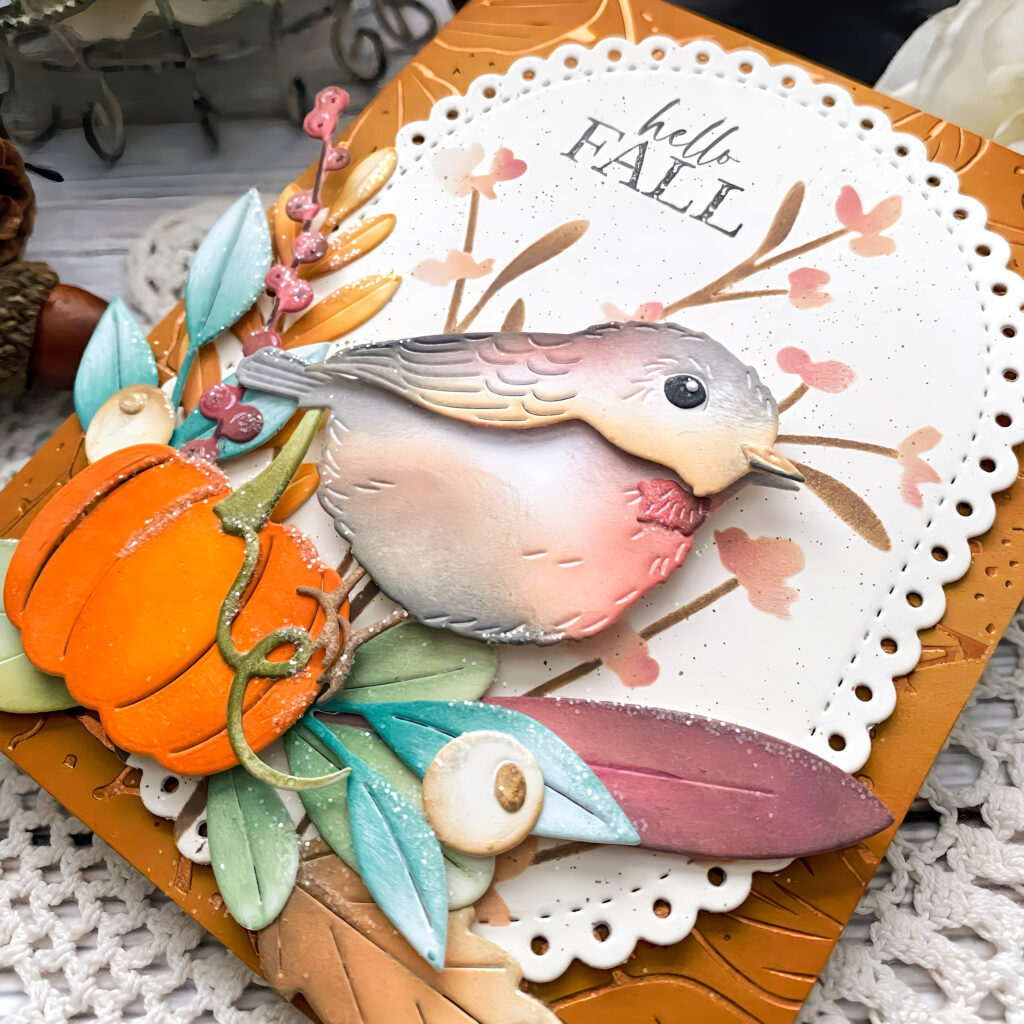
Kelly shares, “Autumn is one of my favorite seasons to craft for! I love revisiting older products and combining them with the new, for something truly unique! I adore this sweet new bird from the So Tweet Die and he’s the perfect addition for this fall card!”
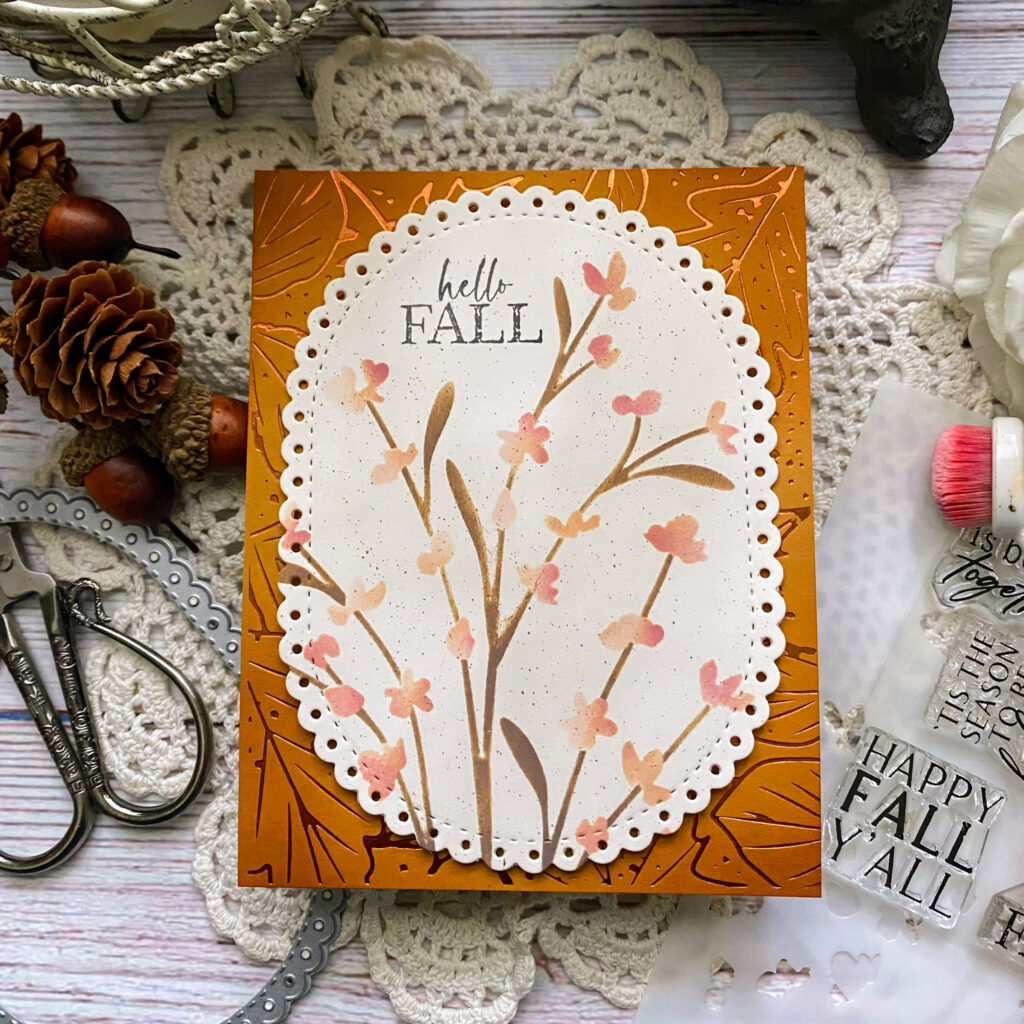
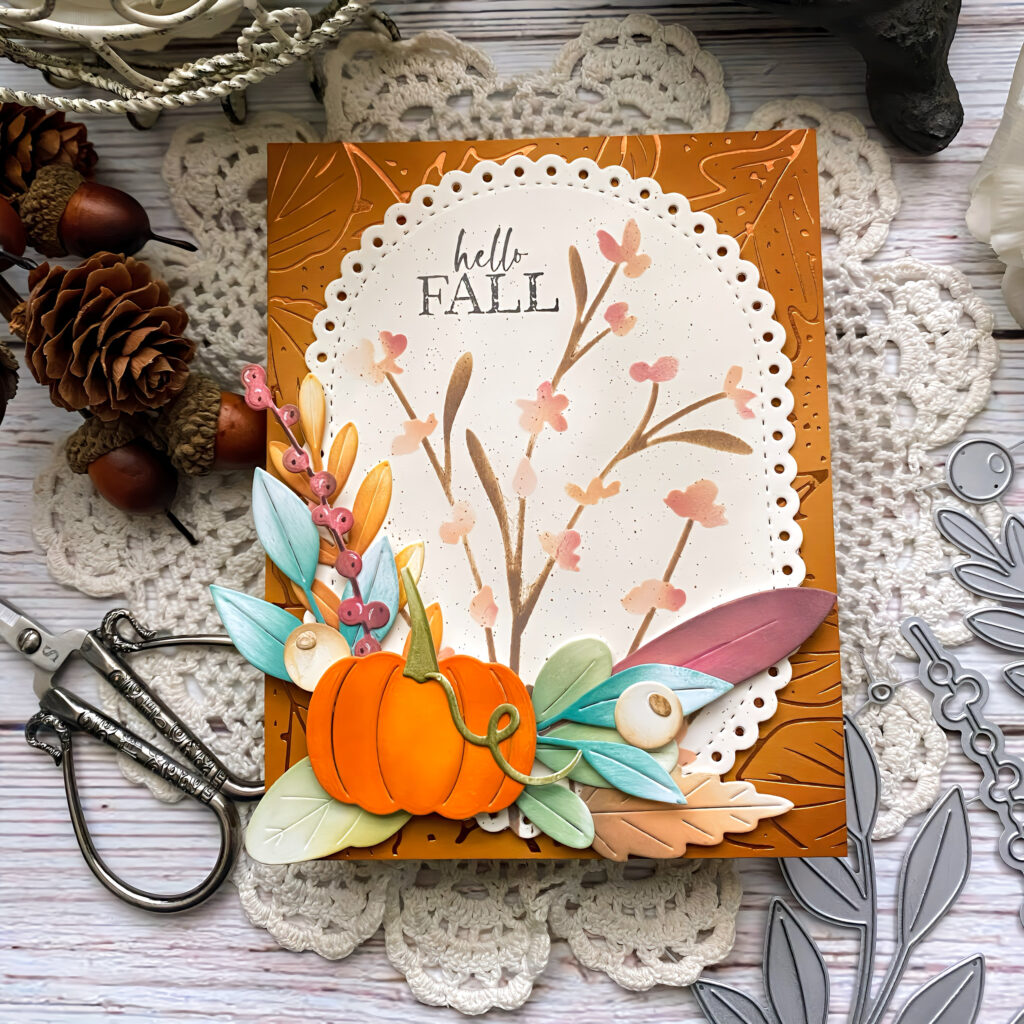
Step 1: Cut an A2 panel of Honey Nut cardstock and blend Honey Nut ink around the four corners. Foil the panel with Copper foil using the Fallen Leaves Hot Foil Plate.
Step 2: Use the Wandering Petals Stencil Collection on a piece of Vintage Cream cardstock for both steps. Add some brown ink splatter, and then cut it out using the largest size included in the Love to Layer: Scalloped Ovals Die. Stamp the sentiment.
Step 3: attach the oval to the background using foam squares.
Step 4: cut leaves and berries using the Into the Blooms: Christmas Sprigs Die. Color them with ink and arrange around the focal piece using liquid glue and foam squares. Cut the pieces for the pumpkin using the Into the Blooms: Fall Boot Die. Color them and attach.
Step 5: Cut and color the bird and attach it near the foliage.
Step 6: Add glitter
Step 7: Adhere the entire panel to an A2 card base
Kelly’s project is a reminder that mixing products across releases can lead to something truly special.🍂 Try blending your own favorites, then tag us on Instagram or share in the comments so we can admire your autumn creations, too.✨
Reader Interactions
Comments
Alice B Samuelsays
Cute card
Graciesays
I love all the details on Kelly’s card Feathered Friends.


Alice B Samuel says
Cute card
Gracie says
I love all the details on Kelly’s card Feathered Friends.
Carol says
Love th fall bird!