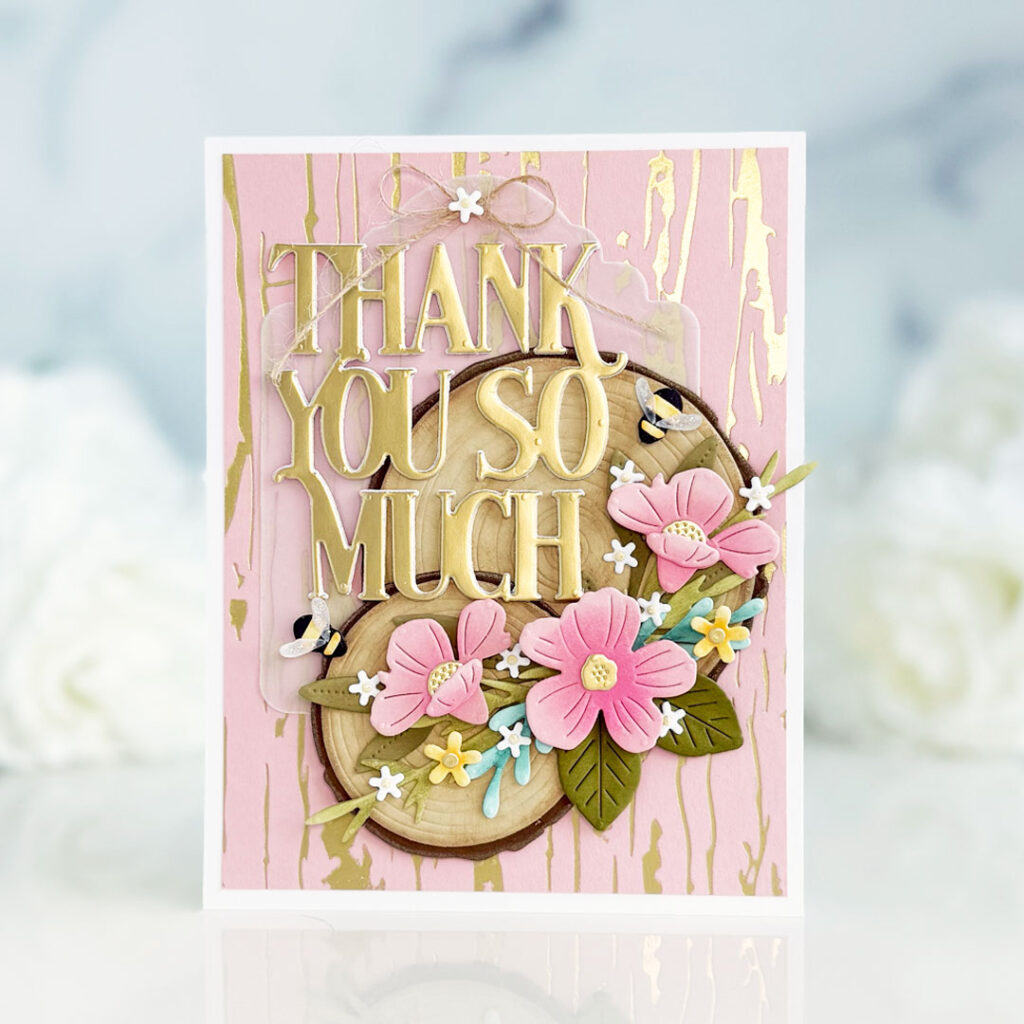
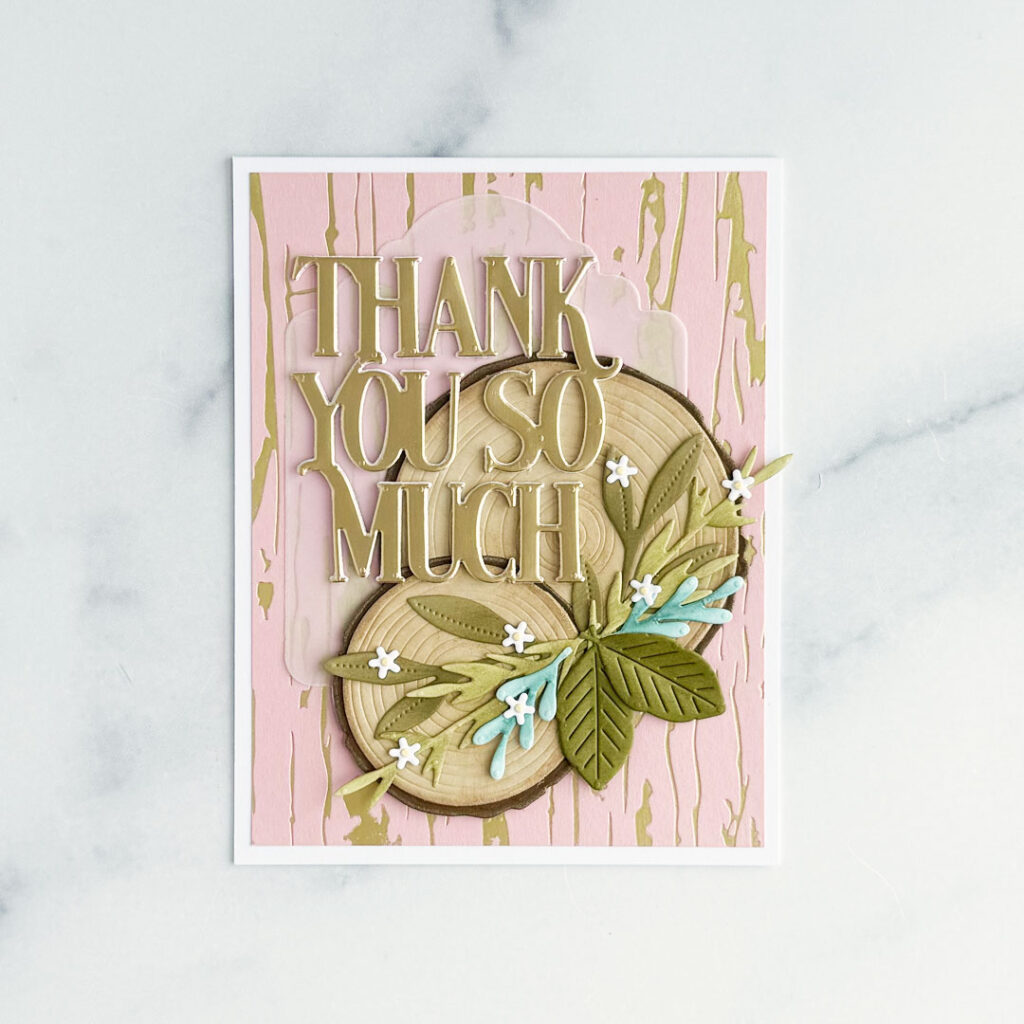
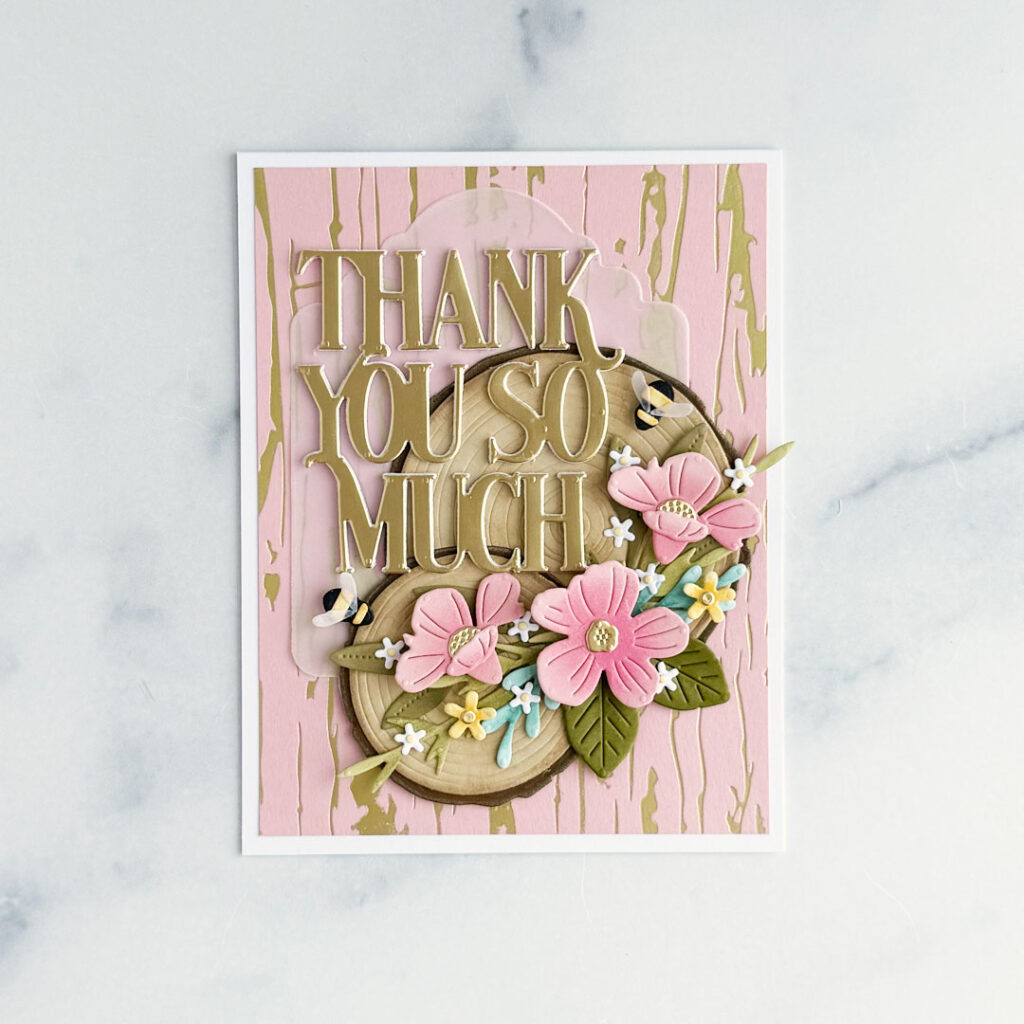
This week’s Project Inspiration is designed by Brenda Noelke (mypapercutcreations). Brenda Noelke’s design layers elegance and texture in the most beautiful way. The background features a soft blush panel accented with gold foiled woodgrain for instant warmth and shine. A stacked wood-slice die cut forms the natural focal point, adorned with dimensional die-cut florals in shades of pink, yellow, and white. The large gold “Thank You So Much” sentiment is perfectly balanced across the arrangement, while tiny bees and delicate floral accents add movement and charm. Every element is thoughtfully placed, making this a masterclass in combining texture, color, and shine for a truly standout thank you card.
“I thought the wood slices from the Into the Blooms: Wild Wood Die Set would pair perfectly with the Rustic Woodgrain Hot Foil Plate from the latest release!! It seems that I’m always in need of thank you cards, so I combined those two products with the Mat Stack: Thank You So Much Die Set to create my thank you card today!!”
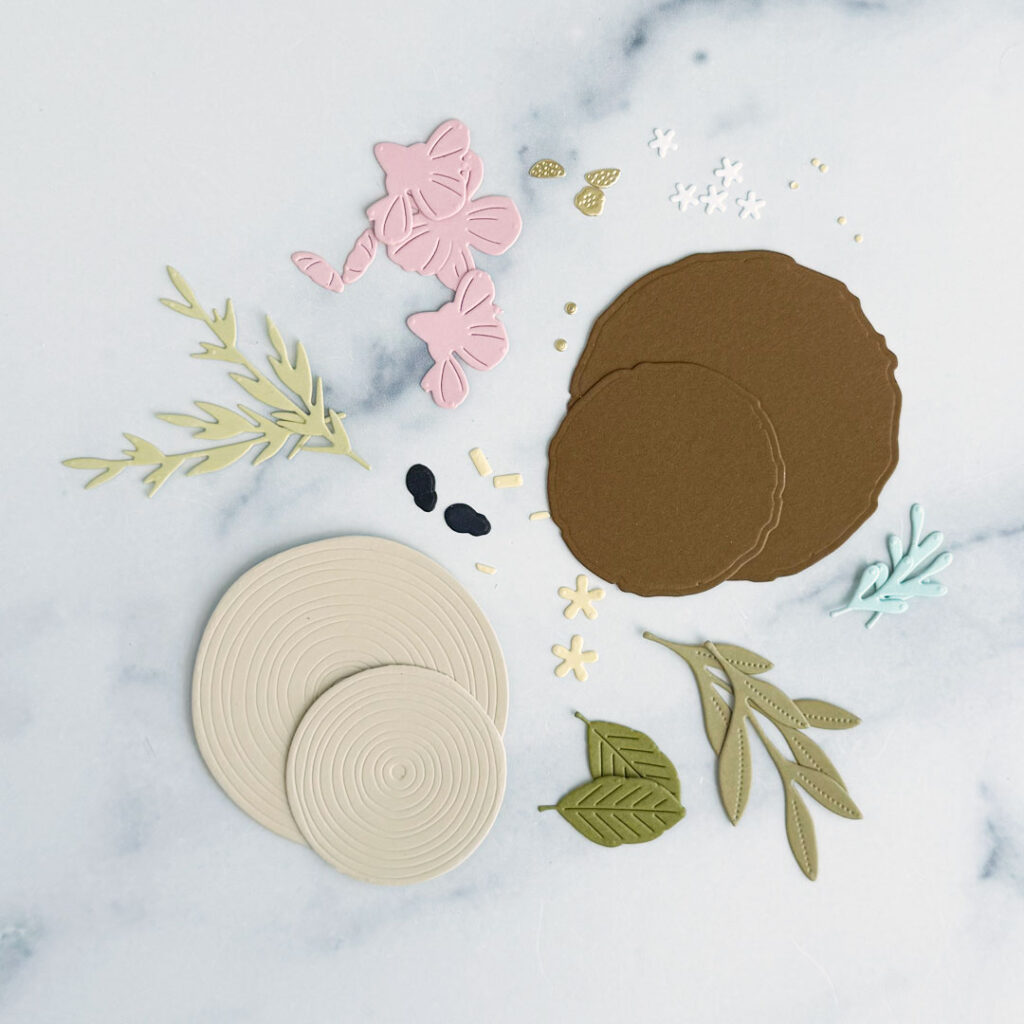
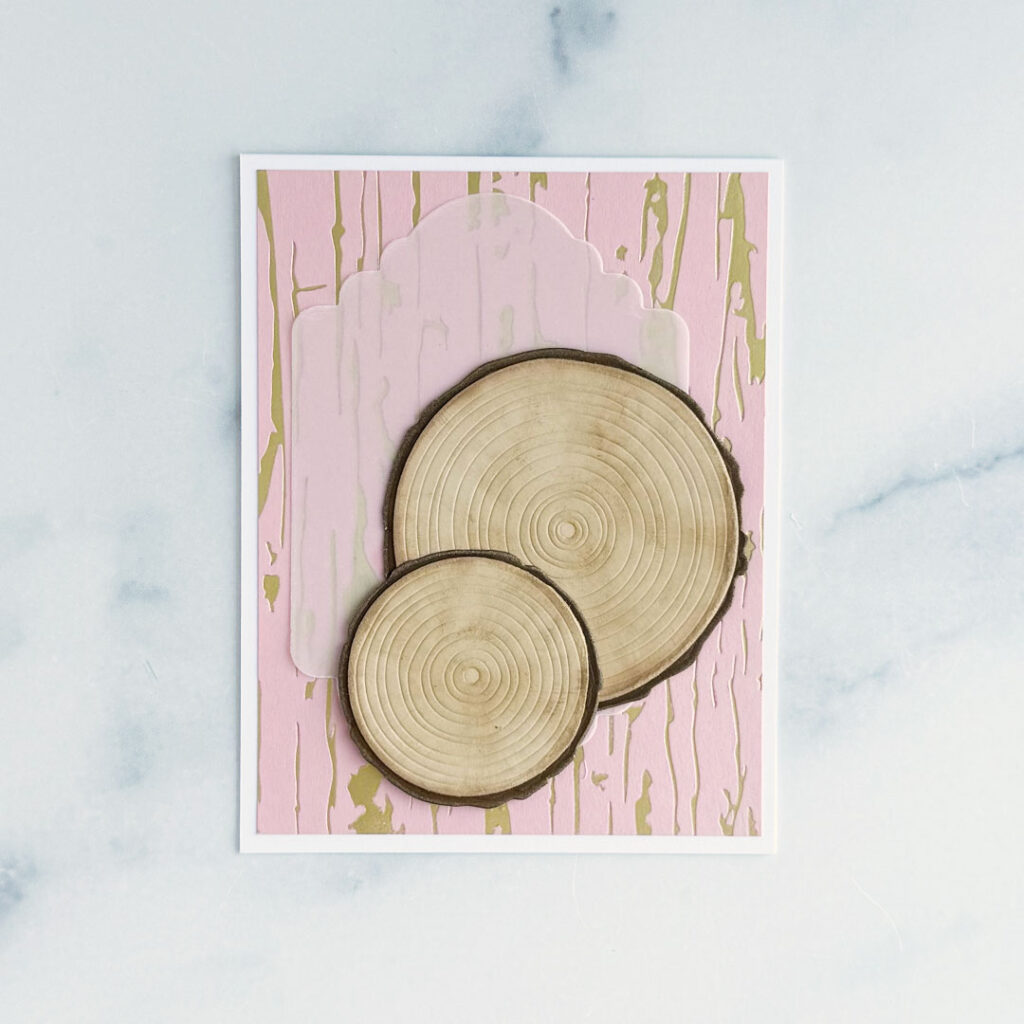
Step 1: Die-cut the elements in the Into the Blooms: Wild Wood Die Set from Pale Peony, Summer Sunrise, Ripe Avocado, Prairie Grass, Spring Moss, Aqua Mist, Fine Linen, Cocoa Bean, True Black, White and matte gold cardstock and vellum.
Step 2: Add shading to the die-cuts with ink and blending brushes to create dimension and interest. For the most part, I used the same color of ink as the cardstock to create subtle shading. I used the following inks: Pale Peony, Hibiscus Burst, Summer Sunrise, Ripe Avocado, Prairie Grass, Aqua Mist, Pinefeather, Classic Kraft and dark brown. I swiped a small metallic gold ink pad along the edges of the inner and outer wood slice die-cuts.
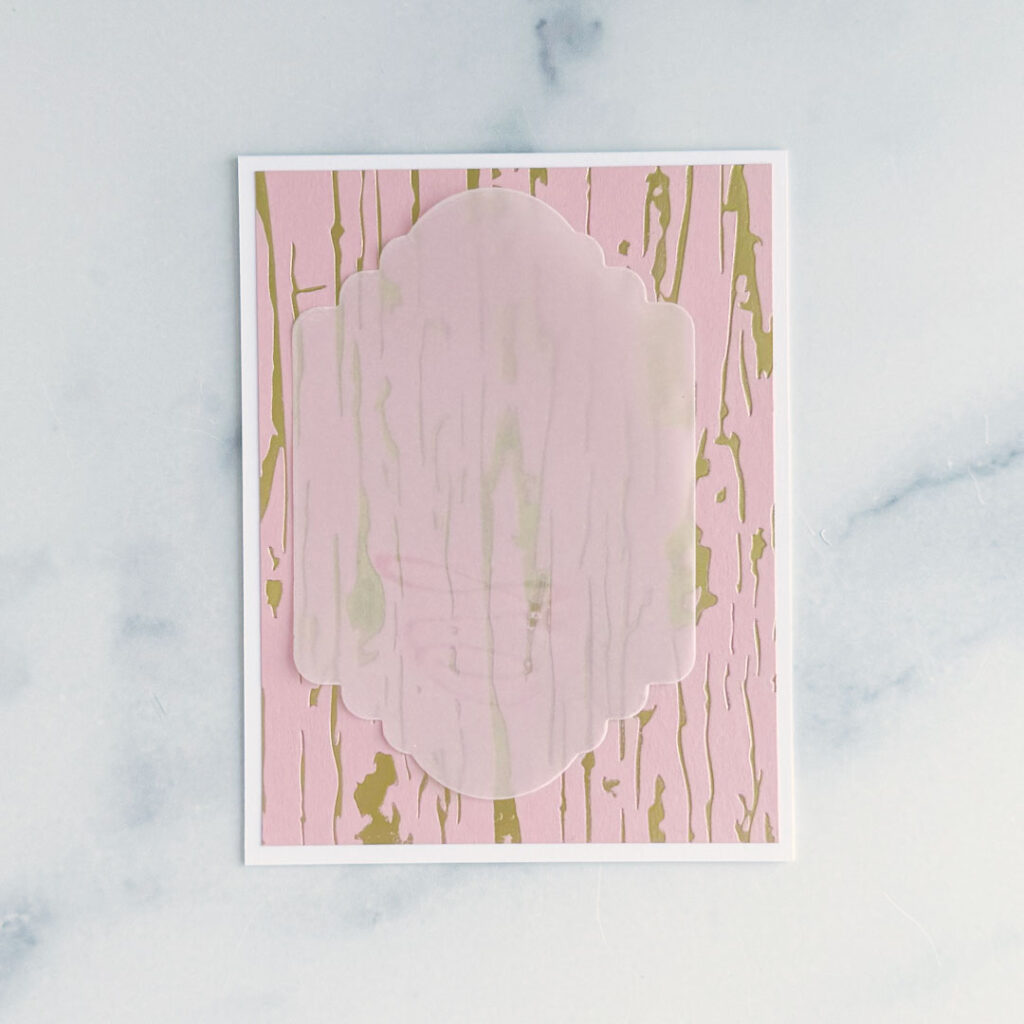
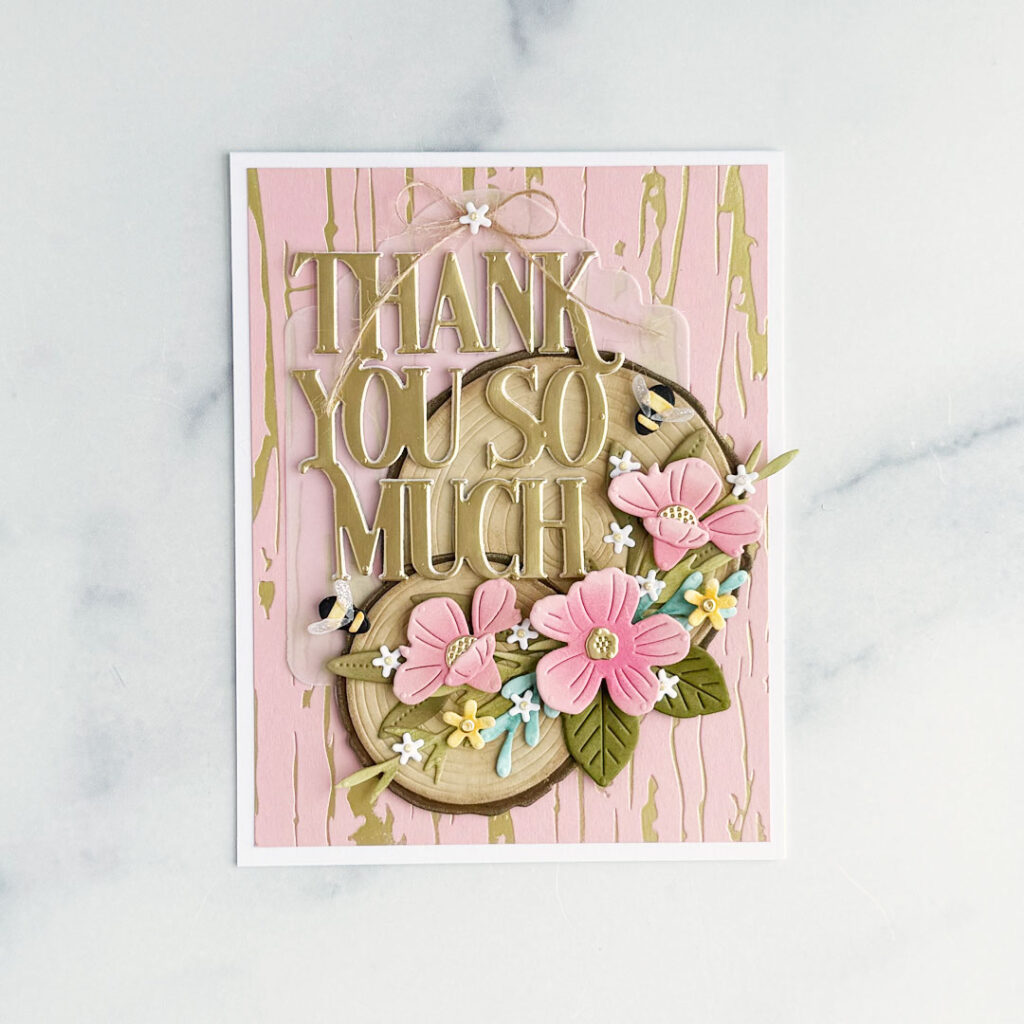
Step 3: Die-cut the tag in the Mat Stacks: Thank You So Much from vellum. The sentiment is also from the same die set. It was die-cut once from matte gold cardstock and three times from heavyweight white cardstock.
Step 4: Stack and adhere the sentiment die-cuts together with liquid glue.
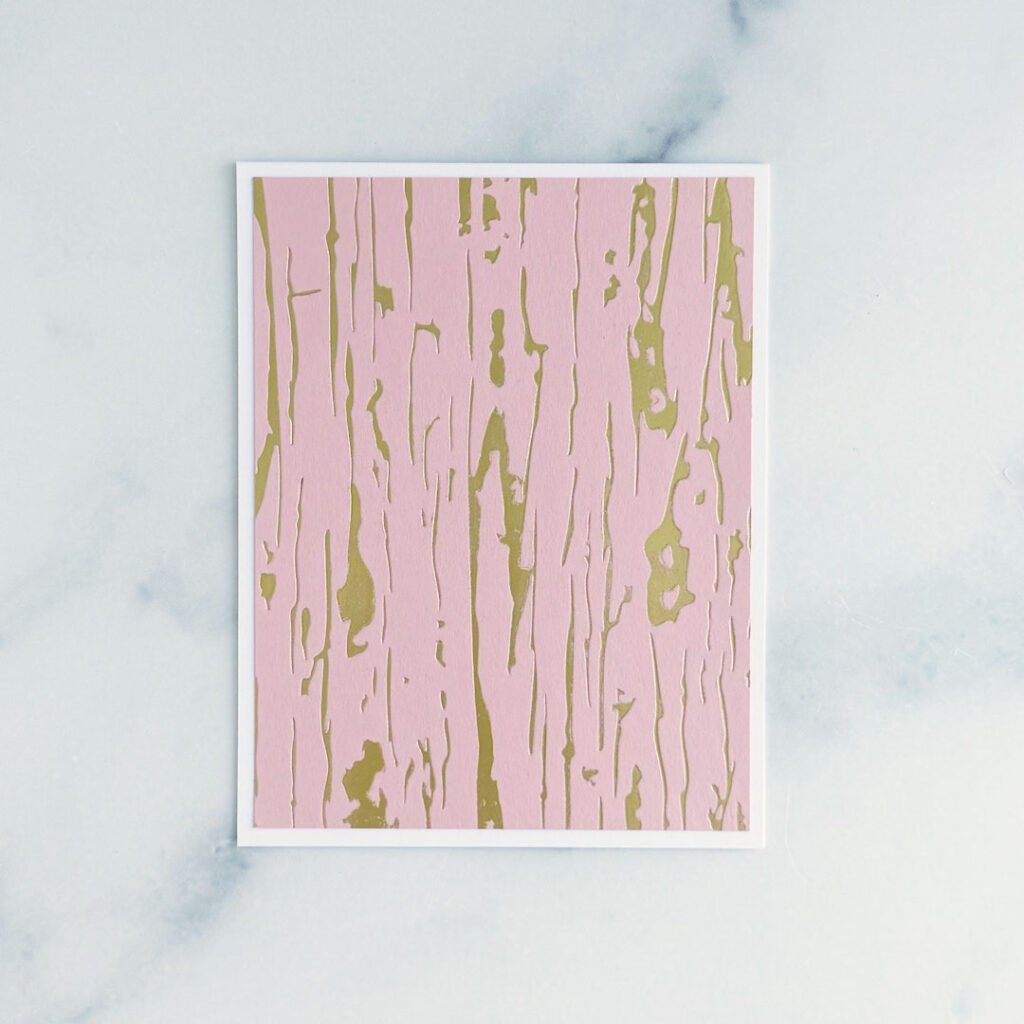
Step 5: Hot foil the Rustic Woodgrain Hot Foil Plate onto an A2 panel of Pale Peony cardstock. Trim slightly and adhere to a white A2 card base.
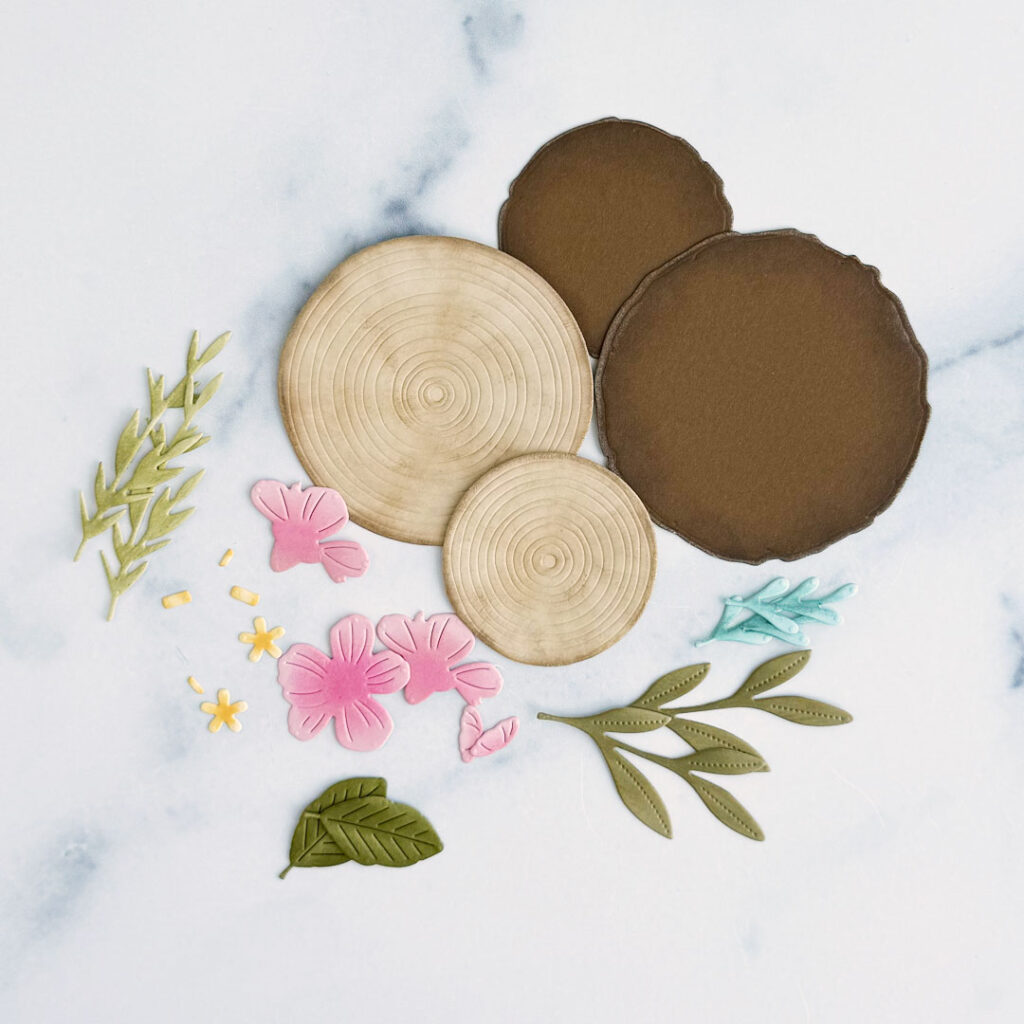
Step 6: Adhere all the die-cut pieces together with liquid glue.
Step 7: Adhere the vellum tag with a small amount of liquid glue. Be sure to add the glue where it will be hidden.
Step 8: Adhere the wood slices with liquid glue.
Step 9: Arrange and adhere the foliage and tiny white flowers with liquid glue, along with the die-cut sentiment.
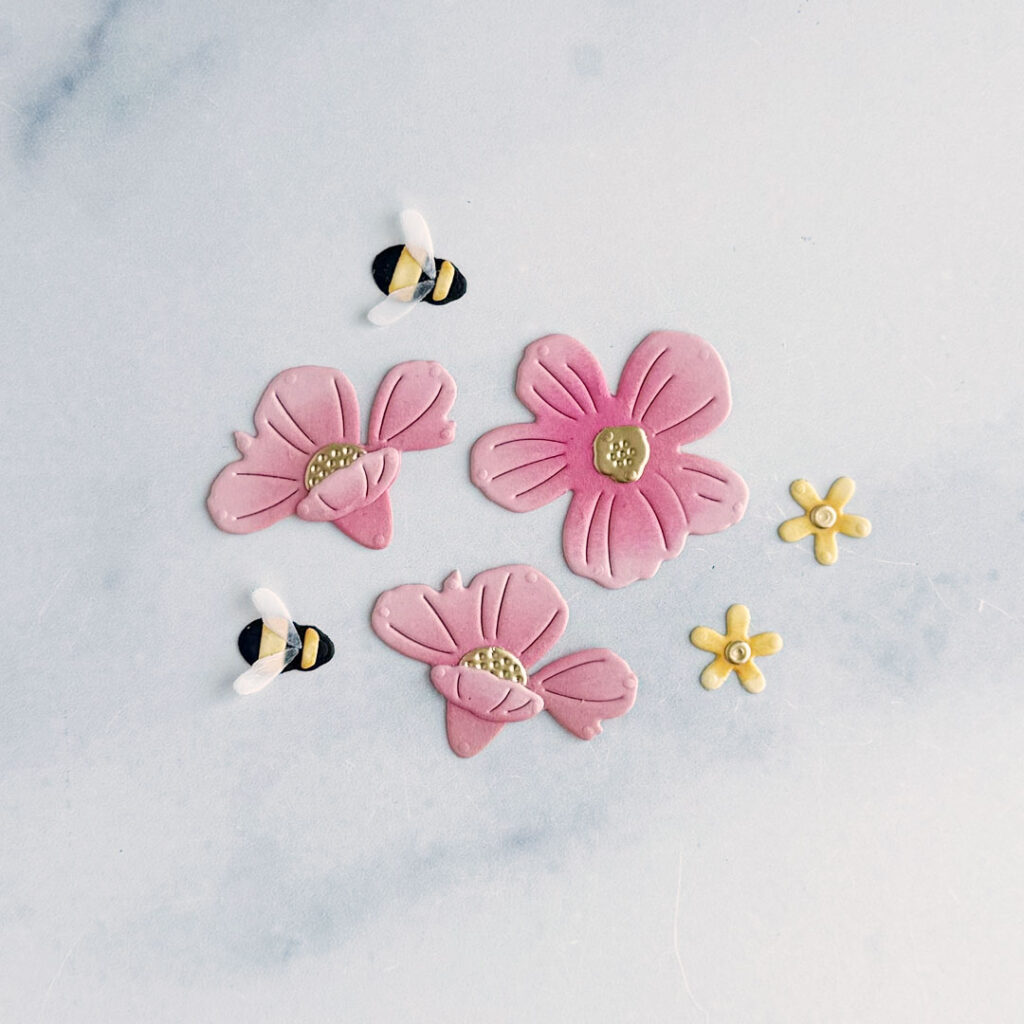
Step 10: Add foam squares behind the pink and yellow flowers and the bees and adhere to the front of the card.
Step 11: Tie twine into a bow and adhere with a small white flower to the top of the vellum die-cut. Add Star Dust Stickles to the bees’ wings and centers of the tiny white flowers.
We’d love to see your take on this design! Don’t forget to tag us on Instagram or share your creations in the comments. Whether you’re celebrating a birthday or just sending a heartfelt hello, this layered card is sure to bring joy to any recipient.


Leave a Reply