


Hello crafty friends. It’s Bobbi Lemanski of Bobbi Hart Design here, sharing a very lovely thank you using products from Papertrey Ink‘s July release. Did you see all the pretty items in the release?! I was blown away. Here’s a fun way to use some of those sets in a unique way. Let’s get started!
I’m using the following Papertrey Ink products:
Mat Stack: Thank You So Much Collection
Into the Blooms: Above Ground Dies
Reflections: Philippians 4 Die Set
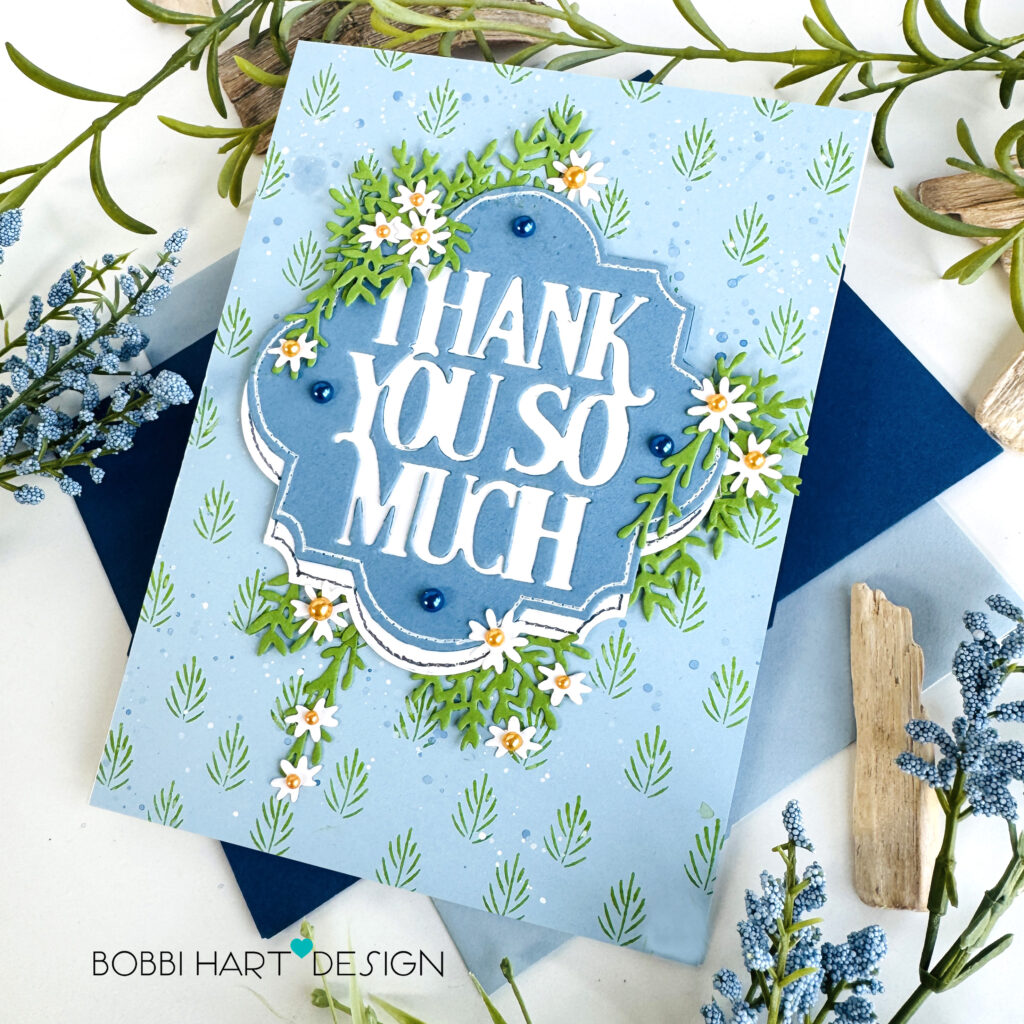
My card is 5″ X 7″ and uses a white card base made from the Stamper’s Select white cardstock. For my black ink stamping, I use True Black Ink.
Here are the step-by-step details for creating this card:
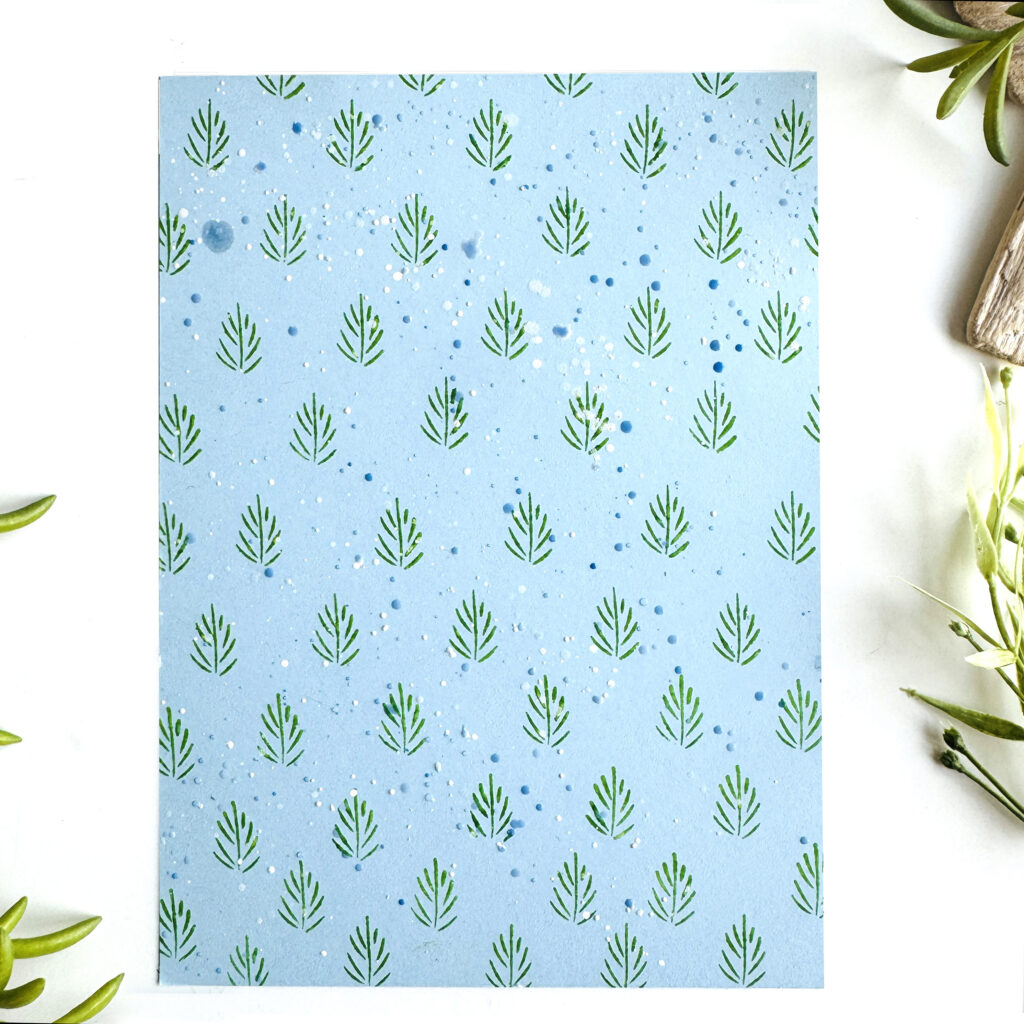
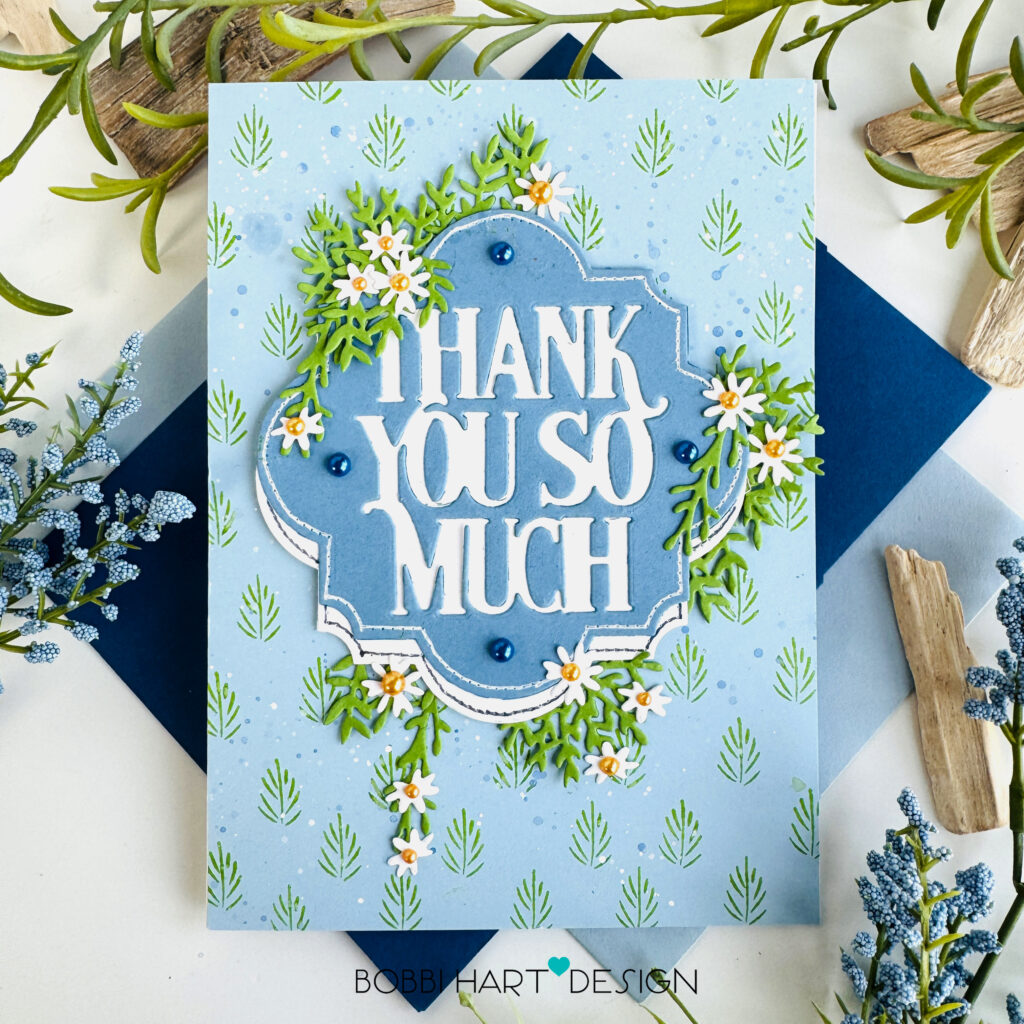
Cut a 5″ X 7″ card front panel from Spring Rain cardstock. Stamp the leafy design using a stamp from the set, The Sweetest Bunch Stamp Set and New Leaf ink. Splatter watercolor paint all over the stamped front using a blue paint and white ink. I use Kuretake Gansai Tambi paint and Dr. PH Martin’s Bleedproof ink. Set the background aside to dry. The leafy design and splatters make a very pretty and organic pattern paper for this card!
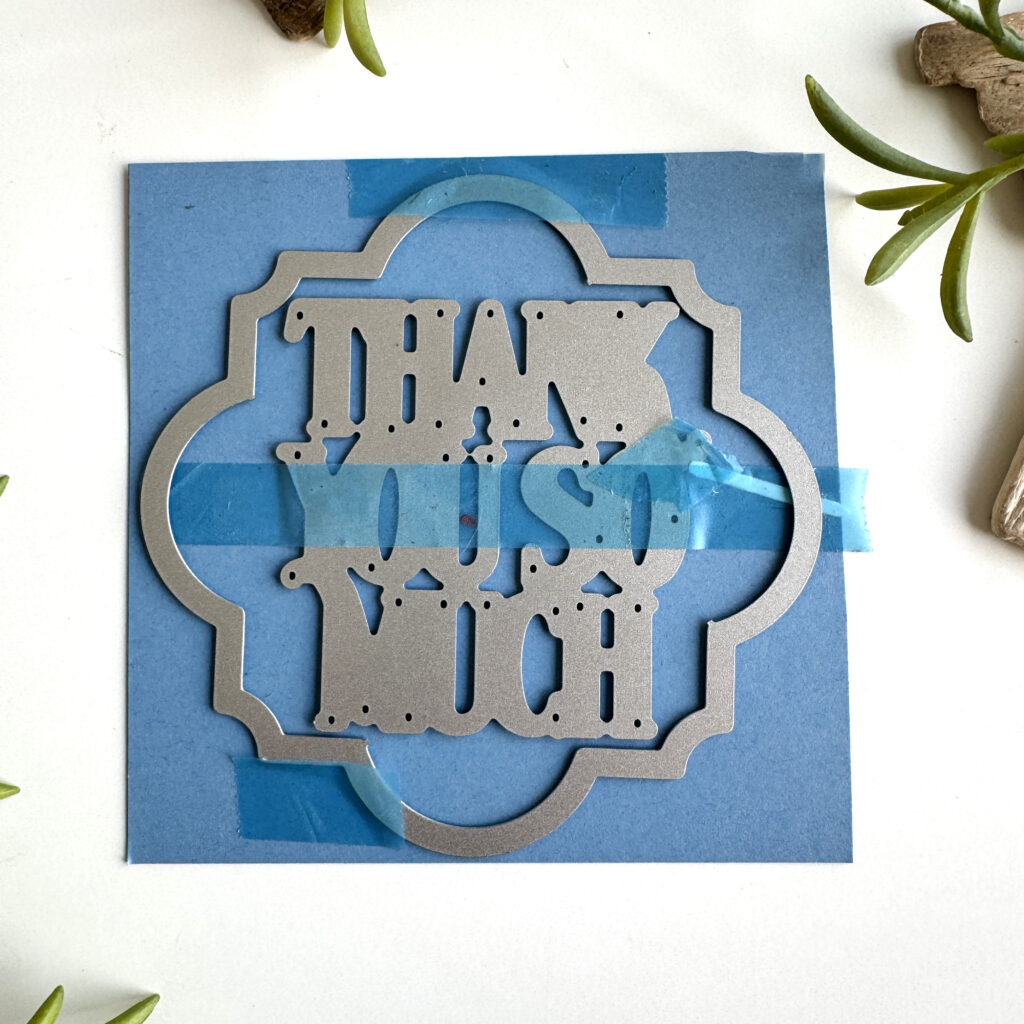
Using Blueberry Sky cardstock, the word die from the Mat Stack: Thank You So Much Collection and the largest die from the Reflections: Philippians 4 Die Set, die cut the main design. You can cut them all at once as shown here, or cut each die separately. Cut one more of the Reflections: Philippians 4 largest die from Stamper’s Select white cardstock.
Remove the words die from the blueberry cardstock. You can save that for another project! Layer the white piece under the blueberry offsetting it vertically. The words will show through in white. Add back in any blueberry-colored center pieces such as the middles of the A and Os to make full letter outlines. Using a Gelly Roll pen in white ink, trace the stitching lines around the blueberry layer and a fine-tip marker in navy or gray to trace the stitching lines on the white layer at the bottom.
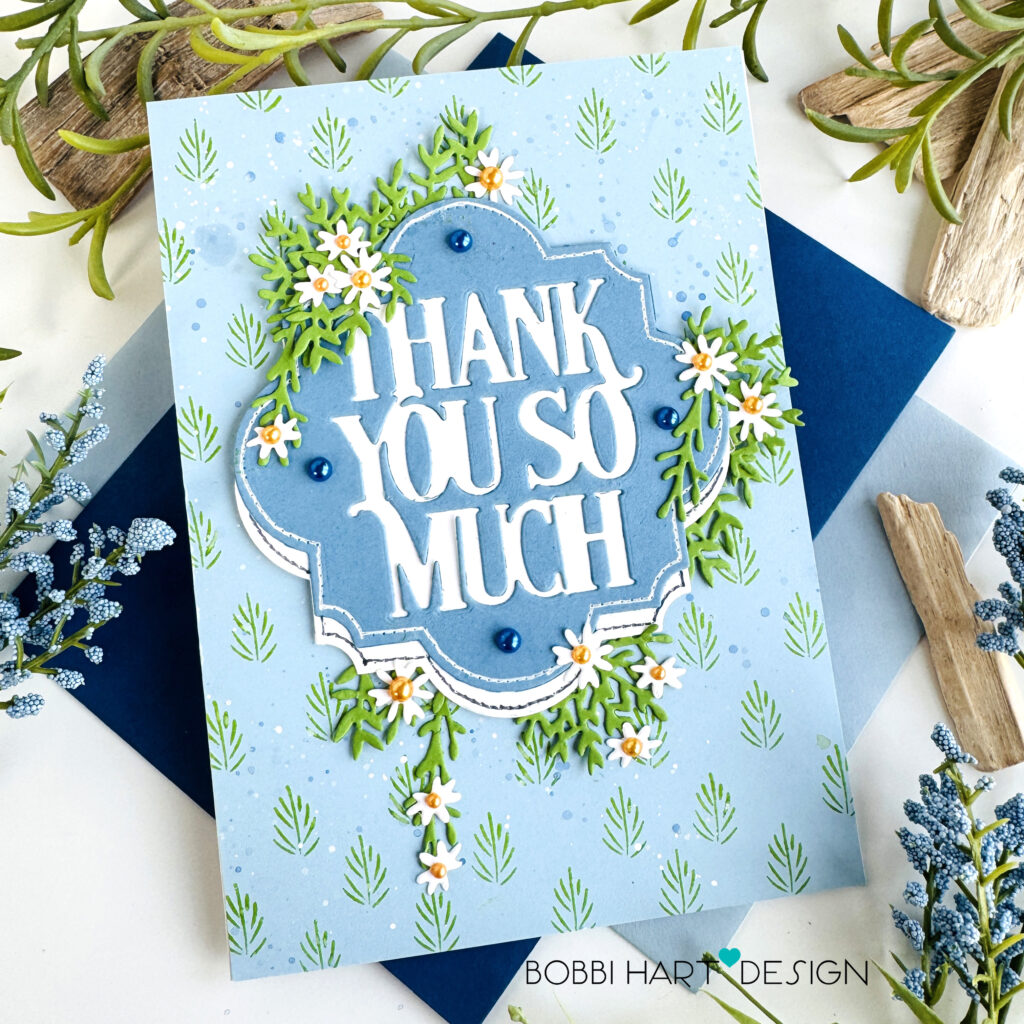
Die cut foliage and flowers from New leaf and white cardstock using the Into the Blooms: Above Ground Dies. Attach the “TYSM” layered die cut on the card front, centering it width wise and slightly higher than a vertical center. Attach it to the card front using foam tabs. Layer greenery and white flowers around the die cut, allowing sprigs to hang naturally. Some should fall behind the design for a natural look.
Add gold pearl gem stickers to the white flower centers and four larger blue gems to the four corners of the blueberry TYSM layered “plaque” to complete the front. Attach the entire blue front to a white 5″ X 7″ folded card base.
You can shop the entire collection here at Papertrey Ink! If you decide to place an order, please use the links in this post so that Papertrey Ink team knows what inspired you. I appreciate it very much. It helps me to continue to bring more ideas to you!
Thanks for stopping by today. If you want to see more ideas and inspiration from me, subscribe to my blog, BobbiHartDesign.com. I’ll send you updates on new posts! You can also find me on Instagram as @BobbiHartDesign and on Facebook as BobbiHartDesign. Bobbi Hartmann Lemanski,
Bobbi Hart♥ Design, Adding h♥art into every design
Leave a Reply