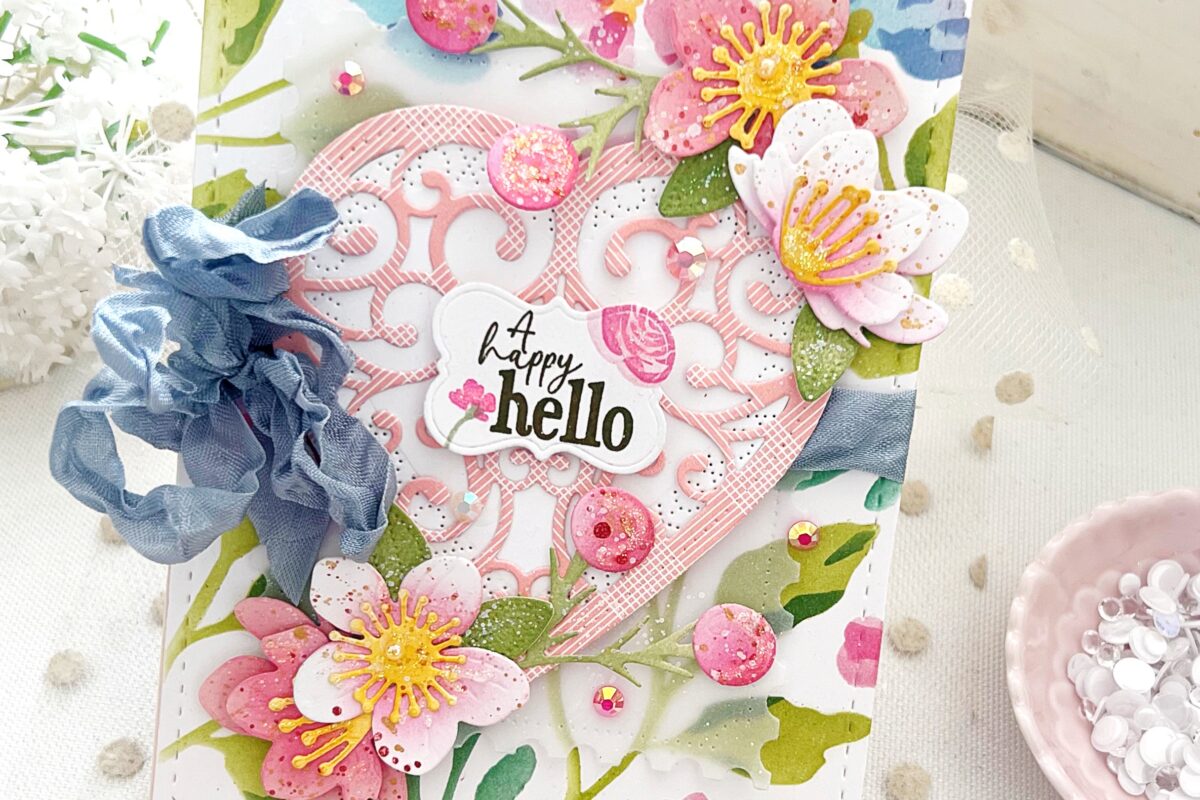
This week’s Project Inspiration is designed by Brenda Noelke. Using the Breathtaking Blooms stamp and die sets along with other June release favorites, she’s crafted a soft and stunning wedding card layered with texture and charm. Let’s dive into the steps so you can create this beautiful design!

STEP 1:
Die-cut the Fantastic Front: Scalloped Frame Die from Lilac Grace cardstock. Adhere a panel of Bitty Big: Aqua Mist cardstock behind the opening and attach to an A2 white card base.

STEP 2:
Die-cut the largest die from the Love to Layer: Arches Die from vellum and adhere by adding adhesive only to the center, so it’s hidden behind other elements.

STEP 3:
Die-cut the Cozy Cafe Frame from Winter Wisteria cardstock and adhere it to the center of the arch.

STEP 4:
Die-cut the smallest die from the Love to Layer: Ovals Die Set from white cardstock and lightly stencil it with the Playful Dots Stencil using Pale Peony ink.

STEP 5:
Stamp the flowers and leaves from the Breathtaking Blooms Stamp Set onto white cardstock using Lilac Grace, Plum Pudding, Pale Peony, Aqua Mist, Pinefeather, and yellow inks. Die-cut them with the coordinating Breathtaking Blooms Dies, then enhance with alcohol markers. Arrange and adhere to the card front.

STEP 6:
Die-cut the sentiment from the Fantastic Front: Scalloped Frames Die Set once from Royal Velvet cardstock and three times from heavyweight white cardstock. Stack and adhere the layers for dimension, then add the sentiment to the center of the oval. Finish with a touch of Stardust Stickles on the flowers for sparkle.

Tips:
– Use a vellum layer for softness without overpowering the background.
– Layer your die-cut sentiment for a professional, dimensional effect.
– Add gentle ink blending or marker detailing to your blooms for added depth and vibrancy.
We’d love to see your take on this design! Don’t forget to tag us on Instagram @PapertreyInk or share your creations in the comments.
Supplies Used:
Stamps:
Breathtaking Blooms
Dies:
Breathtaking Blooms
Fantastic Front: Scalloped Frame
Cozy Cafe Frame
Love to Layer: Arches
Love to Layer: Ovals
Stencils:
Playful Dots
Ink:
Lilac Grace
Plum Pudding
Pale Peony
Aqua Mist
Pinefeather
Yellow Ink (any brand or coordinating PTI shade)
Click here for inks
Cardstock:
White
Lilac Grace
Winter Wisteria
Royal Velvet
Bitty Big: Aqua Mist
Click here for cardstock
Other Supplies:
Stardust Stickles
Alcohol markers
Vellum


Leave a Reply