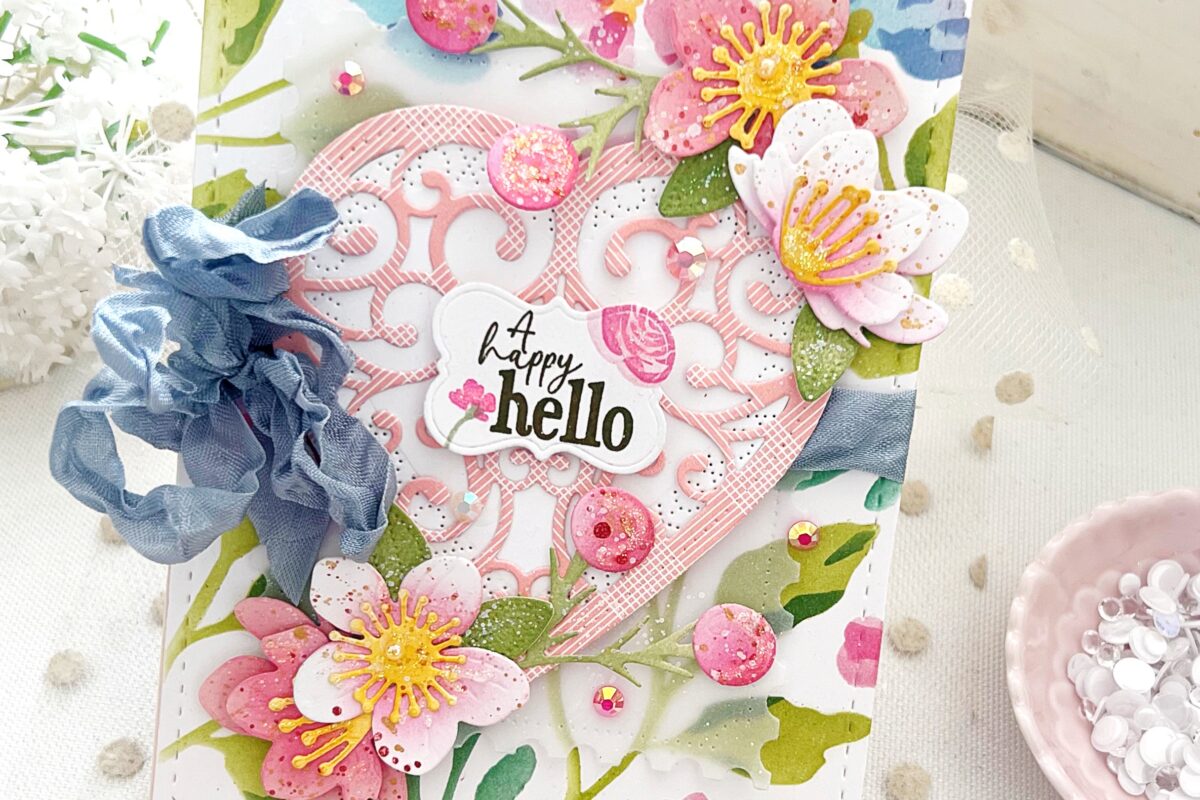
Designer: Kelly Lunceford
Spring is just around the corner, and there’s no better way to welcome the season than with fresh florals, soft colors, and a little sparkle! Today, Kelly Lunceford is sharing a beautiful thank-you card featuring delicate blooms, layered scalloped ovals, and charming tiny envelopes. If you love soft, elegant designs with intricate details, this project will be perfect for you!
Follow along as we break down the steps so you can recreate this lovely design at home.

STEP 1: Create the Background
Cut a Blueberry Sky cardstock panel measuring 4” x 5 1/4”. Lightly blend Fresh Snow ink around the edges for a soft, dreamy effect. Splatter white acrylic paint over the panel to add texture and an artistic touch.

STEP 2: Build the Card Base
Adhere the inked and splattered panel to a top-folding A2 card base made from Stamper’s Select White cardstock using liquid glue.

STEP 3: Add Layered Details
Die cut two Love to Layer: Scalloped Ovals from coordinating cardstock. Use foam squares to attach them to the card front, creating dimension and elegance.

STEP 4: Arrange the Flowers & Leaves
Die cut flowers and leaves using the Into the Blooms: Daisies set. Blend ink over the die cuts for added depth, then arrange and adhere them to the card using foam squares.

STEP 5: Add the Envelopes
Die cut two small envelopes from the With Love Die Collection. Lightly blend Harvest Gold ink around the edges to add warmth. Attach them to the card front with foam squares for a charming, layered effect.

STEP 6: Emboss the Sentiment
Heat emboss a sentiment from Tuck It Sentiments onto a strip of Blueberry Sky cardstock using white detail embossing powder. Attach the sentiment to the card using foam squares for extra dimension.
STEP 7: Finishing Touches
Give the entire card a light spritz of shimmer spray for a soft sparkle. Add glitter to the leaves and flowers for a magical finishing touch.

More Inspiration Awaits!
We love sharing creative ideas every week, and there’s plenty more inspiration to explore! If you loved this project, check out our past Project Inspiration posts for more card-making ideas.
Stay tuned for next week’s feature, where we’ll bring you another stunning design from our talented team!

Supplies Used:
Ink: Harvest Gold, Summer Sunrise, Simply Chartreuse, Ripe Avocado, Fresh Snow
Paper: Blueberry Sky, Spring Rain, Stamper’s Select White CLIKE HERE
Dies: Love to Layer: Scalloped Ovals, Into the Blooms: Daisies, With Love Die Collection
Other Supplies: White acrylic paint, glitter, white detail embossing powder, shimmer spray


Leave a Reply