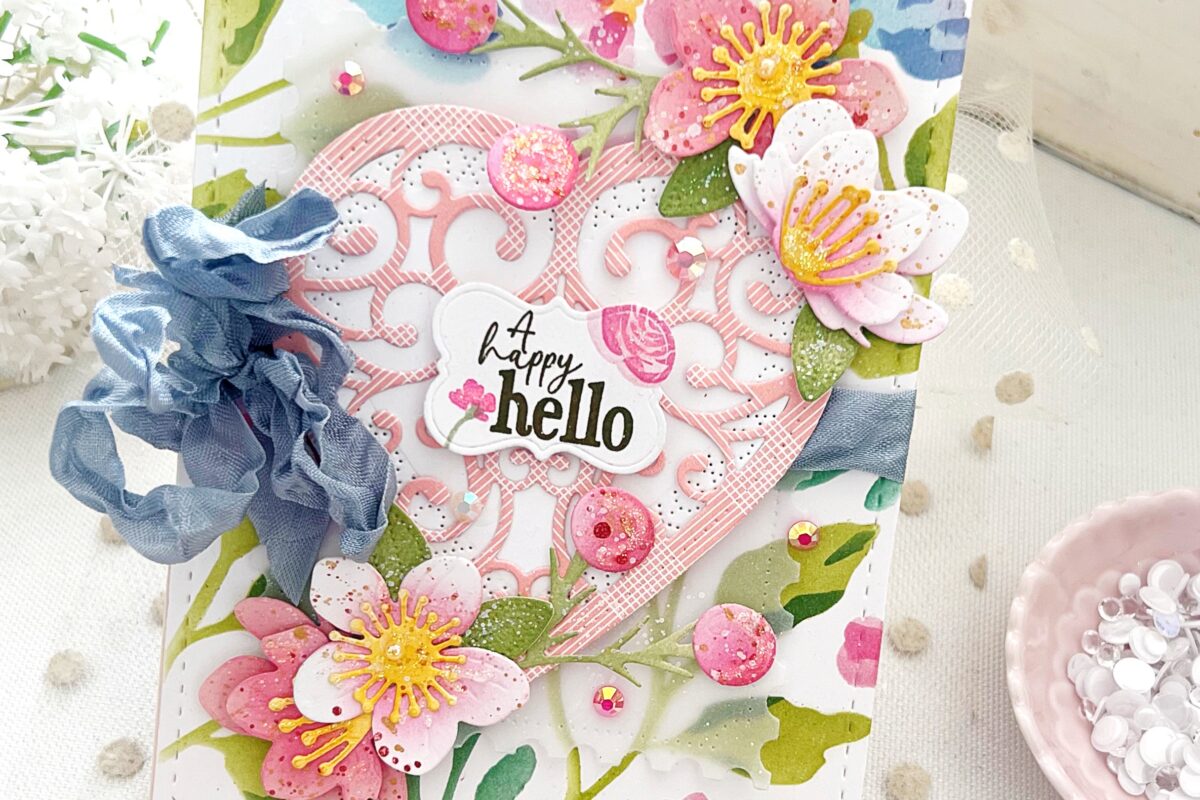
Designer: Melissa Phillips
Spring crafting always brings such joy after the winter holidays! As we dream of warmer days, the delightful Into the Blooms: Spring Nest is the perfect companion for your springtime creations. In today’s project, we’ll layer a charming nest complete with speckled eggs—an ideal introduction to using Distress Spritz and Sprays! Papertrey Ink carries a beautiful variety of colors to add depth and texture to your spring projects and beyond. Let’s dive in!

STEP 1: Create the Nest
Die cut the Into the Blooms: Spring Nest from Fine Linen cardstock.

STEP 2: Add Texture to the Nest
Spray the nest layers with Frayed Burlap Distress Spritz.
Allow them to dry completely before assembling the nest.

STEP 3: Speckle the Eggs
Blend ink on the eggs using Pale Peony, Aqua Mist, and Simply Chartreuse inks.
Using a paintbrush, splatter the nest and eggs with: Fossilized Amber Distress Spritz & Vintage Photo Distress Spray
White paint for extra dimension.
Let dry, then assemble the nest and eggs together.

STEP 4: Build the Layered Base
Die cut the large Love to Layer: Laced Edges from Mint Julep cardstock.
Die cut the medium Love to Layer: Oval from Fine Linen cardstock.
Layer them together using foam adhesive for dimension.

STEP 5: Add the Nest and Florals
Adhere the nest to the center of the oval.
Embellish with ink-blended flowers and leaves from the Into the Blooms: Spring Nest set.

STEP 6: Assemble the Card Base
Create an A2 card base from Fine Linen cardstock.
Cut a patterned paper rectangle slightly smaller than the card front and adhere it to the base.

STEP 7: Finishing Touches
Stamp the sentiment from the Thoughts of Spring Sentiments set onto a die-cut from Just Tags.
Adhere the tag to the lower right of the nest.
Embellish flowers, eggs, and leaves with adhesive pearls and Crystal Stickles glitter.
Scatter clear sequins for a touch of sparkle.

This springtime creation captures the joy and renewal of the season, perfect for welcoming warmer days or celebrating new beginnings.
Whether you’re new to Distress Spritz techniques or a seasoned pro, this project is a delightful way to explore layered textures and colors.
We’d love to know—what’s your favorite part of this project? Let us know in the comments!

Supplies Used:
Stamps: Thoughts of Spring Sentiments
Ink: Cocoa Bean, Simply Chartreuse, Pinefeather, Pale Peony, Aqua Mist, Summer Sunrise, Ripe Avocado
Paper: Fine Linen, Mint Julep
Dies: Into the Blooms: Spring Nest, Just Tags, Love to Layer: Laced Edges, Love to Layer: Ovals
Other: Frayed Burlap Distress Spritz, Fossilized Amber Distress Spritz, Vintage Photo Distress Spray, Blending Brushes, sequins, adhesive pearls, patterned paper, Crystal Stickles glitter


Leave a Reply