


Welcome to our final day of our May Countdown. We have saved some super sweet products for last! Introducing the new Iconic Baby stamps and dies, the Inside Greetings: Welcome stamps, Line it Up: Baby dies, and our From the Heart Hot Foil Plate.
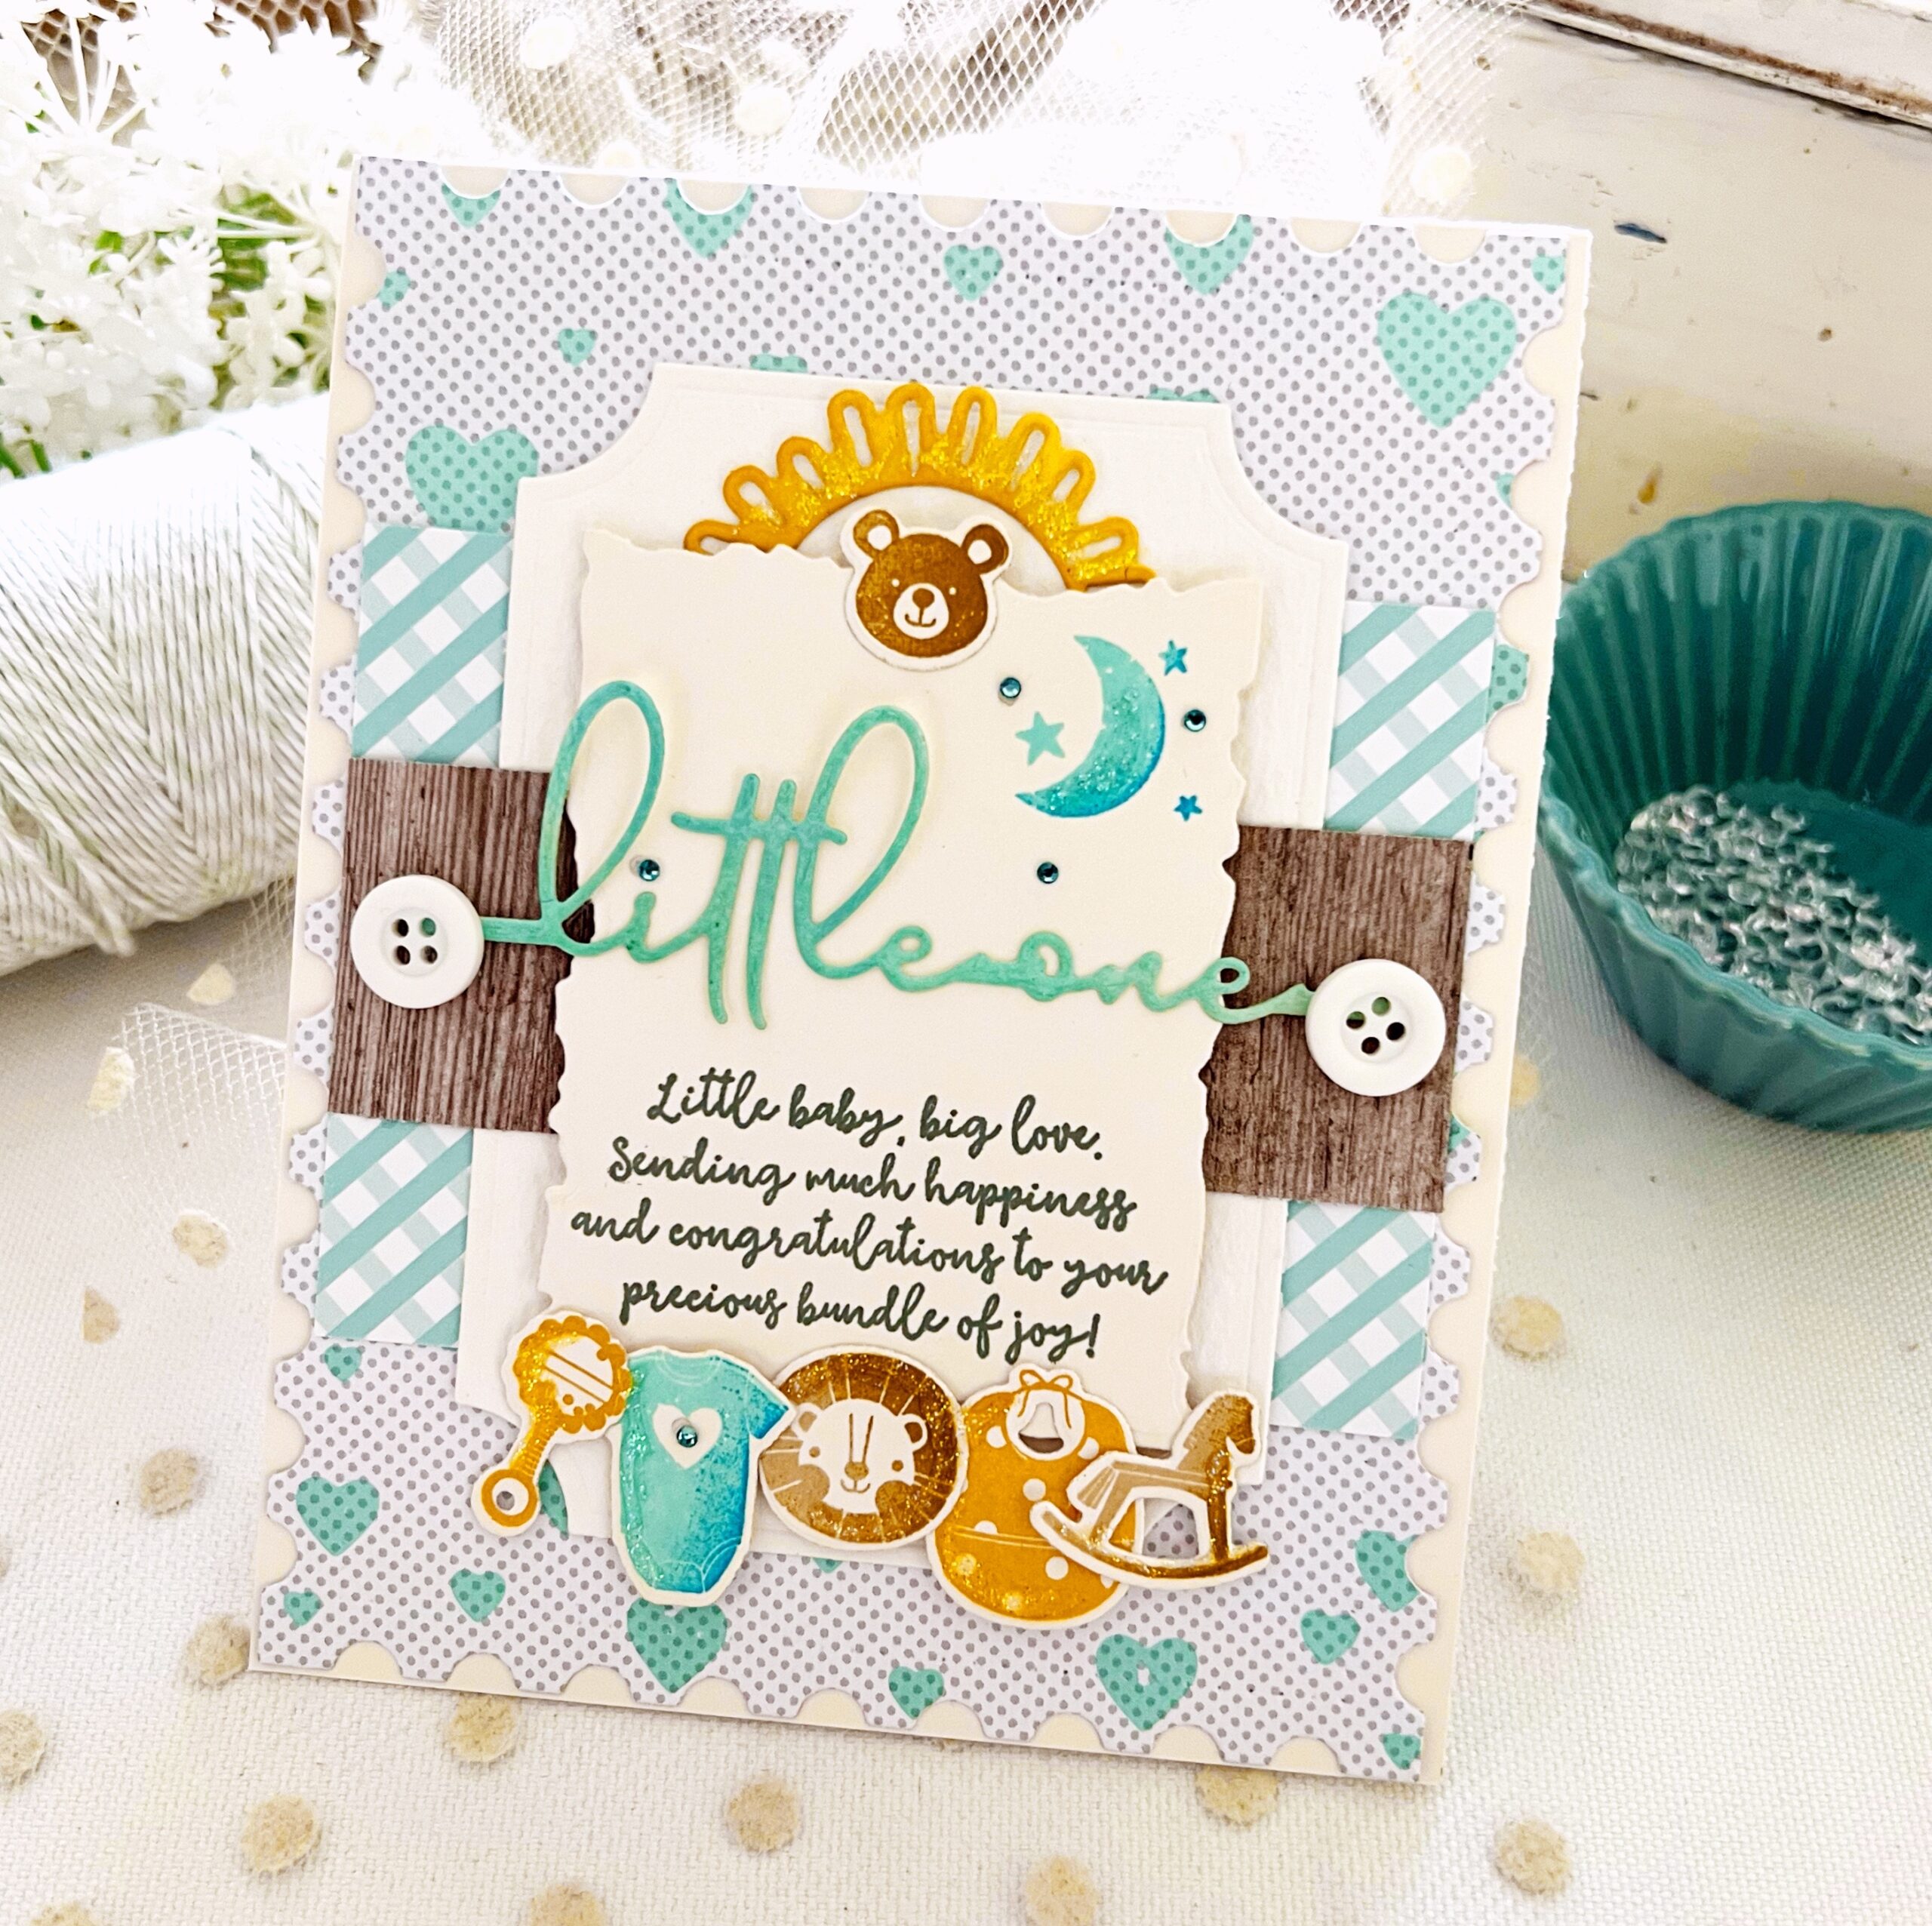
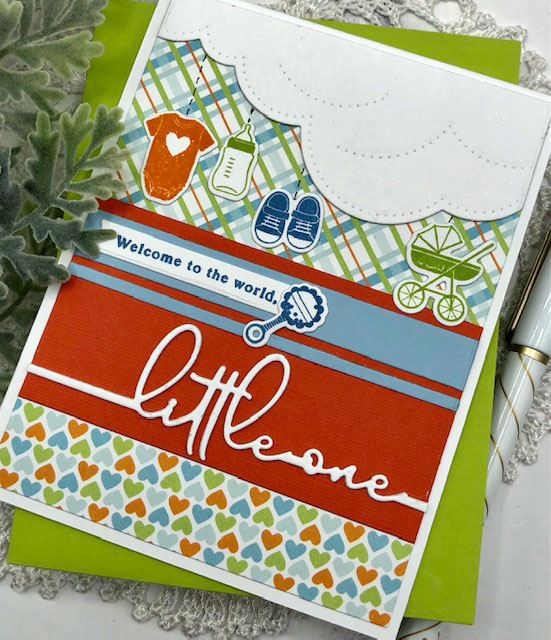
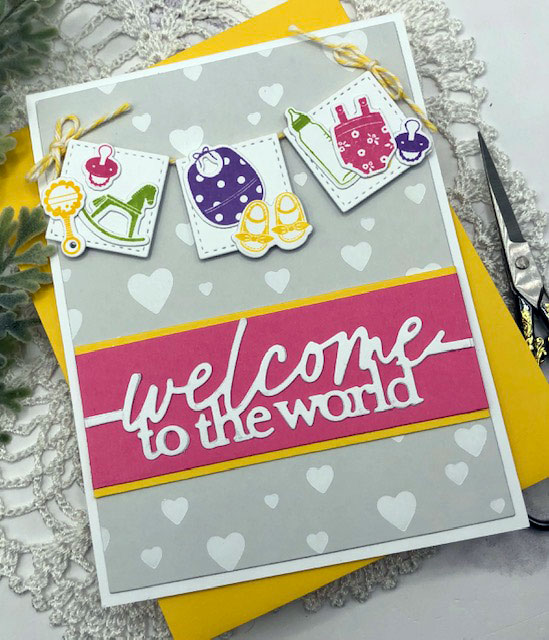
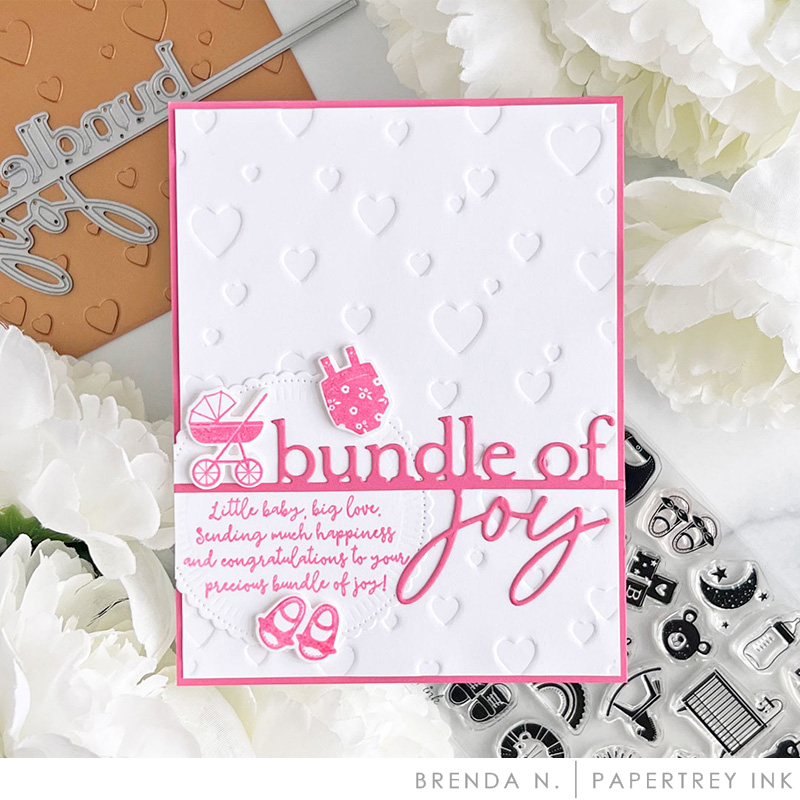
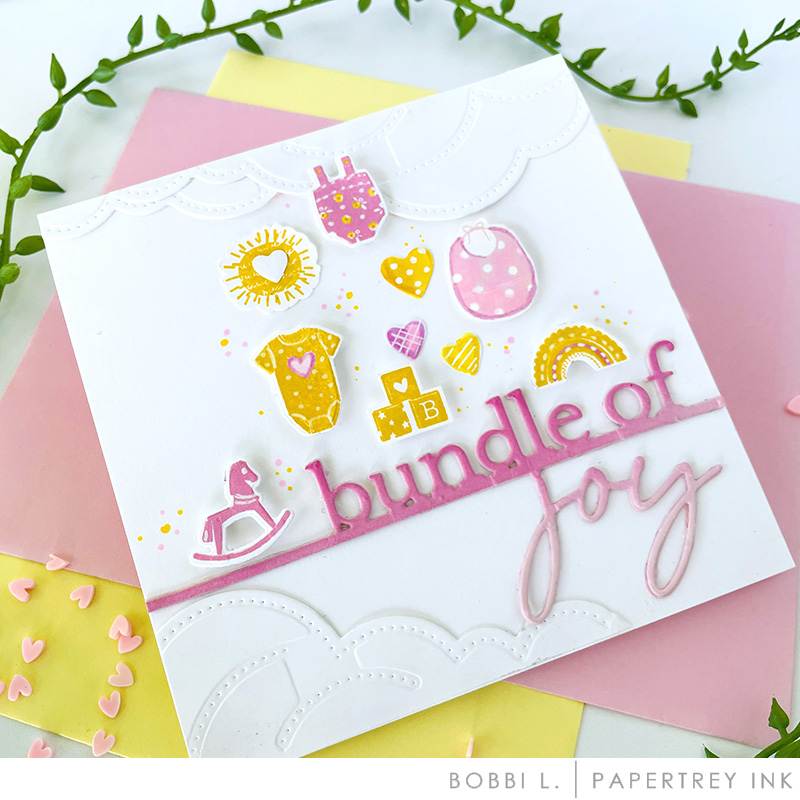
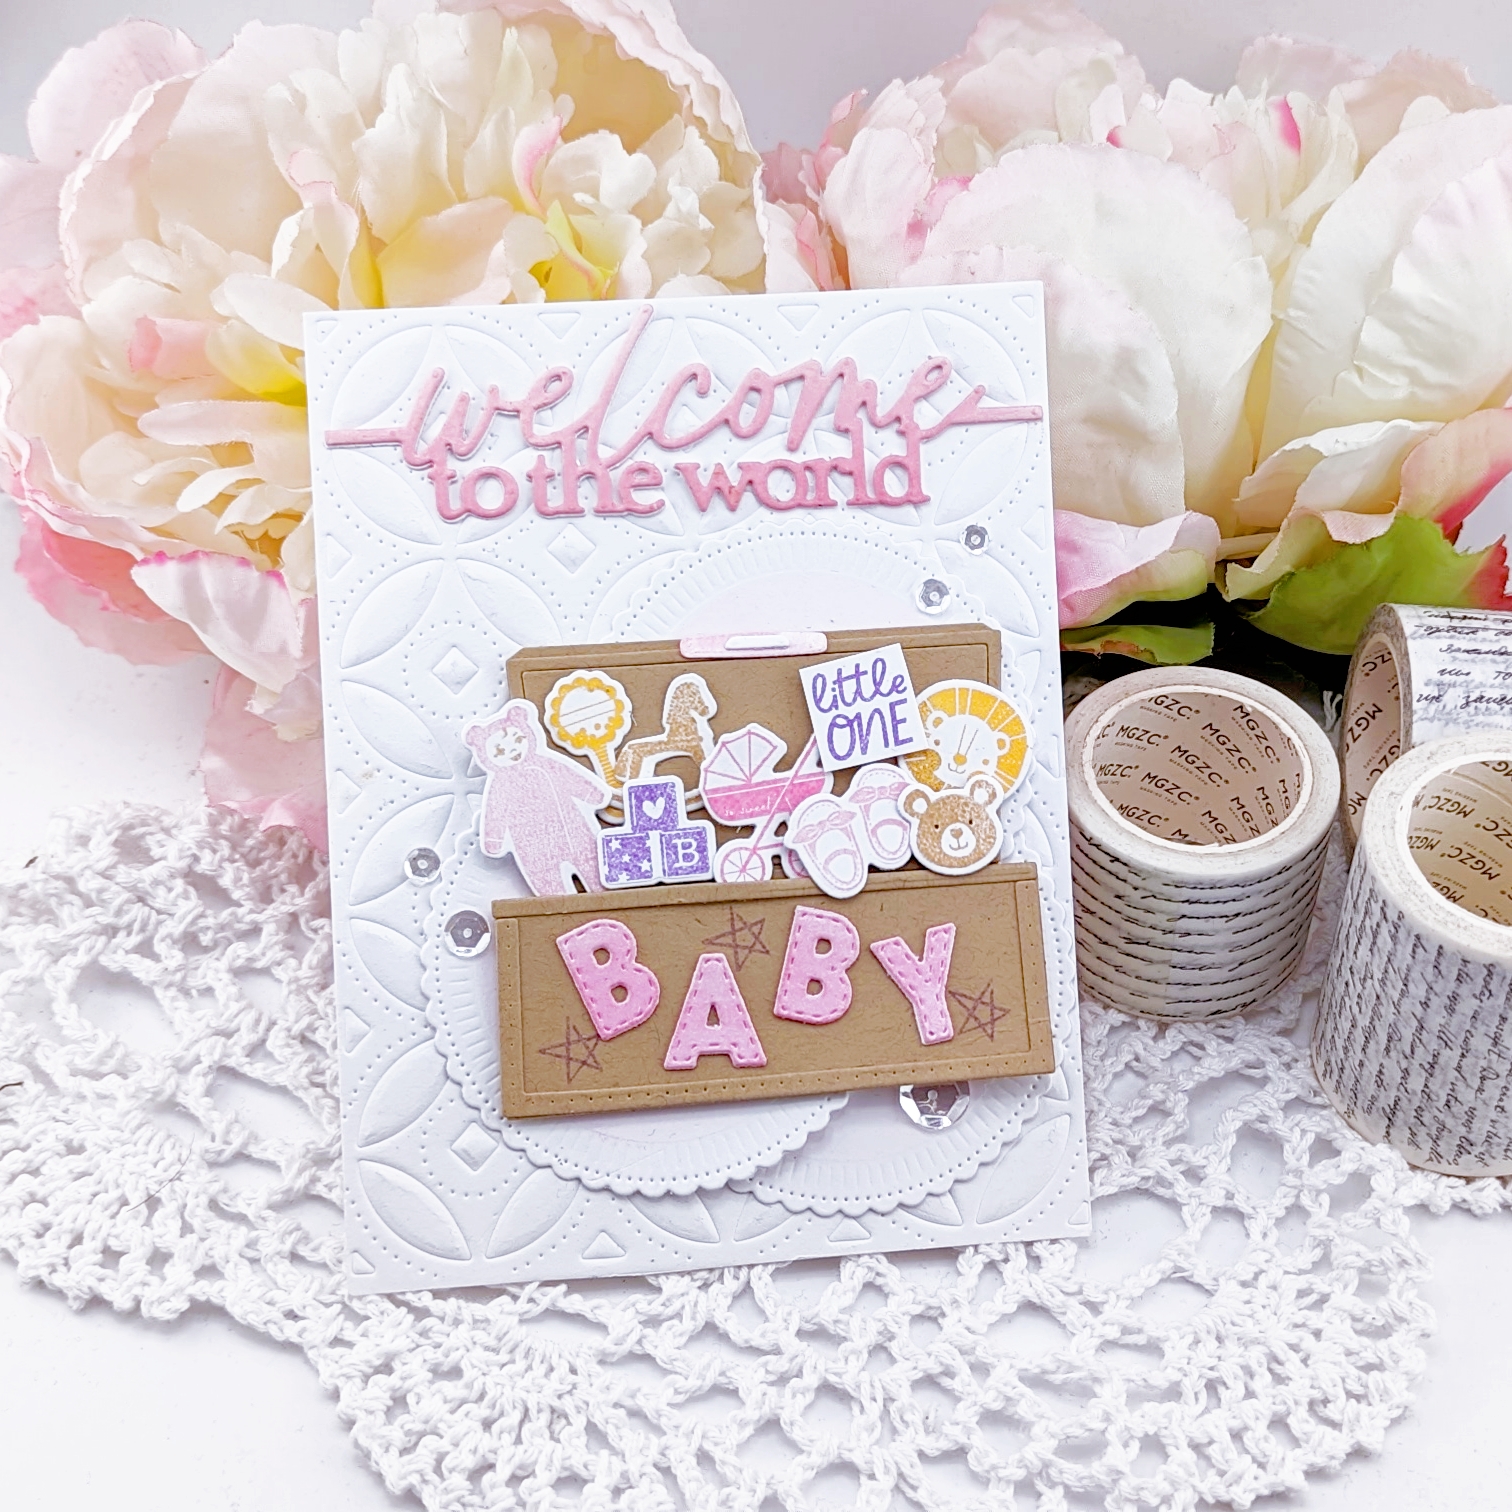
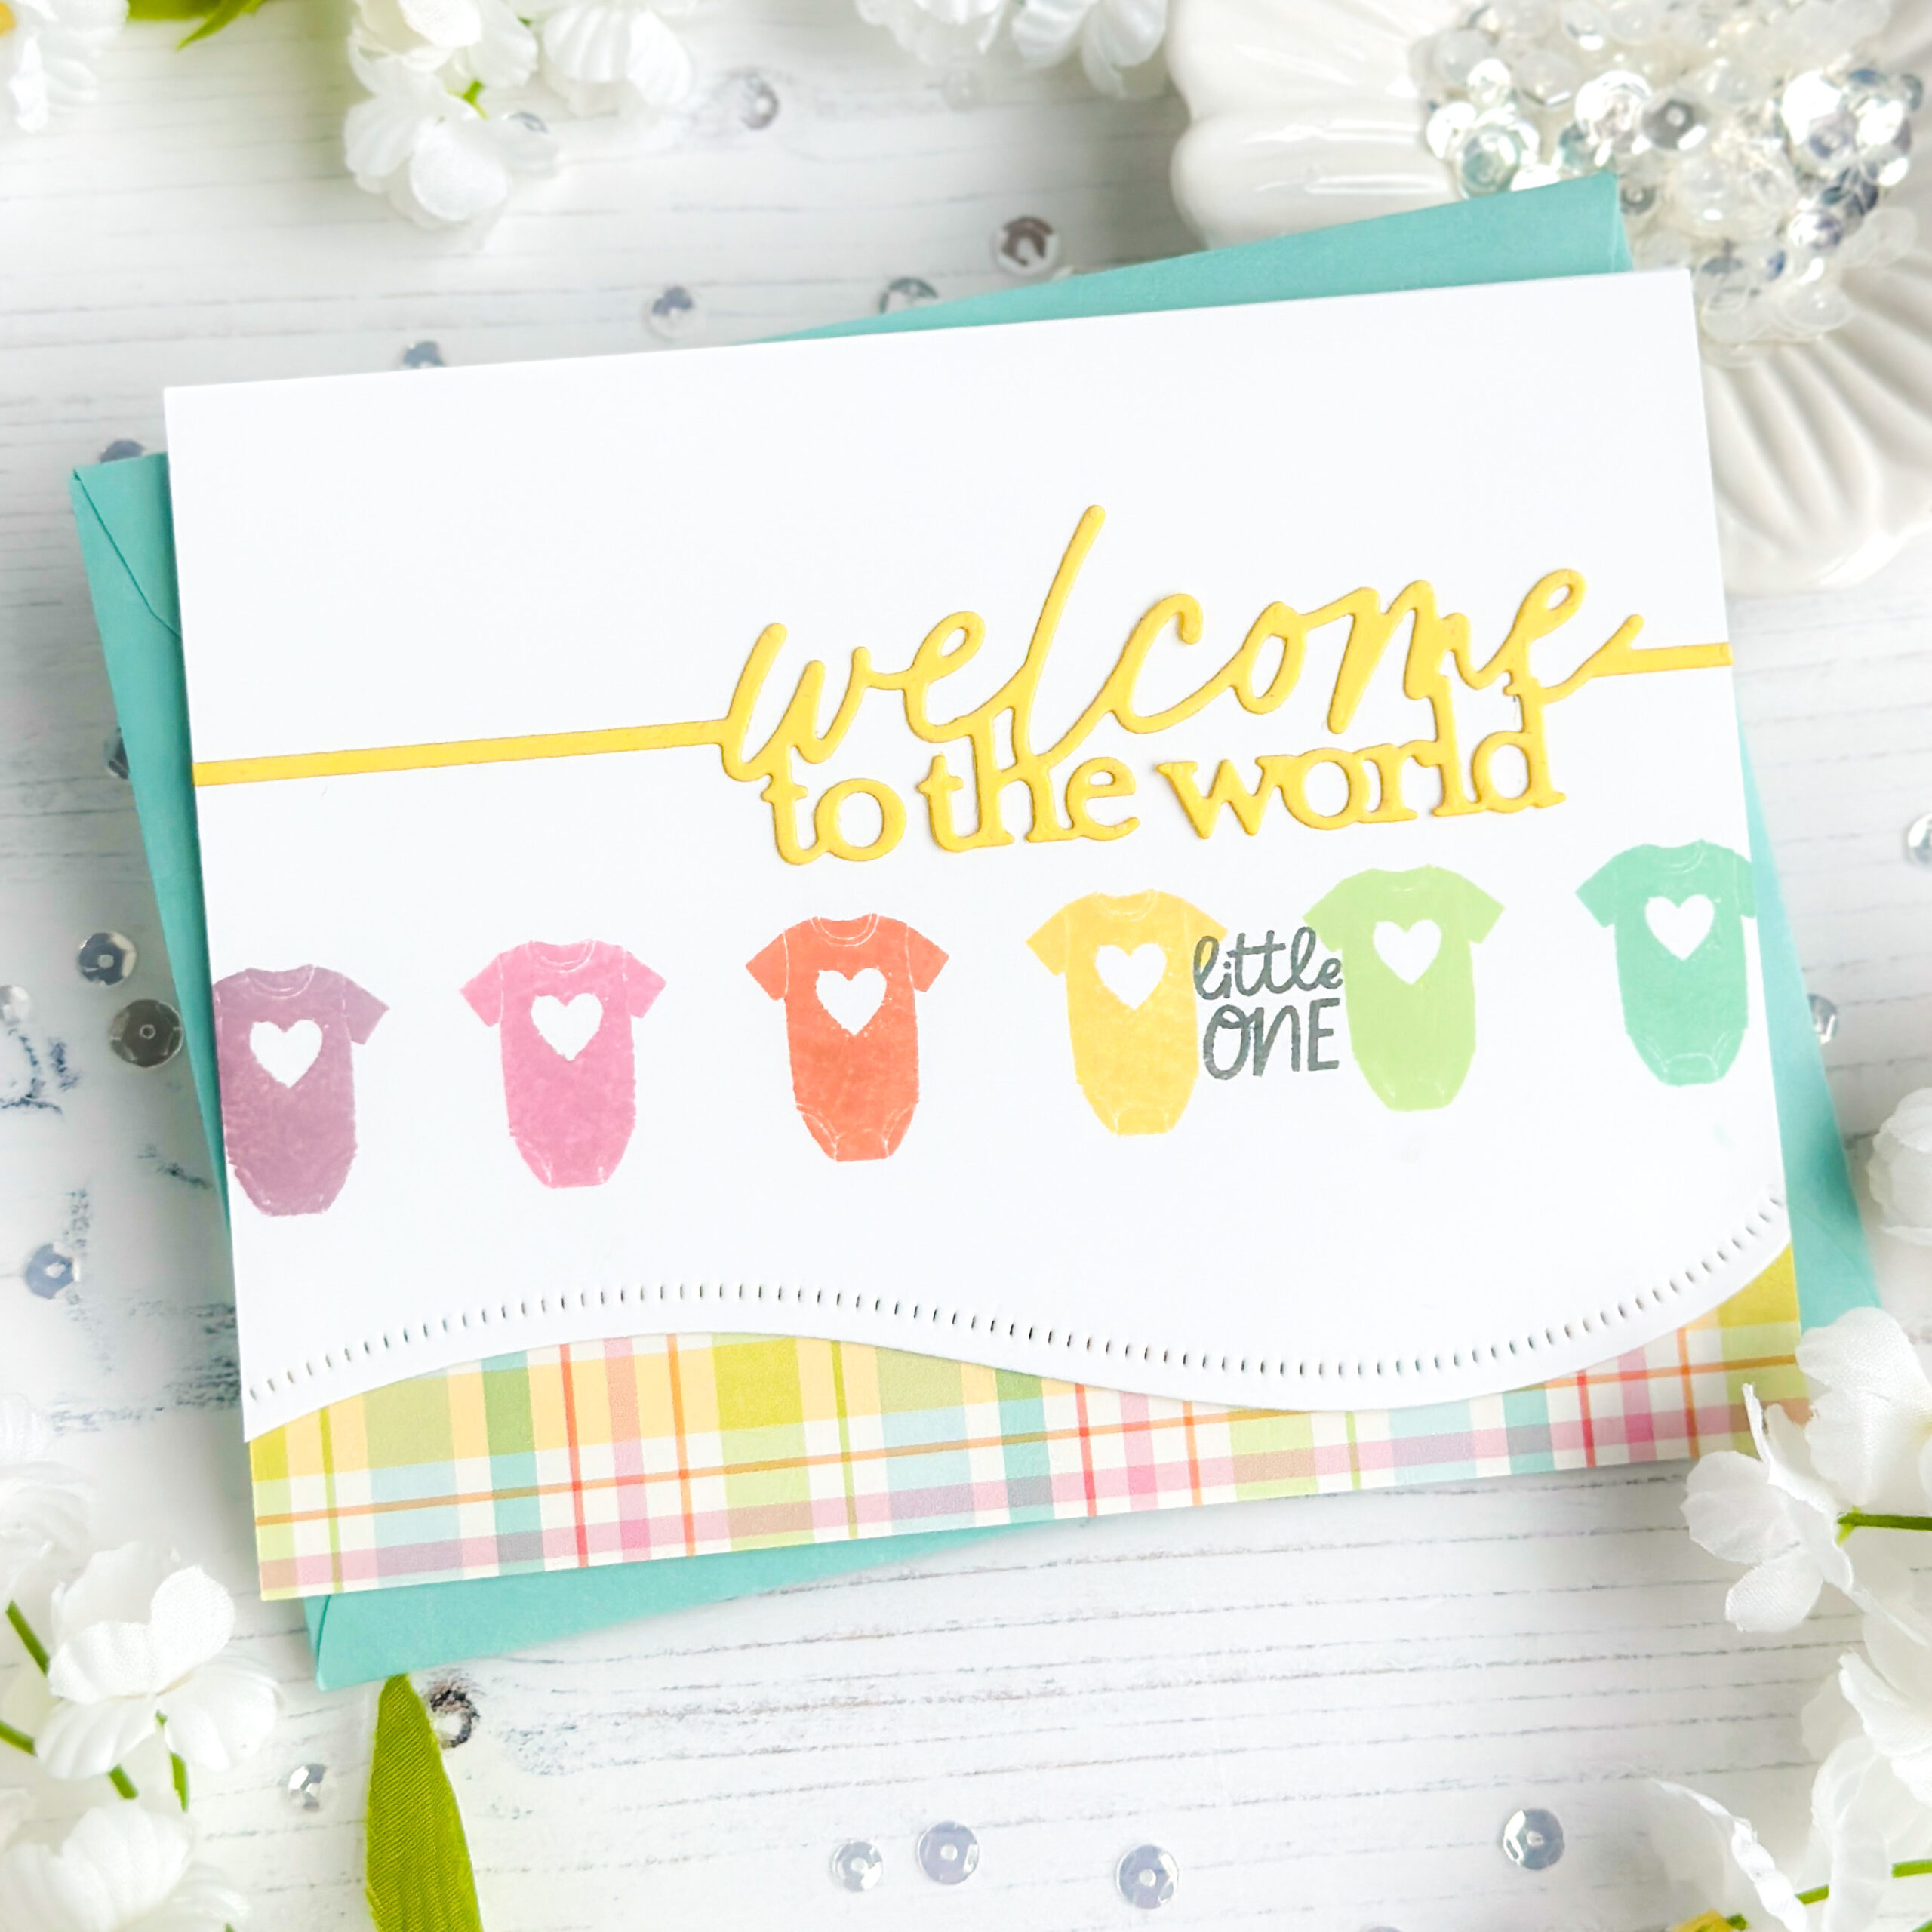
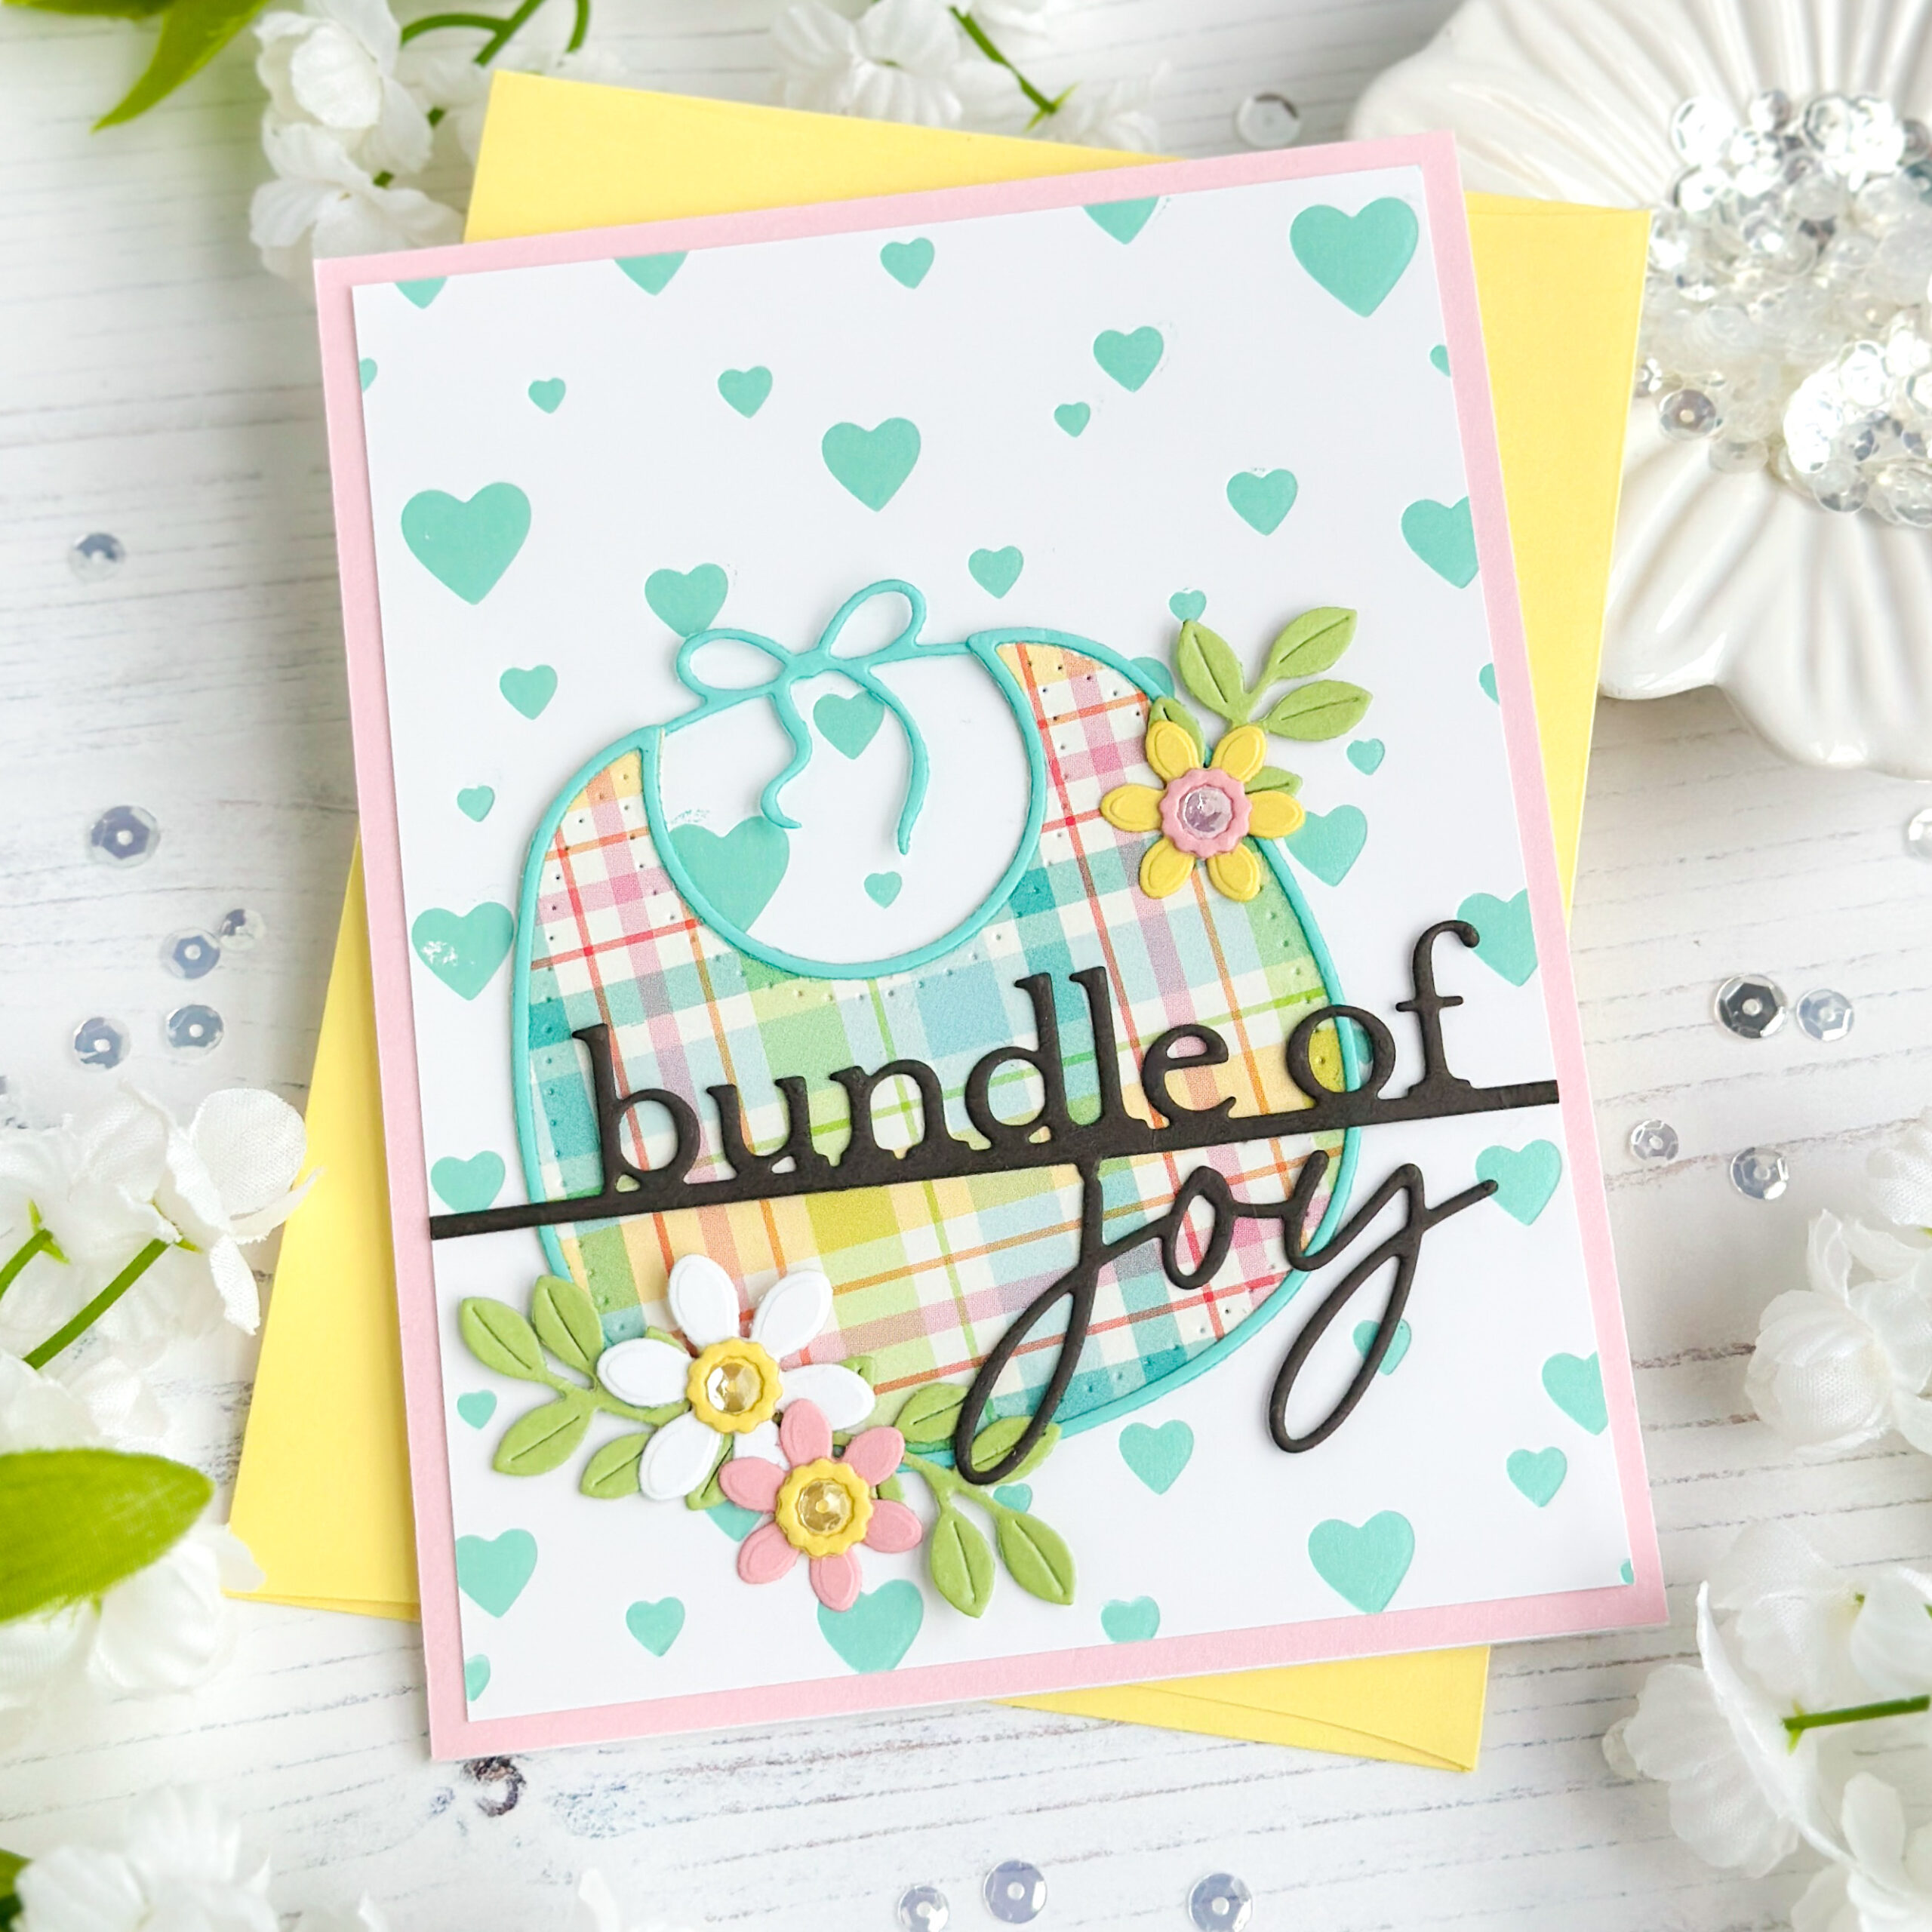
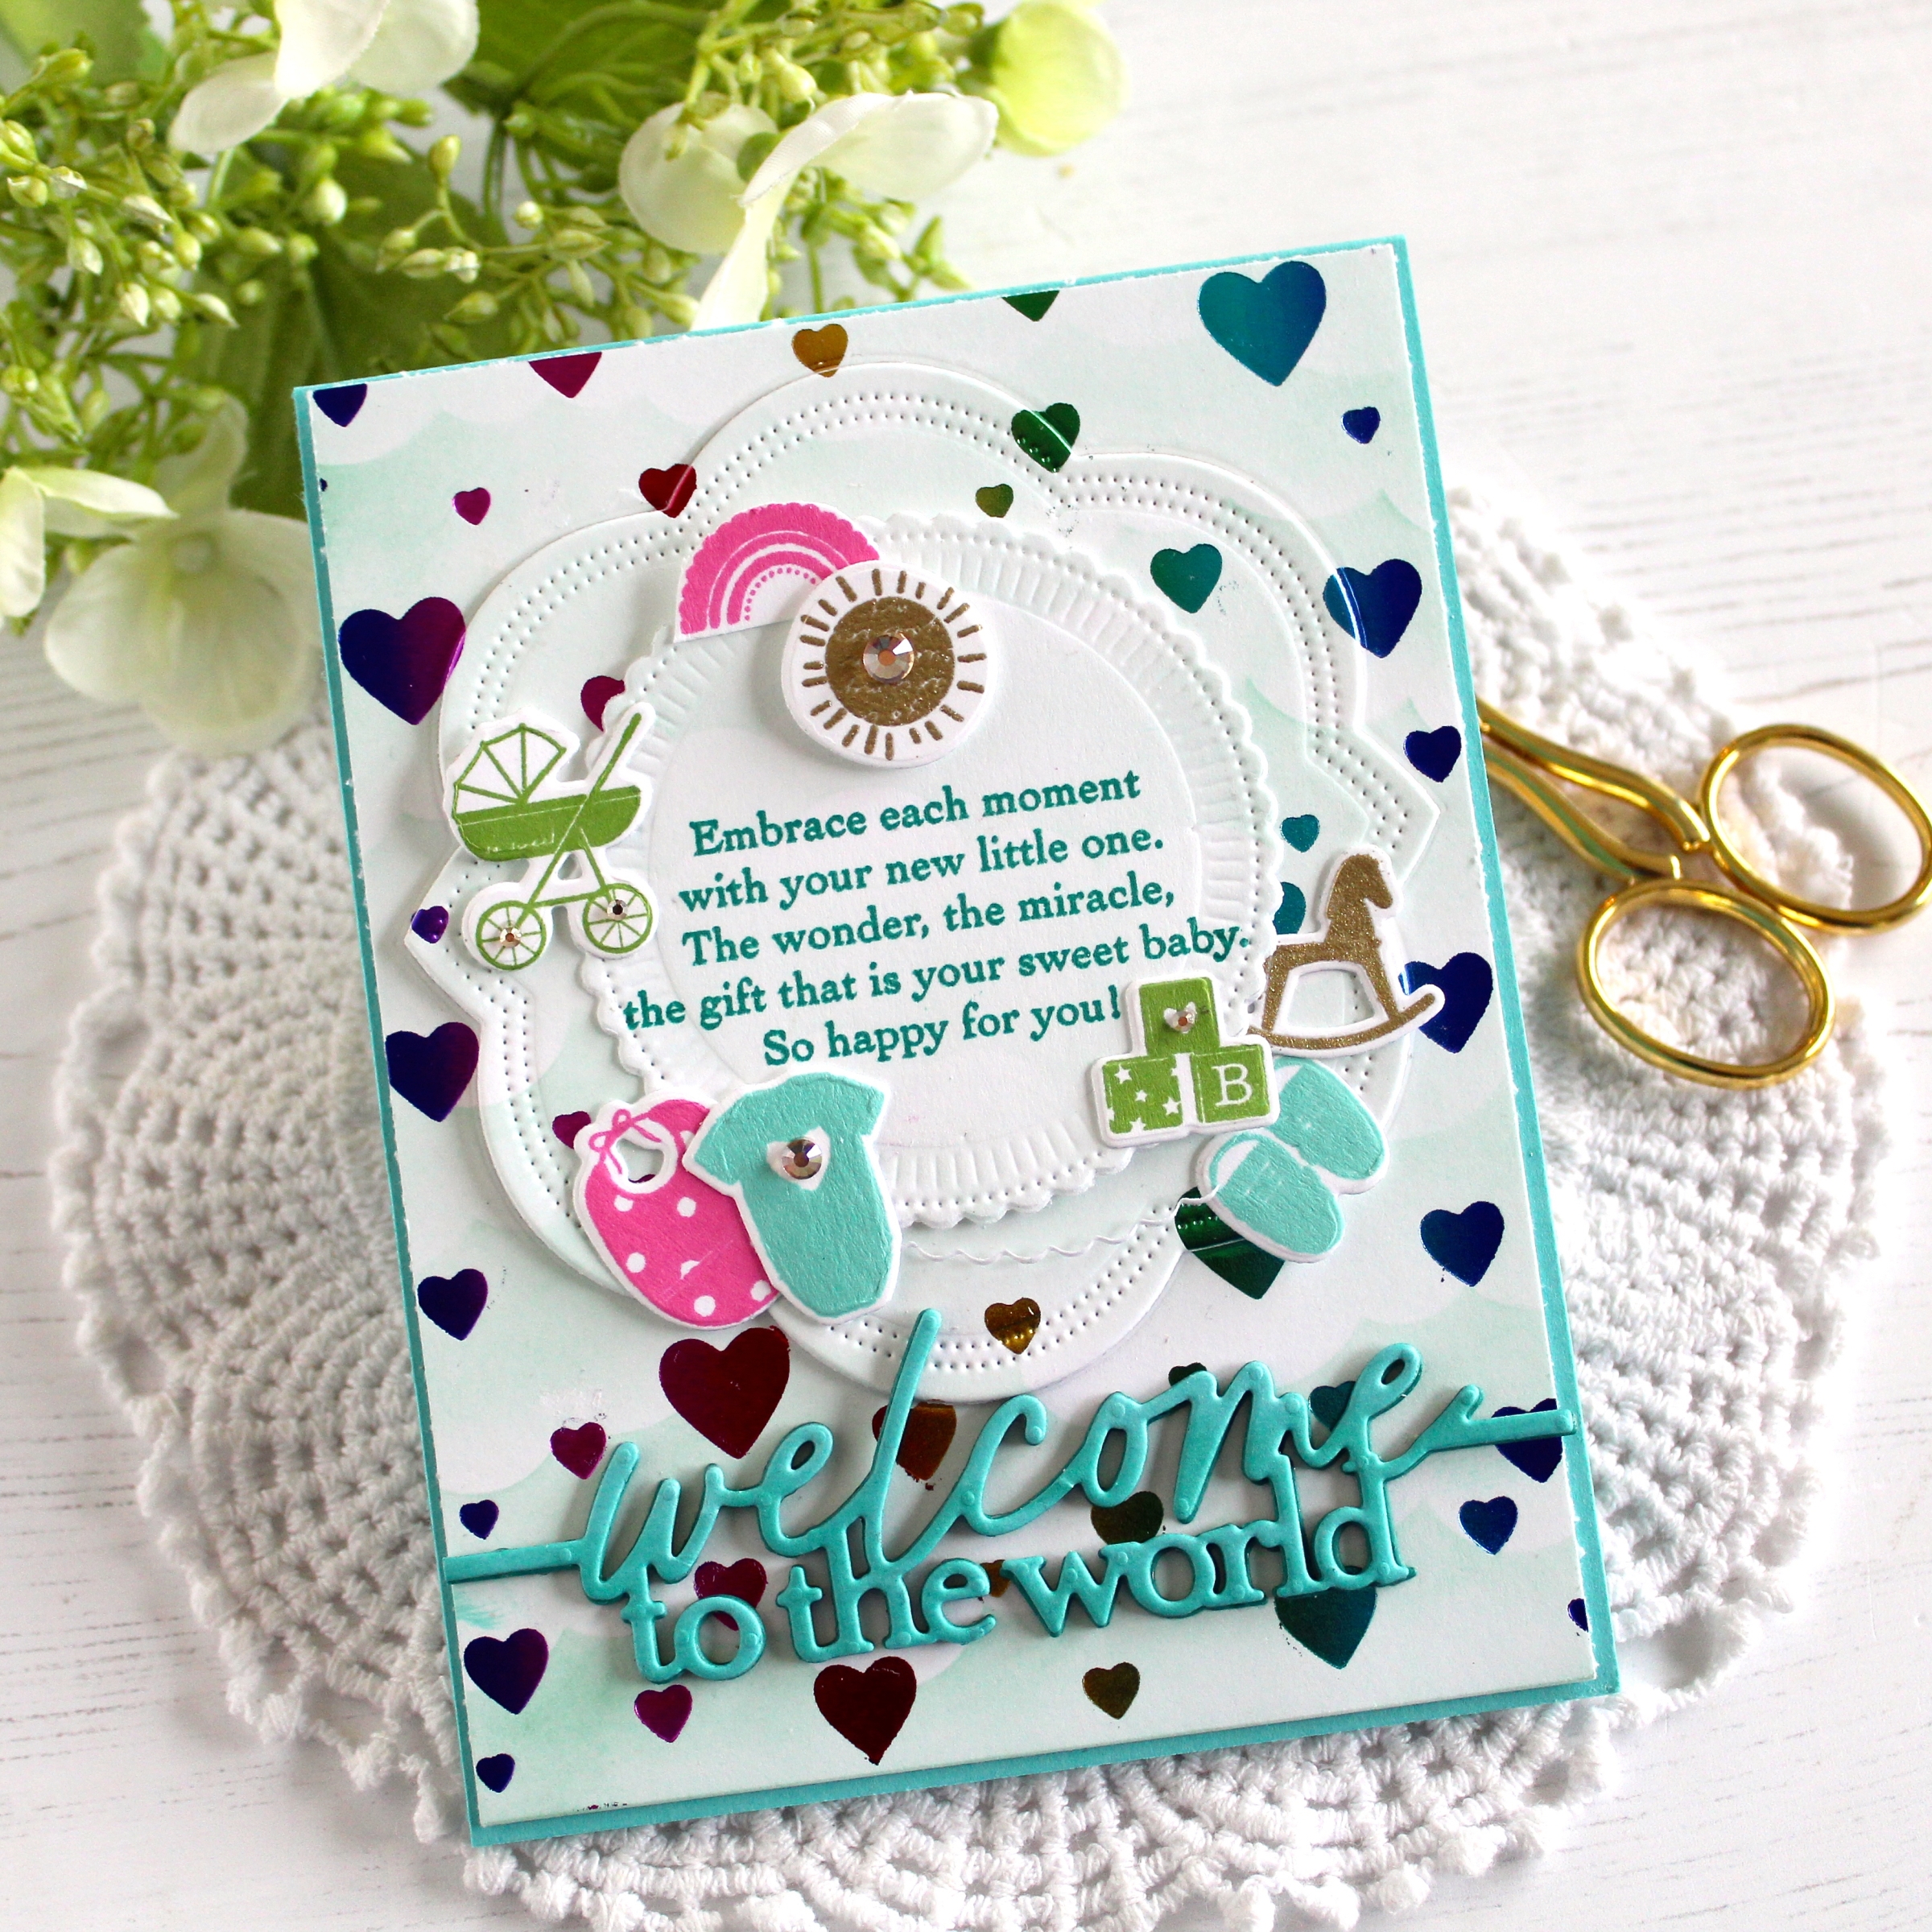
I absolutely adore the new Iconic Baby stamp set and dies and can see myself using them over and over again on my baby cards. The Line it Up: Baby dies have sentiments that effortlessly grace the front of your cards, celebrating baby, of course! Choose from “Little One”, “Welcome to the World”, “Bundle of Joy”, and “Baby”.
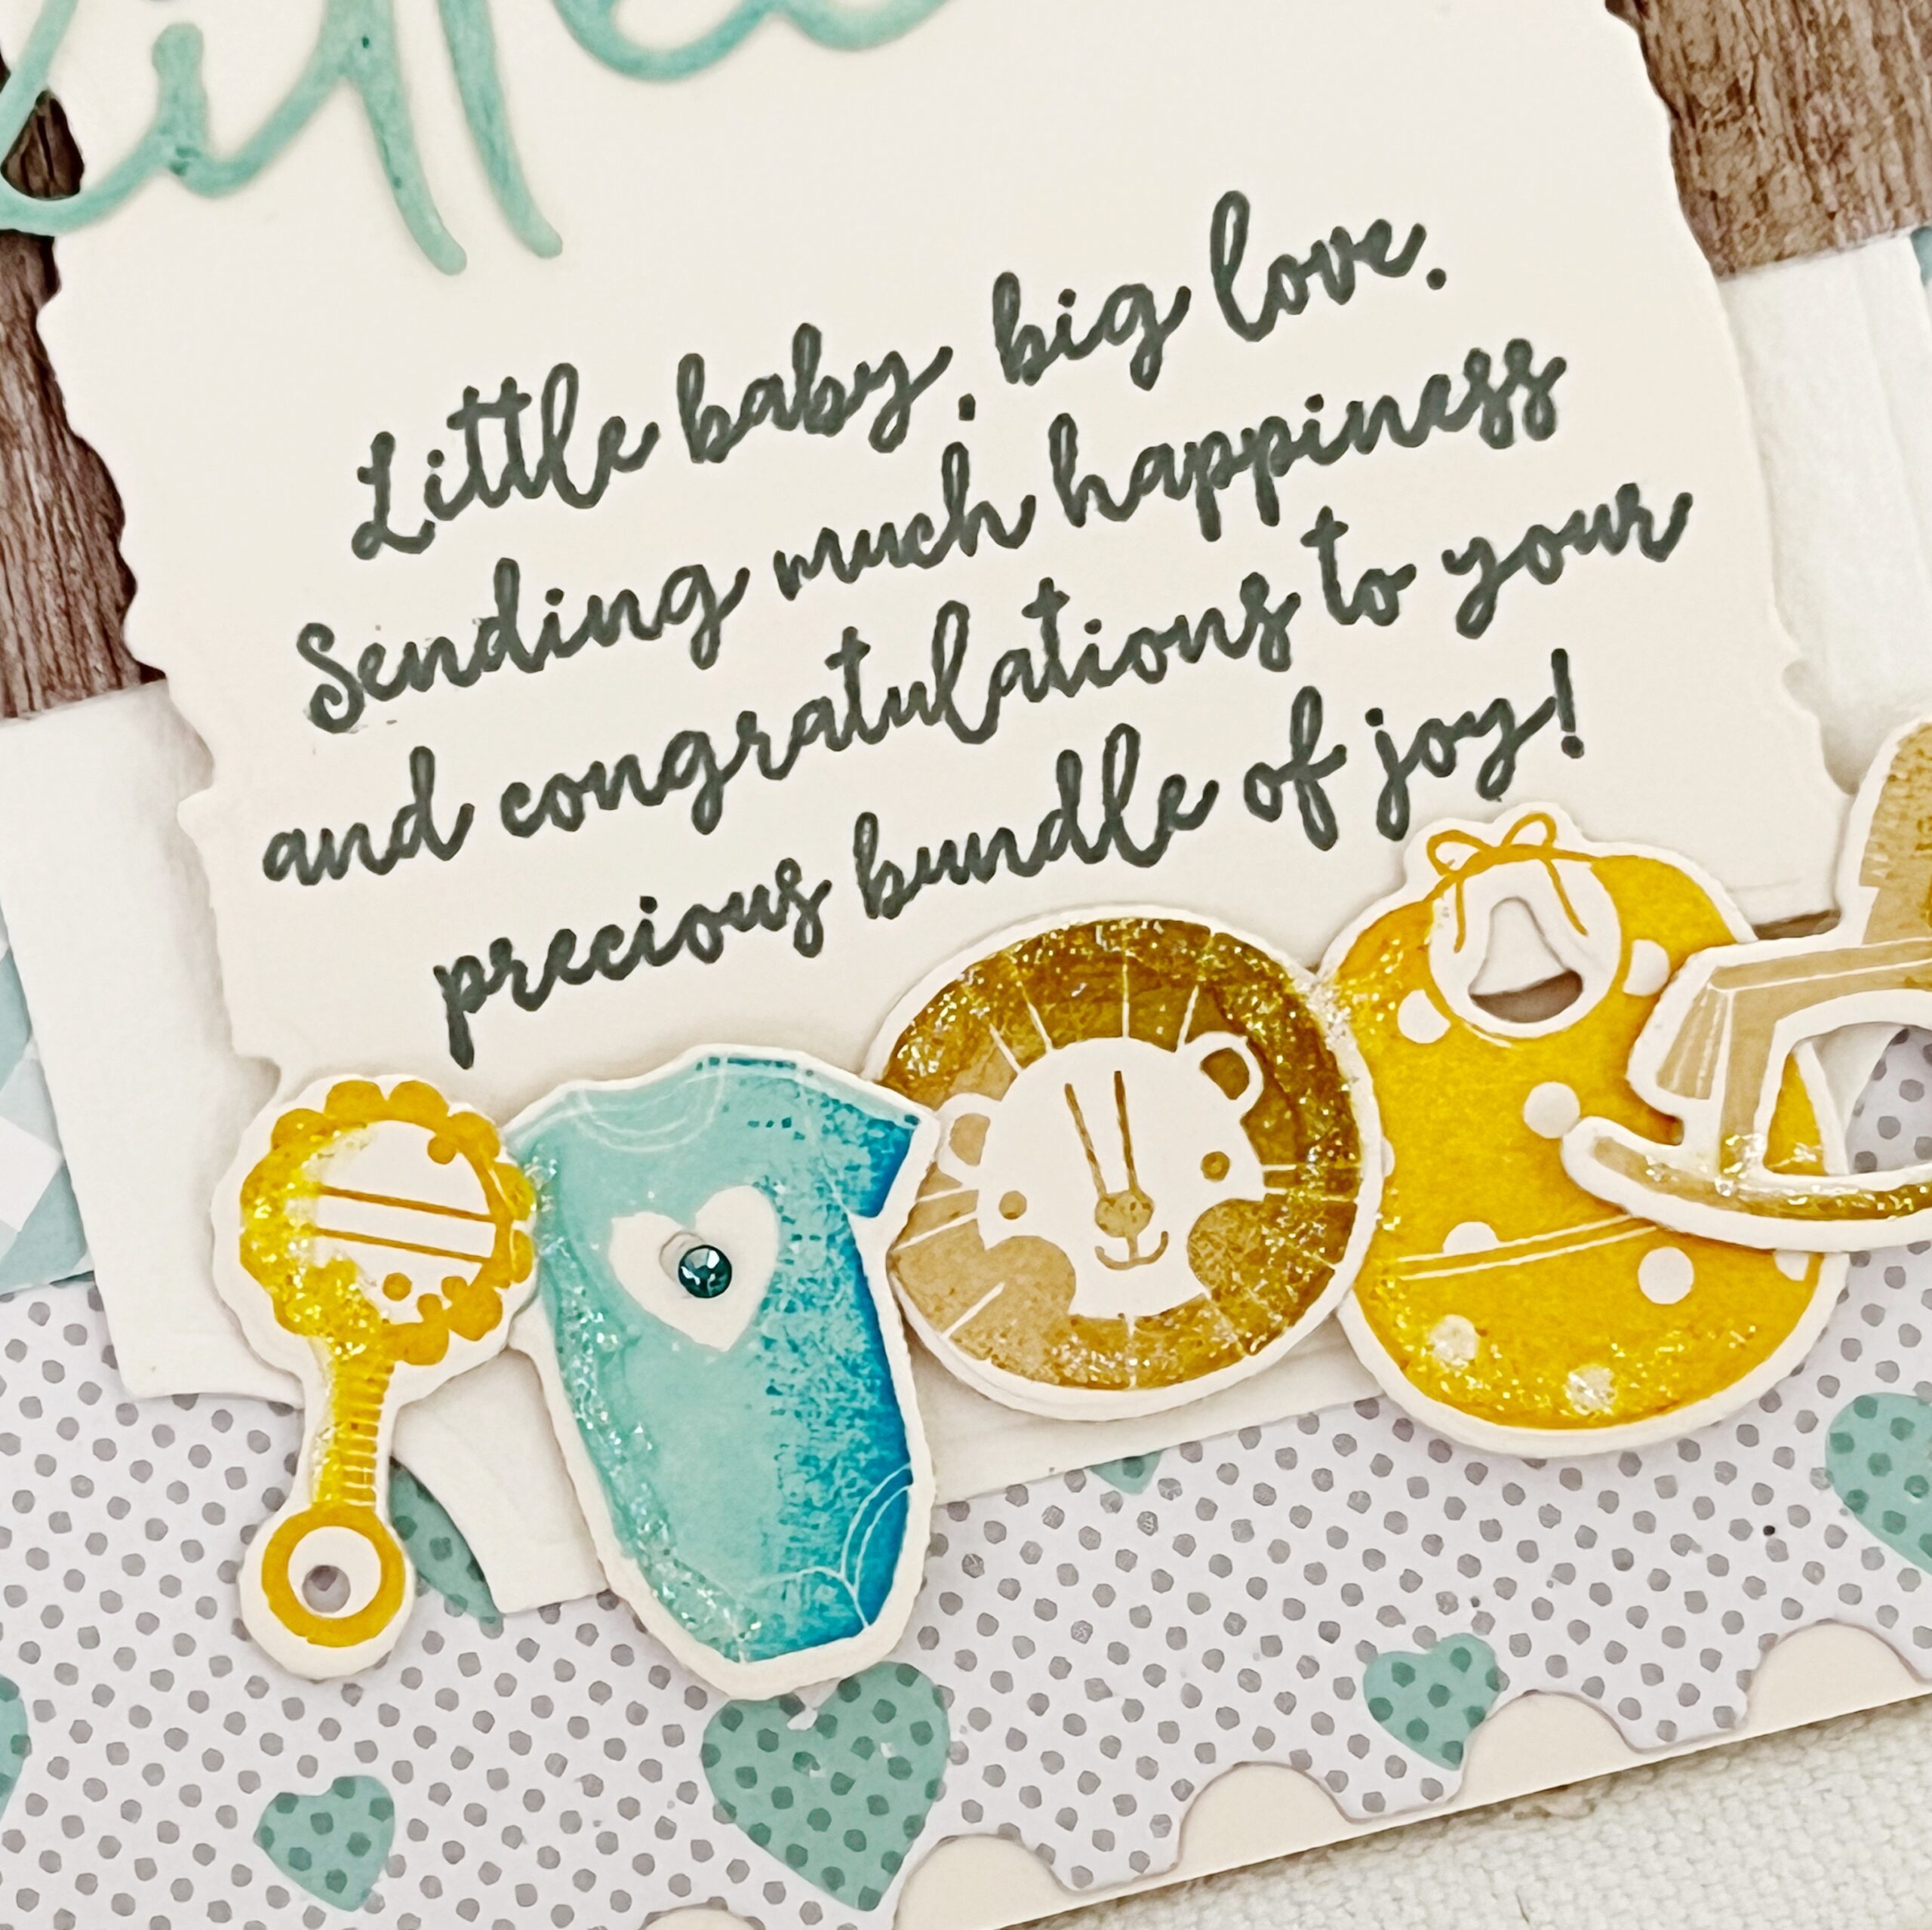
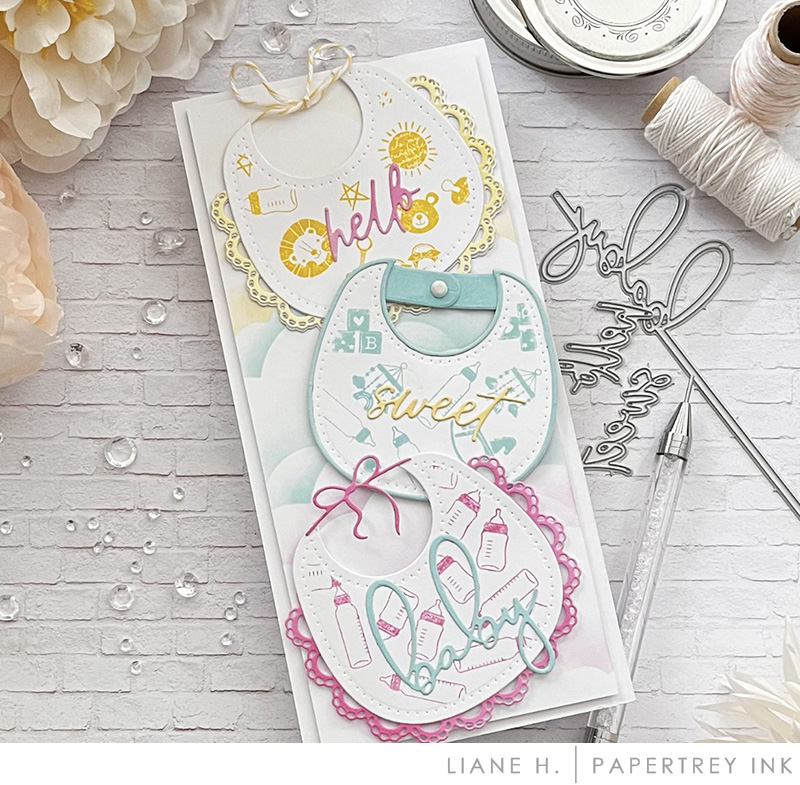
Across the base of my card I have used images from the Iconic Baby stamp set. I love all of the sweet baby images there are to choose from…onesies, rattles, bibs, a rocking horse, teddy bear, ABC blocks, and lots more. The size of these images and the adorable coordinating label stamp and die makes dressing up an envelope, tag, card, or gift wrap so easy and fun.
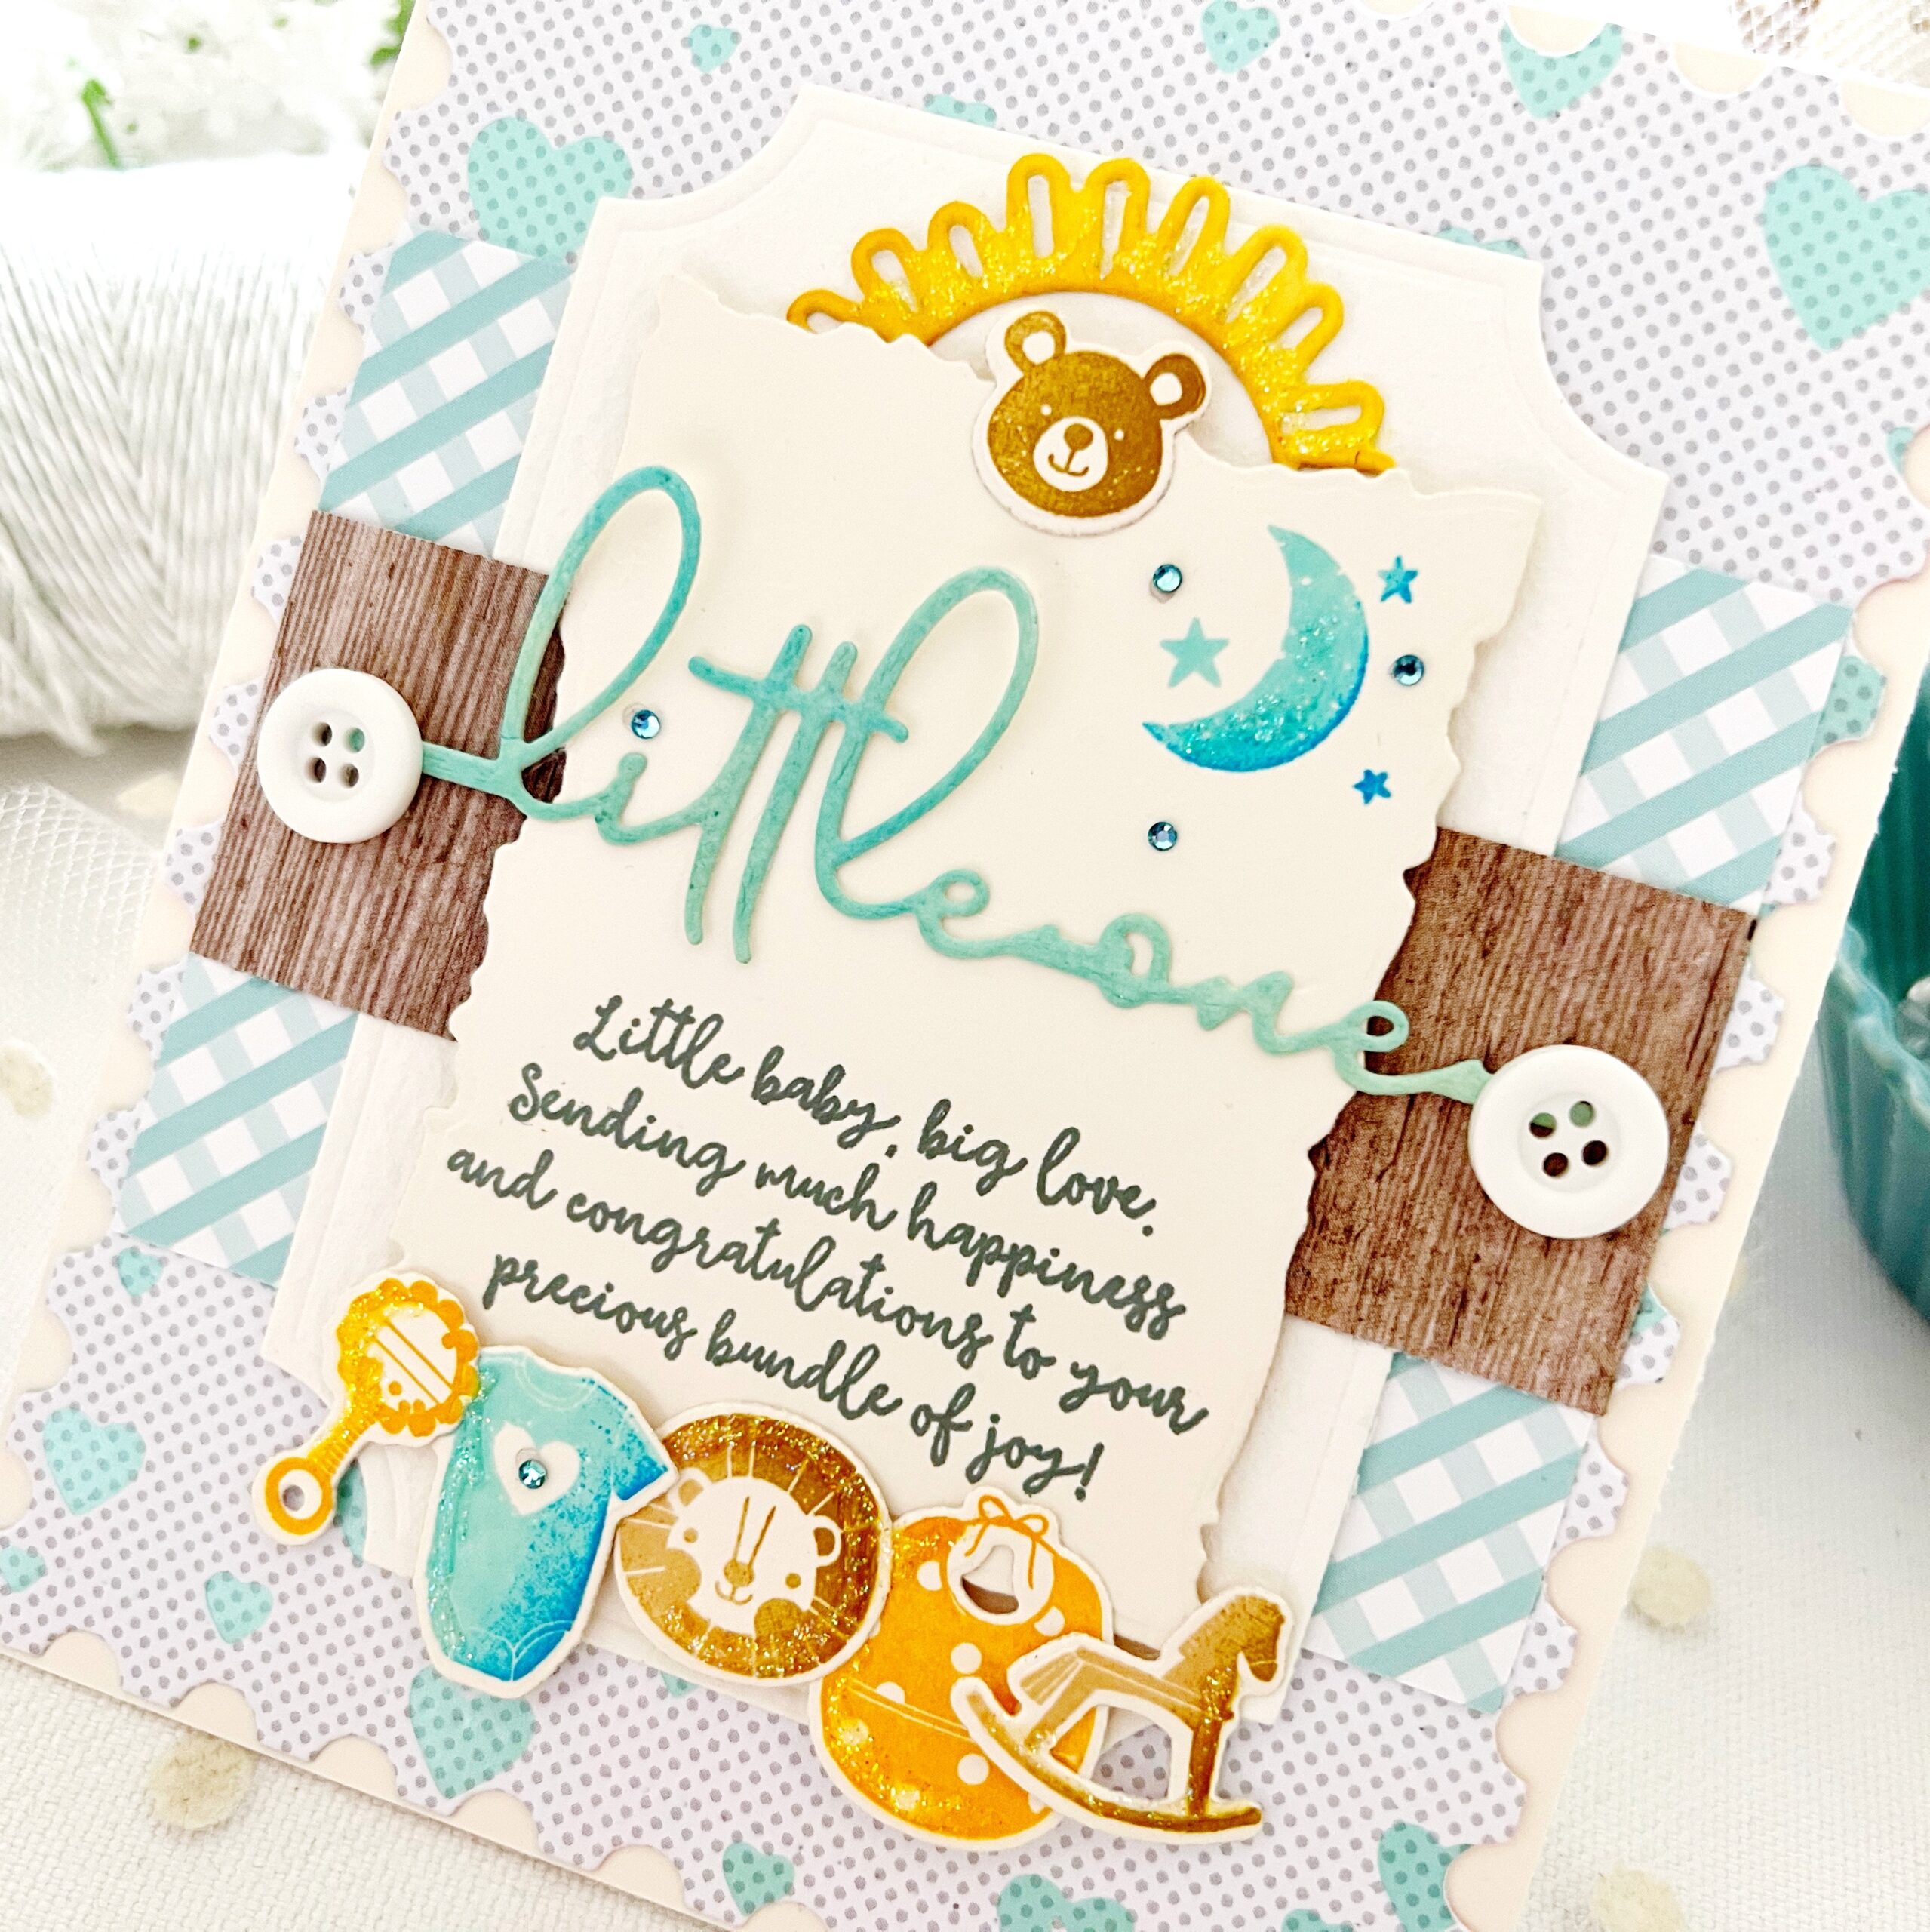
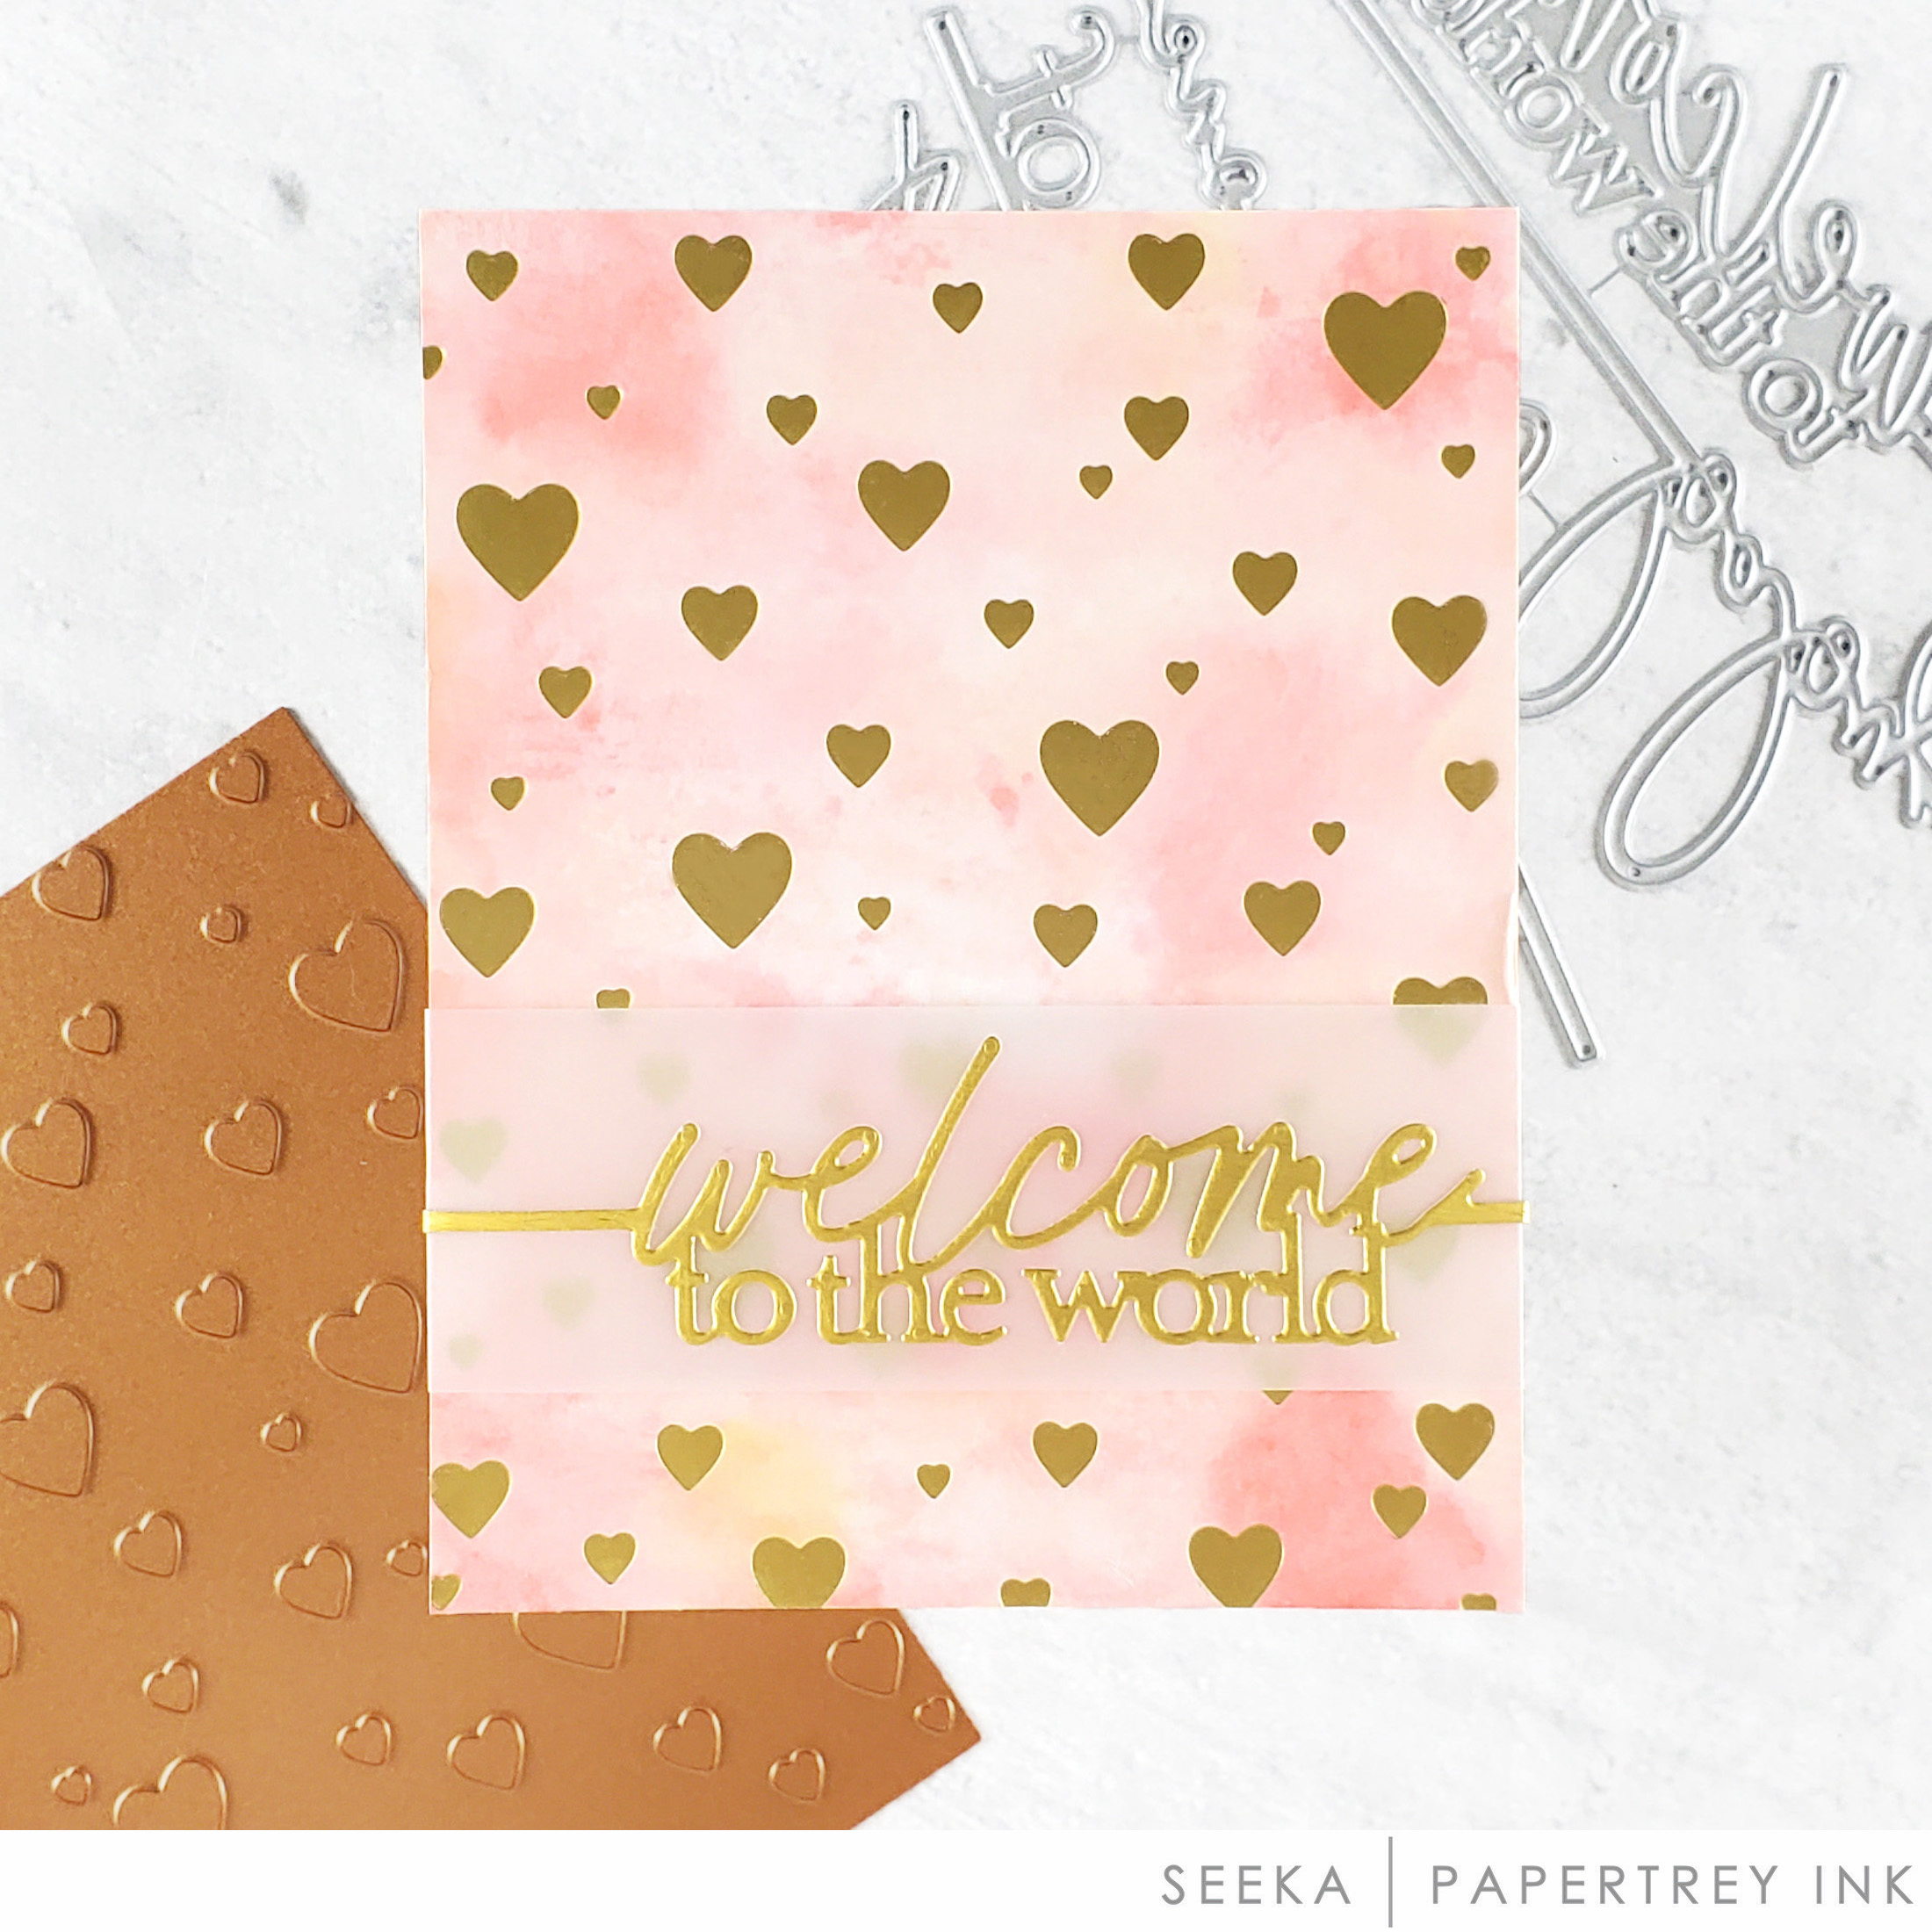
I love the sentiments in the new Inside Greetings: Welcome stamp set. They wrap up all of the happy feelings a new baby brings in such a thoughtful way. I love it when the work of thinking of something to say has been done for me, don’t you? In the background, I have used the new From the Heart Hot Foil Plate which consists of the sweetest smattering of hearts in different sizes, that trickle down from the top to the bottom. This hot foil plate will certainly be getting a workout here on my craft table!
Supplies Used:
STAMPS: Iconic Baby, Inside Greetings: Welcome
INK: Bright Buttercup, Stormy Sea, Fine Linen, Saffron Spice, Honey Nut, Spring Moss, Ocean Tides
PAPER: Vintage Cream
DIES: Iconic Baby, Line it Up: Baby, Love to Layer: Notched, Love to Layer: Torn Edges, Border Bling: Postage Frames
OTHER: From the Heart Hot Foil Plate, patterned paper, buttons, Stickles glitter


TIPS:
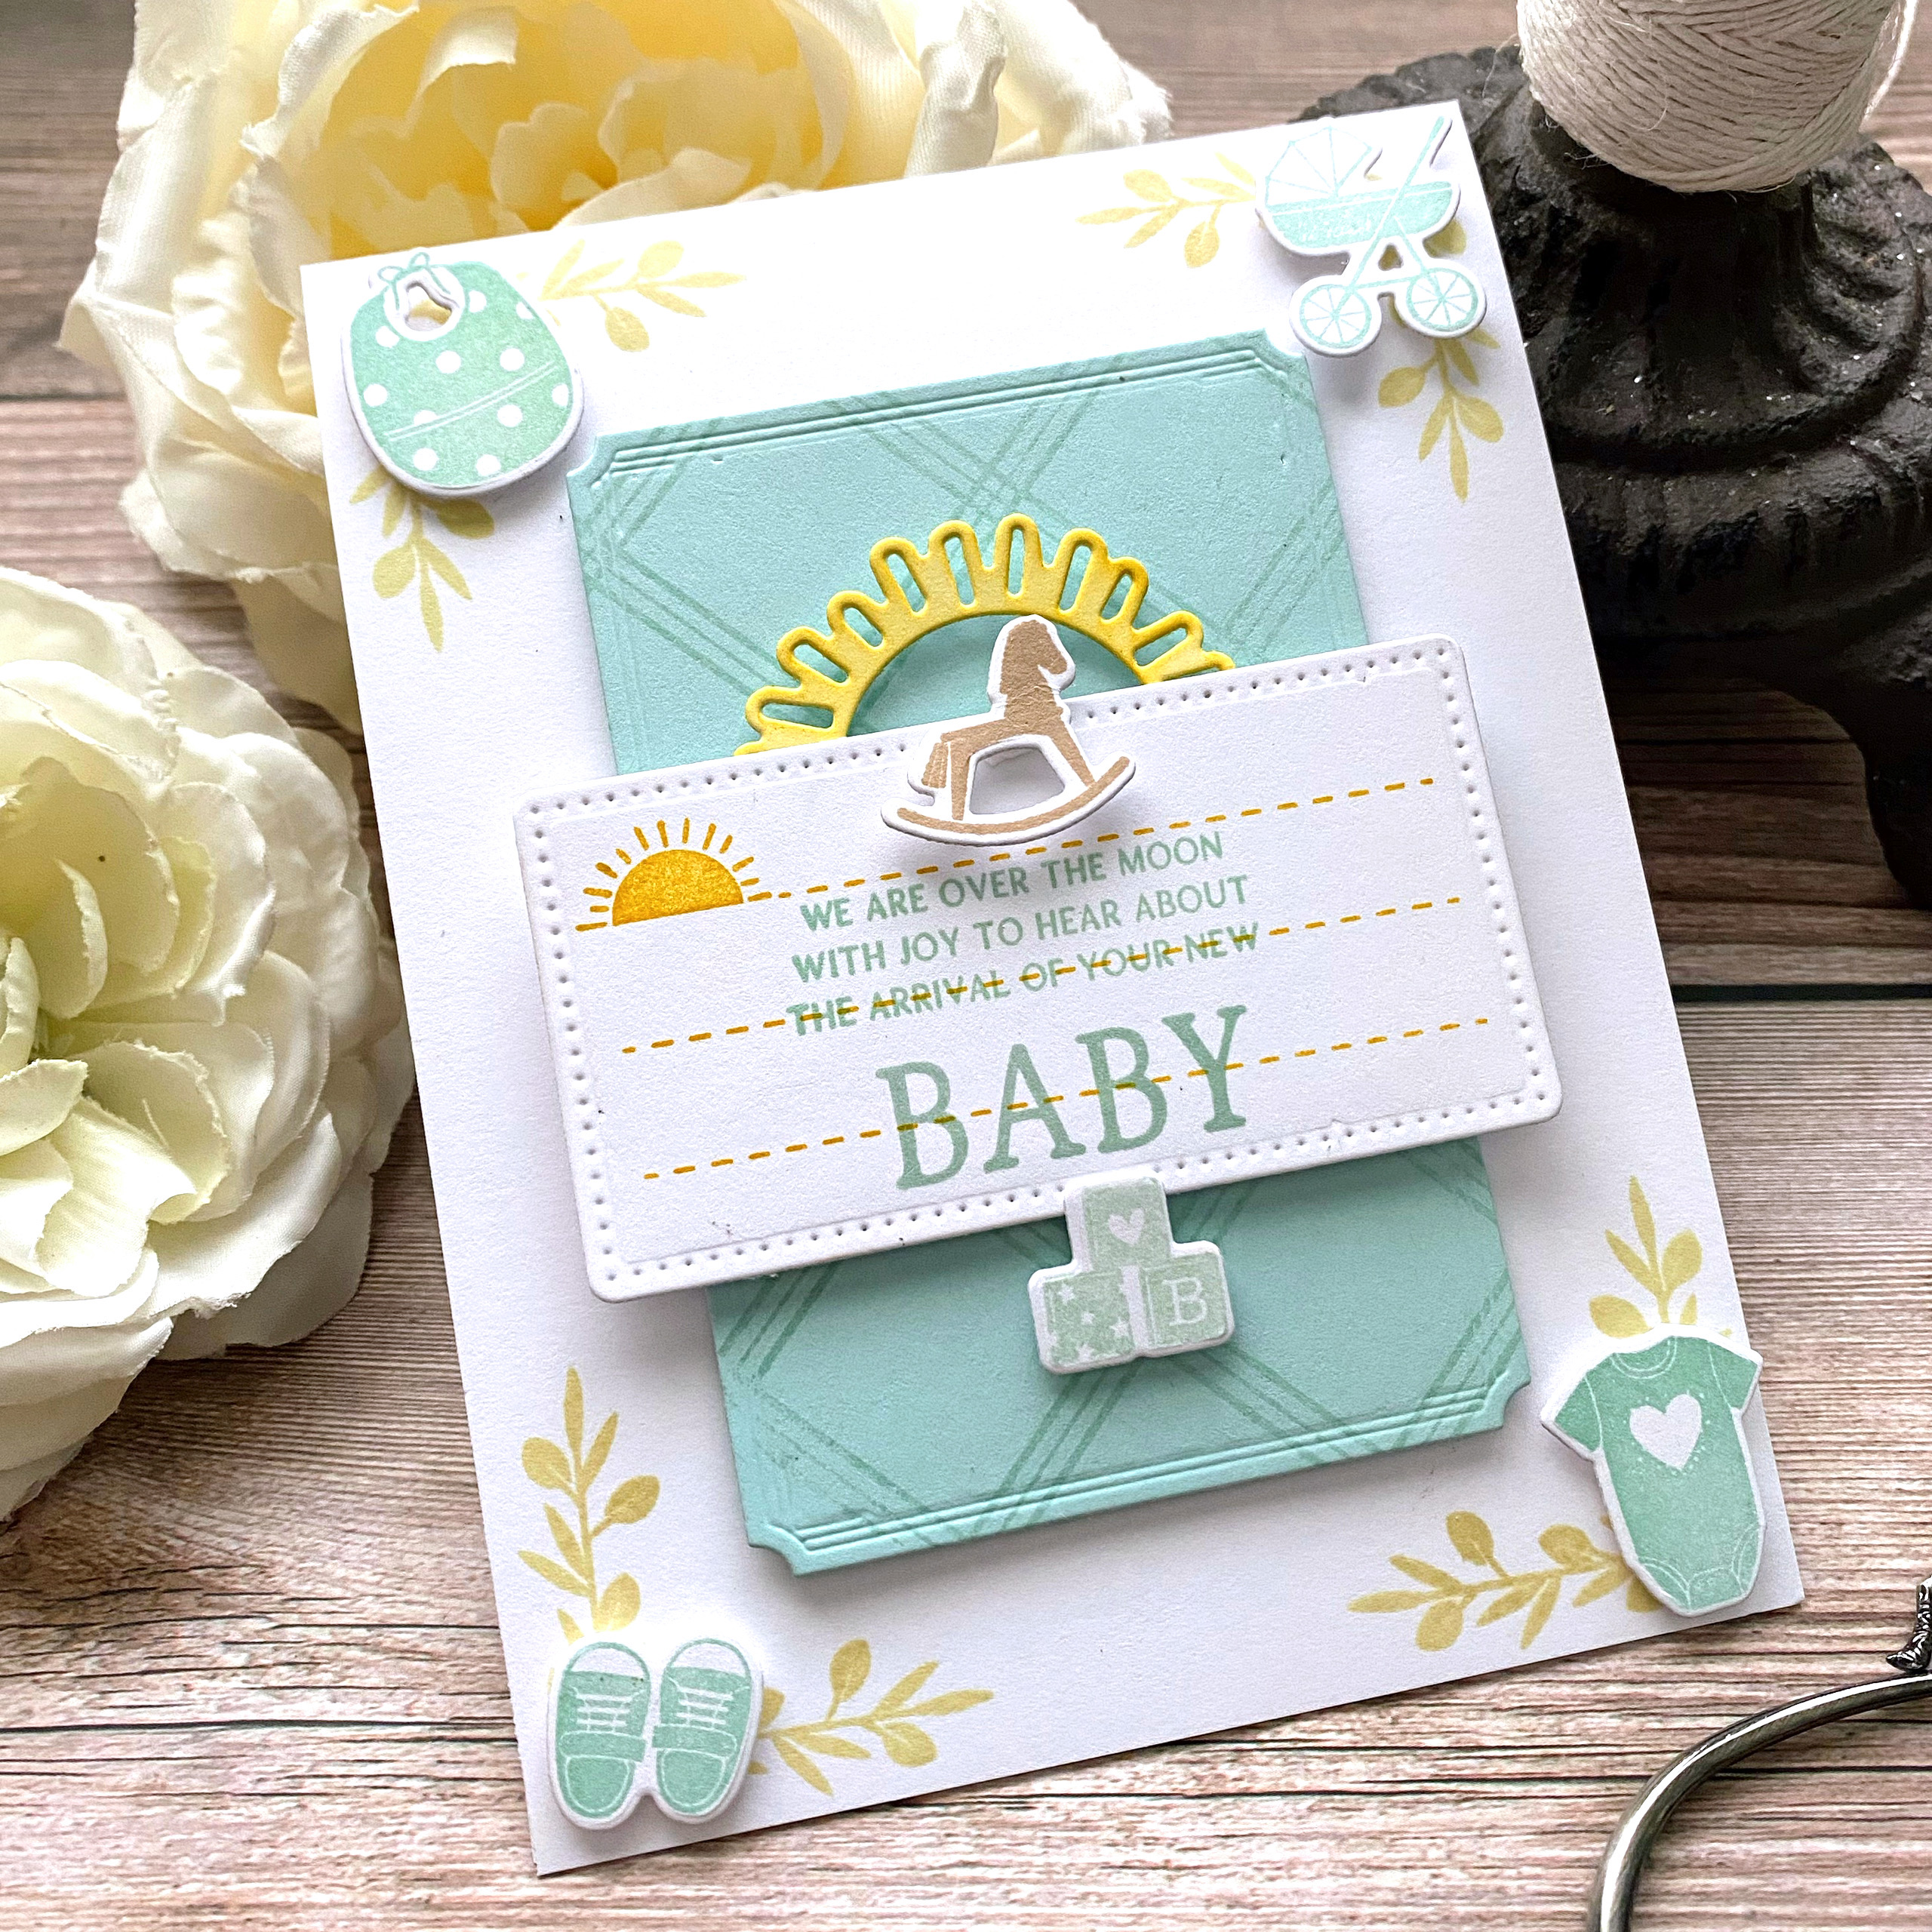
- Embellish the corners with small images from Iconic Baby and Corner Decor
- Layer the sun die and the stitched die for a fun focal point


TIPS:
- Add a thin sentiment over the top of the day cut sentiment for added detail.
- Add the little images from iconic baby in the cluster of flowers.
- For best results, use a high heat to foil the heart background

TIPS:
- Use the heart die as a focal point for the sentiment
- Use the small images in a cluster for a bigger impact
- Use tone-on-tone foil and paper for a classic look
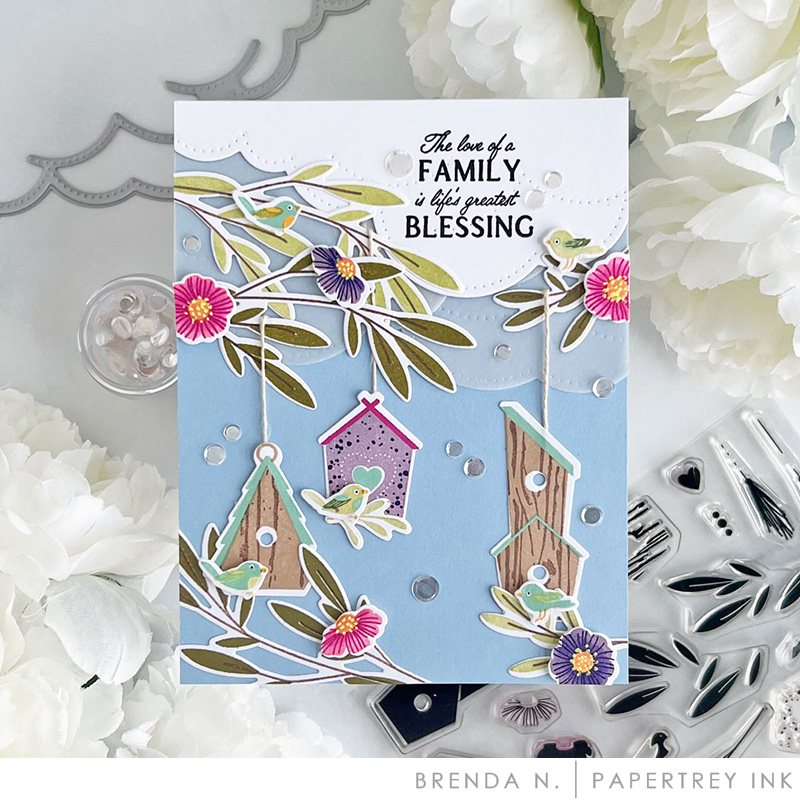
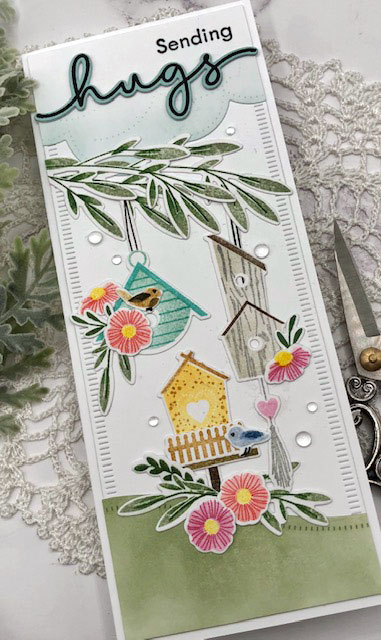
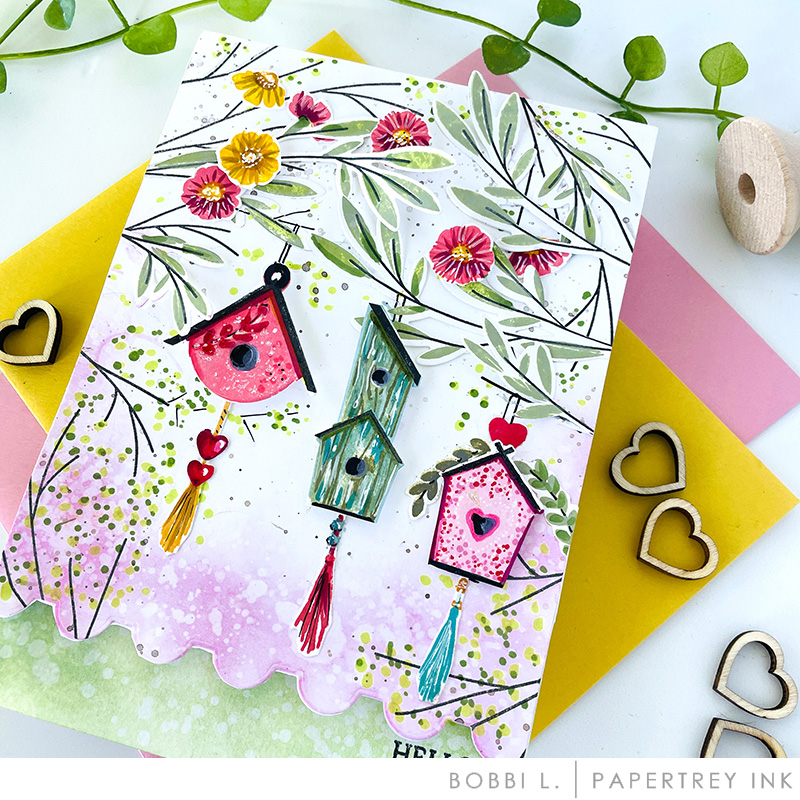
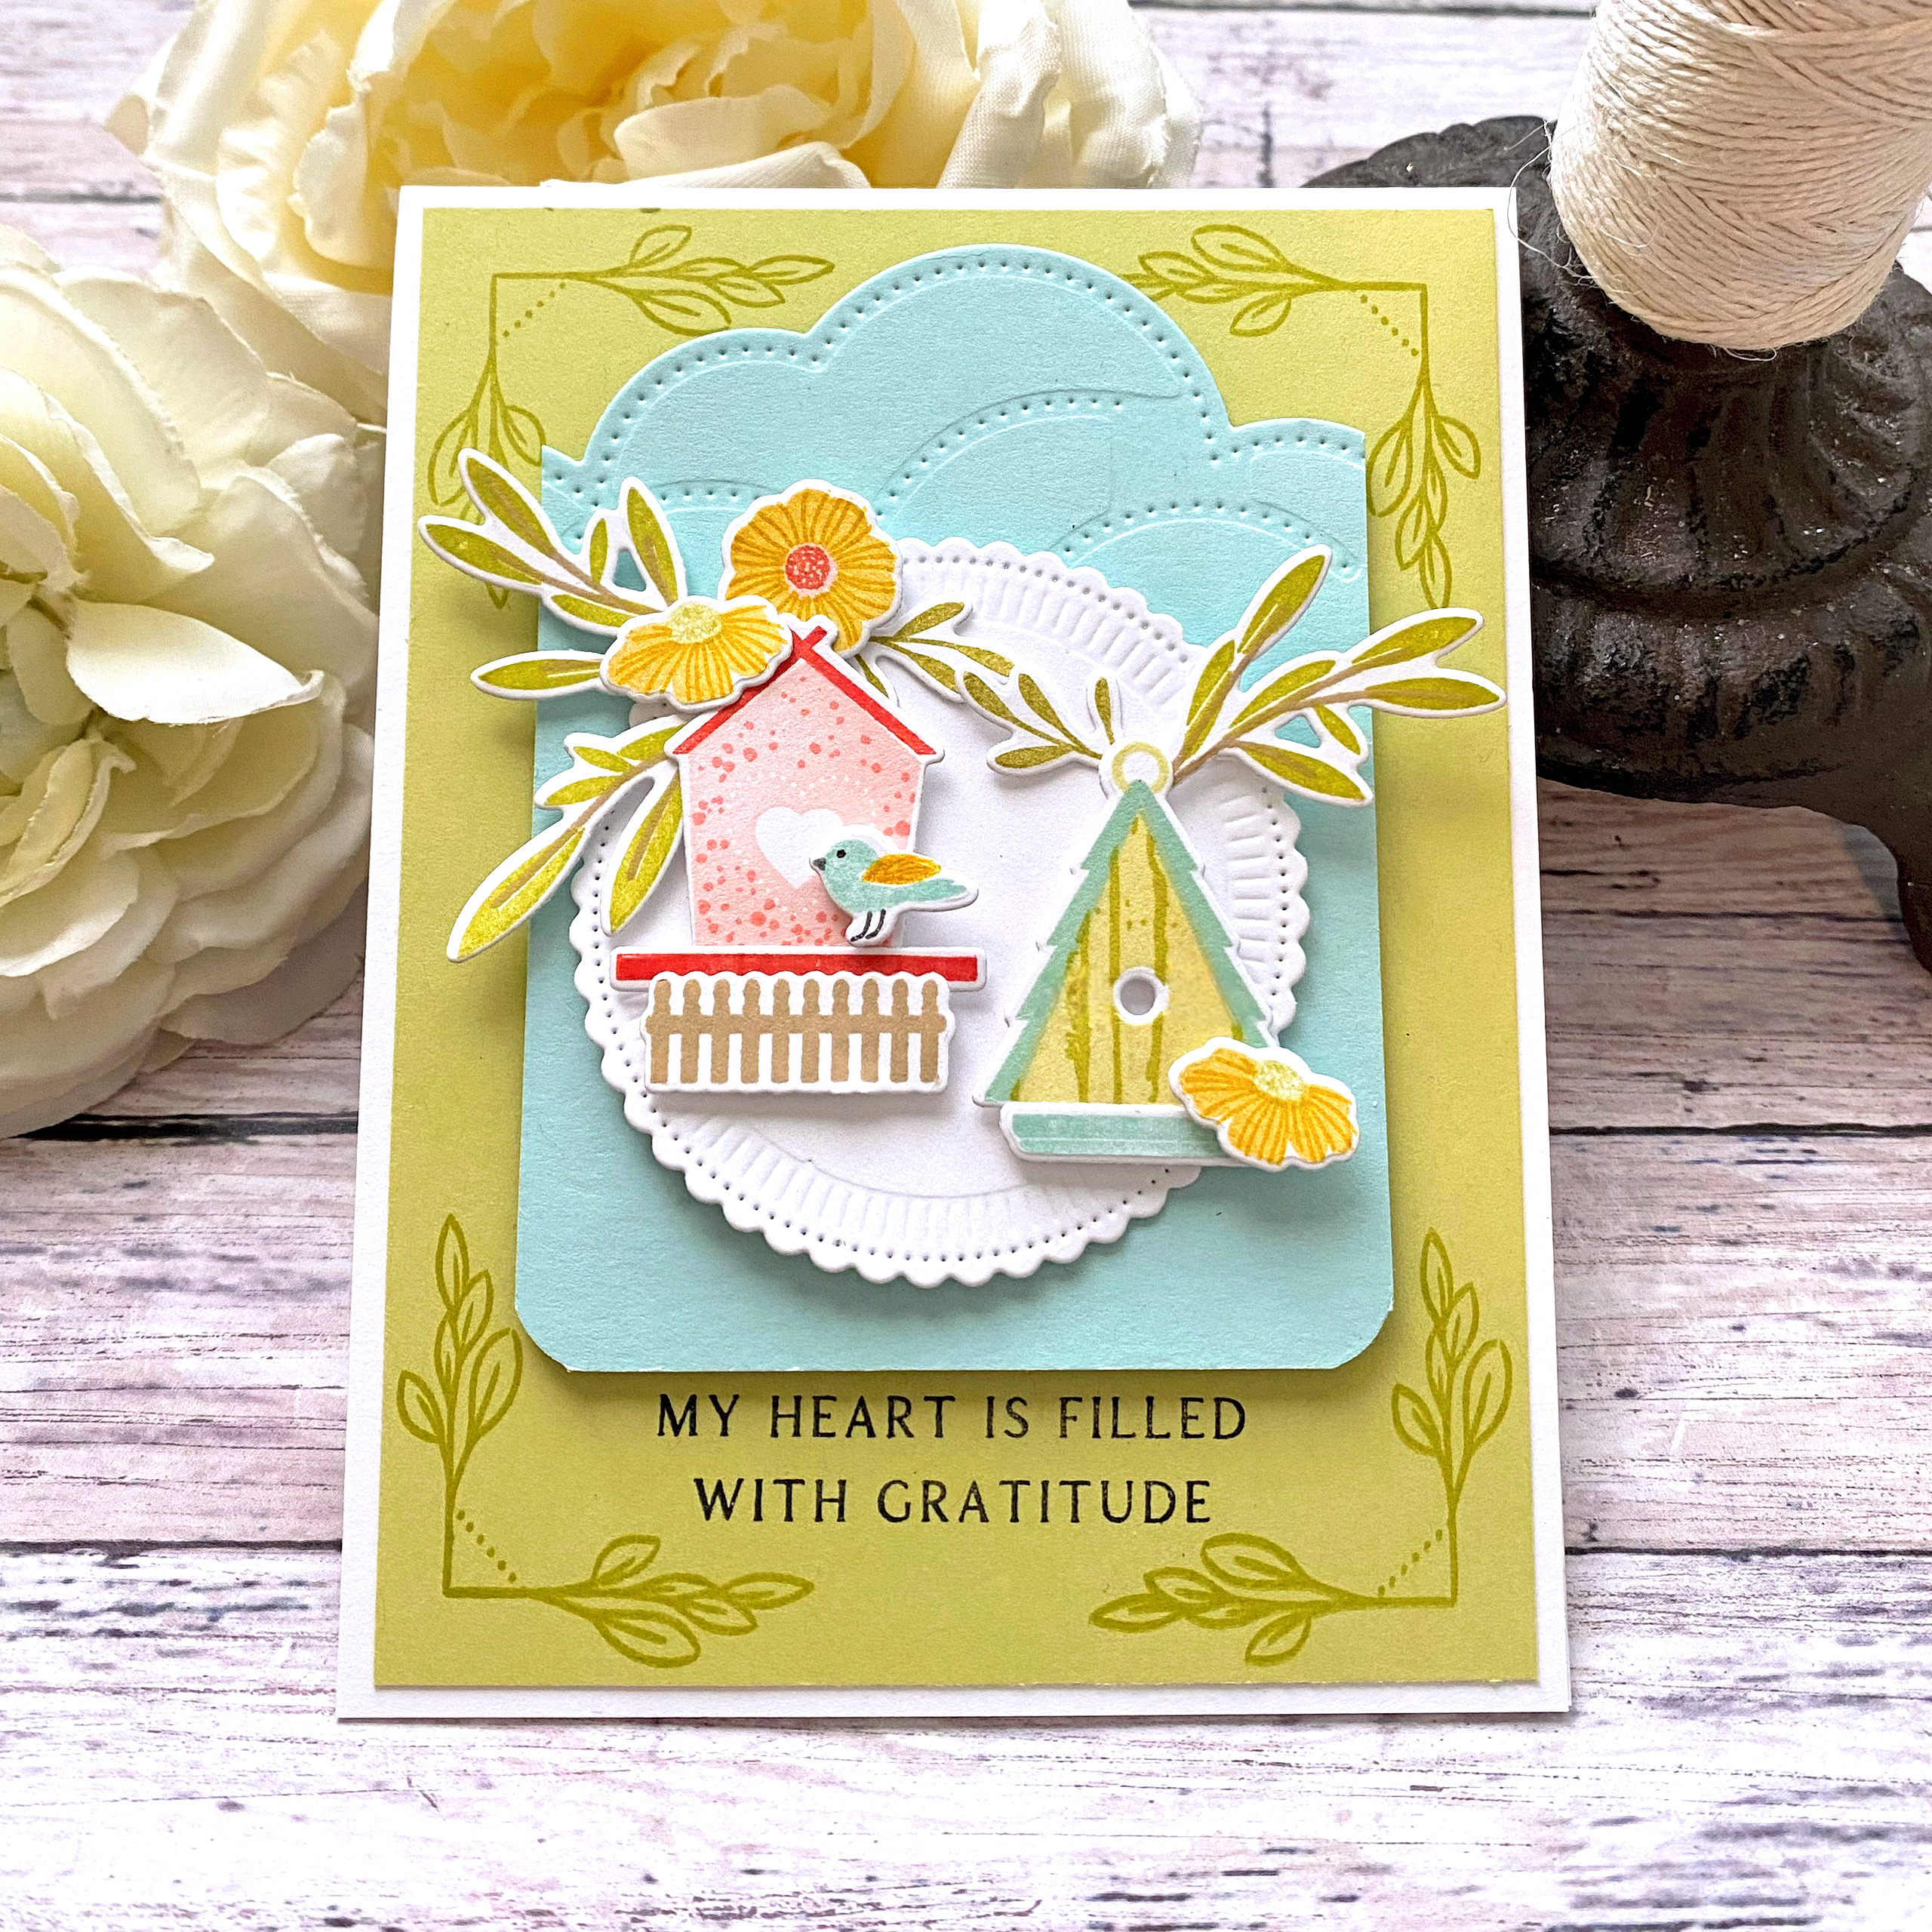
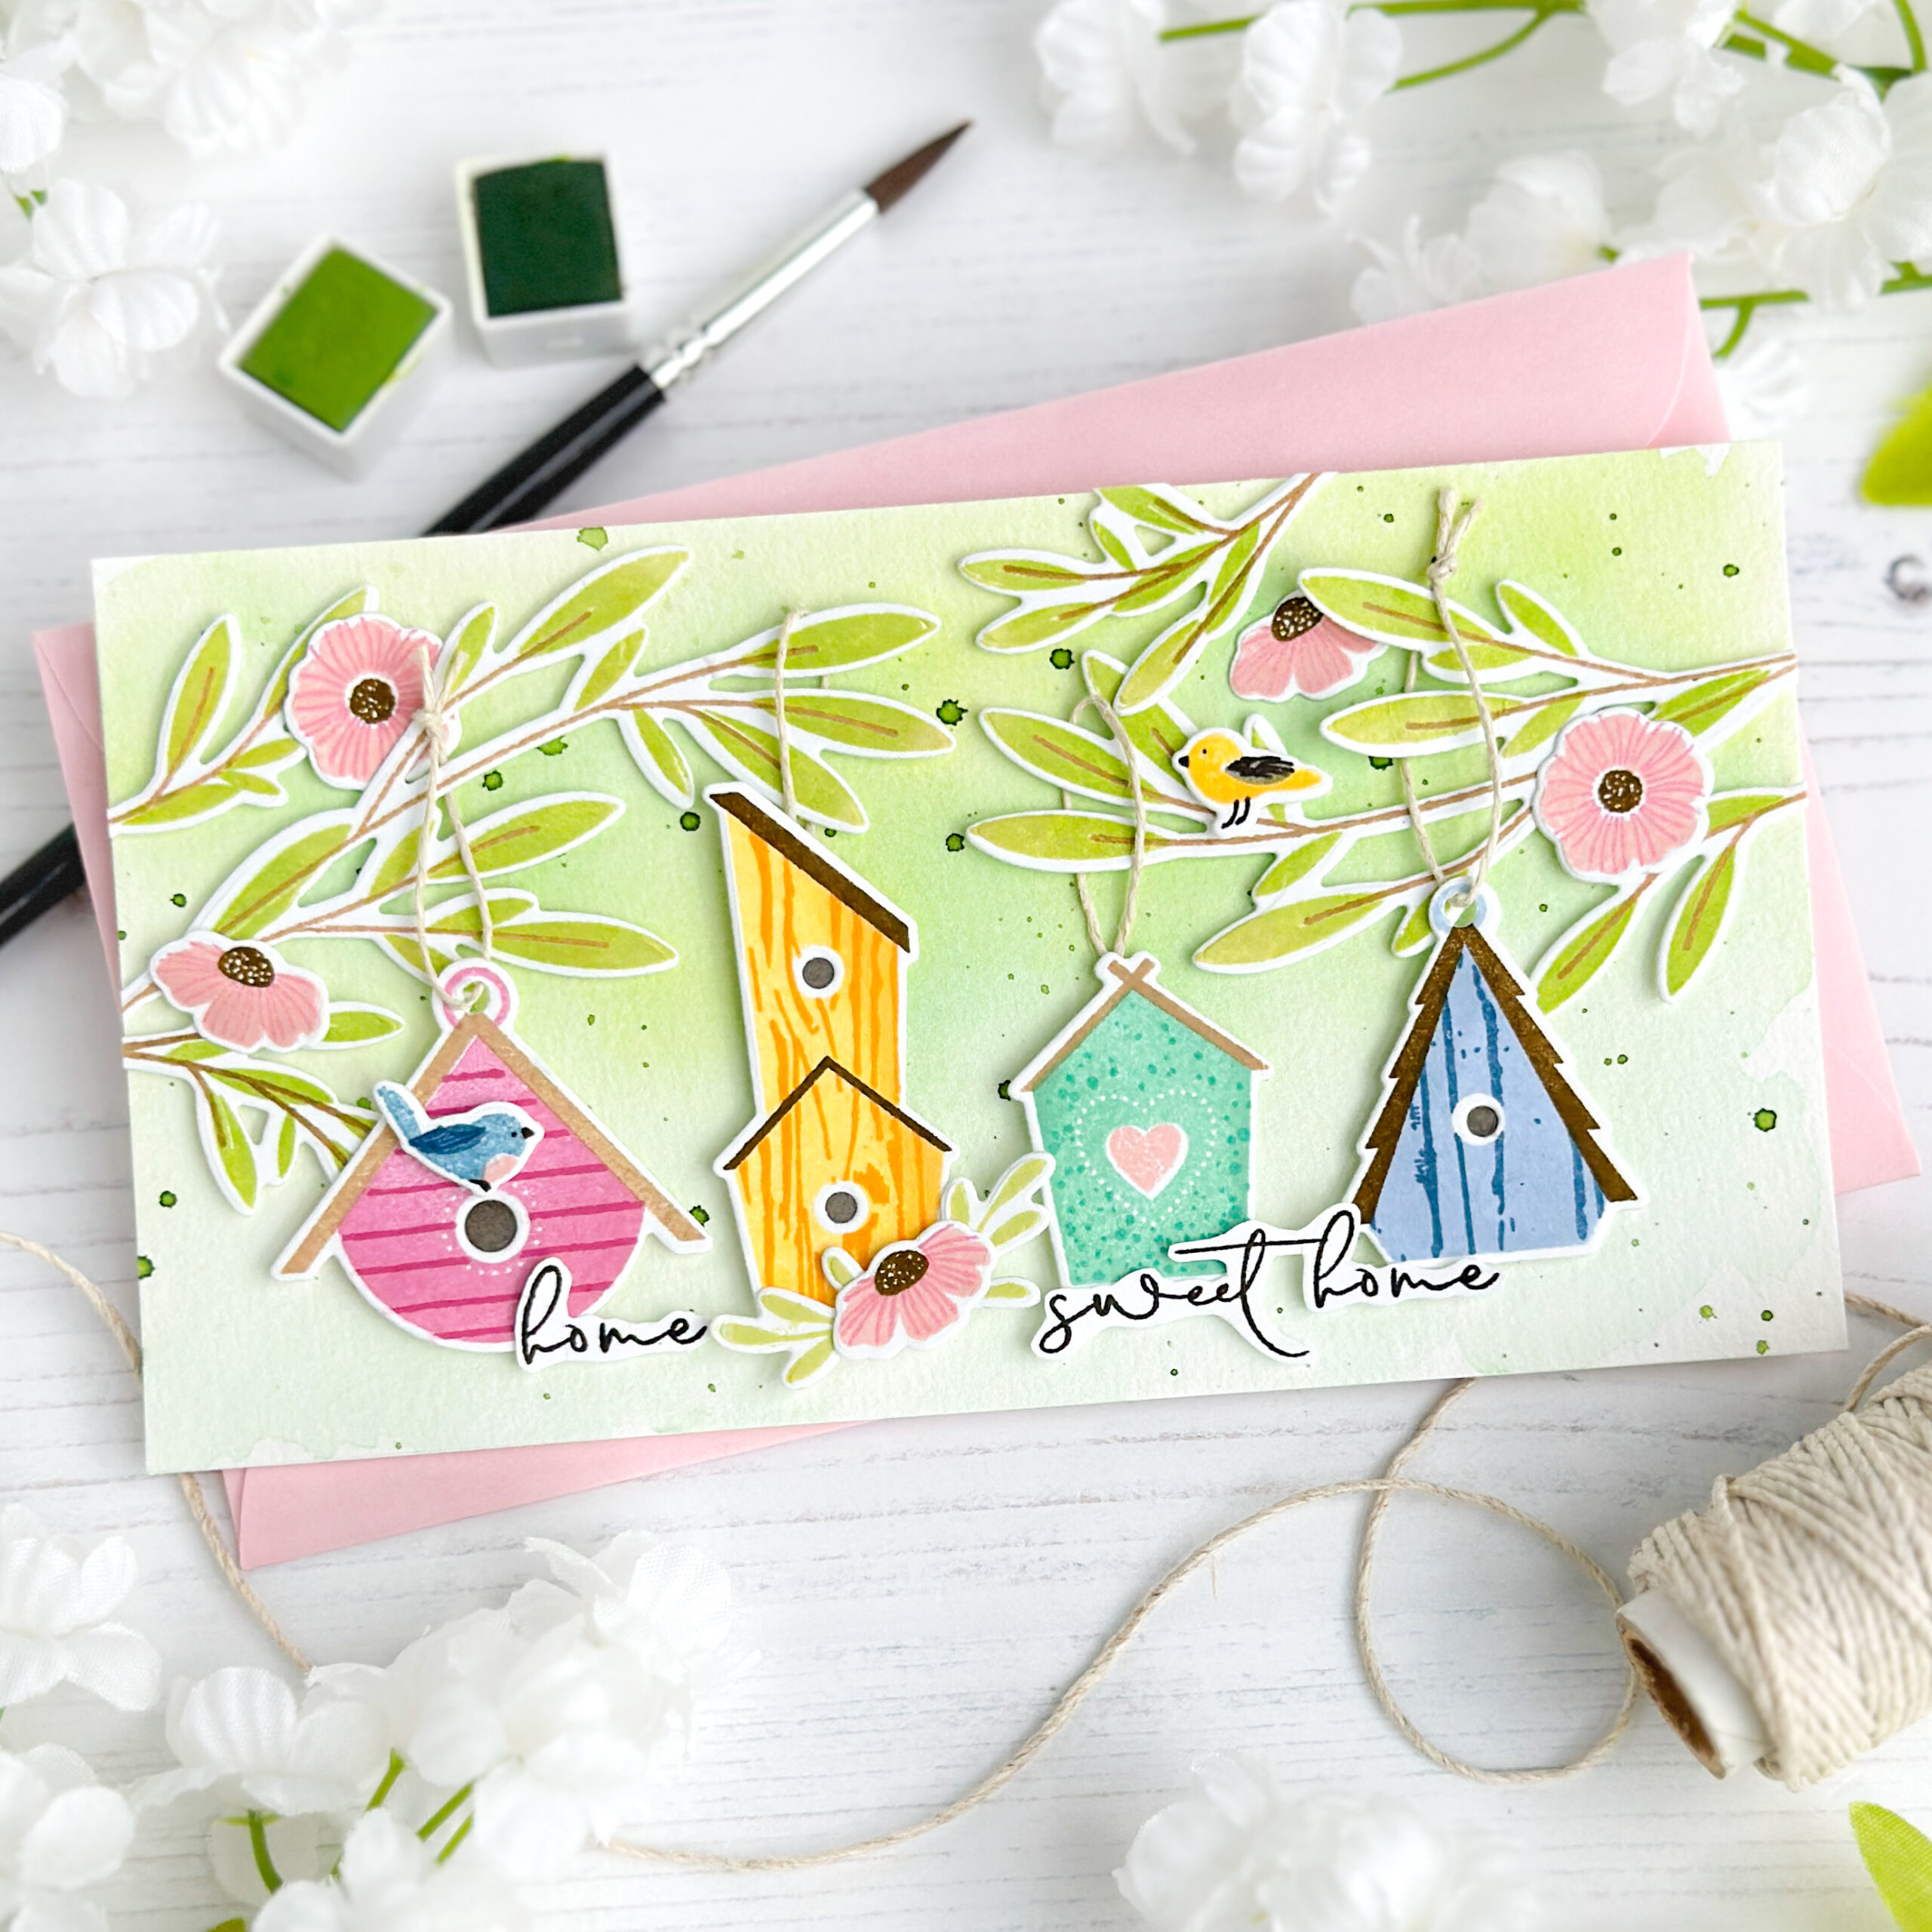
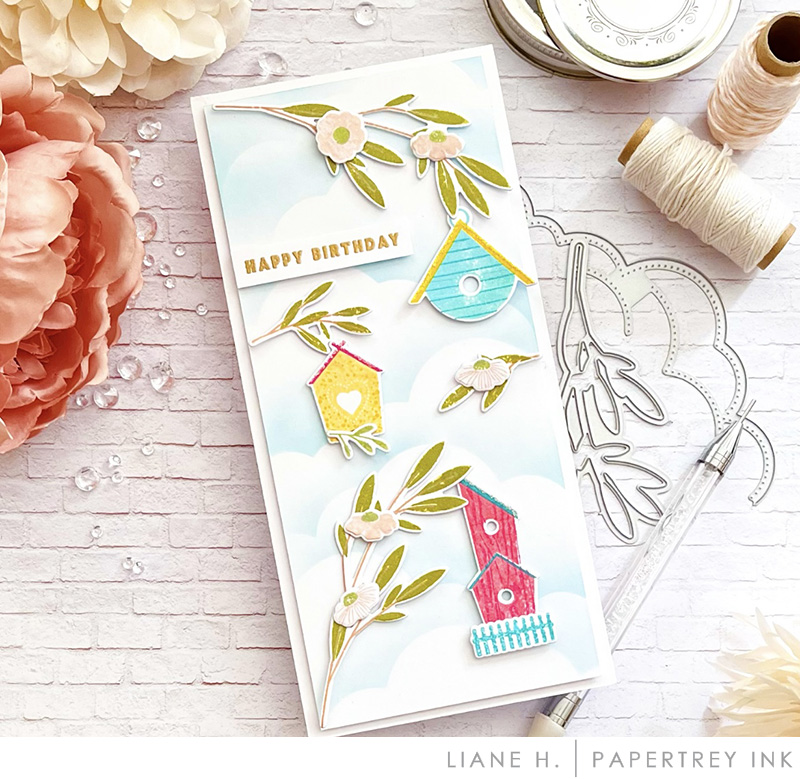
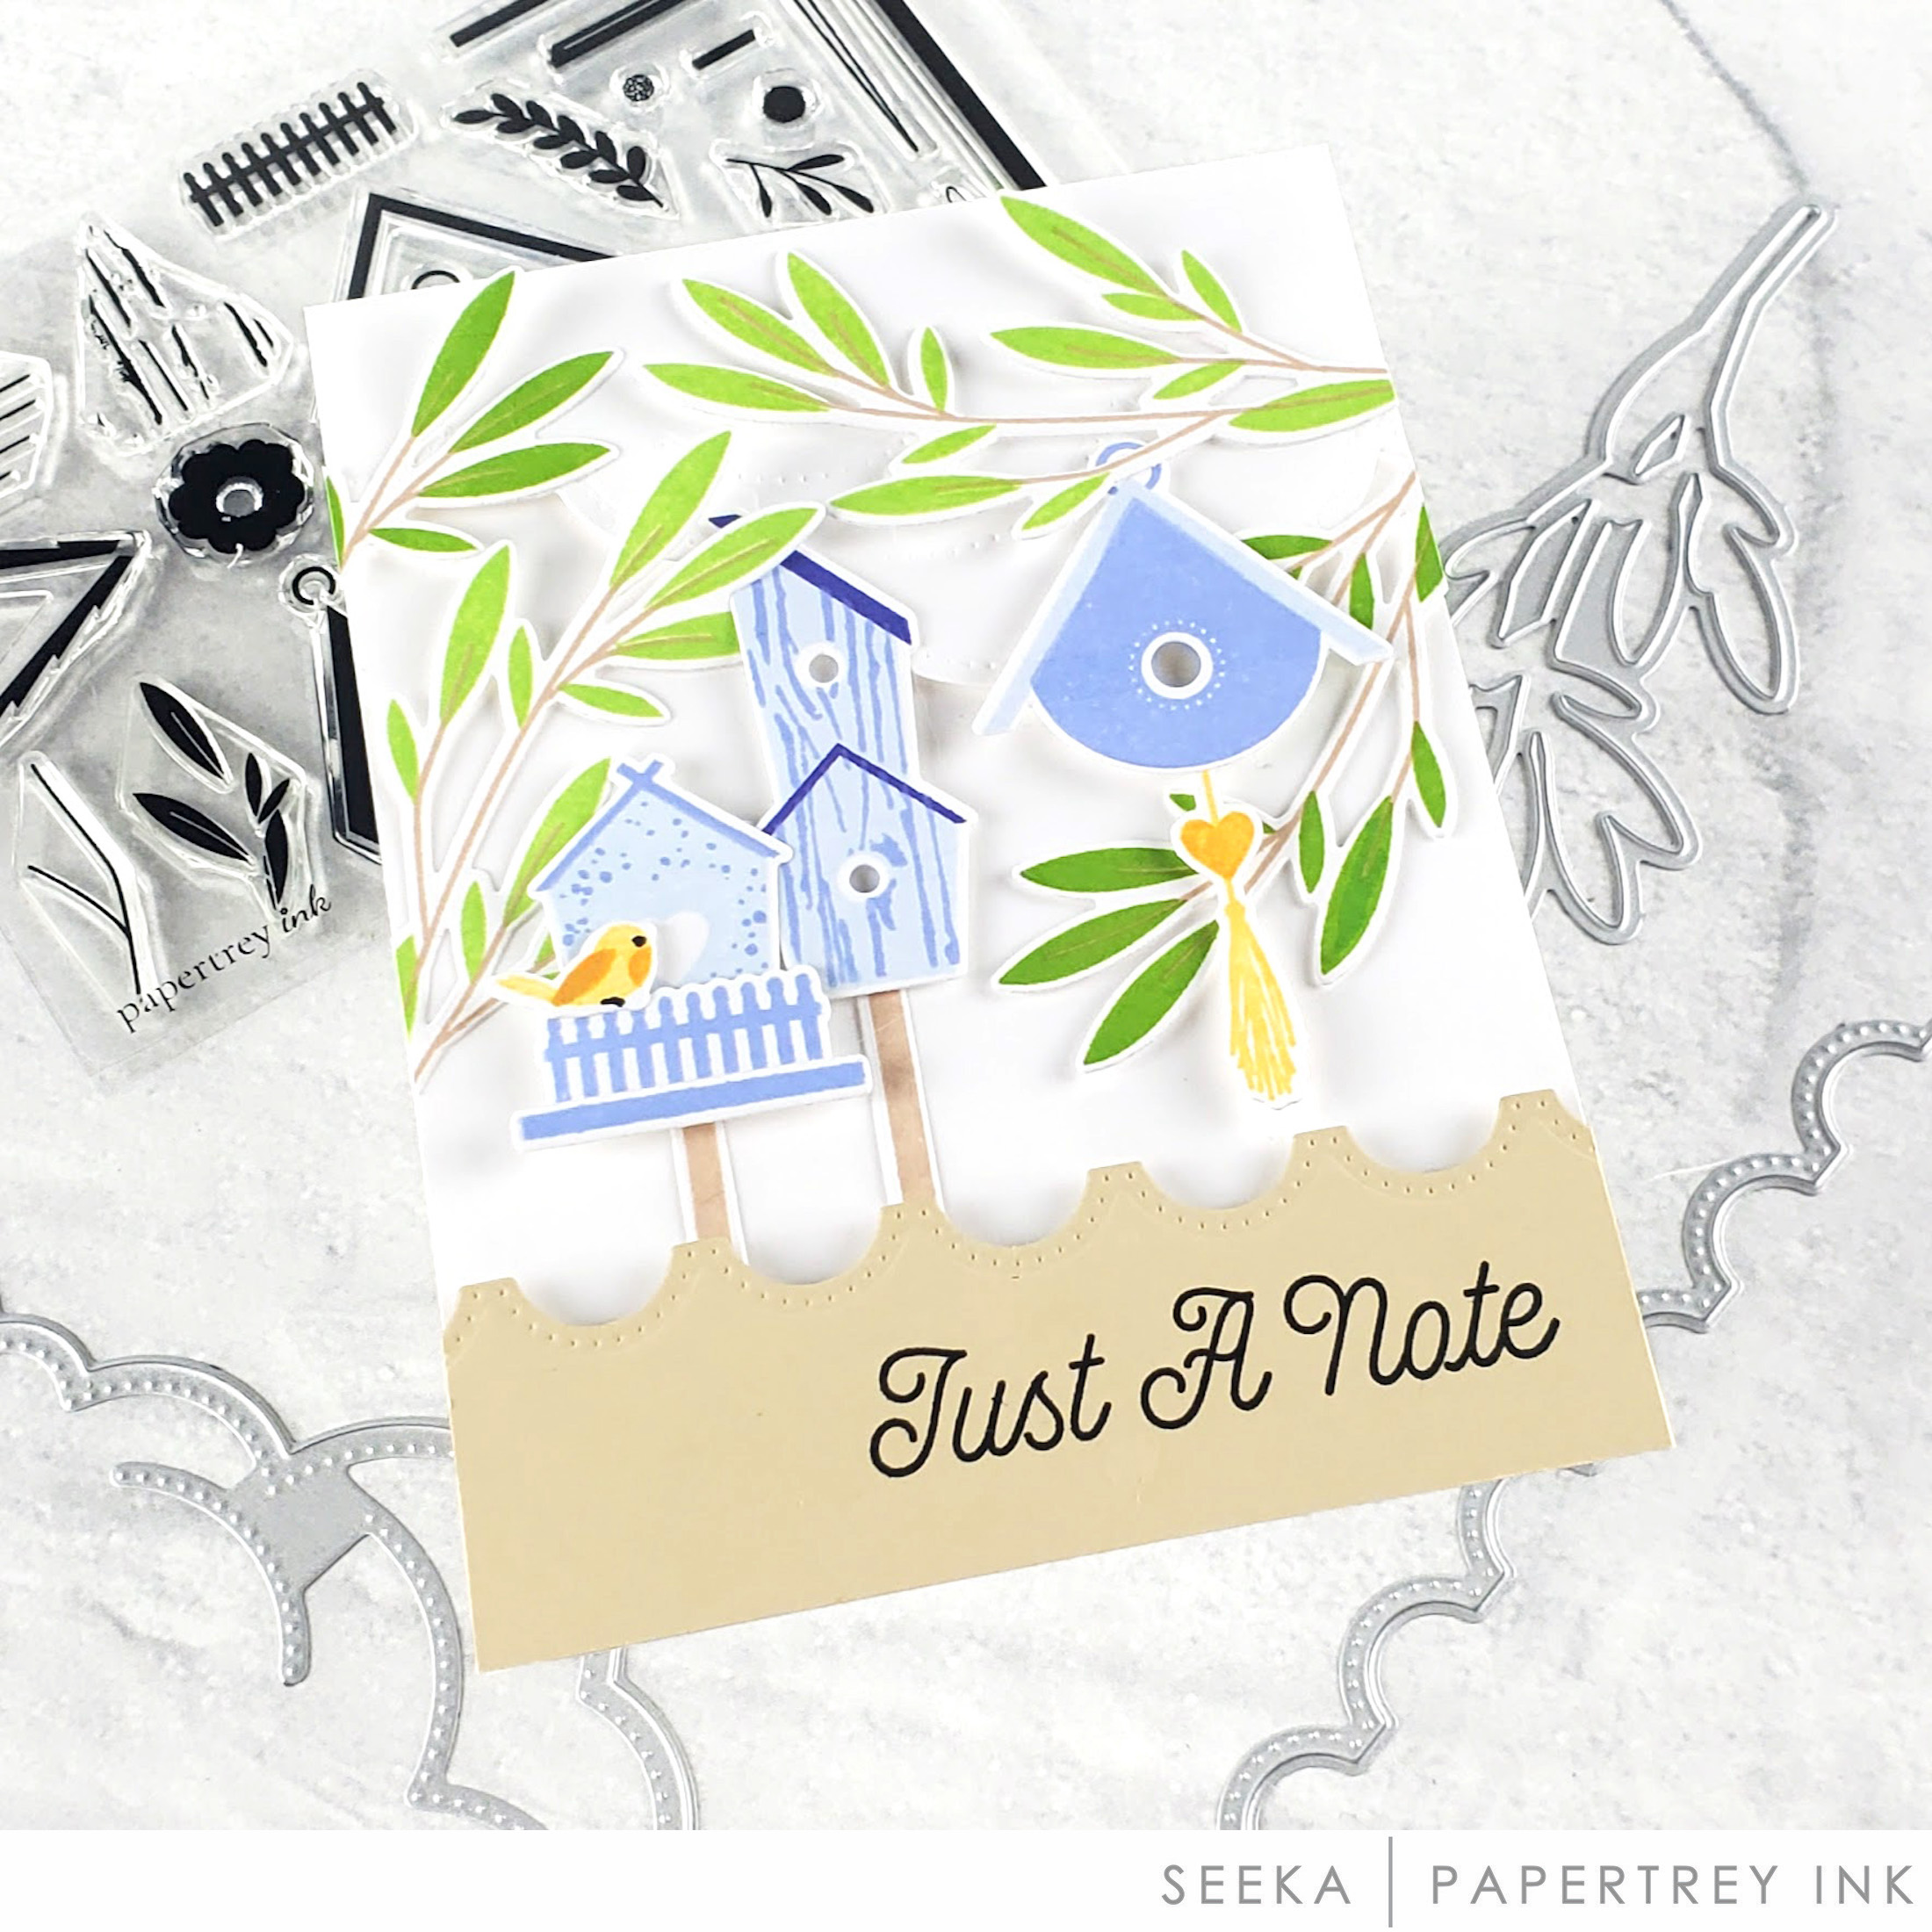
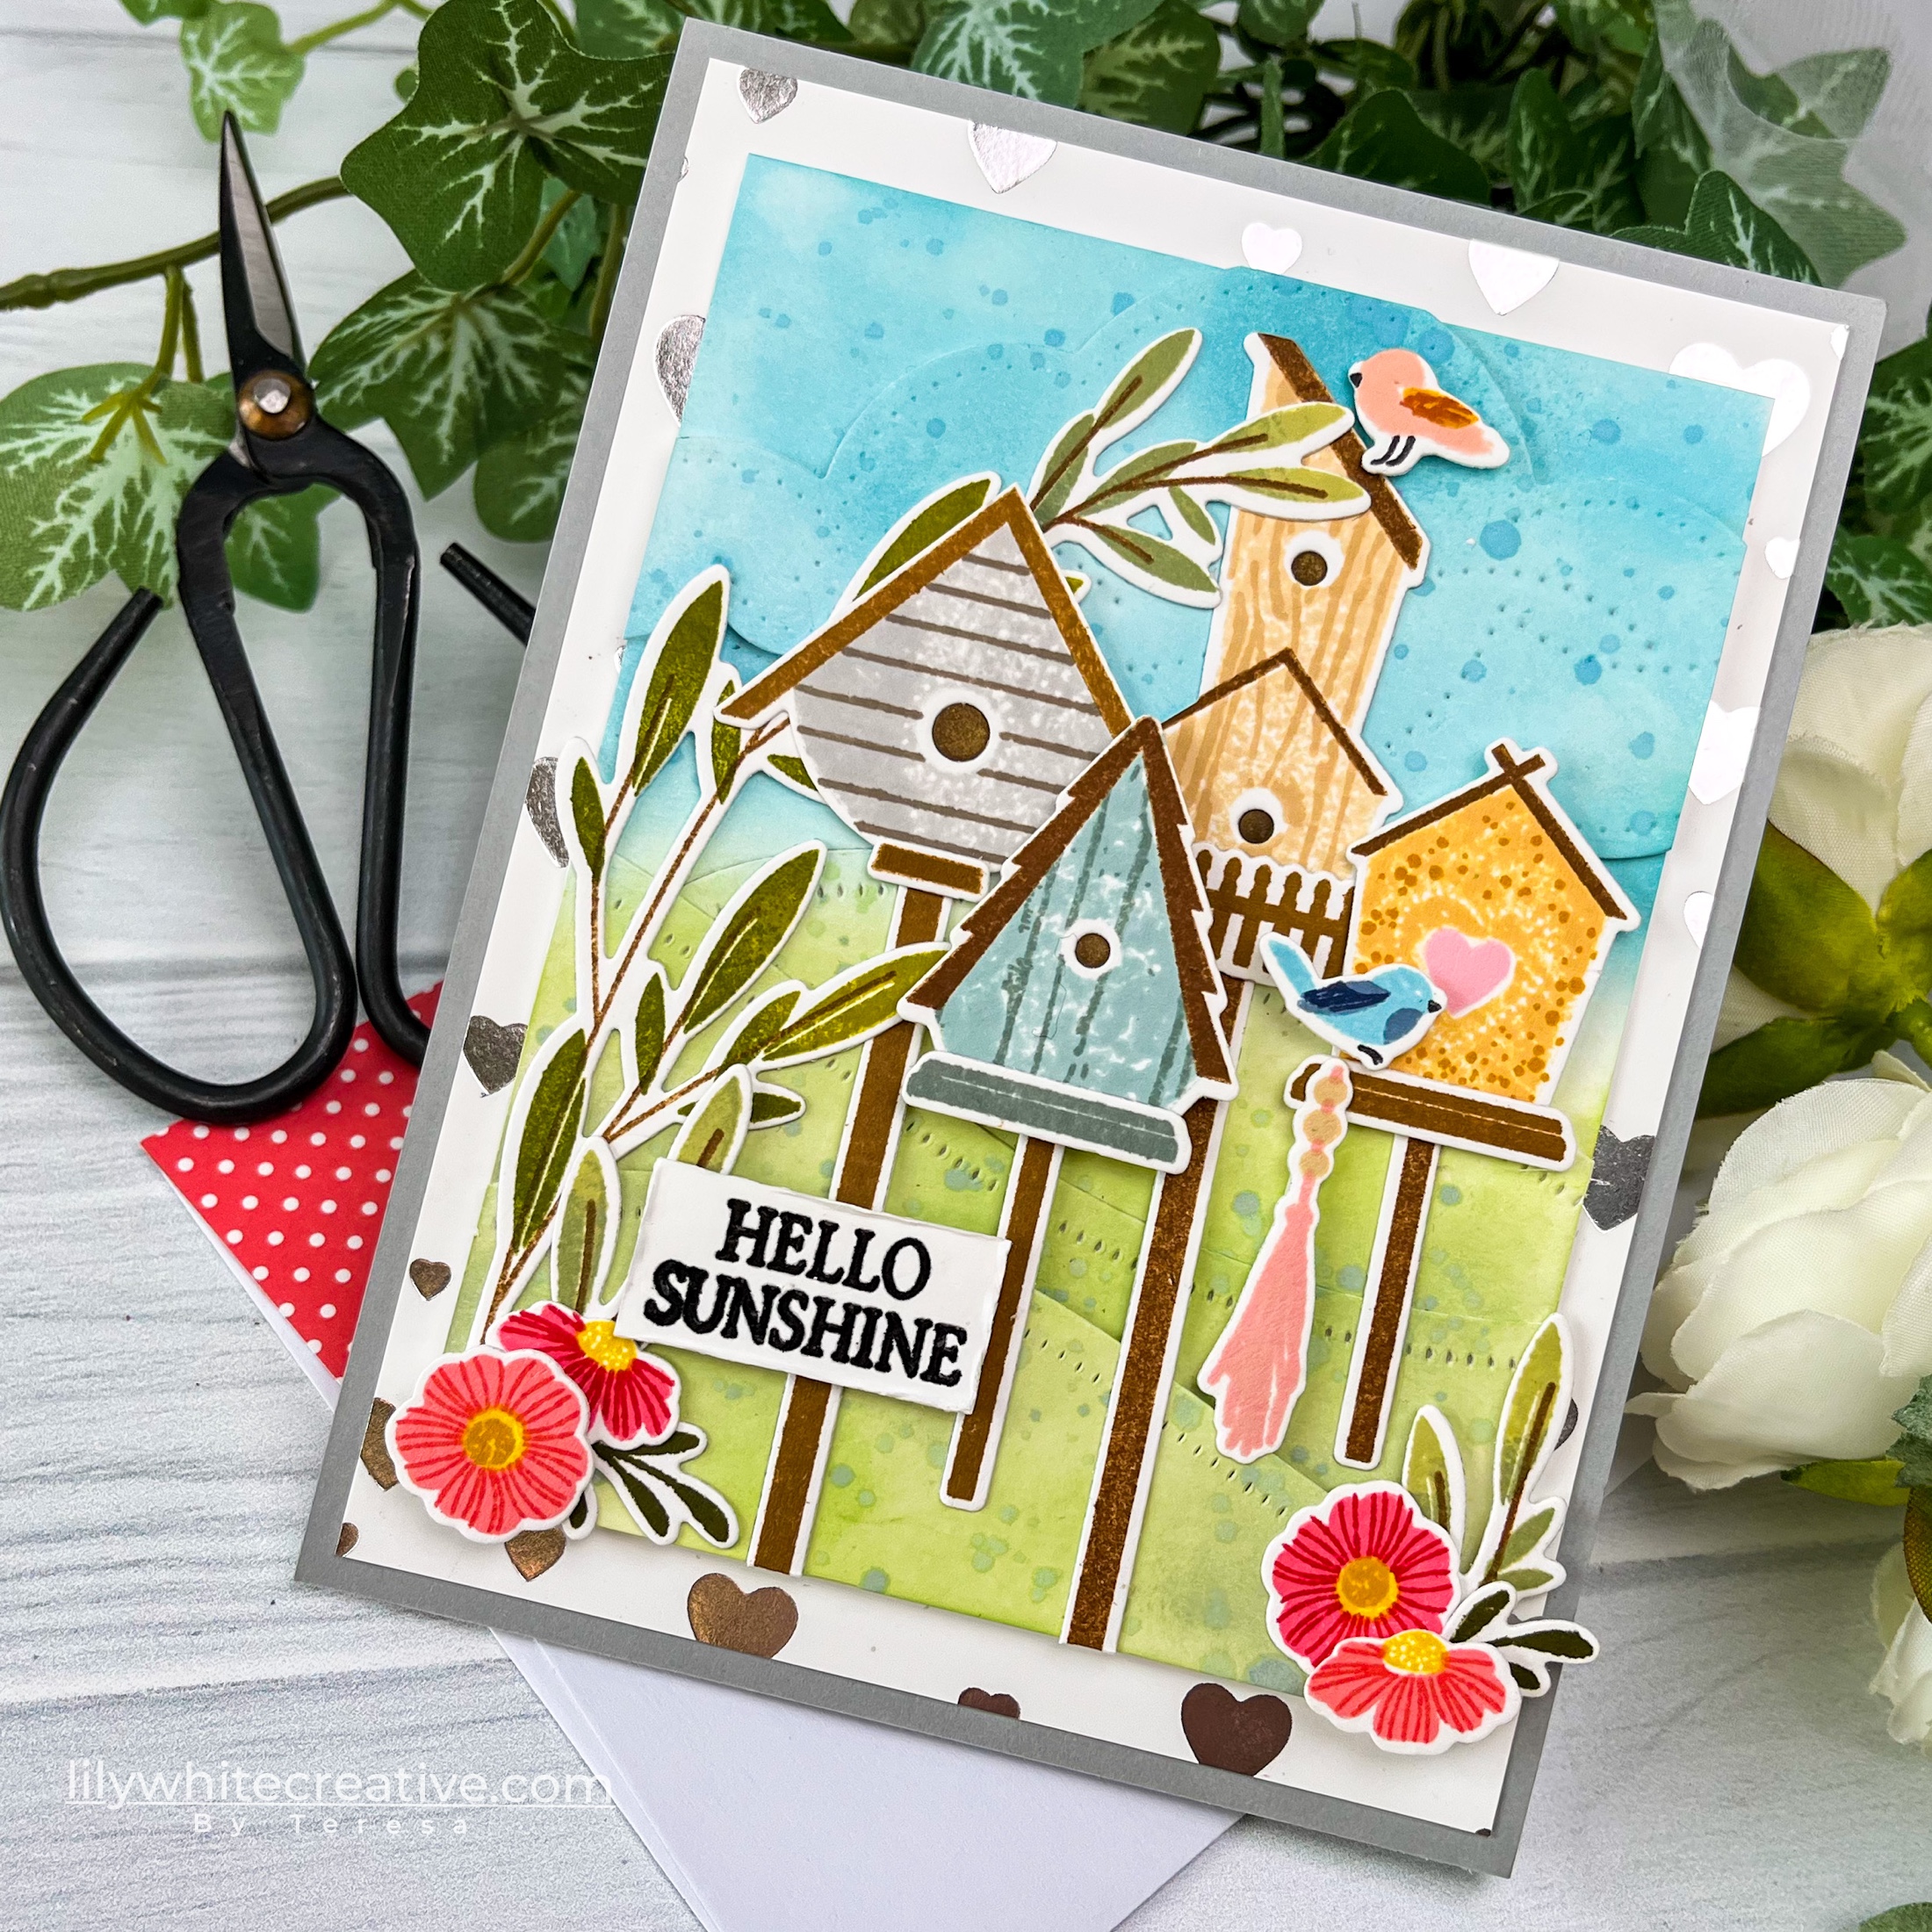
Last but certainly not least is our darling Birdhouse stamp set with coordinating dies. I can’t begin to tell you how much I adore these sweet birdhouse images. We’re also introducing our fabulous, new Elegant Edges: Fresh Cuts dies….AMAZING!
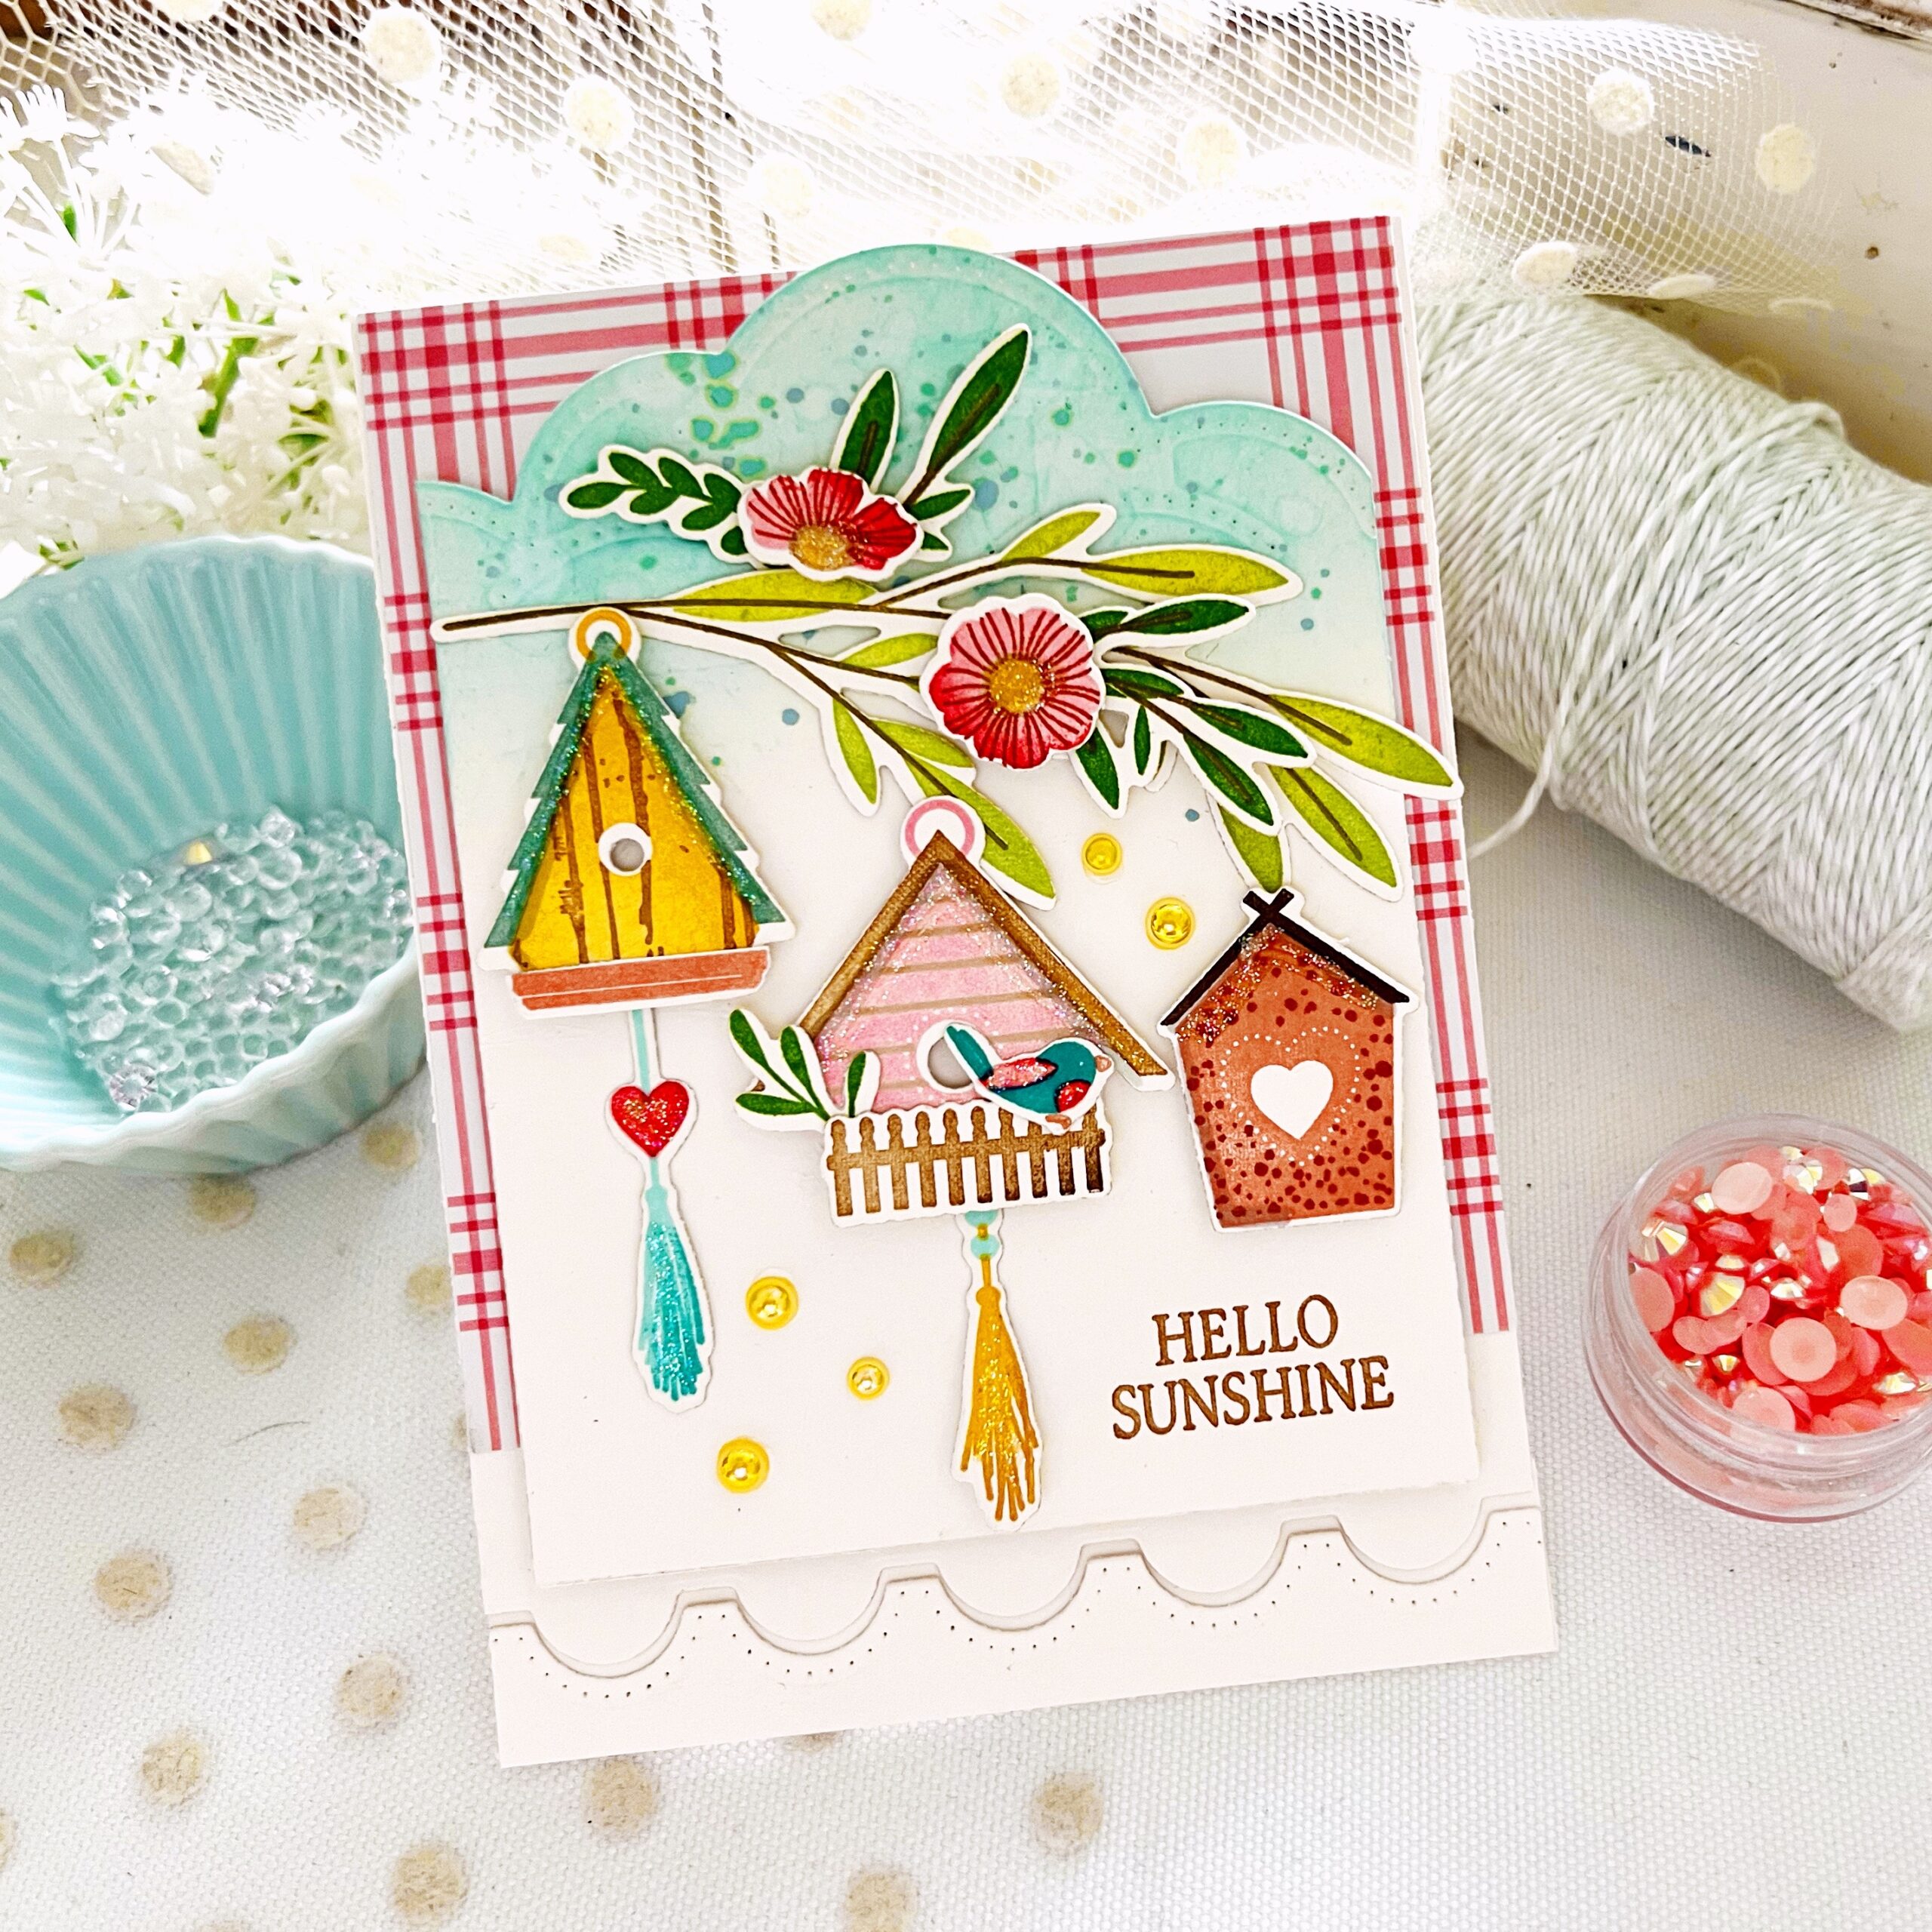
Our Birdhouse stamp set comes complete with four very unique and adorable birdhouses to choose from. Each tiny house has special details that really bring them to life. Woodgrain, stripes, speckles, rooftops, a fence, flowers and even decorative charms that look so cute hanging from below them or even in the branches of the trees.
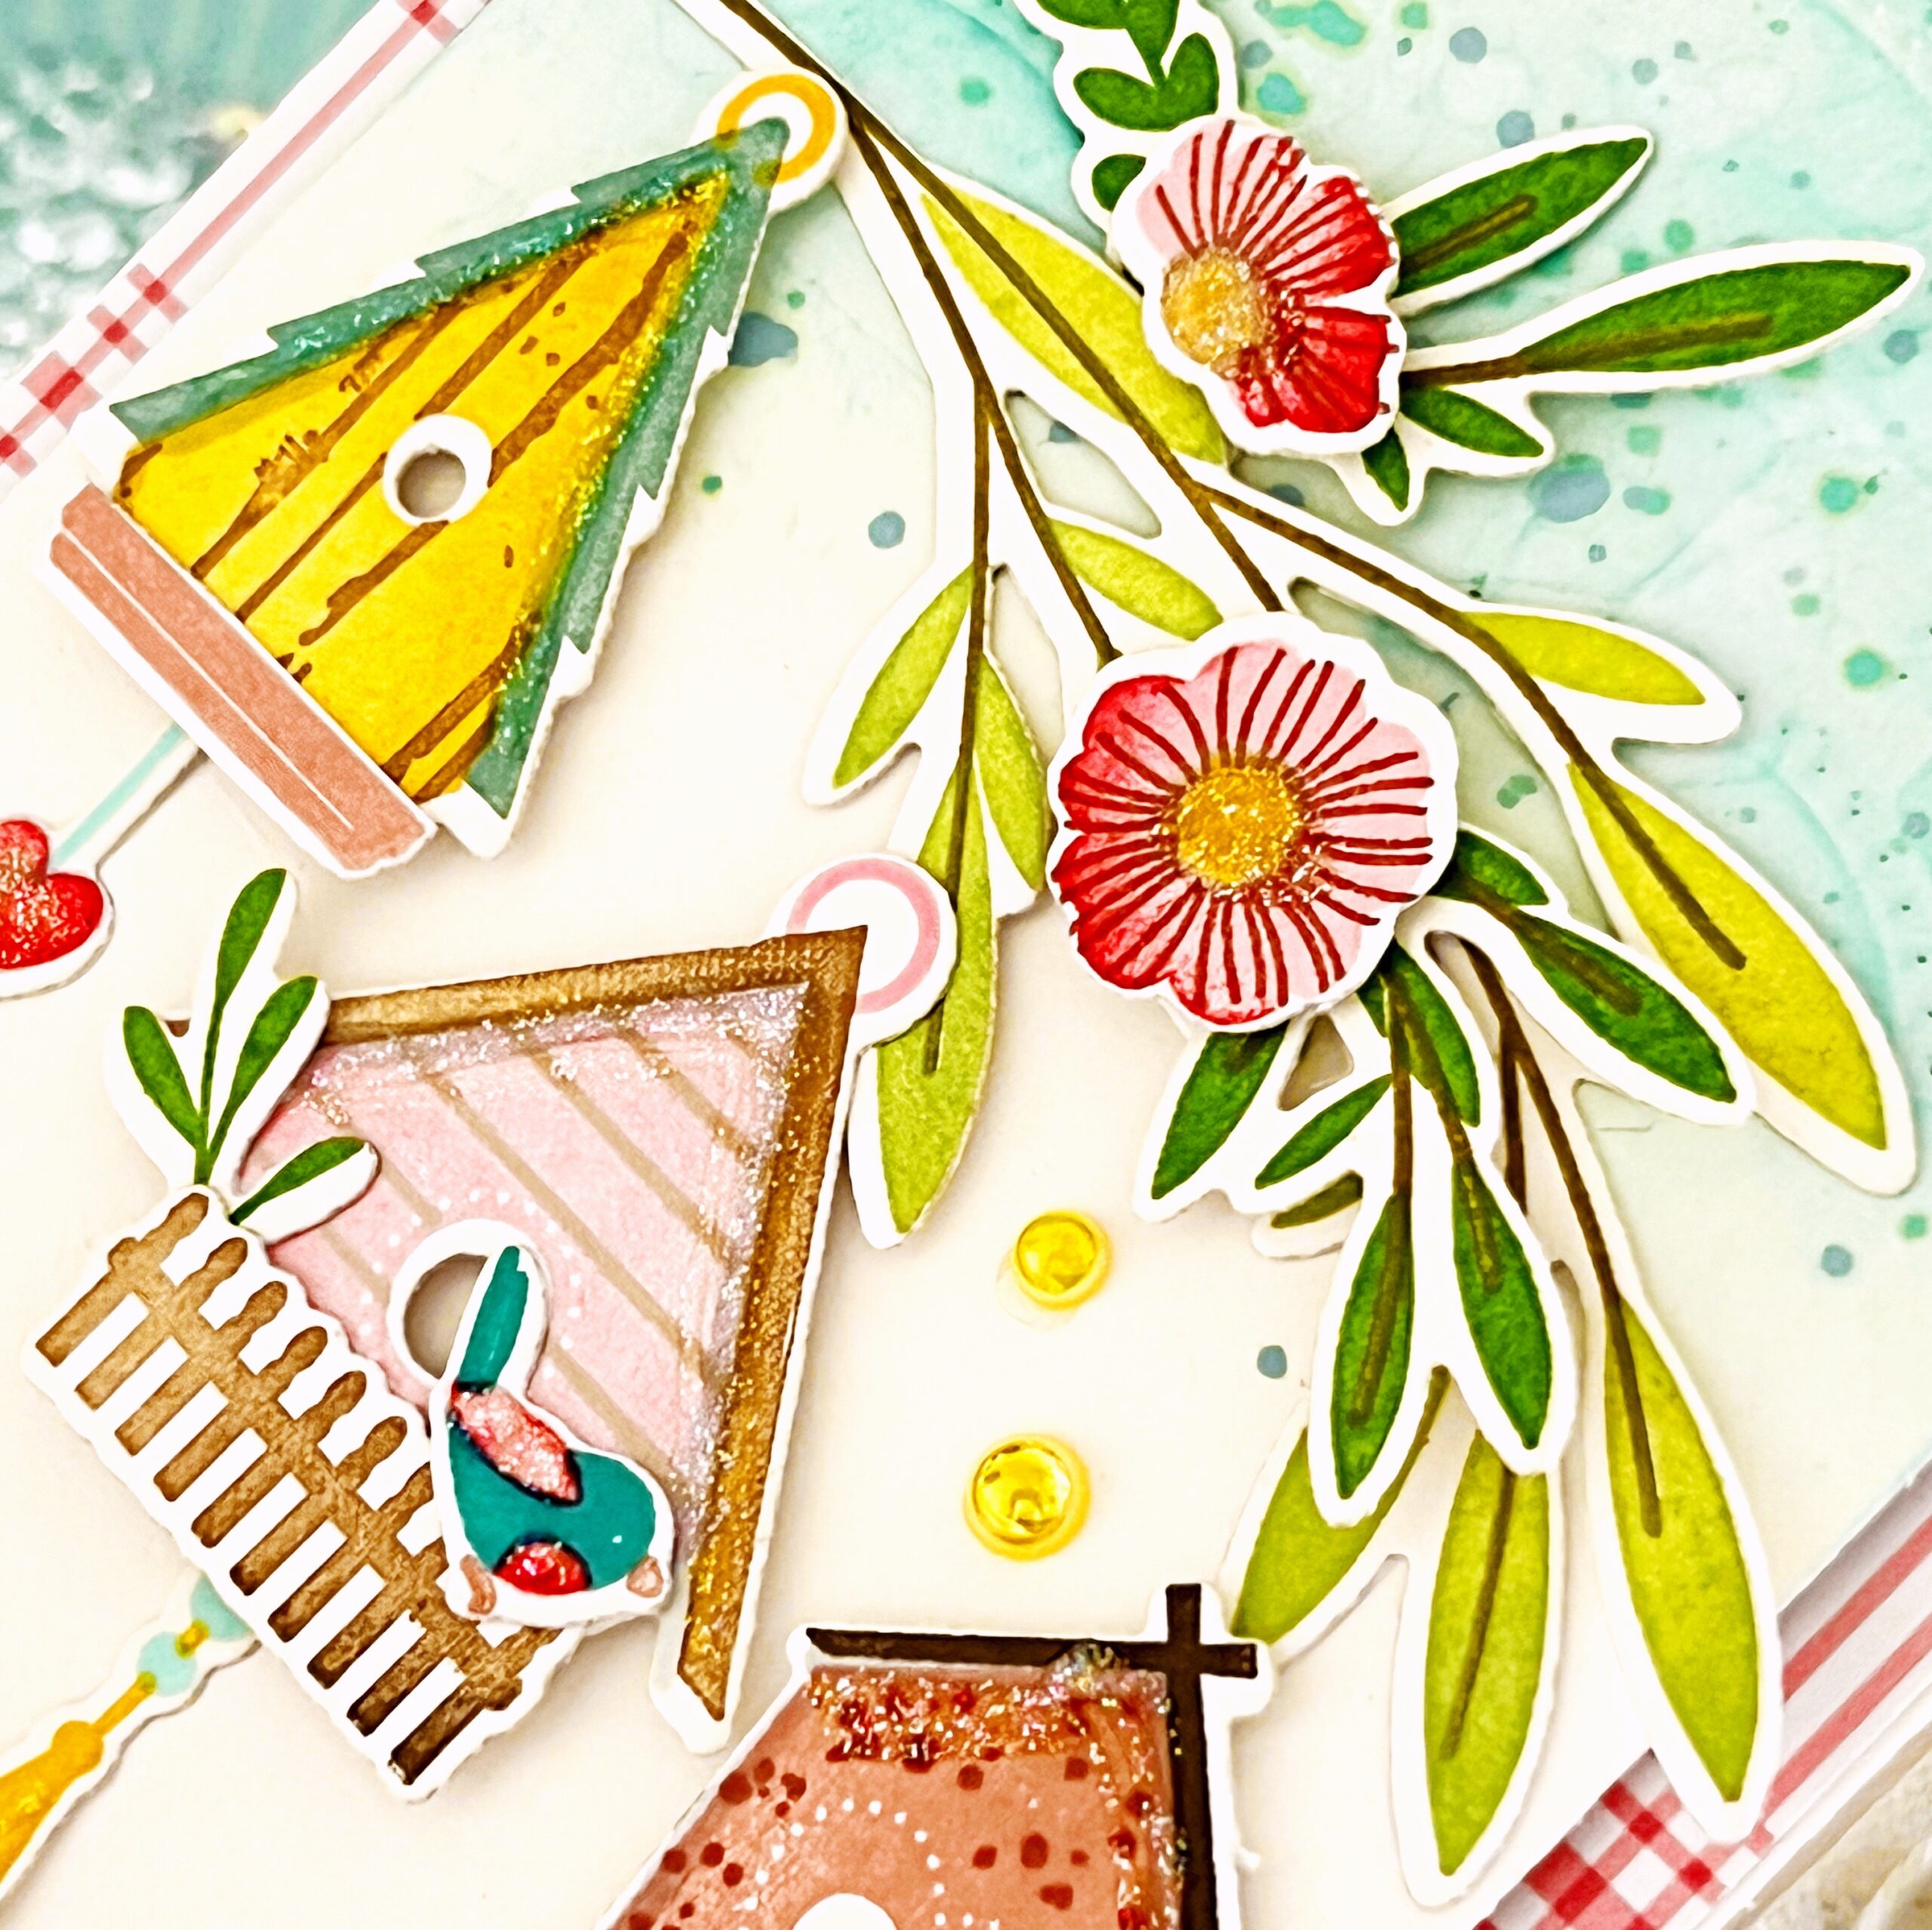
You can choose to hang your houses or perch them on a wood post. I chose to hang mine from my branches and love how adorable they look. I embellished my branches with flowers and vines included in the set as well as the hanging heart and beaded charms. These add so much and are such a fun twist to the stamp set. Across the top and bottom of my card I have used the new Elegant Edges: Fresh Cuts dies. The cloud shape might just be my most favorite! You’ll also fine scallops, a soft curve, and bracket. They are so easy to use and add so much to each card used on.
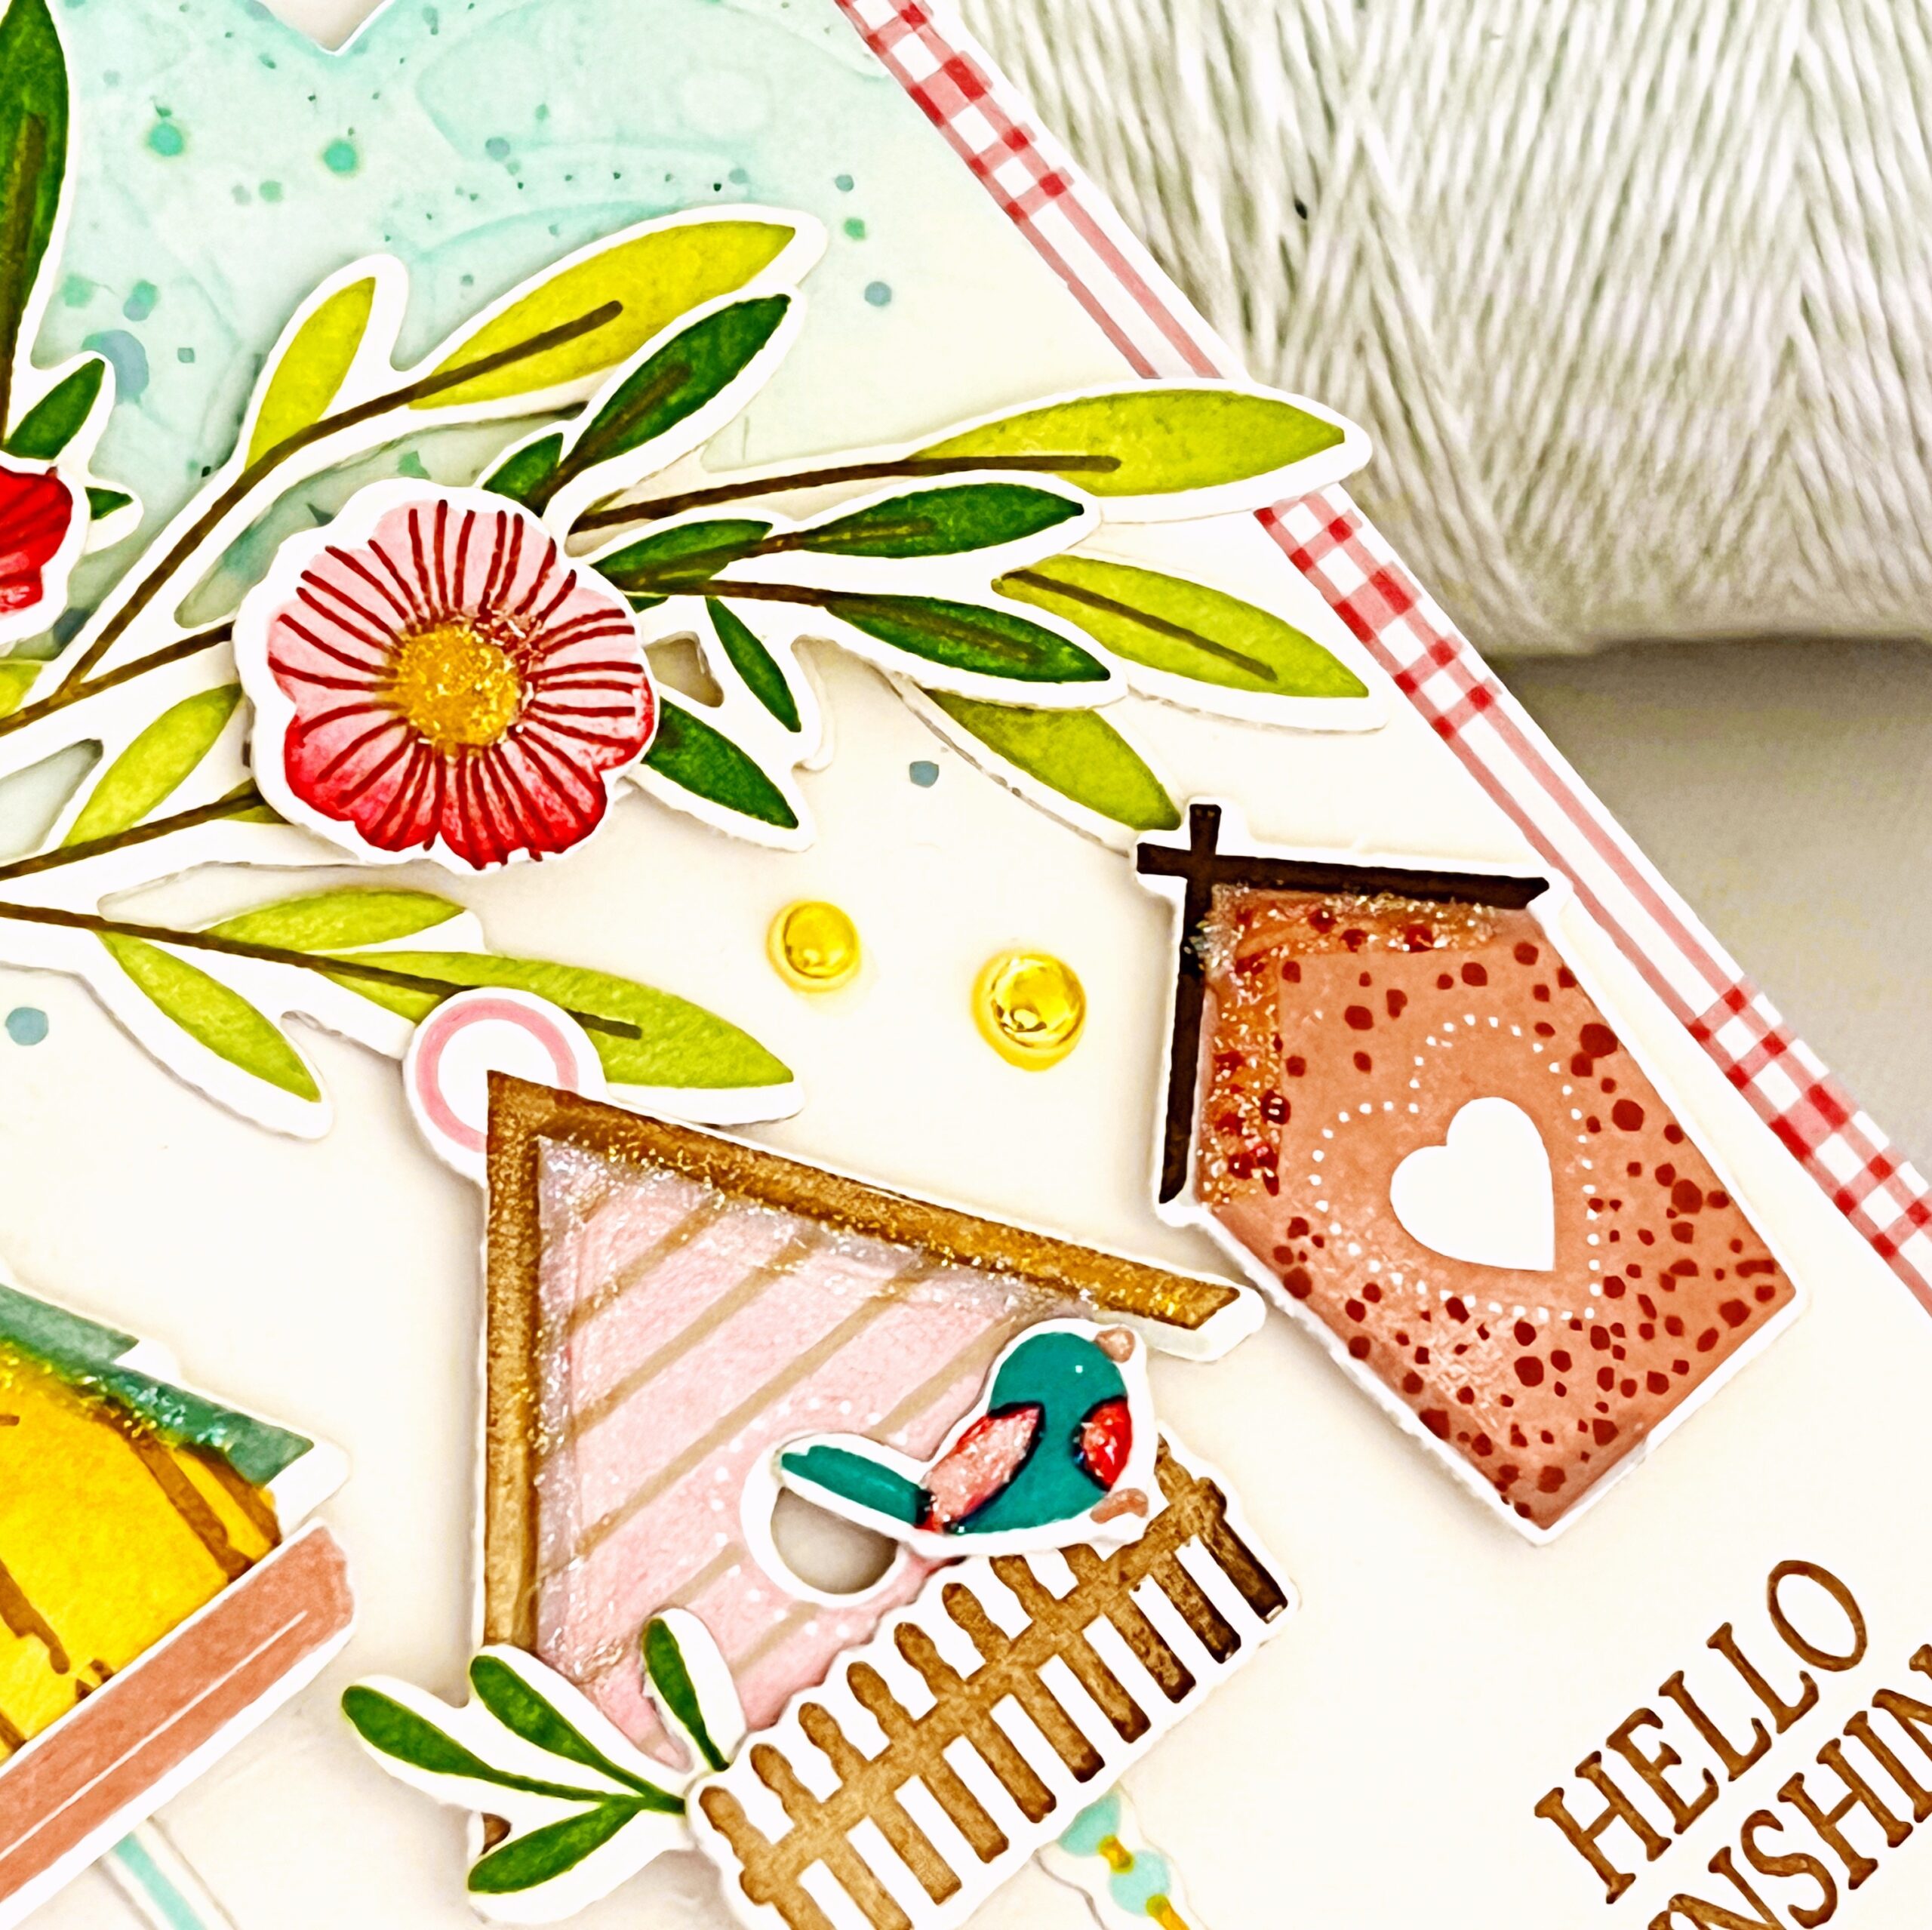
I’ve used a sentiment from the new Just Sentiments: Welcome stamp set at the bottom of my card…the perfect sentiment for this card, I’d say. Another reason I love the Birdhouse stamp set is because it can absolutely be used for so many fun occasions. Perfect for Baby, Welcome to the Neighborhood, Friendship, Thank You, and so much more!
Supplies Used:
STAMPS: Birdhouse, Elegant Edges: Fresh Cuts
INK: Bright Buttercup, Honey Nut, Ocean Tides, Berry Sorbet, Melon Berry, Lovely Lady, Fine Linen, Raspberry Fizz, Hawaiian Shore, Saffron Spice, Dark Chocolate, Green Parakeet, New Leaf, Ripe Avocado
PAPER: Vintage Cream
DIES: Birdhouse, Elegant Edges: Fresh Cuts
OTHER: Distress Spray, patterned paper, adhesive pearls, Stickles glitter


- Allow die-cuts to hang off the edges of scene cards to make it appear that the scene continues beyond the card front (and trim away the excess)
- Add vellum die-cuts in the background (clouds) and pop up some elements with foam tape to add depth
- Use twine to introduce a different texture
- Use pens to add details to stamped images (yellow gel pen on flowers and black glaze pen on the bird’s eyes)
- I always stamp and die-cut extra flowers and leaves to tuck in here and there…if I don’t use them, they can always be used on other projects


We hope you have enjoyed all the beautiful projects that we have shared with you today! We would love to hear what you think of everything we have introduced! Please leave a comment on this post to tell us what you like the most and why, and you will be eligible to win big!

Leave a comment today and you will be automatically entered to win a $50 Papertrey Ink gift certificate! You have until 10am ET, May 23rd to leave your comment and be eligible to win. Only one comment per person please. One randomly selected winner will be posted on the May Release Winners Page by 11 PM ET on May 23rd.


Leave a Reply