


Welcome to Day 1 of our October Countdown. This month is full of the sweetest holiday treats, including the new Sweet Stockings stamps and dies + Holiday Berries Stencils. Let’s jump right in to some projects, shall we?

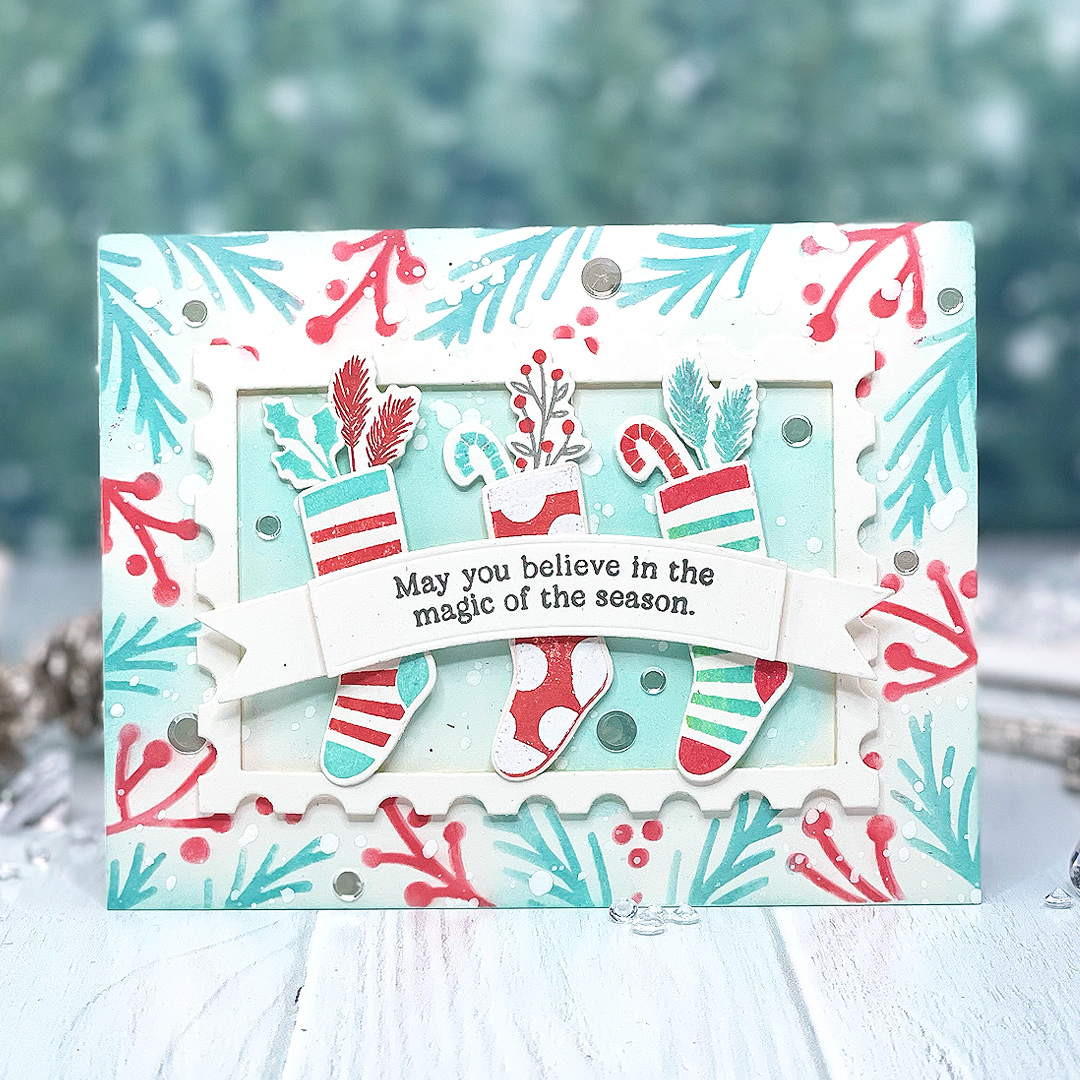
Our new Sweet Stockings are sure to please with their charming, whimsical nature. I love the personality and character you can add to each stocking by using the three-step stamp process. Pick a color for the solid, base layer, add your cuff, heel, and toe layer, and then select from multiple patterns to add on top such as zigzags, polka dots, stripes, stitching, Christmas lights, and more.

This set also comes with all sorts of adorable things to fill your stockings with. Enjoy striped candy canes, flowers, berries, gingerbread men, pine sprigs, holly, and more. These Sweet Stockings are gifts in themselves and such a treat to create with. I layered mine on top of a Love to Layer: Square which is layered over two Love to Layer: Ovals.

Behind my stockings I have used the darling, new Holiday Berries Stencils, which I simply adore. They pair so perfectly with the look and feel of our stockings. I used watermark ink over a Sweet Blush background and then coated on Shabby Green Embossing Enamel. Next, I heat set the enamel in place and sponged on coordinating colors of ink, such as Hibiscus Burst and Spring Moss. This emboss-resist technique really brings out the white embossed areas of the stencil and gives the stencils a completely different look.
Just wait until you see the darling creations from our designers. Their stocking are hung with such charm and love.
Supplies Used:
STAMPS: Sweet Stockings
INK: Ocean Tides, Spring Rain, Hibiscus Burst, Hawaiian Shores, Sweet Blush, Fine Linen, Spring Moss, Pure Poppy, Honey Nut, Ripe Avocado
PAPER: Sweet Blush, Stamper’s Select White
DIES: Sweet Stockings, Love to Layer: Squares, Love to Layer: Ovals
OTHER: Holiday Berry Stencils, velvet ribbon, Stickles glitter, shabby green embossing enamel, twine, Moonshine sequins, patterned paper


TIPS:
-
Use a frame stamp to create a faux fireplace scene to hang stockings
-
To create depth and texture in flowers, leaves, and wood, stamp images multiple times in slightly different colors


TIPS:
-
For a more modern look, use non-traditional colors (like aqua and red) for your holiday cards
-
Use brushes instead of sponges to stencil for a softer look
Our next round of delightful, treats for you today are the Rustic Wood Star dies and Just Sentiments: Believe stamp set. You’ll love the primitive, weathered feel of the gorgeous Rustic Wood Star dies. Total farmhouse love!

The Rustic Wood Star dies come with an already assembled star or several wood planks that you can cut and assemble yourself. This first card uses the already assembled die. I added Fine Linen and Honey Nut ink over my die cut to add color. I then spritzed a bit of water over the surface area and some Distress Spray. This technique give it a perfectly weathered look. And this die set comes with embossed details to create texture and life-like character.

I then die cut two wreaths, one of each size included in the set, sponged ink over both, water, and Distress Spray once again and then added watermark ink and embossing enamel over the tips of the branches of the wreath. This creates a frosty, winter feel that I just love.

The darling bow included in this die set might just be the cutest bow I have ever seen. It is a four-step layered bow and looks so lifelike and real and is a delight to cut from patterned paper, felt, and more. I added the leaves and berries from the Rustic Wood Star dies to my wreath and the top of my sentiment to tie everything together. Plus they make the cutest, little accents, don’t they? You’ll adore the sentiments found in the Just Sentiments: Believe stamp set…they are magical and perfect for the holidays!
Supplies Used:
STAMPS: Just Sentiments: Believe
INK: Tropical Teal. Fine Linen, Honey Nut, Autumn Rose, Ripe Avocado, Ocean Tides, Hawaiian Shores
PAPER: Stamper’s Select White, Aqua Mist, Sheer Basics Vellum
DIES: Rustic Wood Star, Love to Layer: Ovals
OTHER: Velvet ribbon, patterned paper, Distress Spray, shabby green embossing enamel, corrugated cardstock

My second card uses the wood plank pieces of the Rustic Wood Star dies to create my own star. I have used metal brads to attach the ends of my star together, furthering the rustic, primitive look. I love that this is an option with this die collection.

I die cut my bow from buffalo plaid paper and love the country, farmhouse feel it adds. Don’t you love the wreaths that center on the star? They are so charming and come in two different sizes so you can layer them or use them individually. You can also embellish the wreath with greenery, berries, and leaves from the die set as well. Make your wreath as full or sparse as you’d care to.

I’ve used a sentiment from the Just Sentiments: Believe across the bottom of my Love to Layer: Aztec rectangle. And, across the bottom of my card on white cardstock, I have used the new Holiday Berries Stencils to create my own complimentary pattern. They’re a perfect fit, don’t you think?
Supplies Used:
STAMPS: Just Sentiments: Believe
INK: Fine Linen, Pure Poppy, Scarlet Jewel, Ripe Avocado, Olive Twist
PAPER: Stamper’s Select White
DIES: Love to Layer: Torn Edges, Love to Layer: Aztec, Rustic Wood Star
OTHER: Metal brads, patterned paper, washi tape, Stickles glitter, Holiday Berries Stencils


We hope you have enjoyed all the beautiful projects that we have shared with you today! We would love to hear what you think of everything we have introduced! Please leave a comment on this post to tell us what you like the most and why, and you will be eligible to win big!

Leave a comment today and you will be automatically entered to win a $50 Papertrey Ink gift certificate! You have until 7am ET, October 17th to leave your comment and be eligible to win. Only one comment per person please. One randomly selected winner will be posted on the October Release Winners Page by 11 PM ET on October 20th.


Leave a Reply