


It’s the final day of our September Countdown and we have saved some of the cutest, most creative products for last. Introducing the new Bring Home the Holidays dies, Inside Greetings: Peace stamp set, and Snowy Truck Accessories stamp set and dies. Let’s dive right in!

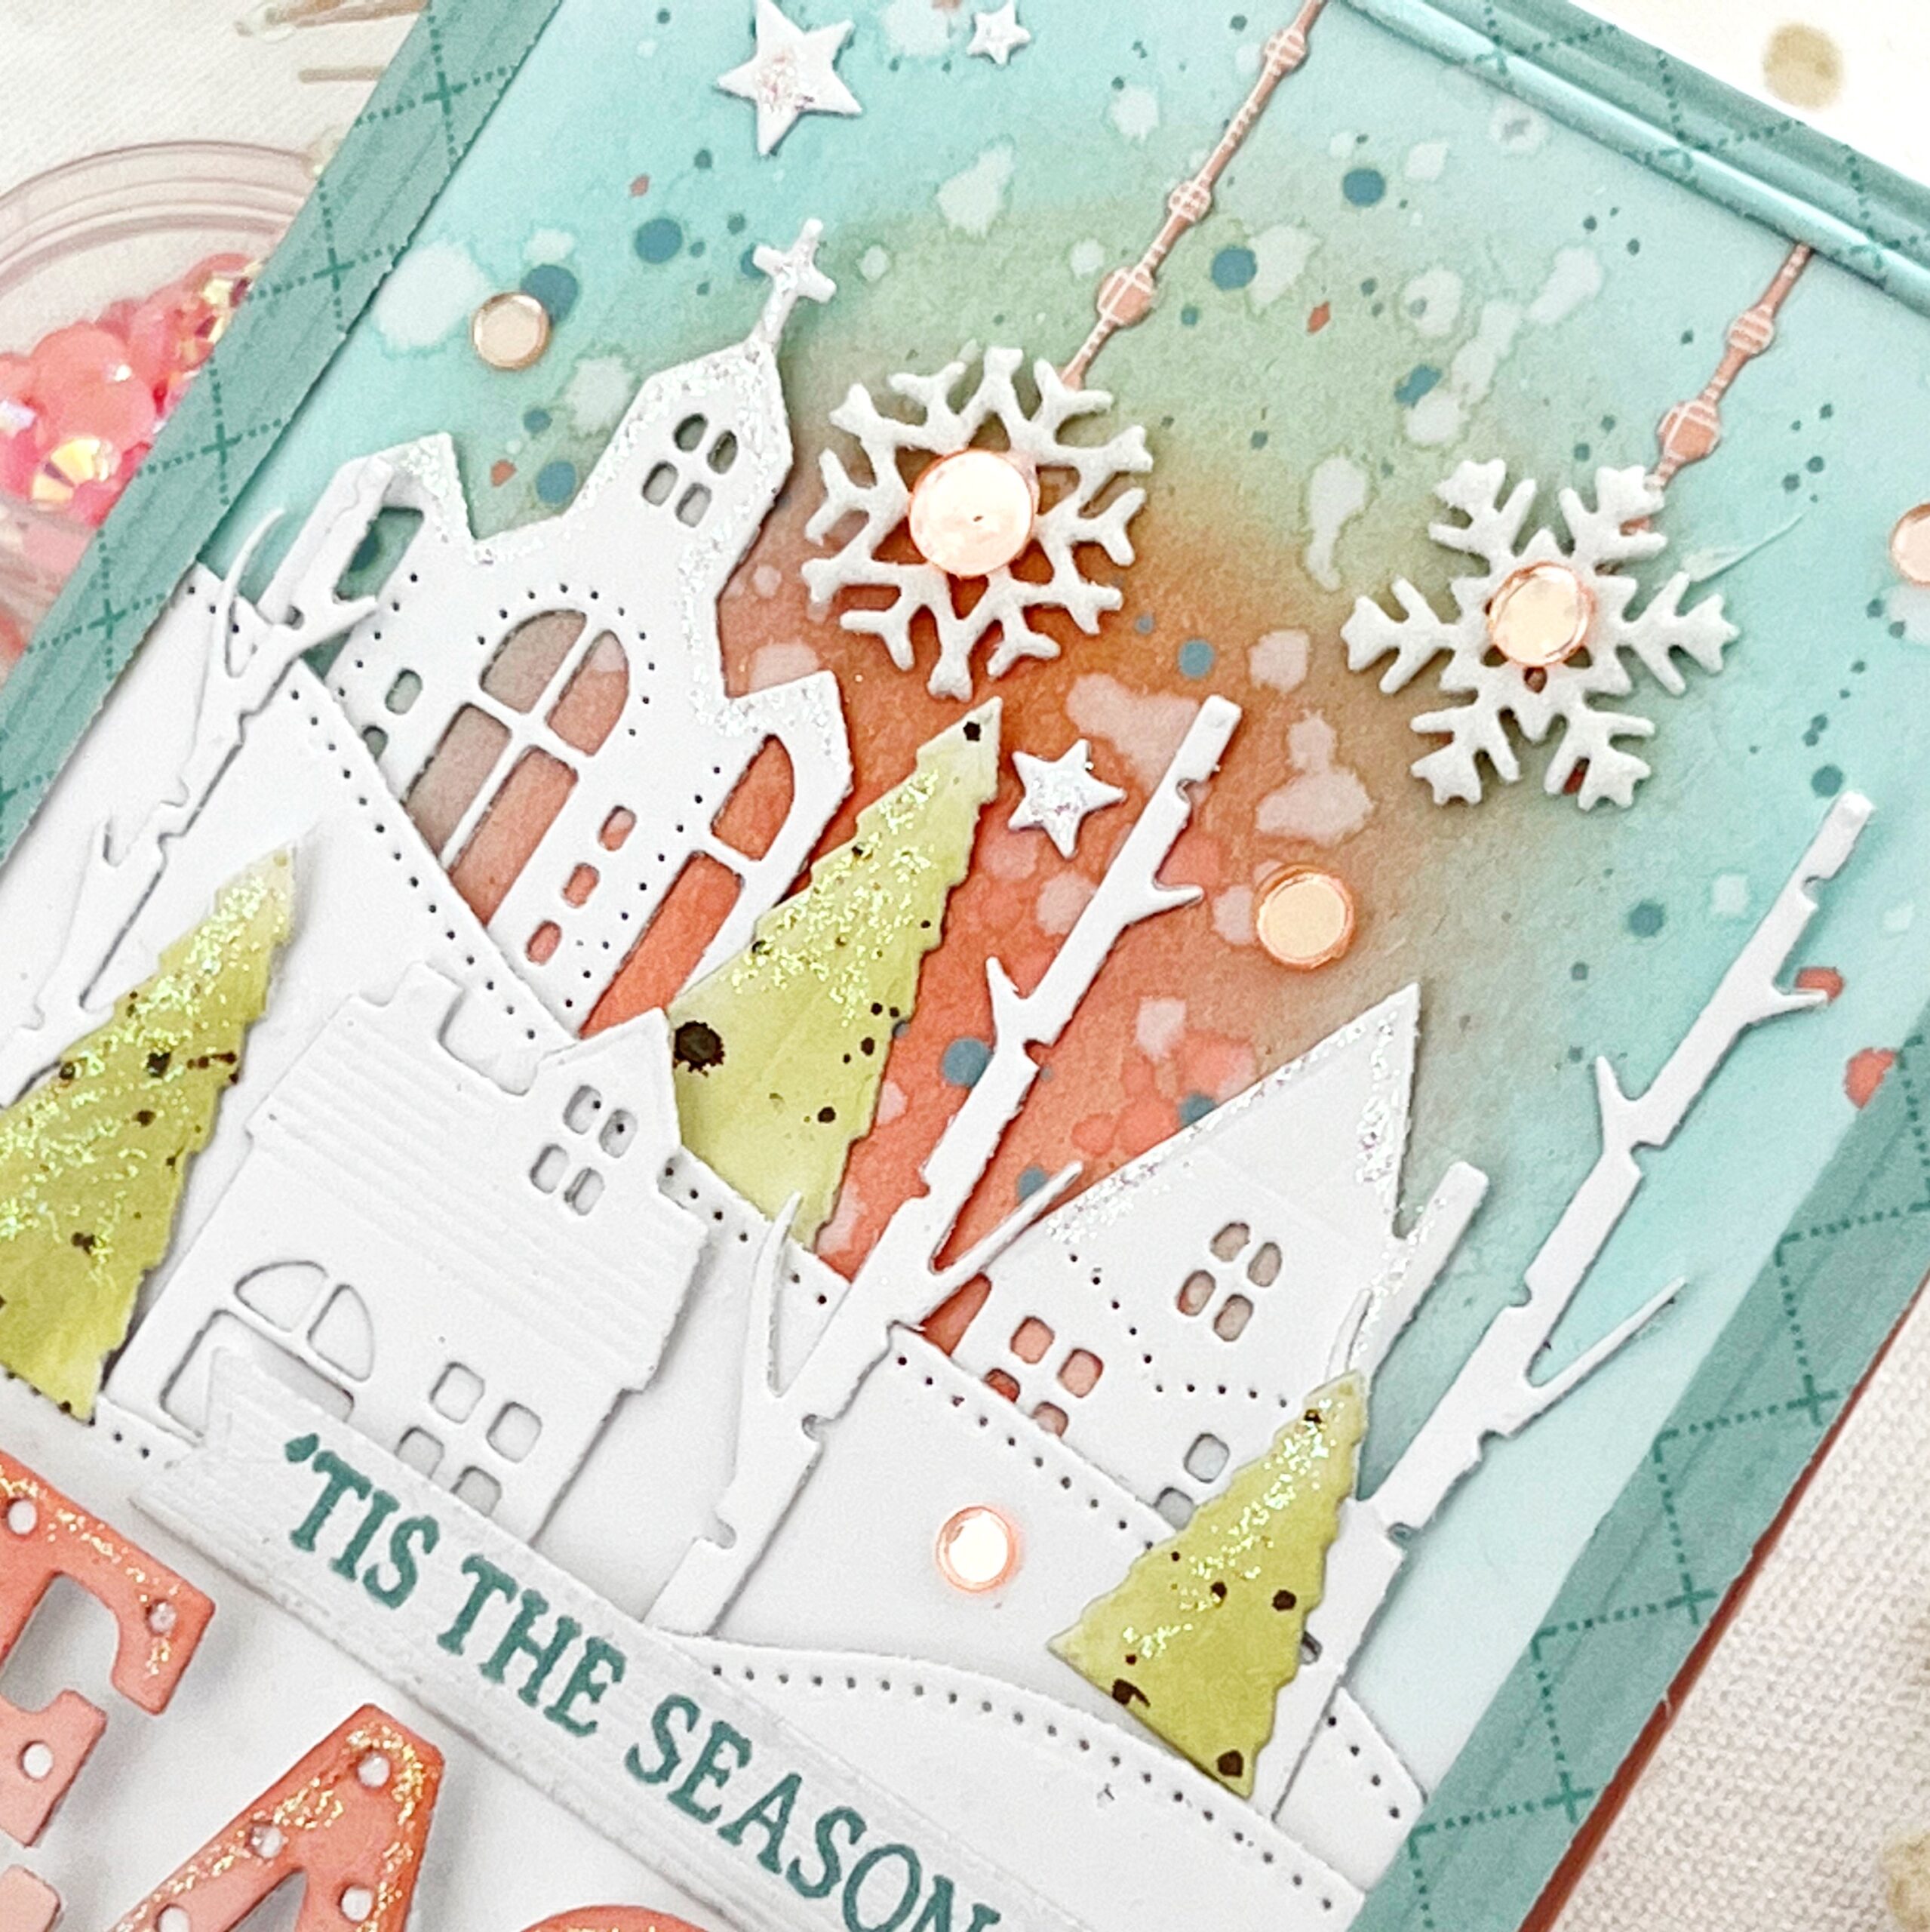
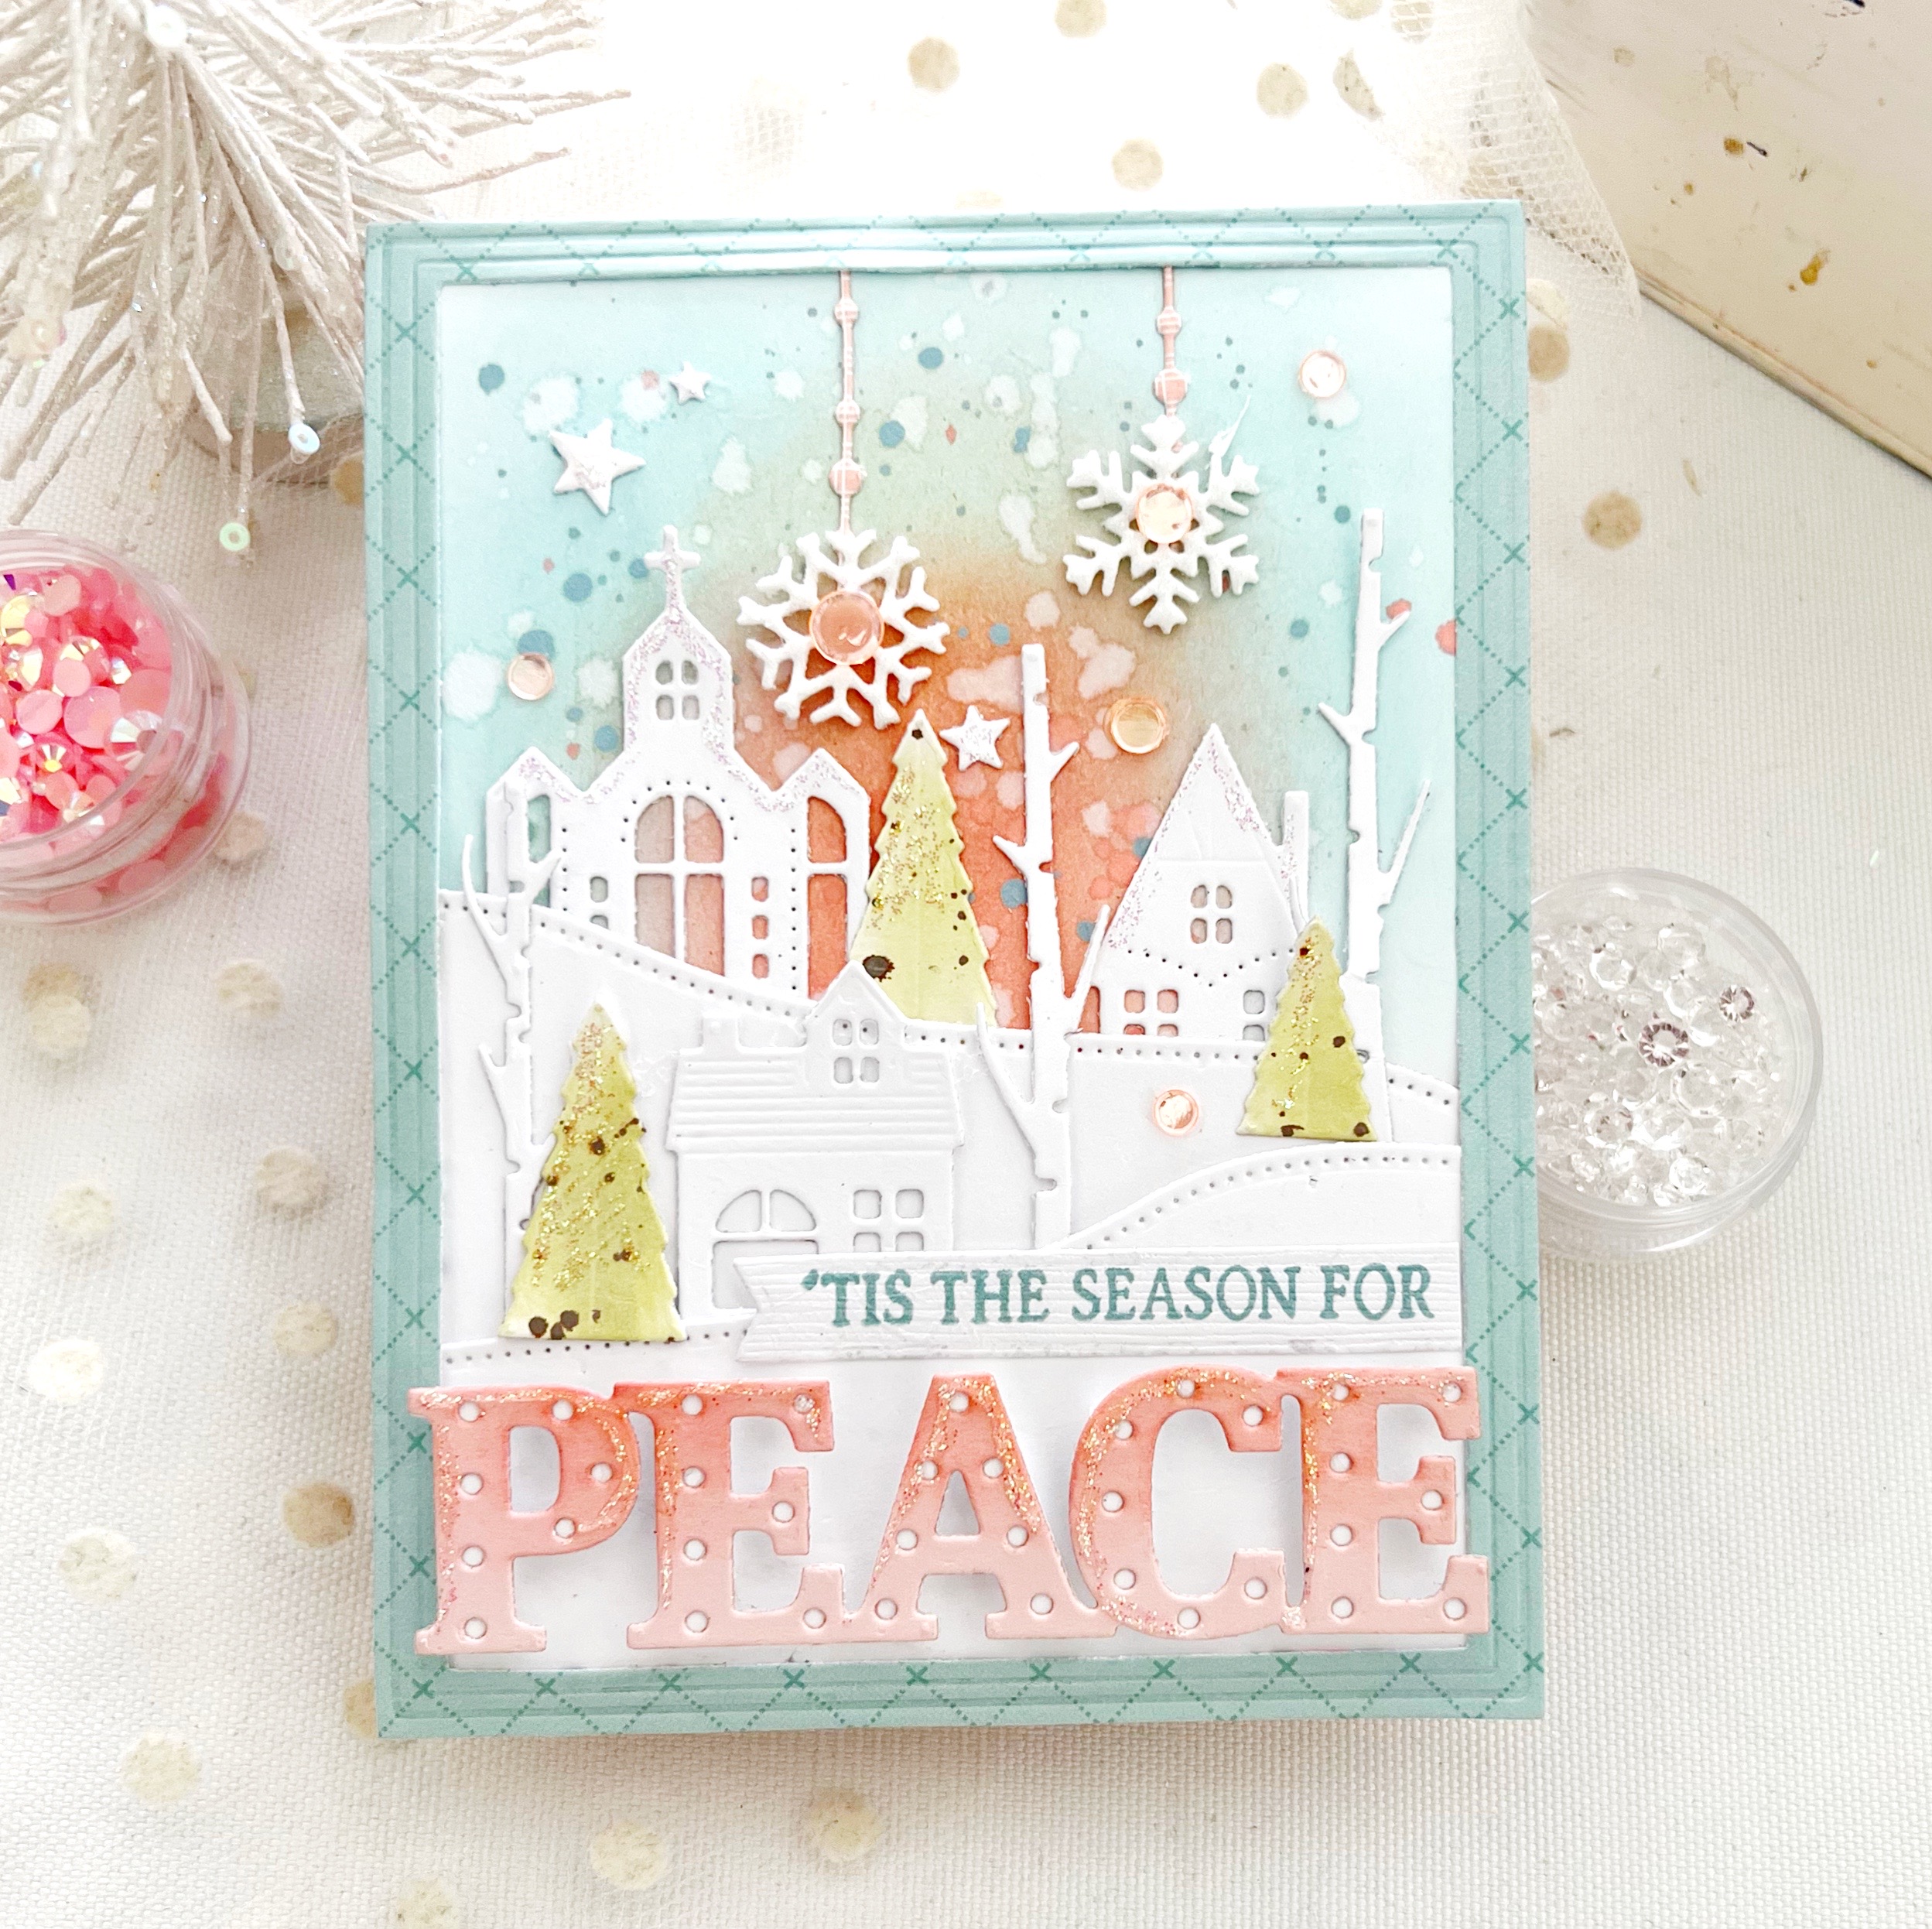
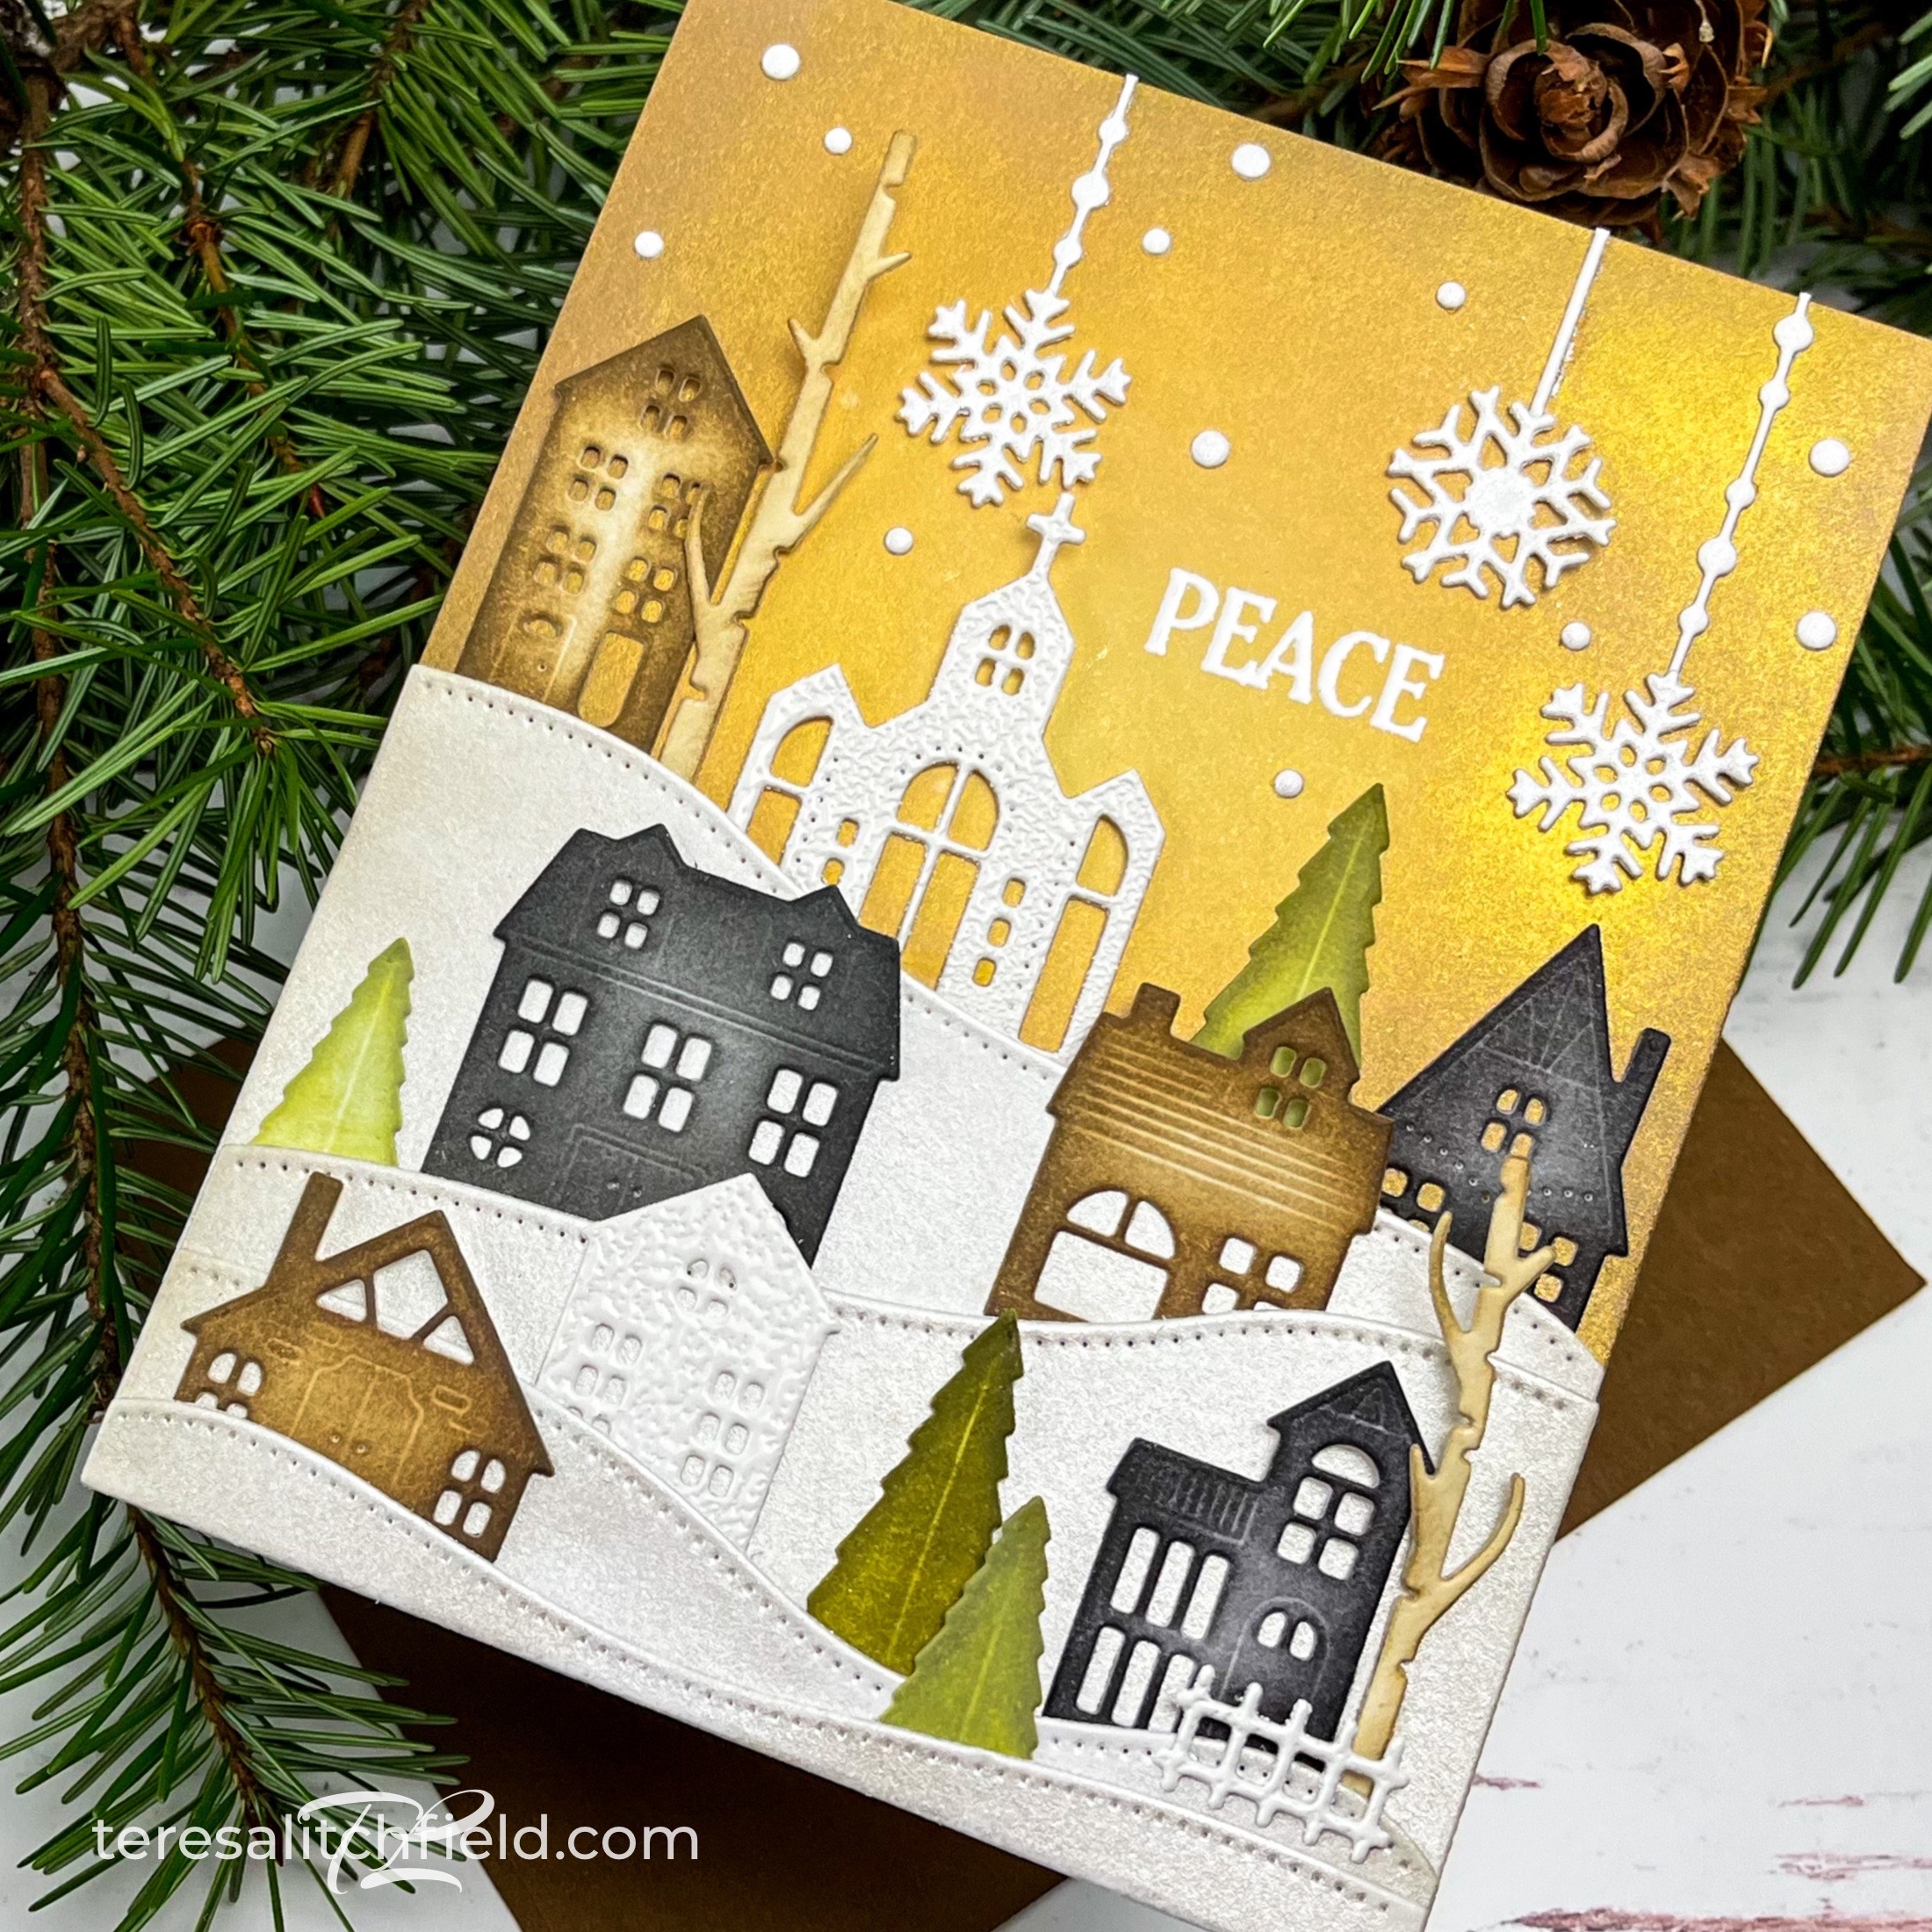
My first card today uses the sweet and serene, new Bring Home the Holidays dies. This new die collection is the perfect scene-builder. There are numerous buildings such as a church, schoolhouse, chalet, houses, etc. to create your tiny village.

You’ll also find aspen tree trunks, which are create the perfect winter accent, pine trees, snowflakes that dangle, a fence, snowdrifts, and stars. It’s such a dream to create with! I decided to die cut my buildings from white cardstock and leave them bare so they’d stand out from the background a bit. But, some color was missing, so I sponged ink over my pine trees and added some splattering and glitter, and felt it was just what I needed.
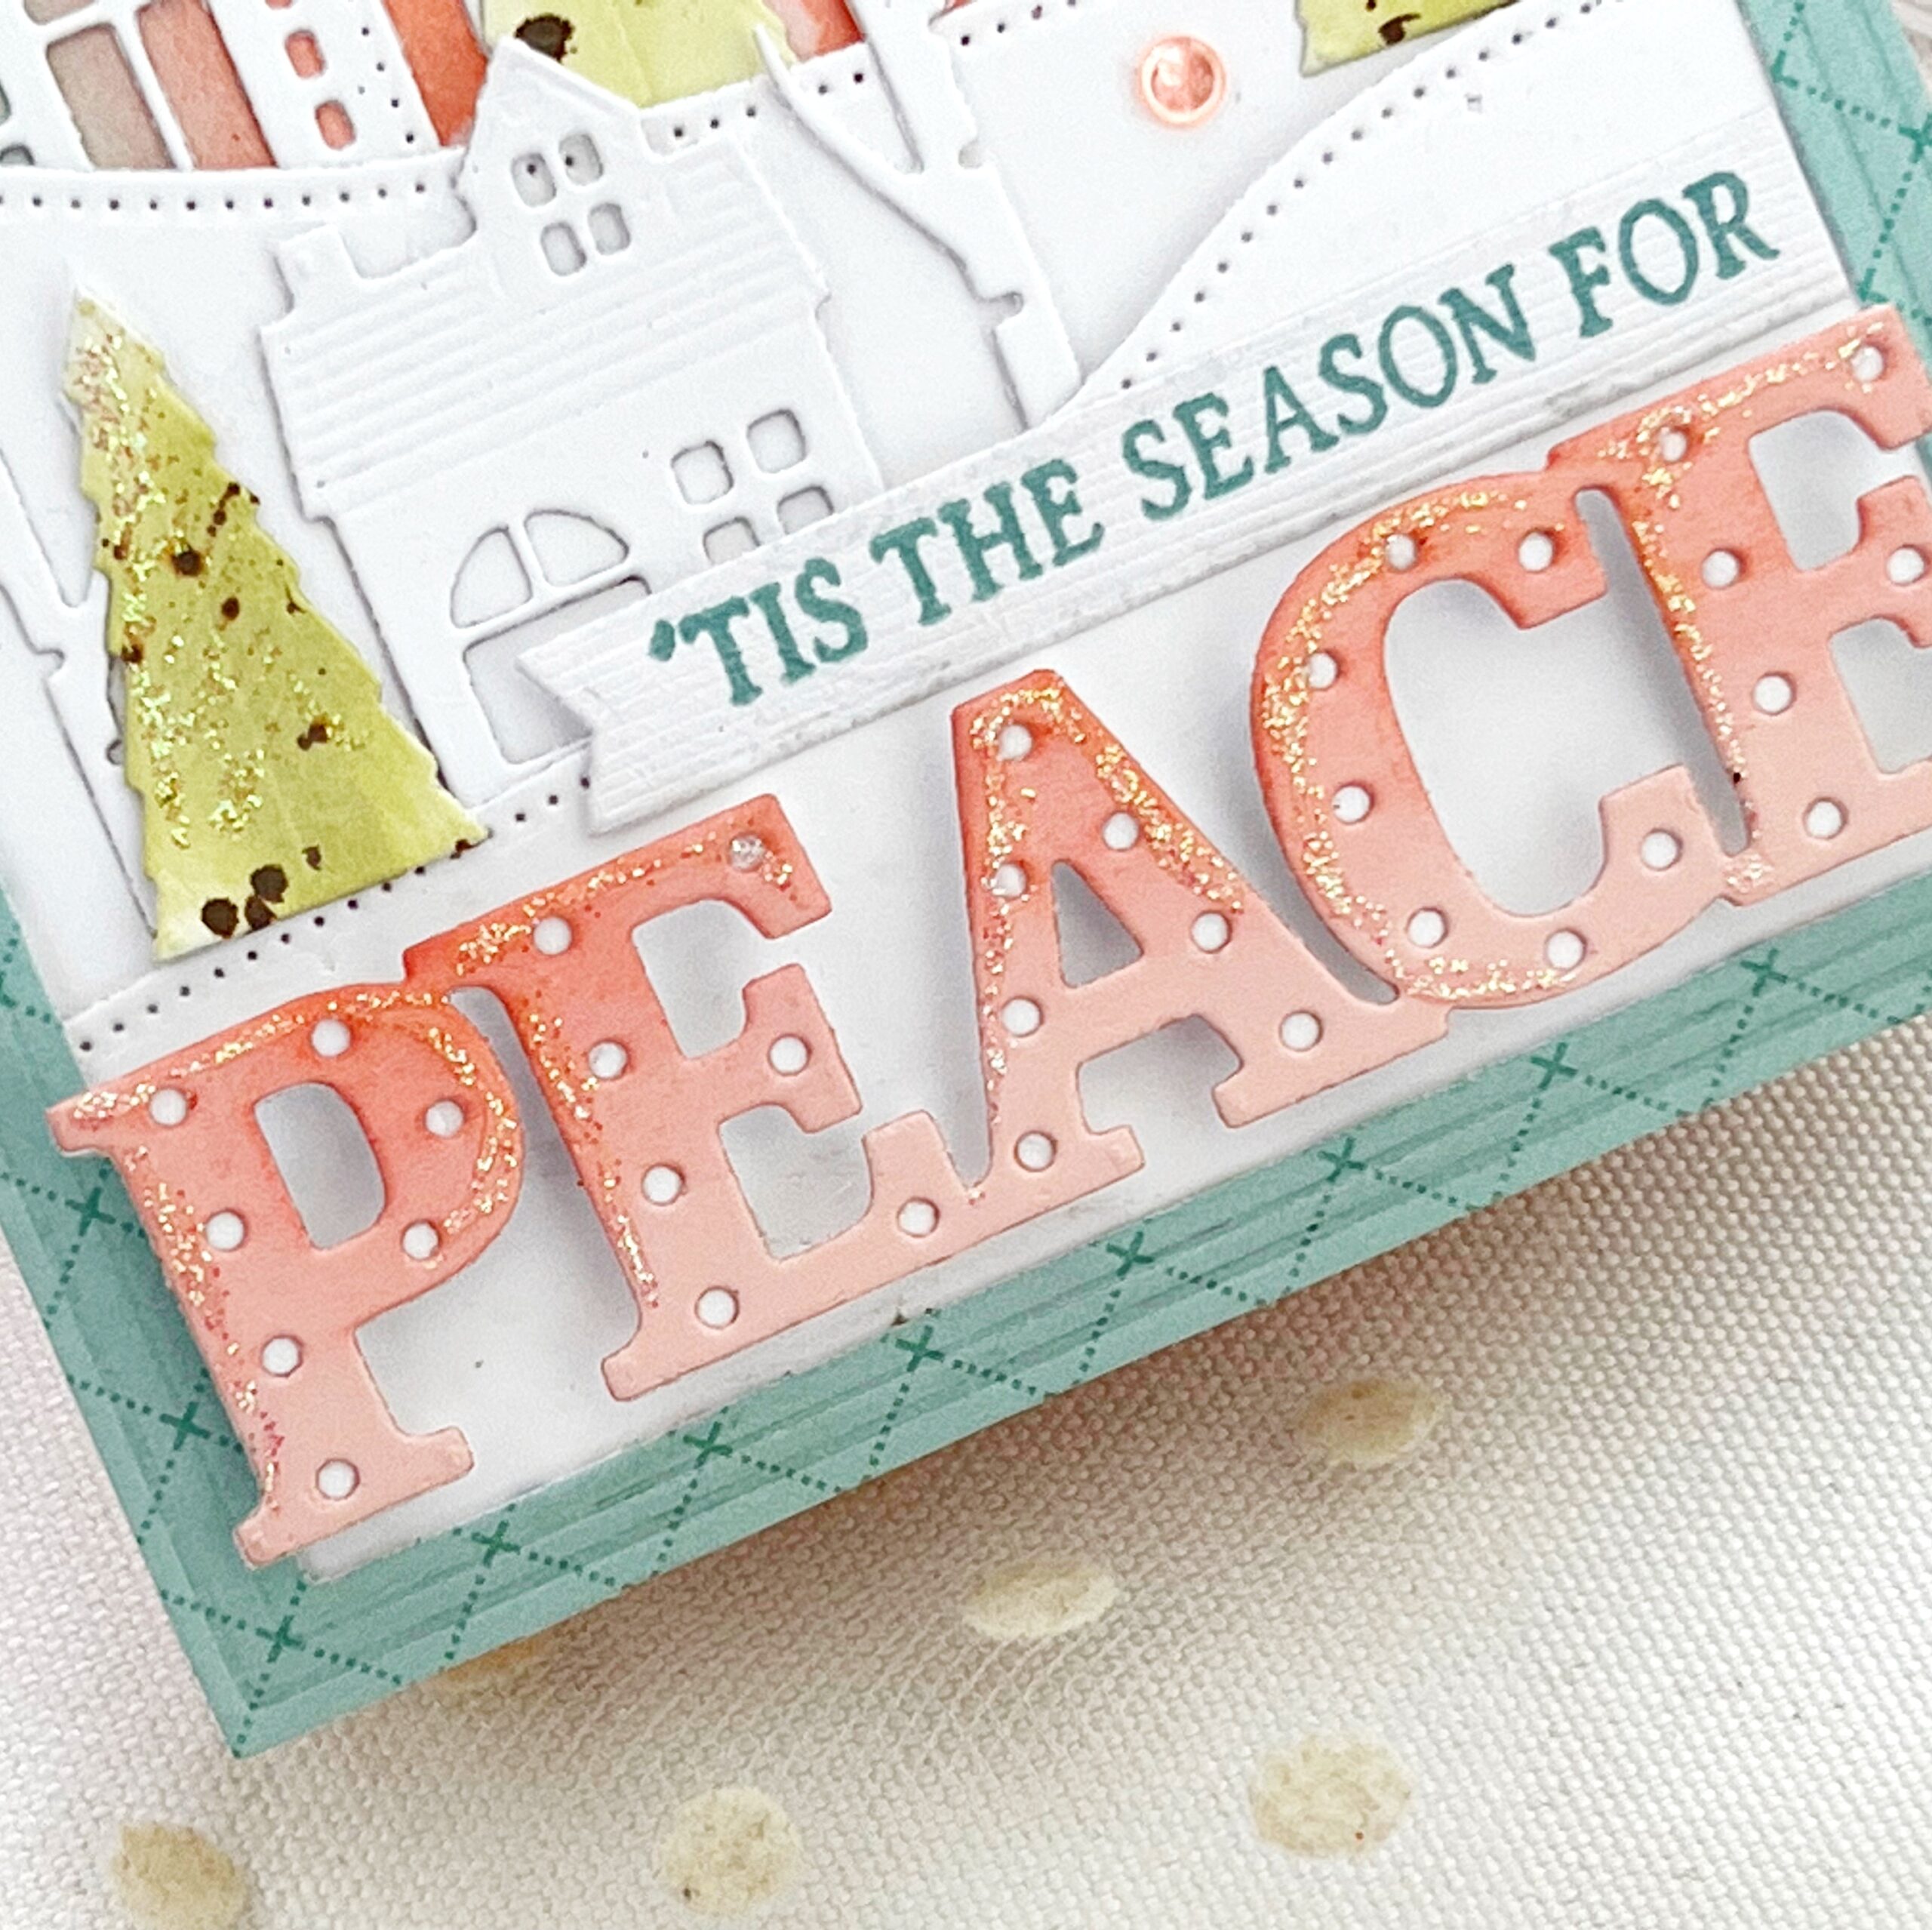
For my sentiment, I used the new Larger Than Life: Peace die and Larger Than Life: Peace Sentiments stamp set. These new products are such a lovely pair and so much fun to mix and match. I don’t know about you, but I love large, jumbo sentiment dies!
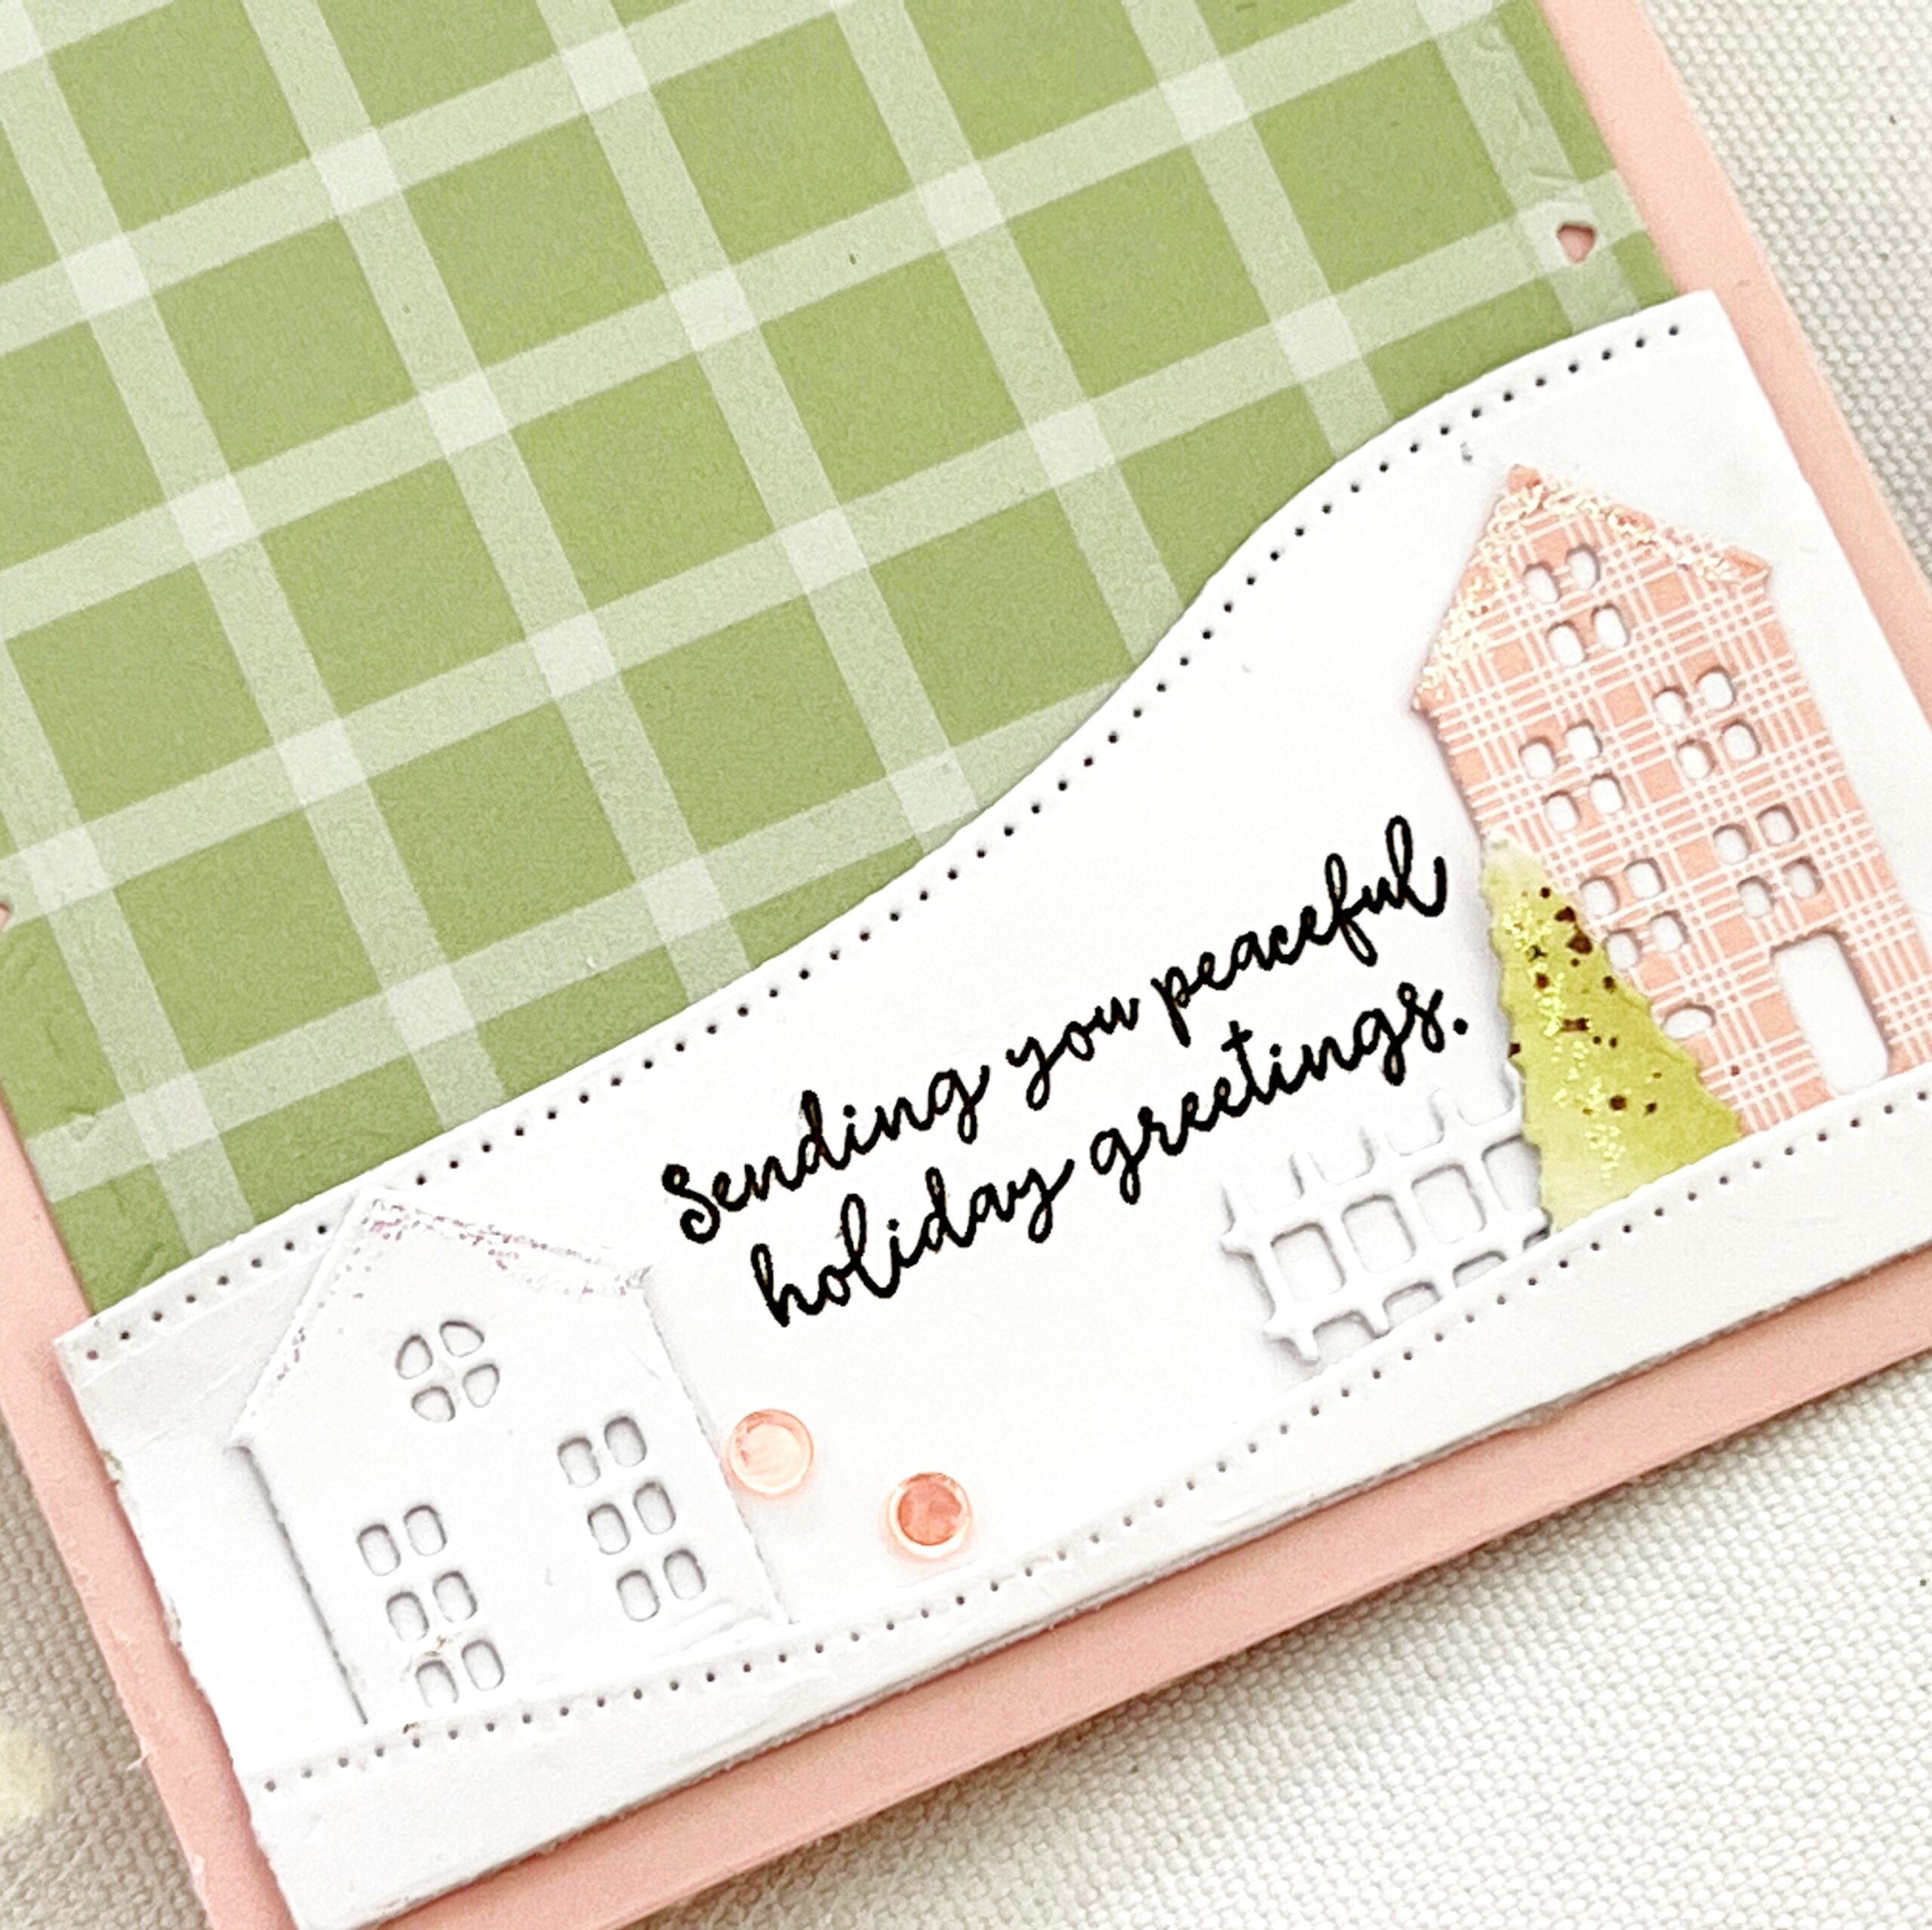
I wanted to bring some of the outside elements of my card into the inside, so I added a snowdrift, houses, a fence, pine tree, and a sentiment from the new Inside Greetings: Peace stamp set. I have been having the best time finishing the inside of my cards this month. I think it’s a treat to receive a card finished on the inside!
Supplies Used:
STAMPS: Larger Than Life: Peace Sentiments
INK: Melon Berry, Pale Peony, Aqua Mist, Green Parakeet, Ocean Tides, Olive Twist
PAPER: Stamper’s Select White, Bitty Big Pale Peony
DIES: Bring Home the Holidays, Larger Than Life: Peace, Border Bling: Skinny Embossed Frames, Love to Layer: Aztec
OTHER: Foam glitter, Moonshine sequins, Stickles glitter, patterned paper, Distress Spray
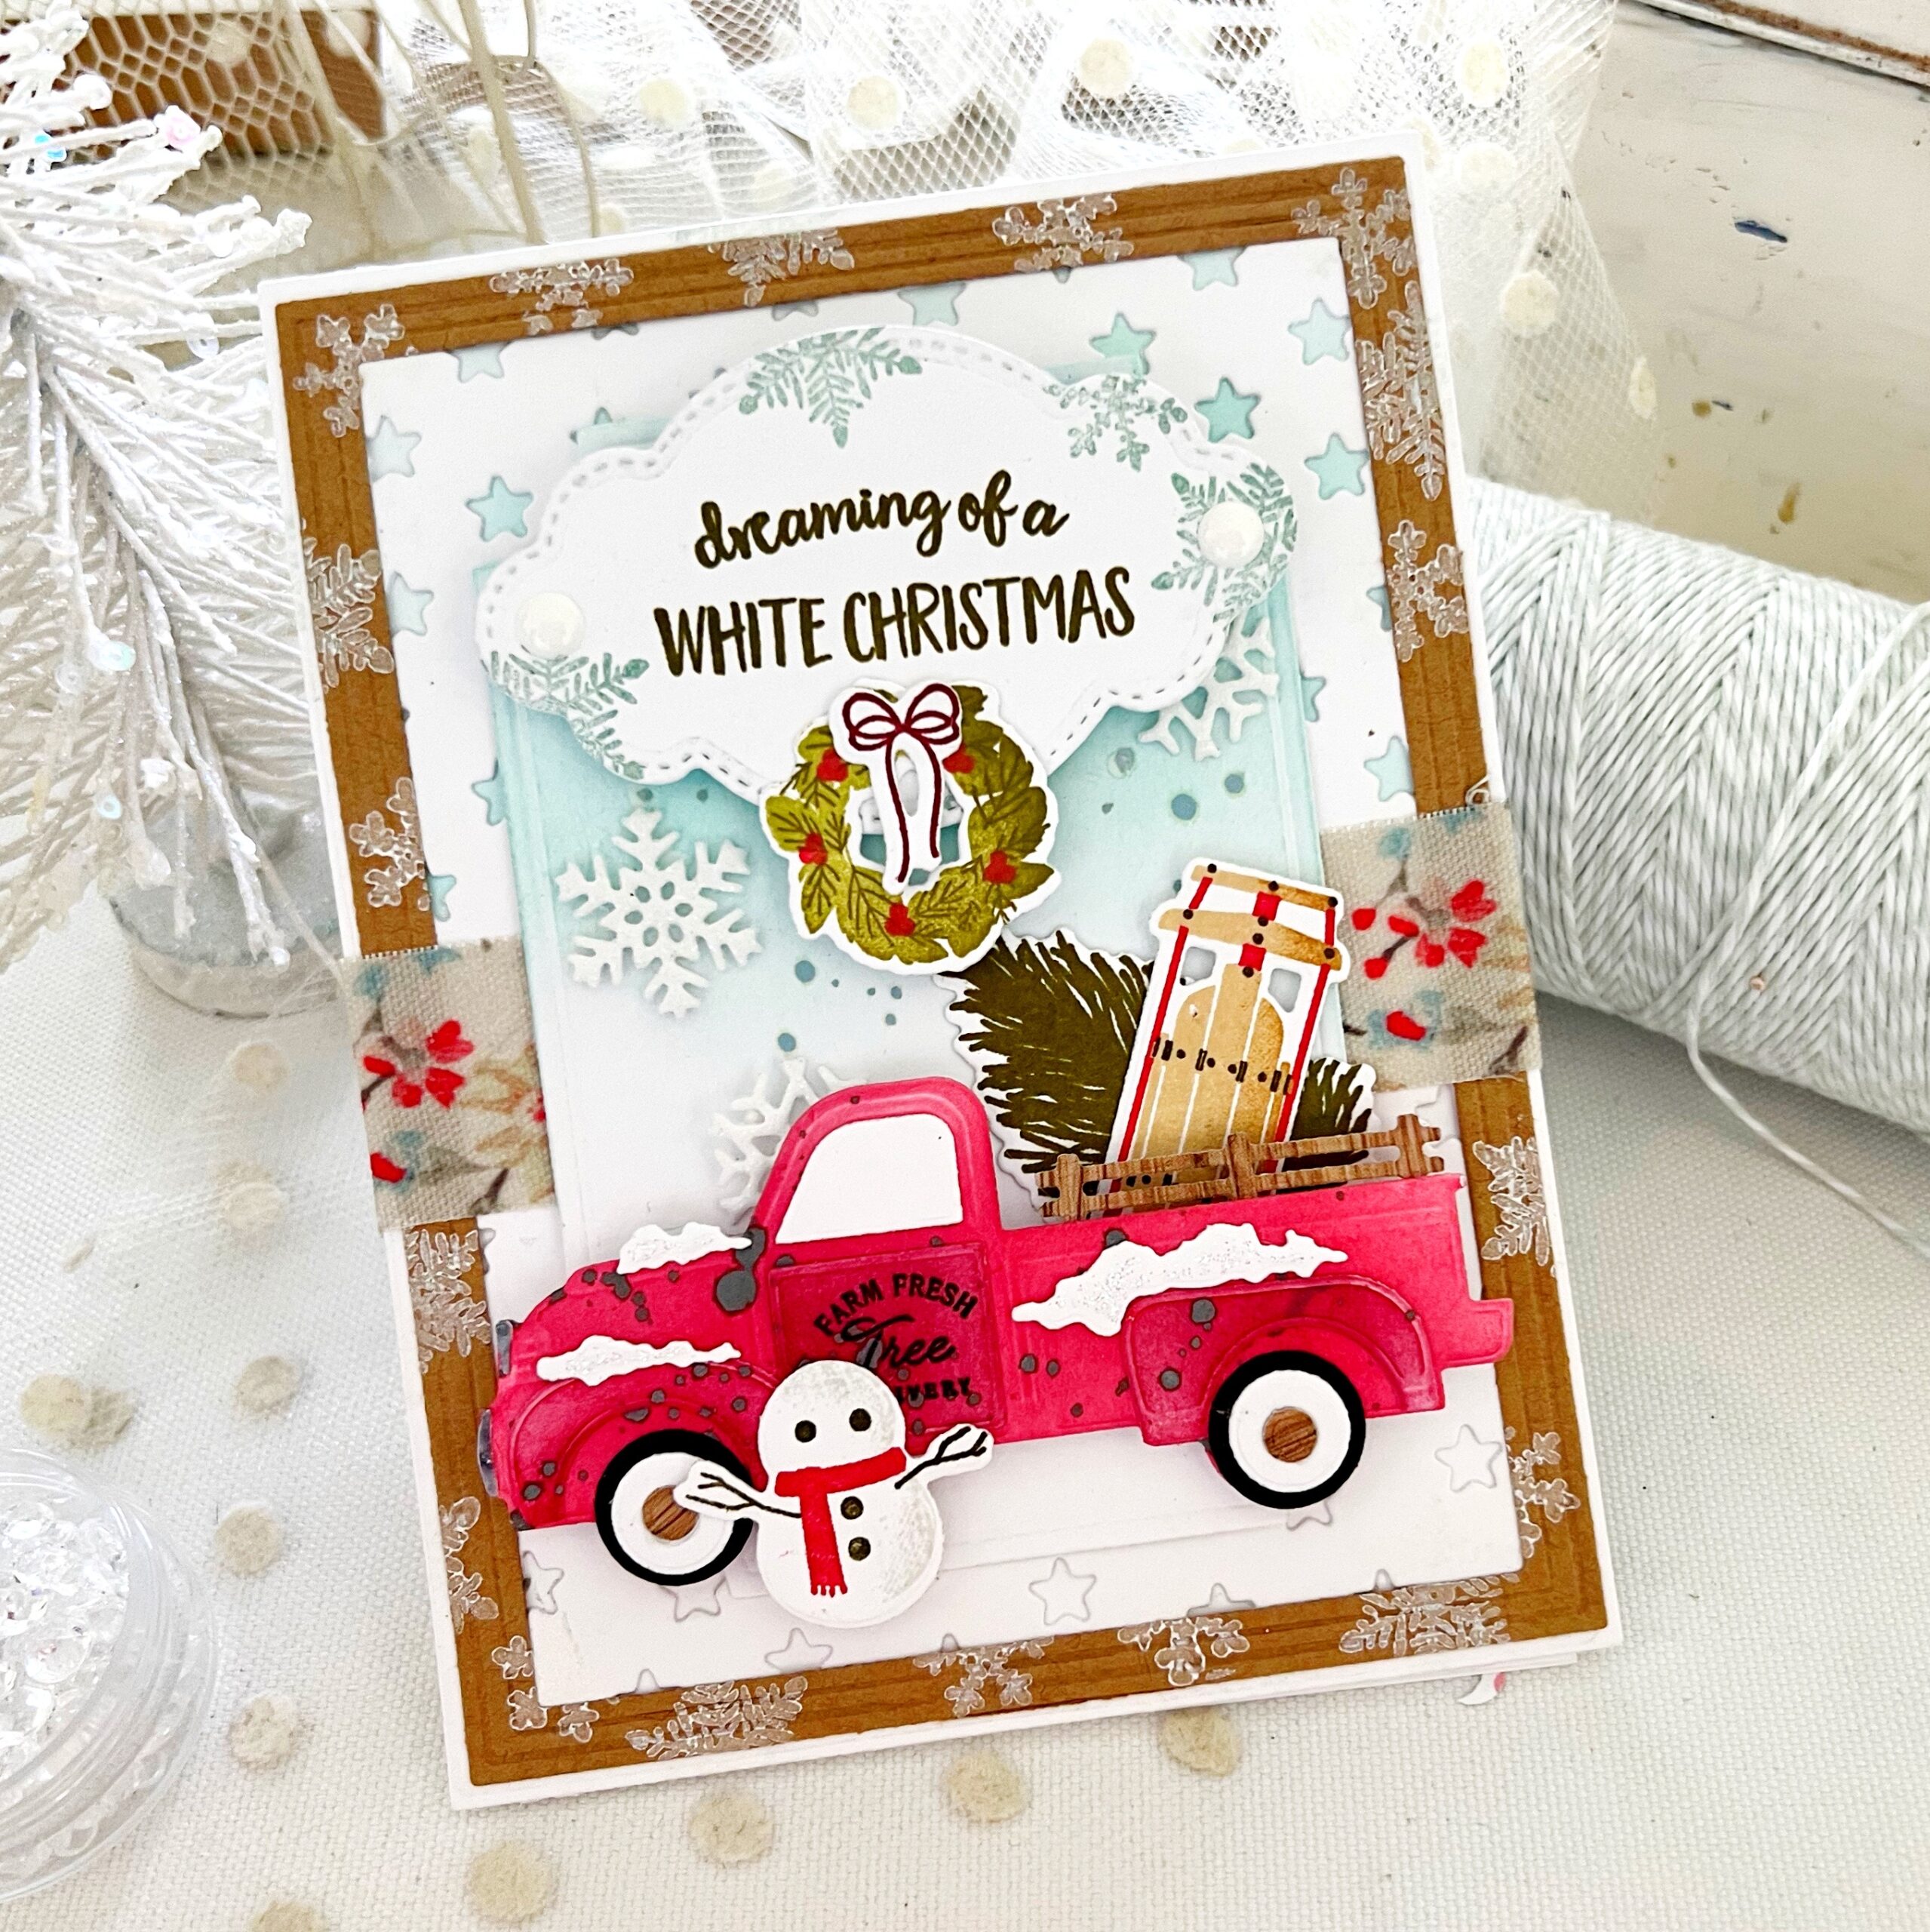
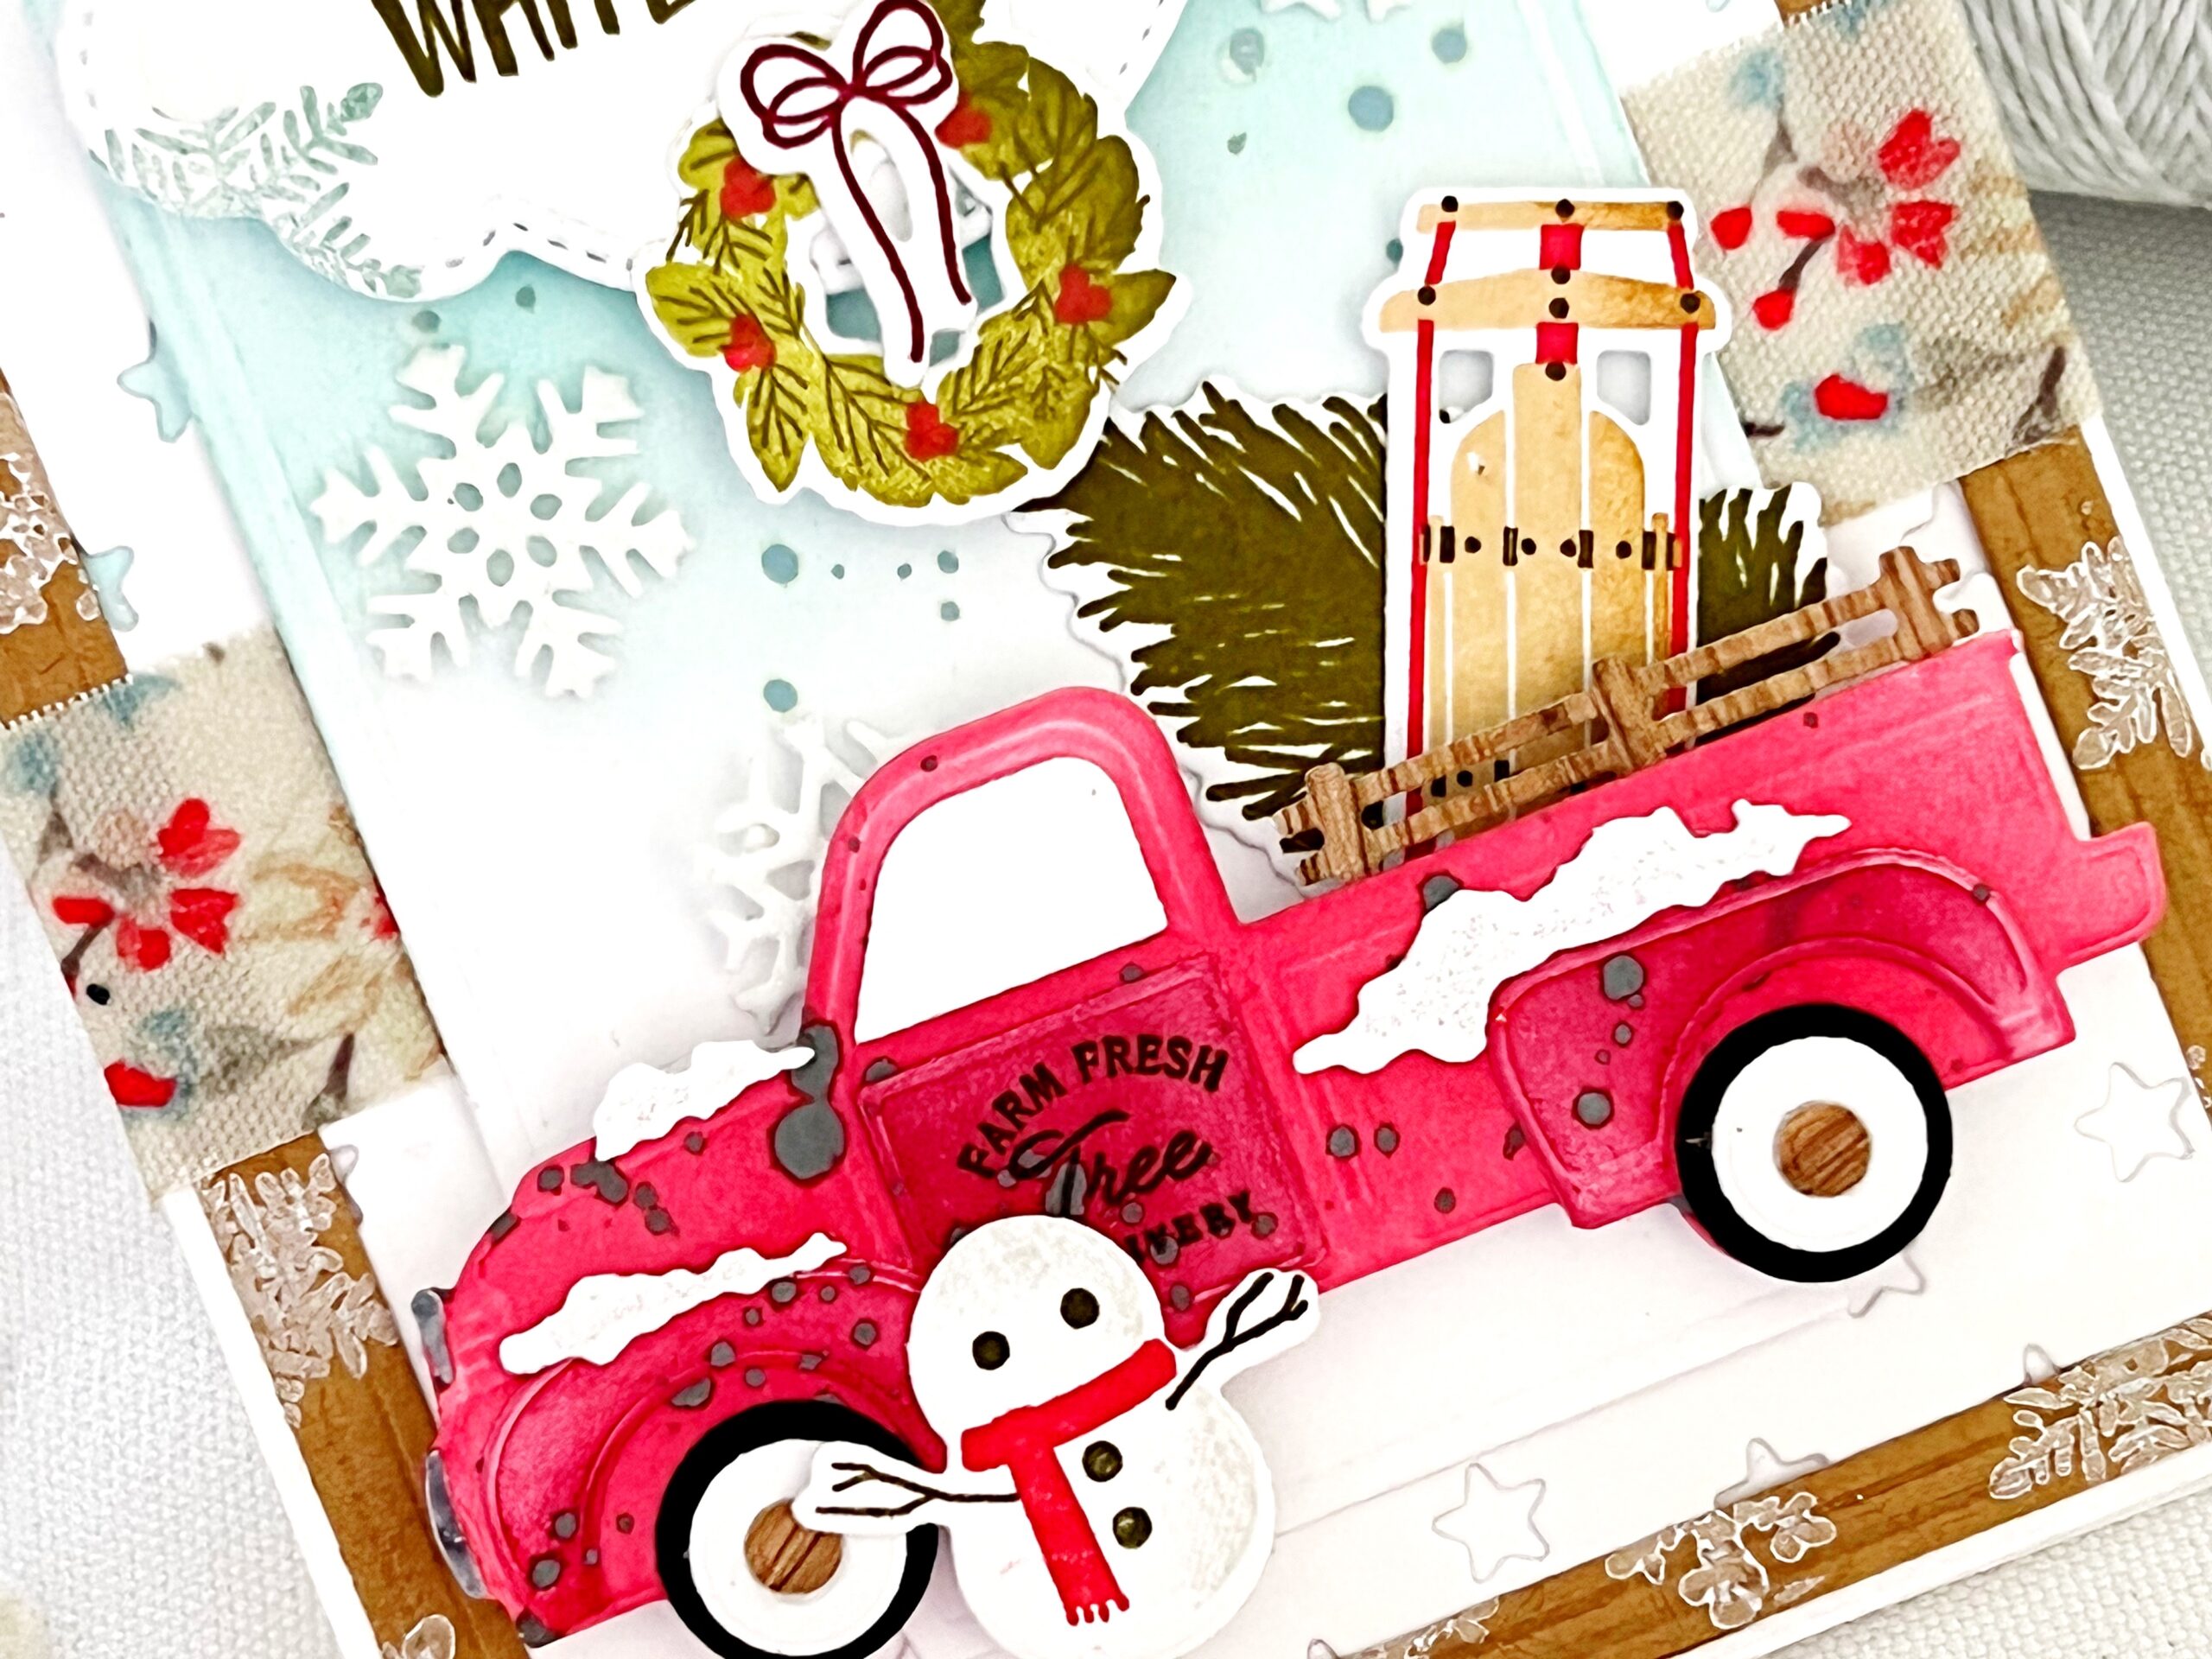
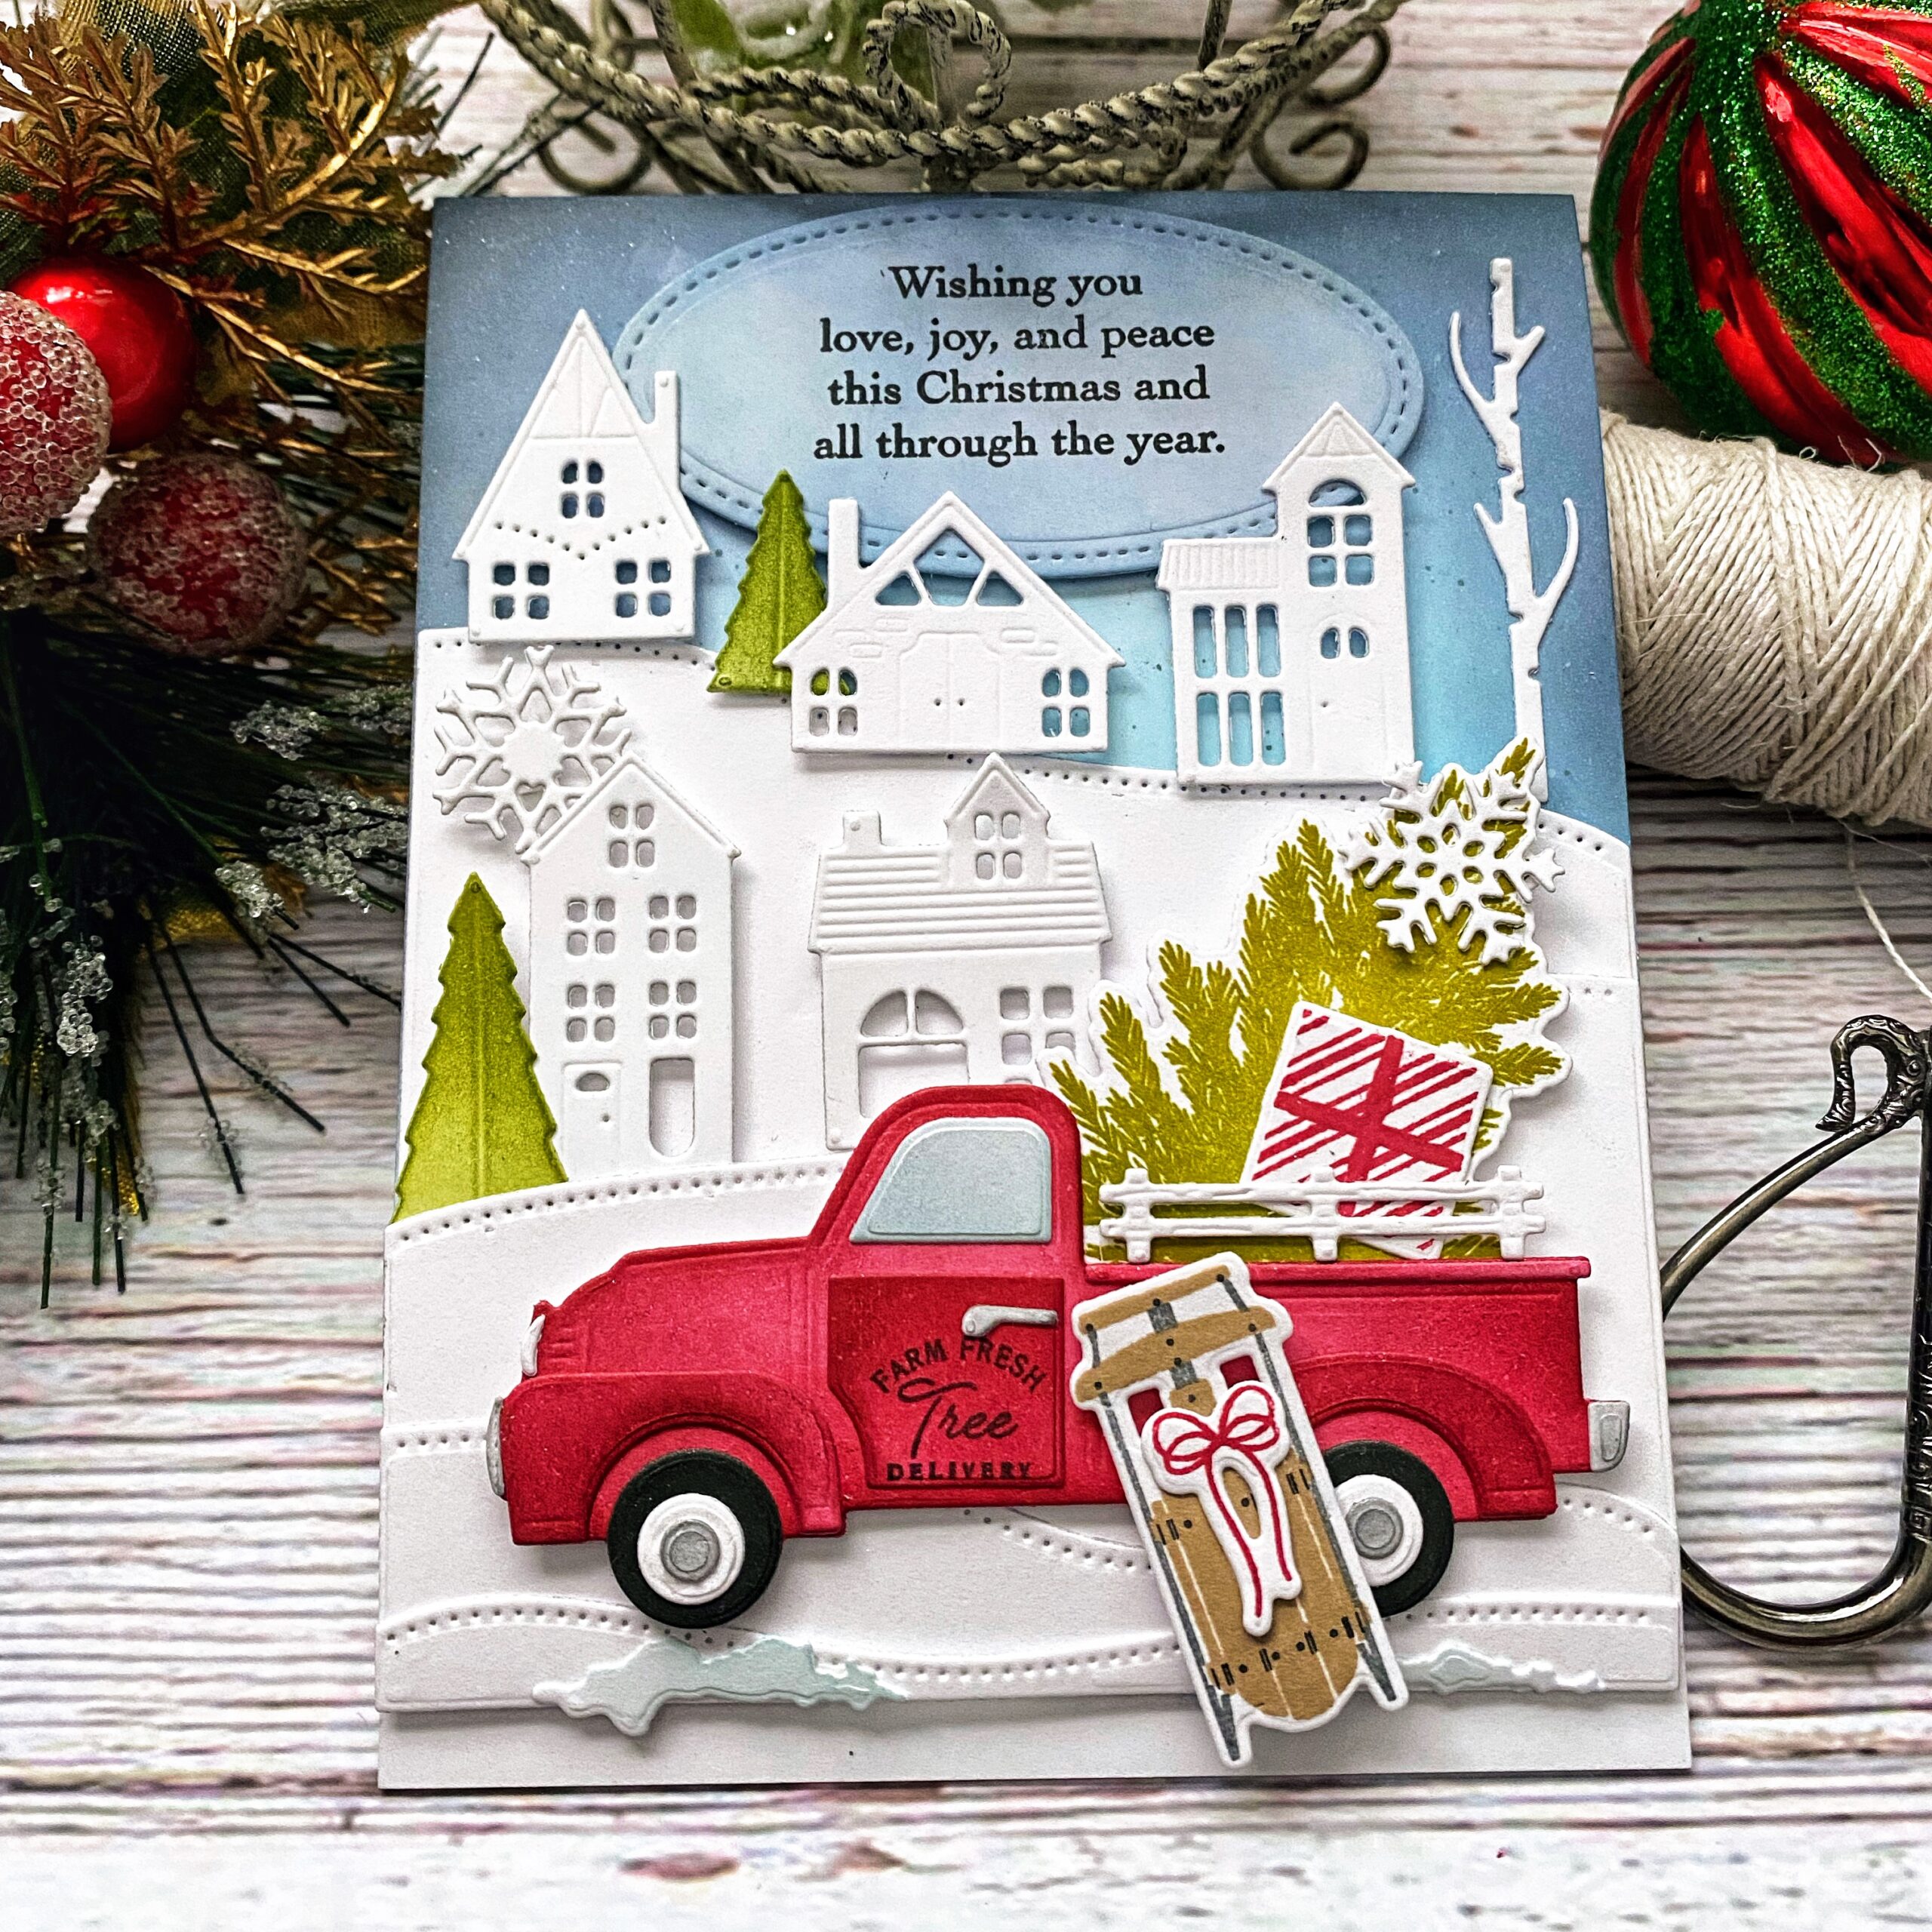
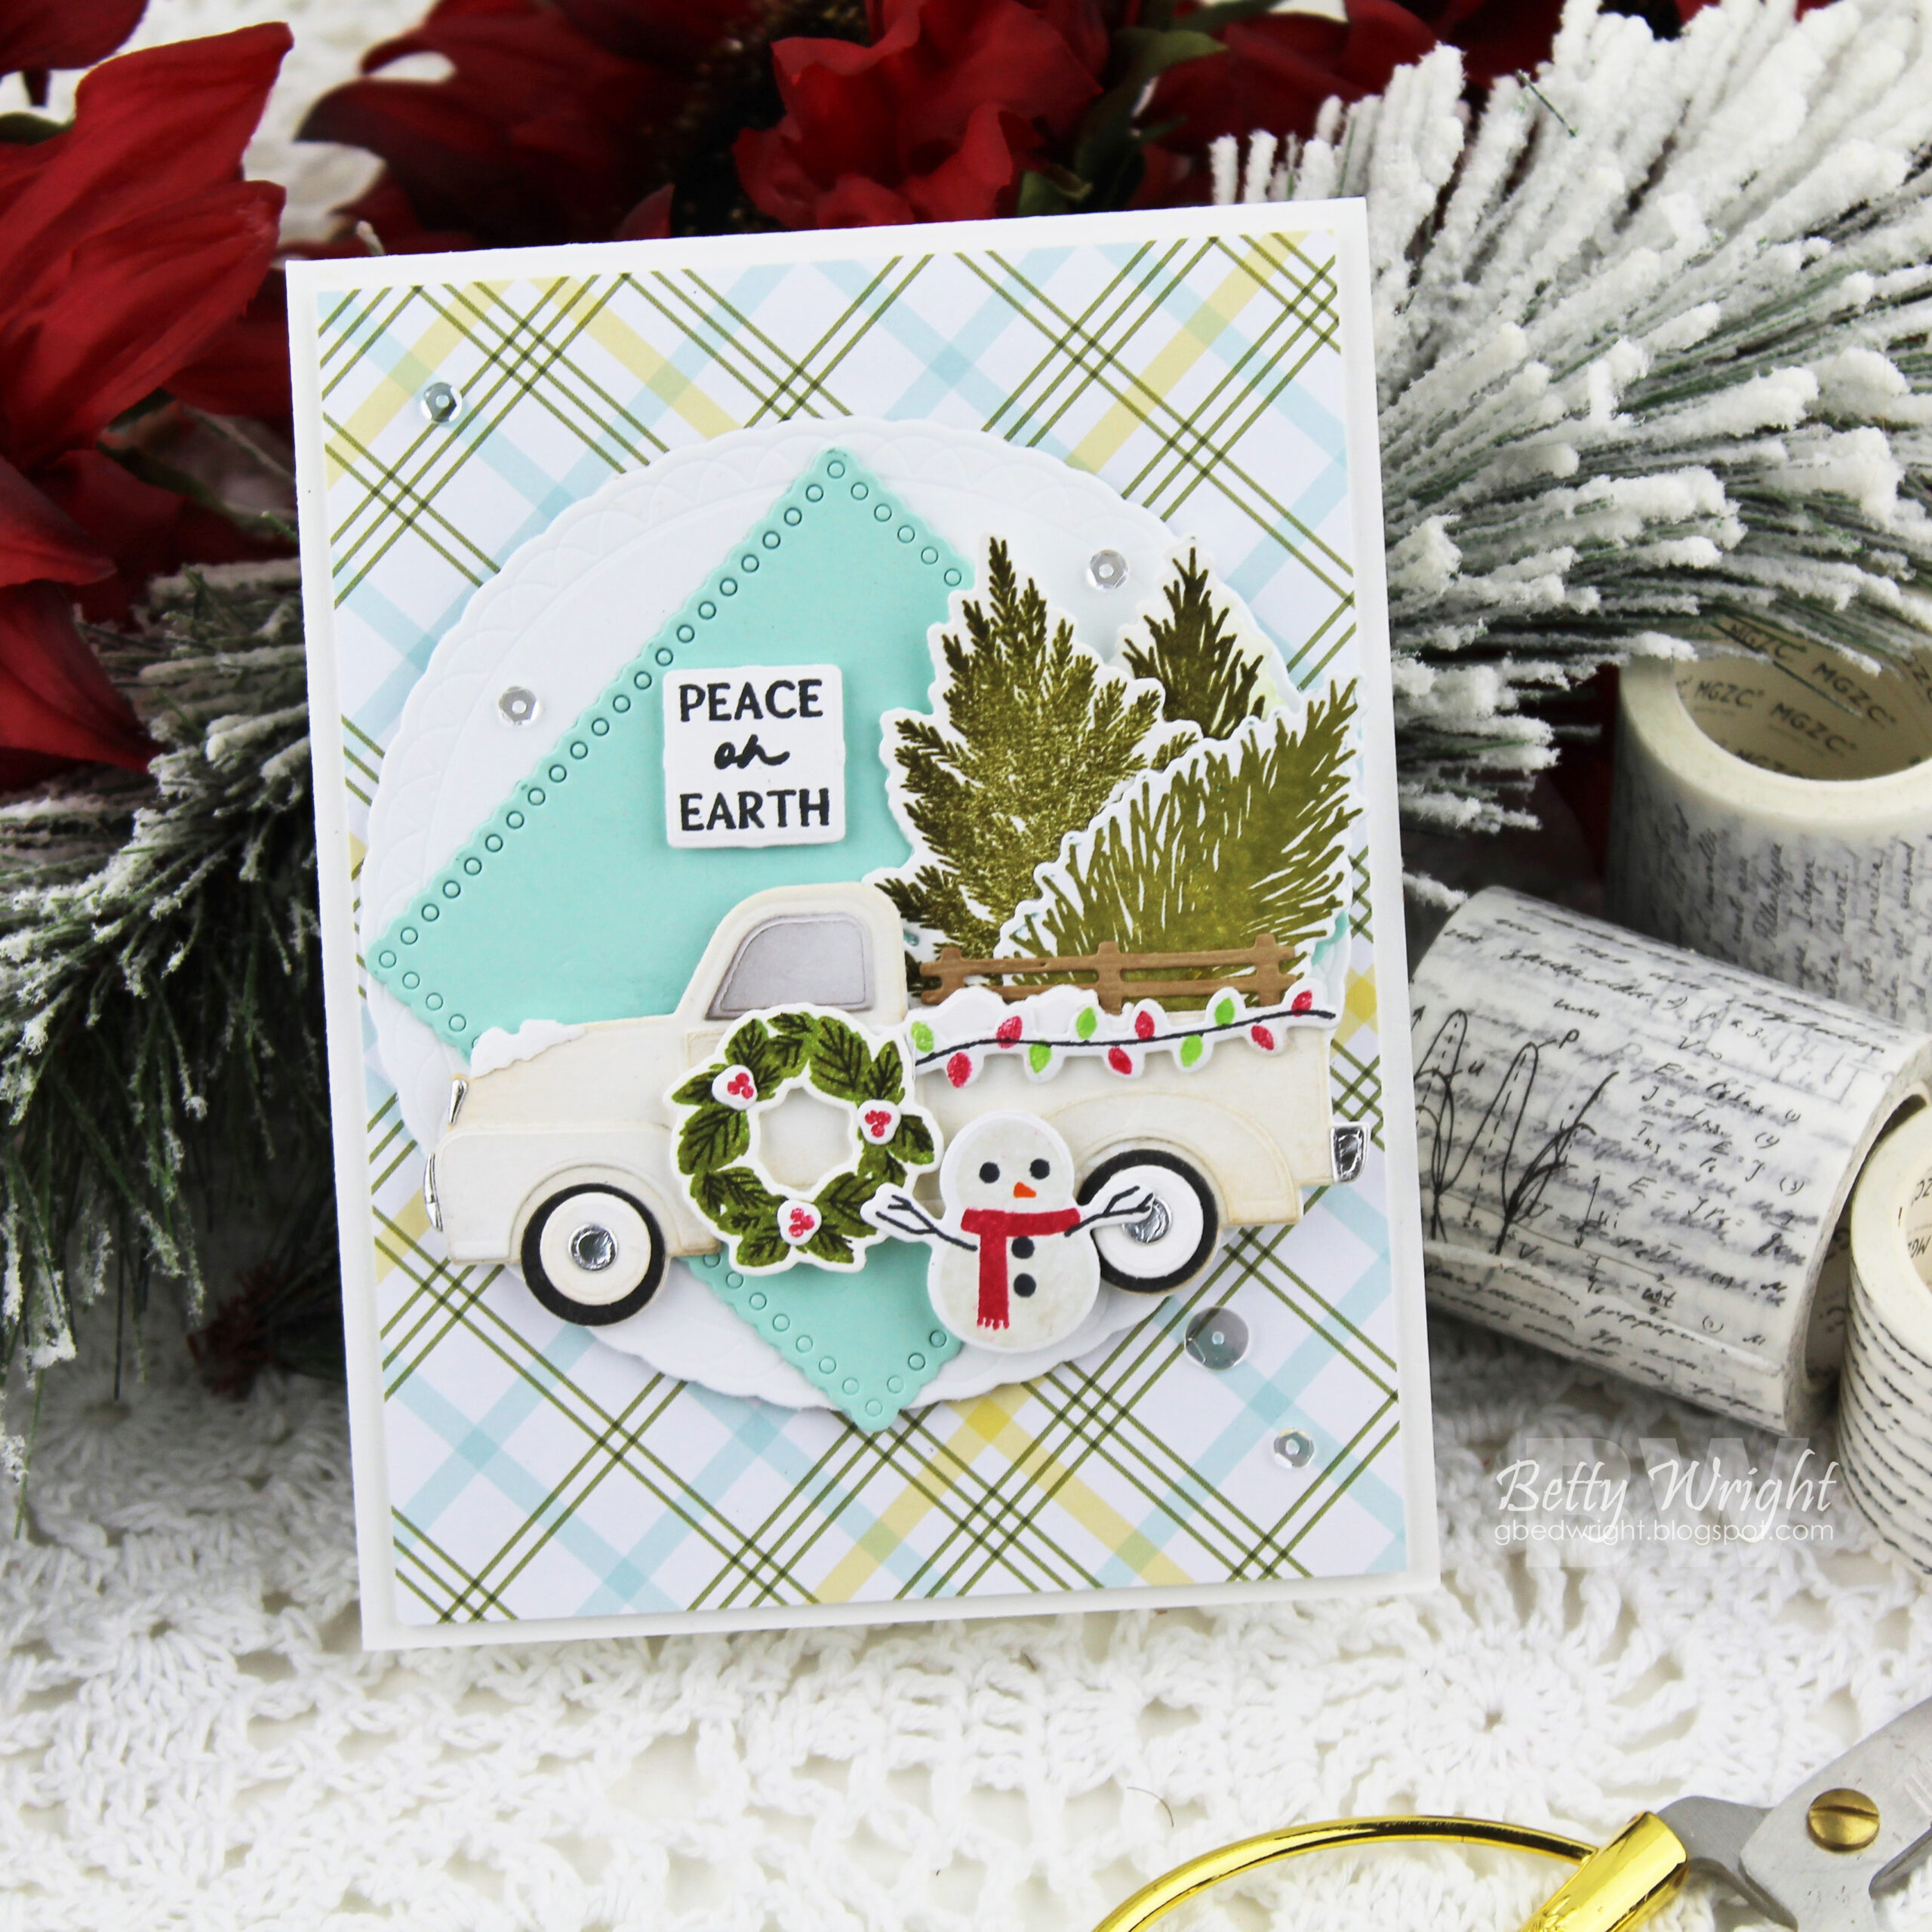
My next card uses the new Snowy Truck Accessories stamp set and dies. Remember the cute pickup truck from the Patriot Die Collection? Well, we’ve taken the truck and created some holiday and winter-themed accessories for it and they are pretty irresistible!

The Snowy Truck Accessories comes with trees to load in your pickup, little piles of snow, a snowman, sled, wreath, sign for the door of the truck, presents, bow, a string of lights, and more. I adore the wooden rack you can place in the truck bed to give it that old-time look and feel.
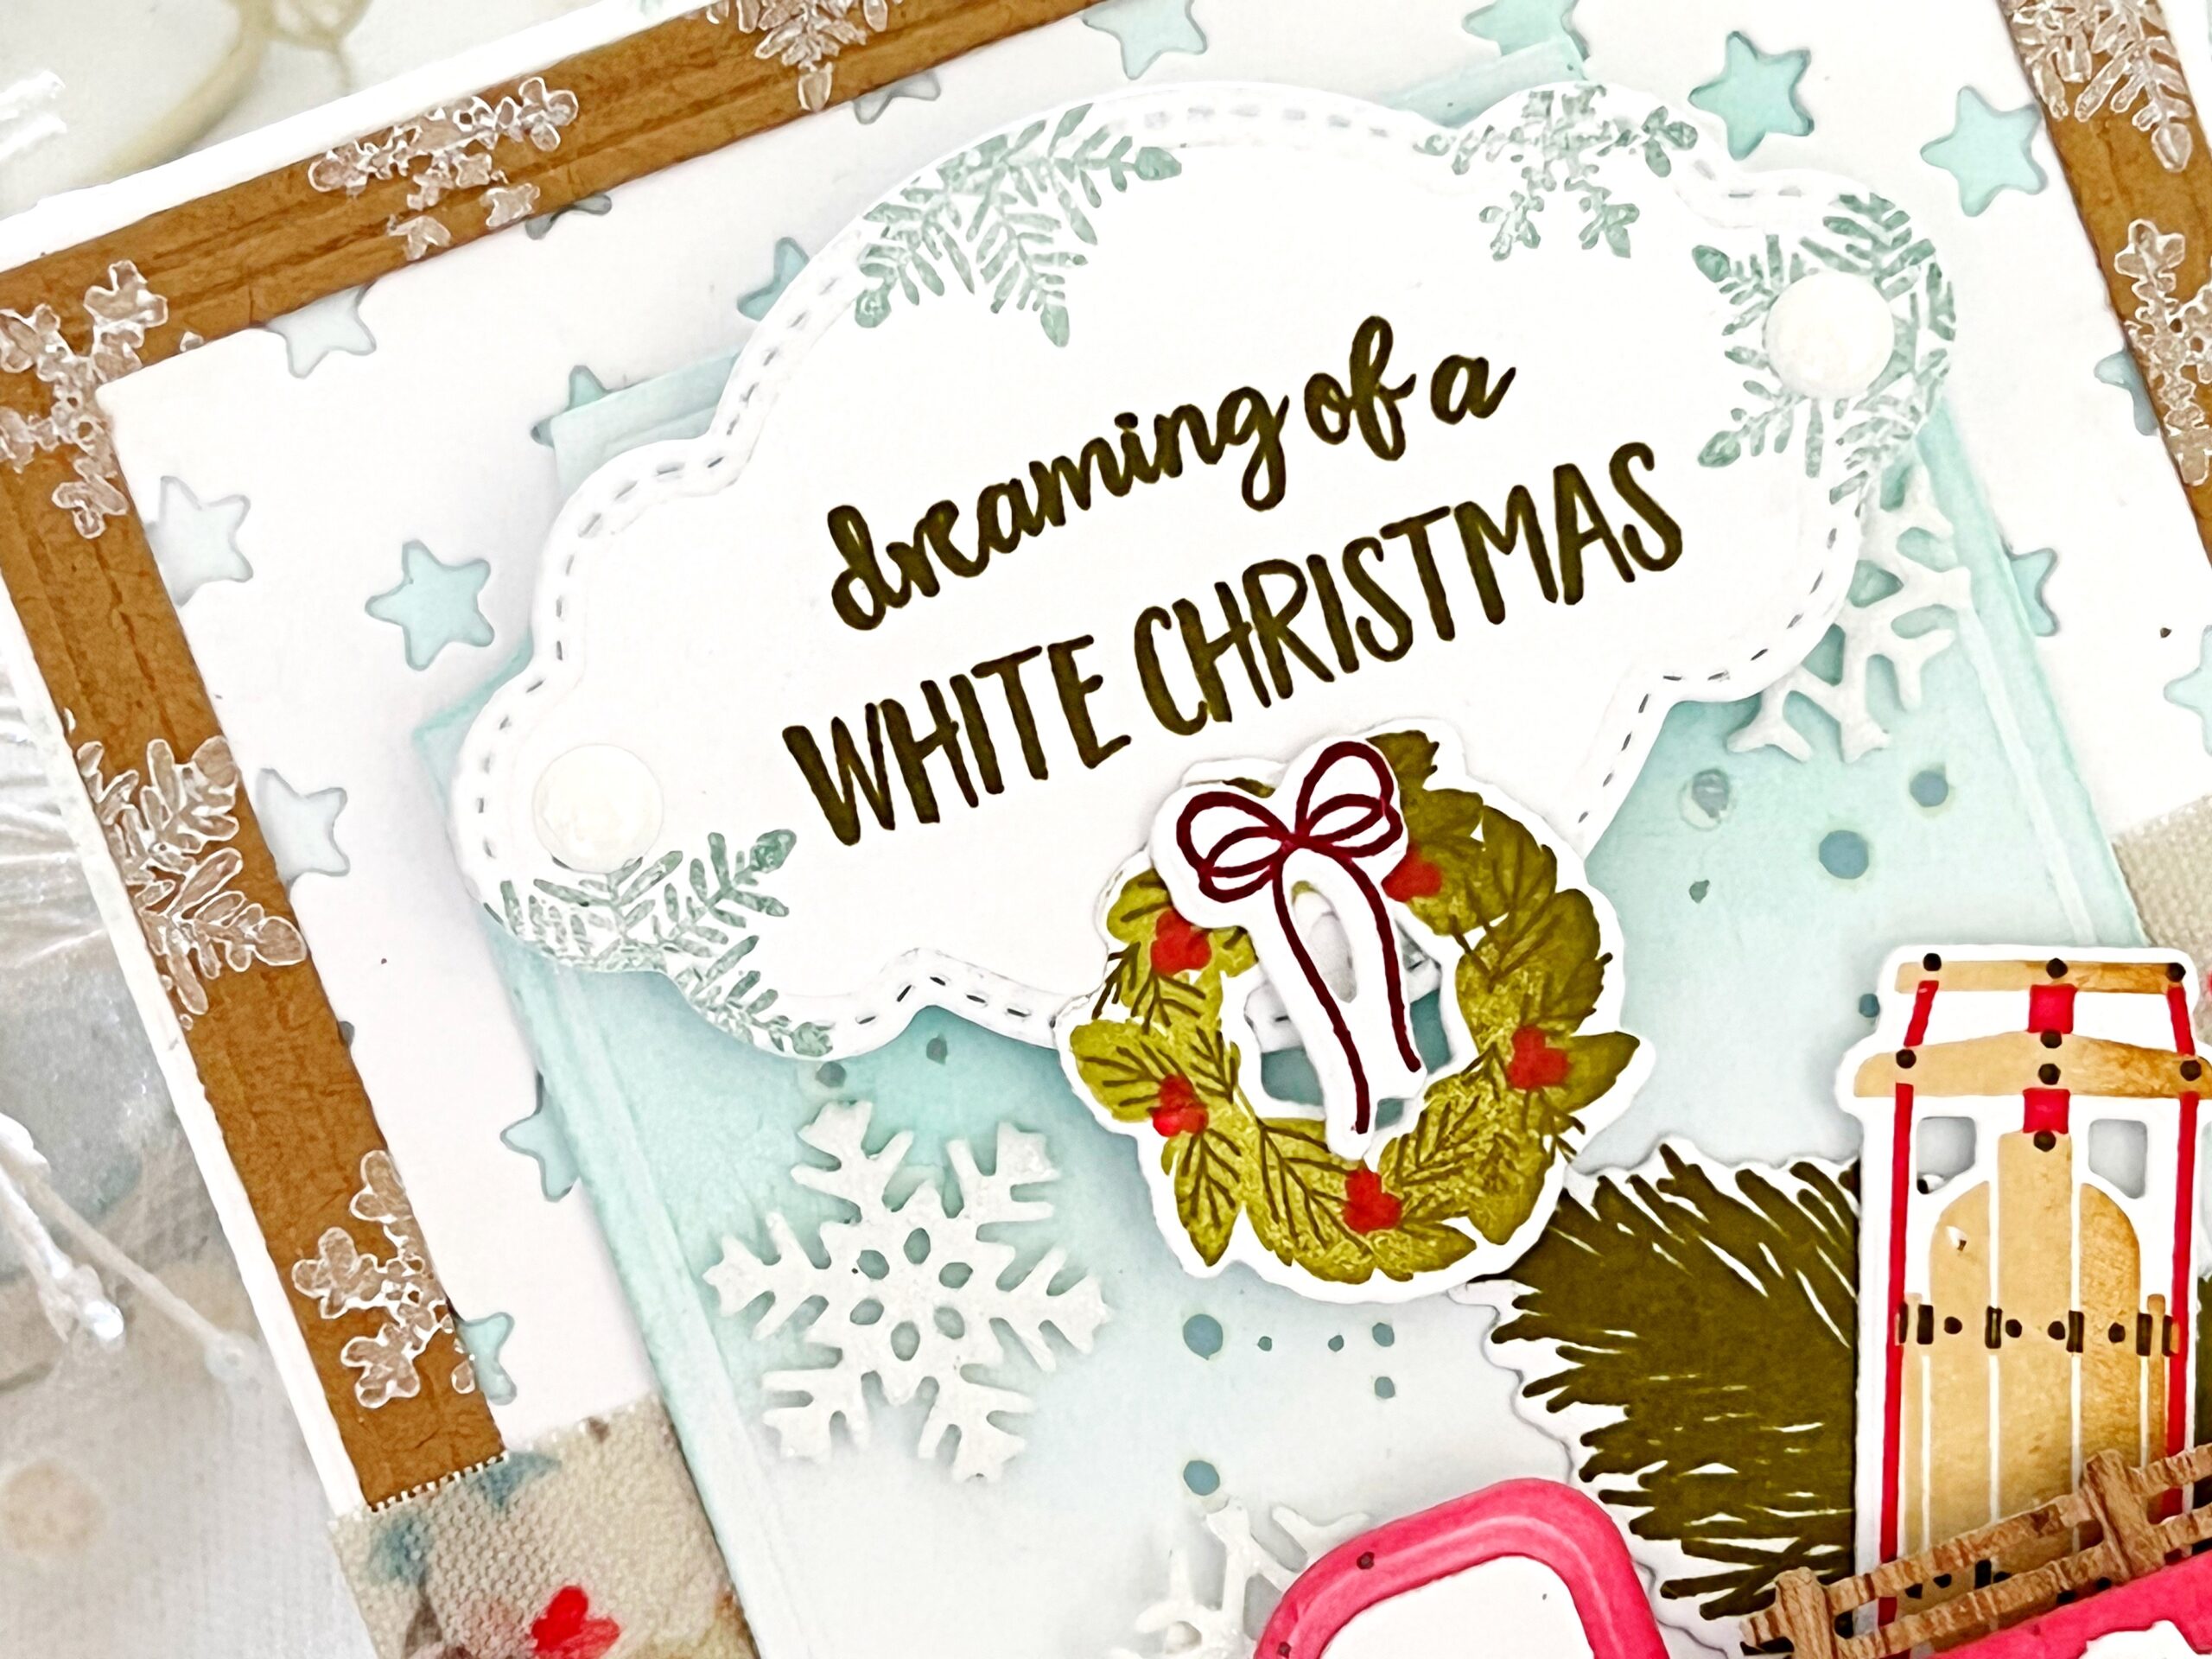
I chose a sentiment from the Let it Snow stamp set because I love the font and felt like it was a perfect fit for the farm truck. I stamped the border around my card. using the tiny snowflakes from the Let it Snow stamp set. I also added glitter foam snowflakes, cut using the Bring Home the Holidays die collection.
Supplies Used:
STAMPS: Snowy Truck Accessories, Let it Snow
INK: Pure Poppy, Scarlet Jewel, Olive Twist, Fine Linen, Honey Nut, Ripe Avocado, Simply Chartreuse, Ocean Tides, Fresh Snow
PAPER: Stamper’s Select White, Kraft
DIES: Snowy Truck Accessories, Patriot, It’s A Sign: Hanging Frames Stitched Layers, Border Bling: Twinkle, Border Bling: Skinny Embossed Frame, Love to Layer: Notched
OTHER: Fabric washi tape, enamel dots, Stickles glitter, Distress Spray, patterned paper


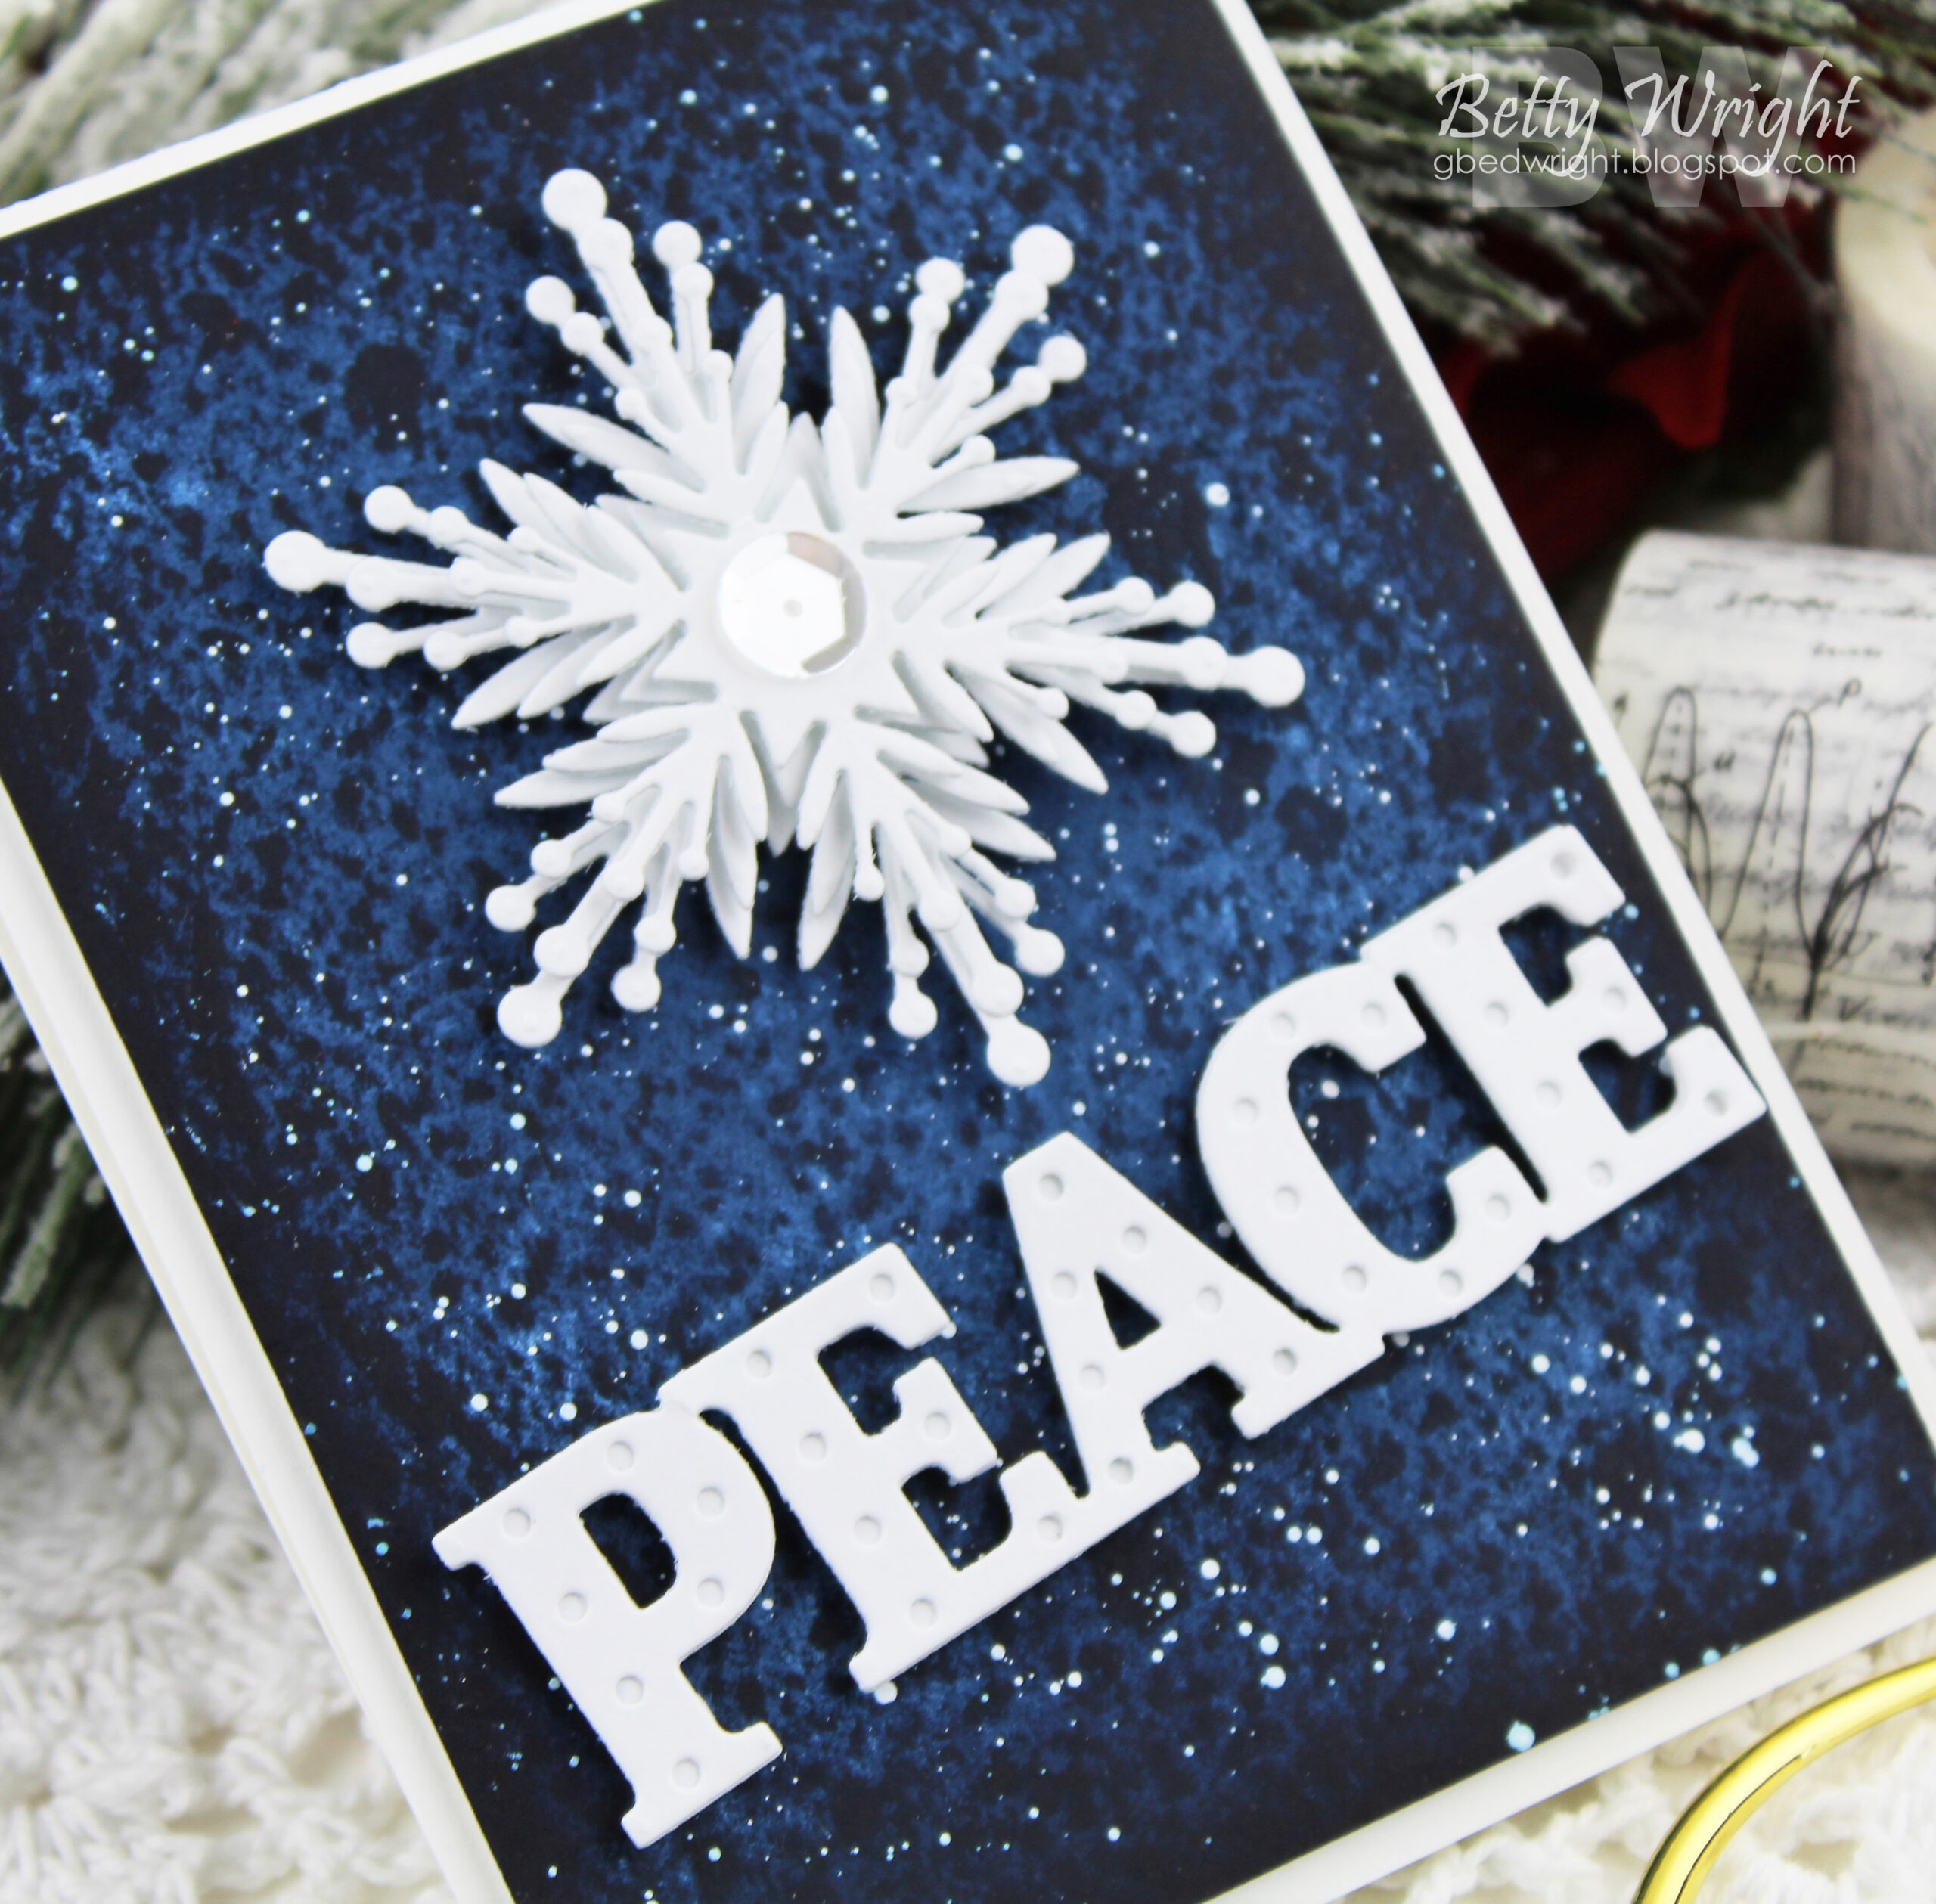
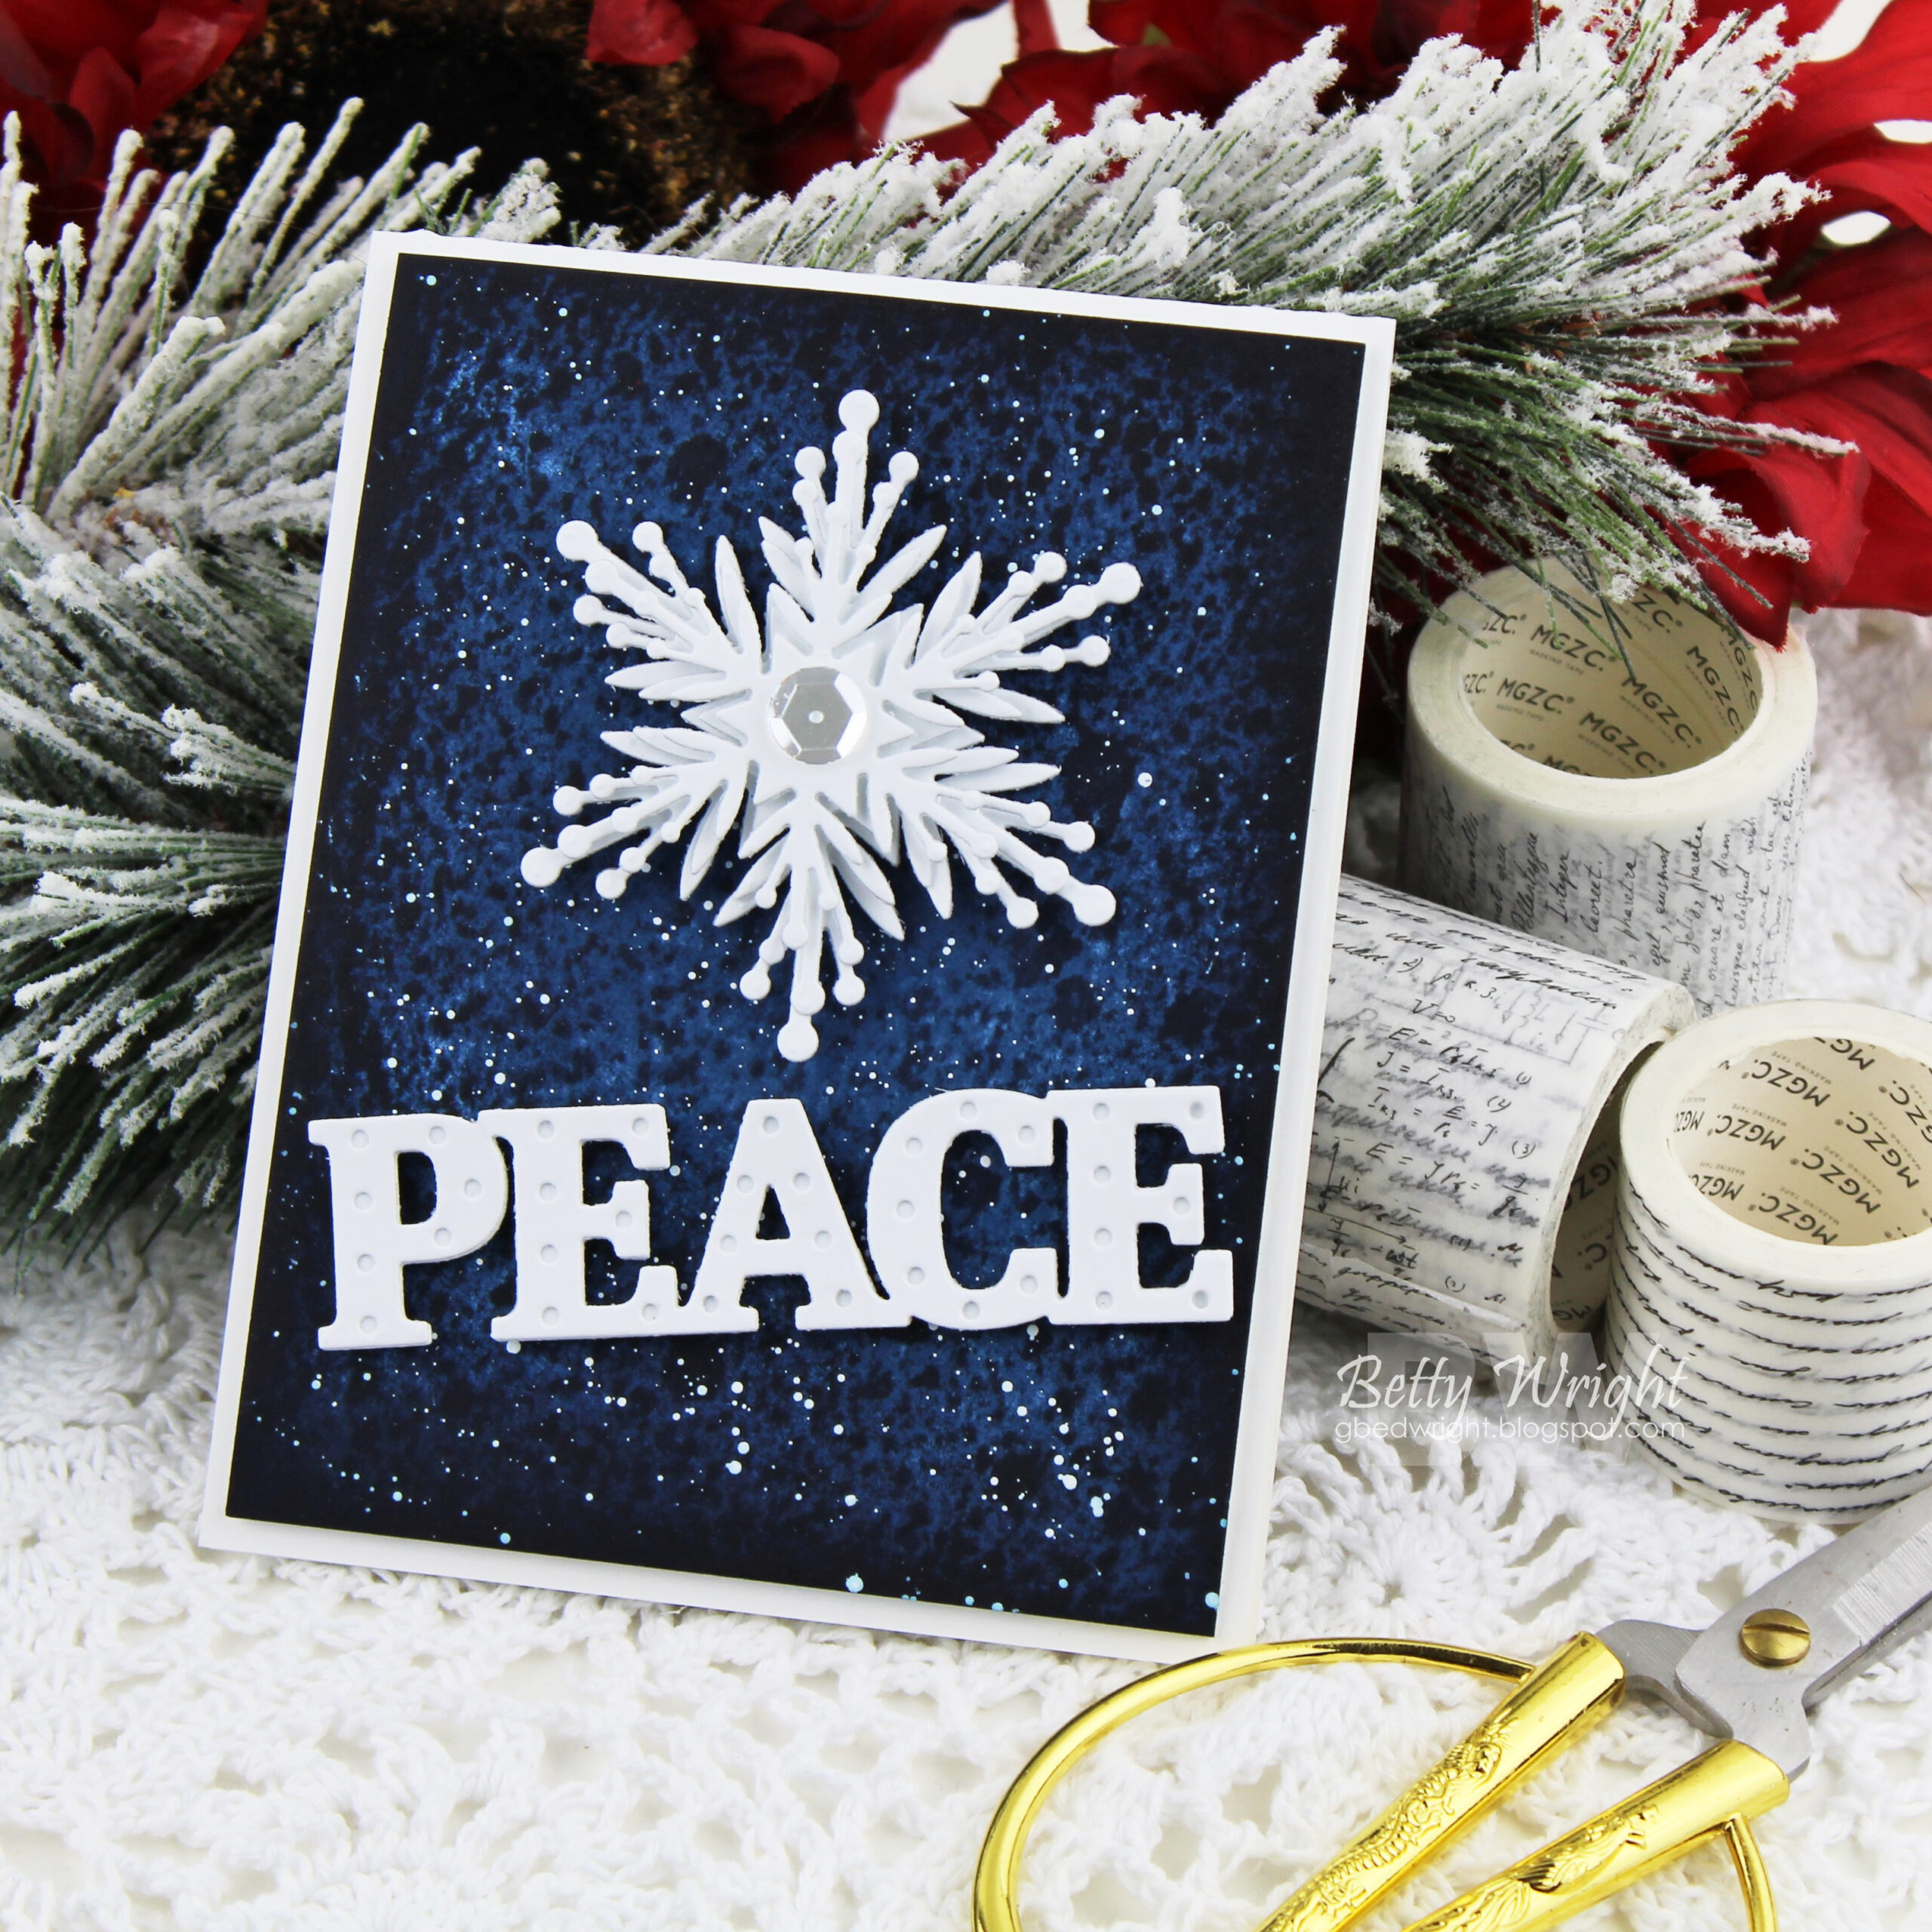
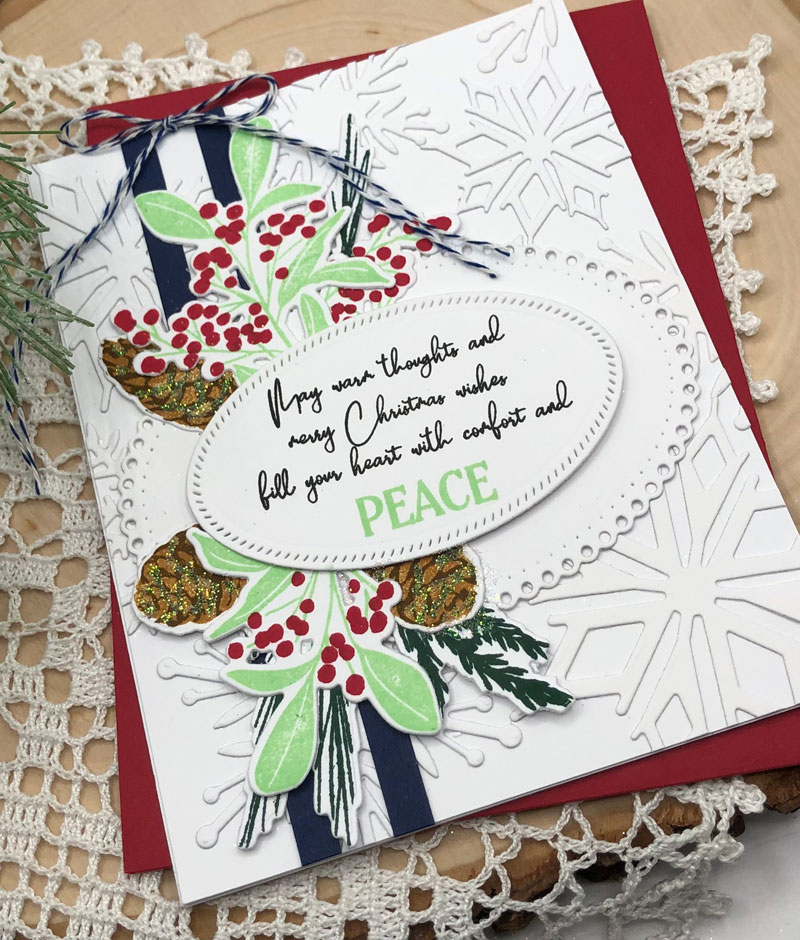
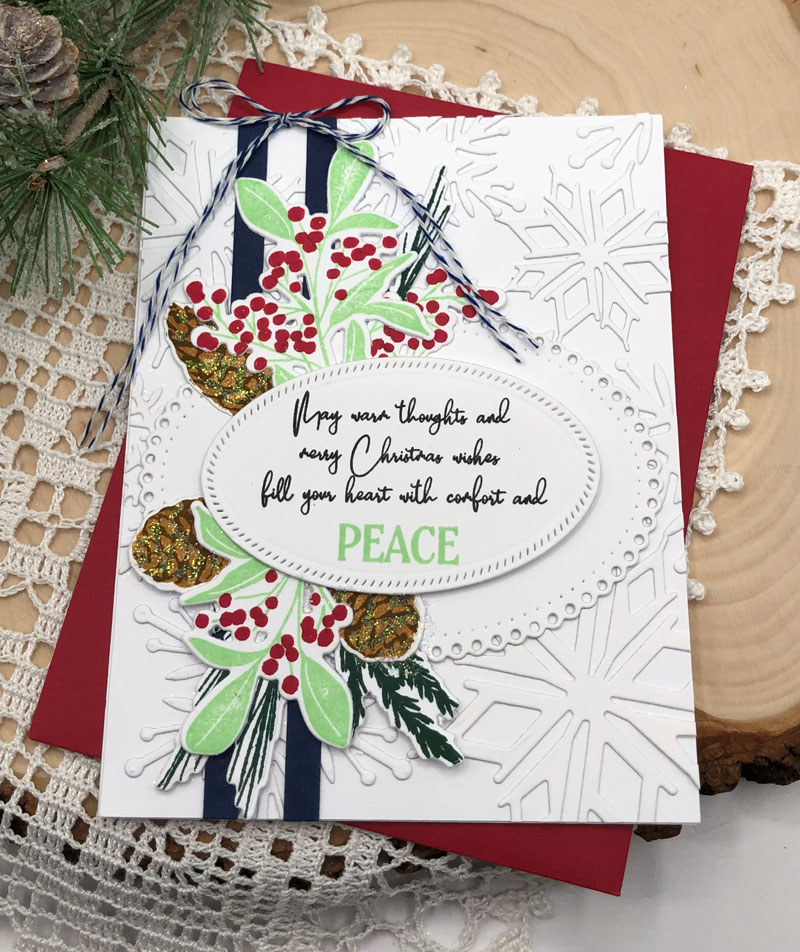
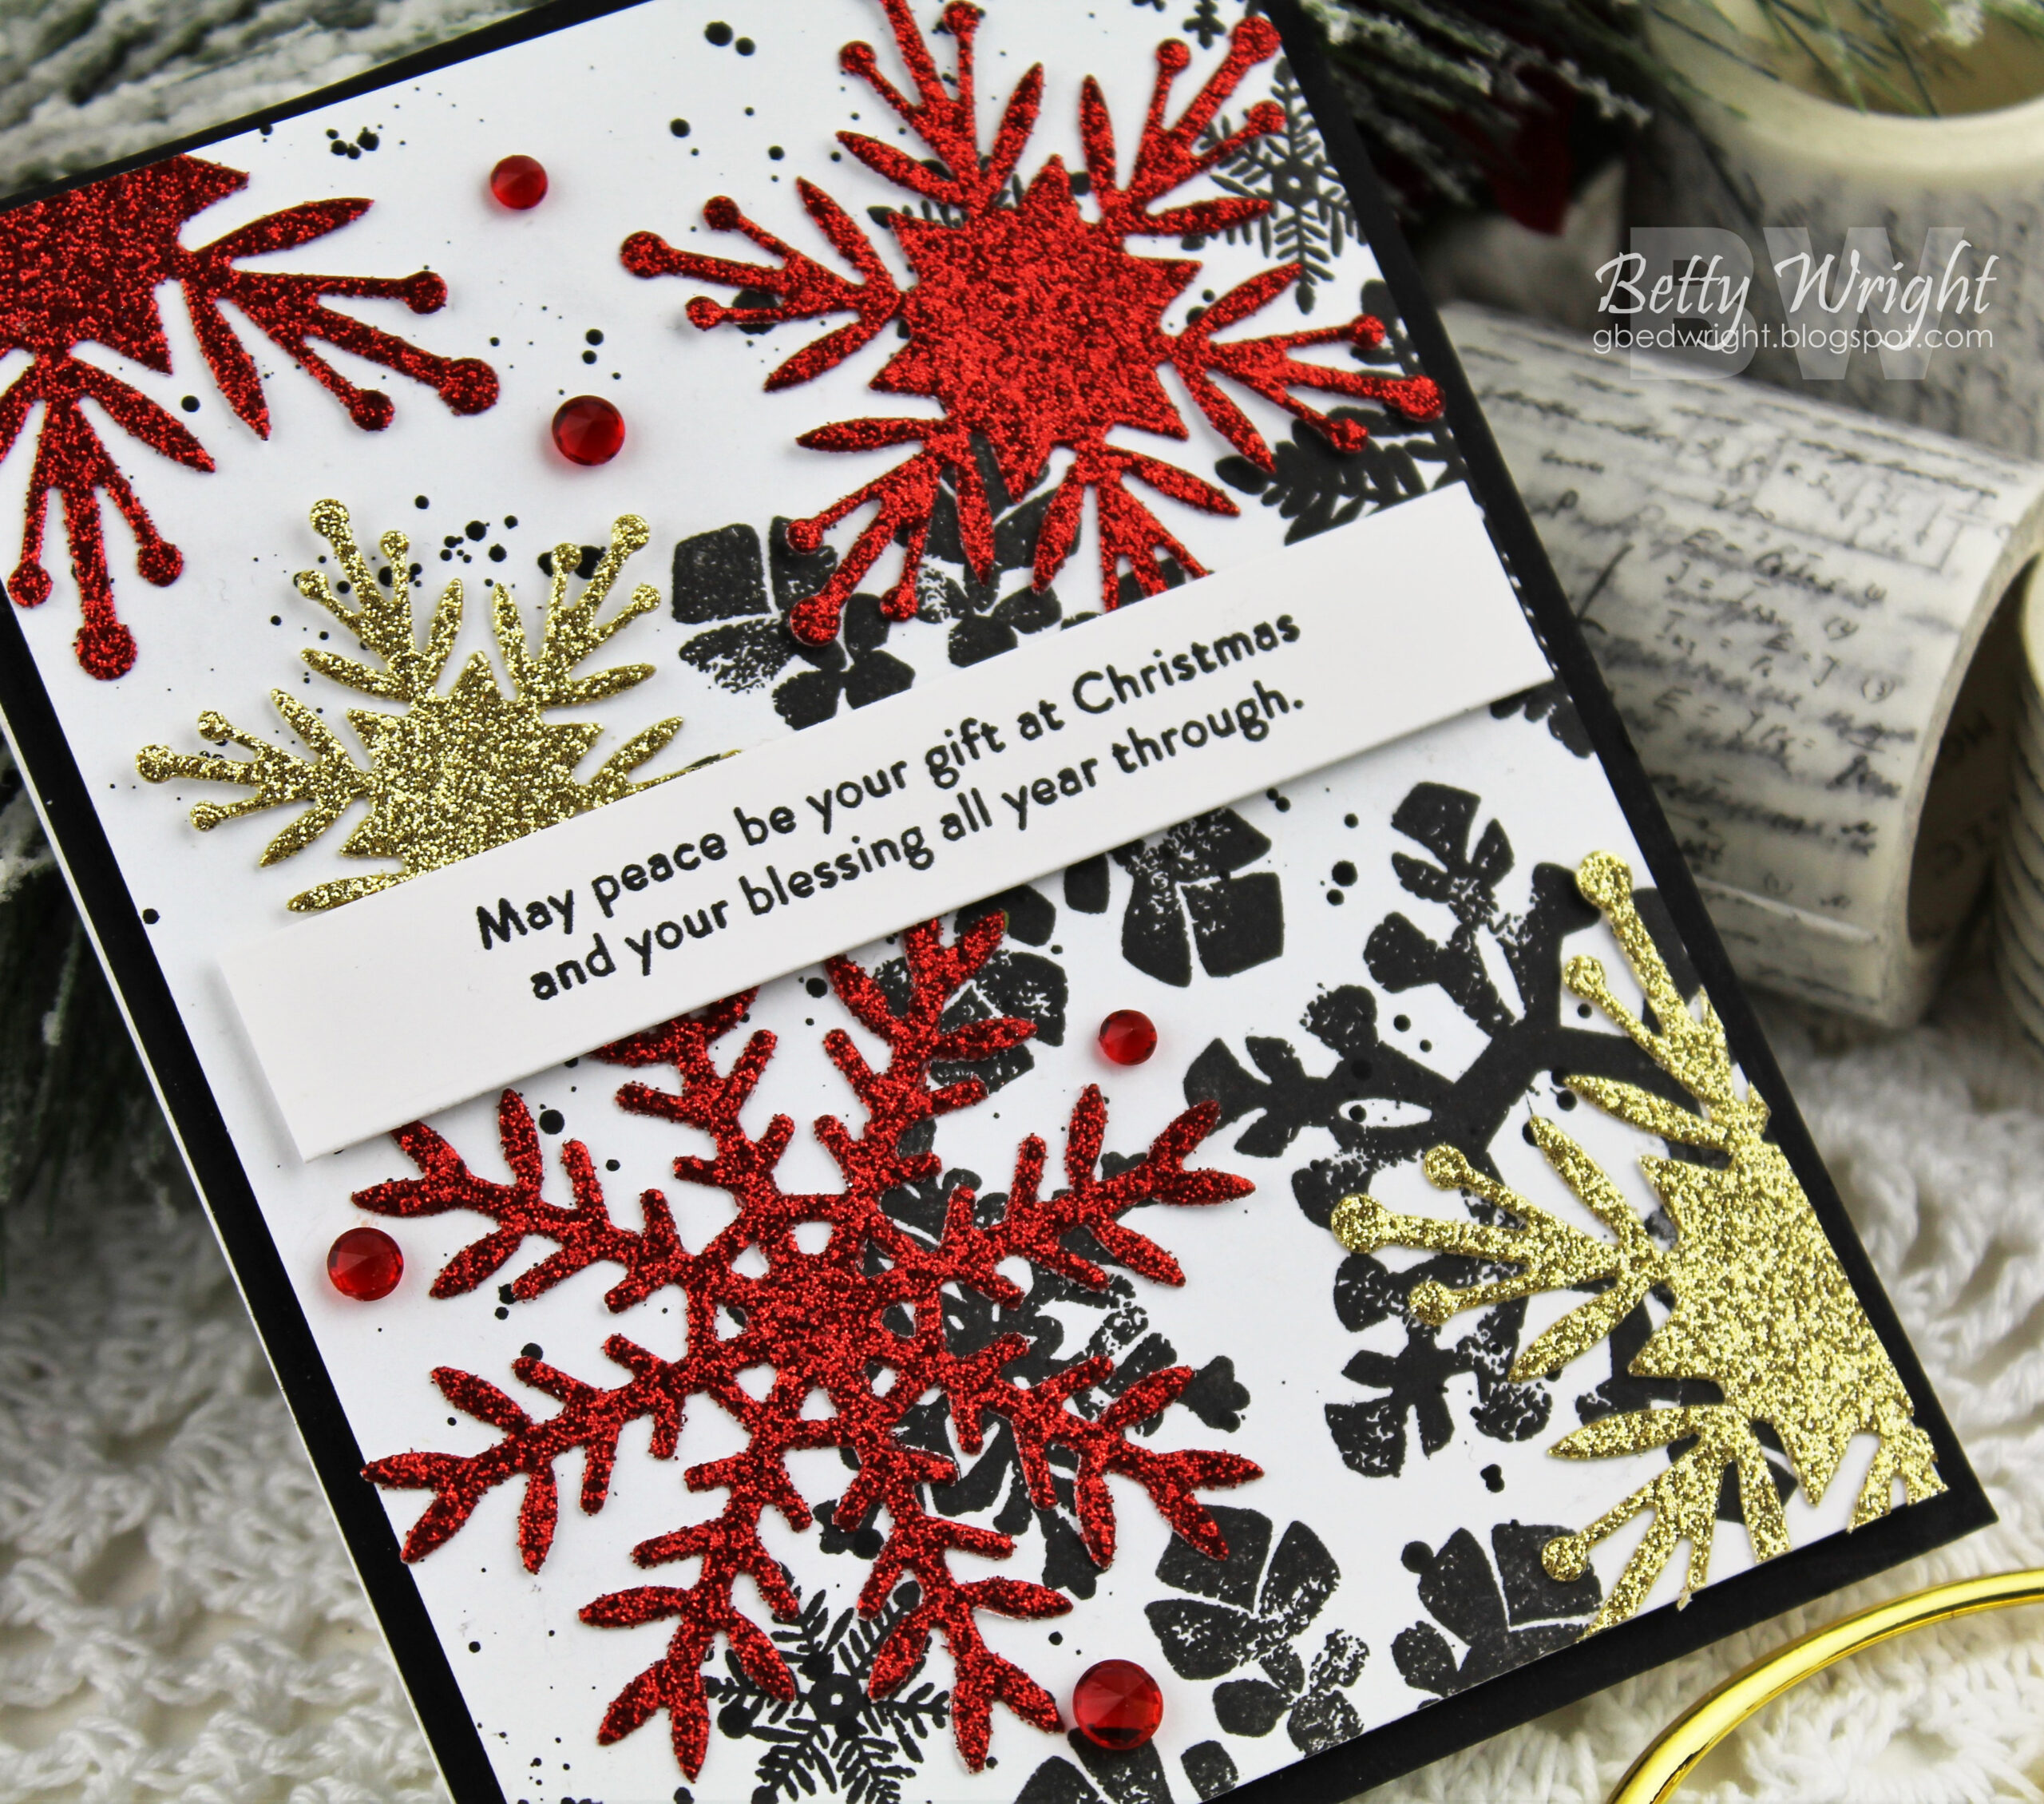
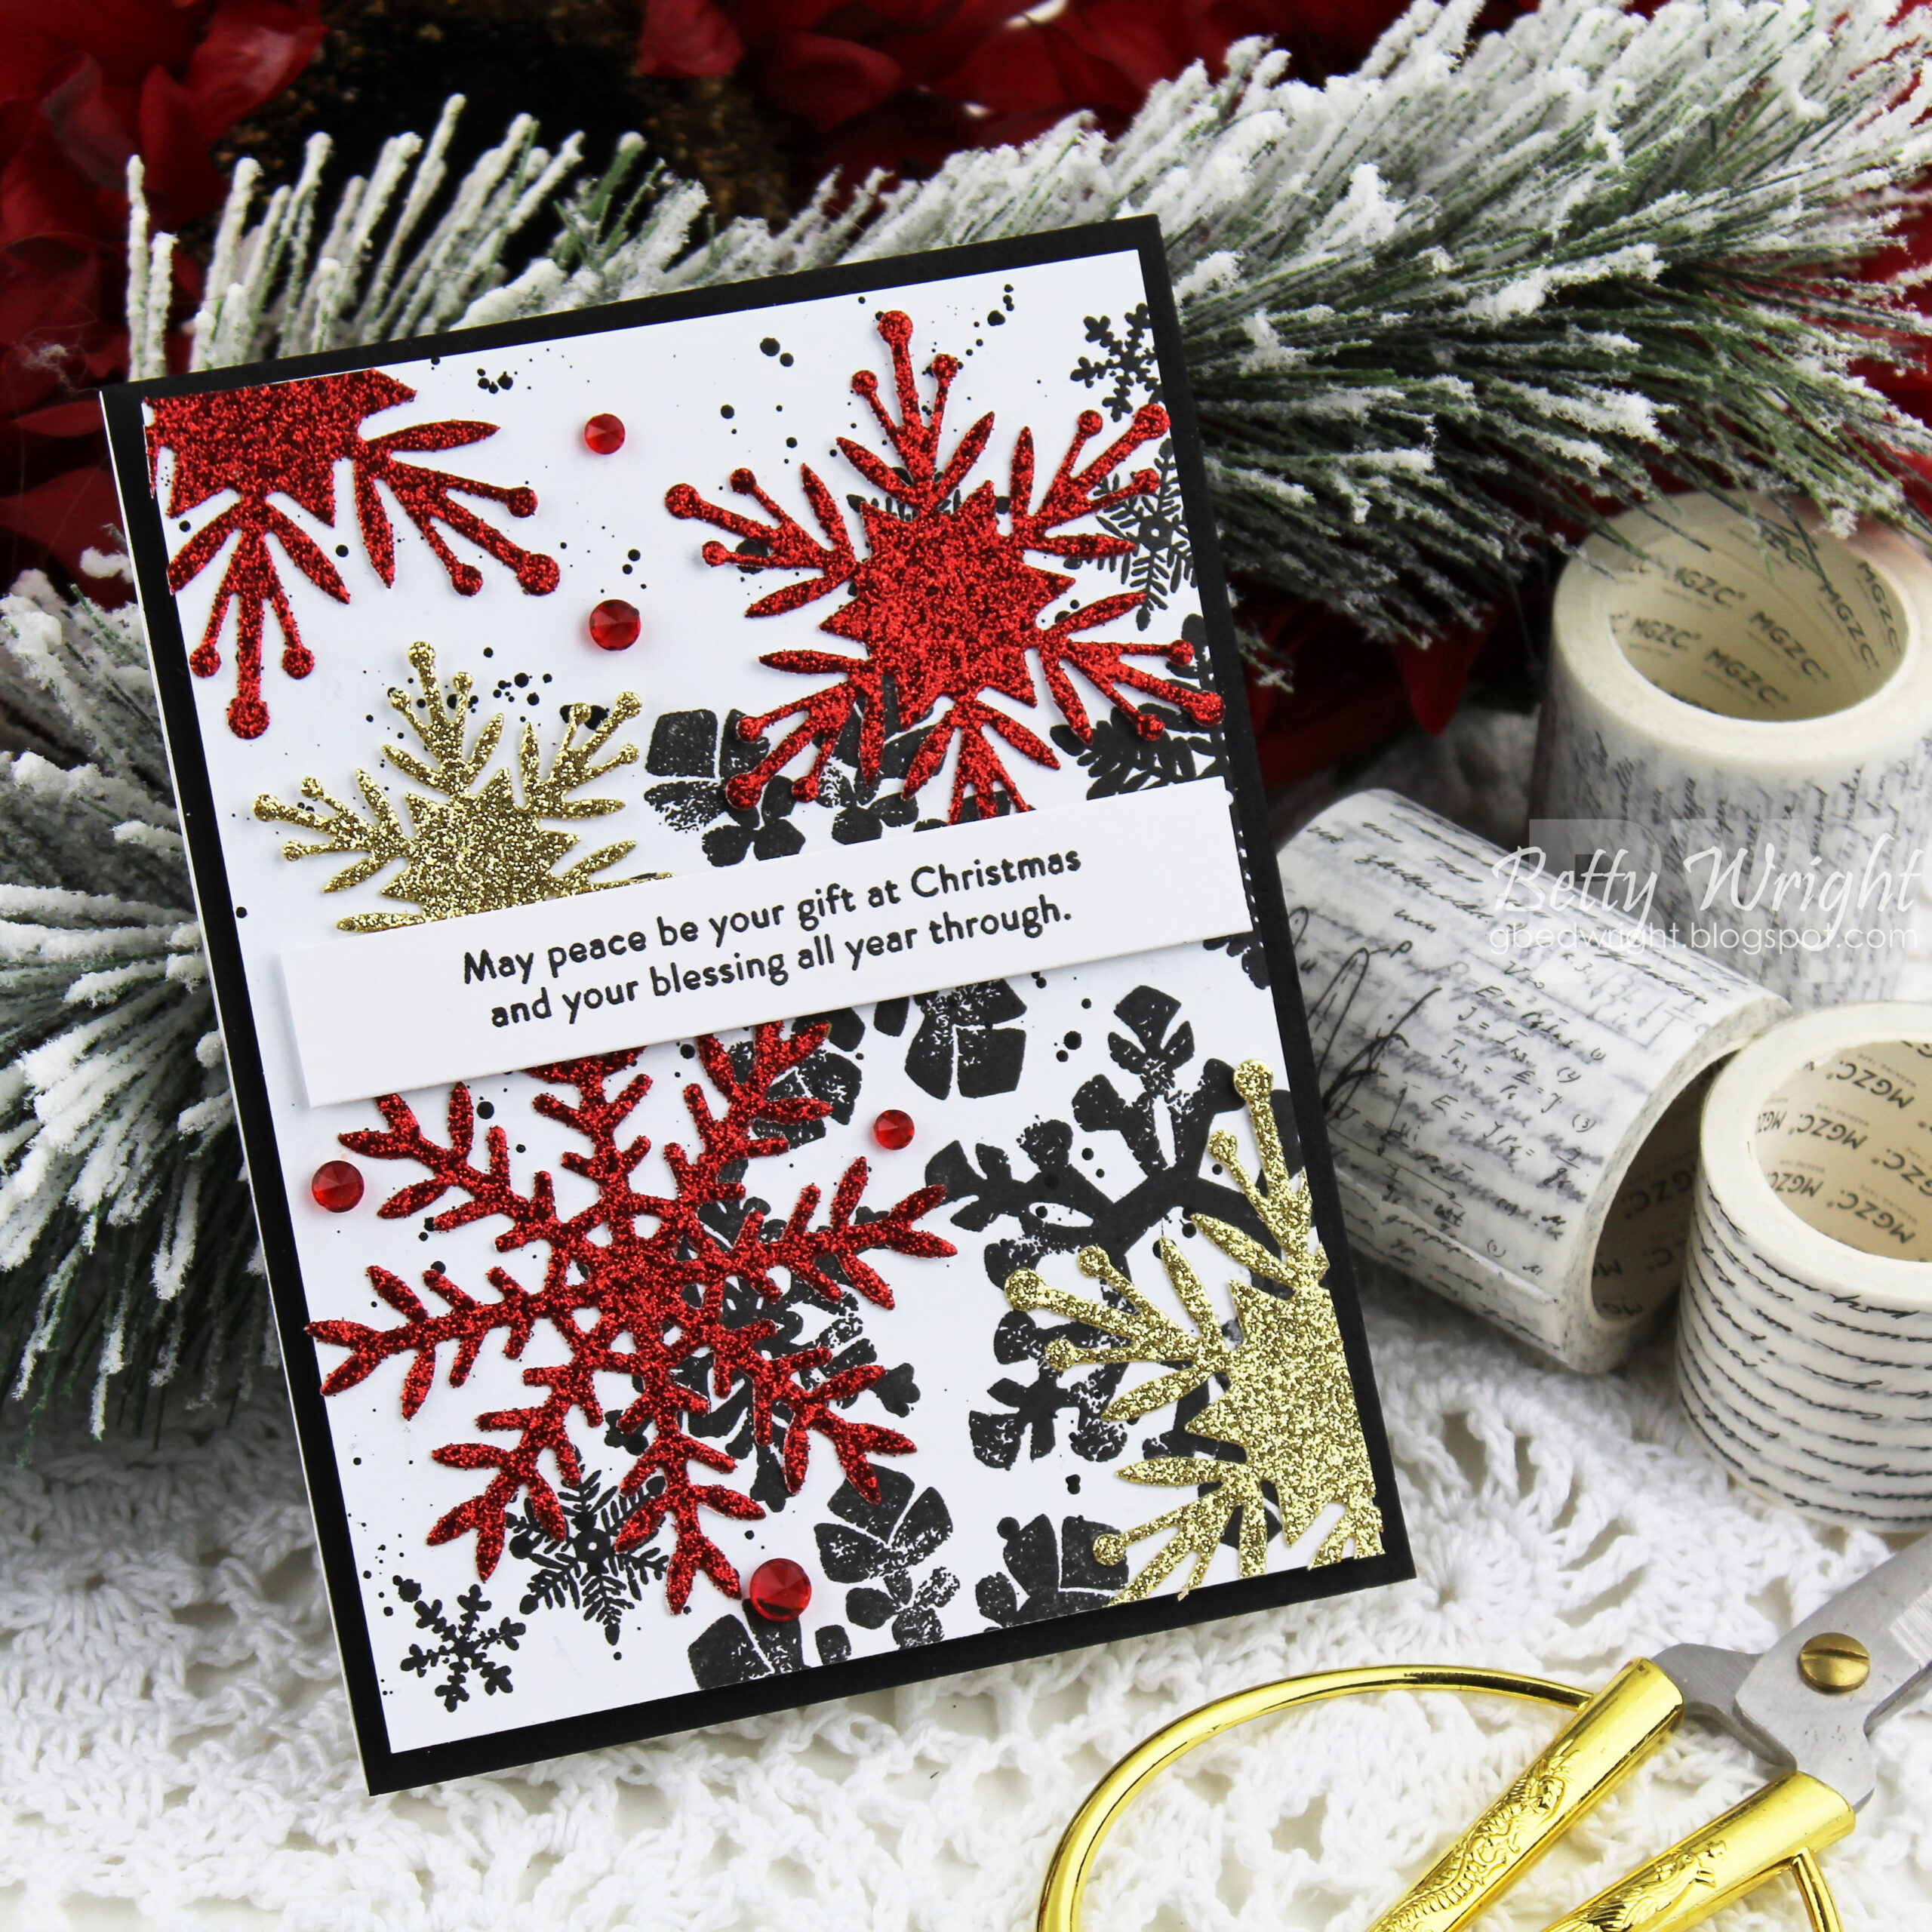
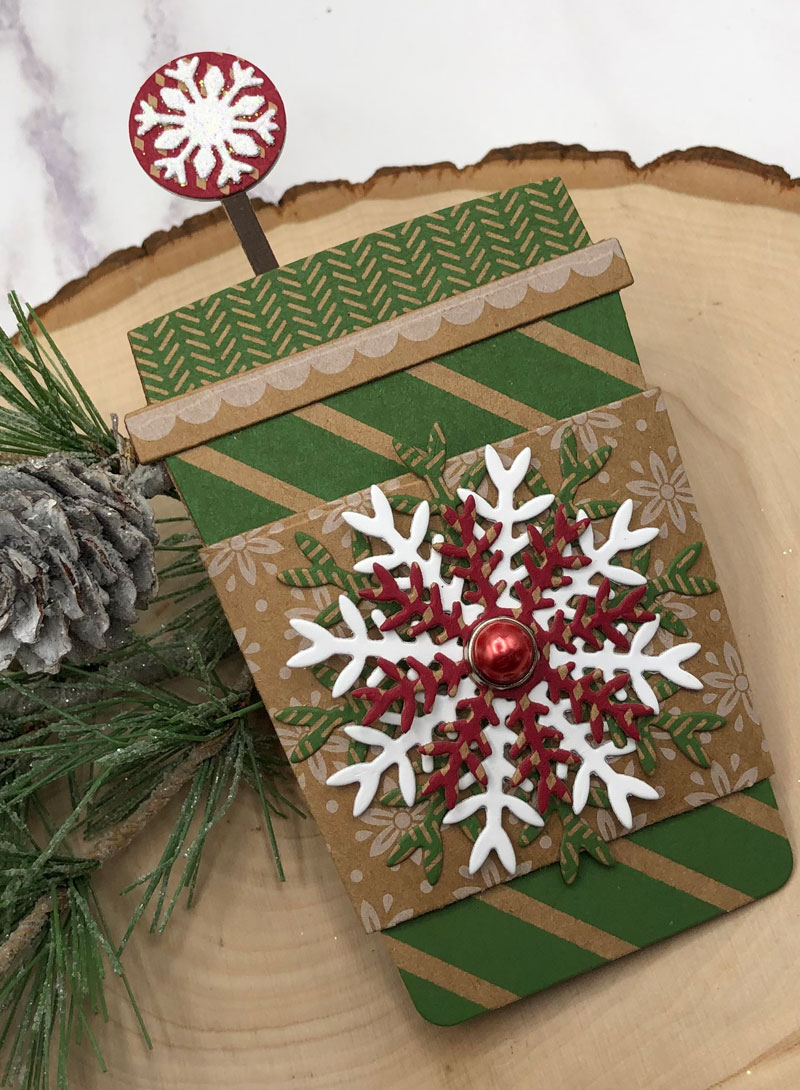
Our last few products for this release are truly so beautiful and special. Introducing the new Layered Snowflakes: Drift, Layered Snowflakes: Crystal, and Layered Snowflakes: Flurries dies. We’re also showcasing the lovely and creative Larger Than Life: Peace dies and Larger Than Life: Peace Sentiments stamp set.
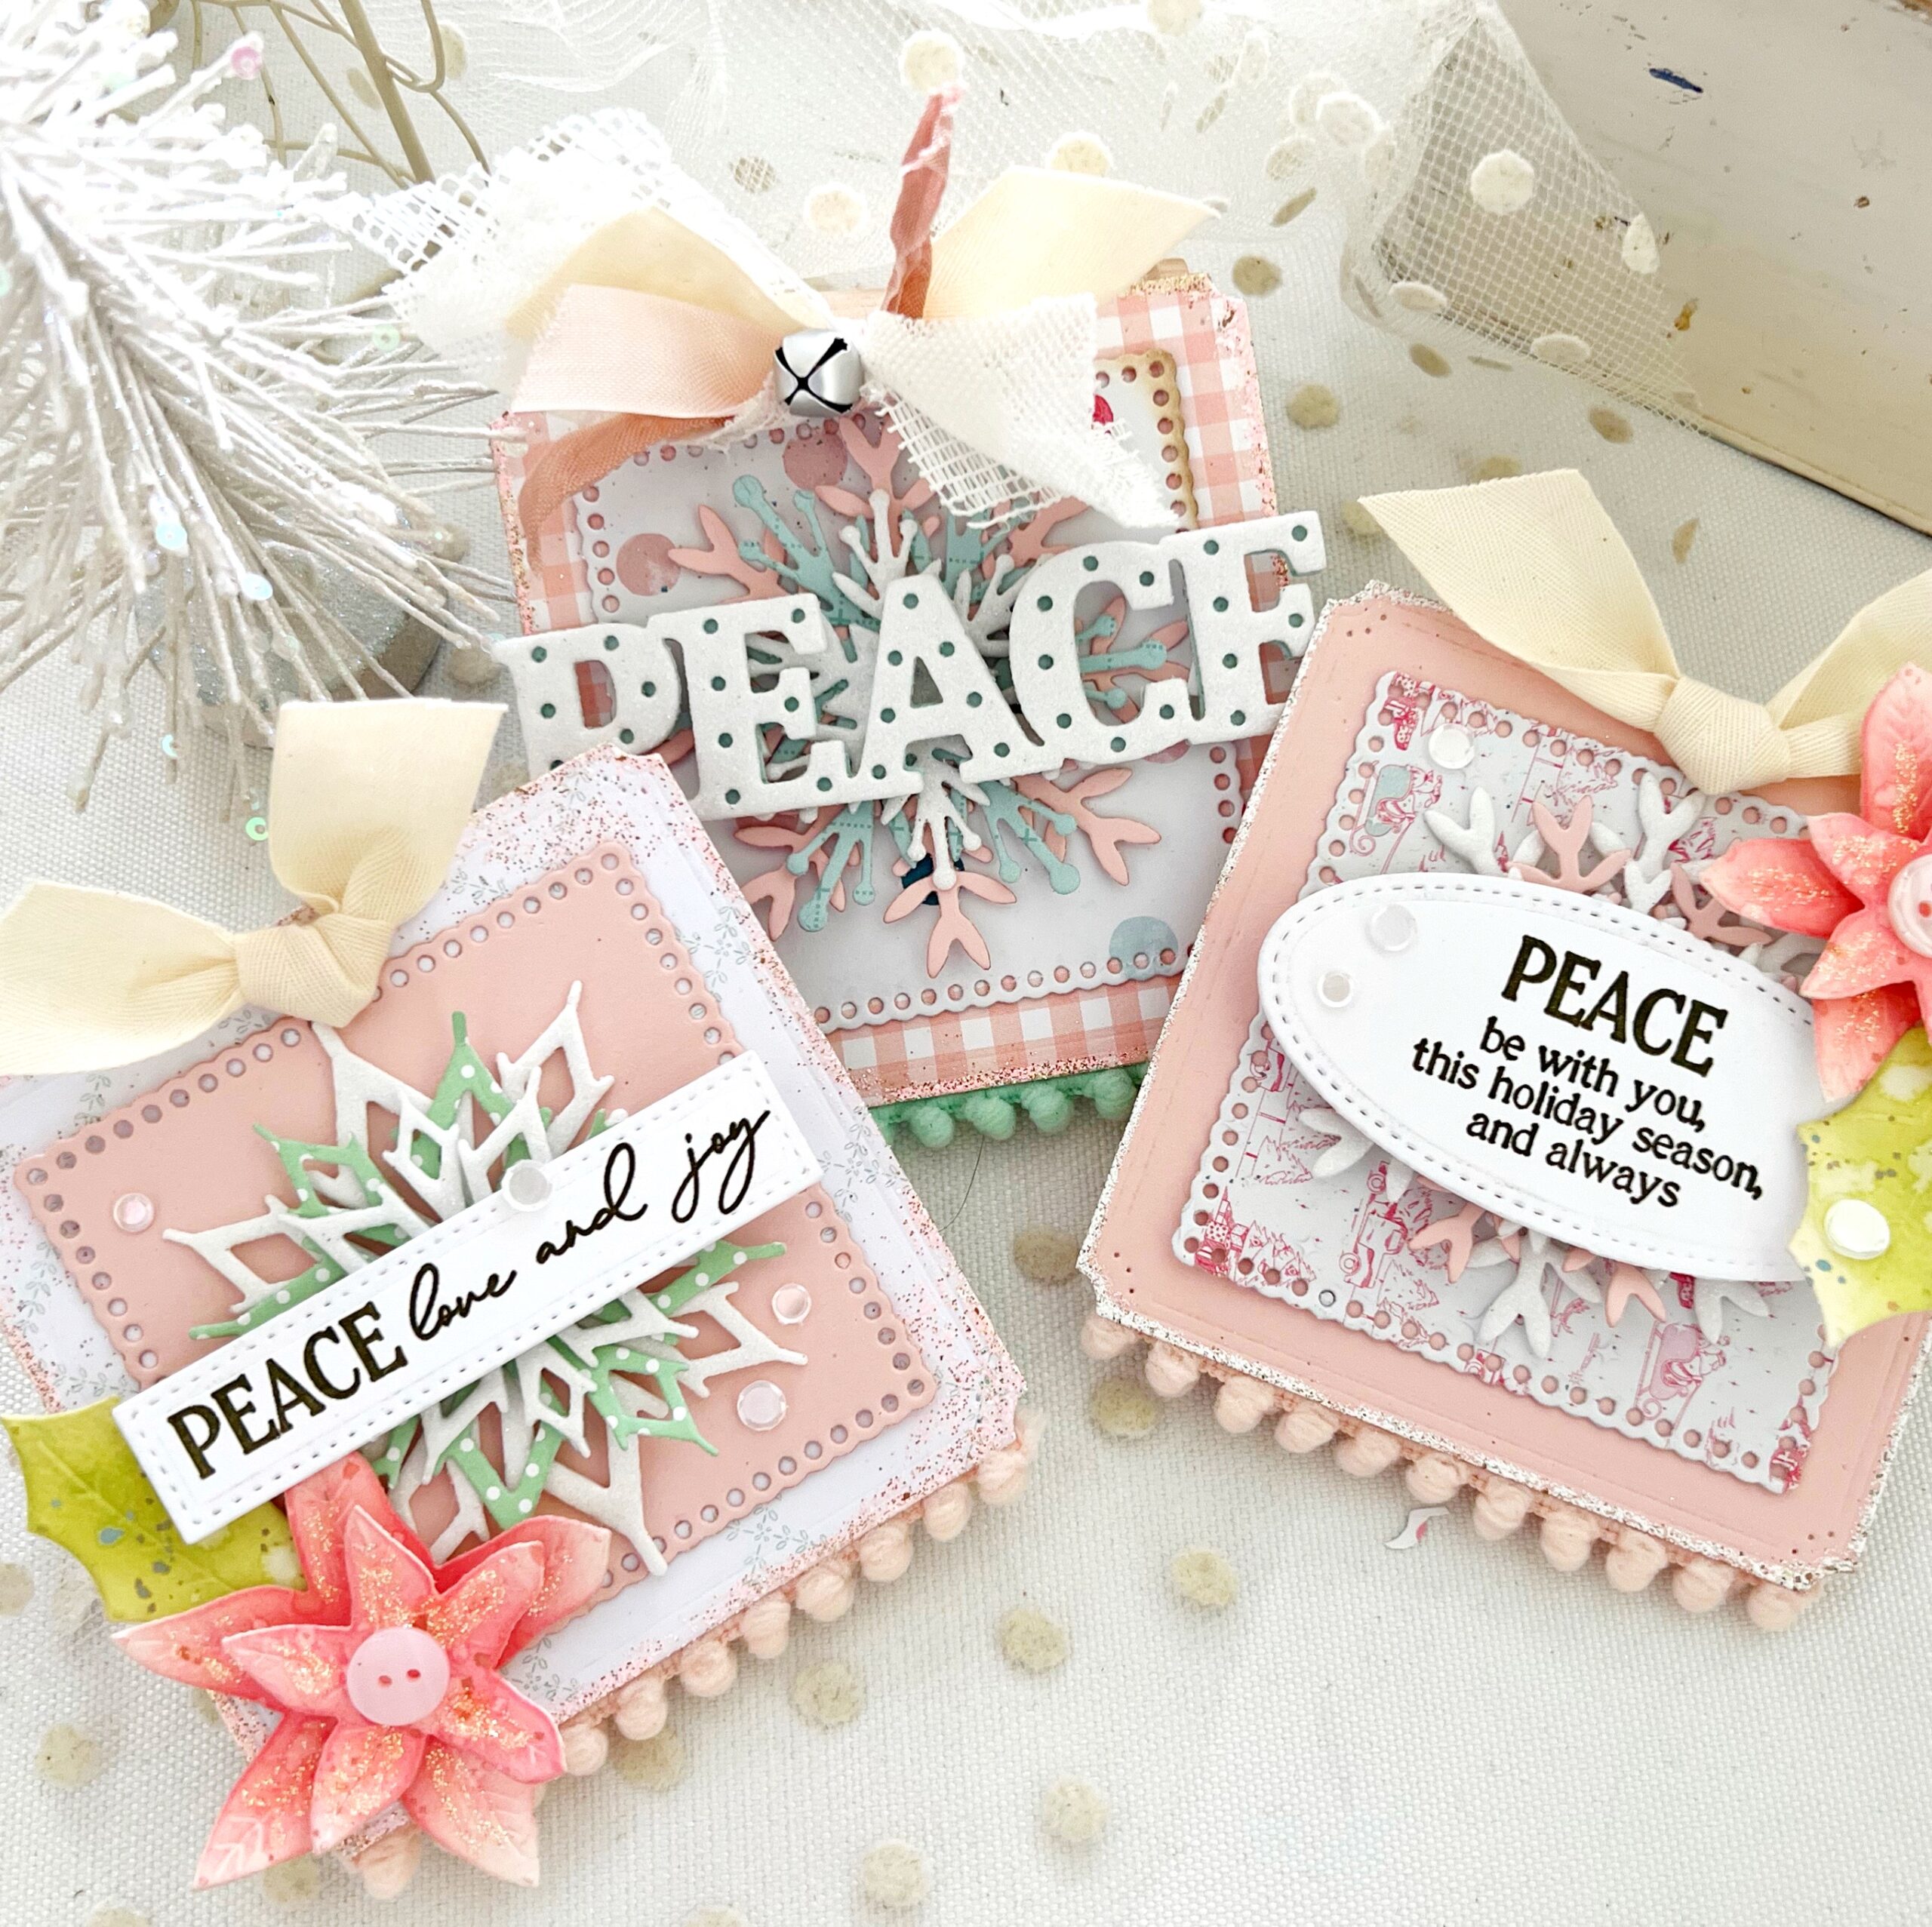
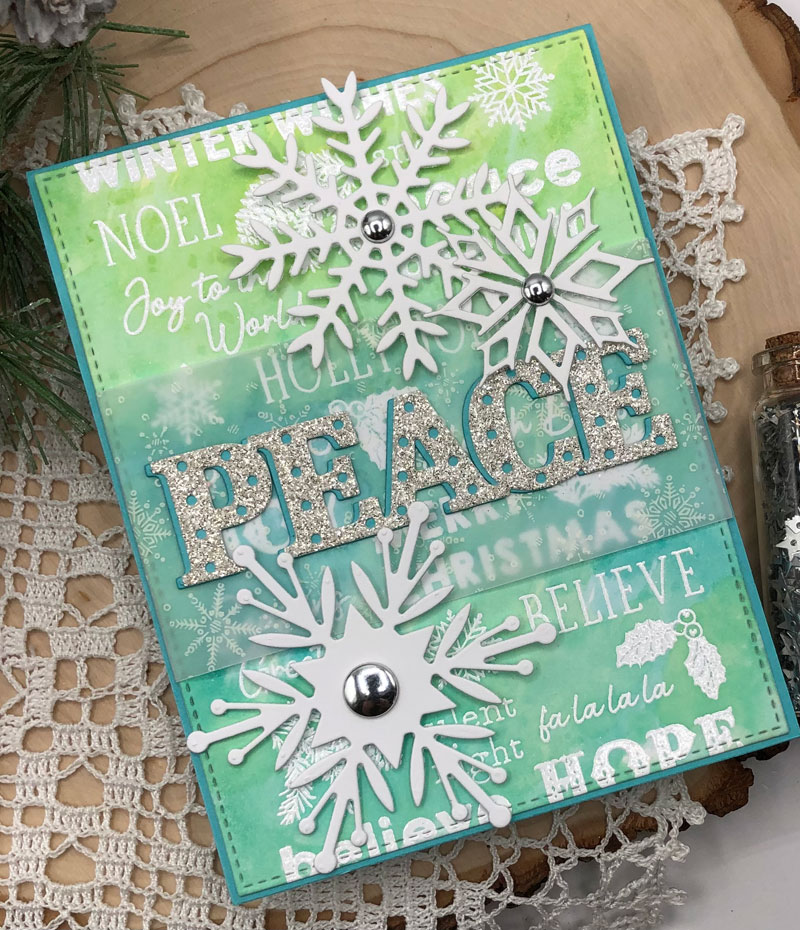
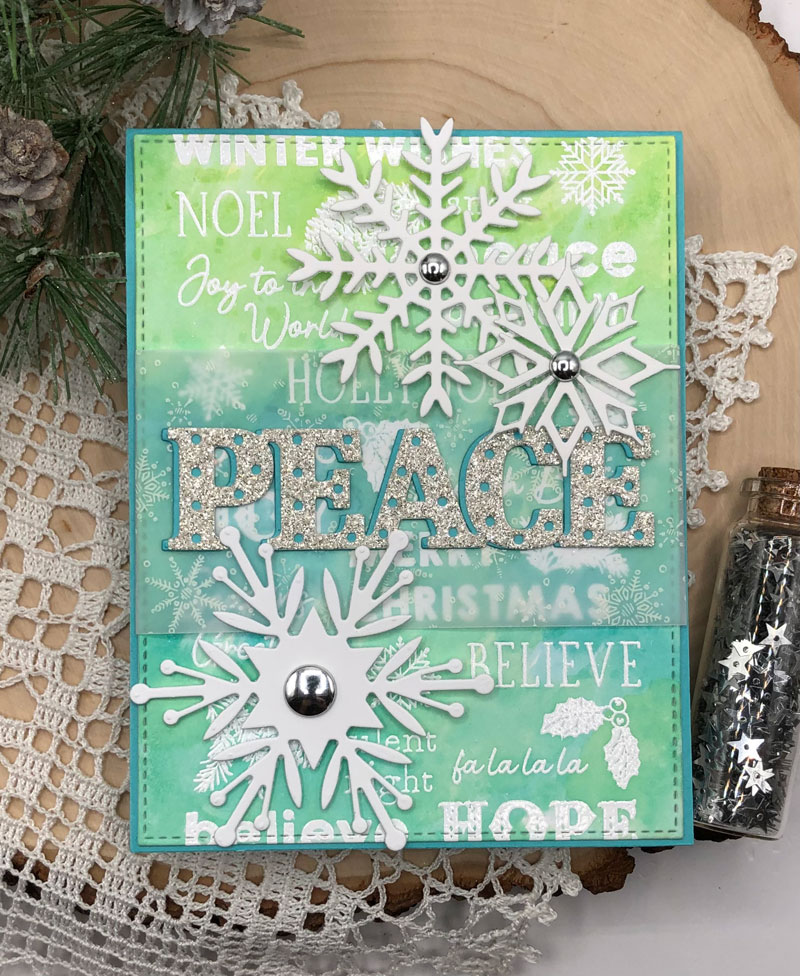
I created a trio of tags beginning with the new Love to Layer: Squares dies. These make the most perfect tags for the holidays, birthdays, weddings, etc! The Layered Snowflakes dies come in three different shapes and varieties, each with three different sizes so that you can in fact layer them and create gorgeous, dimensional snowflakes. They are truly stunning when layered, but create fabulous accents used as single flakes.

I used the Larger Than Life: Peace die across the center of this tag which uses the Layered Snowflakes: Flurries dies. The Peace die comes in two steps with the bottom layer being solid and the top layer with tiny dots punched out to resemble one of those fun, retro lighted signs. The font is timeless and can easily be used for elegant to fun and whimsical cards and tags, as you’ll notice in our designers’ projects.

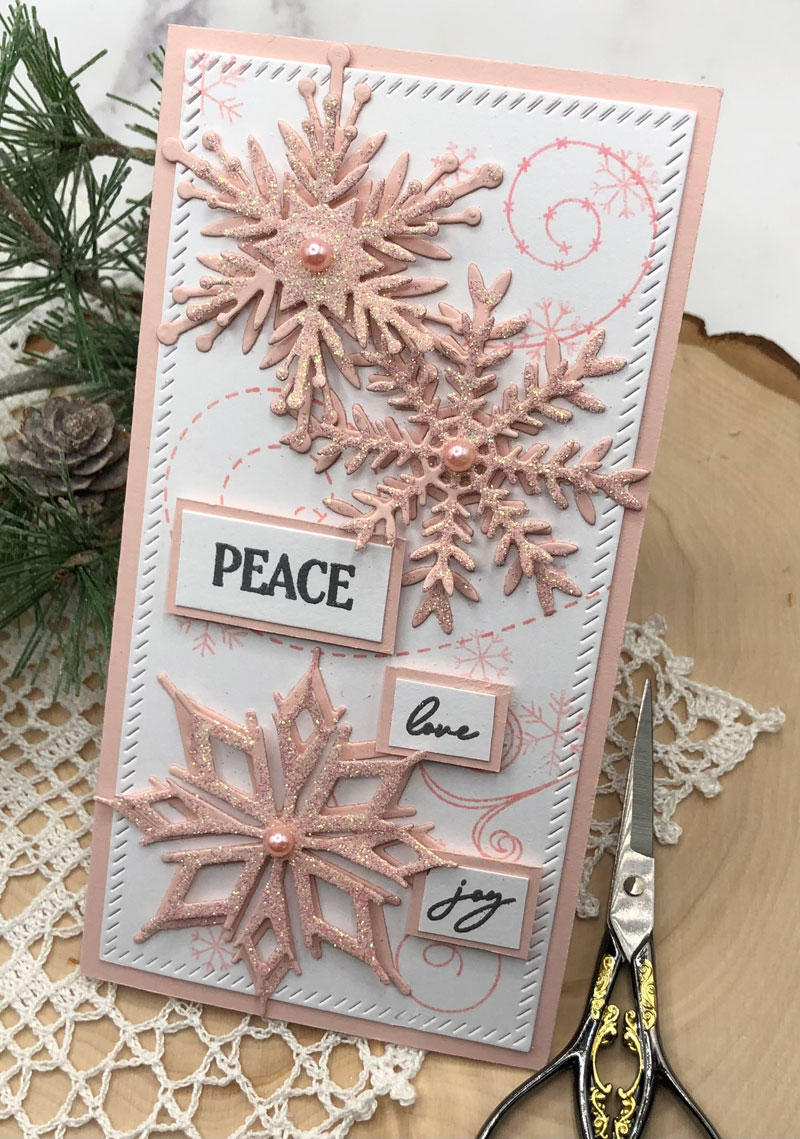
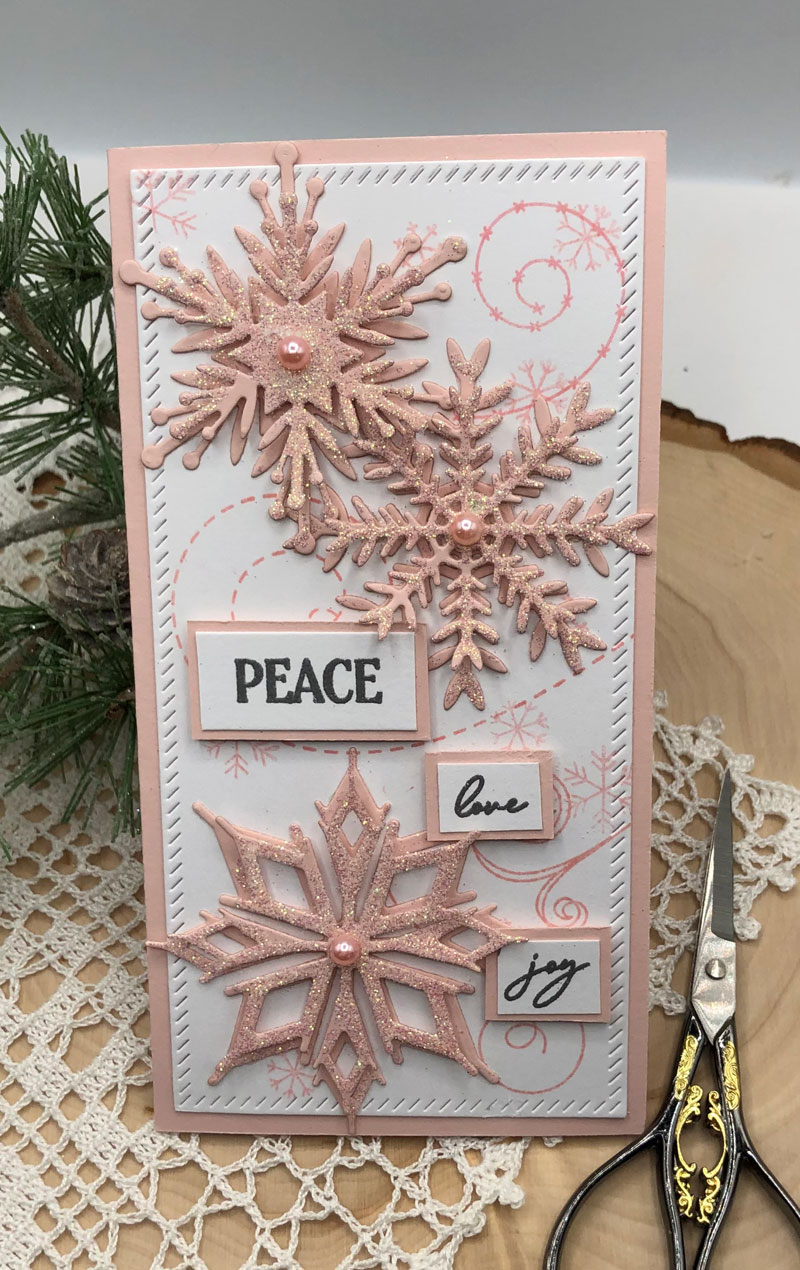
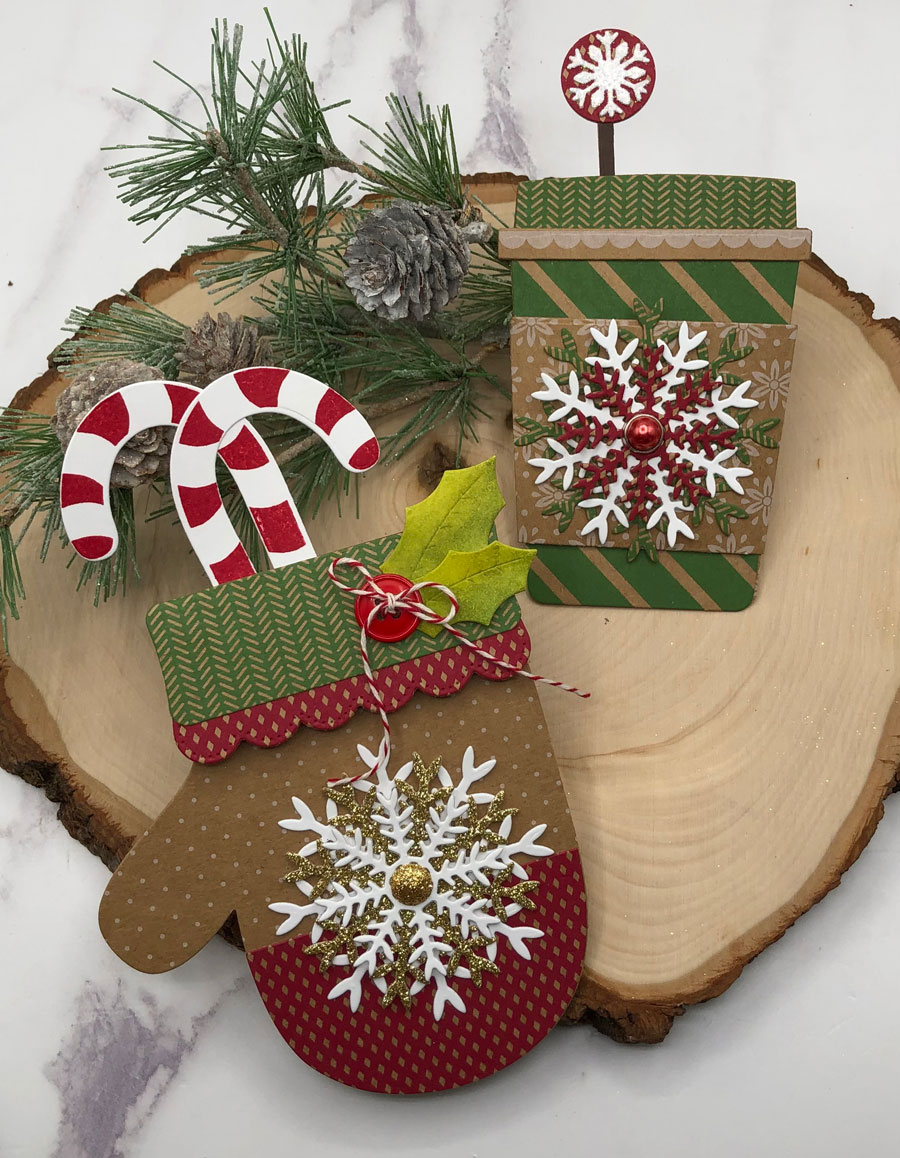
My next tag uses the Layered Snowflakes: Crystal dies and is topped with a stamped sentiment using the Larger Than Life: Peace Sentiments stamp set. I love that this set has the word “Peace” in it, so if you choose to not use the Larger Than Life: Peace die, the stamp set contains everything you need to create a complete sentiment.

The Layered Snowflakes: Drift dies were used on my final tag and once again, I used a sentiment from the Larger Than Life: Peace Sentiments stamp set. I finished each tag with tiny pompom trim, poinsettias from the Go-To Gift Card Holder: Mitten die, trimmings, buttons, Moonshine sequins, and Stickles glitter. These were such a treat to create for you!
Thank you so much for joining us for another wonderful and creative month of new products. It’s been a delight to create for you! Enjoy these last few products from our talented designers.
Supplies Used:
STAMPS: Larger Than Life: Peace Sentiments
INK: Olive Twist, Pale Peony, Hibiscus Burst, Green Parakeet
PAPER: Stamper’s Select White, Bitty Big Mint Julep, Sweet Blush
DIE: Larger Than Life: Peace, Layered Snowflakes Drift, Crystal, and Flurries, Love to Layer: Squares, It’s A Sign: Hanging Frames Stitched Layers, Go-To Gift Card Holder: Mitten
OTHER: Glitter foam, Stickles glitter, buttons, Moonshine sequin, trims, jingle bell

TIPS:
- Add ink to card stock using DTP technique
- Spritz with water in between inking to create texture
- Layer the snowflakes without staggering to create a fun look

TIPS:
- Offset two layers of the sentiment to give a bit of color shadow.
- Layer your die sentiment over vellum to soften the design and allow the base color blending to shine through.
- Pop up the snowflakes with foam dots to add dimension.


TIPS:
- Give your cards added texture by layering a variety of white snowflake dies over white card stock. Any tone on tone colors would work!
- Add a bit of sparkle to your design using glitter.

TIPS:
- Try different colors of snowflakes for a fun effect
- Mix stamps and dies to create a different look
- Add some sparkle to your design
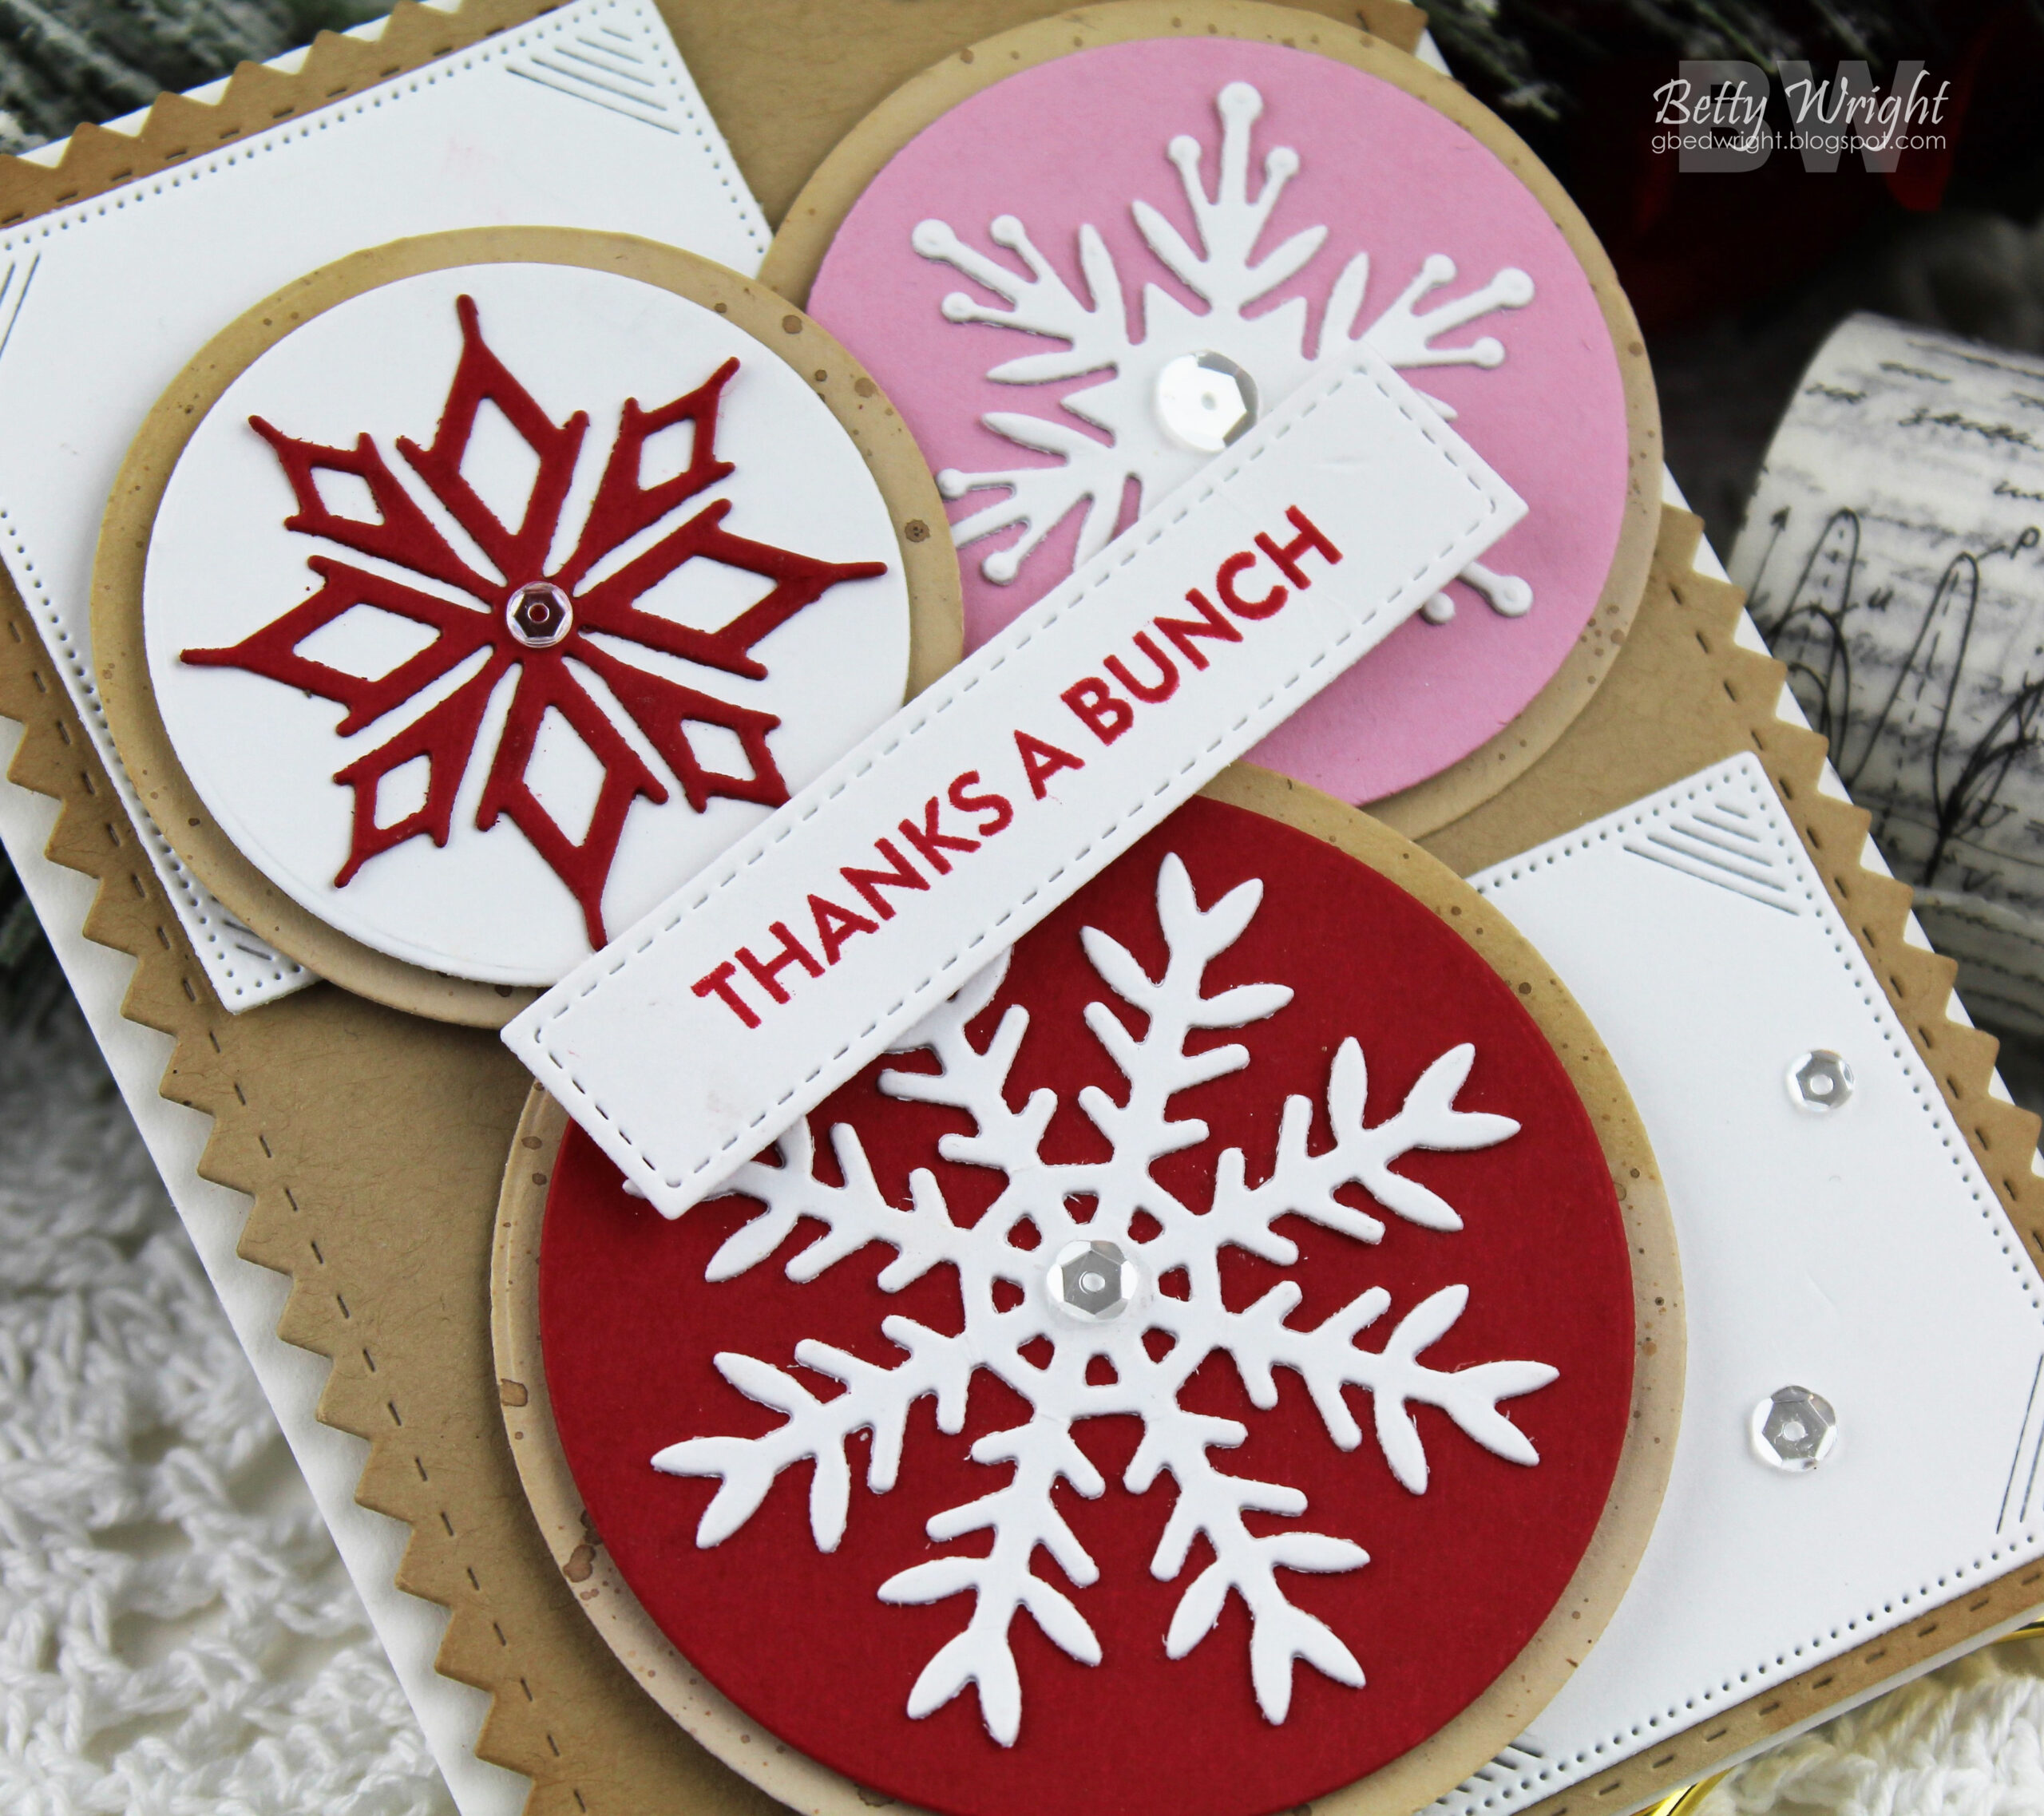
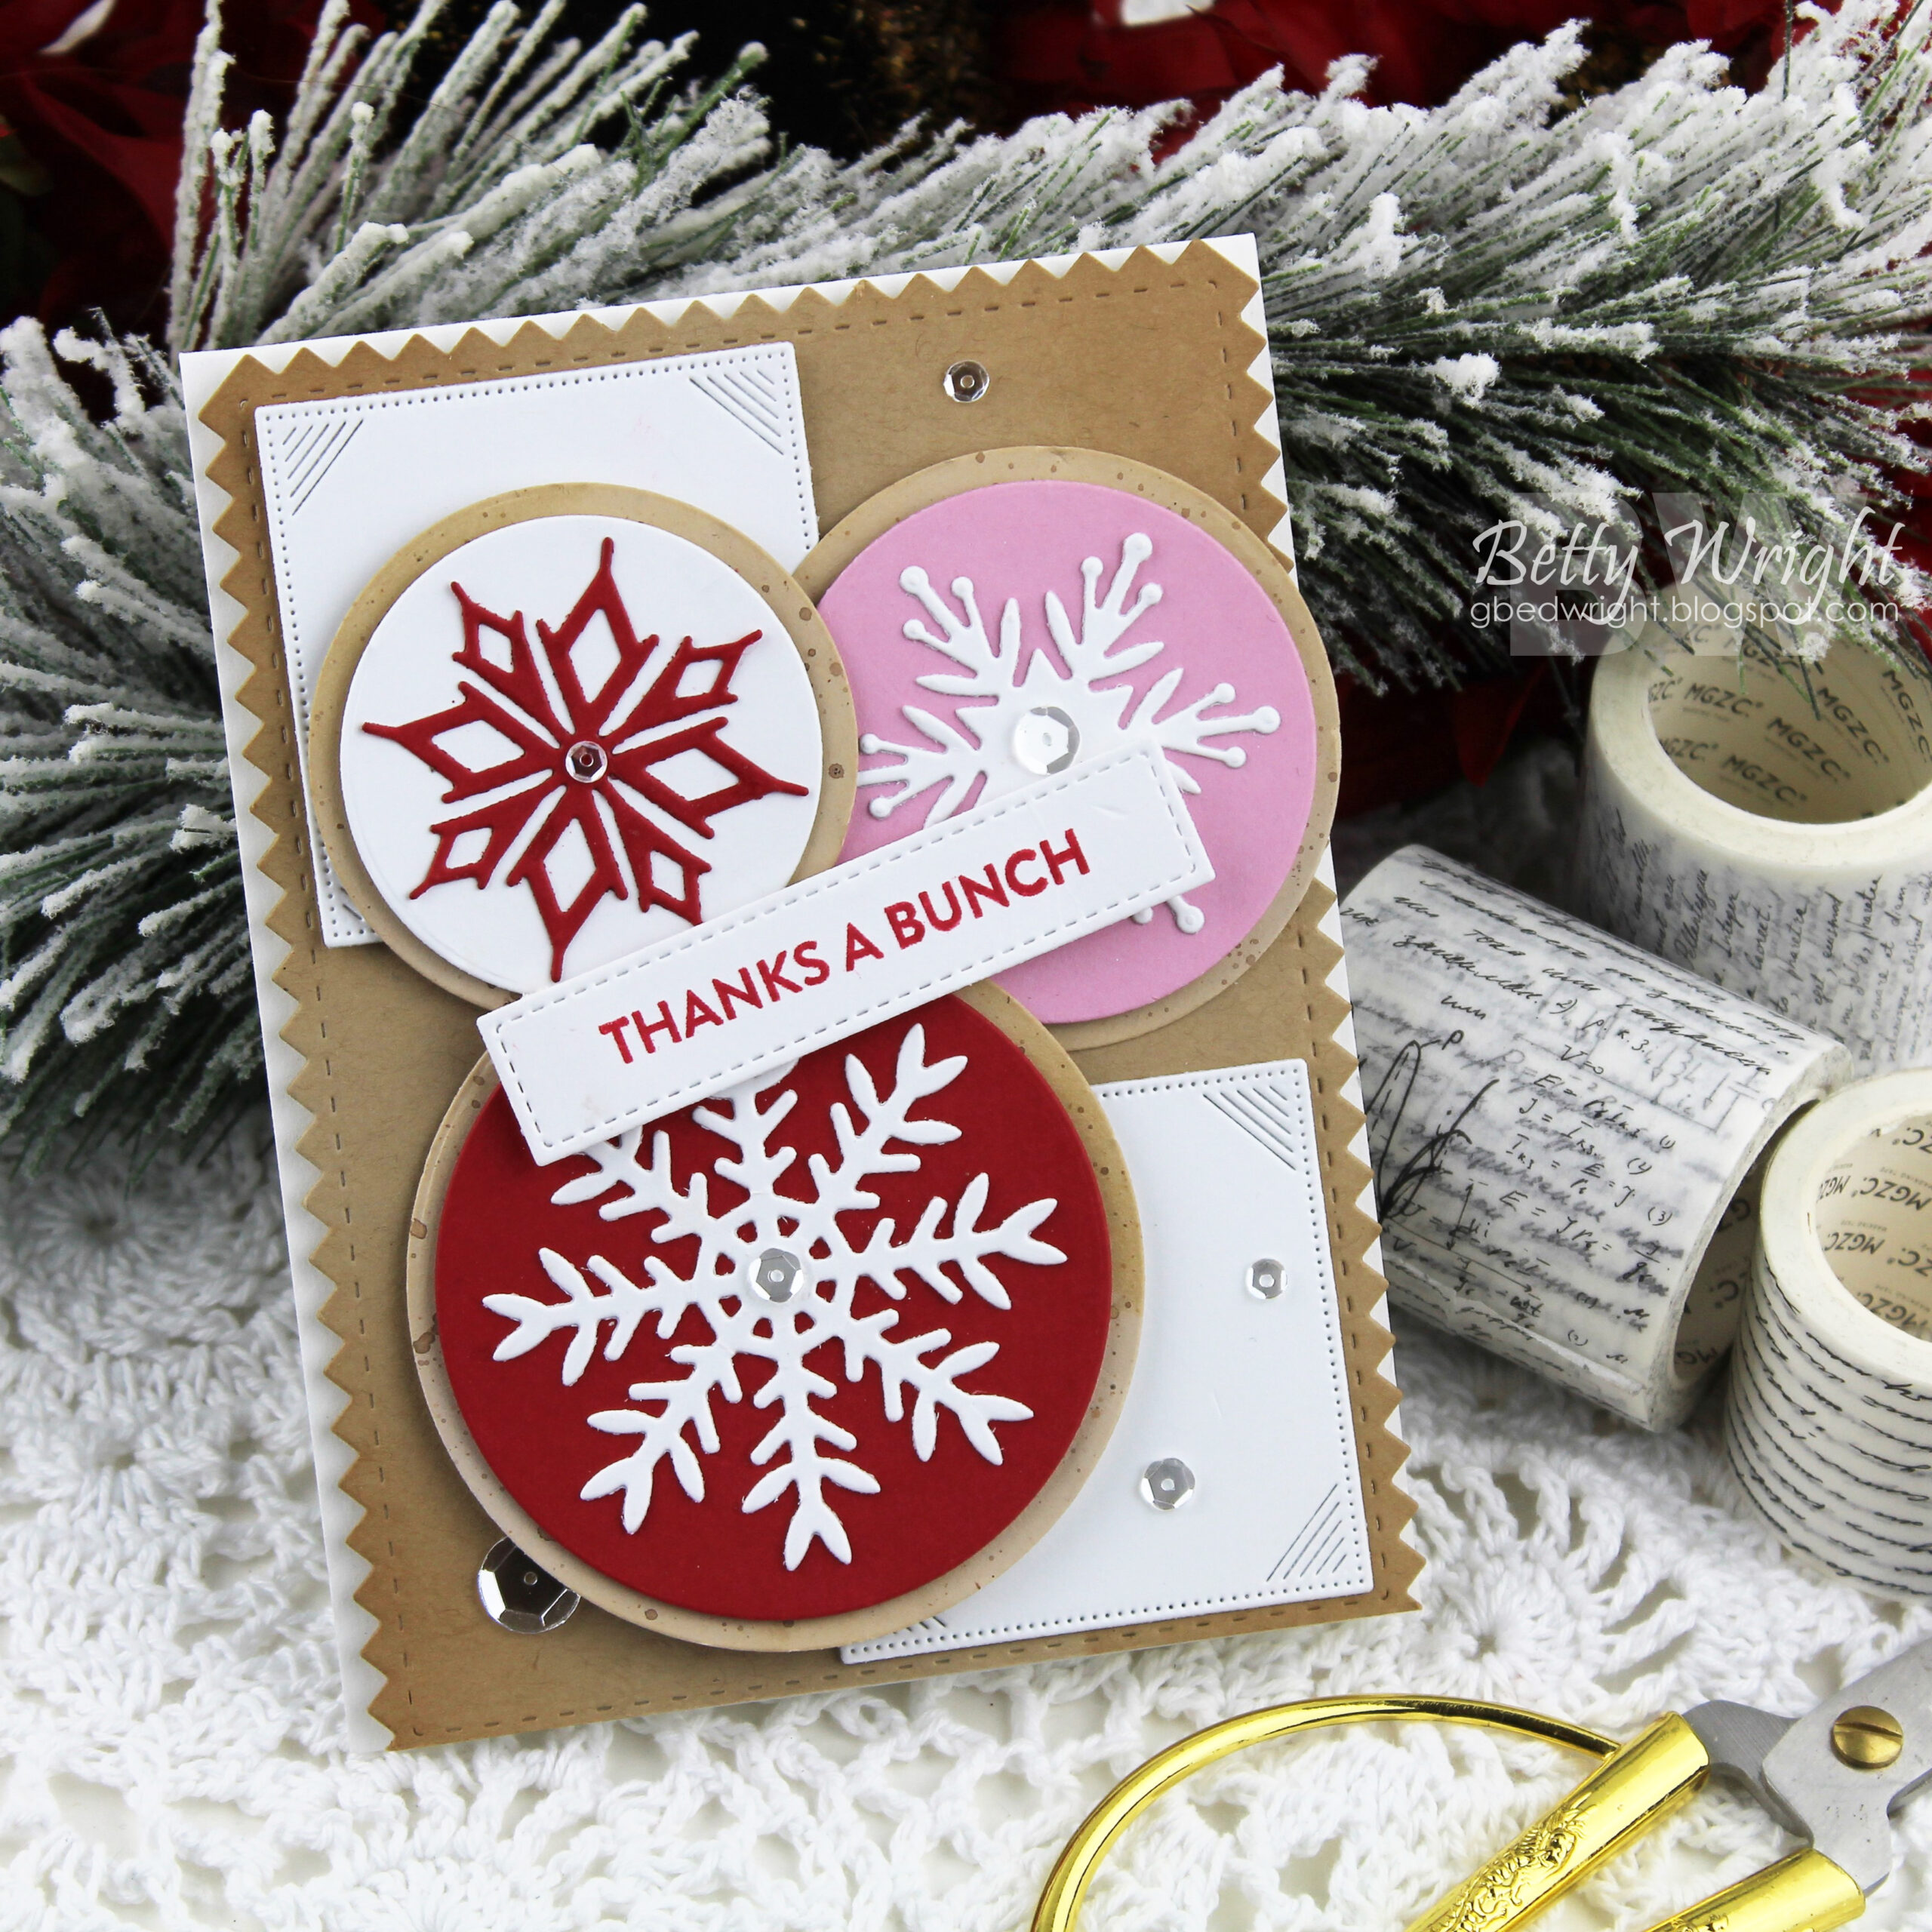
TIPS:
- Layer circle dies to create cookies
- Add splatters to give cookies a real look
- Use an A2 frame upside-down for a different look
TIPS:
- Add small foam dots between snowflake layers to add dimension.
- Add fine glitter to the snowflakes for a more festive and fun look.
- Cut apart words in a sentiment set to allow more variety in design.
TIPS:
- I love layering up the three different sizes of snowflake dies with different kinds of papers. They fit perfectly on both gift card holders which I’m always needing during the holidays!
- Add glitter and gems to give your snowflakes some extra pizzazz!
- The stir stick was transformed from a Halloween version by adding two circles and a small snowflake from the Border Bling: Snowflakes die.
We hope you have enjoyed all the beautiful projects that we have shared with you today! We would love to hear what you think of everything we have introduced! Please leave a comment on this post to tell us what you like the most and why, and you will be eligible to win big!

Leave a comment today and you will be automatically entered to win a $50 Papertrey Ink gift certificate! You have until 7am ET, September 29th to leave your comment and be eligible to win. Only one comment per person please. One randomly selected winner will be posted on the September Release Winners Page by 11 PM ET on September 29th.


Leave a Reply