


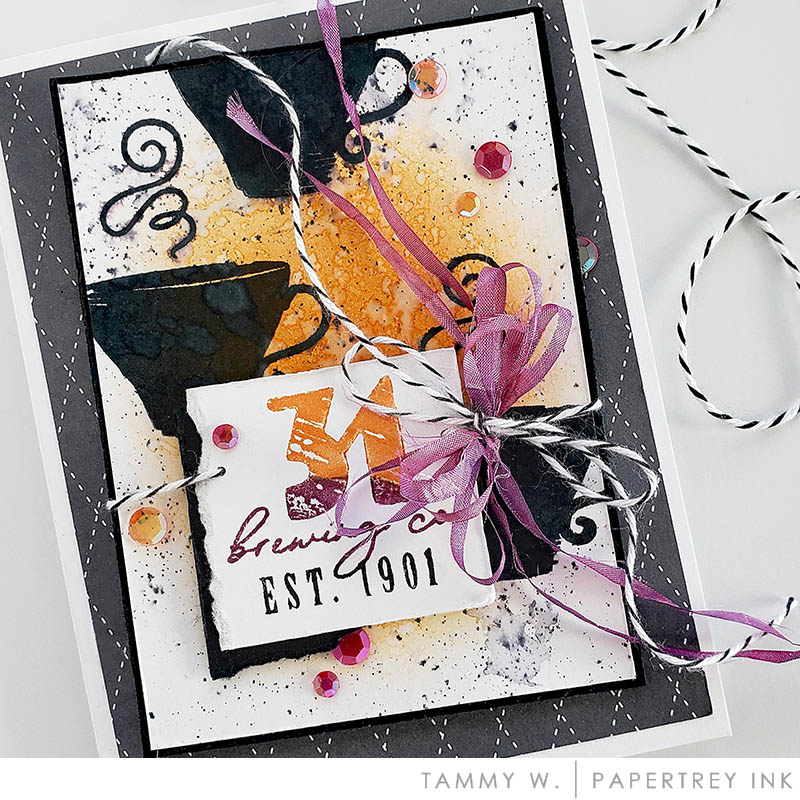
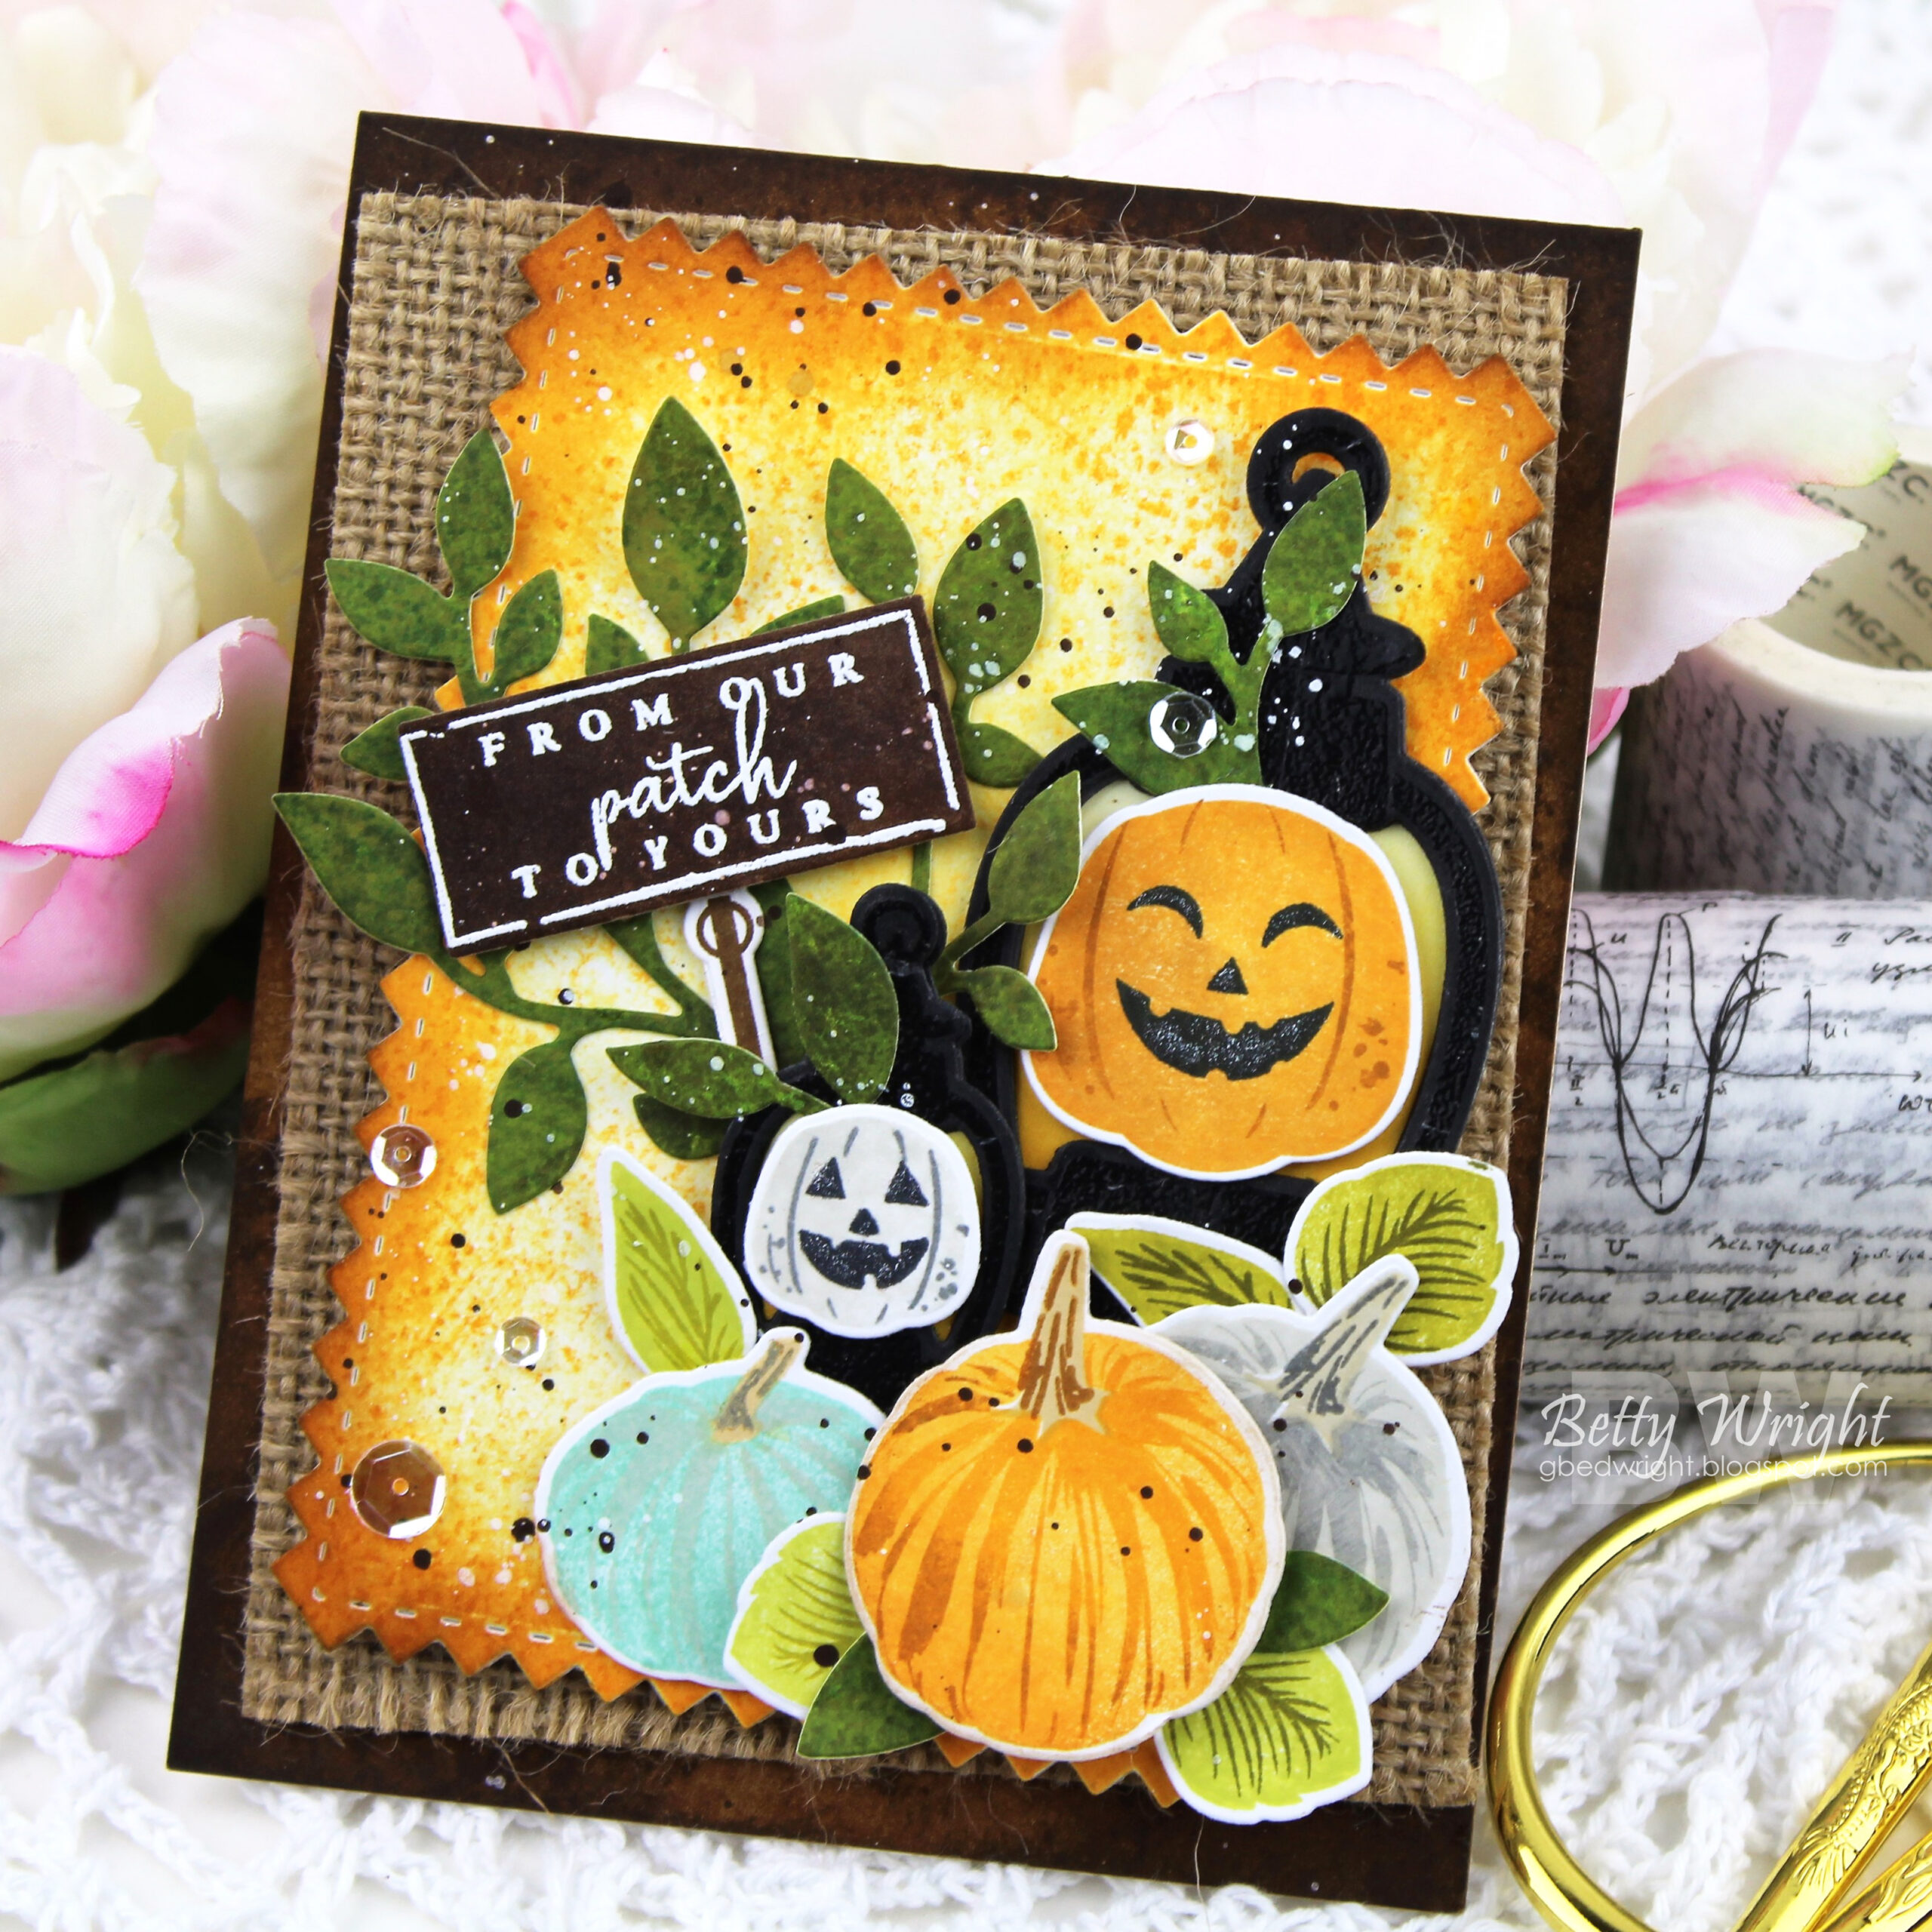
On Day 2, we’ve got some seriously spooky sweets to share with you! Introducing the new Witches Brew stamps and dies, our Brew To-Go dies, and Elegant Edges: Spider Web dies. There’s so much to love today, so let’s get started!
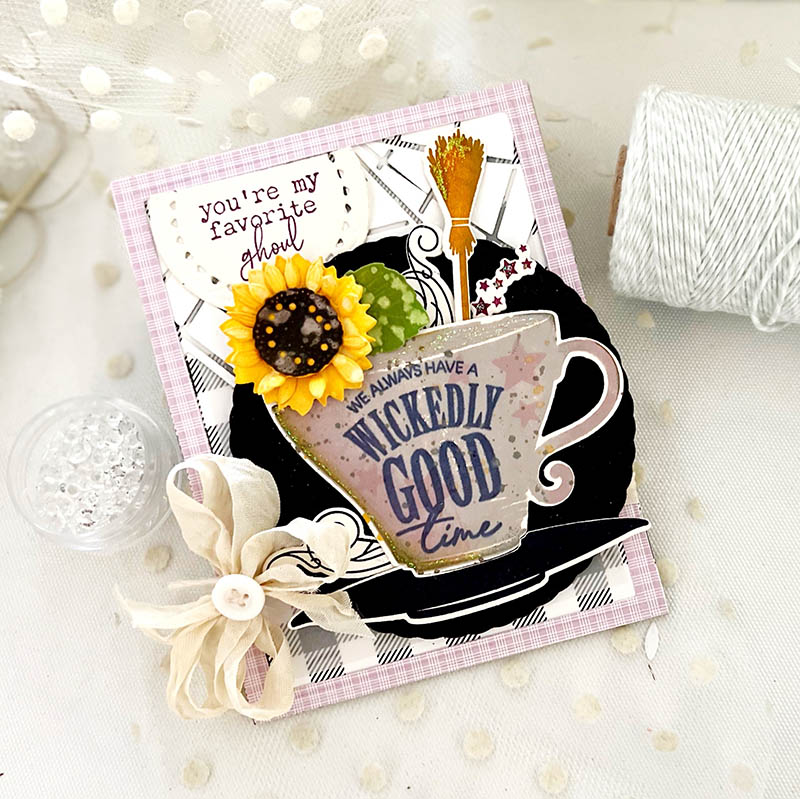
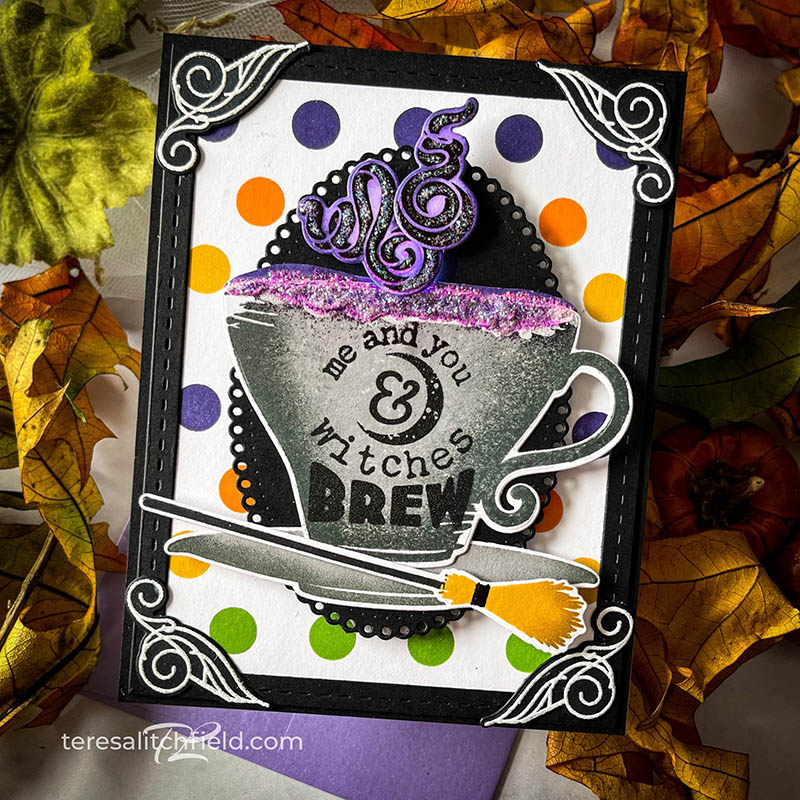
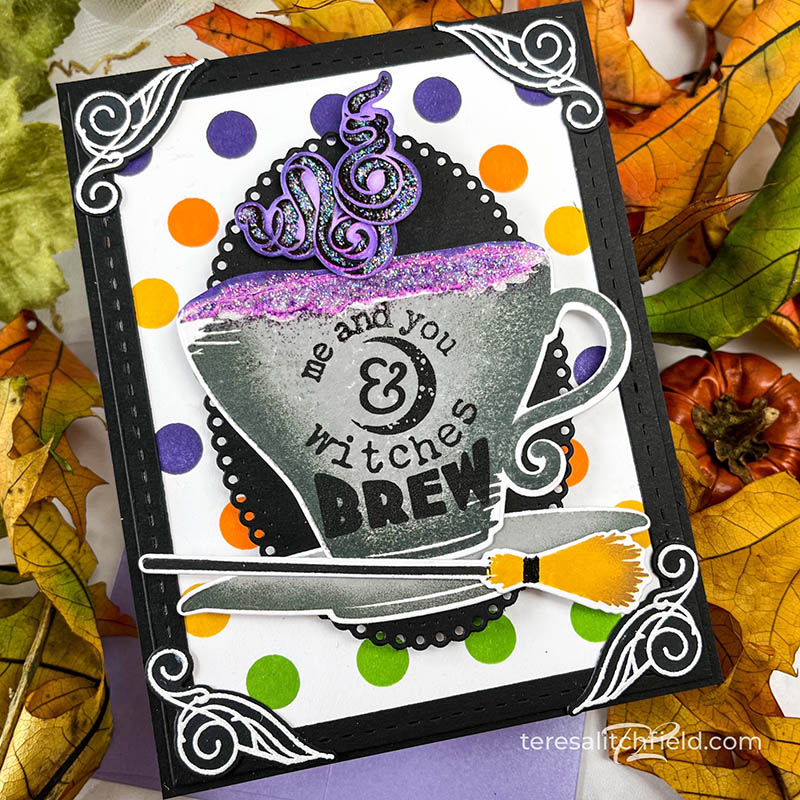
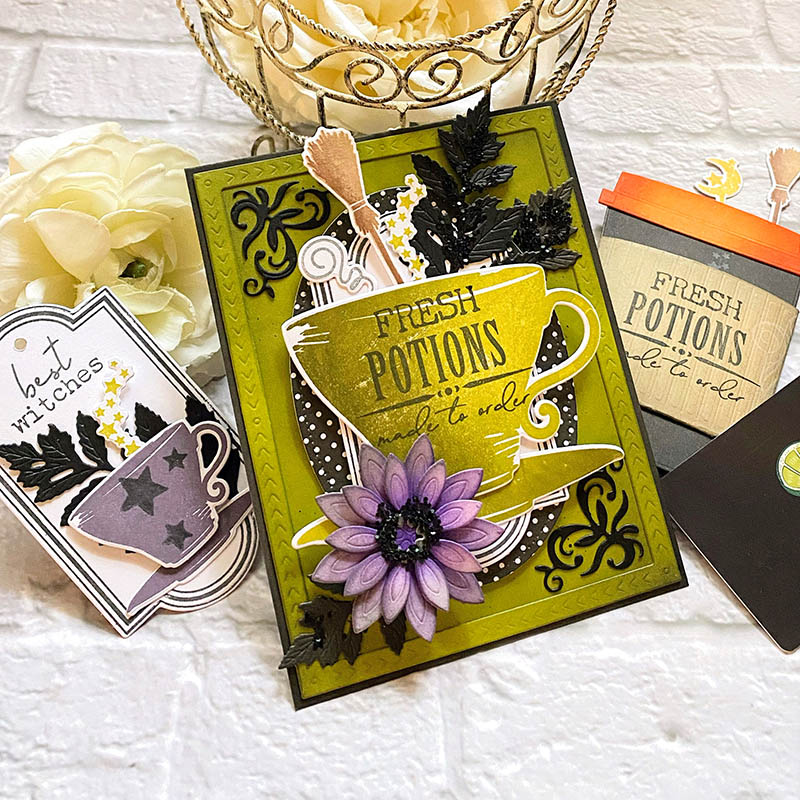
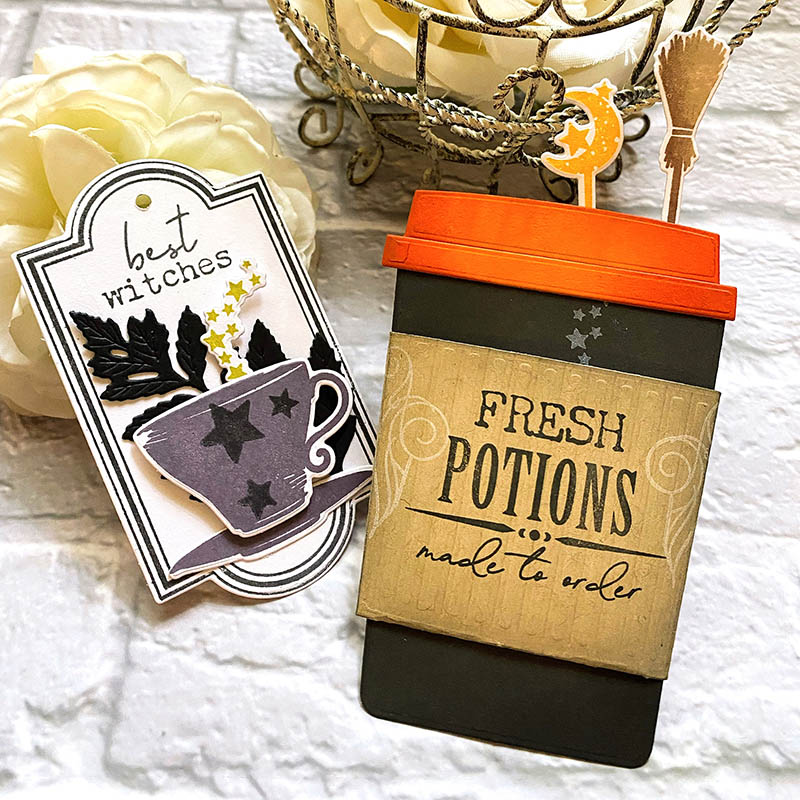
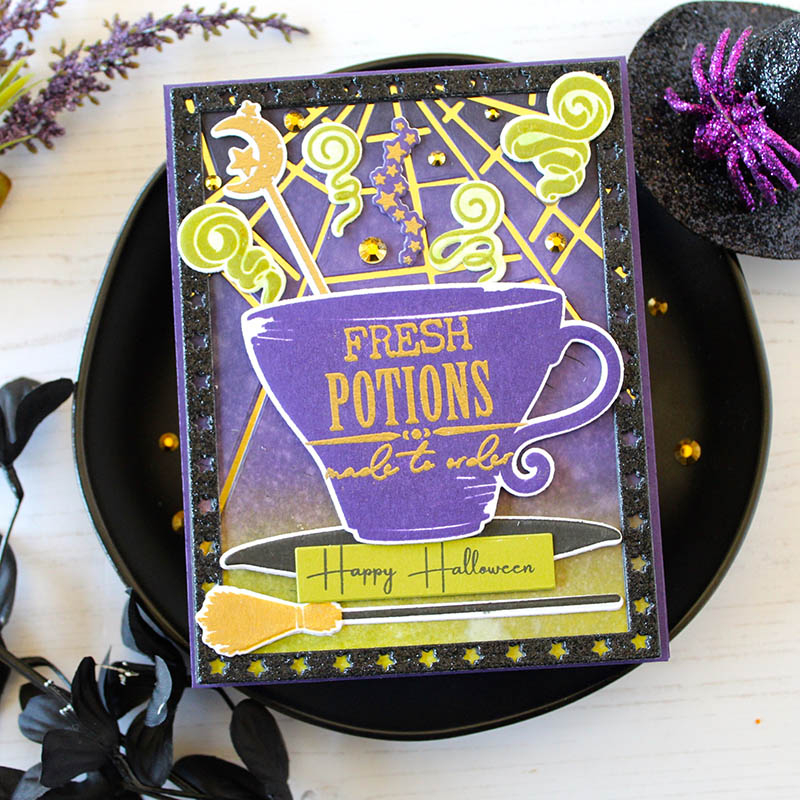
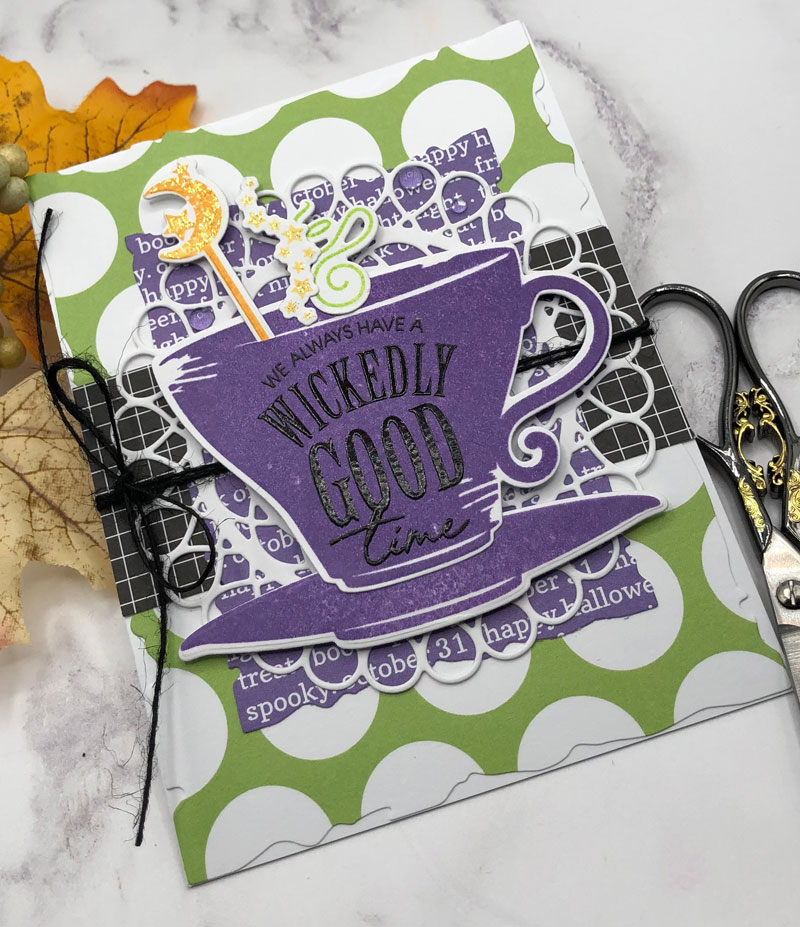
I’ve used the darling Witches Brew stamps and dies on my card, stamping my haunted teacup full of my steaming brew and even setting it on a saucer! This delightful set comes complete with swirls of steam, witches brooms and Halloween moon stir sticks, bubbling stars, and the most playful sentiments.
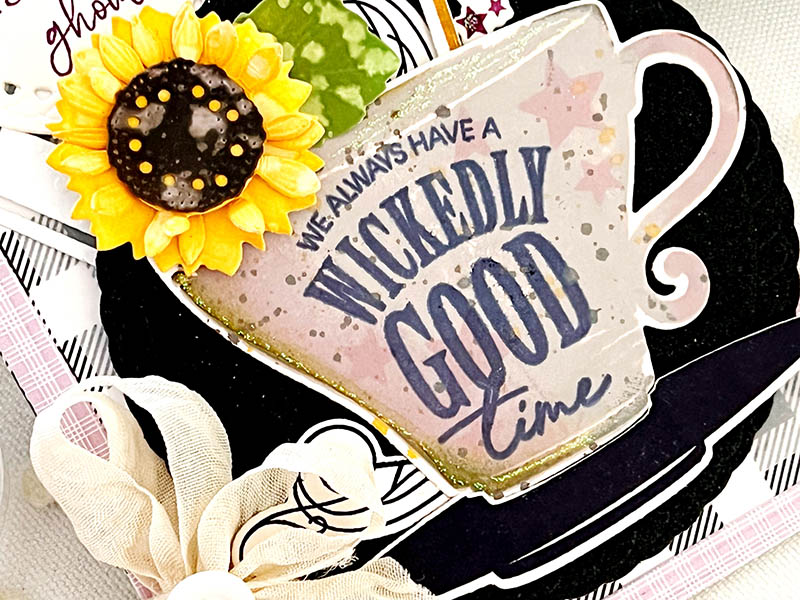
I stamped my teacup in a combination of Soft Stone and Autumn Rose with my sentiment stamped in True Black. I added stars in a soft Lilac Grace, so they’d blend without adding too much distraction. I layered my teacup over a Love to Layer: Scalloped Circle cut from black cardstock. This was first layered over the beautiful, new Elegant Edges: Spider Web die cut. I love it cut from white, with just a bit of the Chicken Scratch Gingham showing from behind.
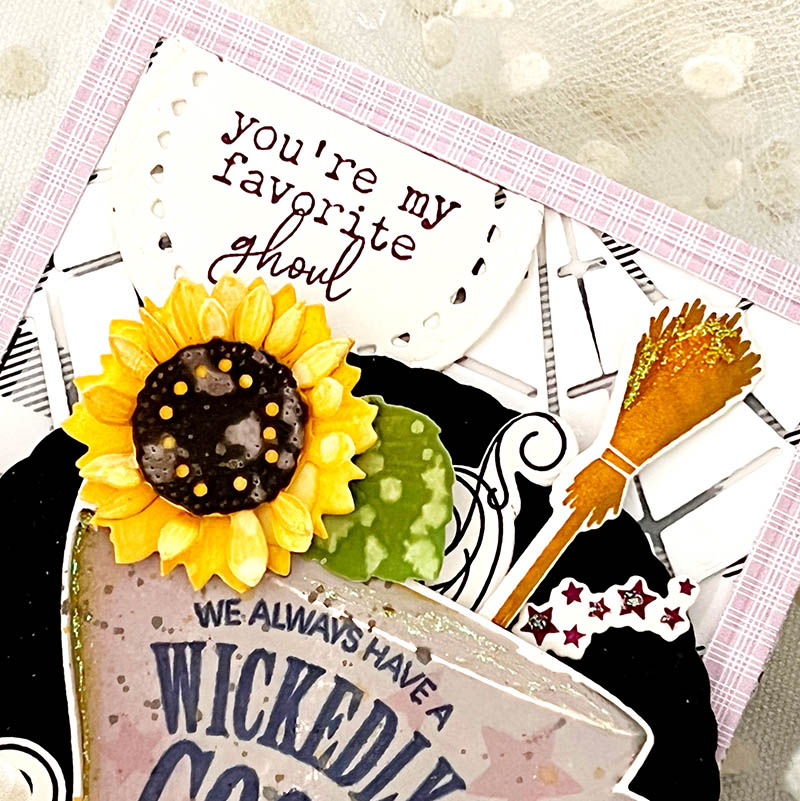
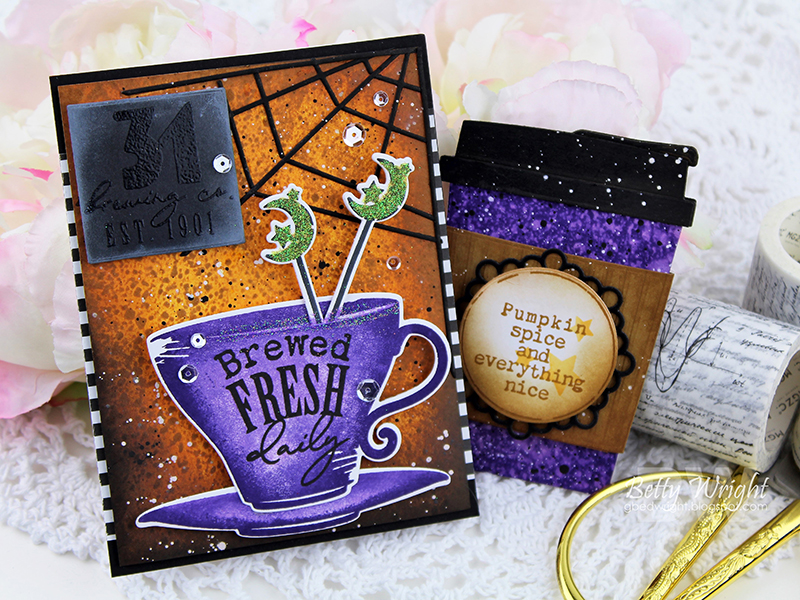
My teacup is filled with steamy swirls and stars, an Into the Blooms: Sunflower, and the cutest stir stick in the shape of a witches broom. I added a second sentiment from the new Just Sentiments: Spooky stamp set, which you’ll be hearing more about next!
Enjoy these wickedly sweet creations our designers have ready for you!
Supplies used:
STAMPS: Witches Brew, Just Sentiments: Spooky
INK: Olive Twist, True Black, Soft Stone, Lilac Grace, Autumn Rose, Amethyst Allure, Green Parakeet, Bright Buttercup, Summer Sunrise, Ripe Avocado, Saffron Spice
PAPER: Stamper’s Select White, Chicken Scratch Gingham, Bitty Big Lilac Grace, Sheer Basics Vellum
DIES: Witches Brew, Elegant Edges: Spider Web, Love to Layer: Scalloped Circles, Into the Blooms: Sunflowers, Border Bling: Embossed Skinny Frames
OTHER: scrunched seam binding, black glitter paper, Distress Ink and spray, Stickles glitter
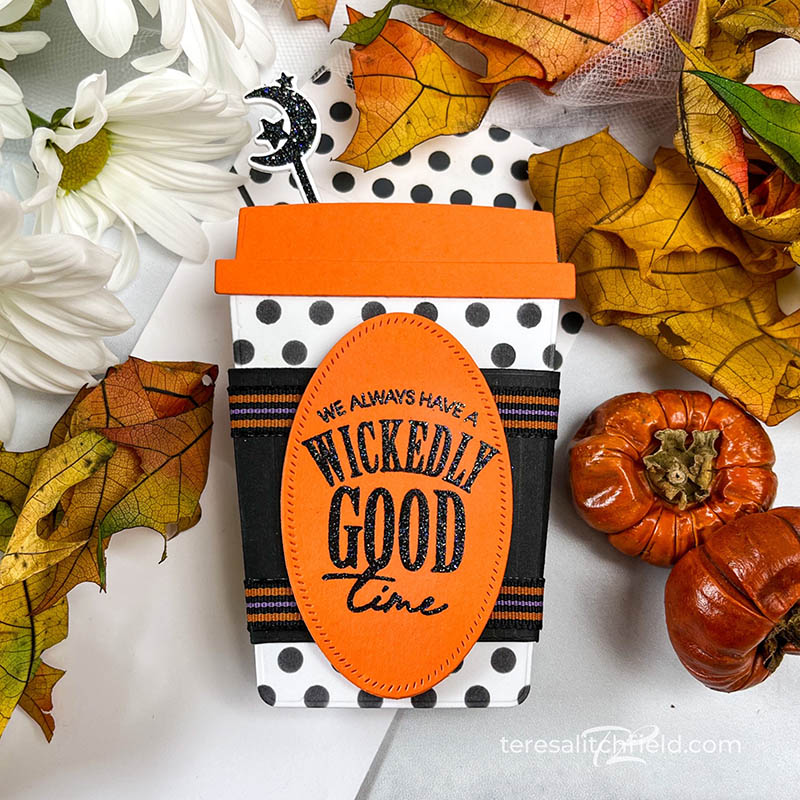
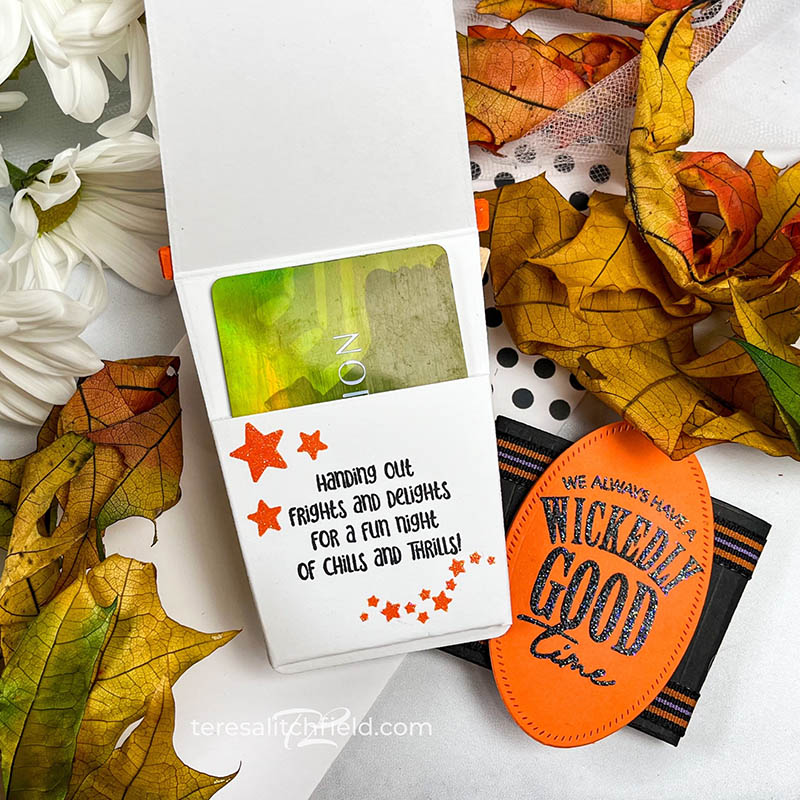
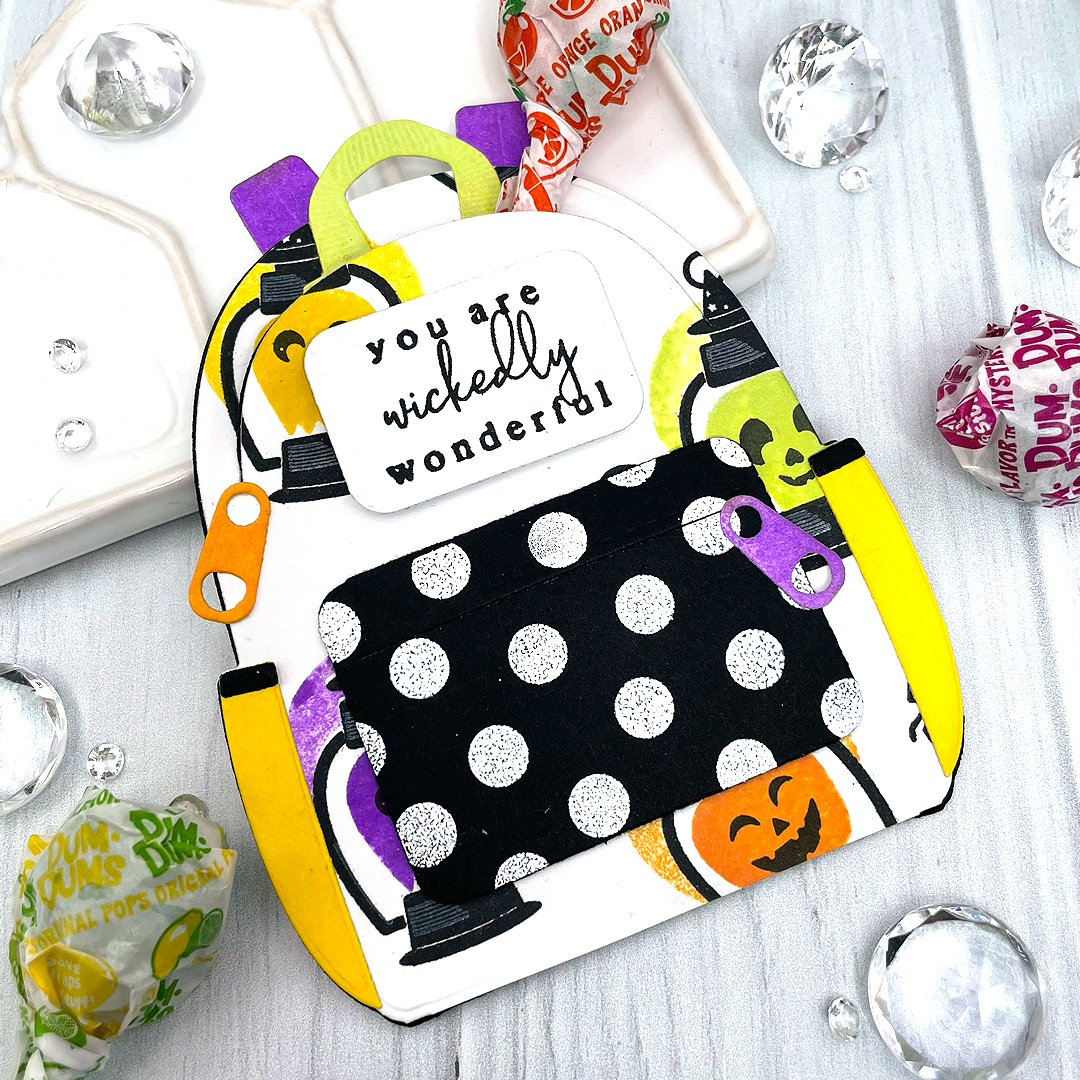
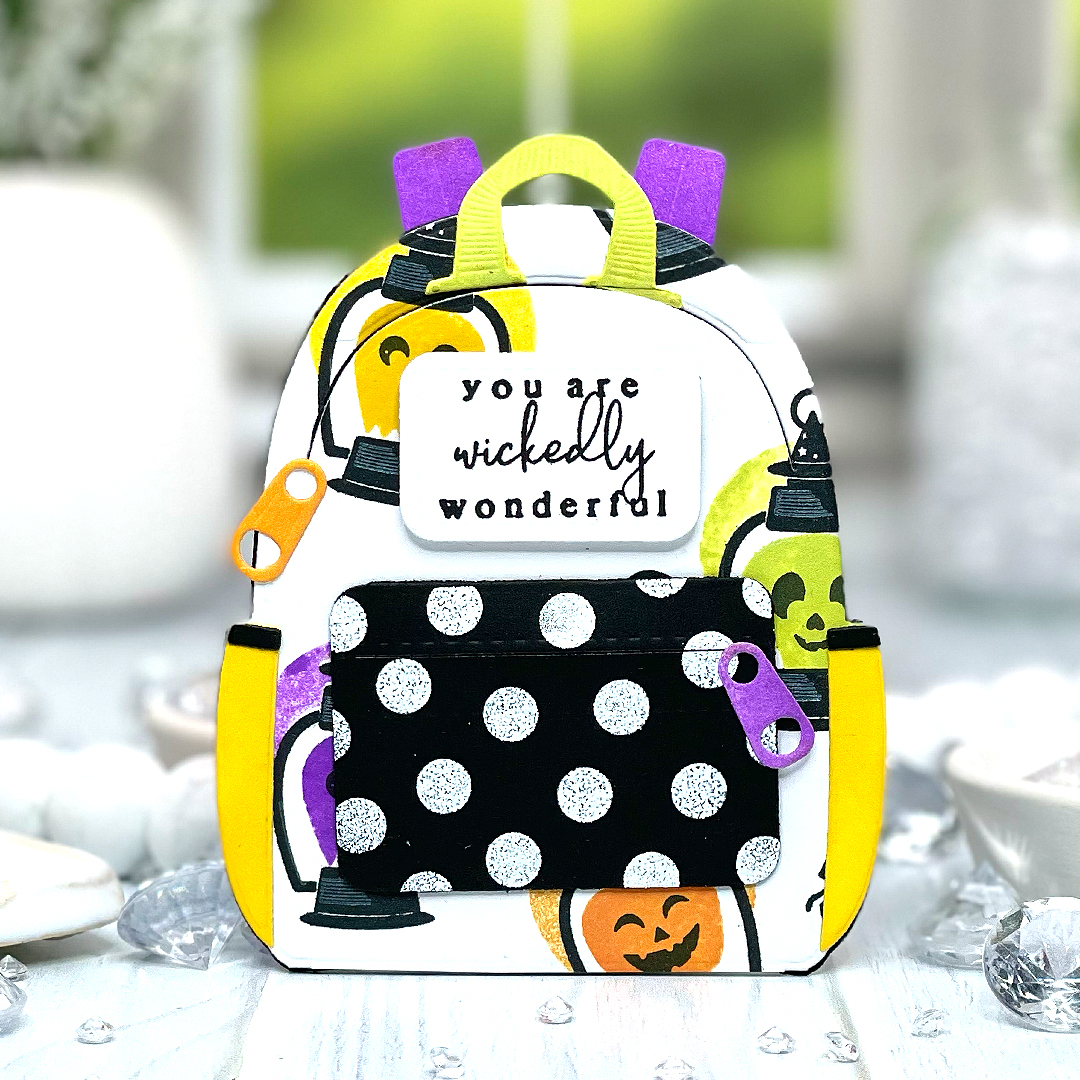
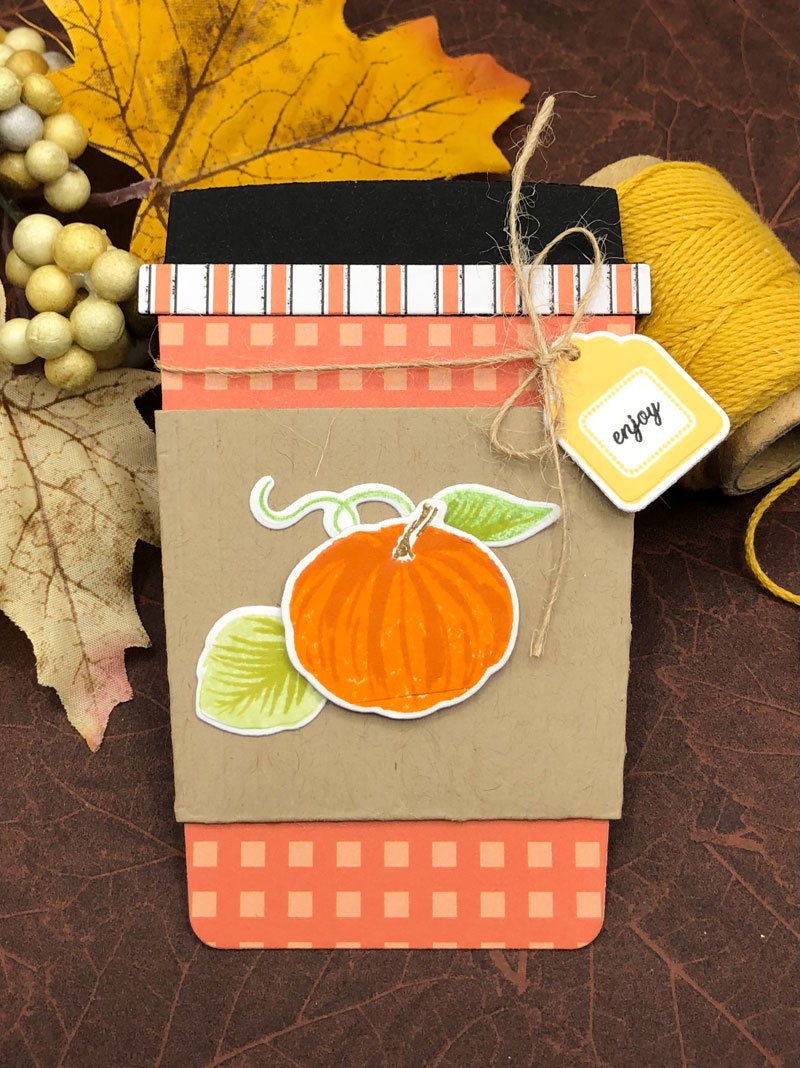
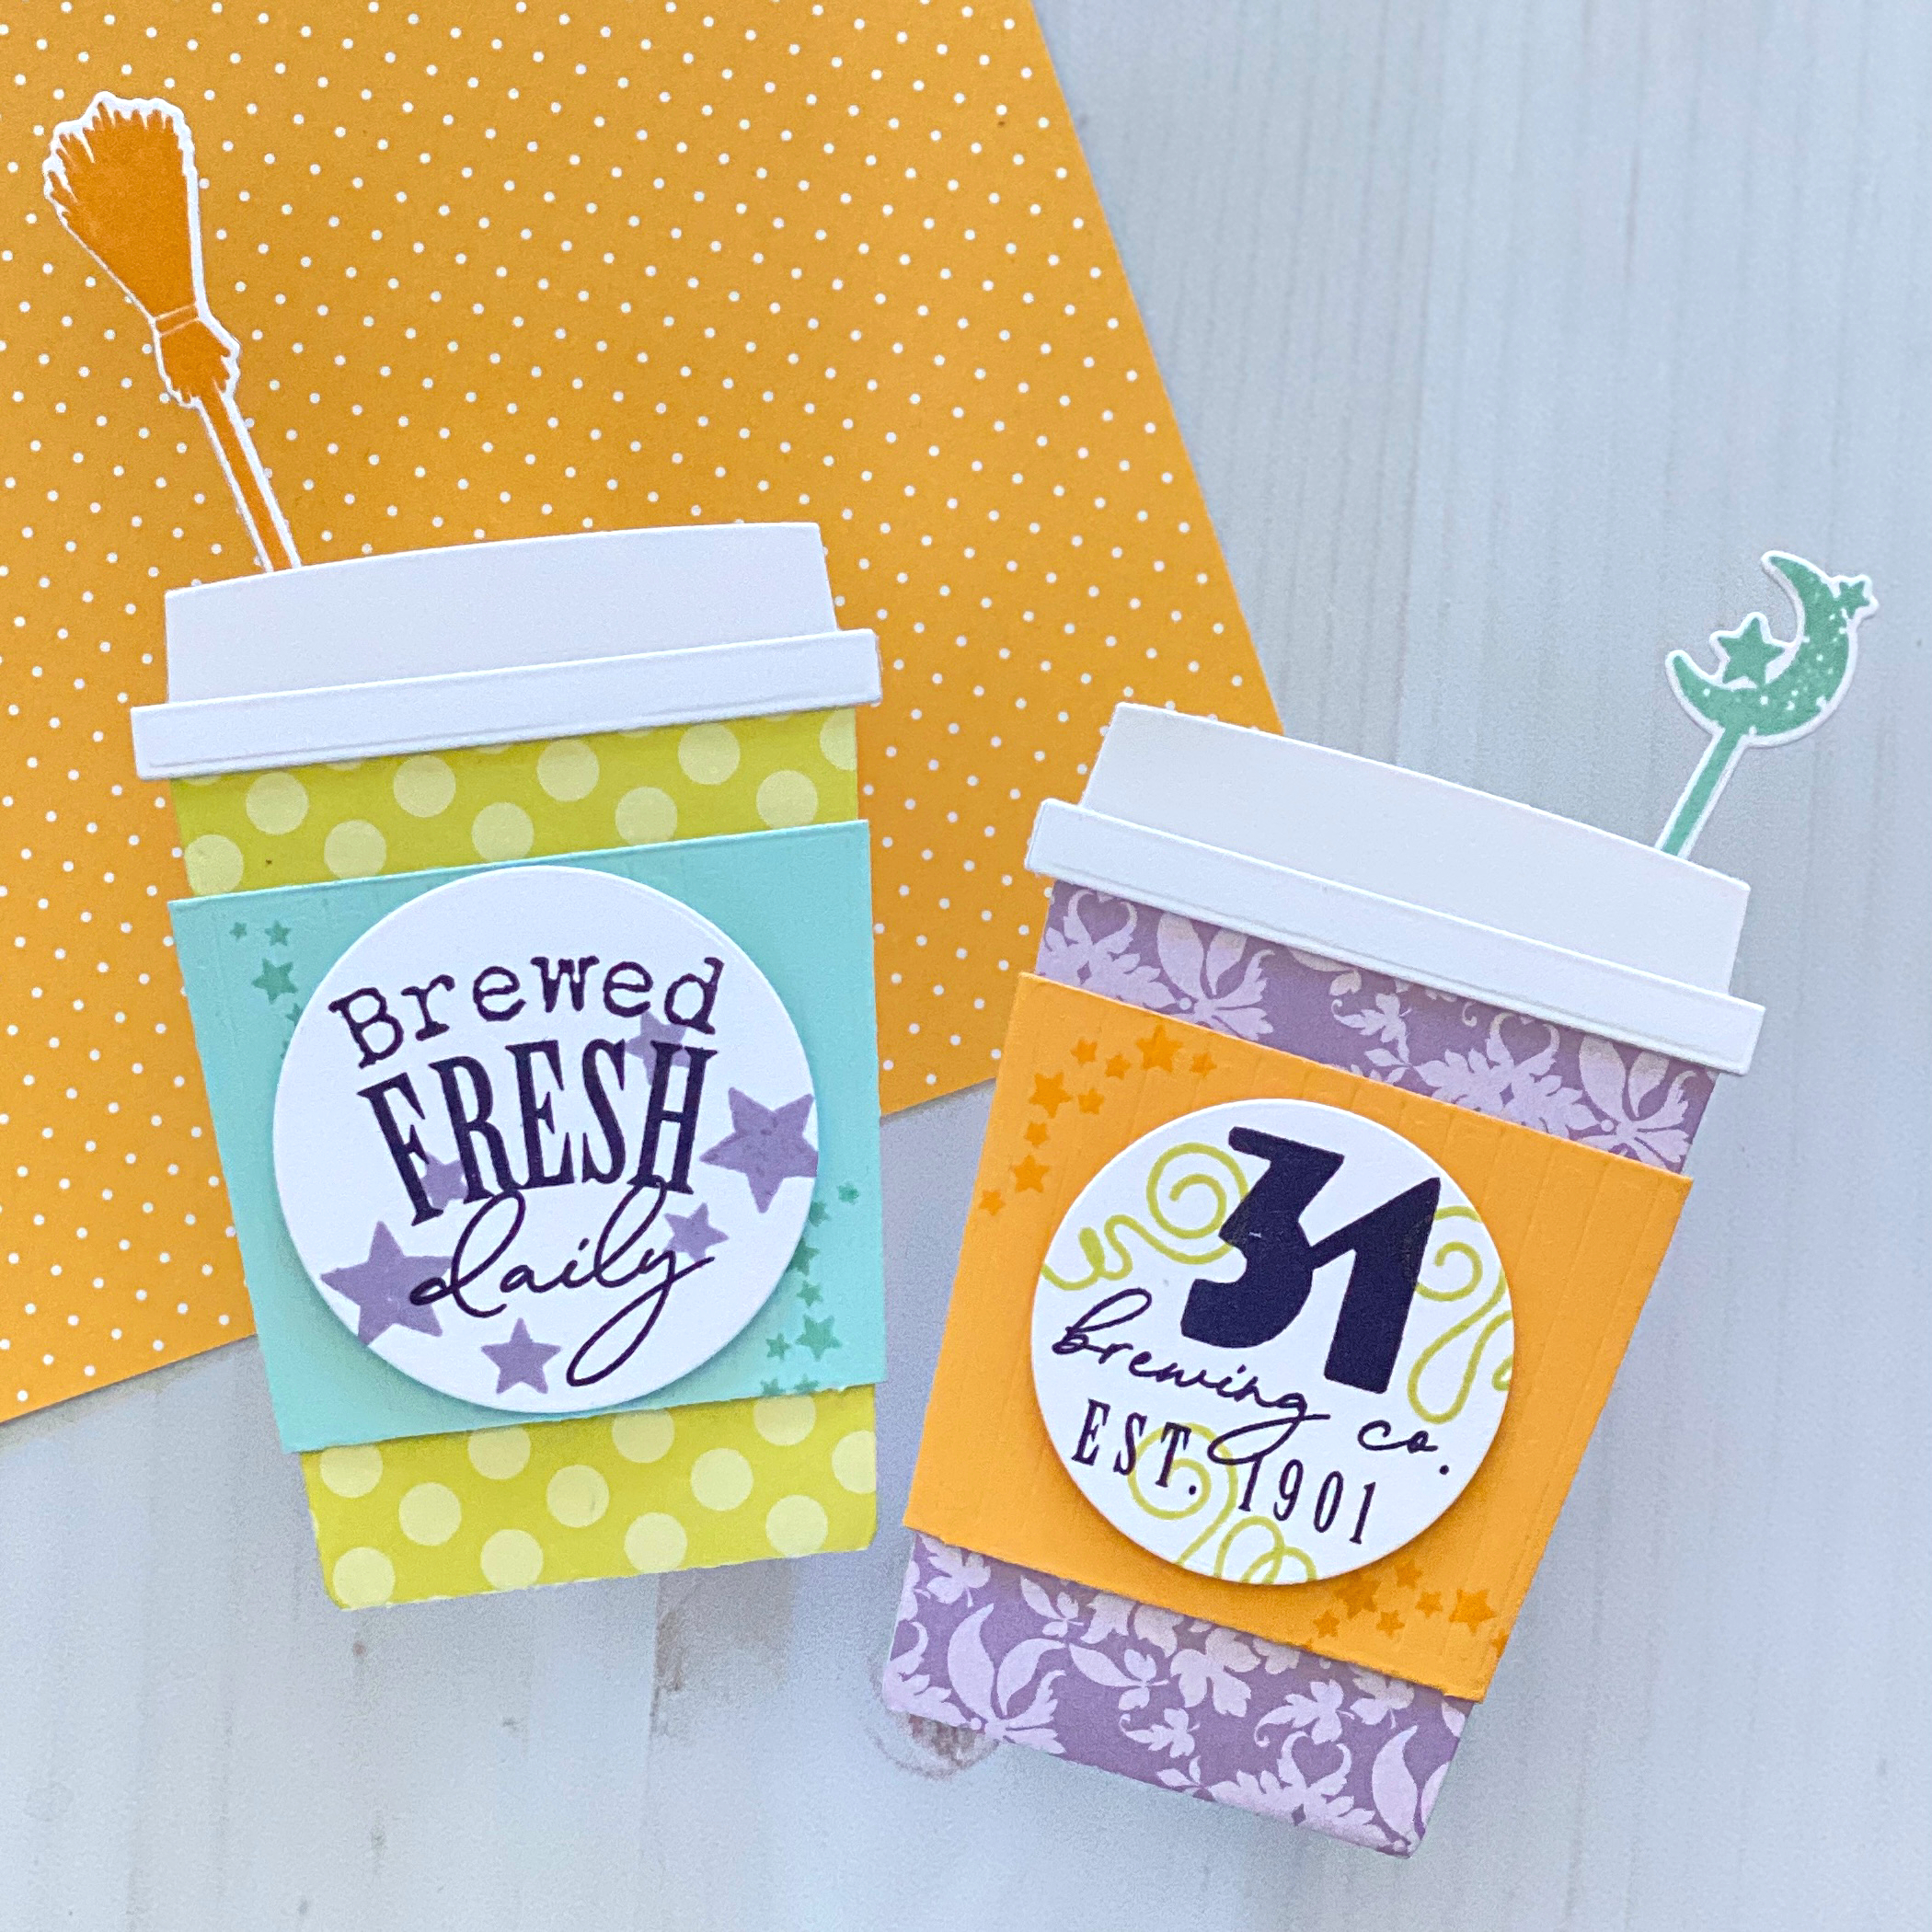
Next up, our designer Dana Kirby has created the cutest gift card holders using our new Brew To-Go dies.

Look at this darling set of gift card holders. Our Brew To-Go dies can be used with our Witches Brew stamp set or any number of sets to create gift card holders throughout the year. Imagine hot cocoa cups, Back to School cups, Fall flavors, etc. I love Dana’s coordinating colors and designs on this delightful pair.
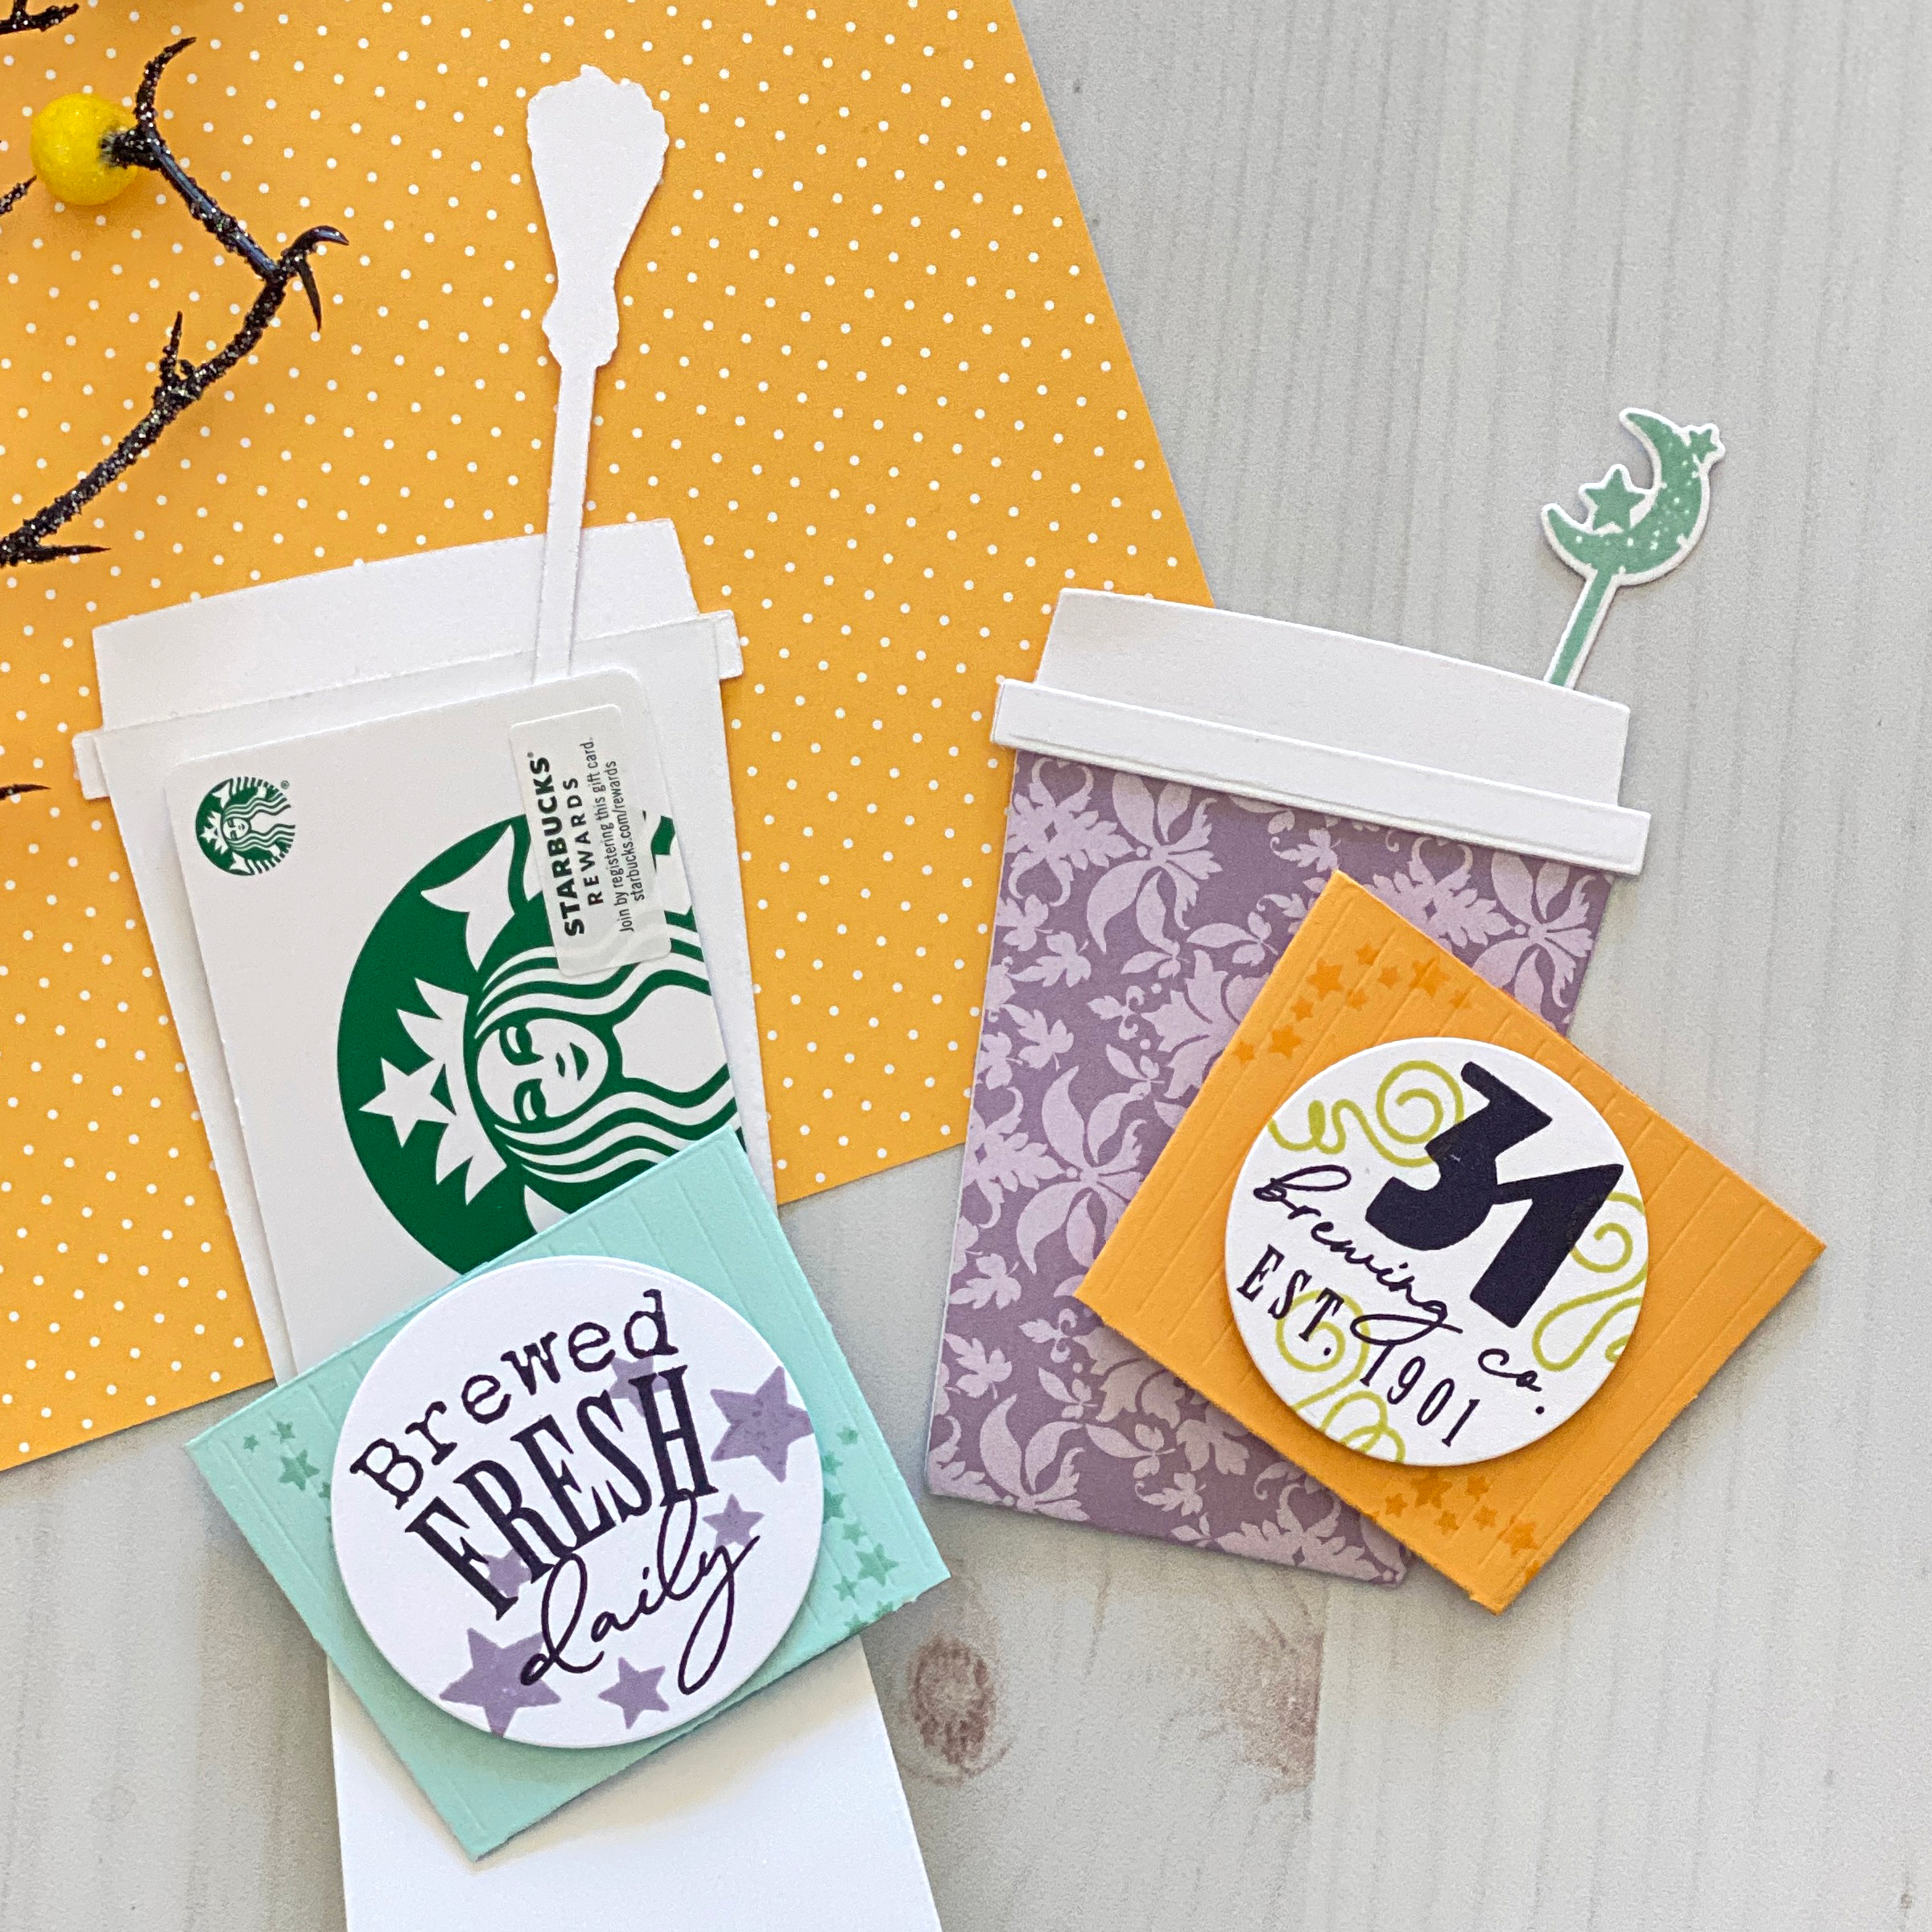
Inside, Dana has slipped Starbucks gift cards, perfect for all of you pumpkin spice lovers out there. Wouldn’t these be such a sweet treat to receive? I love Dana’s special touches, including the darling broom that serves as a stir stick. Enjoy creating with this die set….inspiration abounds!
Supplies used:
STAMPS: Witches Brew
INK: Summer Sunrise, Limeade Ice, Aqua Mist, Winter Wisteria
DIES: Witches Brew, Brew To-Go

TIPS:
- Add some foaming brew to the cup by applying Texture Paste and Embossing Glaze.
- Stickles adds a glittery sparkle to your brew.
- a twinkling Light make the potion GLOW!


TIPS:
- Create a Shaped card by die cutting the cup with a folded card base just below the top cut line to keep the fold.
- Cut 2 gift card holders with the die placing 1 inside the card and the 2nd as a decorative band around the outside.
- Mini Slimline Envelopes work great to send this Halloween treat!
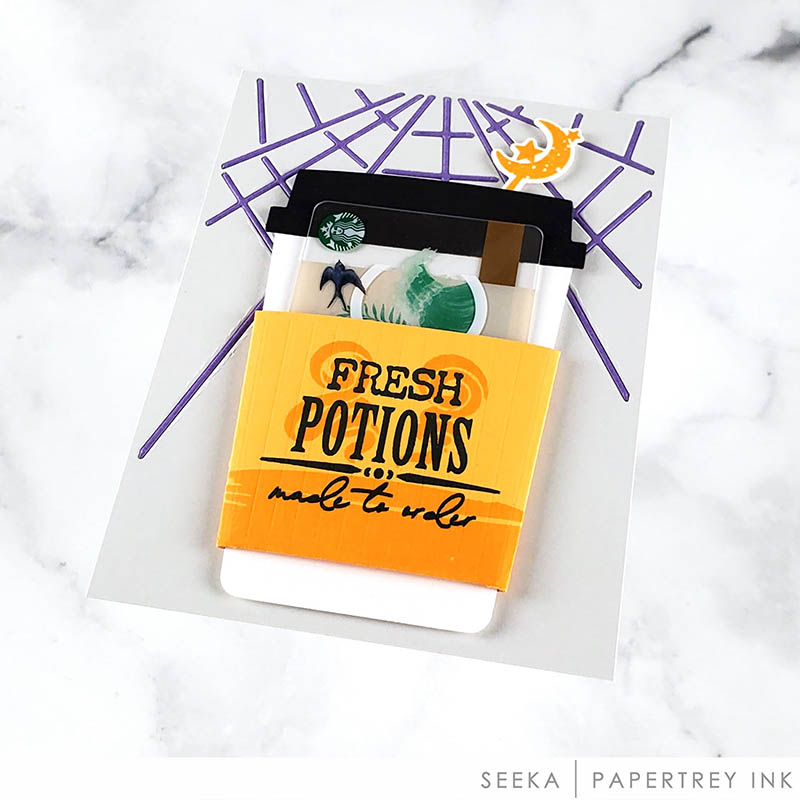
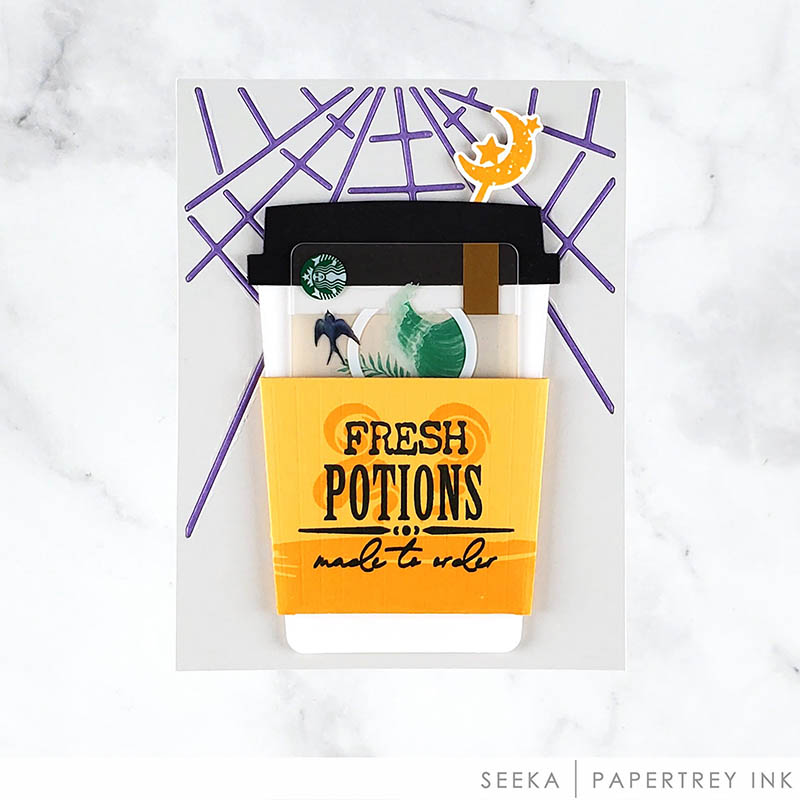
TIPS:
- For the tone-on-tone look on the coffee cup sleeve, use an ink color that coordinates with the cardstock color, or use clear embossing ink
- When inlaying the purple spider web into the gray background panel, use clear tape on the back of the background panel so that the spider web has something strong to stick to. This is much easier and cleaner than using glue.
- When assembling the card, cut off most of the length of the stir stick to make it easier to slide behind coffee cup lid


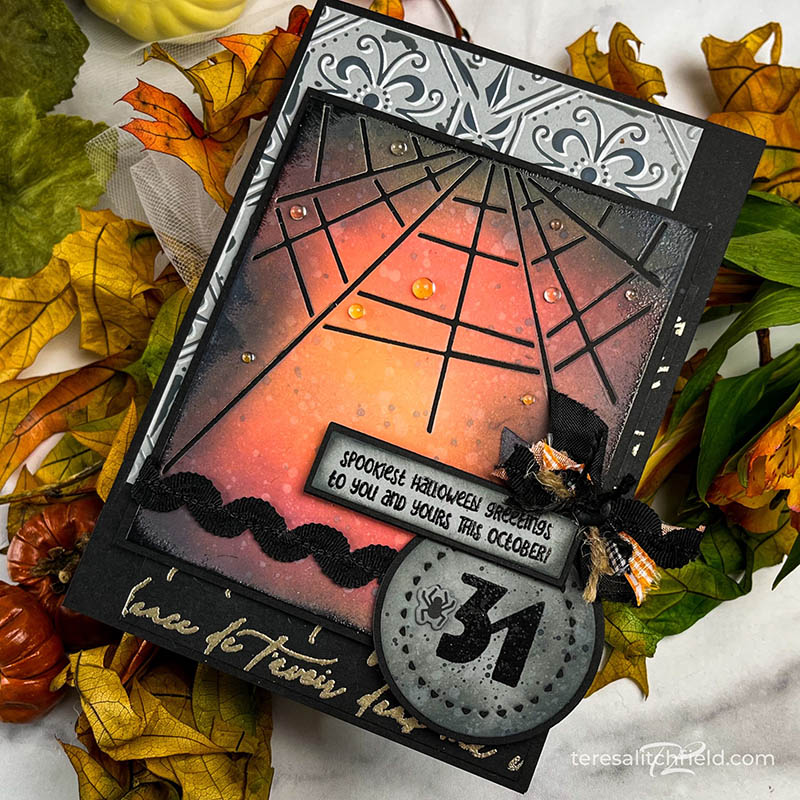
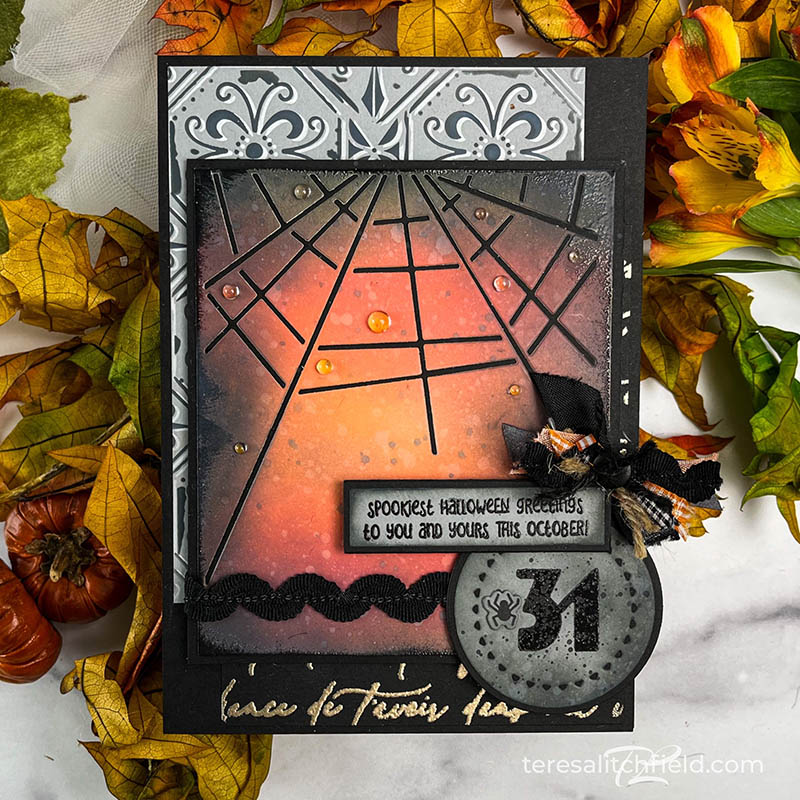
TIPS:
- Create a 5×7 card and add layers of A2 size designs
- Ink Blend a spooky background before cutting the spider web.
- Use up fun ribbons in a Junk Bow to mimic a Spider!
- Add Clear Drops on the Spider Web for the look of water droplets.
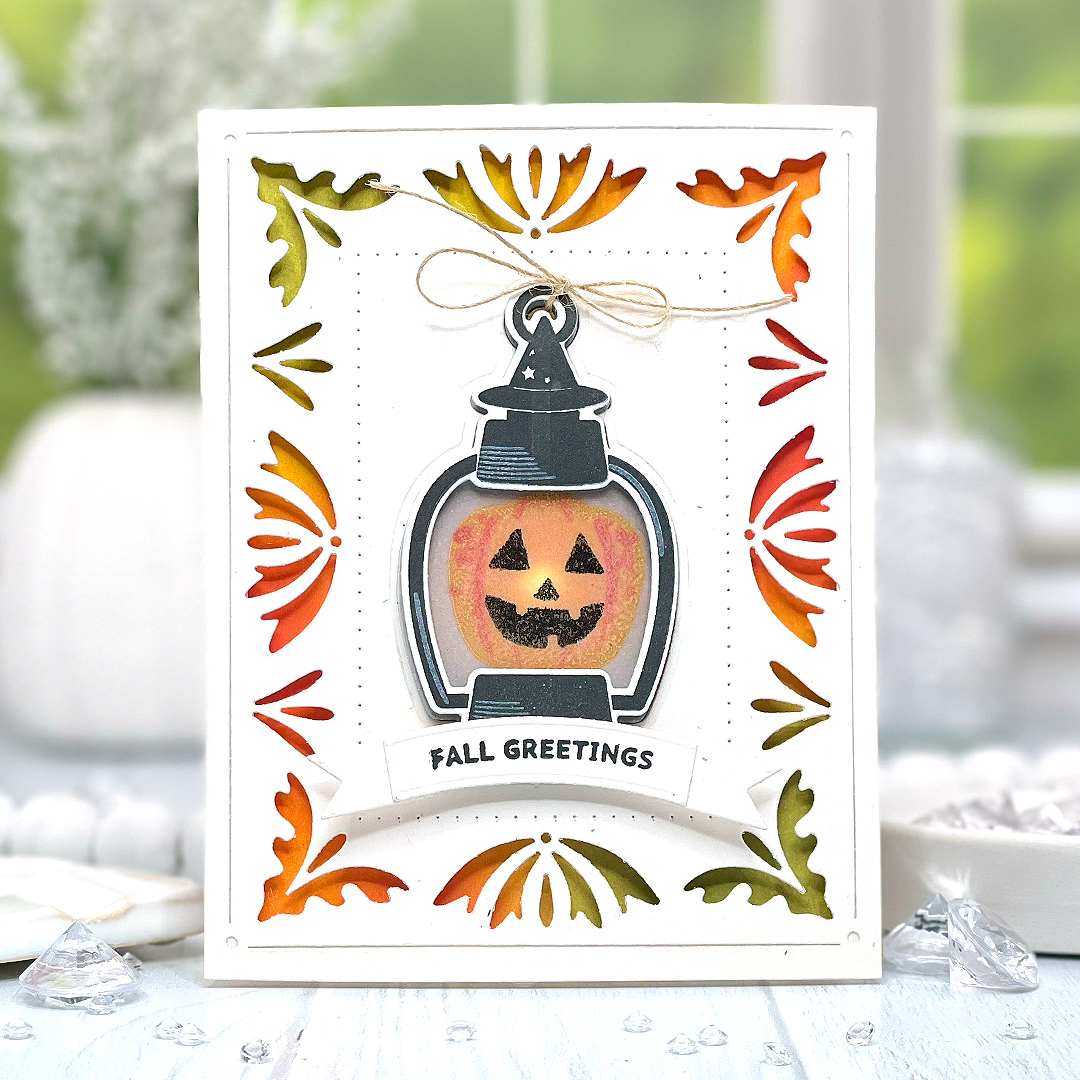
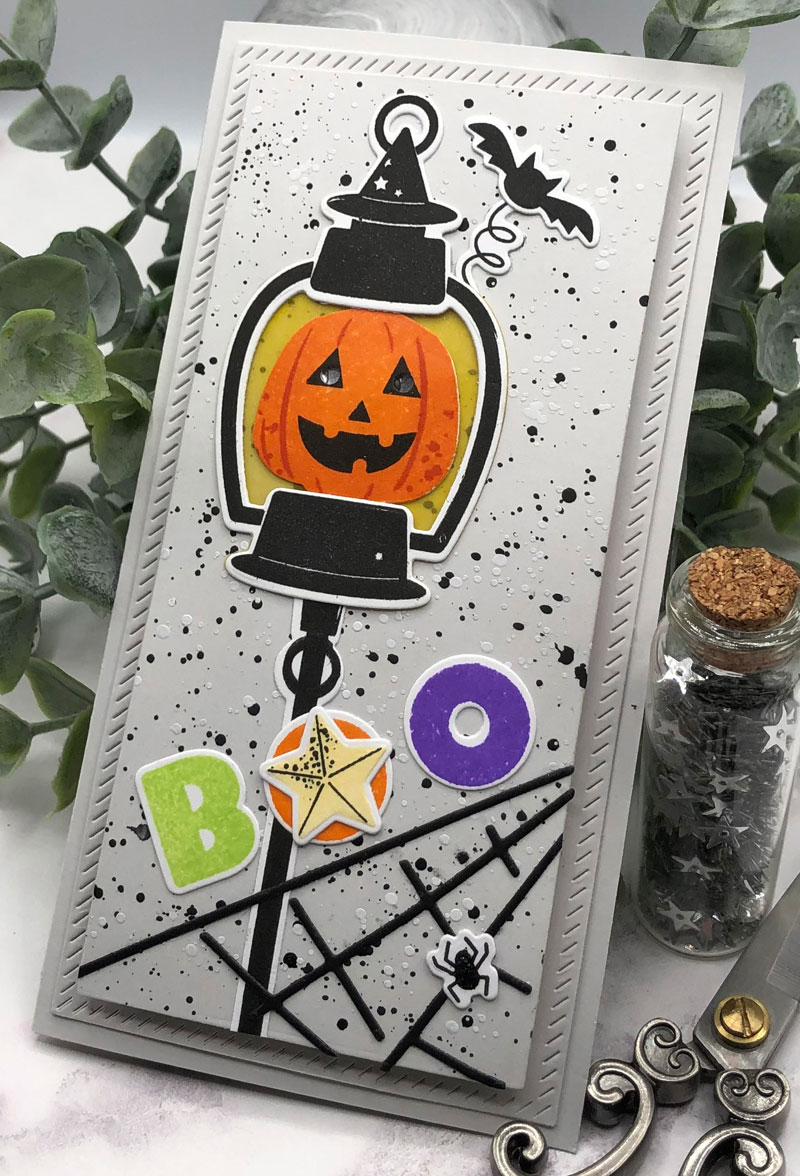
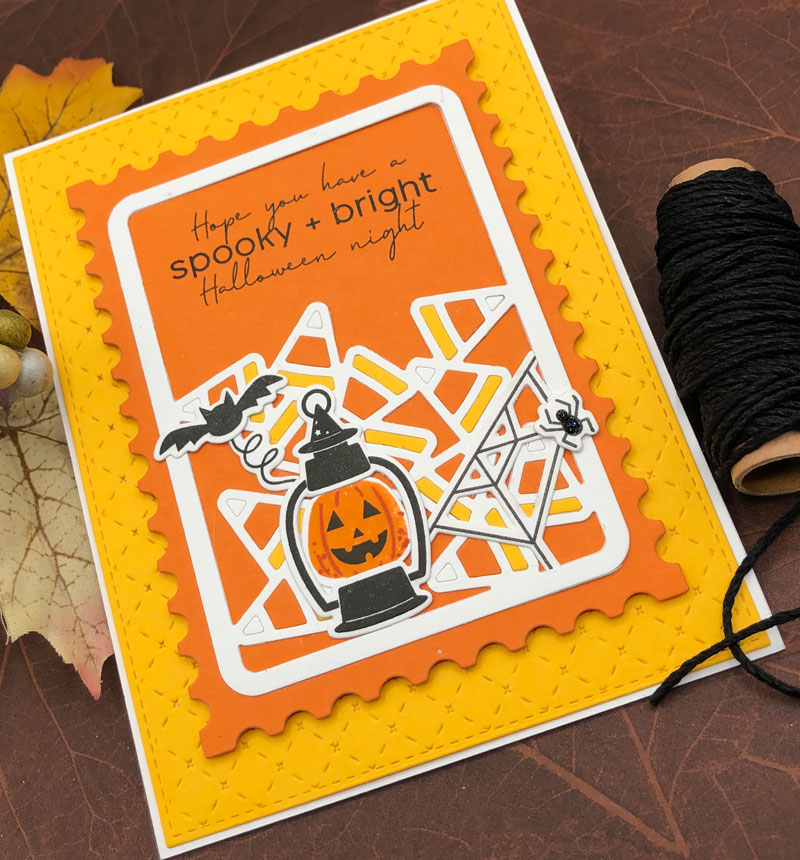
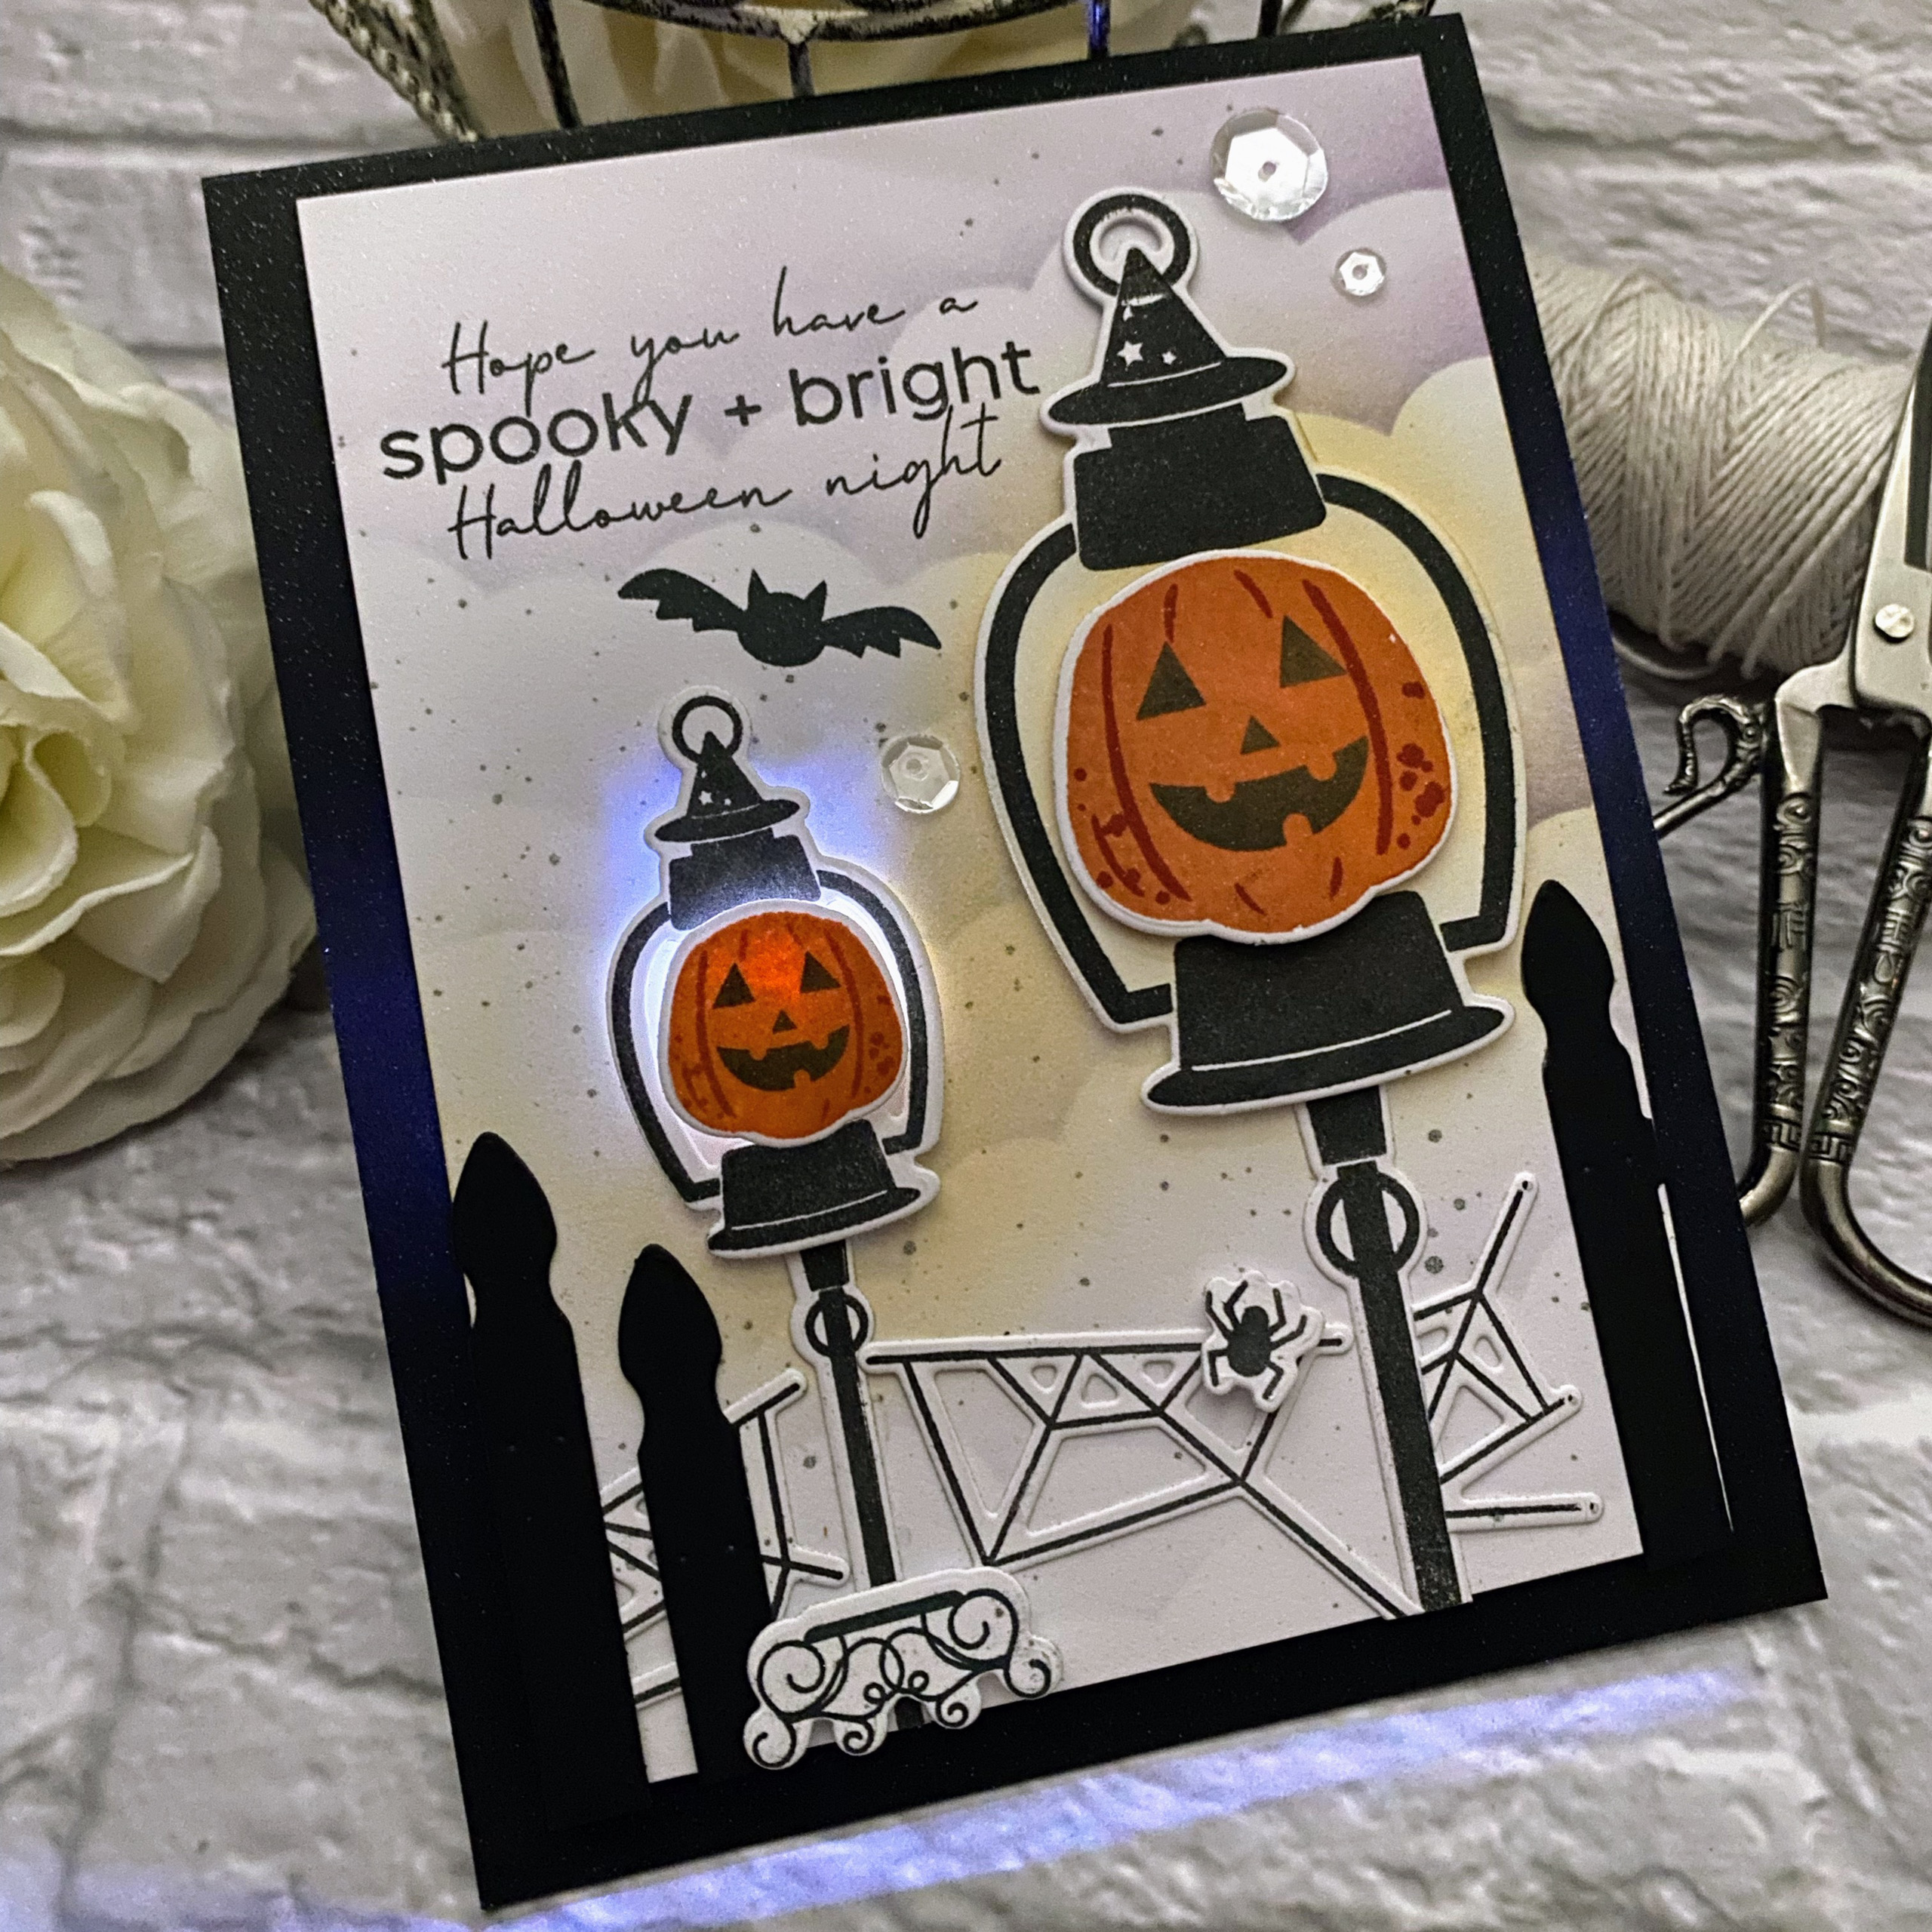
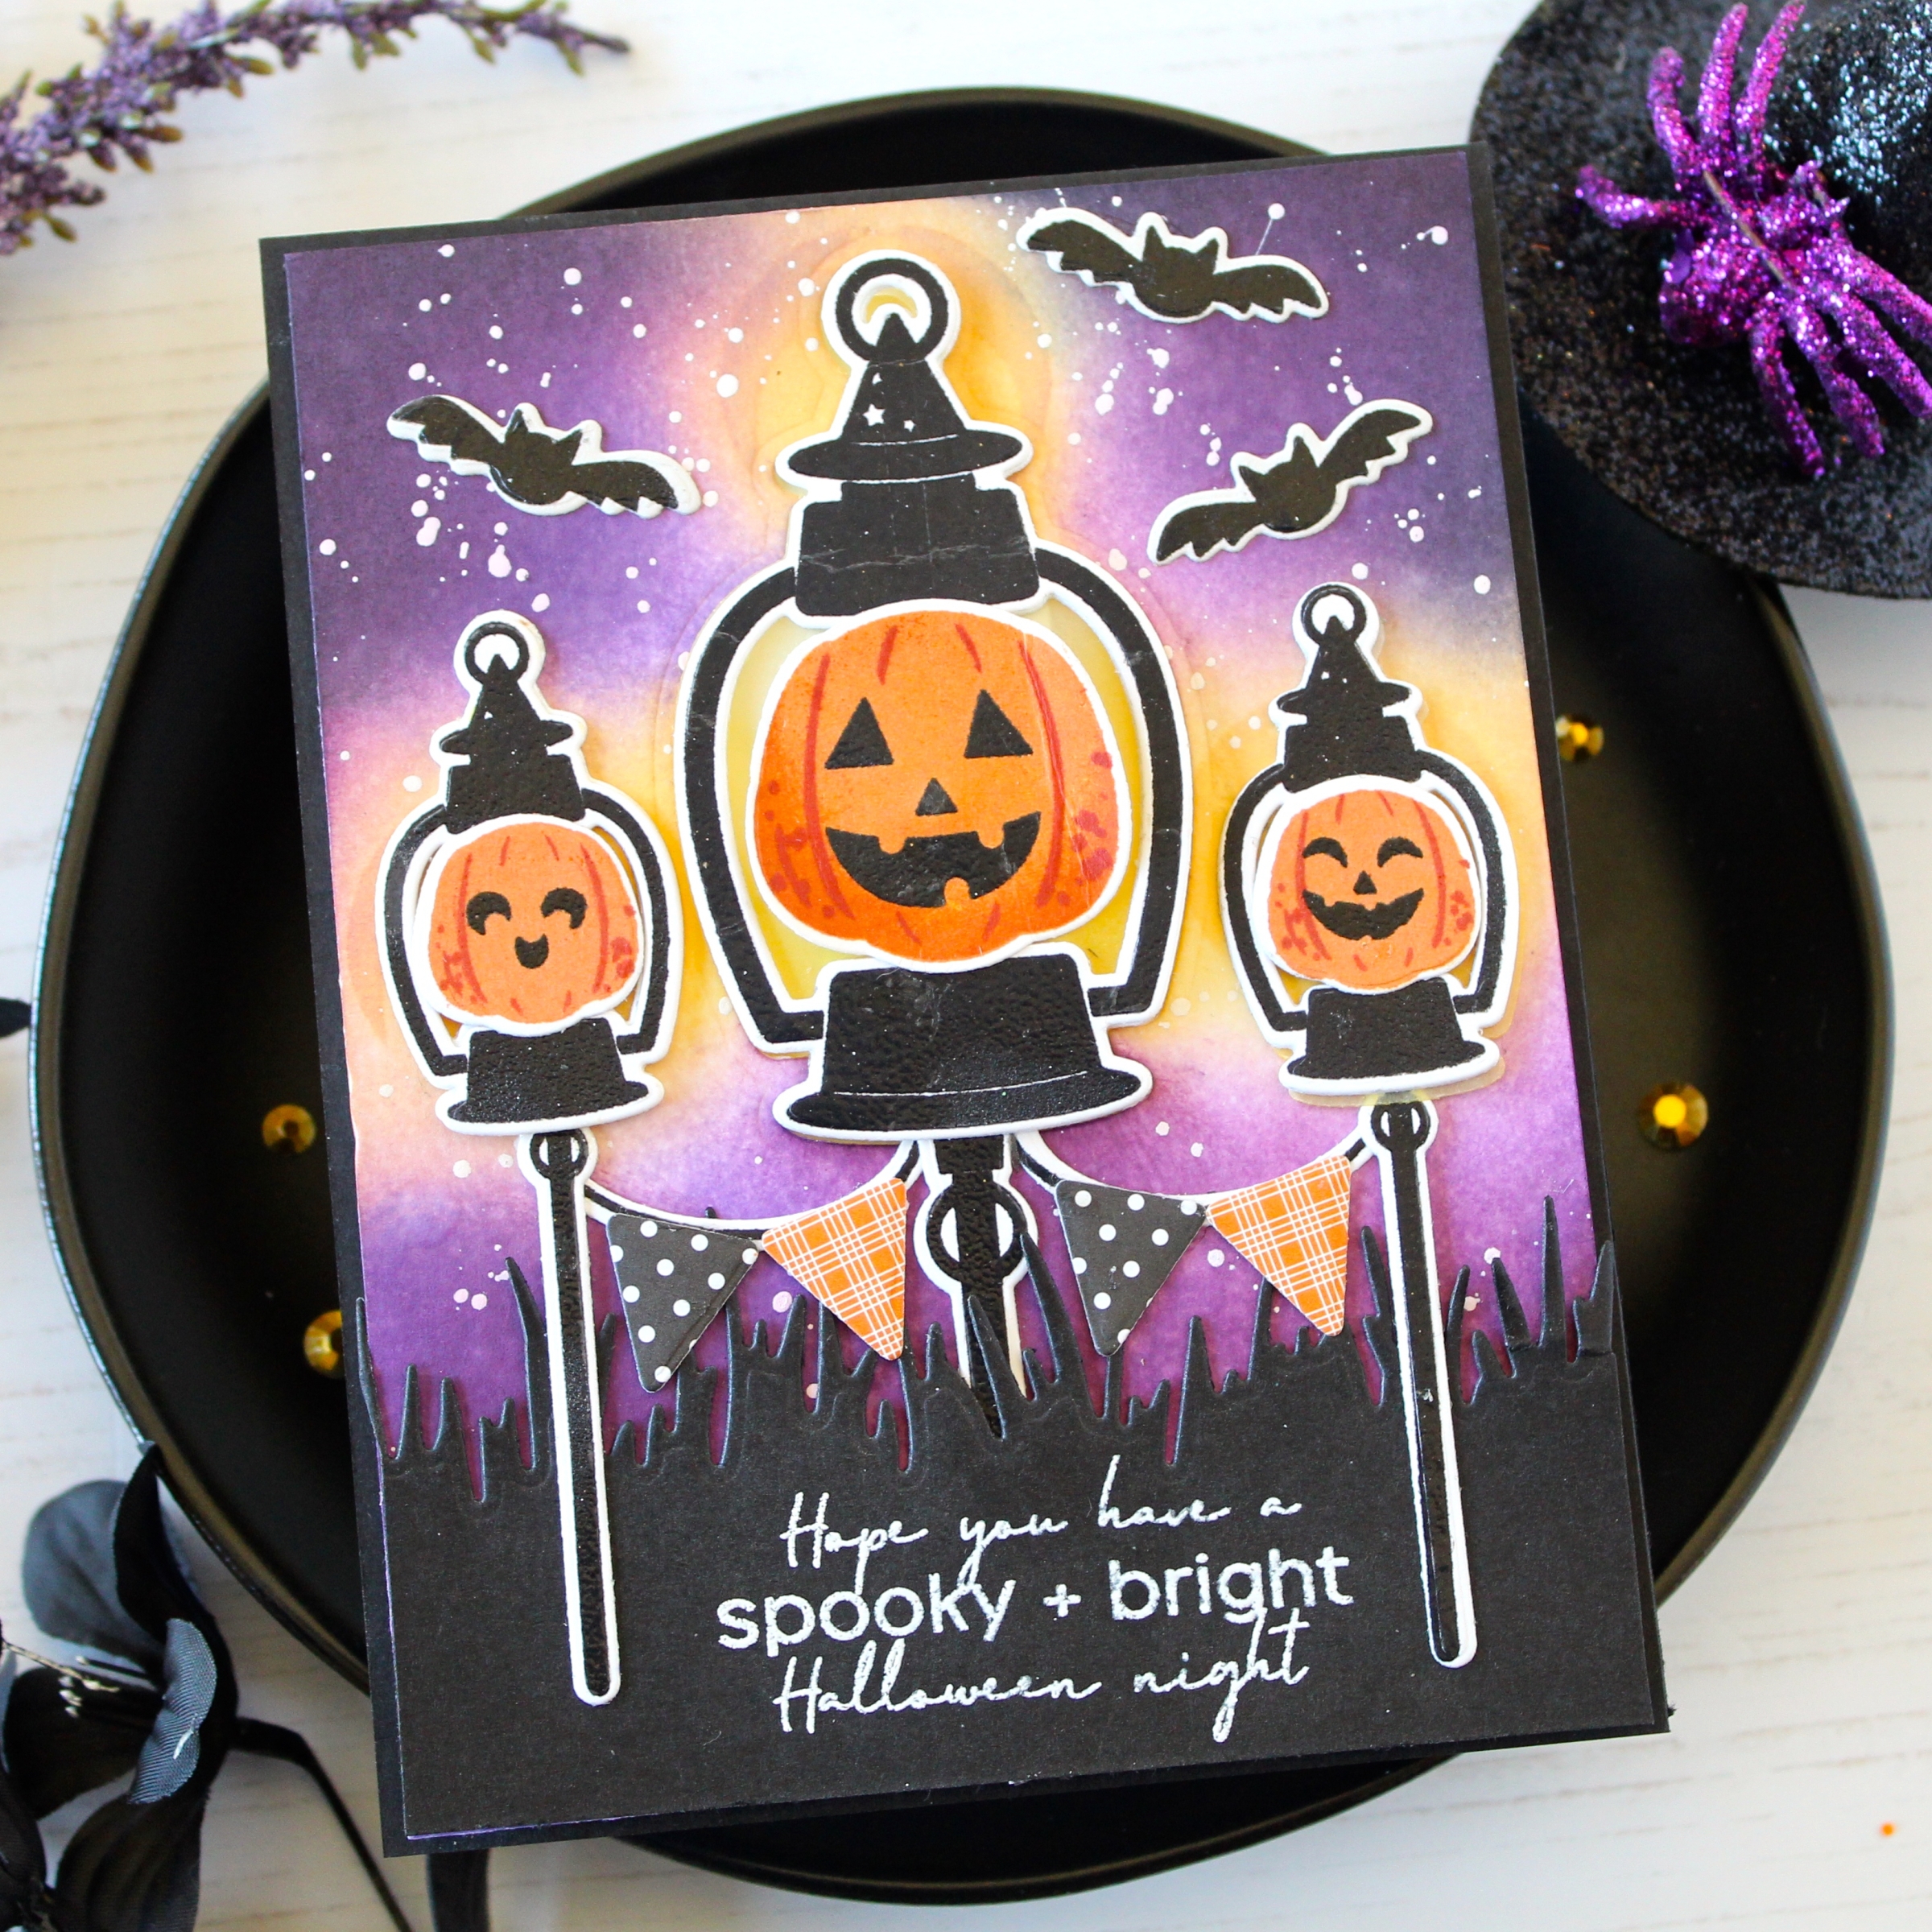
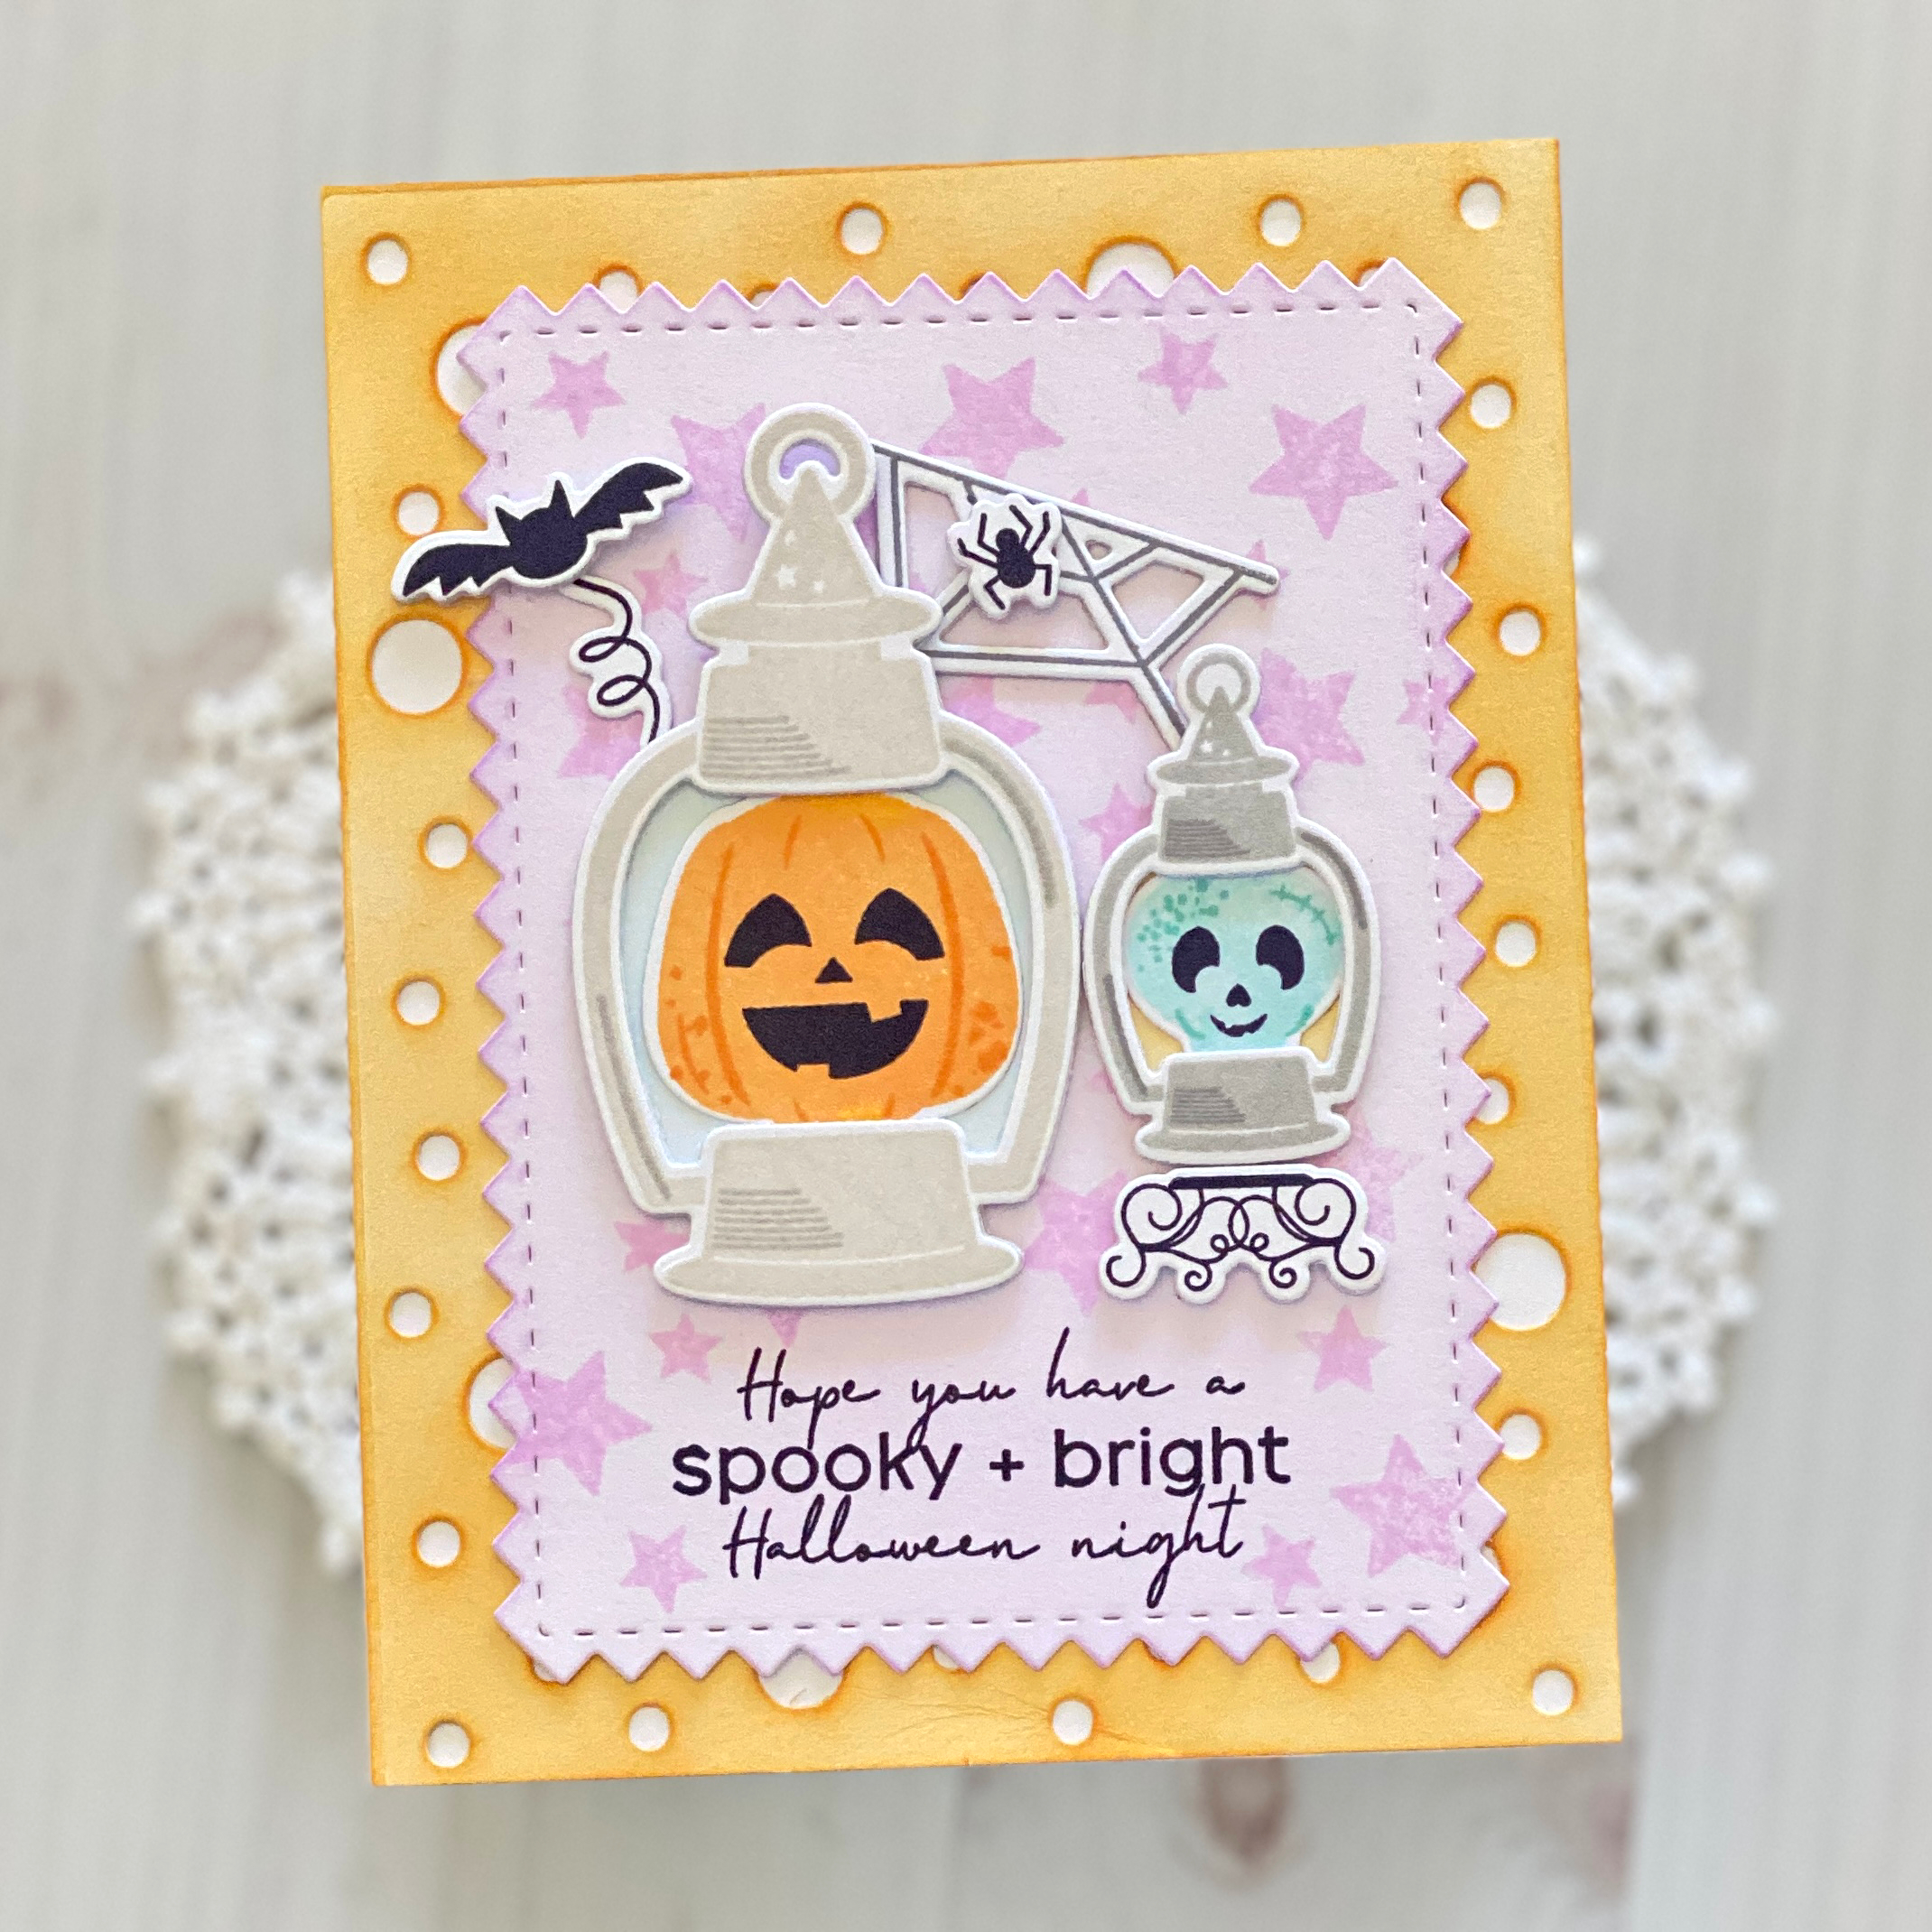
Ready for the cutest, little light-up Halloween lanterns? We sure are! Introducing the new Bright Night stamp set and dies, Just Sentiments: Spooky stamps, and Cornered: Spider Webs dies.
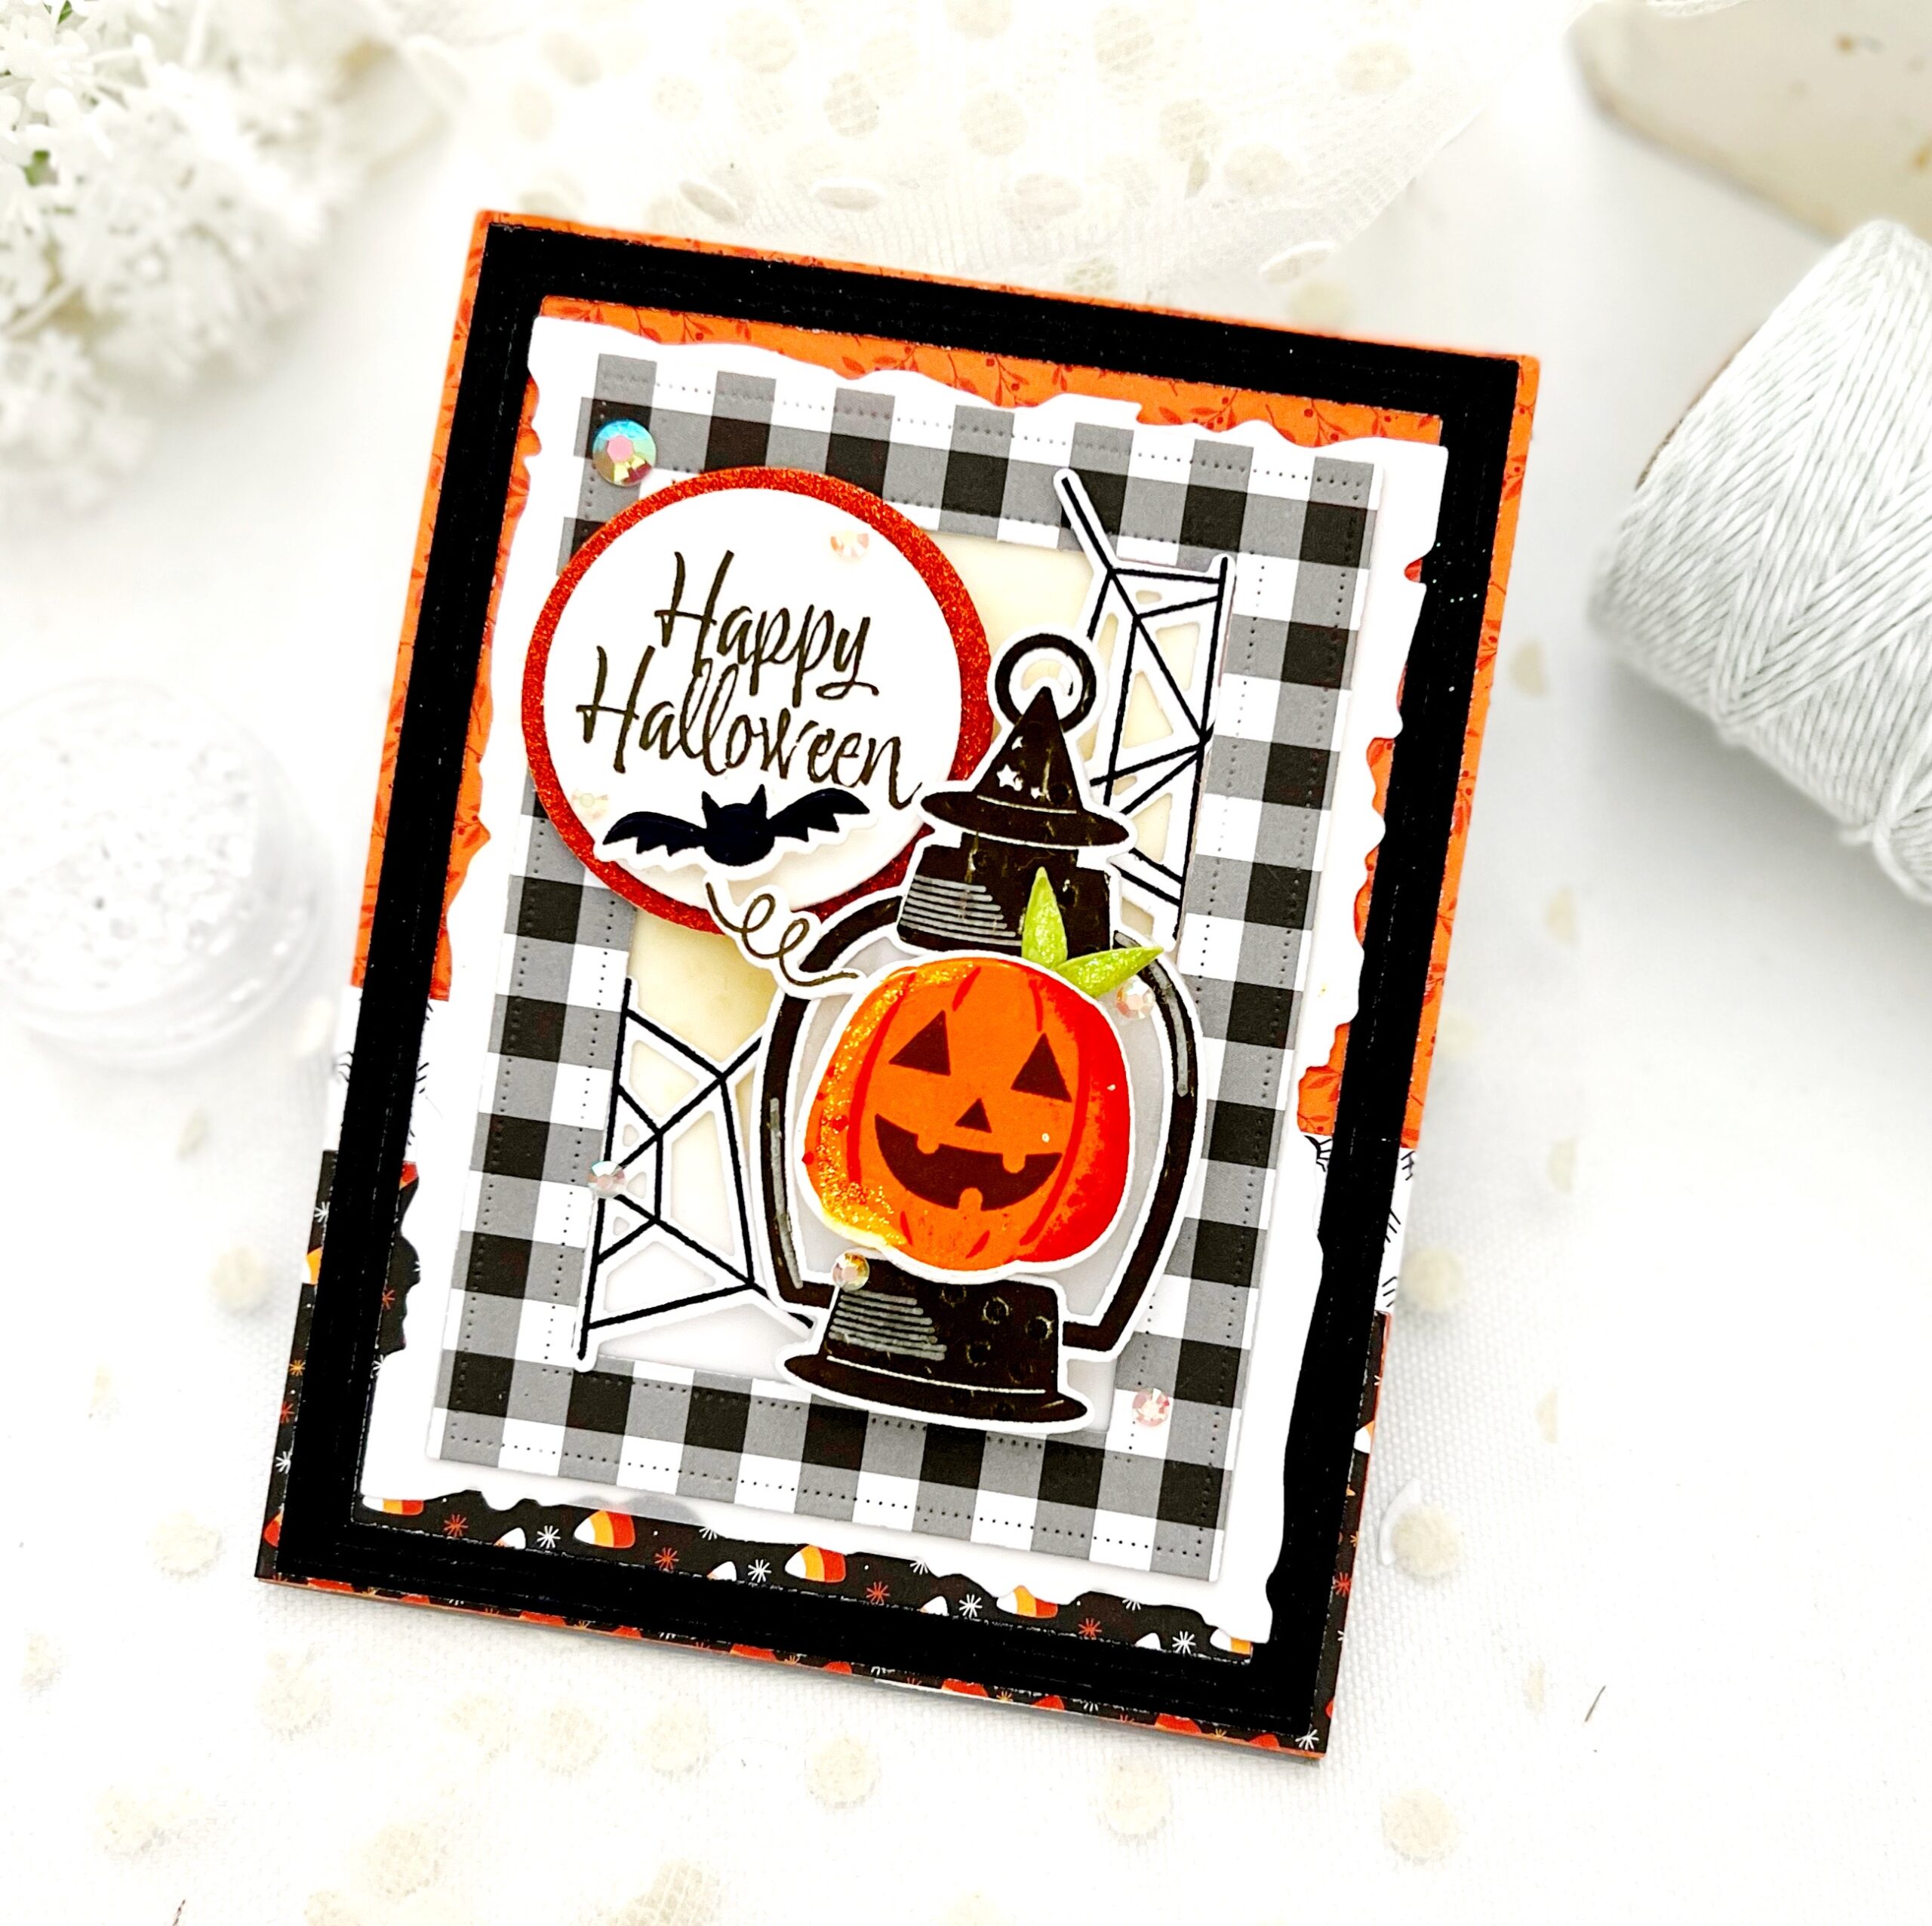
My mind was blown and I was instantly in love when I first saw the new Bright Night stamps and dies. This set comes with two different sizes of lanterns, both with a variety of faces to choose from and in pumpkins, ghosts, and skulls. I promise they’re the sweet variety, not the spooky!
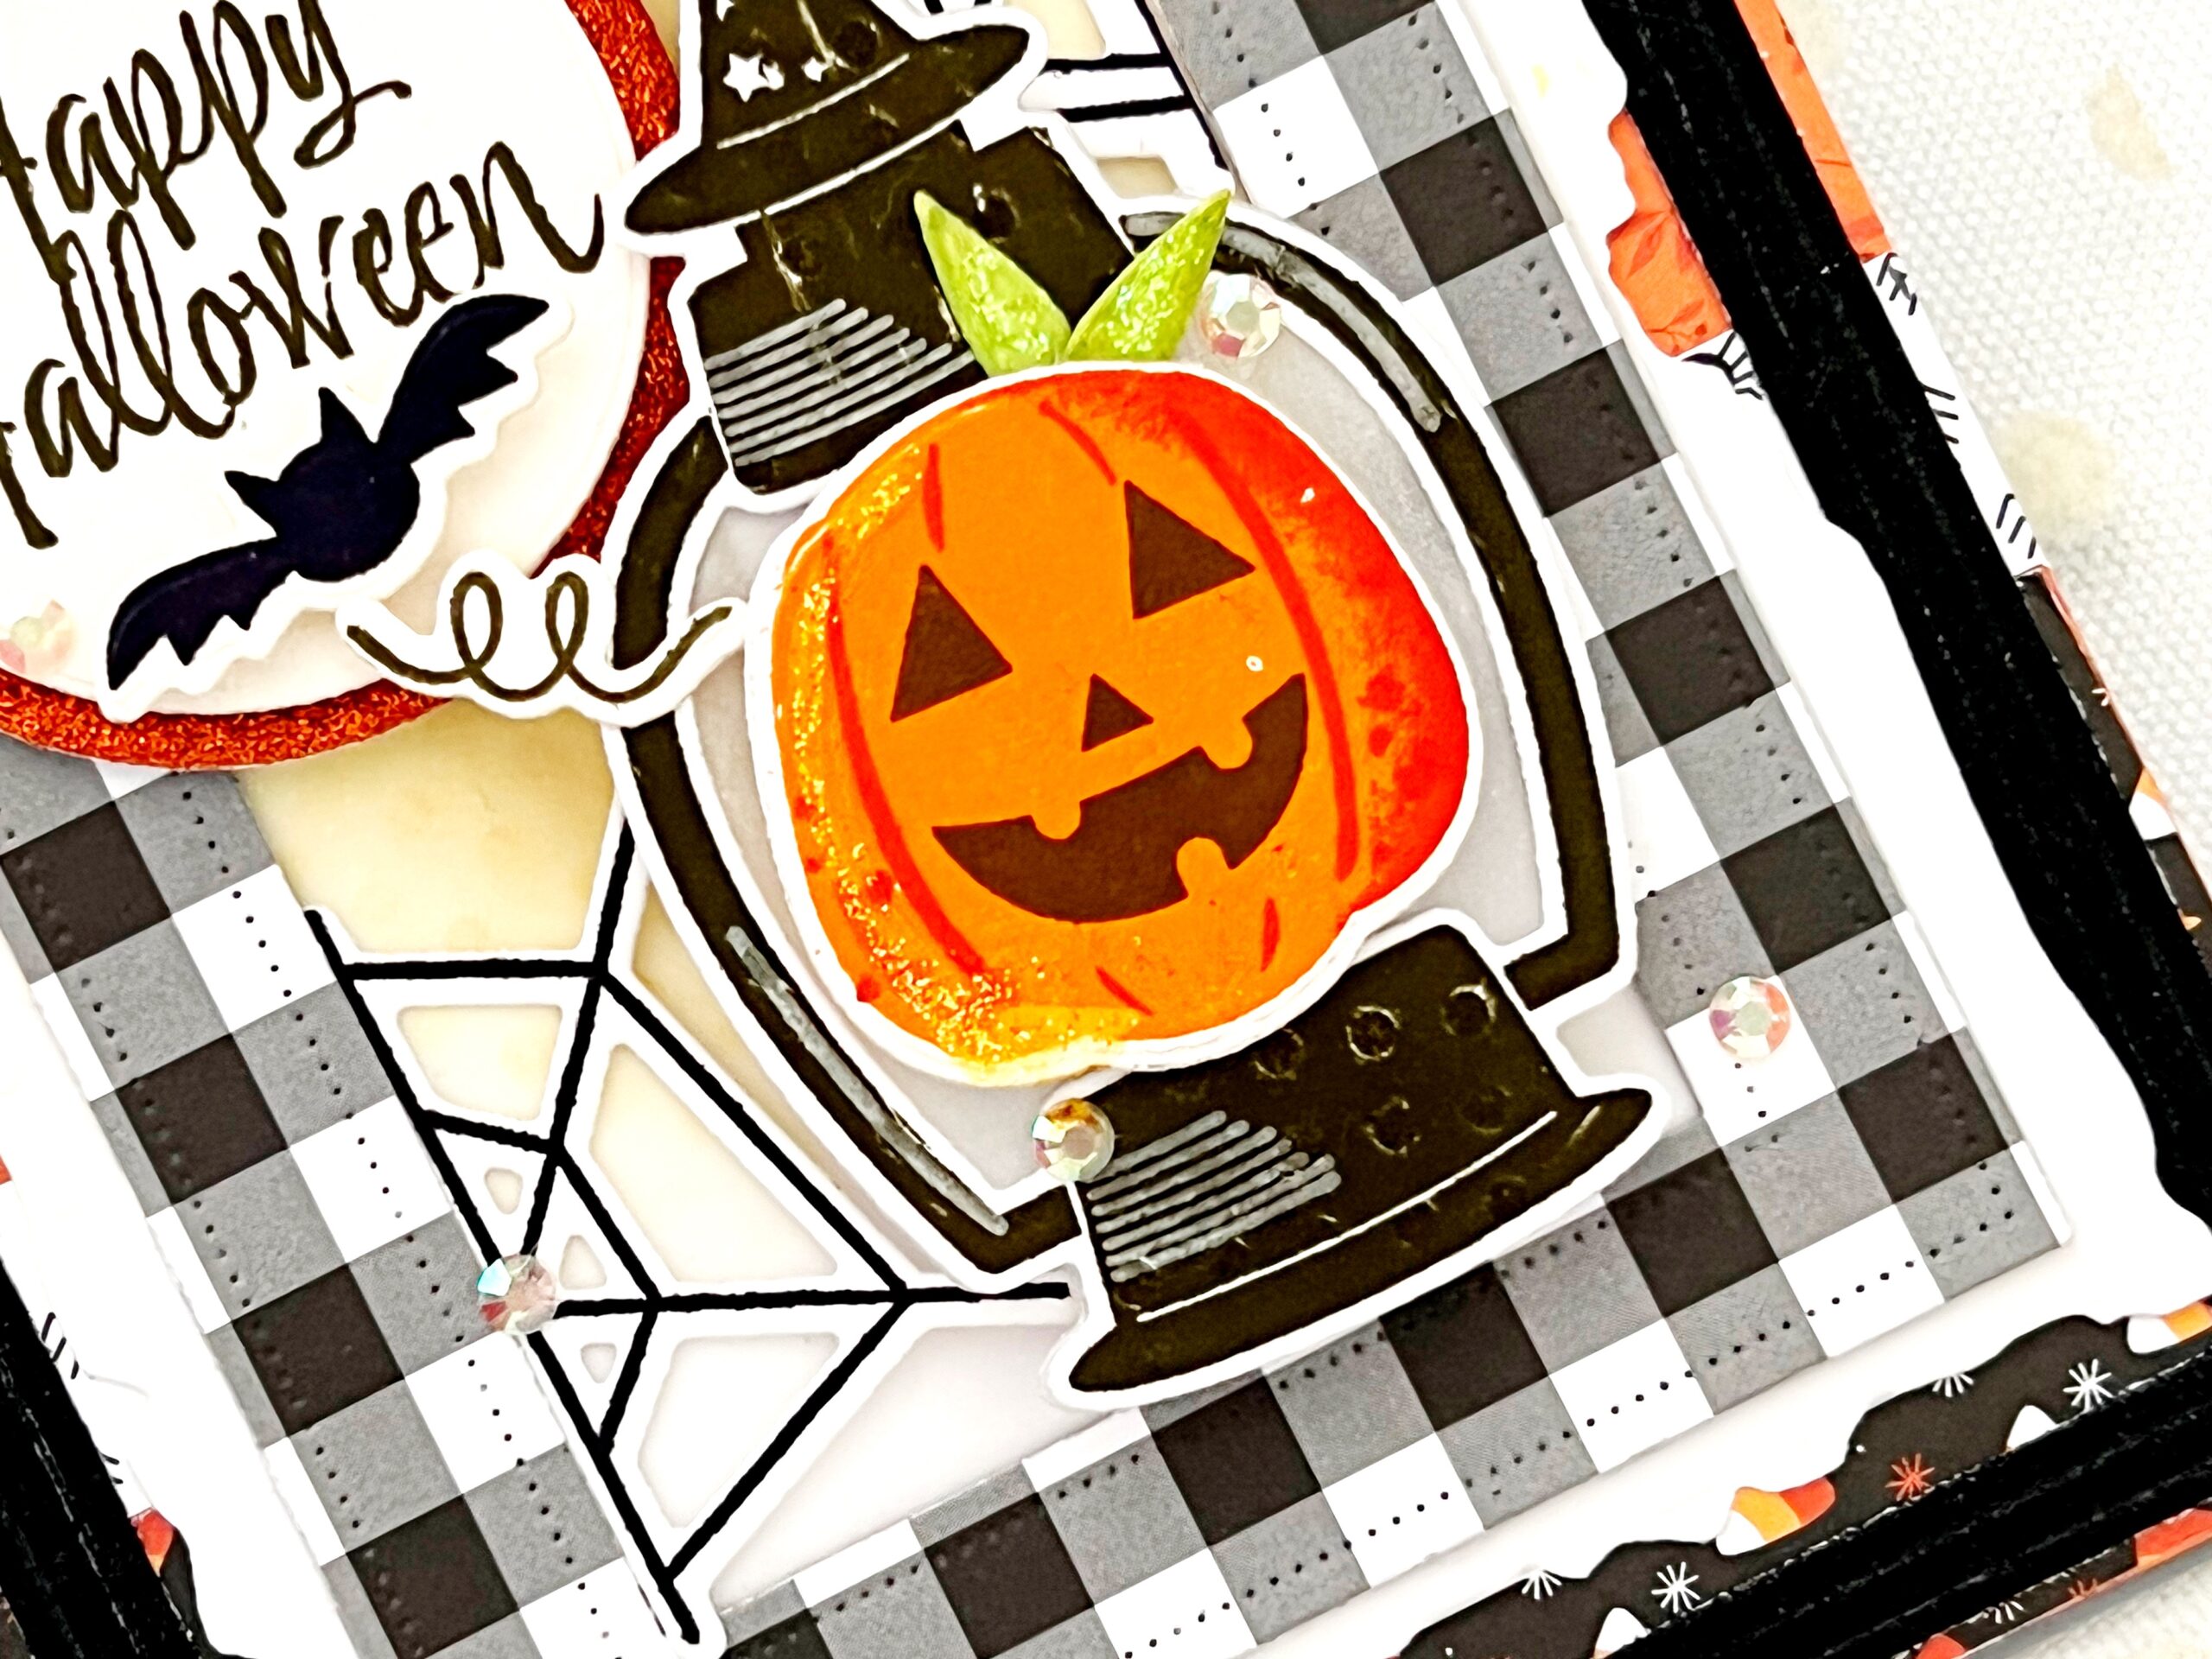
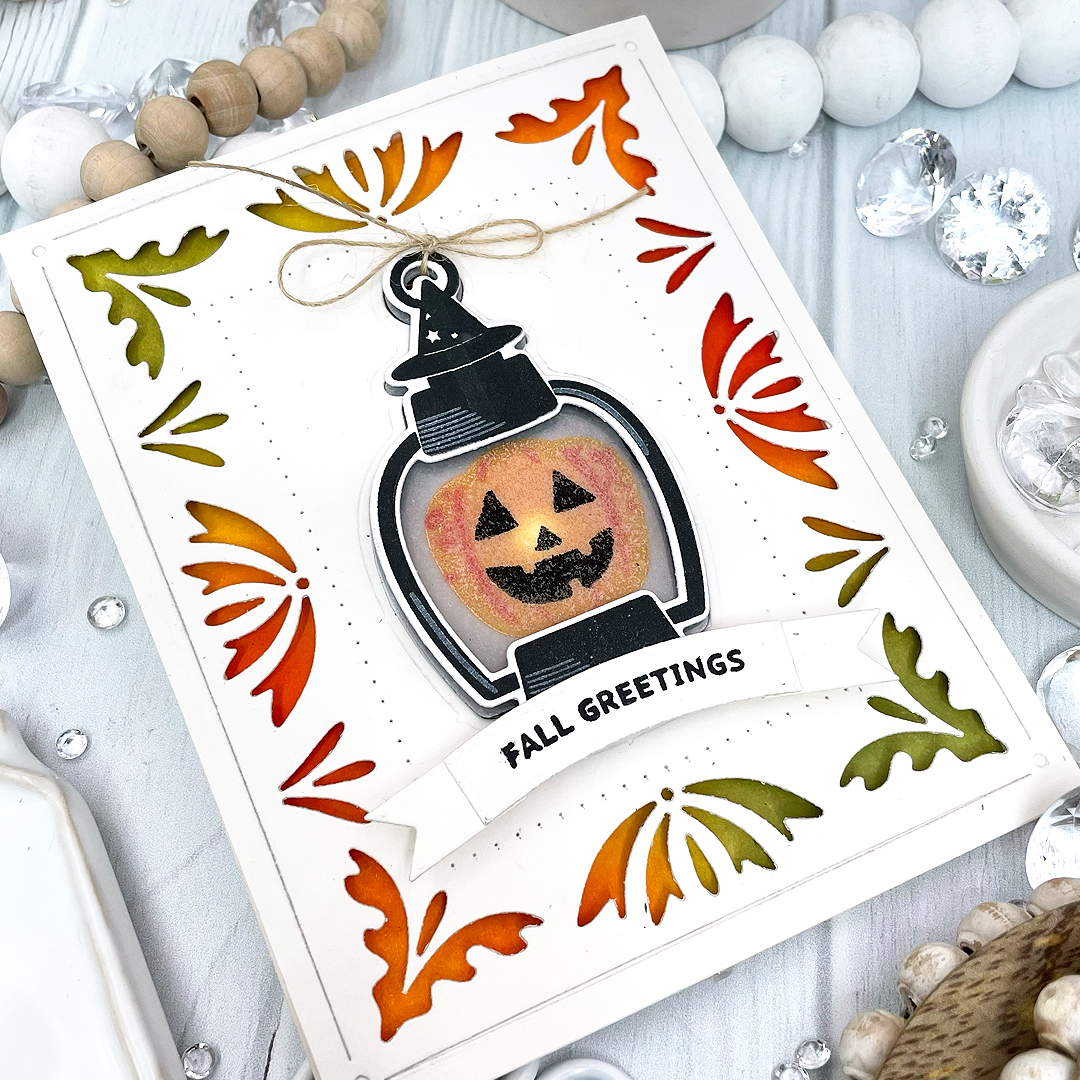
I chose to use the large lantern on my card, and used one of our new battery operated lights that are slim enough to create right into your card! These are so exciting and enable you to light up your lanterns to create delightful, interactive cards. One of my most favorite elements to this stamp and die set is the cute little bat on a spring that you can have popping up and out of your lantern. I also love the design of the witches hat incorporated into the lantern….have you ever seen anything so cute?
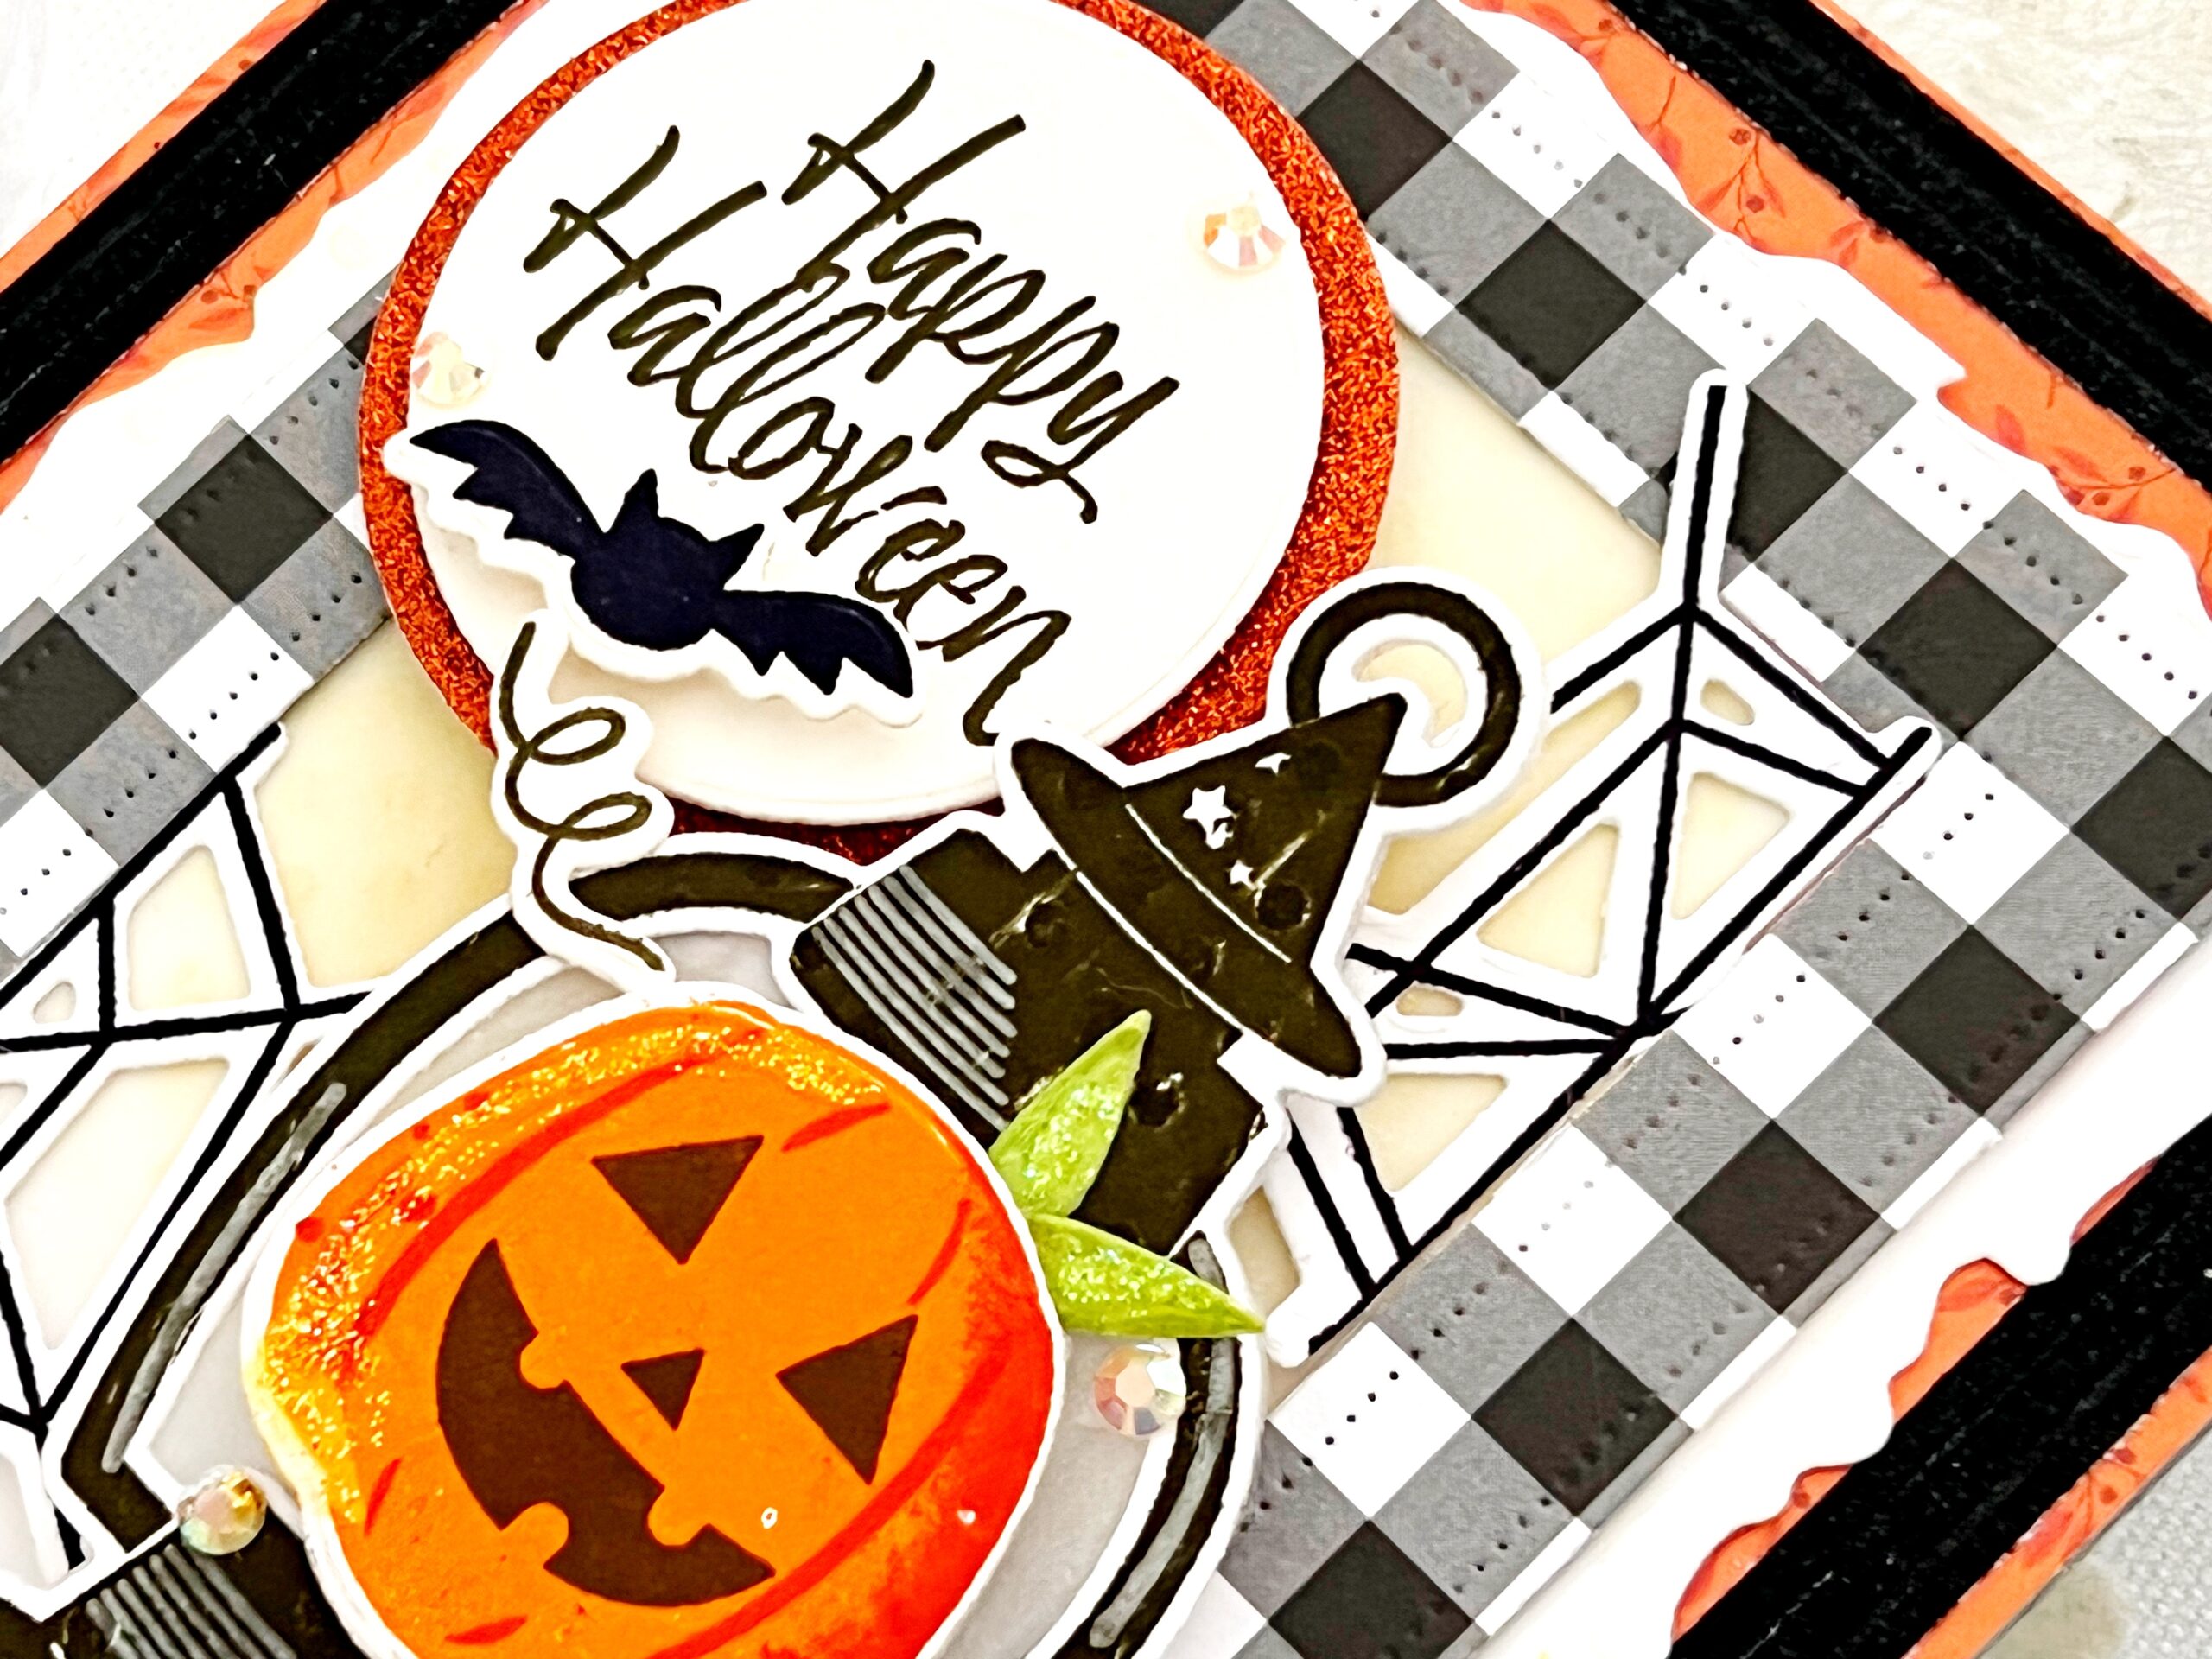
This set enables you to place your lanterns on posts to have them popping up at different levels, or sitting solidly. It’s up to you and there are multiple possibilities! I adore the tiny spider webs in this set and scattered them around the opening of my card. I used the creepy, but super cute, Happy Halloween sentiment from the new Just Sentiments; Spooky stamp set. There are so many fun sentiments included in this set, it’s hard to choose just one! A must have in your Halloween crafting stash, for sure!
Supplies used:
STAMPS: Bright Night, Just Sentiments: Spooky
INK: True Black, Orange Zest, Terracotta Tile
PAPER: Vintage Cream, Sheer Basics Vellum
DIES: Bright Night, Pierced Rectangles, Vintage Blooms, Penciled Outlines
OTHER: patterned paper, black glitter paper, ribbon, adhesive gems, Stickles glitter, battery light

TIPS:
- For light up cards, stamp on vellum to allow the light to shine through.
- Inlay your light up element into a front panel so that can hide the lamp behind it.
- Back your cover plate panels with blended ink for a custom background


TIPS:
- Make your own “patterned paper” with small stamps.
- Make reverse polka dot patterns by heat embossing white onto colored cardstock.
- If you don’t have the right cardstock color, color your diecuts with ink to match.


TIPS:
- Back your spider web die cuts with holographic cardstock for extra color and shine.
- Add blended white ink on black cardstock for a spooky look.
- For a brighter white embossed look, try using white ink and white embossing powder together.
We hope you have enjoyed all the beautiful projects that we have shared with you today! We would love to hear what you think of everything we have introduced! Please leave a comment on this post to tell us what you like the most and why, and you will be eligible to win big!

Leave a comment today and you will be automatically entered to win a $50 Papertrey Ink gift certificate! You have until 7am ET, August 16th to leave your comment and be eligible to win. Only one comment per person please. One randomly selected winner will be posted on the August Release Winners Page by 11 PM ET on August 18th.


Leave a Reply