


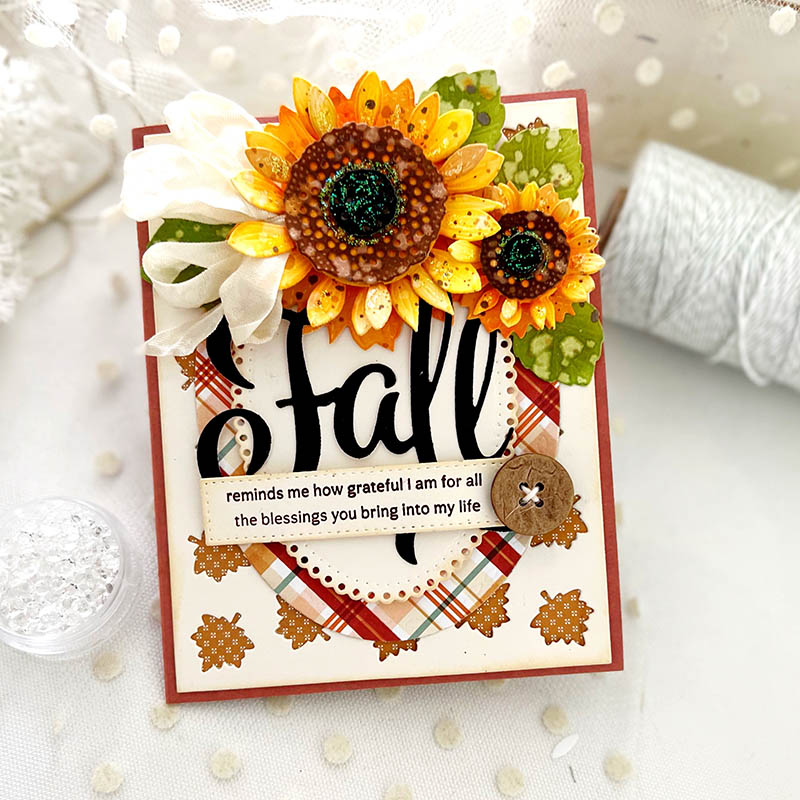
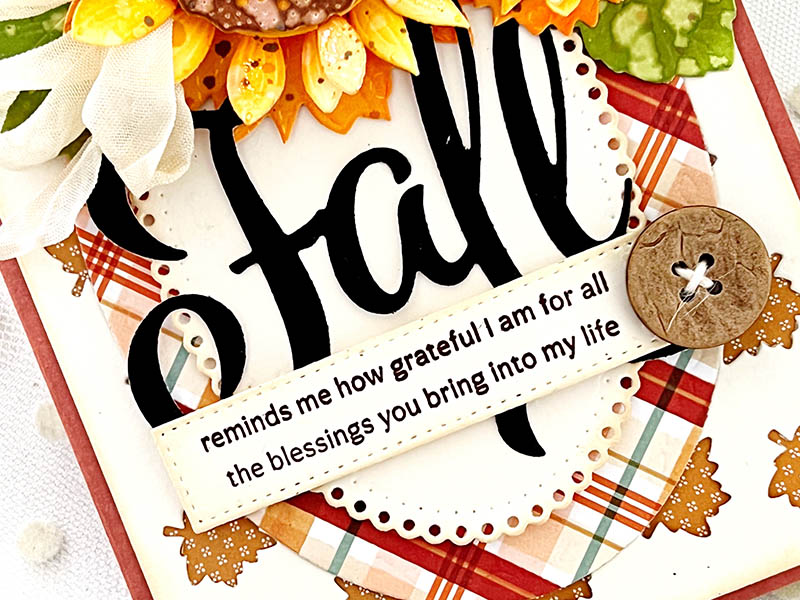
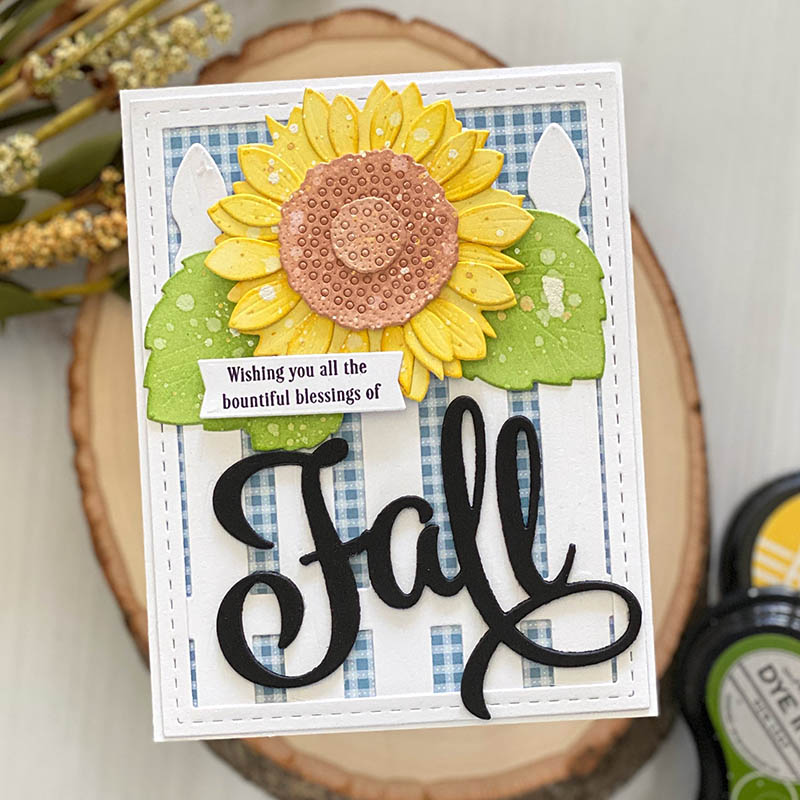
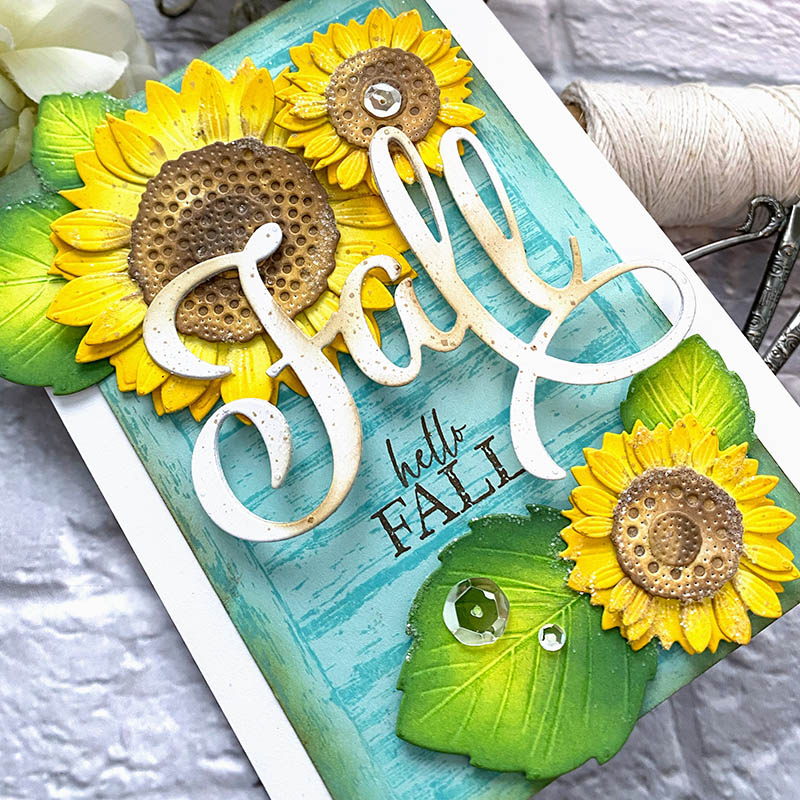
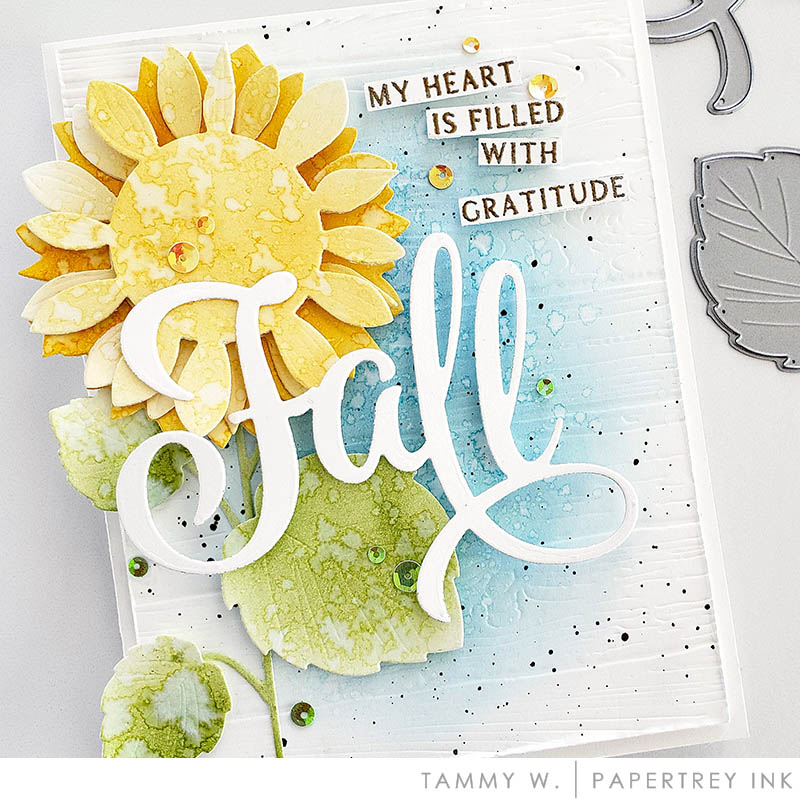
Welcome to Day 1 of our August Release! We’ve been working hard behind the scenes to bring you the most delightful, new Autumn-themed products and know you’ll love what we have to share! My first card today uses the gorgeous, new Into the Blooms: Sunflower dies, Larger Than Life: Fall dies, and Larger Than Life: Fall Sentiments stamps. Let’s dive right into my project!
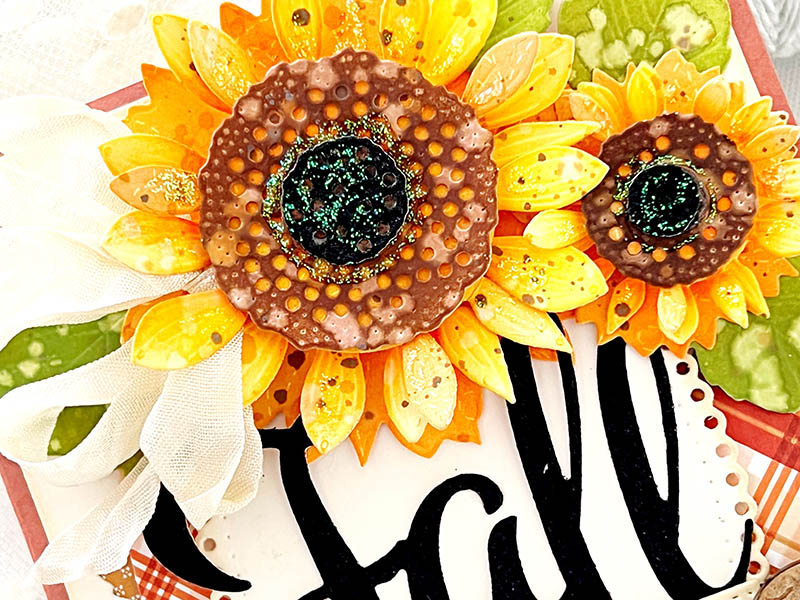
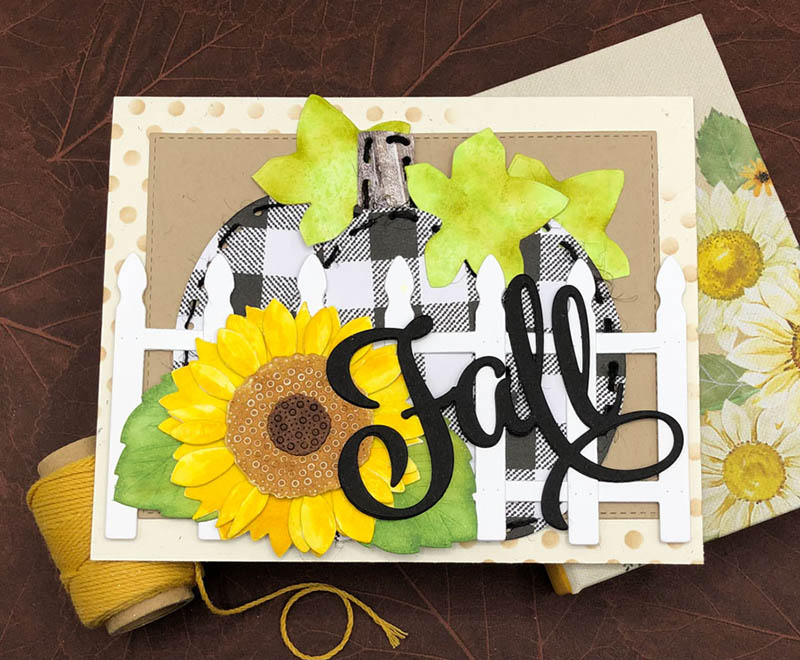
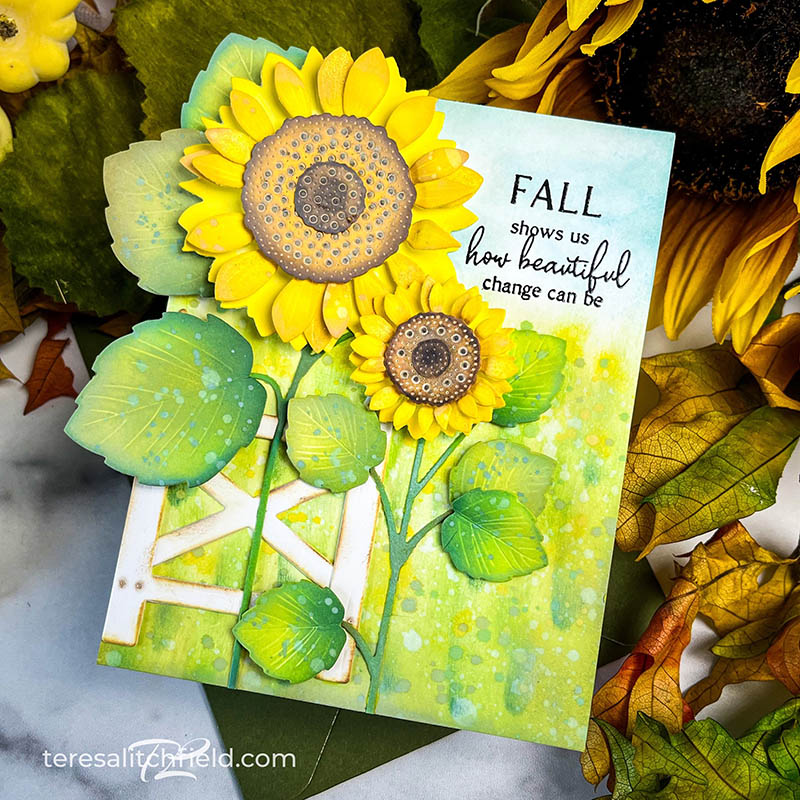
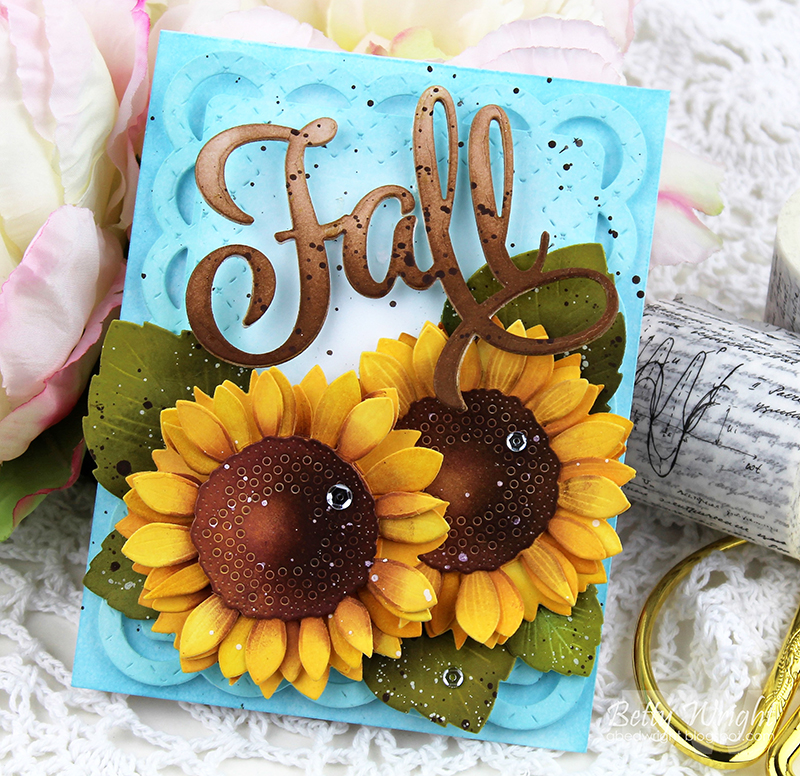
I couldn’t wait until it was time for an Into the Blooms: Sunflower collection, and it’s finally time. They are even more beautiful than I imagined! This die set comes with a multi-layered large and small sunflower, both the absolute perfect size for your fall projects. They also come with stems and leaves, so you can perch those happy, bold blooms right on top of their stout stems, or leave them on their own. Wait until you see how some of our designers have used their sunflowers with the stems….I am smitten. I love the jumbo centers that really bring these happy flowers to life and create such a realistic look.
Supplies used:


TIPS:
- Use dye ink the add color to your sunflowers and leaves.
- Add paint splatters to your die cuts for added interest.
- Cut multiples and stack the large Fall die cut for added dimension and stability.

TIPS:
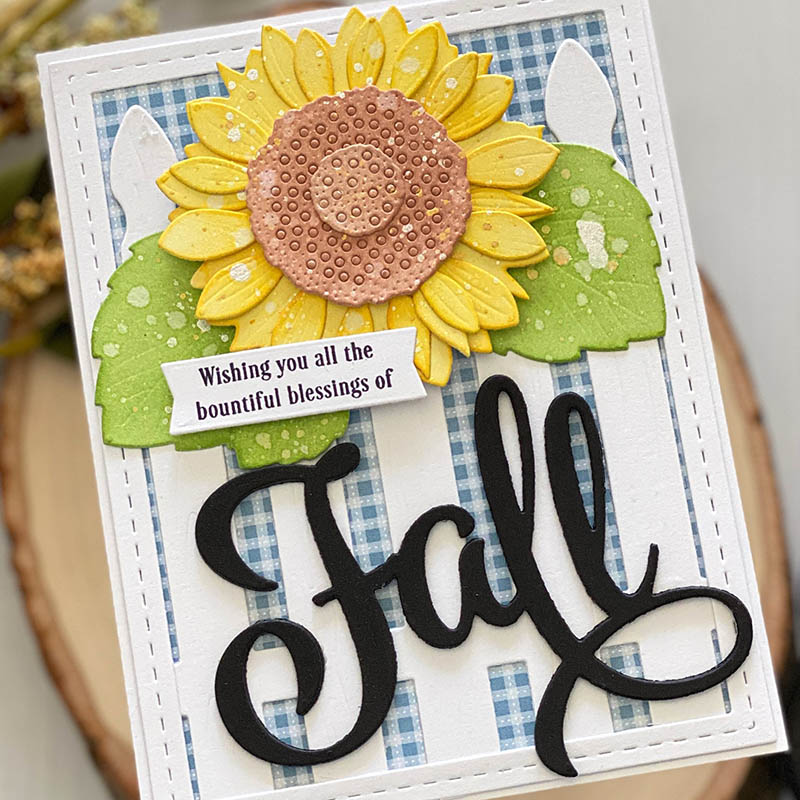
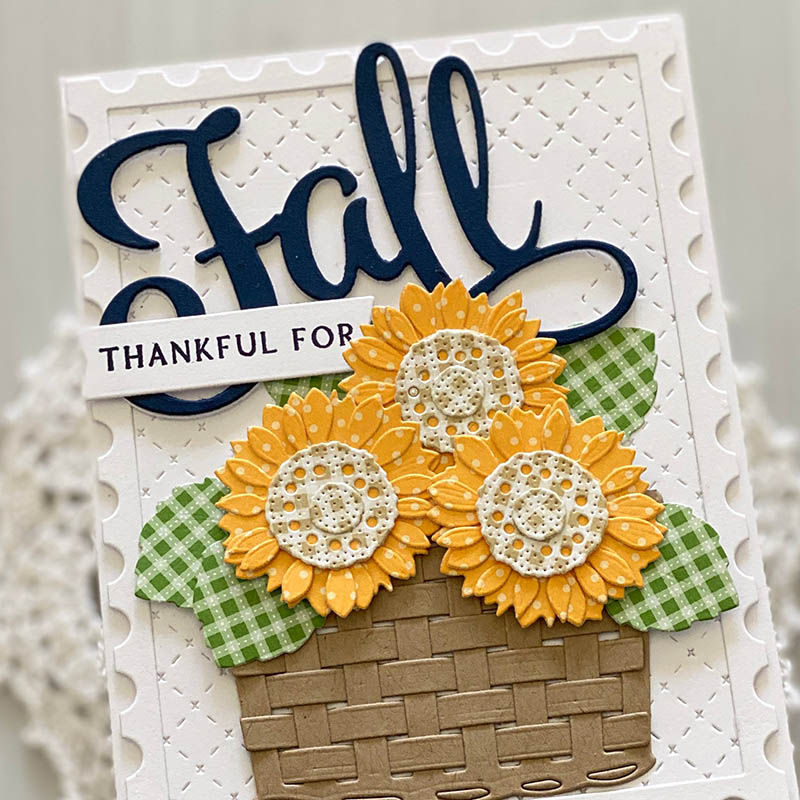
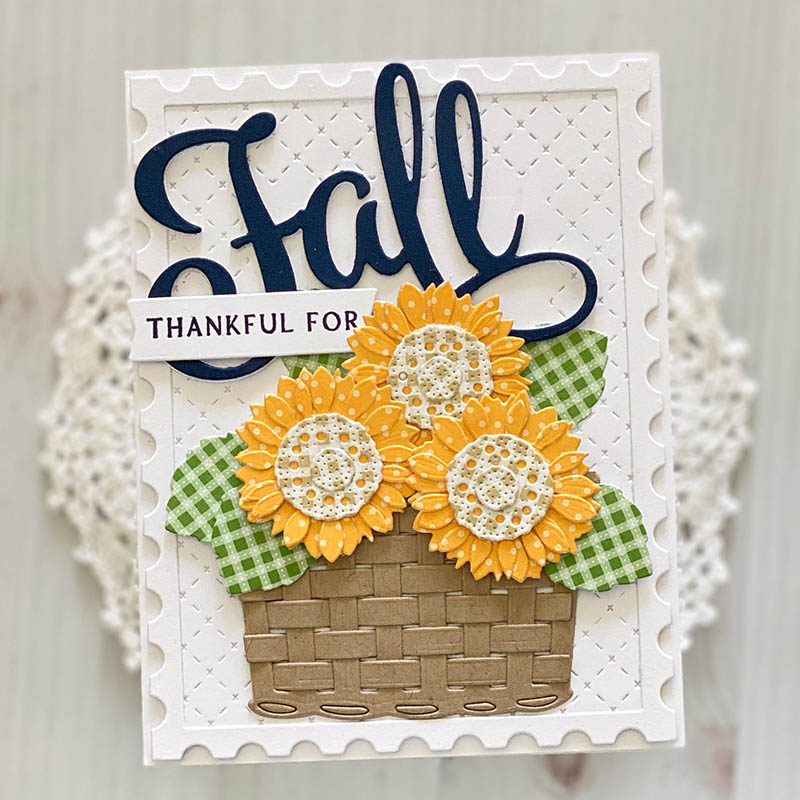
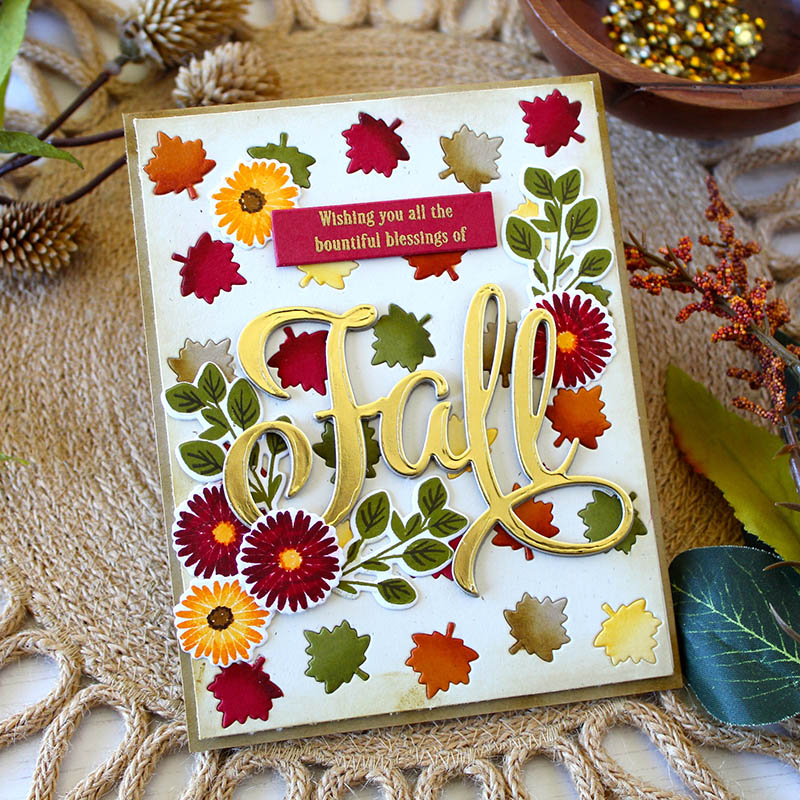
- Cut your sunflowers and leaves from patterned paper. The detail from the patterned paper adds a fun touch to your flowers.
- Use the Weave A Basket die to create a basket for your flowers.
- Die cut the word fall three times and stack the die cuts for some added dimension.
- Use an all white card panel for a clean and simple design.

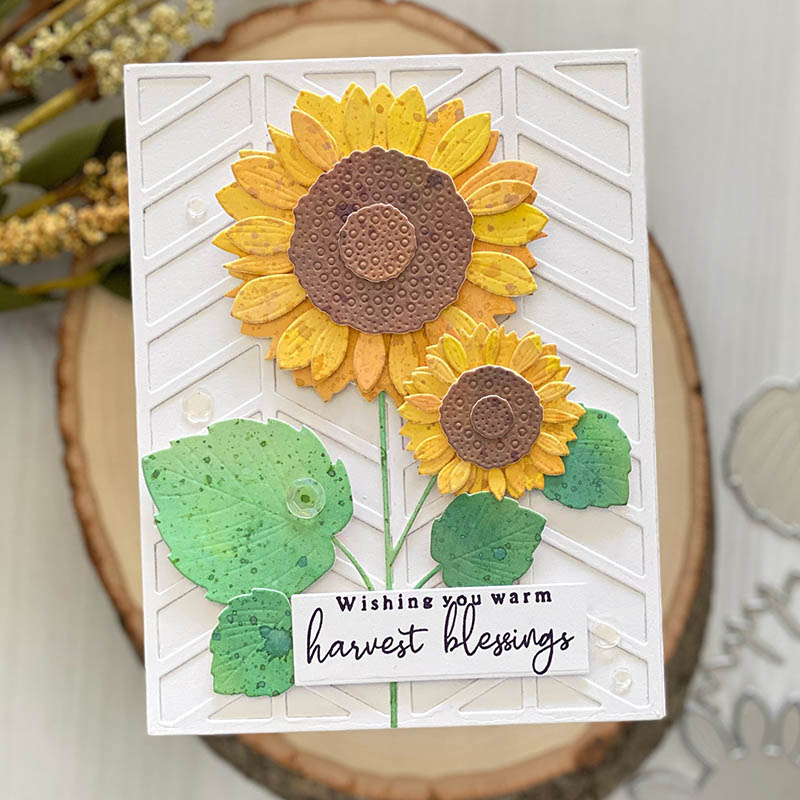
TIPS:
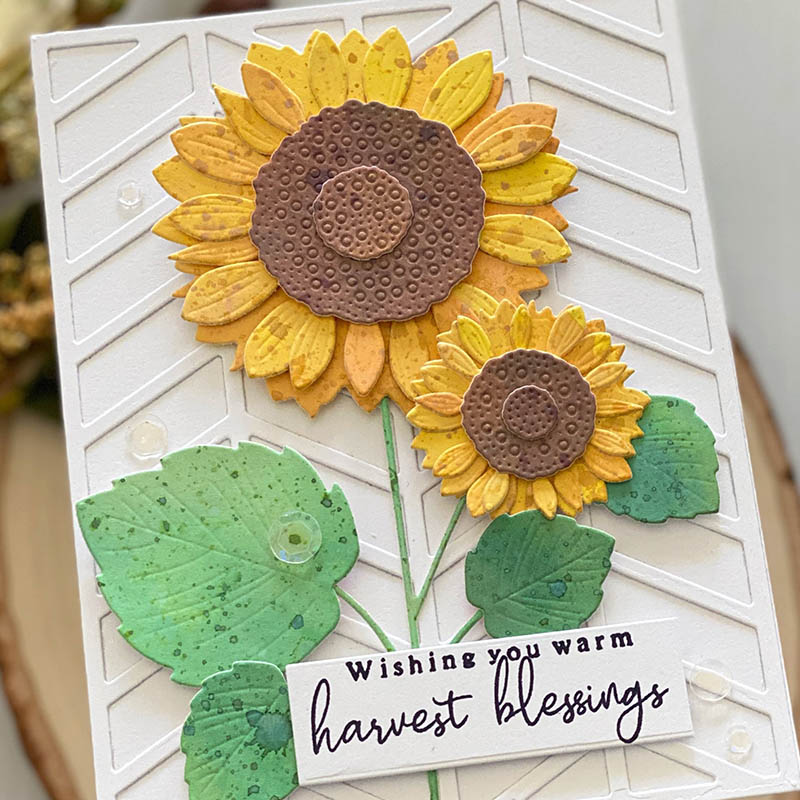
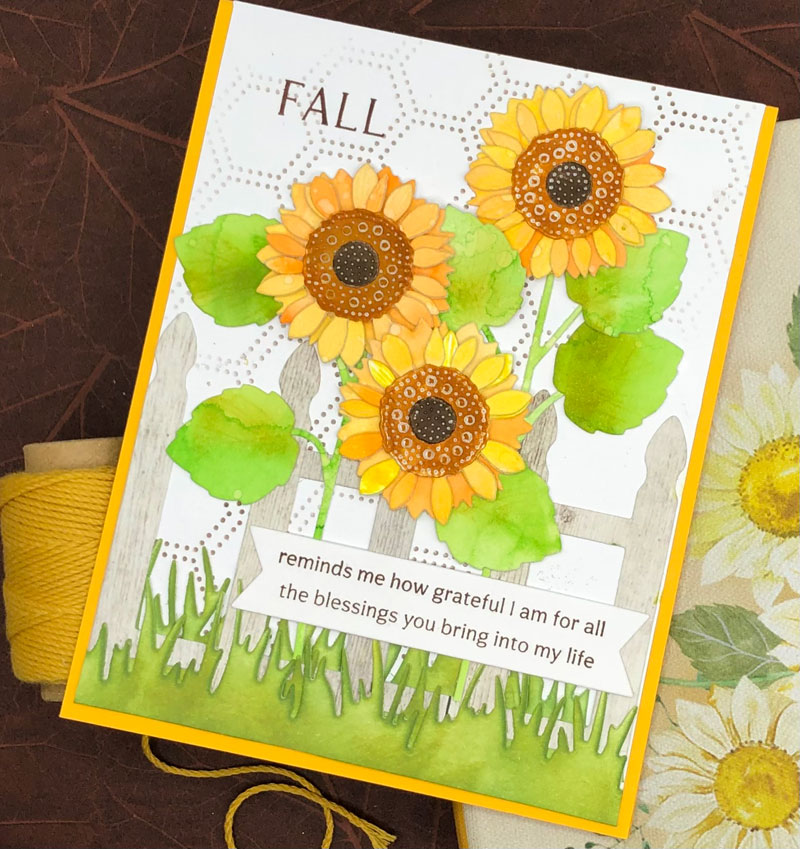
- Use Distress Oxide Ink to watercolor on a sheet of watercolor paper and then die cut your flowers, leaves and stem. The watercolor paper will help your die cuts to not curl or warp when you add water.
- Use a Cover Plate to create your card panel.
- Attach your flowers with foam adhesive for some added dimension.
- Add a few sequins to your card panel for some added detail.
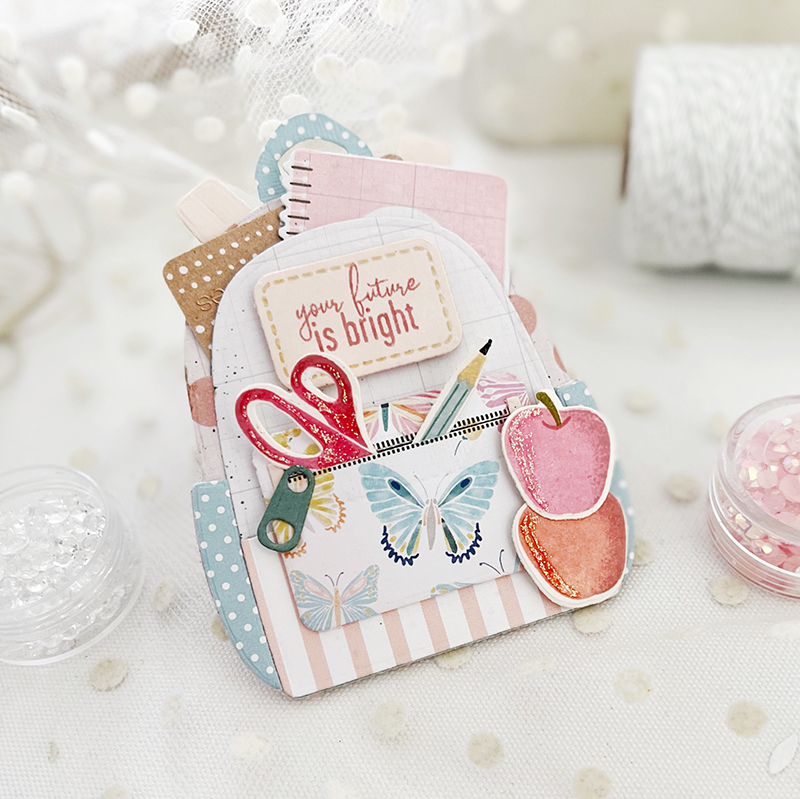
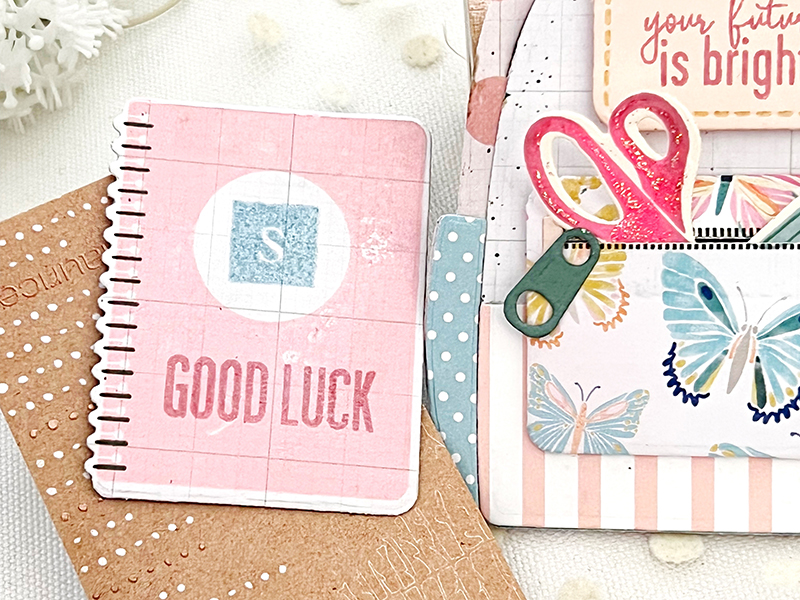
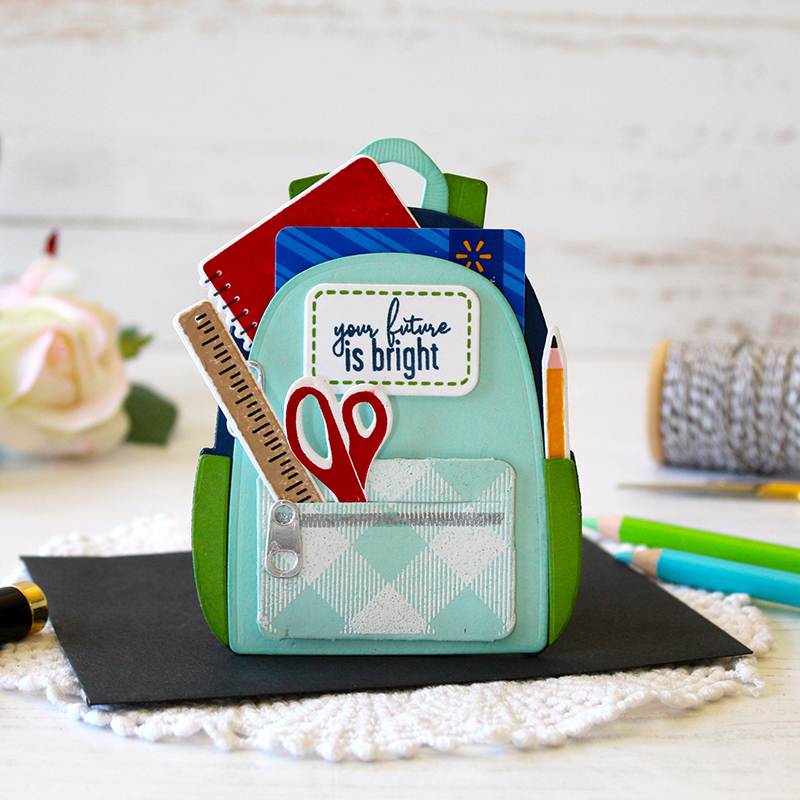
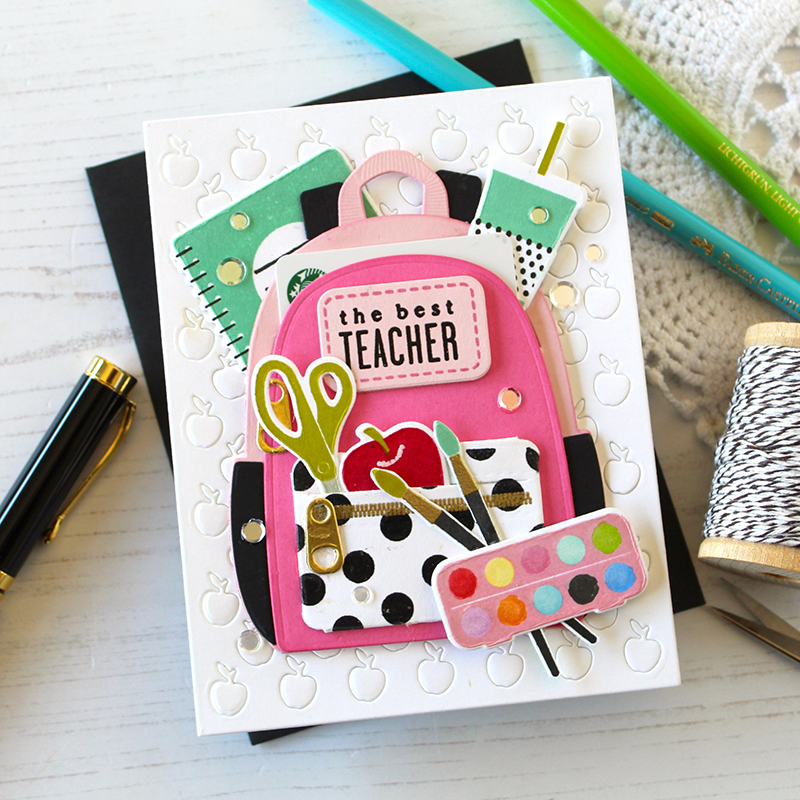
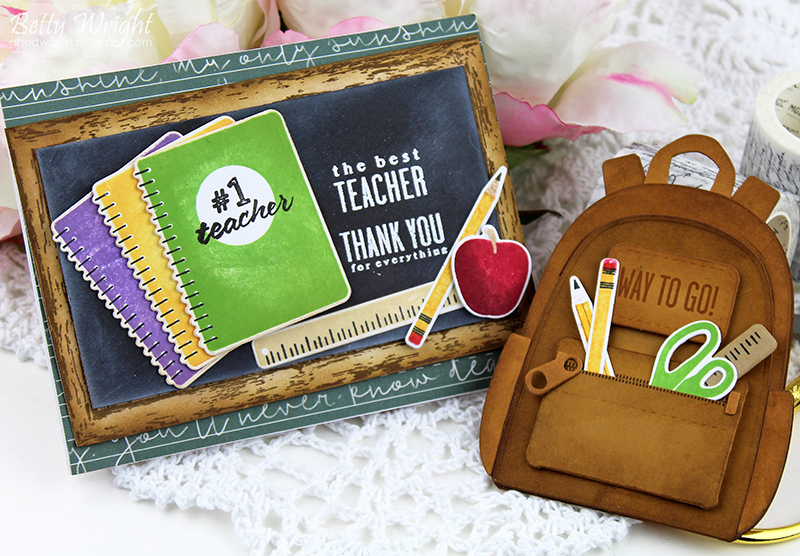
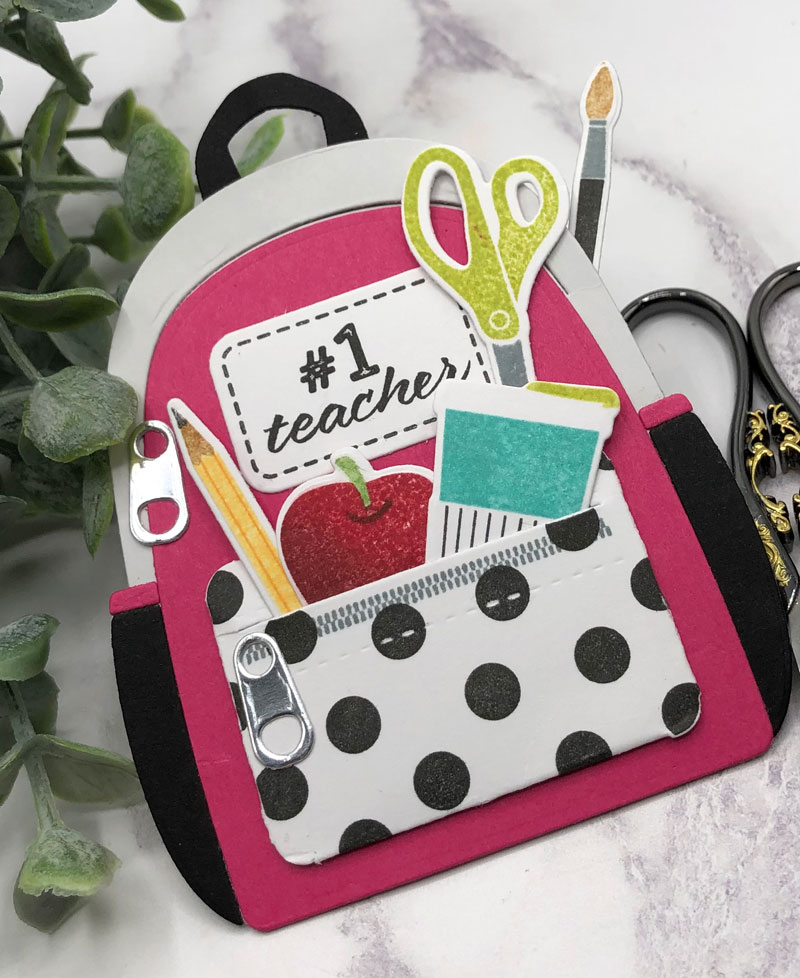
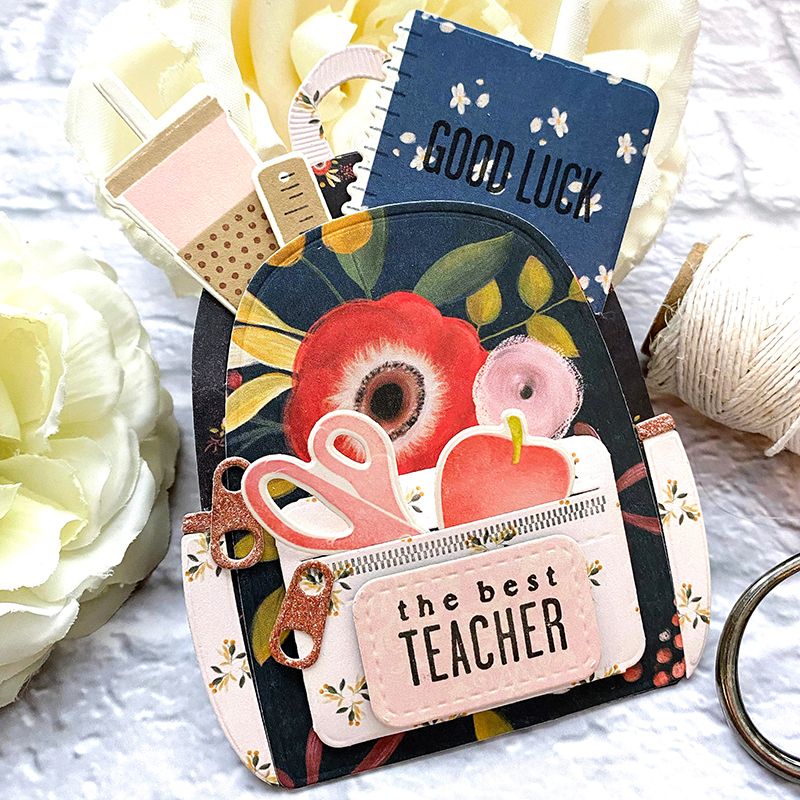
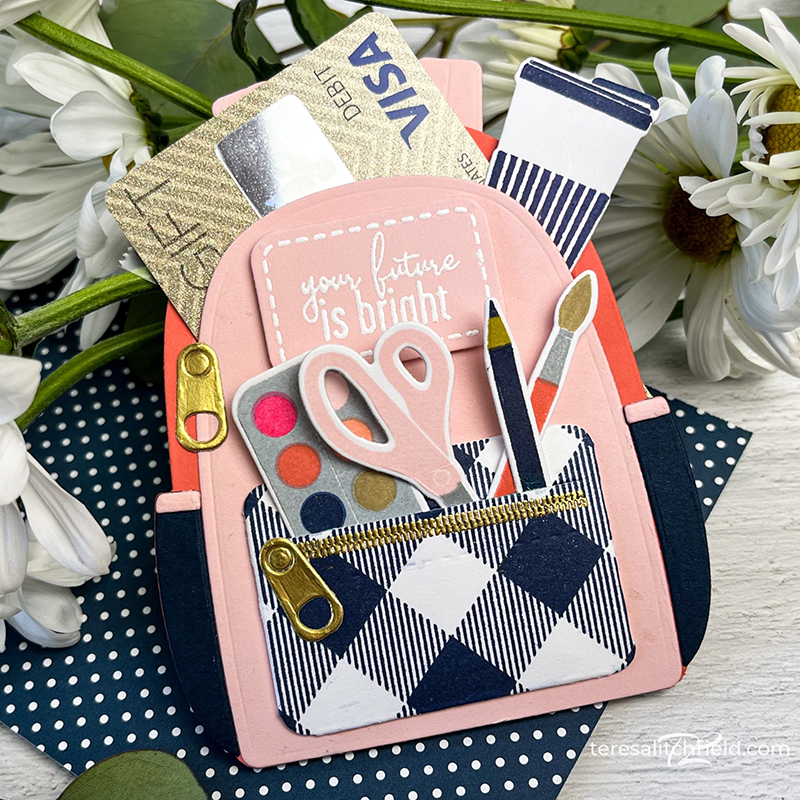
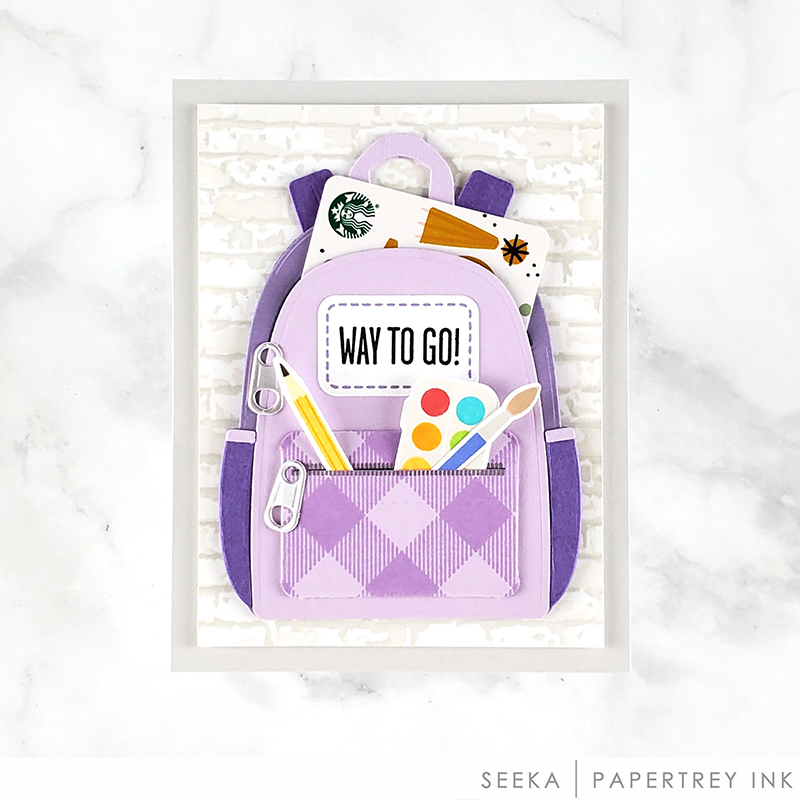
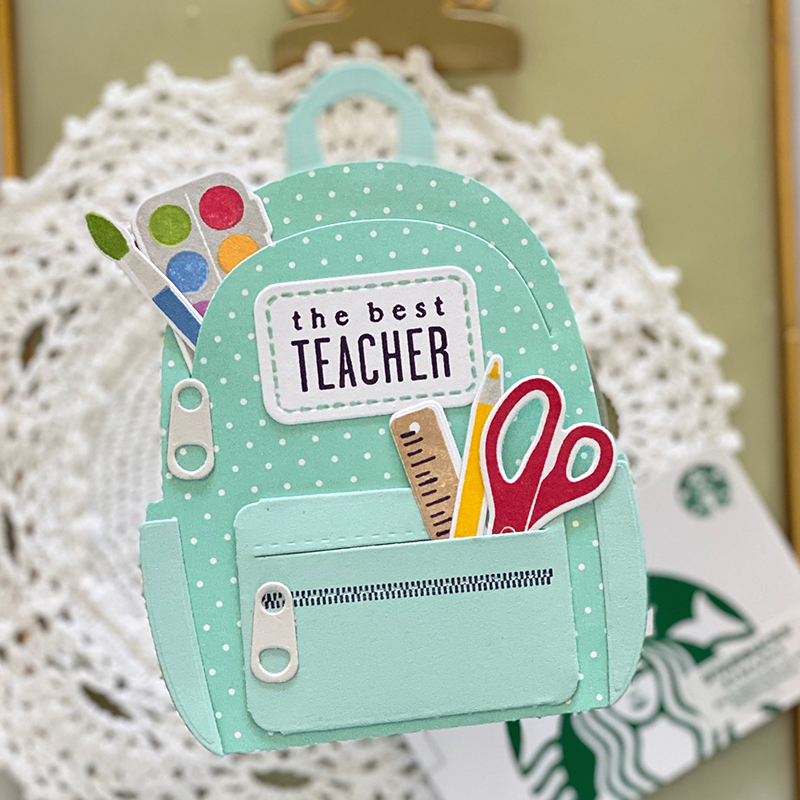
Our newest Go-To-Gift Card Holder is in the shape of the cutest backpack on earth, and is just in time for Back-to-School, teachers, students, and all of the fun this time of year holds. I created a soft, floral Go-To-Gift Card Holder: Backpack for my college girl, who will be moving into her dorm on the 26th….I can do this, right?
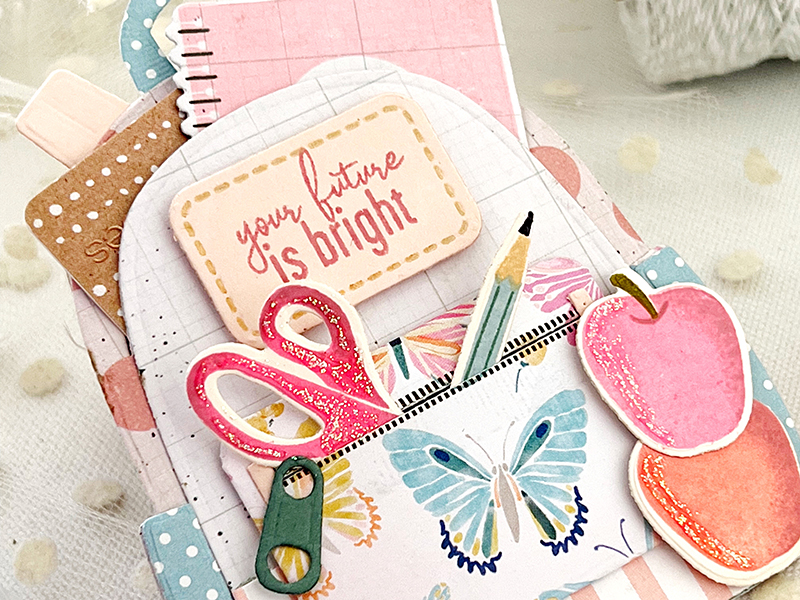
The backpack die comes with a puffy pocket for the front that you can cut from patterned paper or cardstock and stamp with jumbo polka dots or gingham from the coordinating Backpack Accessories stamps and dies. This set also comes with pencils, paintbrushes, a ruler, zipper, label, paint tray, mug, apples, and more. These darling accessories will allow you create handmade backpacks perfectly suited for your student, teacher, friend, etc.
Supplies used:

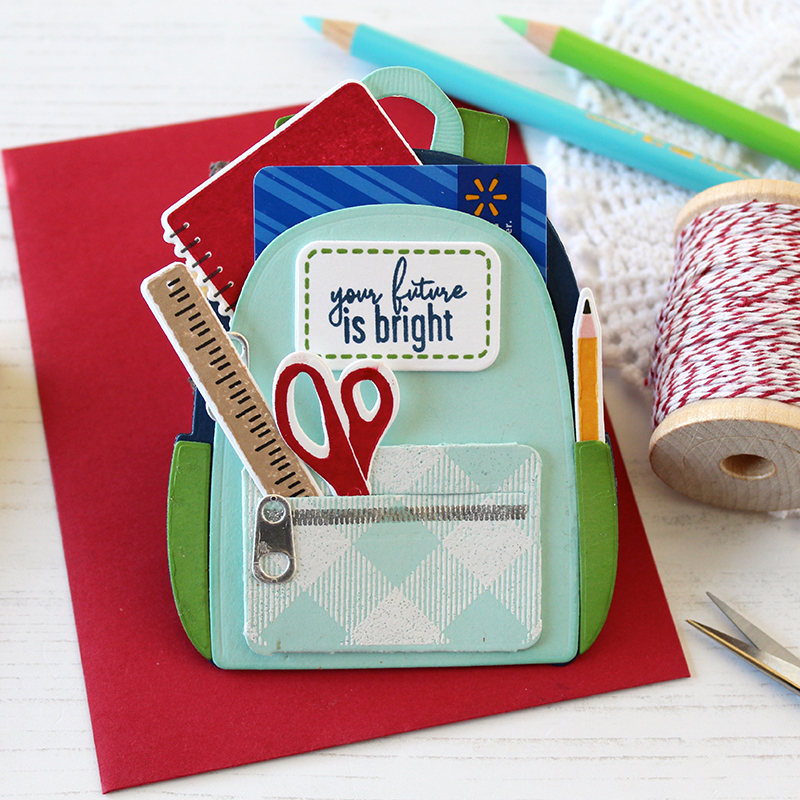
TIPS:
- Emboss the zipper with silver embossing powder for a more realistic look.
- Tuck the notebook behind the gift card
- Tuck a few of the accessories in the pockets.

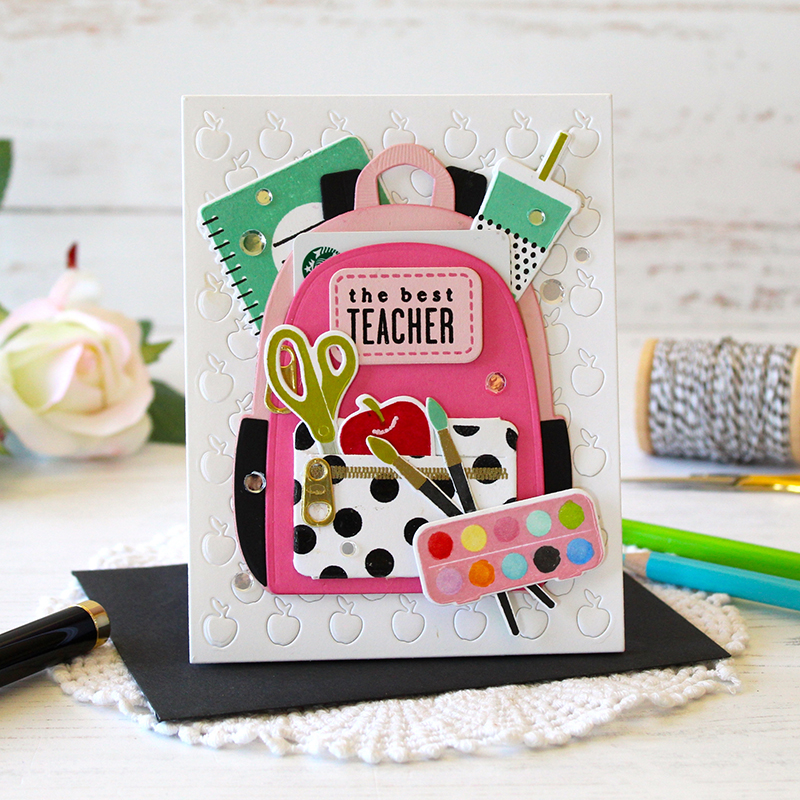
TIPS:
- Use a cover plate to create the subtle background.
- Add a few sequins to the card front.
- Attach the gift card to the card front.
We hope you have enjoyed all the beautiful projects that we have shared with you today! We would love to hear what you think of everything we have introduced! Please leave a comment on this post to tell us what you like the most and why, and you will be eligible to win big!

Leave a comment today and you will be automatically entered to win a $50 Papertrey Ink gift certificate! You have until 7am ET, August 15th to leave your comment and be eligible to win. Only one comment per person please. One randomly selected winner will be posted on the August Release Winners Page by 11 PM ET on August 18th.


Leave a Reply