


We are already on Day 3 of our July Release and we’re just getting started. All the heart eyes for what’s in store for you today. Introducing the new Cover Plate: Flutter Frame die and Crafting Queen stamps and dies. Let’s dig into some fun projects, shall we?
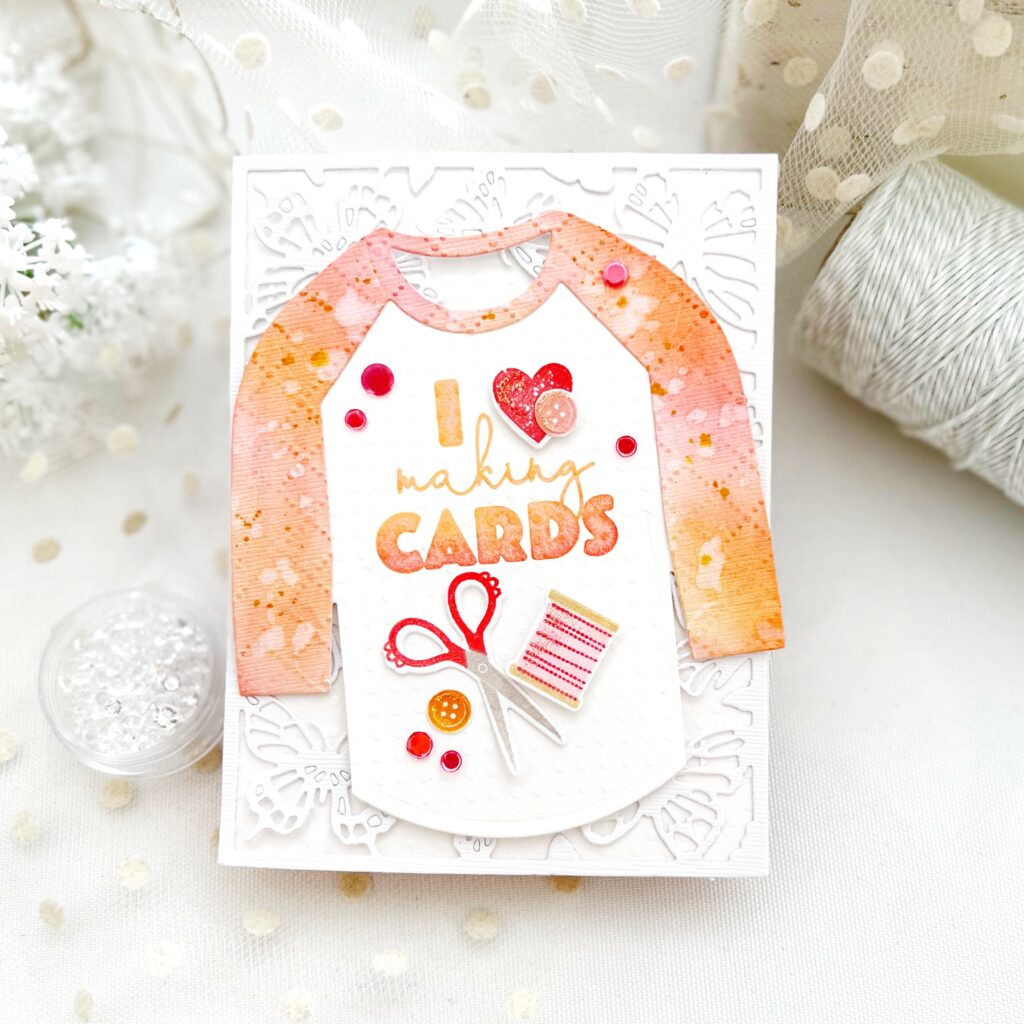
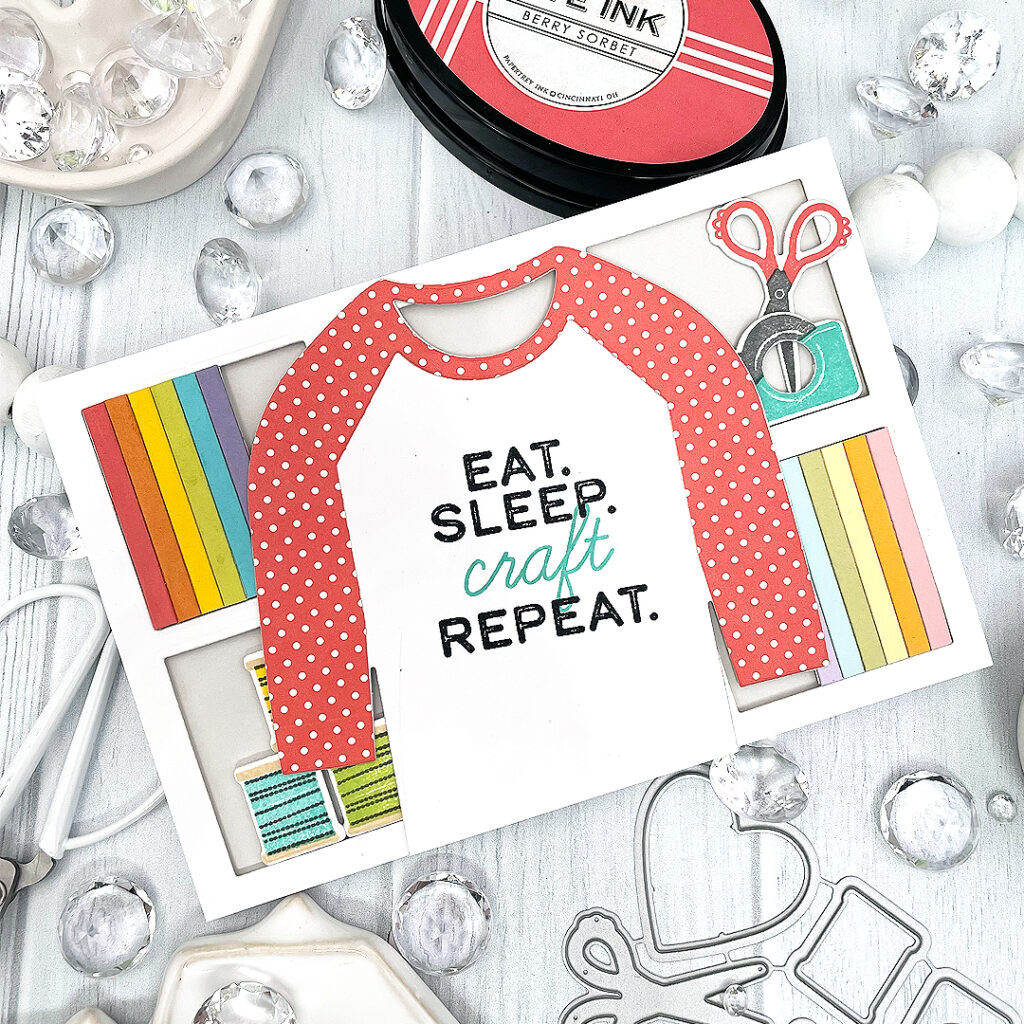
Our Crafting Queen stamps set was created to coordinate with our Baseball T dies. We wanted a little something for us ladies when it came to creating t-shirts, hence the creation of Crafting Queen. It’s a pretty special set if you ask me. If only these darling, embellished shirts came in my size.

Most of the sentiments found in Crafting Queen are 2-step, so you can really have fun mixing and matching, and creating t-shirts with personality. You’ll also find the sweetest assortment of accents such as decorative scissors, buttons, hearts, a spool of twine, ribbon, a tape dispenser, etc. I love how on the sentiments I chose, the heart is the second step, and I was able to stamp it in a secondary color and adhere is using foam adhesive to make it pop.
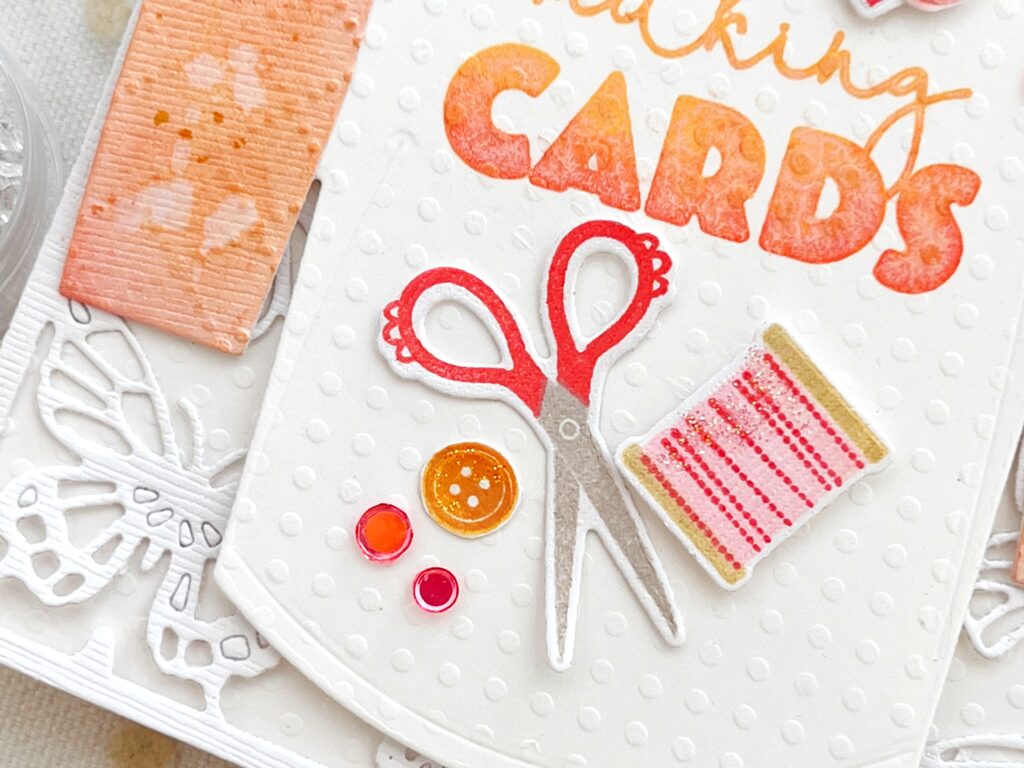
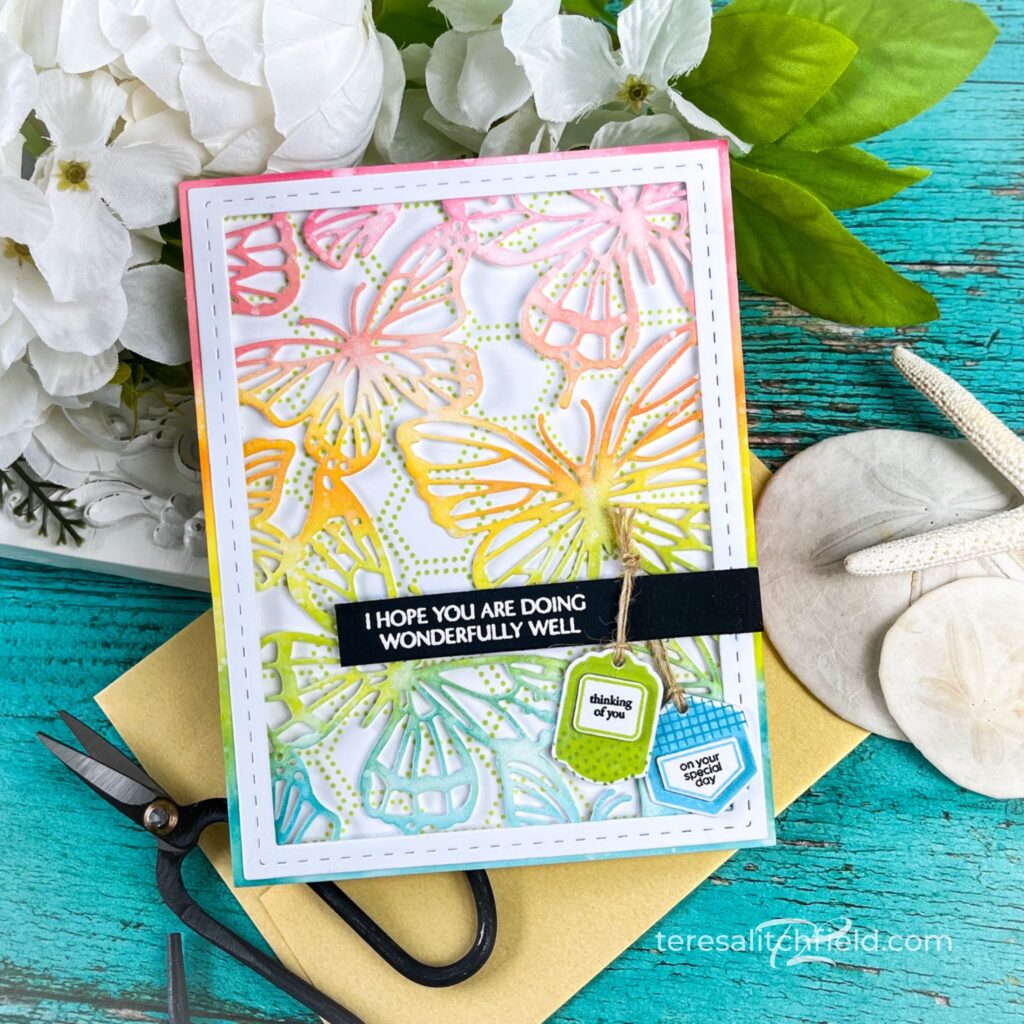
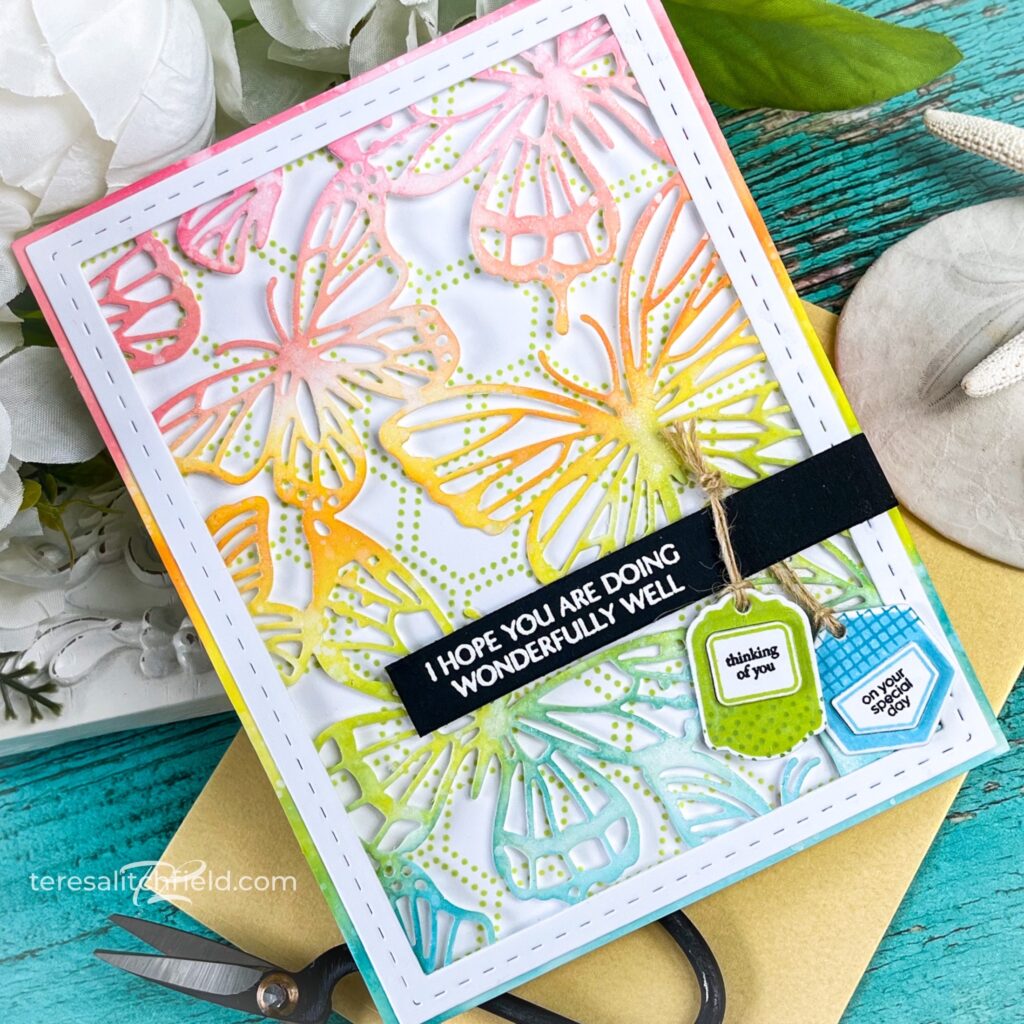
I added the darling scissors and spool of twine, accenting with Berry Sorbet Moonshine sequins, and tiny stamped buttons. My t-shirt was cut from white cardstock and the sleeves were sponged with ink and then spritzed with water to create a simple watercolor look. Behind my t-shirt, you’ll notice the lovely Cover Plate: Flutter Frame die used to create a beautiful, subtle background. This die works great as a frame, background, or even with individual butterflies cut out and used to embellish your cards and tags. It’s truly so delicate and beautiful!
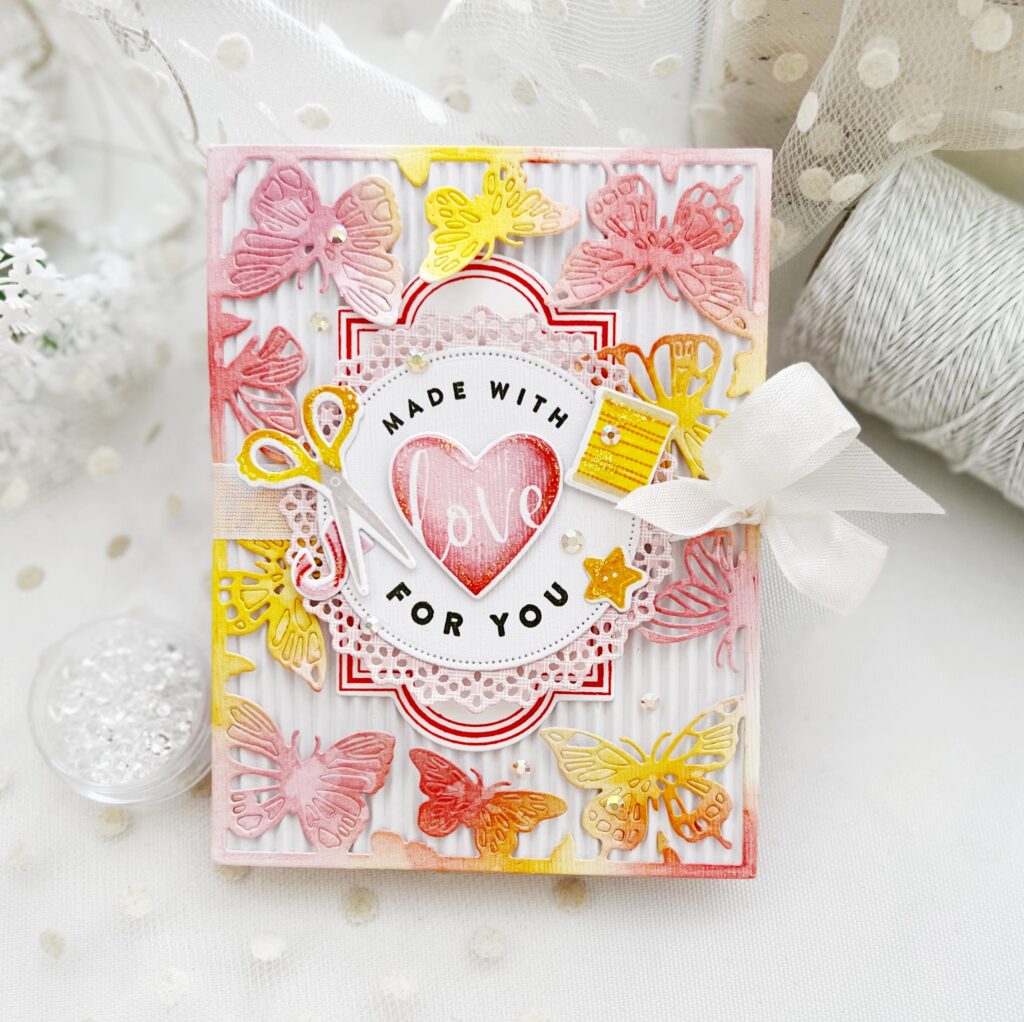
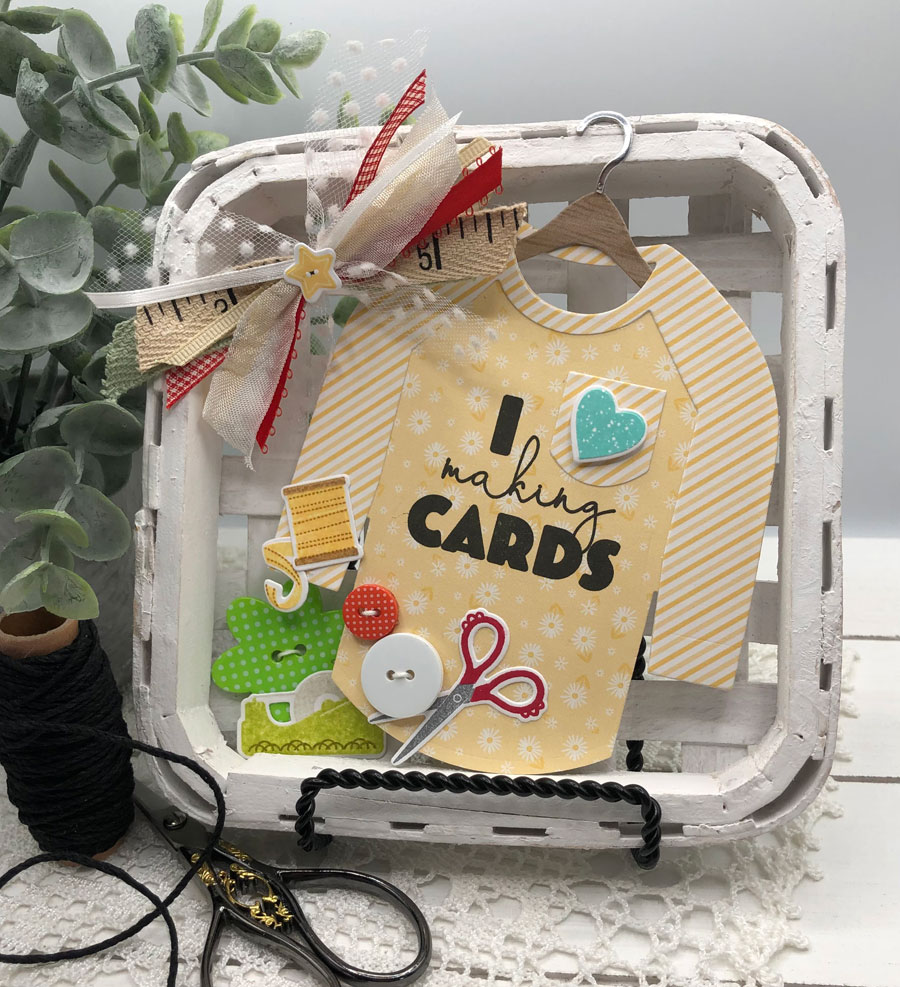
On my second card, I wanted to show how the Crafting Queen stamp set and dies can be used separate from the Baseball T die. Isn’t this the cutest sentiment? Think of all of the things you can use it for. It’s perfect for cards and gift tags, for birthdays, holidays, and just because. I adore it!
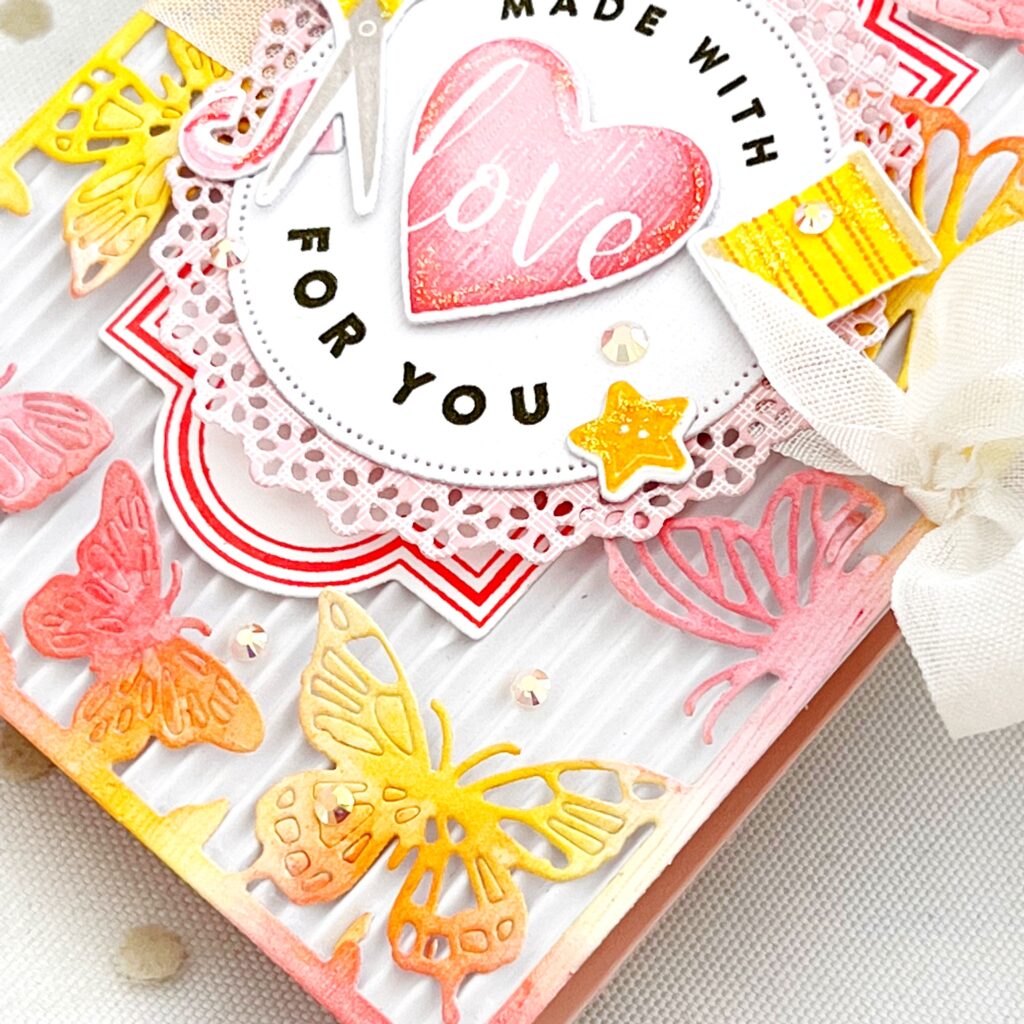
Surrounding my focal point, I used the Cover Plate: Flutter Frame, sponging ink in Summer Sunrise, Bright Buttercup, Melon Berry, and Lovely Lady. This frame adds the perfect feminine touch to cards…and does so very simply and quickly.
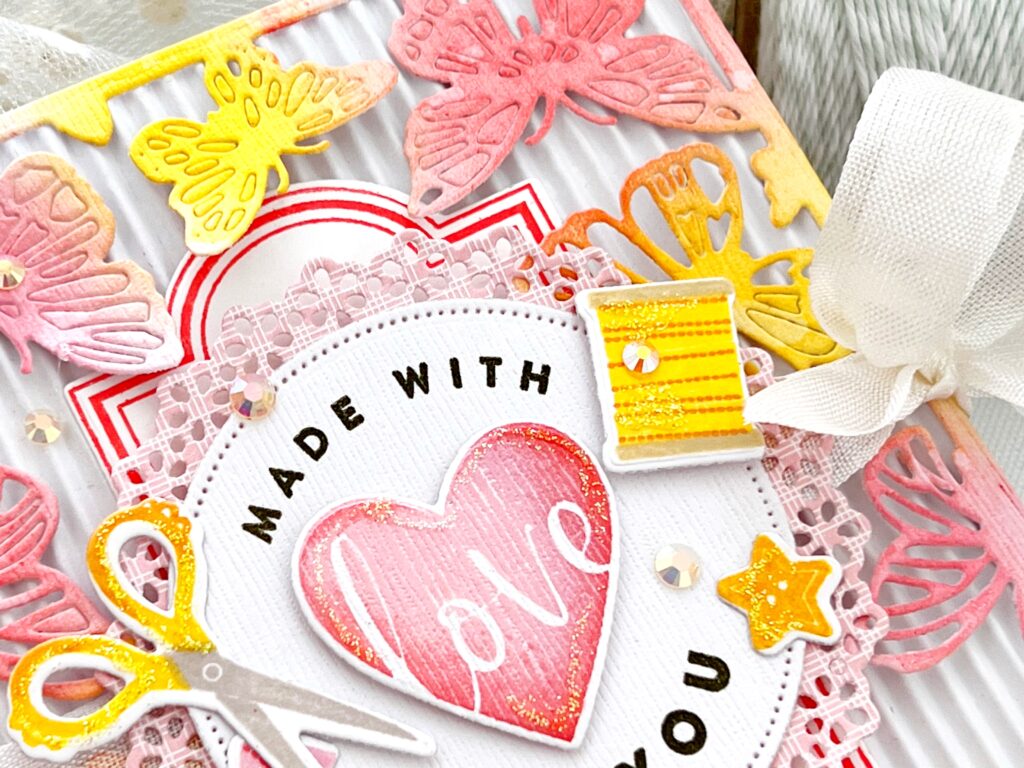
I layered my Crafting Queen sentiment over a die cut Delicate Doilies circle cut from Bitty Big Sweet Blush. This was then layered over a die cut and stamped tag, cut using the Framing Florals die. I then accented with the playful images found in Crafting Queen. They’re all so much fun to use, it’s hard to decide on a select few!
You’ll notice just how much fun our designers had creating with these new products. They’ve created delightful feasts for your eyes!
I Love Making Cards Card
Supplies used:
STAMPS: Crafting Queen
INK: Melon Berry, Berry Sorbet, Summer Sunrise, Lovely Lady, Soft Stone
PAPER: Stamper’s Select White
DIES: Crafting Queen, Cover Plate: Flutter Frame
OTHER: Moonshine Sequins: Berry Sorbet , Embossed Cardstock, Stickles Glitter
Make With Love Card
Supplies used:
STAMPS: Crafting Queen
INK: Melon Berry, Berry Sorbet, Summer Sunrise, Bright Buttercup, Lovely Lady, Olive Twist, Soft Stone
PAPER: Sweet Blush, Stamper’s Select White, Bitty Big: Sweet Blush
DIES: Crafting Queen, Cover Plate: Flutter Frame, Framing Florals, Delicate Doilies
OTHER: Adhesive Gems, Stickles Glitter, Corrugated Cardstock, Seam Binding

TIPS:
- Cut out your paper with the Flutter Die, then cut apart the individual butterflies. For an extra bit of layering tuck a butterfly underneath one of the layers on your card or project.
Supplies used:
STAMPS: Crafting Queen
DIES: Cover Plate: Flutter
OTHER: Ribbon, Pearls, Sequins

TIPS:
- Die cut your paper with the Flutter Die, the cut one of the butterflies. Use the butterfly along with the Flutter Frame Die for an extra bit of layering and dimension.
Supplies used:
STAMPS: Crafting Queen
DIES: Cover Plate: Flutter, Cover Plate: Flutter Frame
OTHER: Sequins
Next up today, we have something extra special for you Tiny Tag lovers out there. Ready? Introducing our new Tag-Its: Mini stamps and dies. And, our new Cover Plate: Flutter dies bring you gorgeous butterflies on a larger, more life-like scale. Delightful!
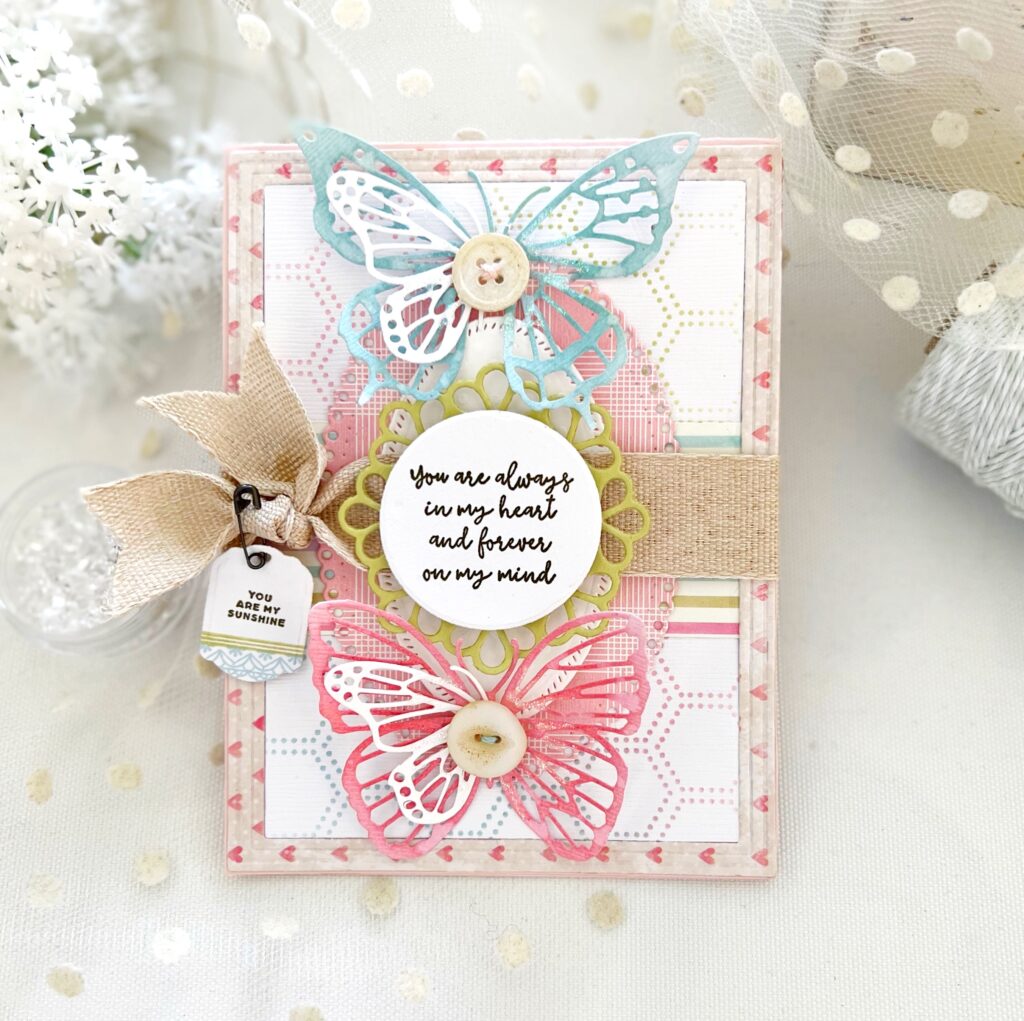
I have long-loved the Tiny Tags Papertrey Ink came out with years ago. I’m so delighted it’s time for a refresh and renewal on this fun tag concept. Our New Tag-It’s: Mini stamps and dies come in the most delightful variety of shapes and is bursting with patterns, images, and sentiments for you to create your own custom tags from.
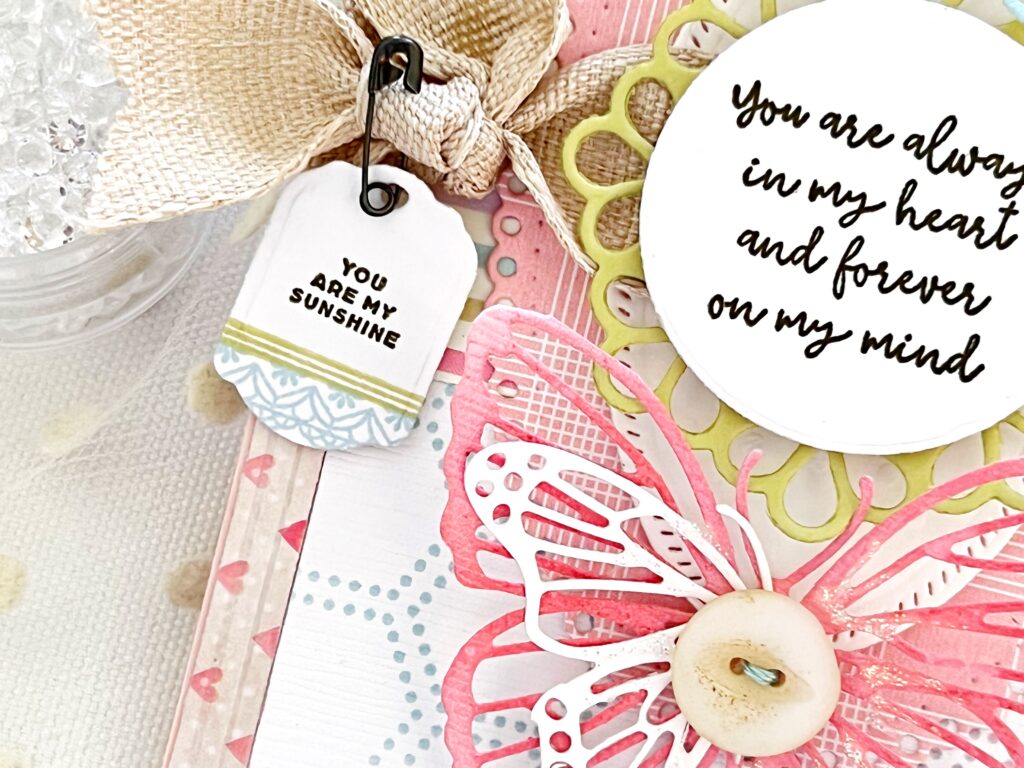
I stamped my little tag using two of the borders found in the Tag-It’s: Mini set and my chosen, “You Are My Sunshine” sentiment. I thought this coordinated perfectly with my Inside Greetings: You’re On My Mind sentiment. These tags are so much fun to attach to a knotted ribbon or bow using twine, a button, metal safety-pin, clothespin, hat pin, etc.
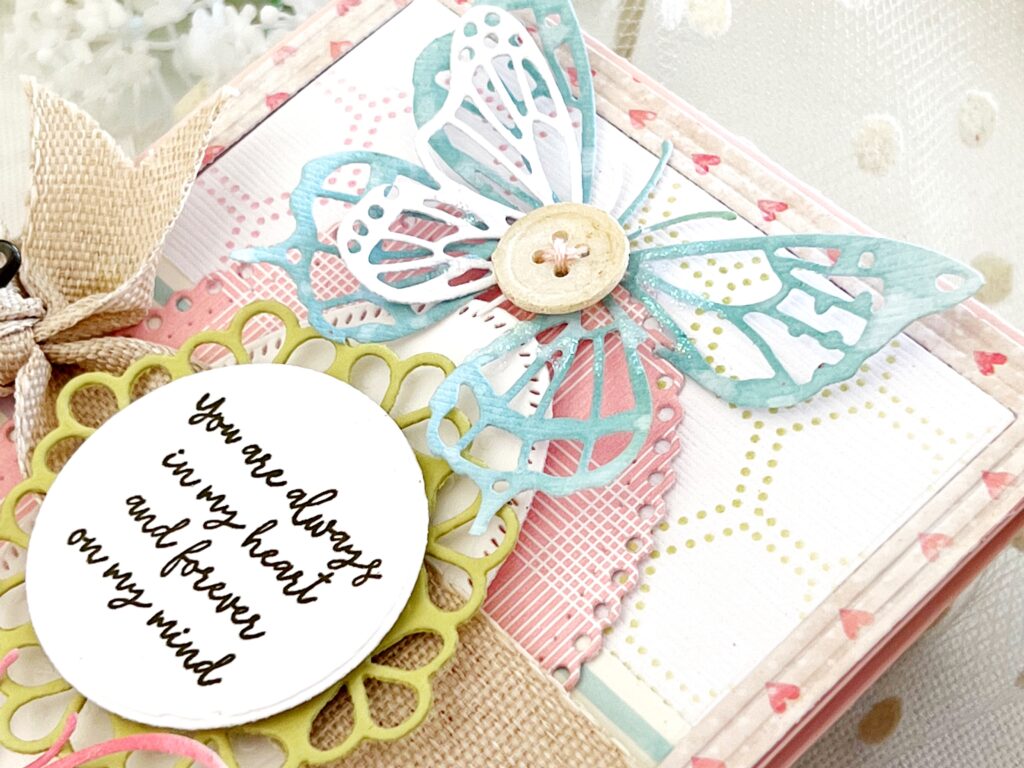
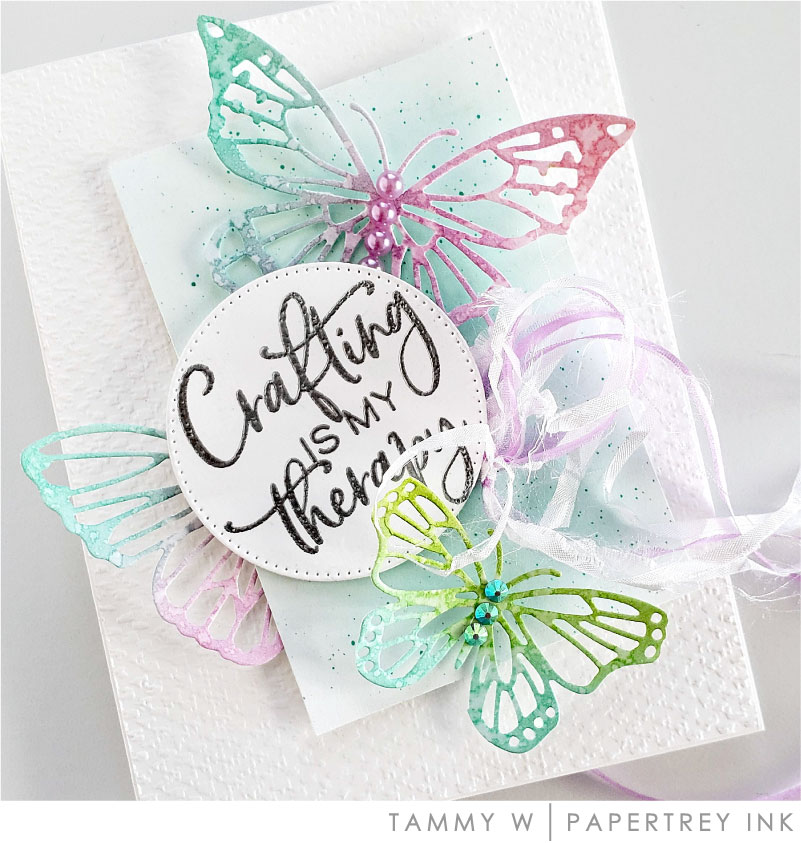
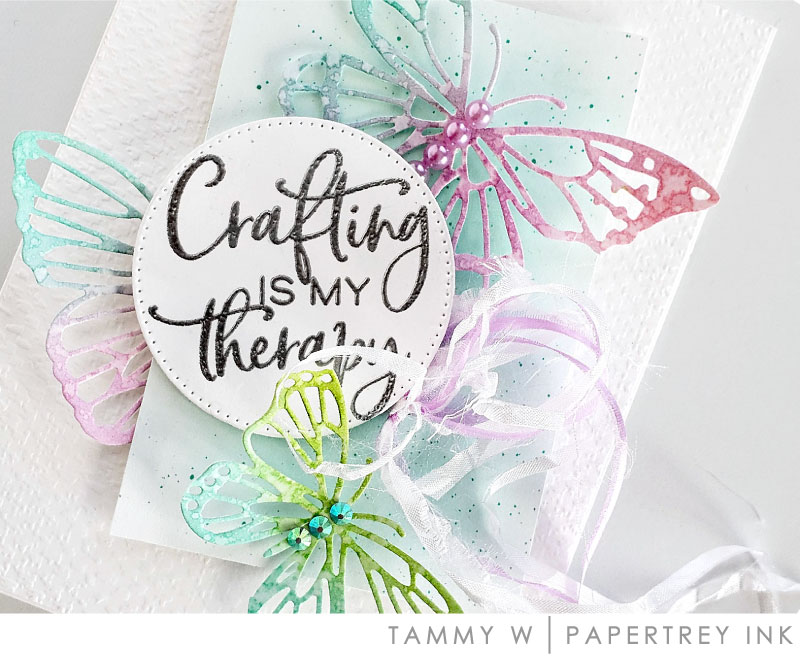
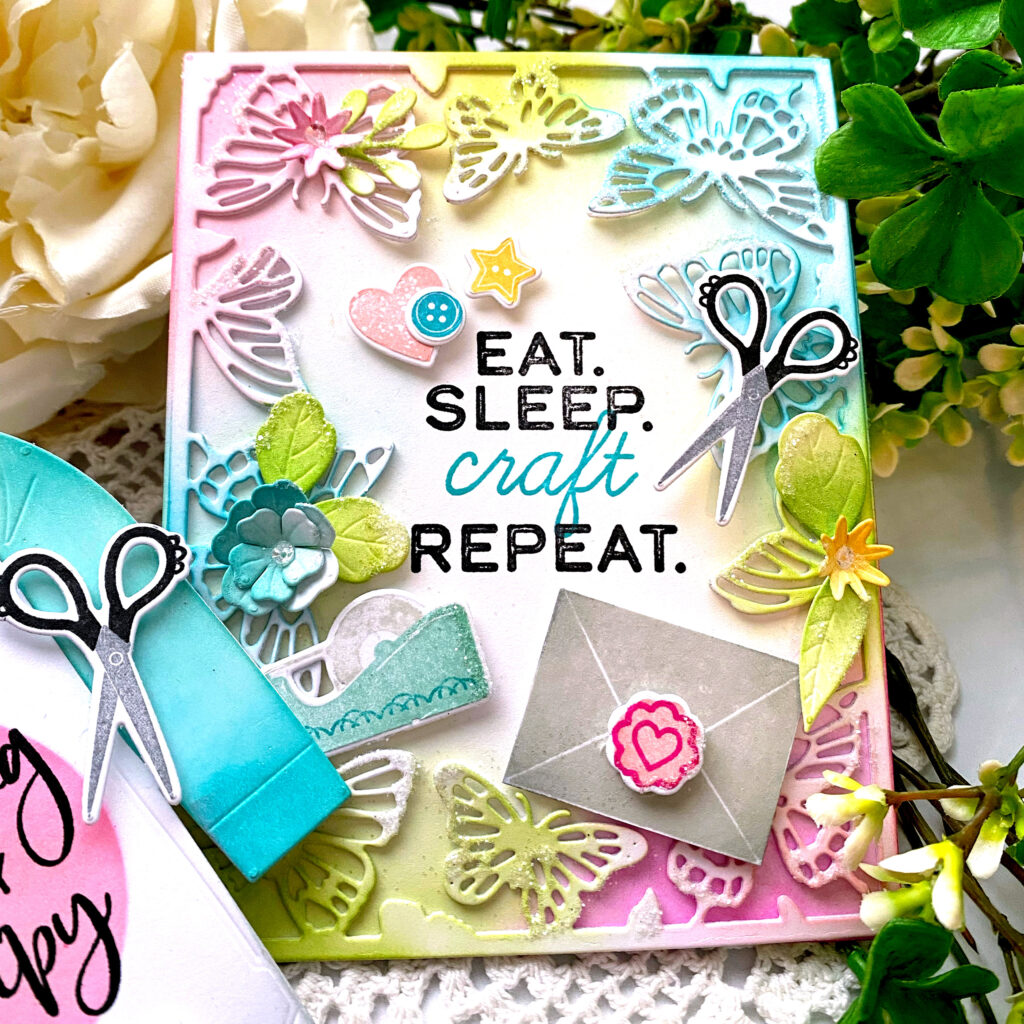
I clipped apart a few of the butterflies from the new Cover Plate: Flutter die, adding ink to the larger two butterflies, and added them to my card front. This is a fun way to use this new frame die. I added secondary wings as well, loving the pretty, layered effect of the smaller white wings over the larger, colored wings. Behind my butterflies, I have used the new Love to Layer: Ovals dies and the new Dotted Hexagon Stencils, which you’ll be hearing more about soon!
Off to see what our designers have created using these beautiful new products. Will you join me?
You Are My Sunshine card
Supplies used:
STAMPS: Tag It Minis, Inside Greetings: You’re On My Mind
INK: Spring Moss, Spring Rain, Lovely Lady, Berry Sorbet, Olive Twist
PAPER: Fresh Snow Linen, Sweet Blush, Stamper’s Select White, Bitty Big: Pale Peony
DIES: Tag It Minis, Love to Layer: Ovals, Cover Plate: Flutter, Delicate Doilies
OTHER: Dotted Hexagon Stencil Collection, Twill, Metal Safety Pin, Buttons, Stickles Glitter

TIPS:
- Inlay die cut pieces to selectively let the color show through a die cut cover plate
- Using vellum over backgrounds instead of cardstock to show more of the background design
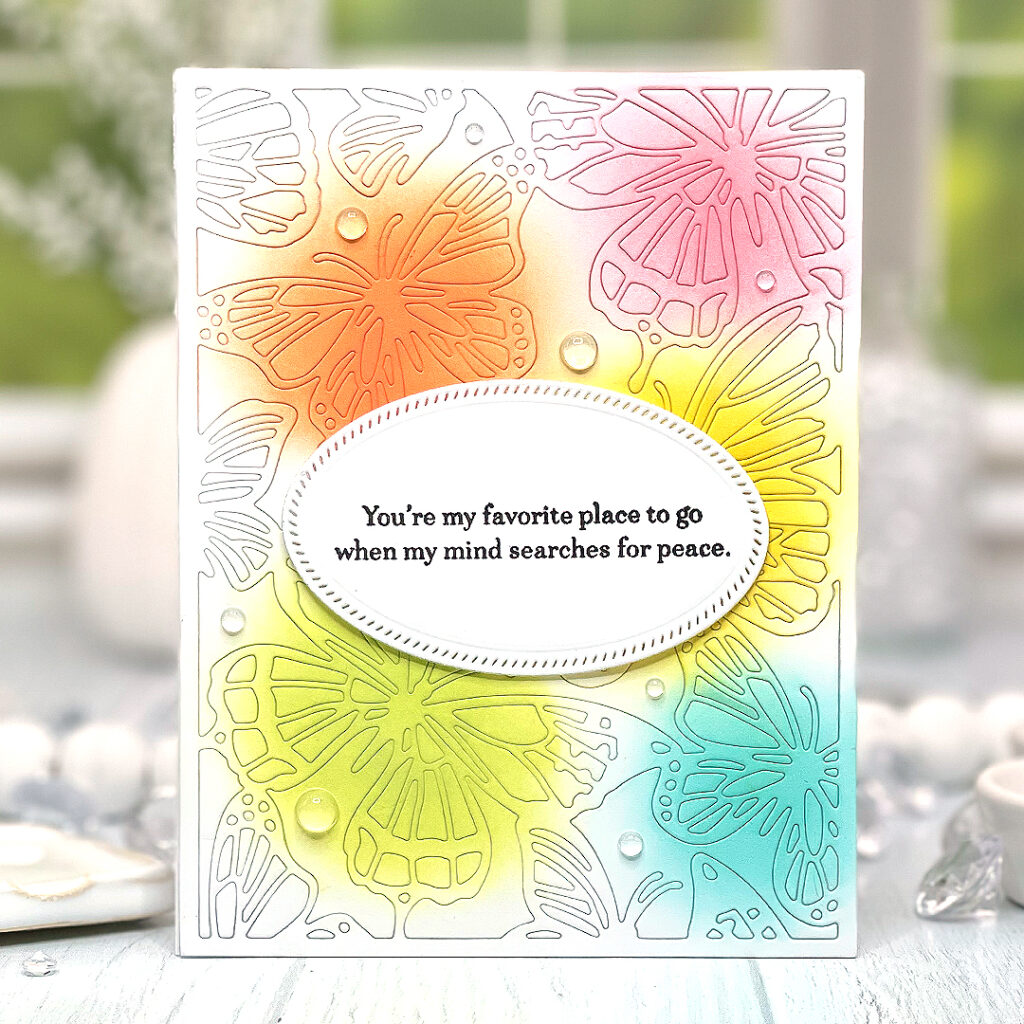
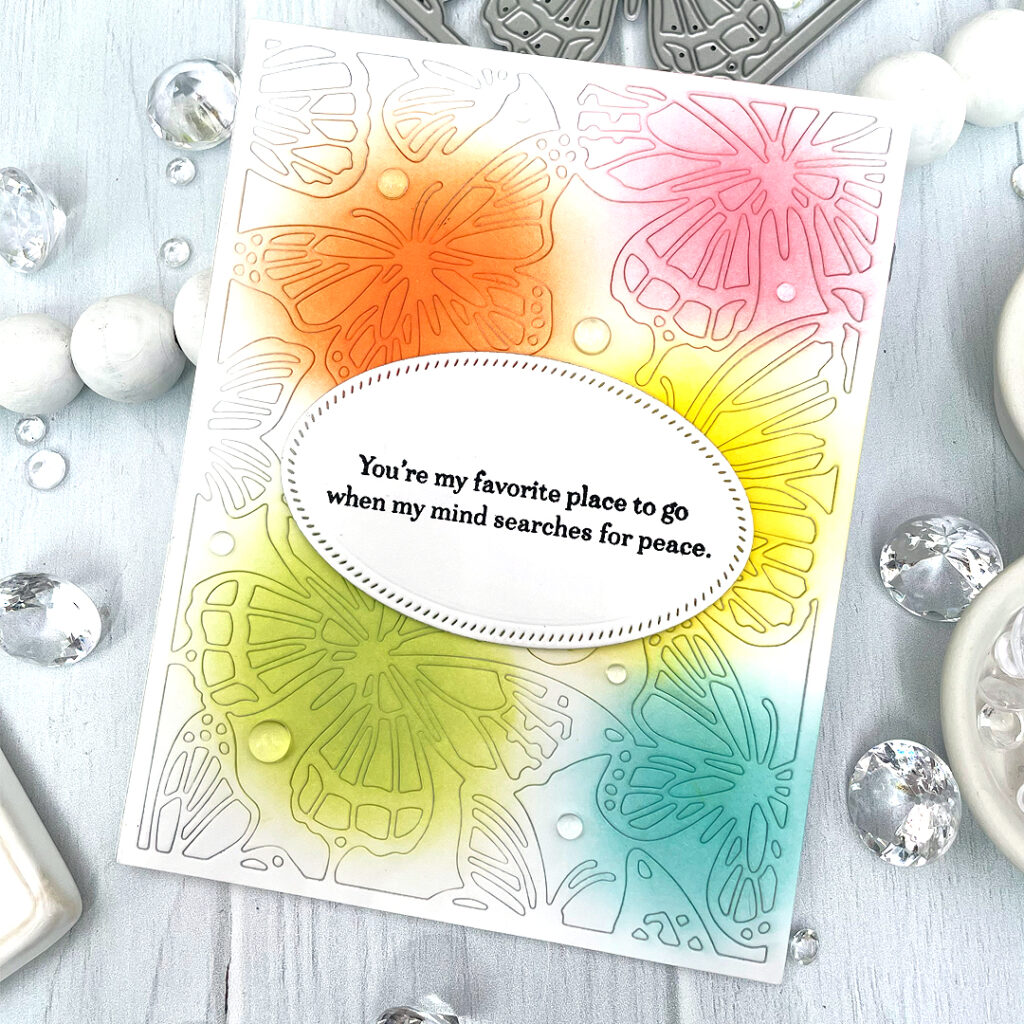
TIPS:
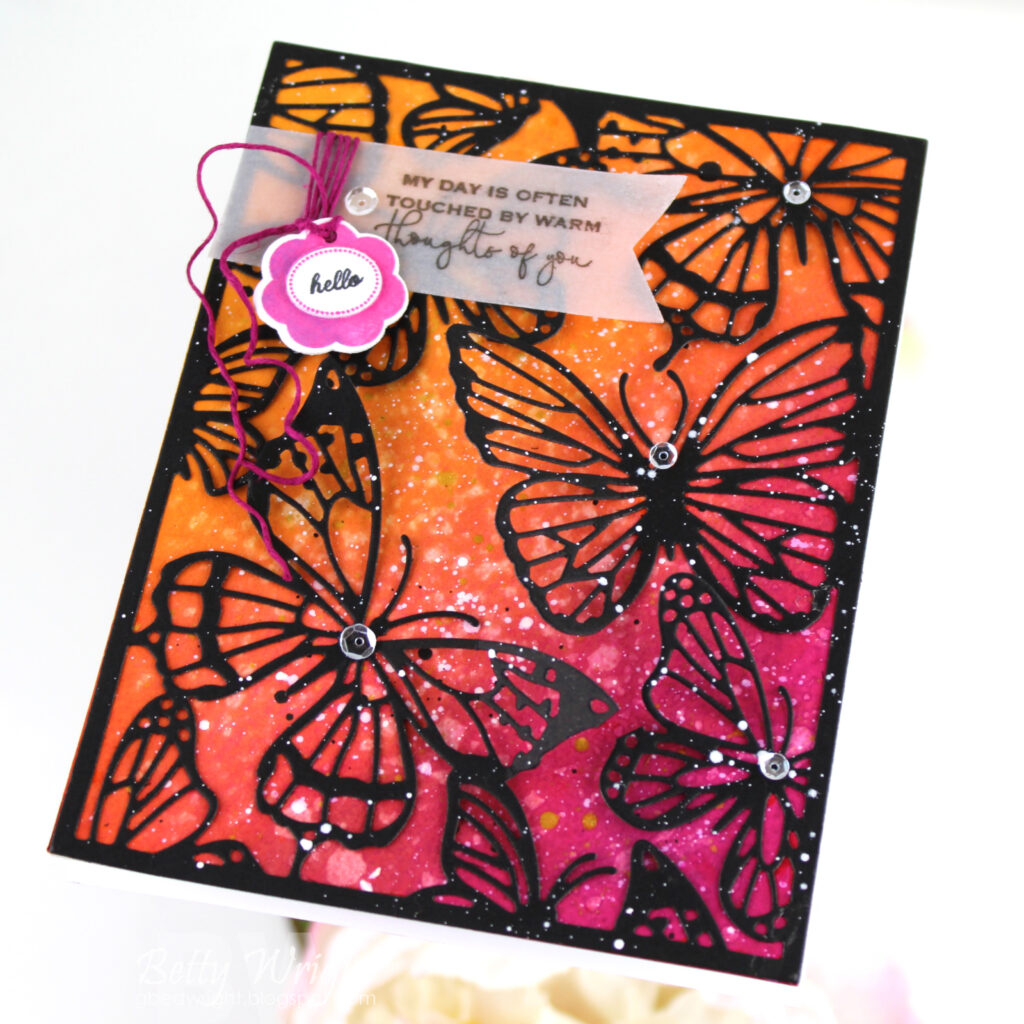
- Detailed cover plates are perfect for embossing designs as well as cutting
- Blend ink over the embossed cover to bring out the design

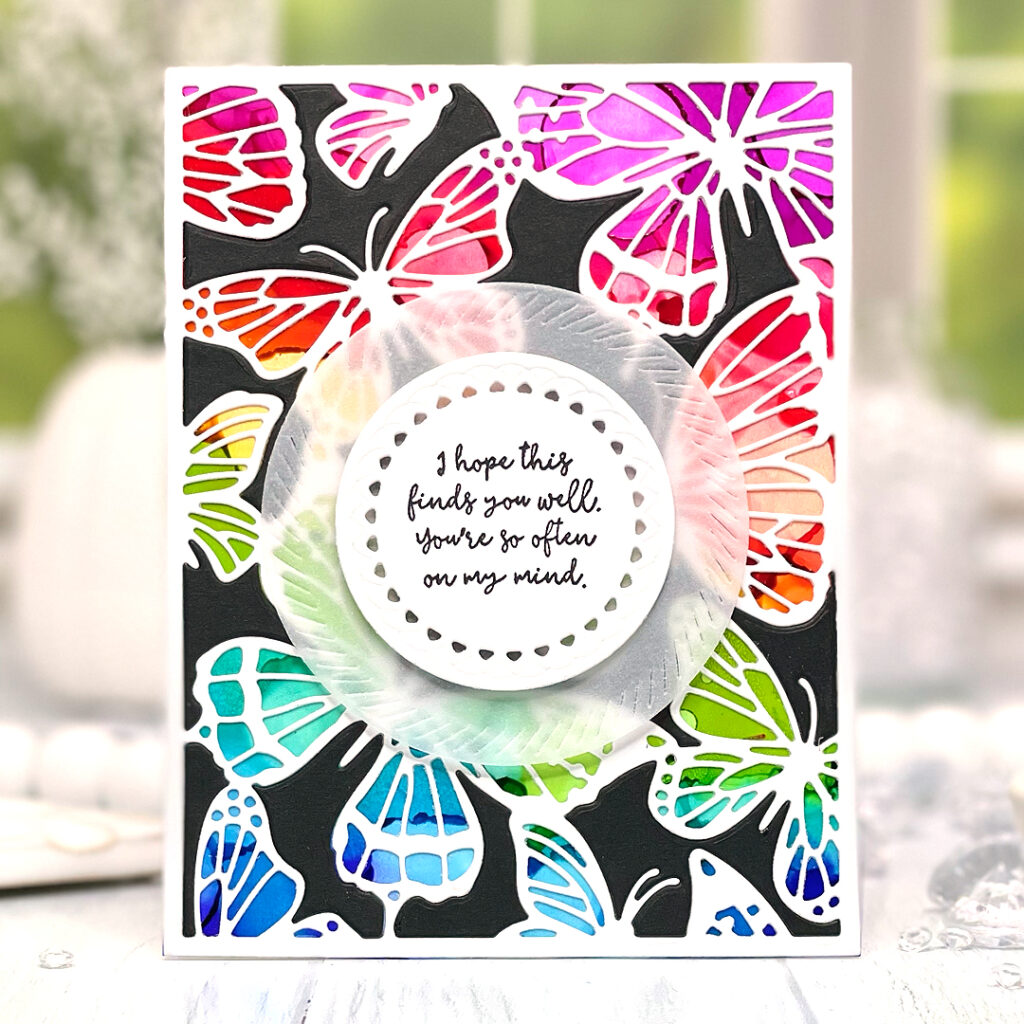
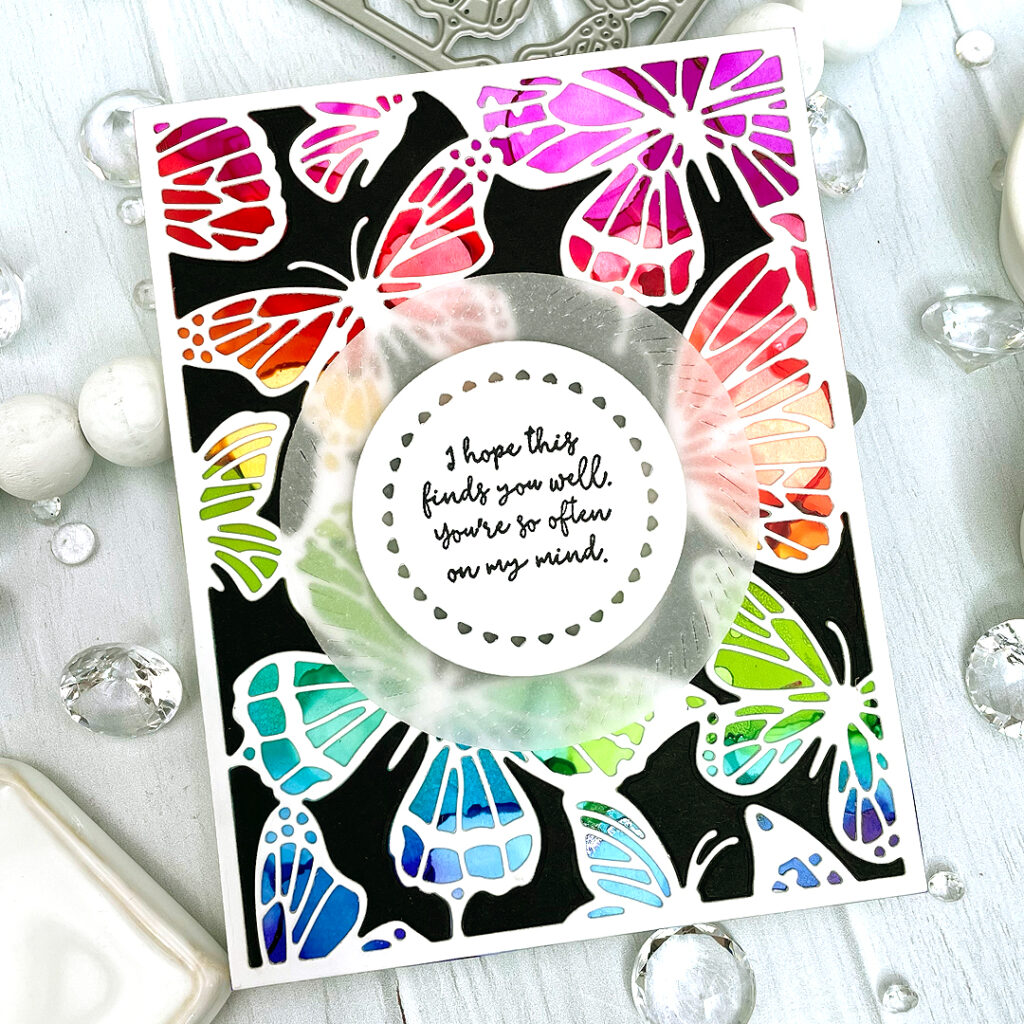
TIPS:
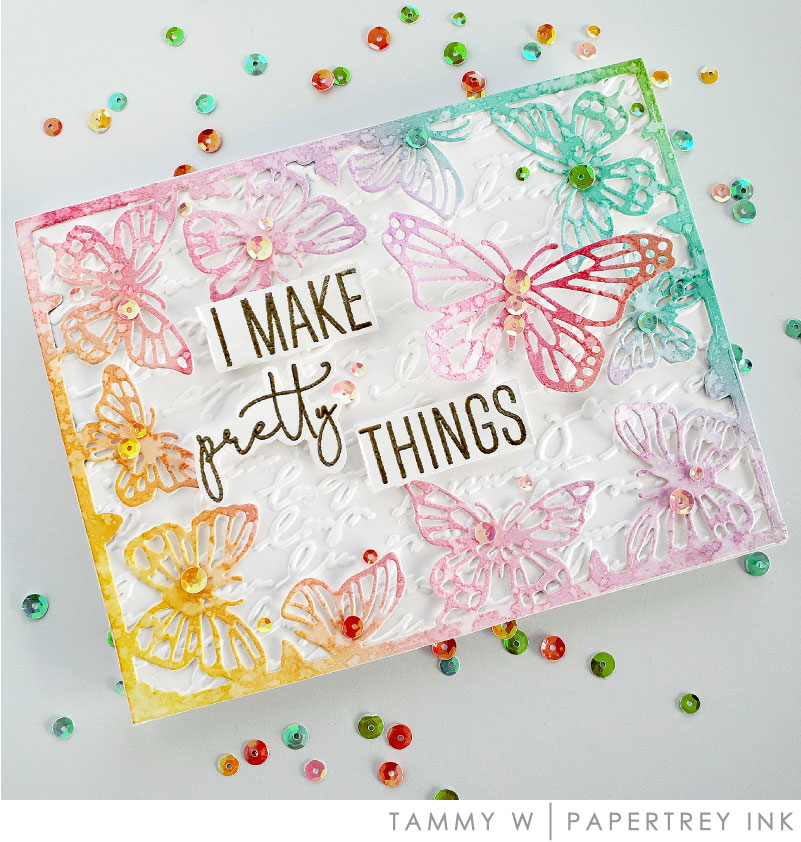
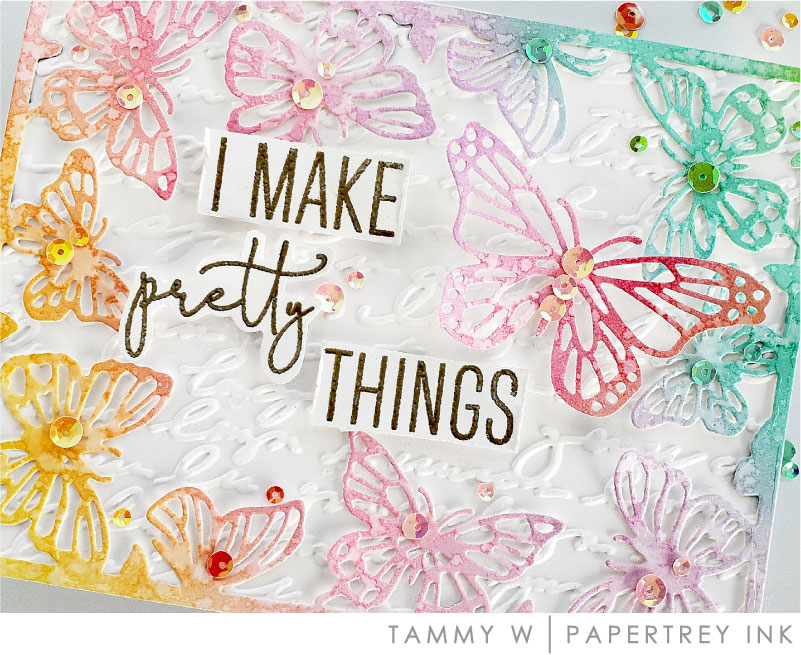
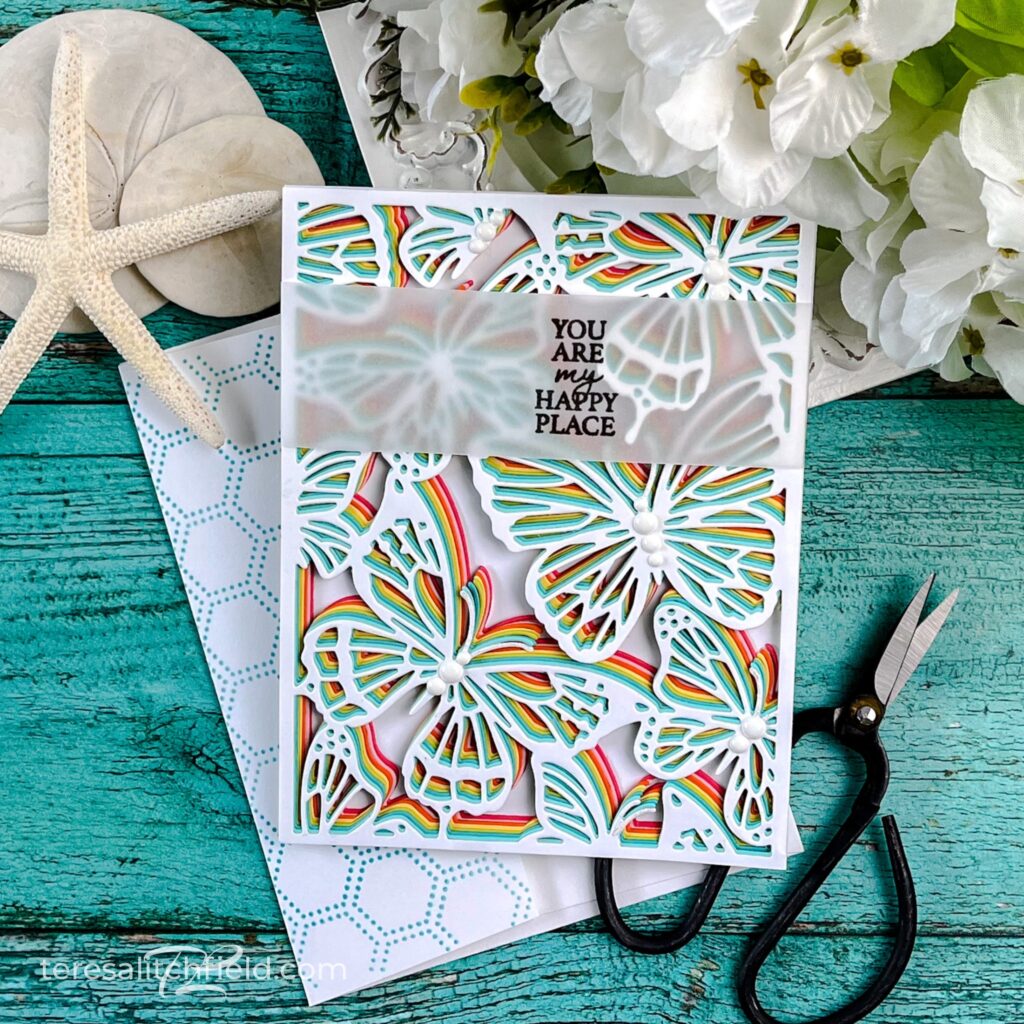
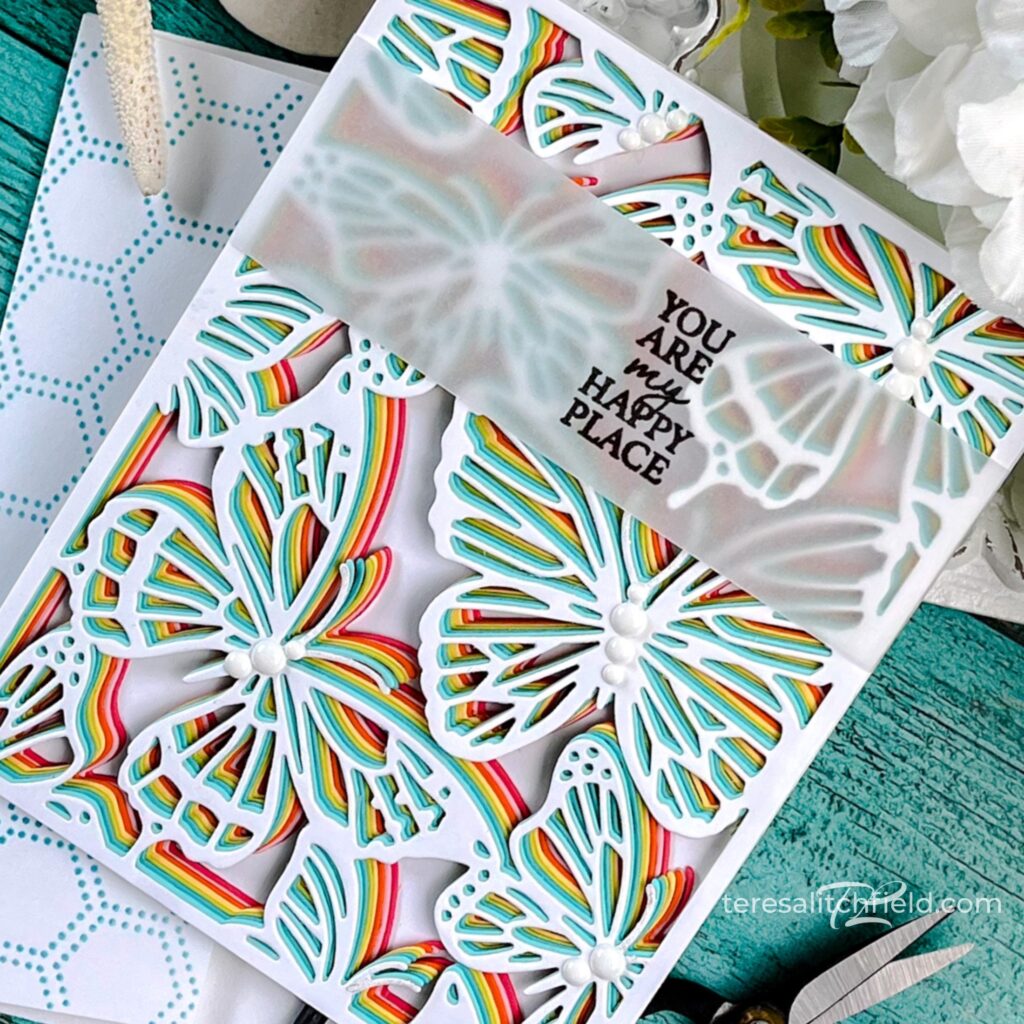
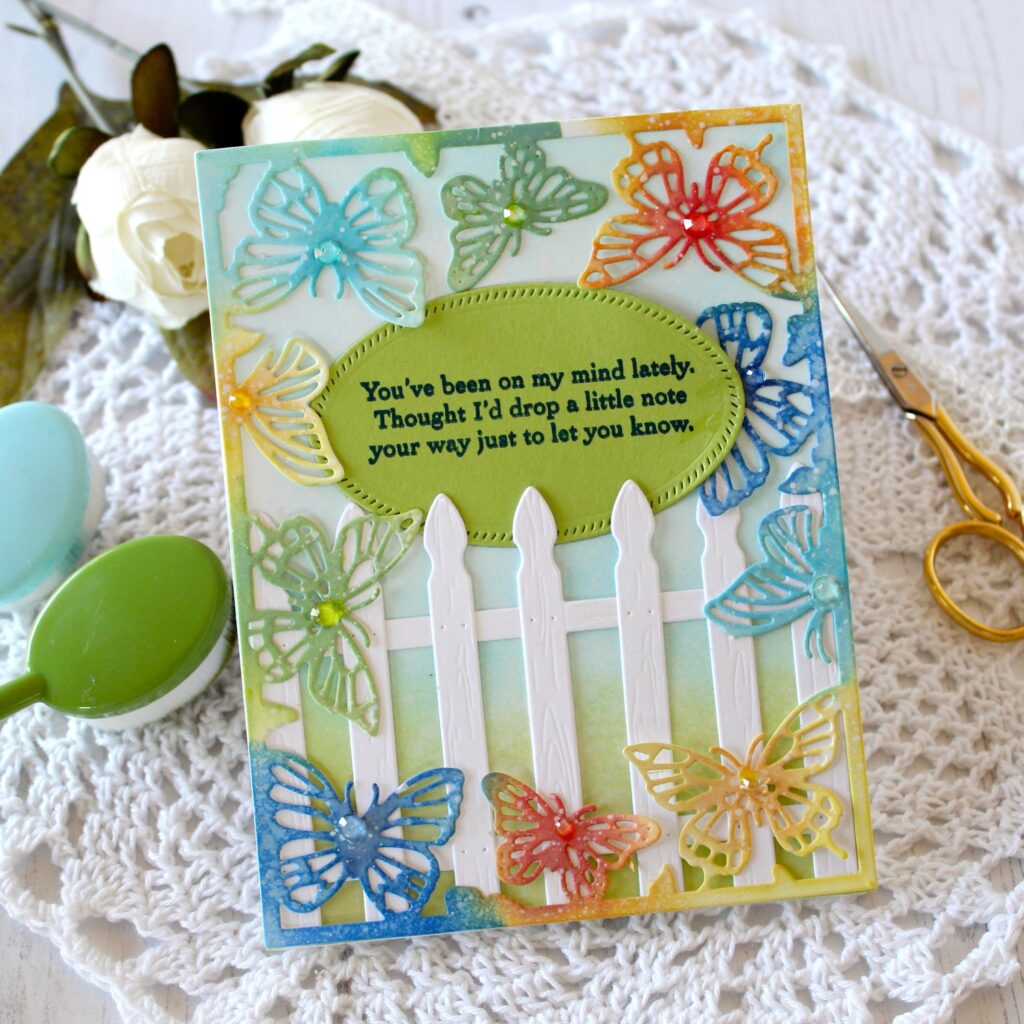
- Stack multiple colors of cardstock using the cover die for a rainbow of butterflies to add color and dimension.
- Offset colored cardstock and trim off access to keep the A2 size. Add white die cut on top for a finished look.
- Stamp sentiment on Vellum for a soft see-thru look.

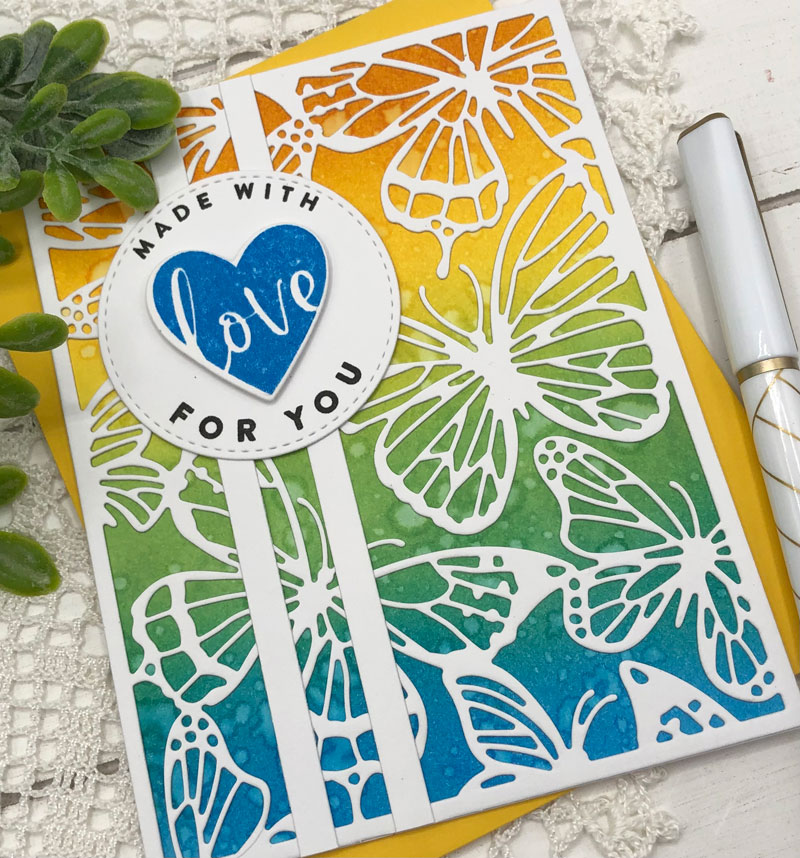
TIPS:
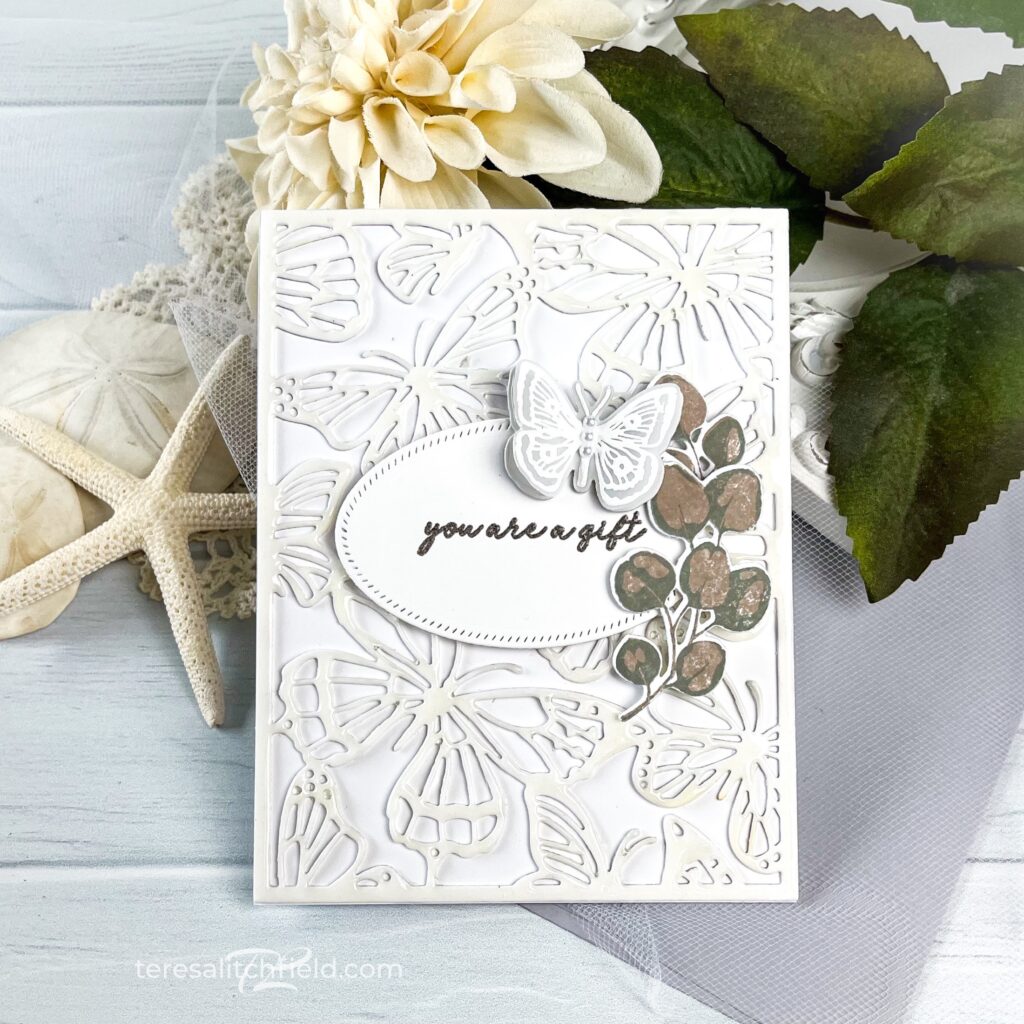
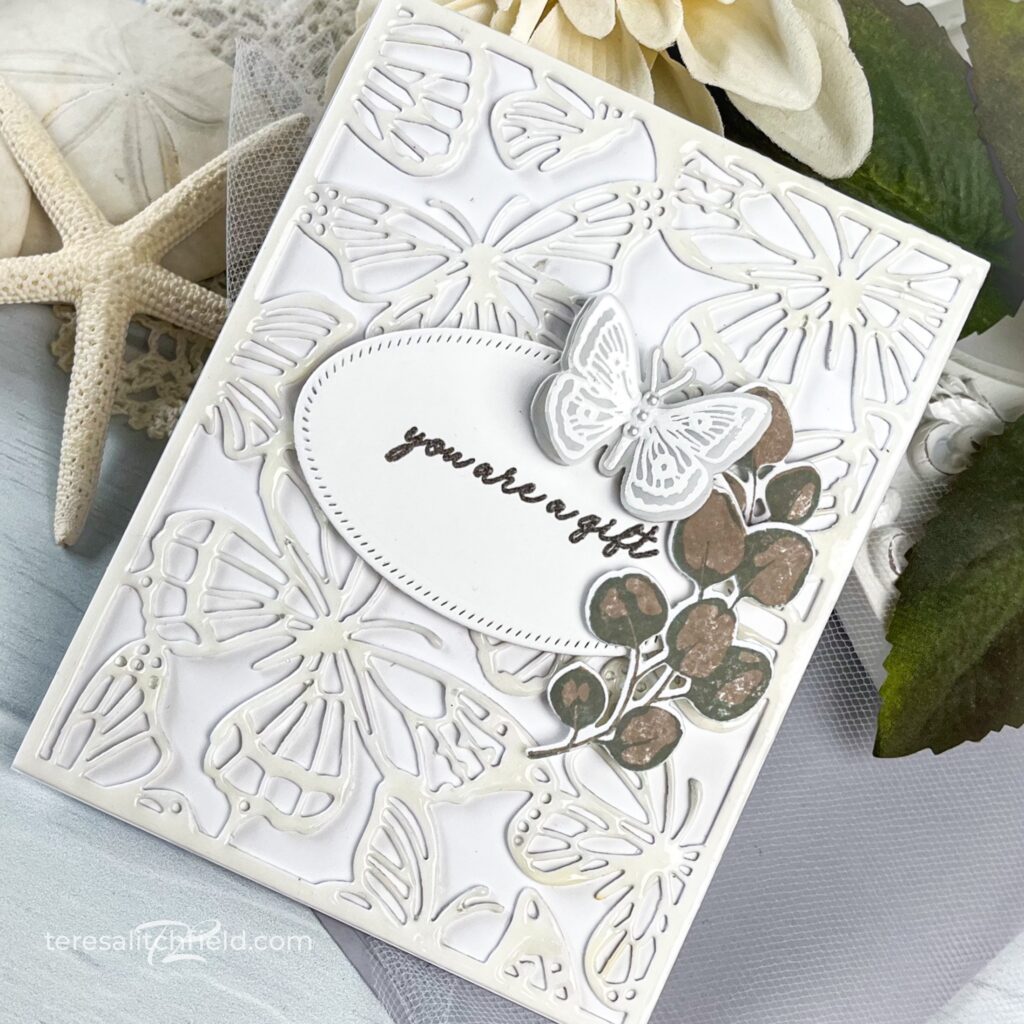
- Create an elegant white on white card using the cover plate.
- Use an embossing pad and clear embossing powder in several layers to create a domed, shiny patent leather look to the die cut.
- Coordinate with the Graceful Butterflies Set!

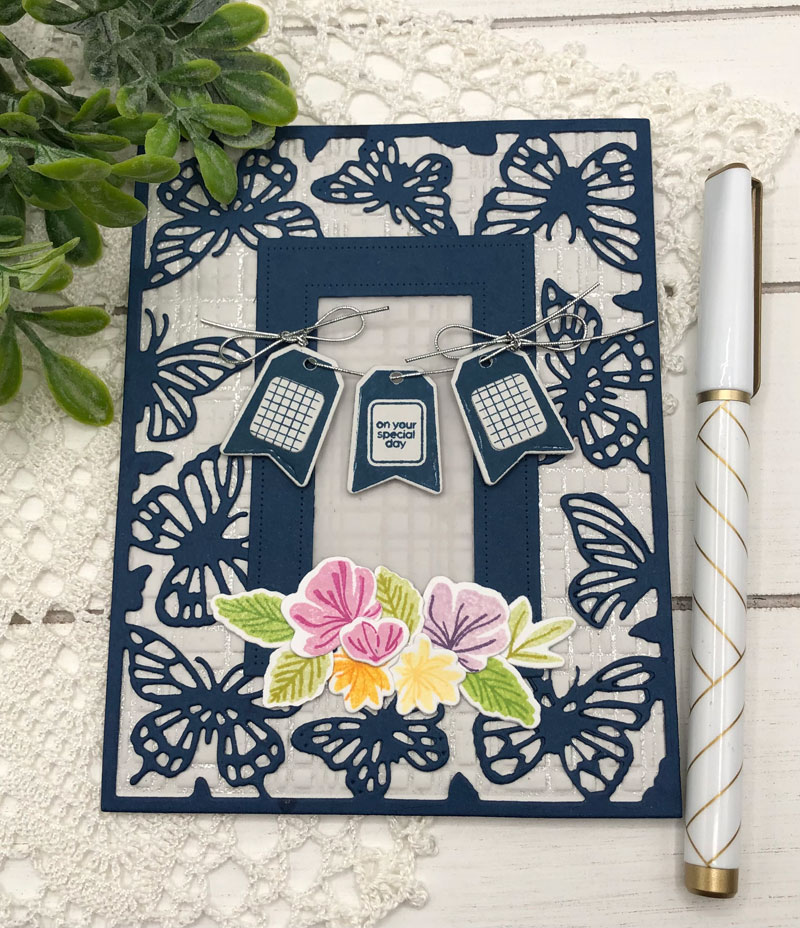
TIPS:
- Add layered dimension to the mini tags by using the dies provided in the set to make the sentiments stand out!
- Hang the mini tags off of an element on your card for added interest.
- Use foam tape to elevate the cover plate die cut so it’s suspended.
- Cover the butterflies using a glitter pen. Every card needs some SPARKLE!!
TIPS:
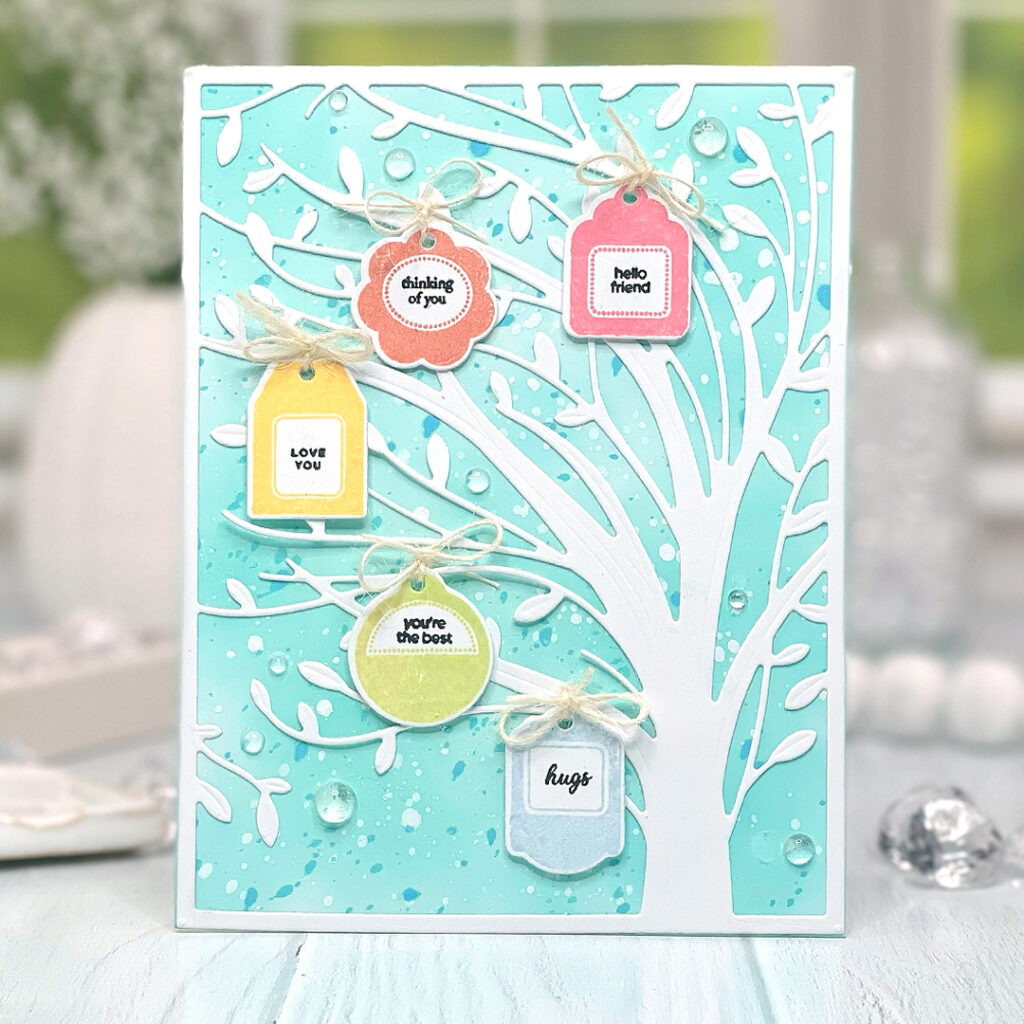
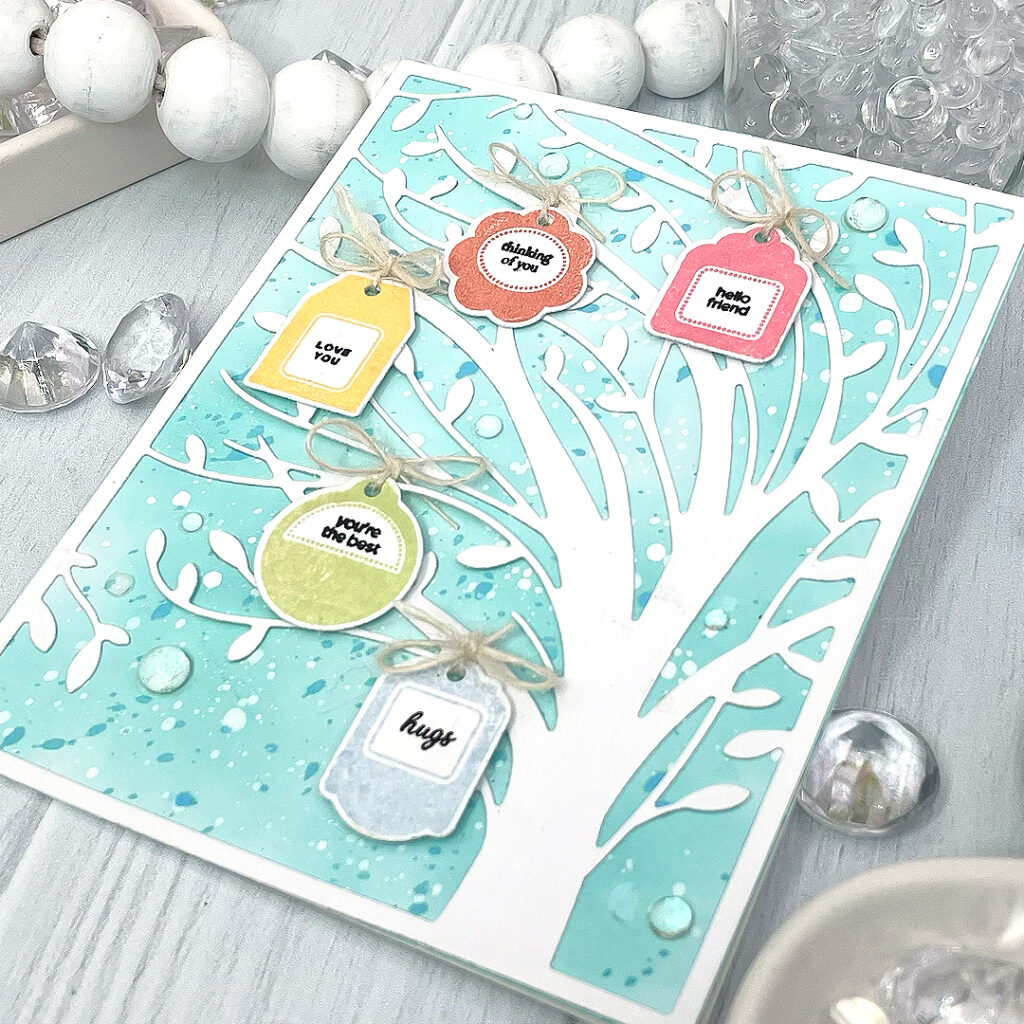
- Add small elements to your cards with twine or string instead of glue.
-
Repeated elements or embellishments on a card is a perfect opportunity to use a rainbow color scheme.
- For sets with small dies, don’t cut the dies apart. This will help prevent misplacing a die.
We hope you loved all of the wonderful projects we shared with you today! Let us know what’s going on your list for this release! If you leave a comment on this post, you will be eligible to win!

Leave a comment today and you will be automatically entered to win a $50 Papertrey Ink gift certificate! You have until 7am ET, June 21st to leave your comment and be eligible to win. Only one comment per person please. One randomly selected winner will be posted on the July Release Winners Page by 11 PM ET on June 21st.


Leave a Reply