


Hello, Everyone! Welcome to Melissa’s Fab Friday Feature
_____________________________________________________________________________________________
Welcome to my Fabulous Friday Feature! Today I wanted to show a fun way to use your stencils. Papertrey Ink has such a great variety of them and they are so much fun to incorporate into your projects. Let’s get started!
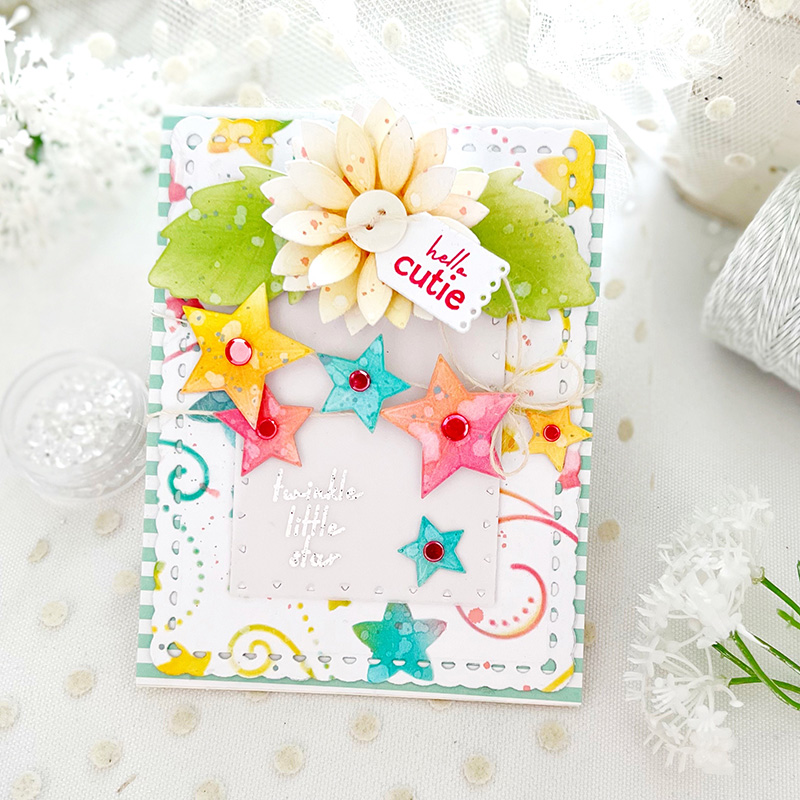
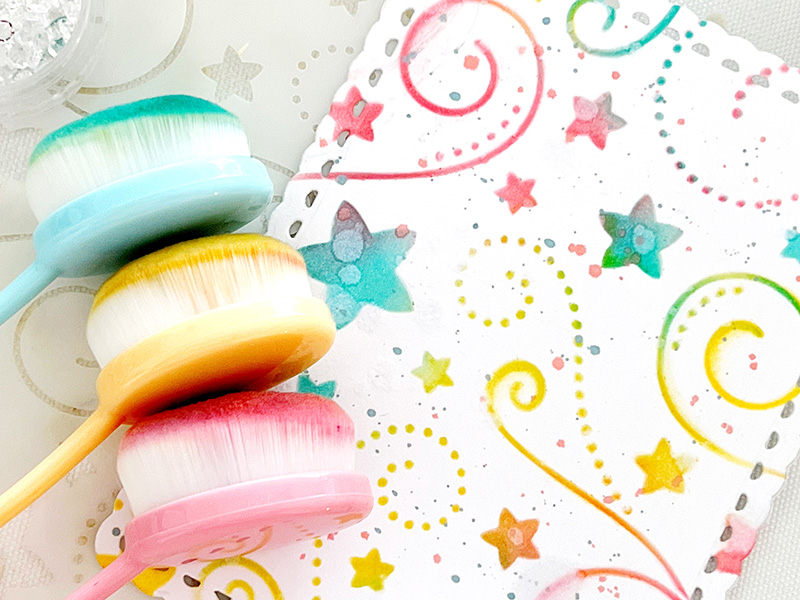
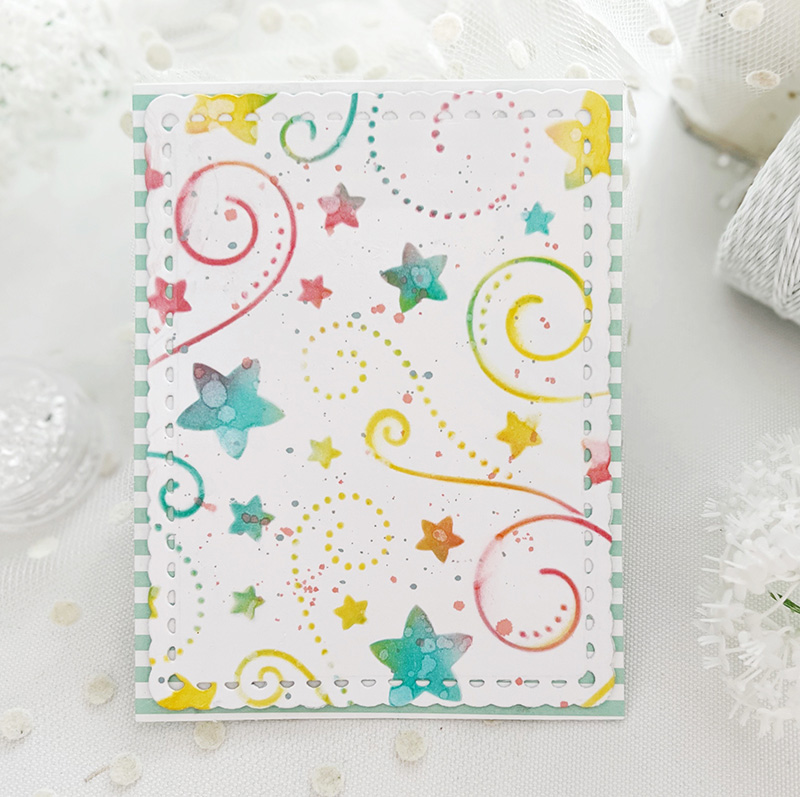
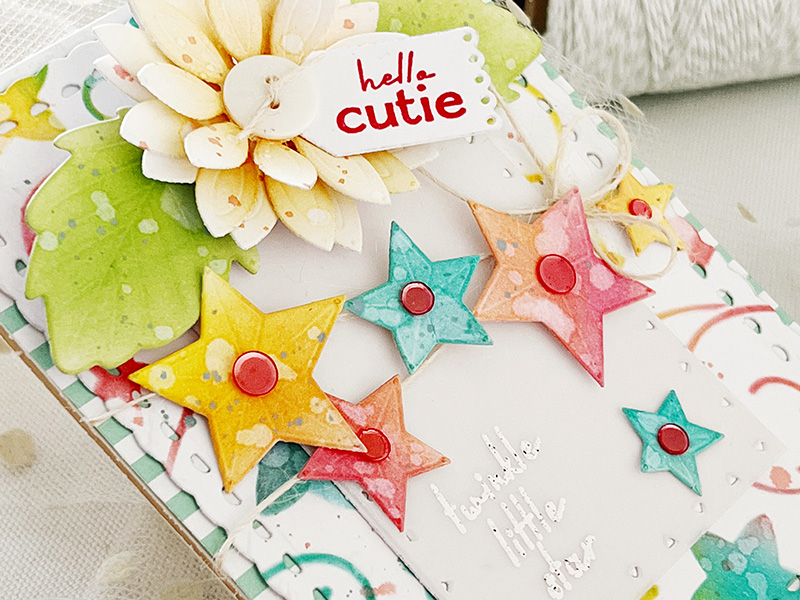
I began by using the Scallop Stackers: Small die, white cardstock, and the Night Sky Background Stencil. I layered my stencil over the top of my white cardstock, attaching it securely with tape so it wouldn’t move as I added my color. I used Bright Buttercup, Hawaiian Shores, Melon Berry, and Hibiscus Burst. My favorite tool to use with my stencils are my blending brushes.
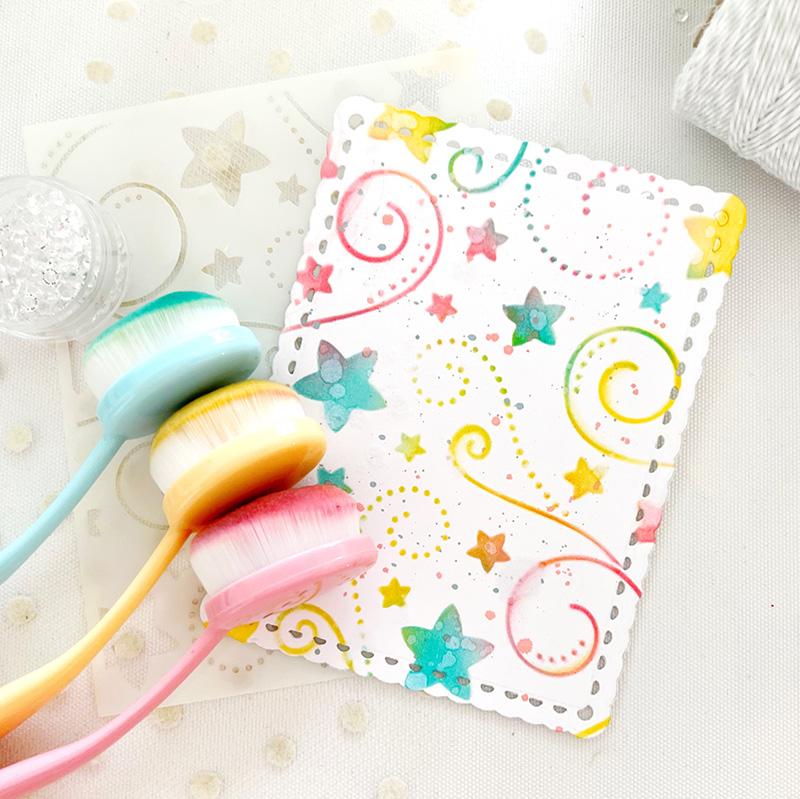
After applying my ink, I removed the stencil and lightly spritzed water over my surface to create a soft, watercolor effect. I also splattered Distress Ink in two coordinating colors over my surface.
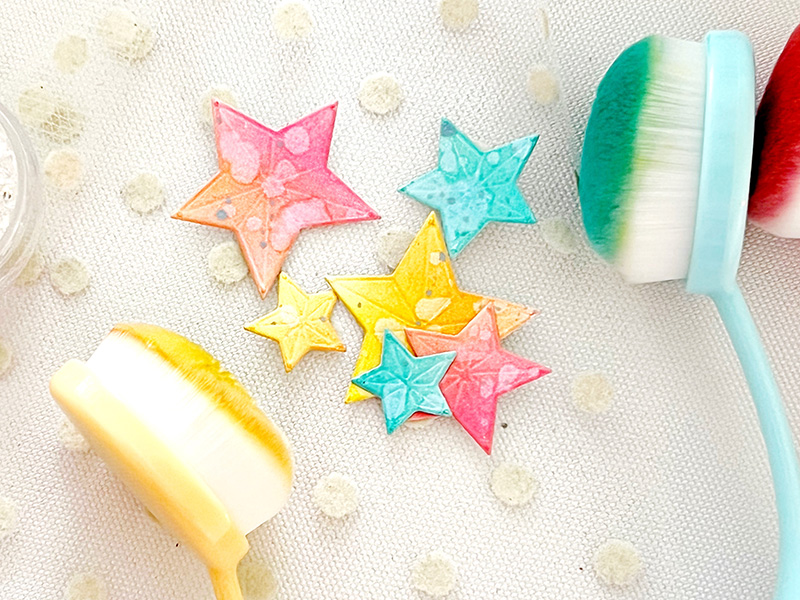
Next I die cut stars from white cardstock using the Patriot dies. I then blended ink in the same colors as my stencil on each star, repeating the water and Distress Ink splatters.
I created a card base from white cardstock and then added Bitty Big Aqua Mist paper to the front of my card. I then attached my stenciled, scalloped die cut background to the center.
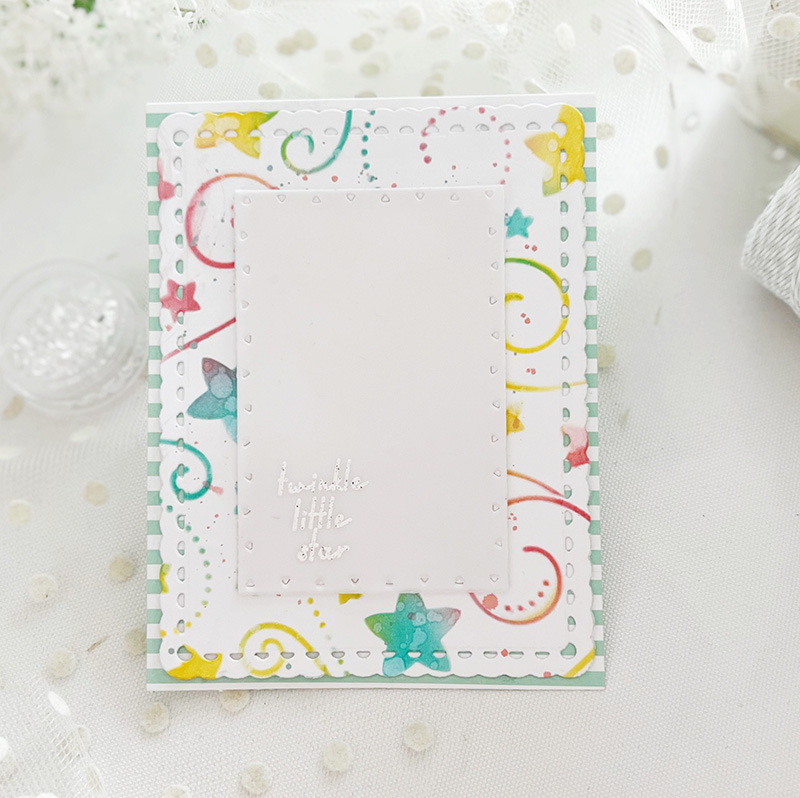
I created my focal point by die cutting Love to Layer: Aztec twice, once from white cardstock, for the base layer, and the second time from vellum, for the top layer. I then stamped my sentiment in watermark ink and heat embossed it using white embossing powder. I adhered both to the center of my card.
Next, I added a layered flower using the Into the Blooms: Dahlia and leaves from the Into the Blooms: Pansies. I added color to them using the same ink blending technique used earlier. I attached them to the top of my vellum cardstock block.
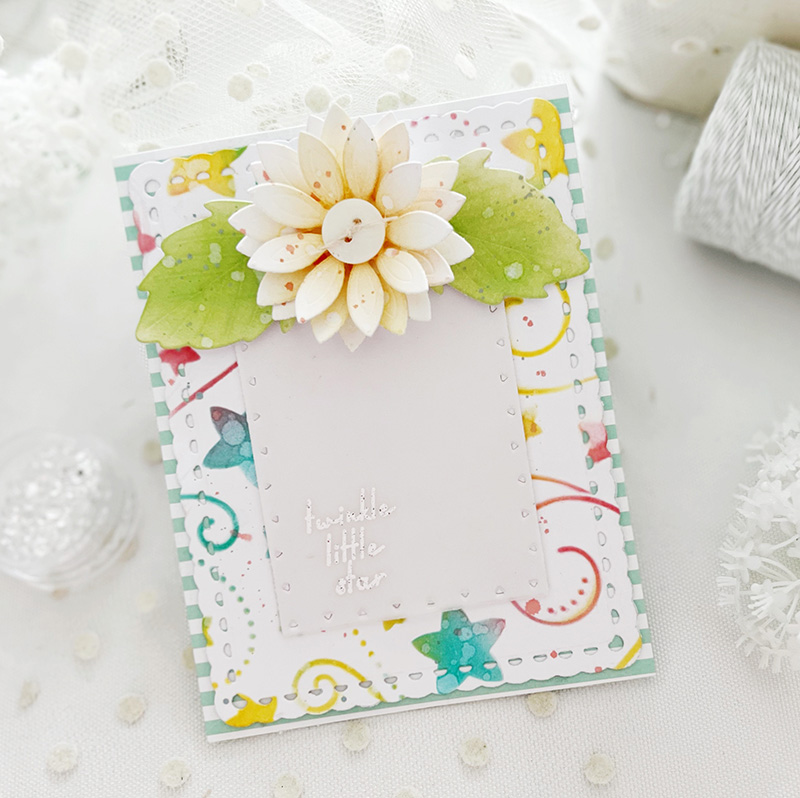
I used the Adorable Outfits stamp set and a Tiny Tag and stamped my second sentiment on it. I then attached it to the center of my flower using a button and twine.
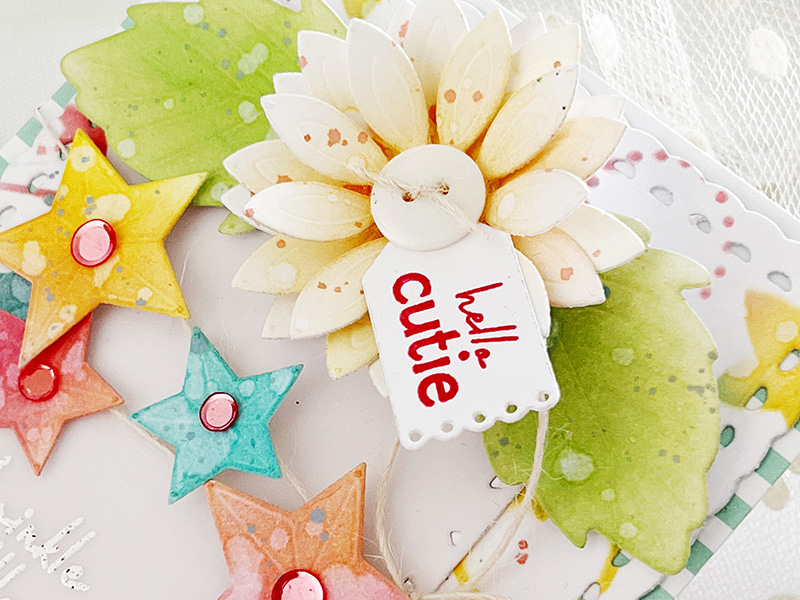
To finish, I wrapped twine around my card and attached my die cut stars to the twine. I added a bit of sparkle to the centers of each star using Melon Berry Moonshine Sequins.
Stencils are a delight to create with! There are so many creative ways to use them. Hope you’ll pull yours out this week and give them a try!
Melissa

STAMPS: Adorable Outfits
INK: Bright Buttercup, Hibiscus Burst, Melon Berry, Hibiscus Burst, Green Parakeet, Simply Chartreuse
PAPER: Stamper’s Select White, Sheer Basics Vellum, Bitty Big Aqua Mist
DIES: Into the Blooms: Dahlias, Into the Blooms: Pansies, Tiny Tag, Love to Layer: Aztec, Scallop Stackers: Small, Patriot
OTHER: Night Sky Background Stencils, Melon Berry Moonshine Sequins, twine, button, white embossing powder

PRIZE
One winner will be chosen at random to receive a $25 gift certificate.
RULES
To enter, participants are required to create a card using stencils using Ink to Paper/Papertrey Ink products and share it via the link below. We can’t wait to see what you make!
Only one entry per person and the deadline is June 17th at 7am. This post will be updated with the randomly selected winner.
CHALLENGE
EDITED TO ADD THE RANDOMLY SELECTED WINNER
Leave a Reply