


Hello and welcome to the first day of our May Countdown! I am so excited that you’re joining us. Today is all about BABY and we’ve got the cutest, new products to help you welcome in the fresh, little bundle of joy and congratulate the new mother. Introducing the new Adorable Outfits stamps, dies, and stencils.
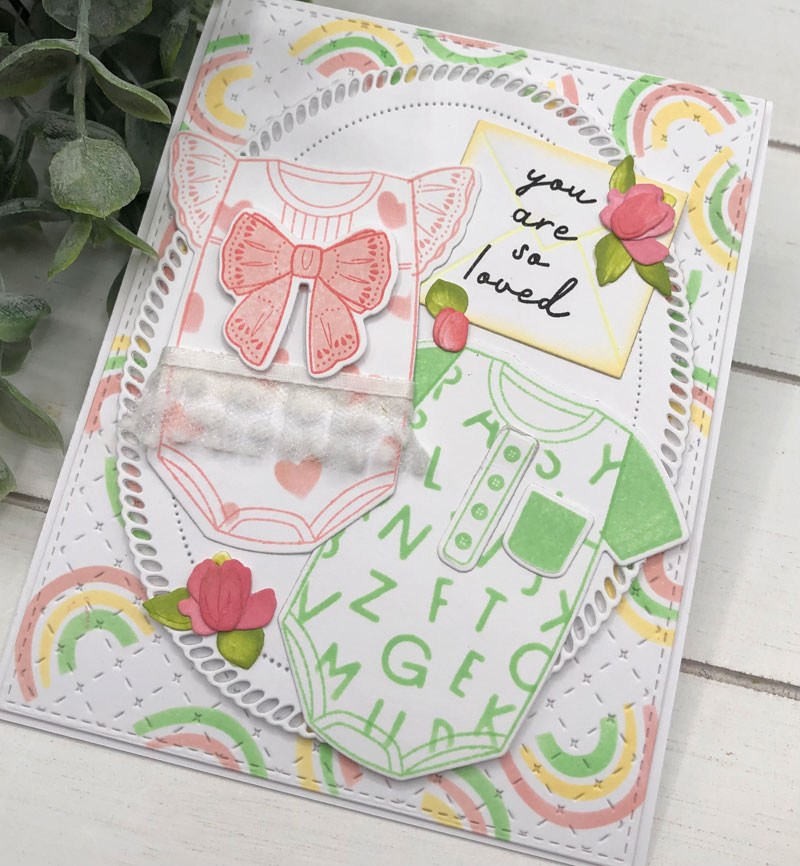
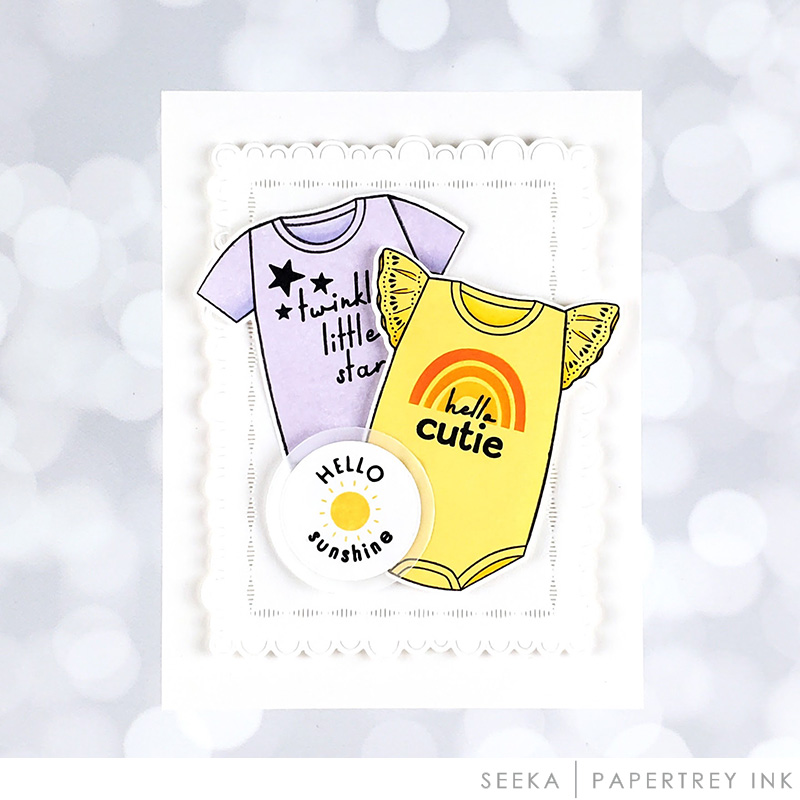
I can’t imagine anything cuter than baby onesies, can you? Create your own darling onesies in any color of your choice for the new baby boy or girl. Add ruffles, flowers, a tie, rainbow, bow, sunshine, even a tiny necklace for the new little lady.
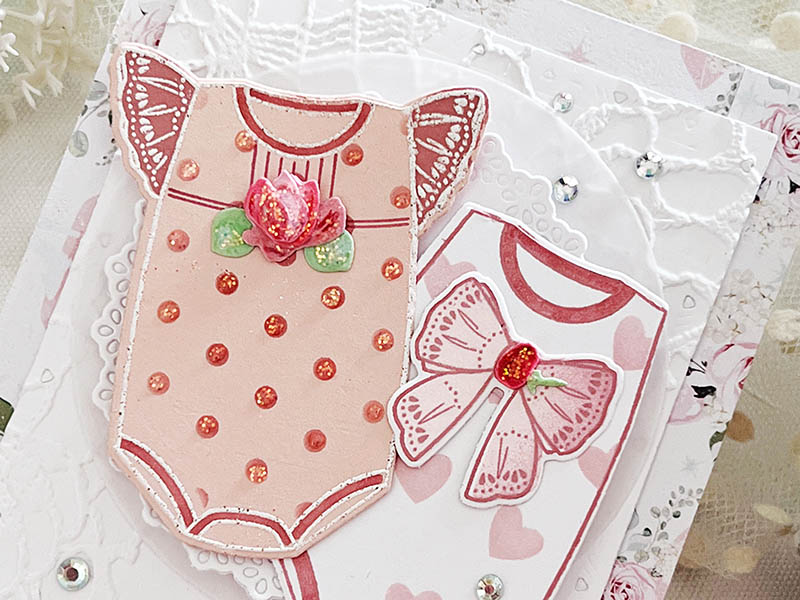
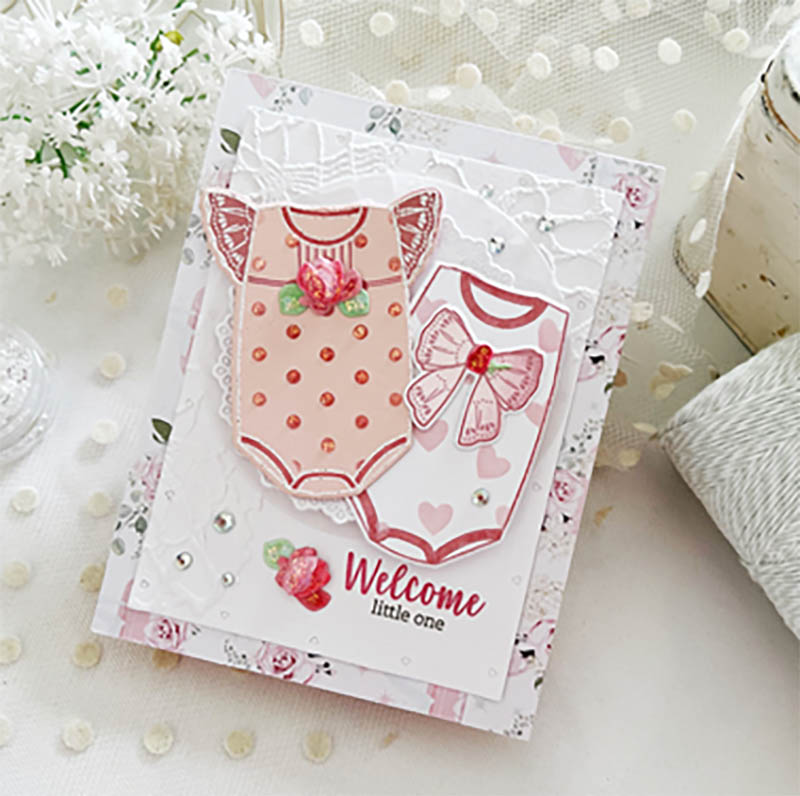
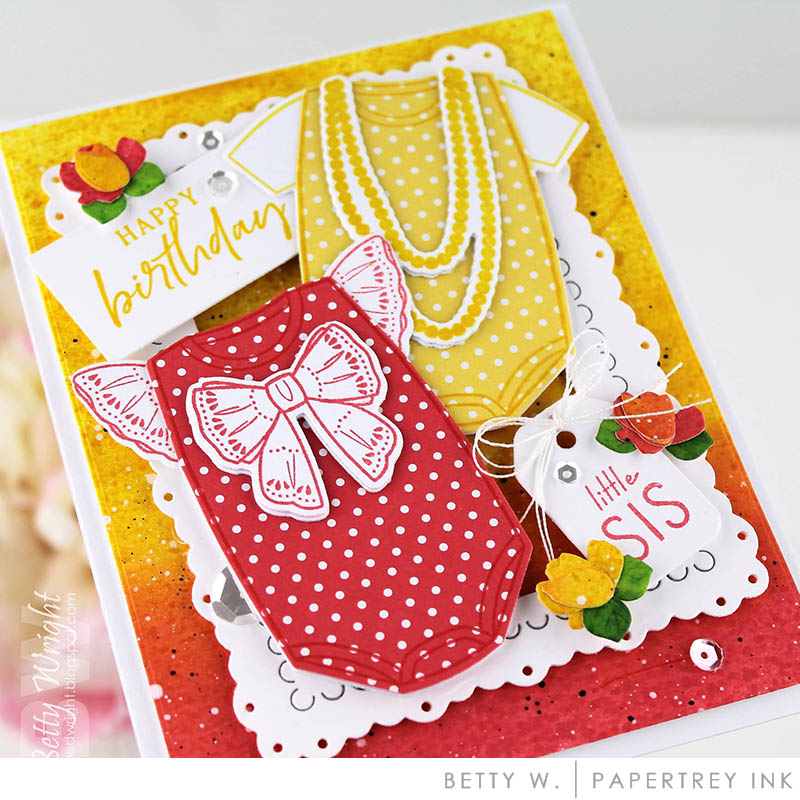
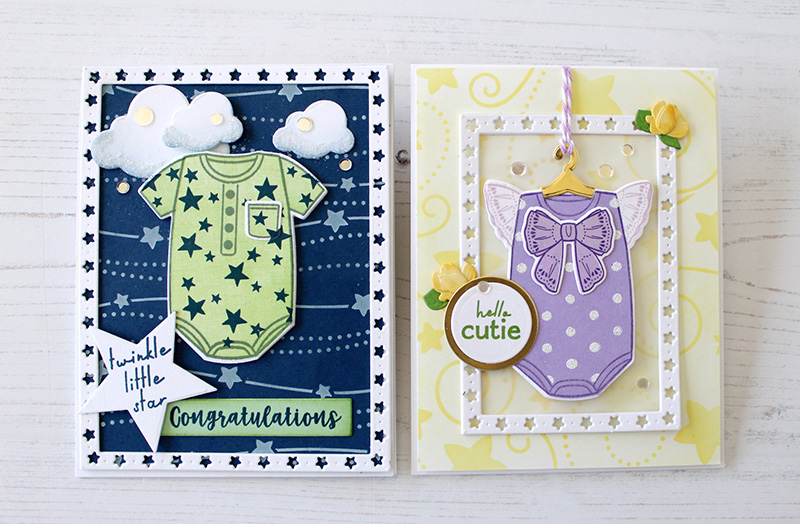
I couldn’t wait to use the sweet, lace accents on my first baby outfit. I began by die cutting my first onesie from Sweet Blush cardstock, then stamping the outline and sleeves in watermark ink, and lastly, heat embossing in white powder. I then added my Adorable Outfits stenciling and stamped my accents. The second outfit was die cut from white cardstock, stamped in Autumn Rose, and stenciled in Sweet Blush. Aren’t those stenciled dots and hearts adorable? I love the matching, intricate bow and tiny rose buds. They’re completely irresistible!
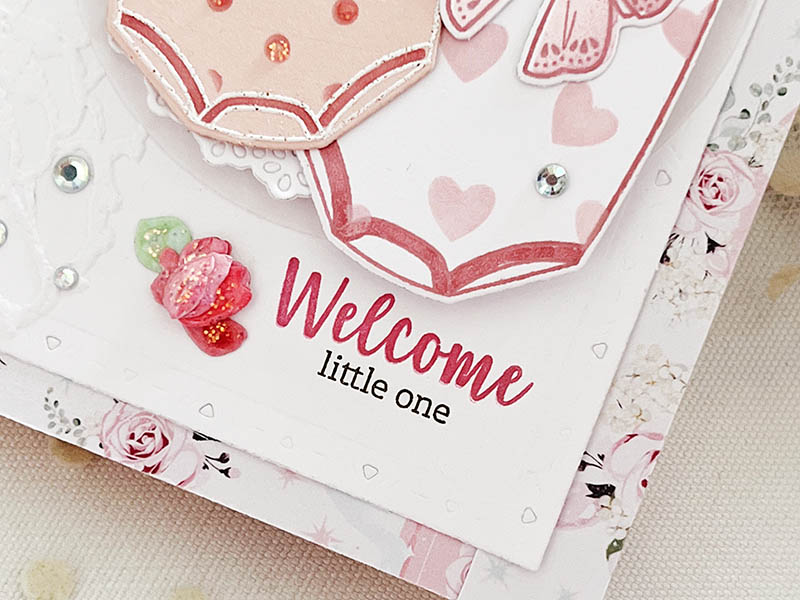
My “Welcome Little One” sentiment comes from the new Little One stamp set. You’ll love the mix and match options available with the sentiments found in this darling new set.
Supplies used:
STAMPS: Adorable Outfits, Little One
INK: Autumn Rose, Pale Peony, Sweet Blush, Hibiscus Burst, Pure Poppy, Mint Julep, Raspberry Fizz, Olive Twist
PAPER: Stamper’s Select White, Sheer Basics Vellum, Sweet Blush
DIES: Adorable Outfits, Pattern Party, Delicate Doilies
OTHER: Adorable Outfits Stencil, adhesive gems, Stickles glitter, patterned paper
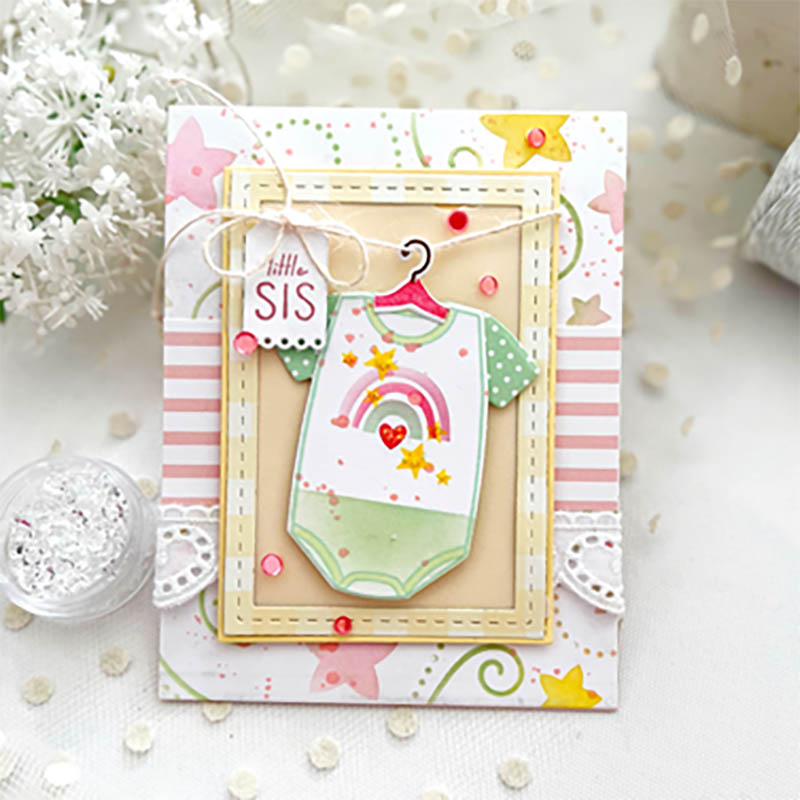
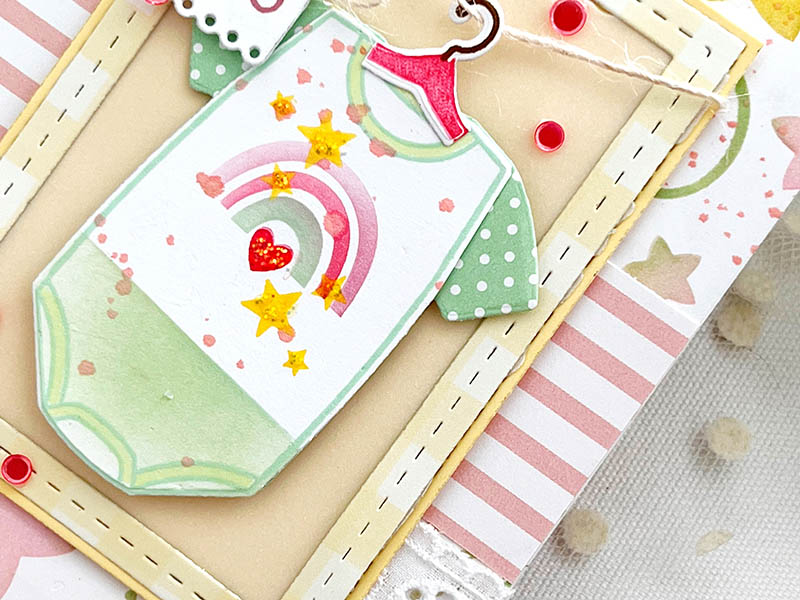
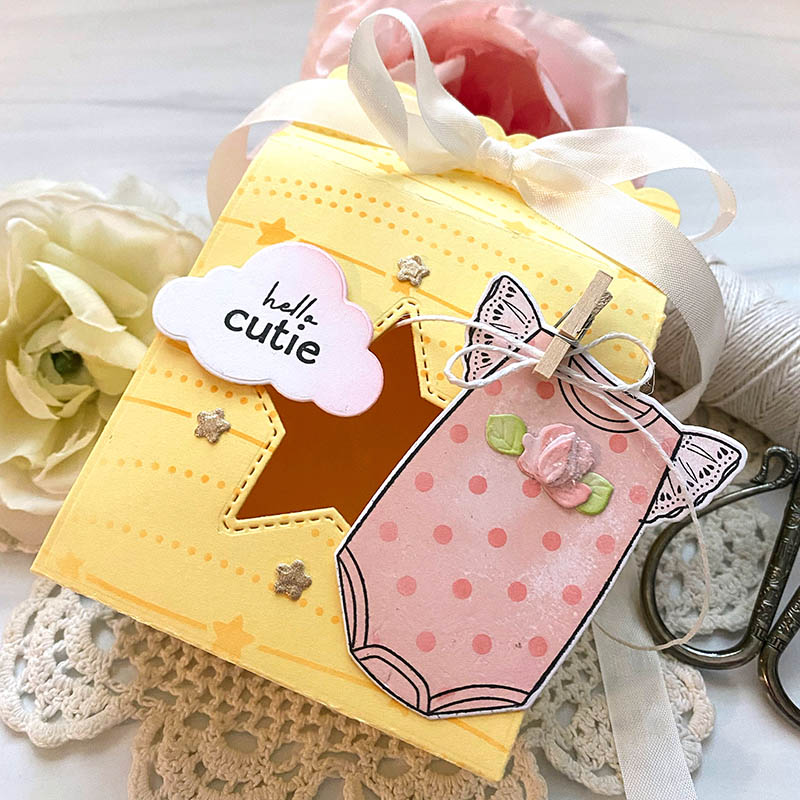
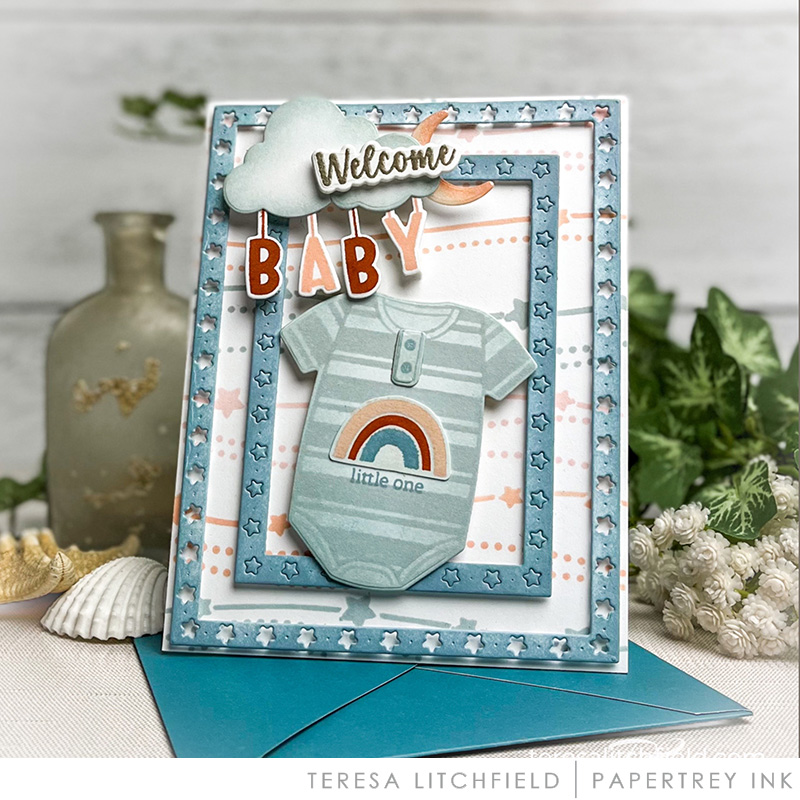
My next card uses the rainbow stencil from the Adorable Outfits Stencils. I added stamped stars, heart, and outline around my onesie. Aren’t the Bitty Big Mint Julep sleeves the cutest? I layered my onesie tank over the onesie with sleeves die. These stamps and dies are so much fun to mix and match…kind of like playing with dress up dolls!
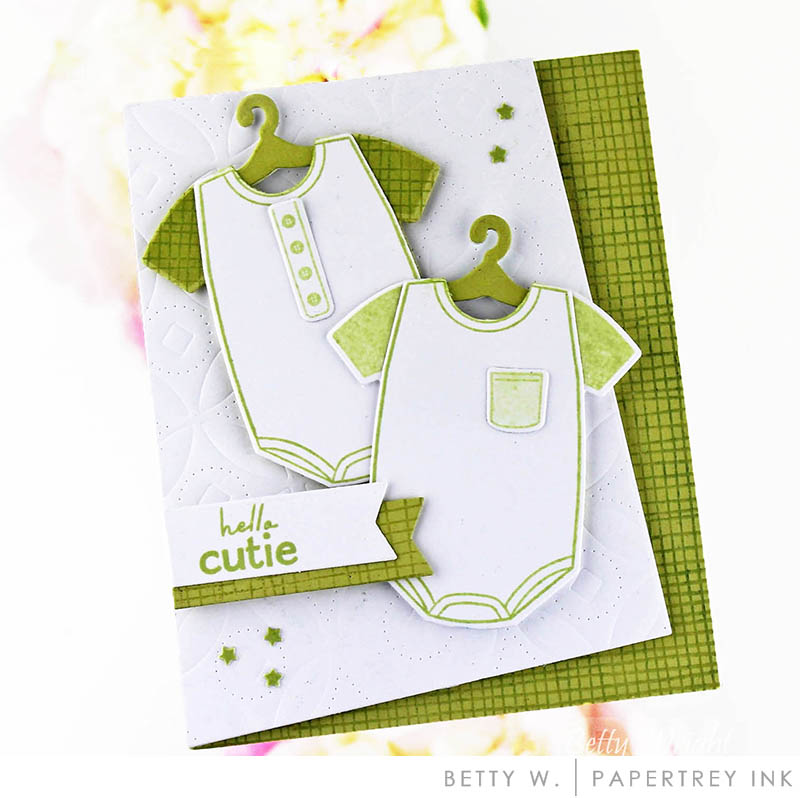
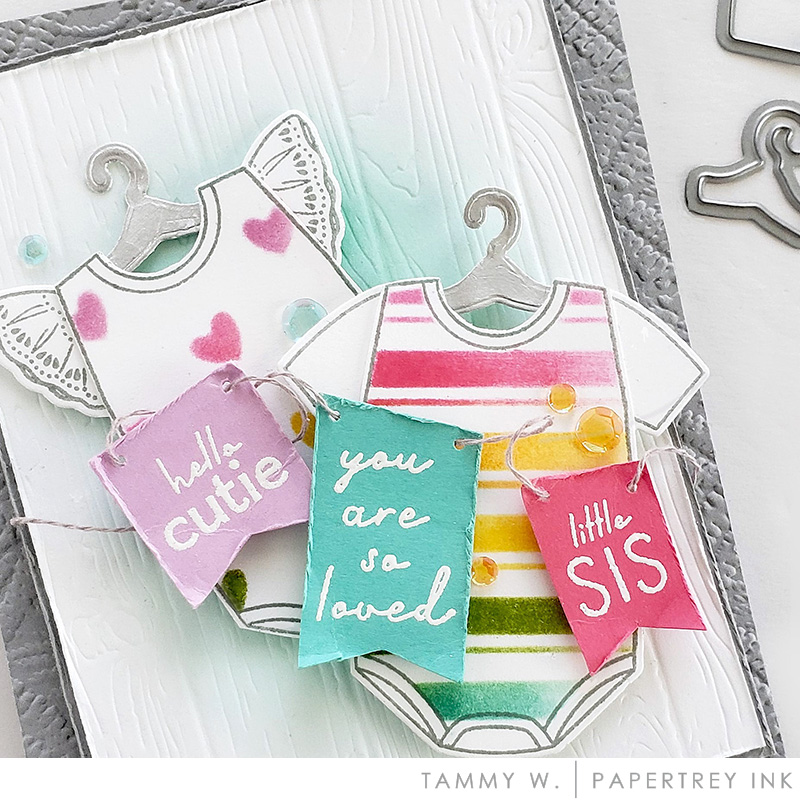
The Adorable Outfits also comes with a tiny baby hanger so you can hang your little outfits on a clothesline, string them together, attach with a mini clothespin, etc. Wait til you see how our designers have used their little hangers.
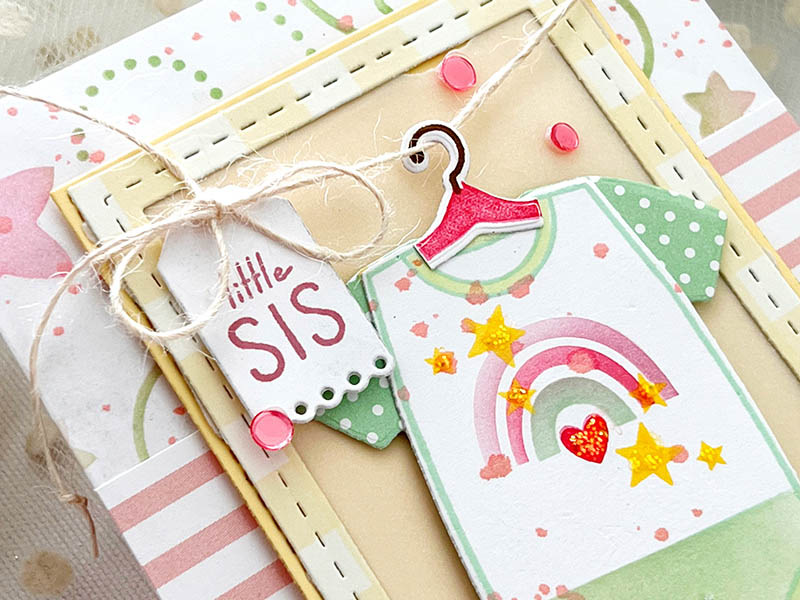
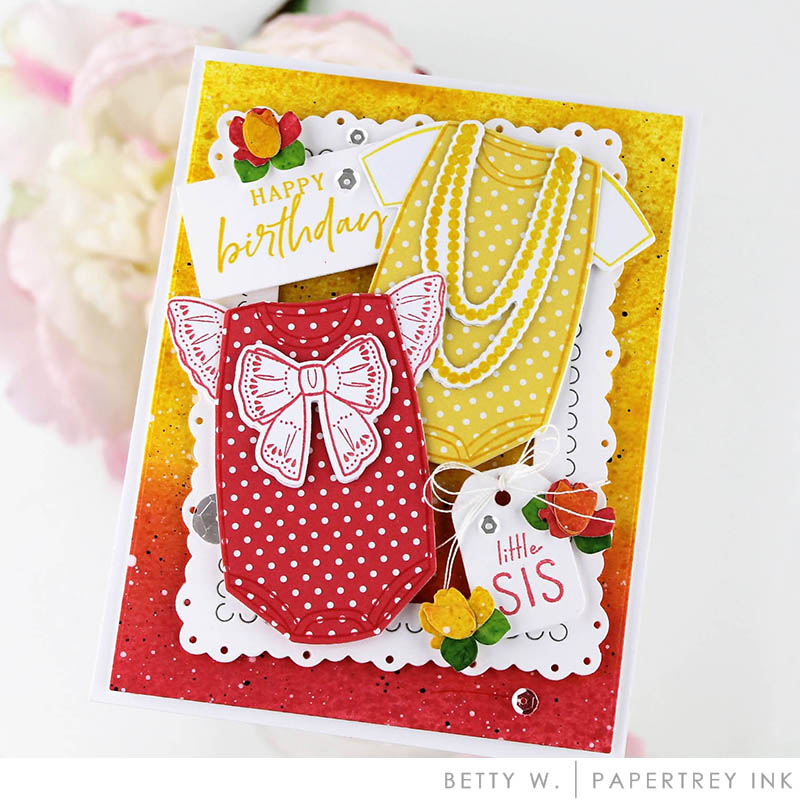
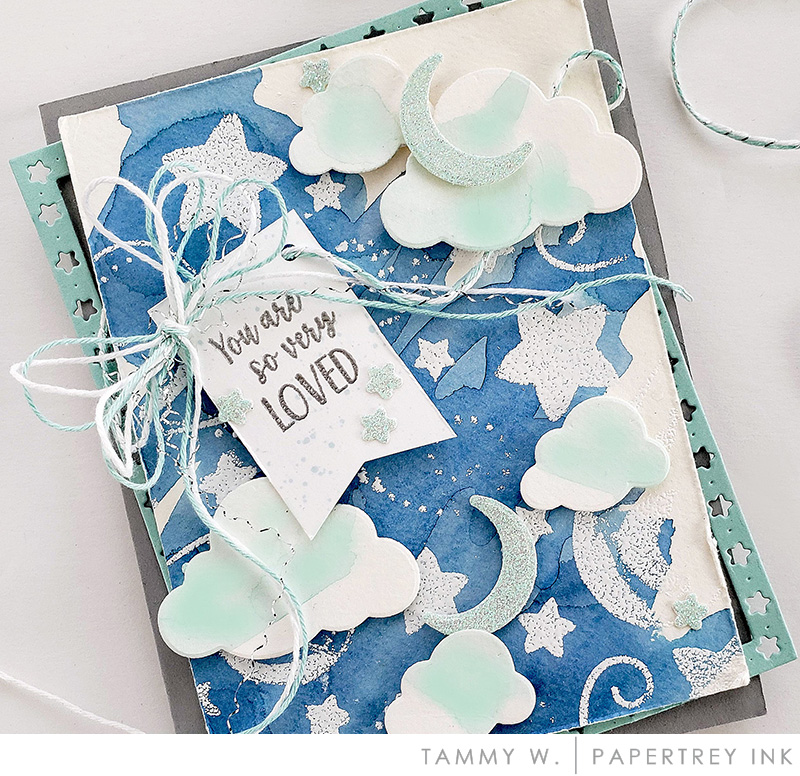
I adore the cute sentiments found in the Adorable Outfits set. “Little Sis” is one of my favorites. I stamped it on a die cut Tiny Tag and tied it to my clothesline. In the background of my card you can see the new Night Sky Stencils used. I love using this stencil…the chunky stars and swirls will quickly become a favorite of yours too!
Now for the cutest little outfits you’ll ever see. Enjoy what our designers have created using the Adorable Outfits stamps, dies, and stencils.
Supplies used:
STAMPS: Adorable Outfits
INK: Autumn Rose, Bright Buttercup, Hibiscus Burst, Pure Poppy, Mint Julep, Pale Peony, Olive Twist, Vintage Jadeite
PAPER: Stamper’s Select White, Harvest Gold, Sheer Basics Vellum, Bottles & Blooms
DIES: Adorable Outfits, Tiny Tags, Border Bling: Skinny Stitched Frames
OTHER: Berry Sorbet Moonshine sequins, twine, Stickles glitter, patterned paper, trim


TIPS:
- The stars from Border Bling: Skinny Star Frames die was used for my card embellishments
- Use portion of background stamps to stretch your craft supplies
TIPS:
- Ink blend panel using PTI inks. Add ink and water splatters to add texture and dimension
- Don’t forget to stamp onto your pattern papers to create different looks.
- Layer sleeveless onesie with the sleeved onesie to create quick dimension.

TIPS:
- The stars from Border Bling: Skinny Star Frames die was used for my card embellishments.
- Don’t forget to emboss your background dies to create different looks. Here, the dimension is to mimic a baby quilt.
- I stamped the Loosely Woven stamp onto Spring Moss card stock using Spring Moss ink, then stamped the onesie sleeves using the same ink for a layered stamping effect.
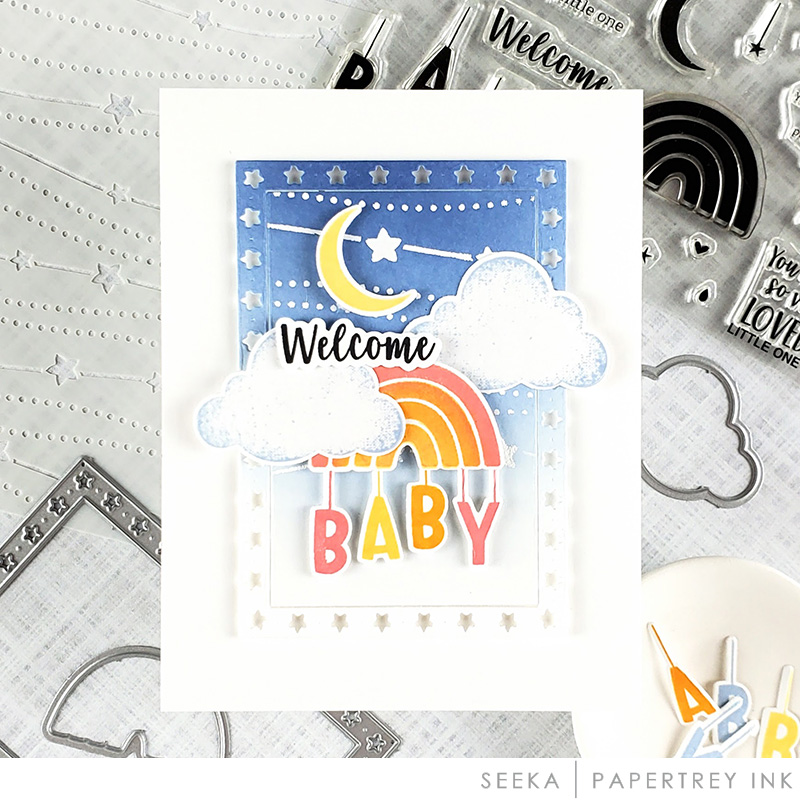
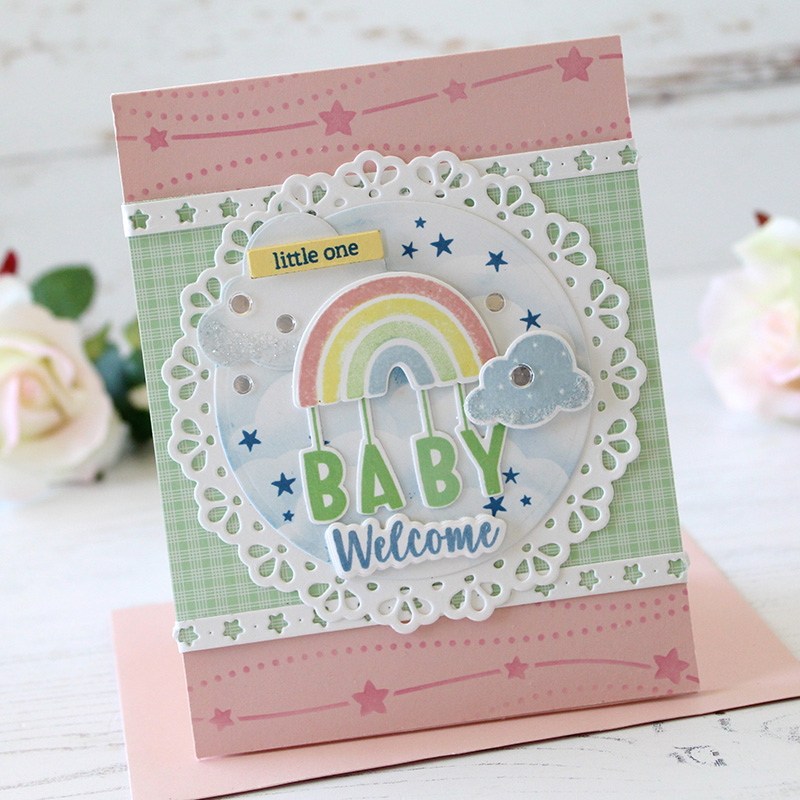
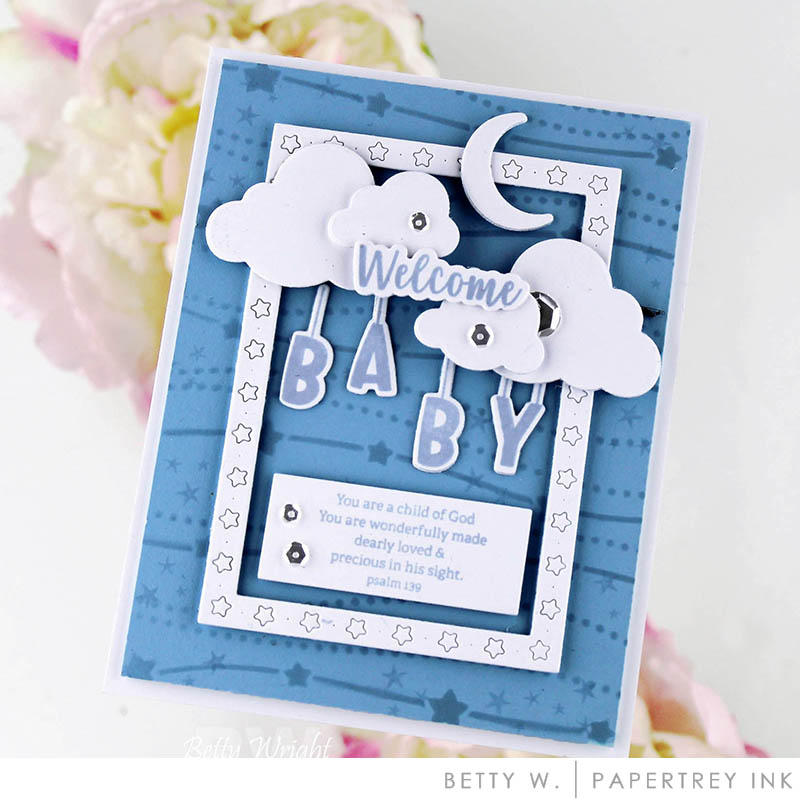
Along with our new, Night Sky Background Stencils, comes the coordinating and oh, so darling, Little One stamp set and dies. We’ve got a new set of Border Bling frames available too, the Border Bling: Skinny Star Frames dies.

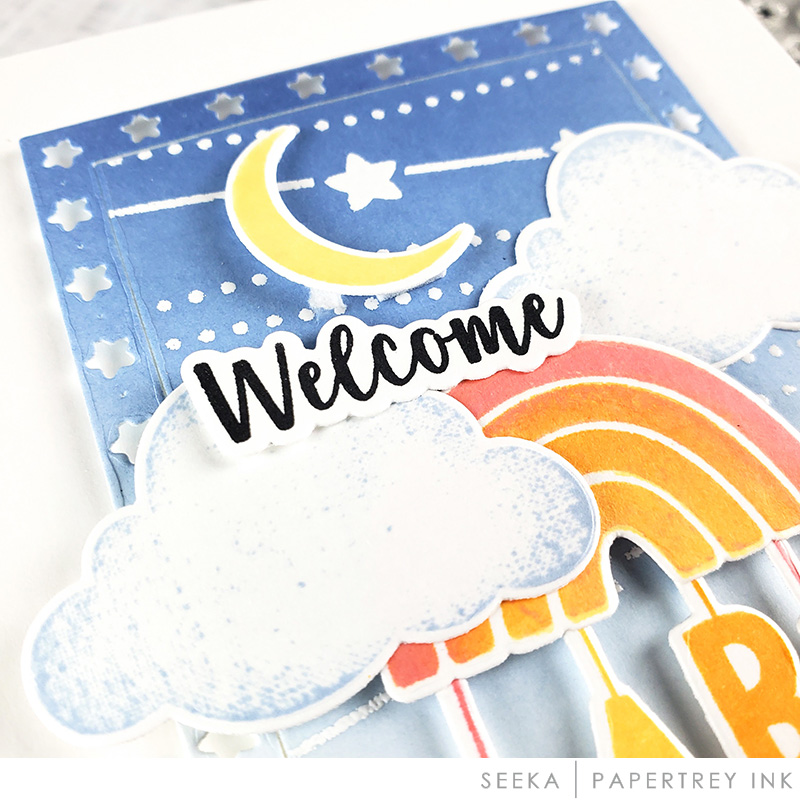
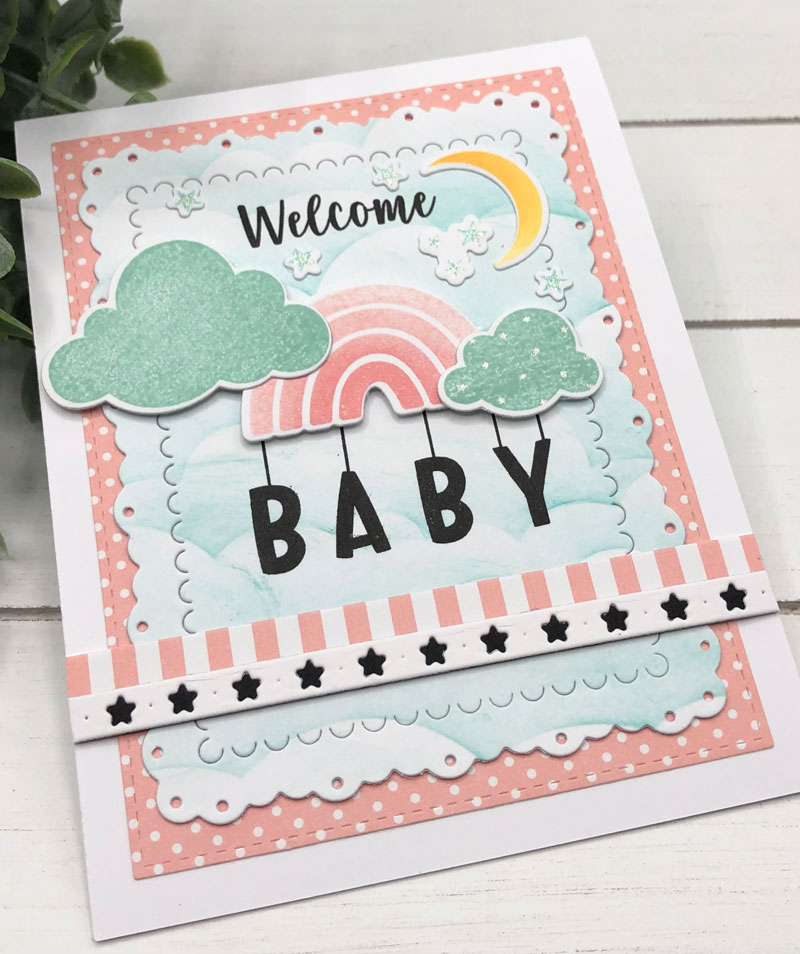
Little One is all about the soft, gentle textures and iconic images that are associated with babies. Think clouds, a soft, starry sky, a whisper of a a moon shining through their window at bedtime, and a happy, welcoming rainbow. I used the assorted cloud shapes to create my background, adding a spritz of water to create a blending effect.
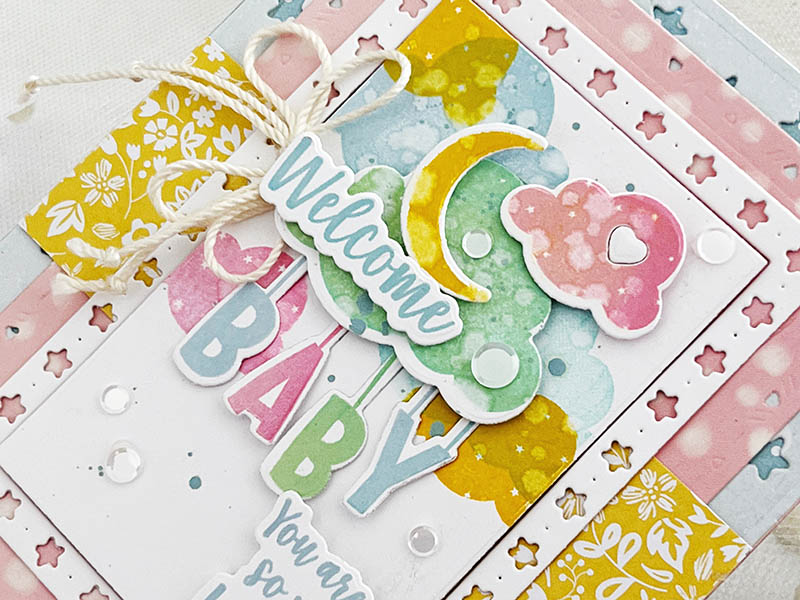
I love how the letters spelling “BABY” hang from beneath the clouds. You can almost feel them swaying gently in the breeze, sprinkled with a bit of stardust. I added in a few die cut clouds and moon, adhering them using foam adhesive to give dimension.
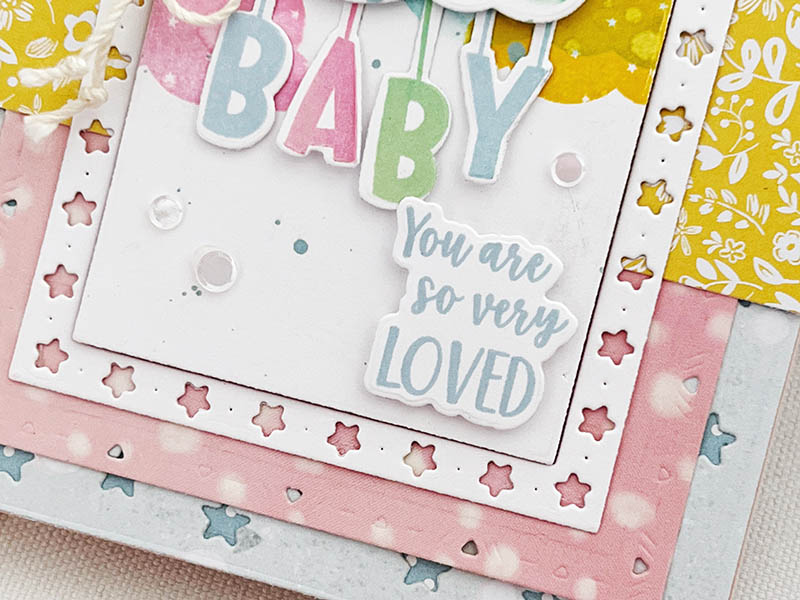
You’ll adore the fun, tiny sentiments you can mix and match to create just what you want to say to welcome in the new addition to the family. I surrounded my focal point using the new Border Bling: Skinny Star Frame. Isn’t it the cutest? These frames will be hard to put down!
Ready for some serious sweetness from our designers? They’ve got some extra special projects ready to share with you.
Melissa
Supplies used:
STAMPS: Little One
INK: Spring Rain, Bright Buttercup, Pale Peony, Hibiscus Burst, Aqua Mist, Mint Julep
PAPER: Stamper’s Select White, Bitty Big Spring Rain, Bottles & Blooms
DIES: Border Bling: Twinkle, Border Bling: Skinny Stars Frames, Little One, Love to Layer: Aztec
OTHER: Patterned paper, twine, Fresh Snow Moonshine sequins


TIPS:
- Use a stamp positioning tool to stamp the gradient rainbow; ink up one section of the rainbow stamp, soften the edge of the inked area by dabbing with a rag, stamp down, then repeat with additional colors. Dabbing prevents a harsh line of color and helps create a more seamless blend.
- Use an acrylic block to stamp the clouds and roll just the edges of the clouds into the ink. This will create definition at the edges of the cloud to give them shape, and will leave the centers of the clouds white. The texture of your ink pad will add additional interest so be sure to experiment!
- For the blue sky panel, first ink blend onto a panel of white cardstock, then die cut using a Skinny Star Frame die, then stencil the night sky with embossing ink and heat emboss with white embossing powder.
We hope you have enjoyed all the creations that we have shared with you today! We would love to hear your initial thoughts on everything we introduced! Please leave a comment on this post to tell us what you think of the new products, and you will be eligible to win big!

Leave a comment today and you’re automatically entered to win a $50 Papertrey Ink or Ink to Paper gift certificate! You have until 7am ET, May 21st to leave your comment and be eligible to win. Only one comment per person please. One randomly selected winner will be posted on the May Release Winners Page by 10PM ET on May 24th.


Leave a Reply