


Hi everybody, welcome to our new feature What do I do with this? For this challenge our designers will get to try out some of these new tools and share the projects they created using them. We’ve got some fun, new things coming to the Papertrey Ink store and our designers will show you how to use them so you’ll be comfortable incorporating them into your card-making and gift-giving. Stay tuned for exciting and creative things coming your way! We want to share what our designers love with you, and this gives you a first-hand look into their crafty-faves!
Let’s get started!
Hi Friends! It is Melody here today and I have a set of cards to share with you that fit perfectly in the Clearly Creative Card Box that is available in the PTI online shop and make a perfect handmade gift.
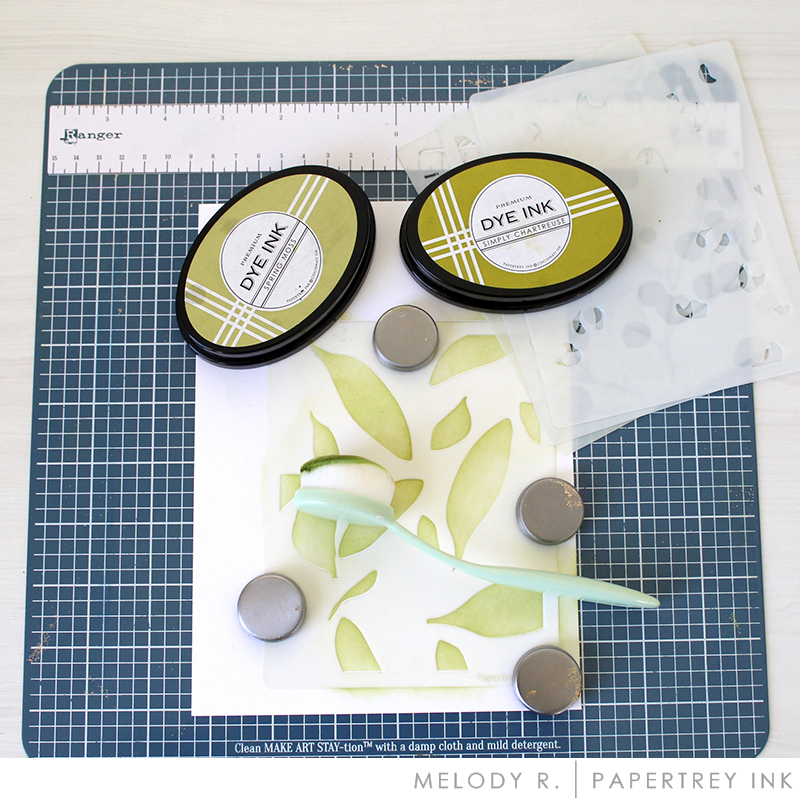
I wanted to keep the cards simple to mass produce. A stencil works great to easily create pretty backgrounds. I used the Berry Branches Stencil Collection, which is a set of four stencils that allow you to add the beautiful details.
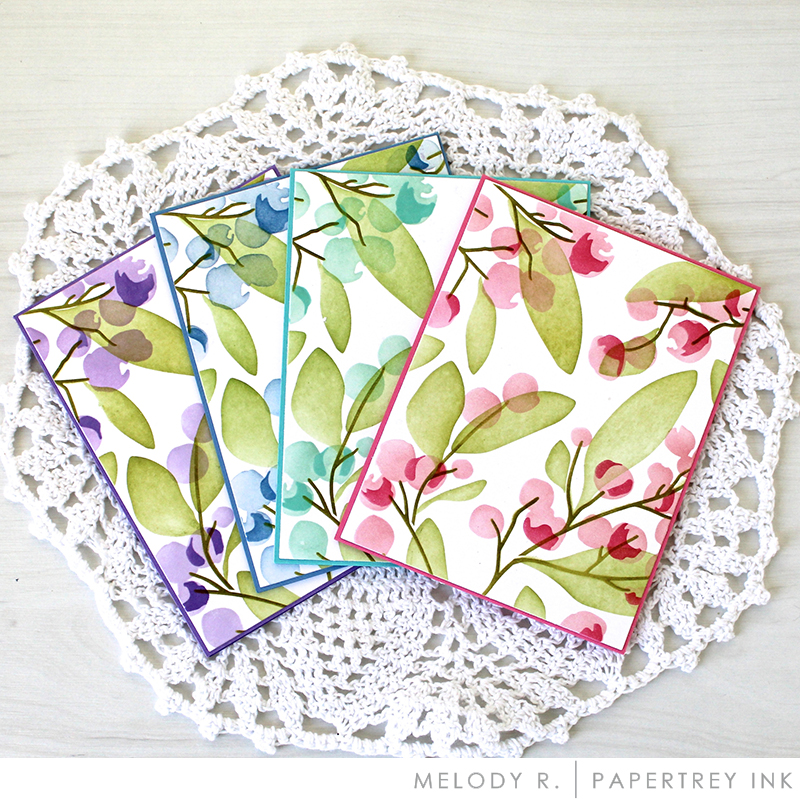
I choose a different color combination for each card and attached the card fronts to a coordinating color of card base.
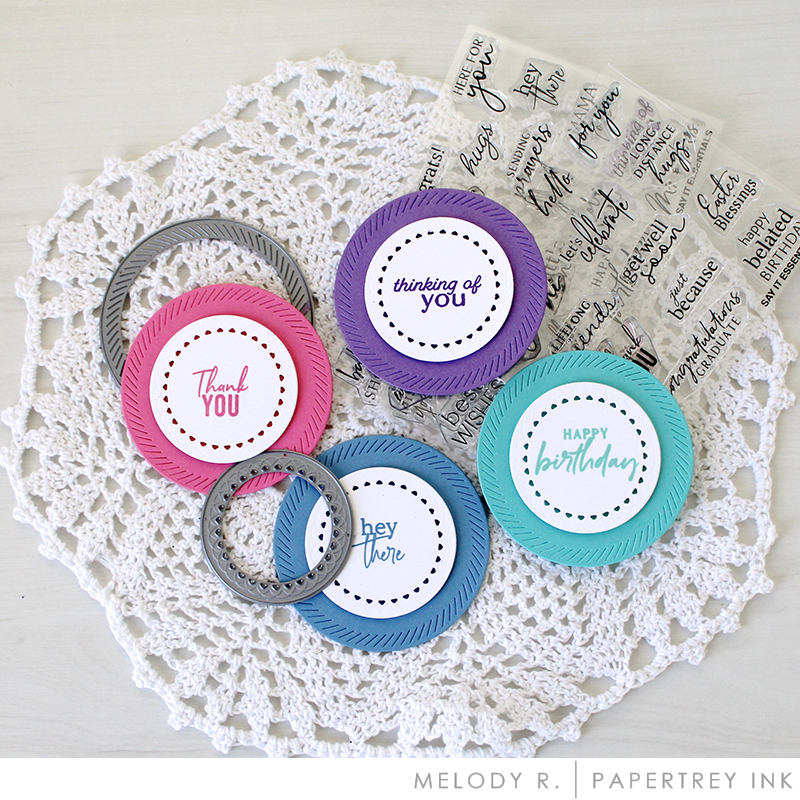
Next I chose 4 different sentiments from the Say It Essentials Stamp Set. I stamped on Stamper’s Select White Cardstock and die cut each sentiment with the smaller die in the Love to Layer: Scalloped Circles Die. Then I die cut a second circle from the die set in a coordinating color and attached the sentiment with foam tape.
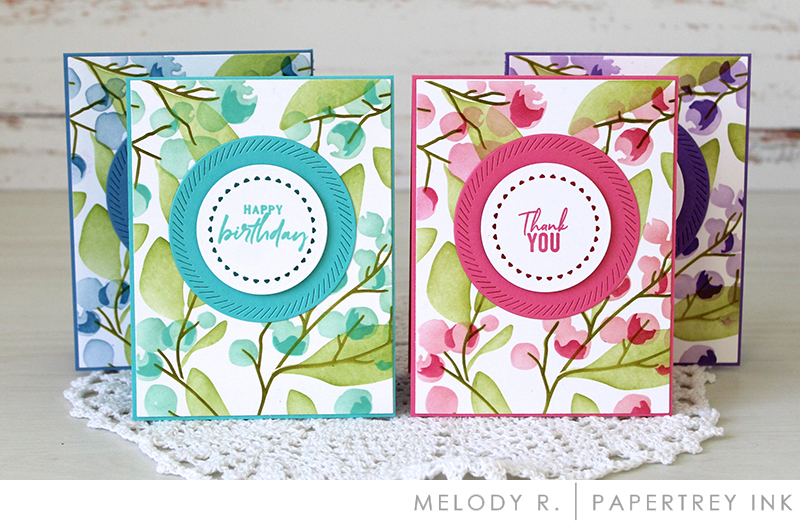
The final step was to attach to sentiment to the card front and package the cards up!
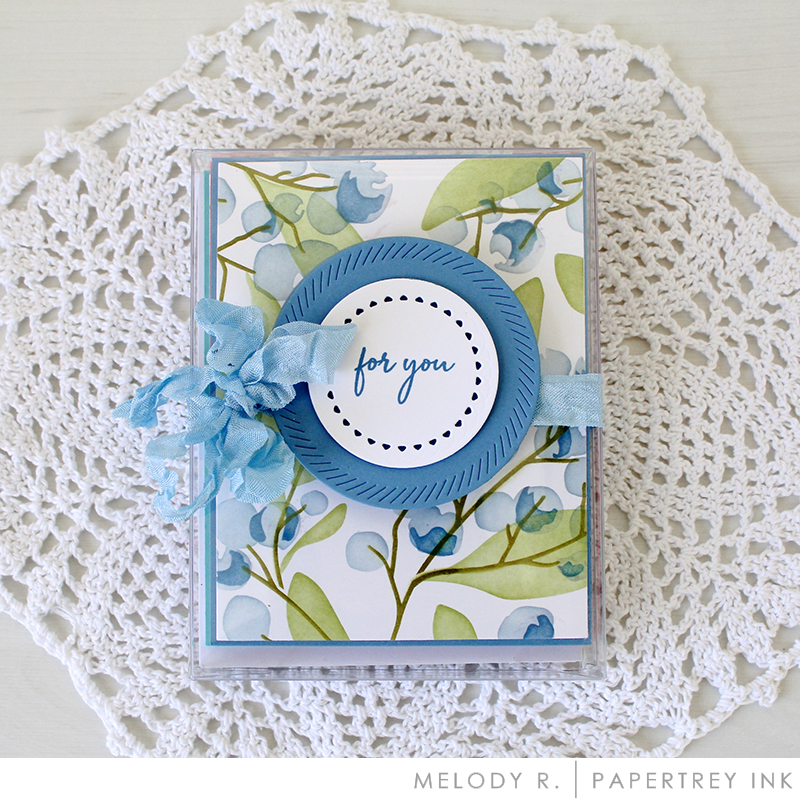
I packaged the four cards and four envelopes in the Clearly Creative Card Box. In the same manner as I created the card sentiments, I added a sentiment to front of the box and tied a pretty blue crinkle ribbon around the box.
Thanks for joining me today. I hope I have inspired you to play along with the challenge!

DIES: Love to Layer: Scalloped Circles Die
INK: Spring Moss, Simply Chartreuse, New Leaf, Pure Avocado, Sweet Blush, Hibiscus Burst, Aqua Mist, Hawaiian Shores, Spring Rain, Blueberry Sky, Lilac Grace, Amethyst Allure
PAPER: Stamper’s Select White, Hibiscus Burst, Hawaiian Shores, Blueberry Sky, Amethyst Allure
OTHER: Berry Branches Stencil Collection, Foam Tape, Blending Brushes
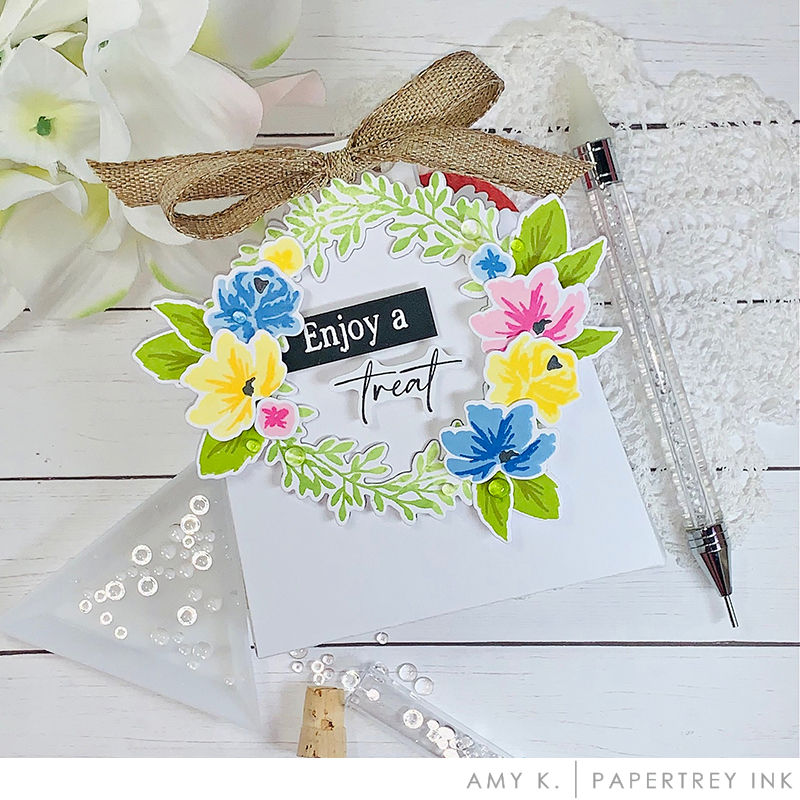
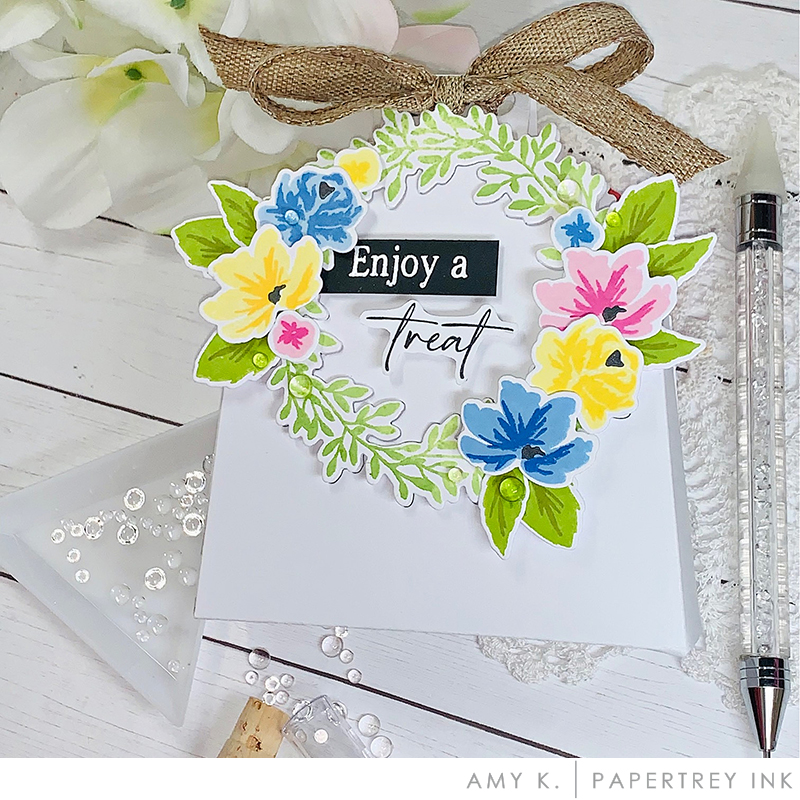
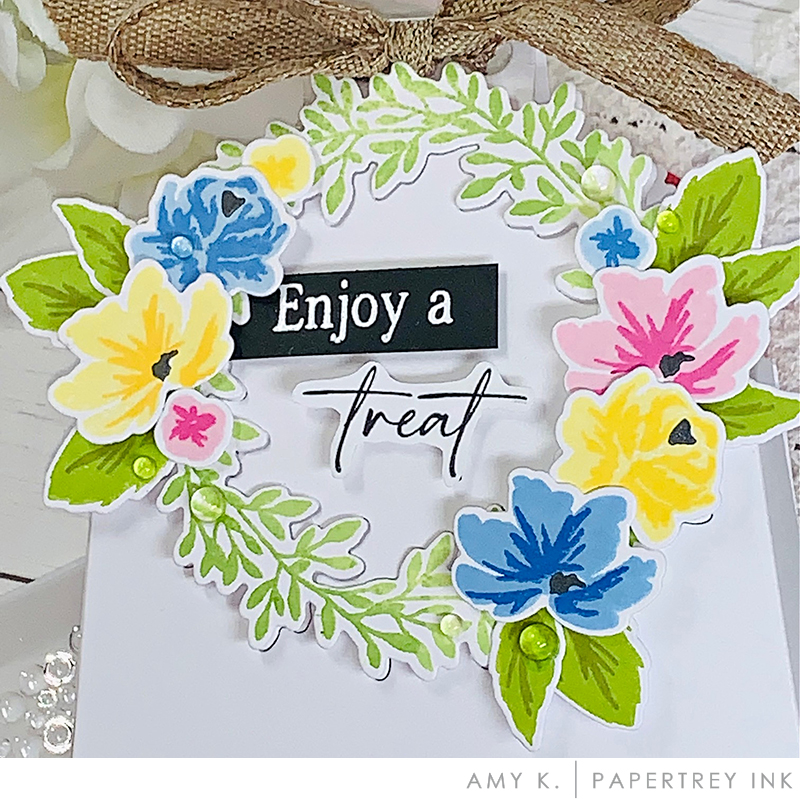
Hi friends! Amy here with spring treat box that would be perfect to drop off for a friend for May Day!
The Wreath Favor Box Die is simple to assemble and uses one piece of cardstock, cutting the die out twice. I generally like to use a lighter weight cardstock for this so the score lines are easy to fold. When assembling a treat box, I prefer a strong adhesive like Scor-Tape.
I went with fun, bright spring colors for the blooms from the Wreath Favor Box Sentiments stamp set. After adhering the wreath to the front of the treat box, the blooms were arranged and added with foam adhesive. A sentiment from the same set was stamped and added to the center of the wreath.
For some fun embellishments, Rainstones were added across the petals and wreath. A simple earth toned bow completes the box.
DIES: Wreath Favor Box Die, Wreath Favor Box Sentiments
INK: Simply Chartreuse and Pure Avocado (leaves), Sweet Blush, Hibiscus Burst, Spring Rain, Blueberry Sky (blooms)
PAPER: Stamper’s Select White, True Black
OTHER: Rainstones, Scor-Tape, Foam Adhesive, Ribbon

PRIZE
One winner will be chosen at random to receive a $25 gift certificate.
RULES
To enter, participants are required to create your own card set using PTI/Ink to Paper supplies and Melody’s technique or your very own. Share your finished project via the link below. We can’t wait to see what you make!
Only one entry per person and the deadline is April 25th at 7AM. This post will be updated with the randomly selected winner.
CHALLENGE
EDITED TO ADD THE RANDOMLY SELECTED WINNER
Congratulations, Becca Yahrling! Please send an email to customer service and provide them with your full name and the email address you would like your gift certificate sent to. Thanks so much to everyone for playing along!
Leave a Reply