


Hello, friends! I’m so happy you’re here to join is for our April Release. It’s Day 1 and we’re starting things off with something extra special. It’s definitely FOR THE BOOKS! Let’s get started.

Introducing our new Go-To Gift Card Holder: Book with coordinating accessories such as Book stamps, Book Scrolls stamps and dies, Book Pockets, Book Box, and Bookmark. This collection is loaded with products and possibilities! You’ll want to check out the Go-To Gift Card holder: Book Box the designers have used to create an actual 3-dimensional book! I am so smitten with it and can’t wait to share a project using it.

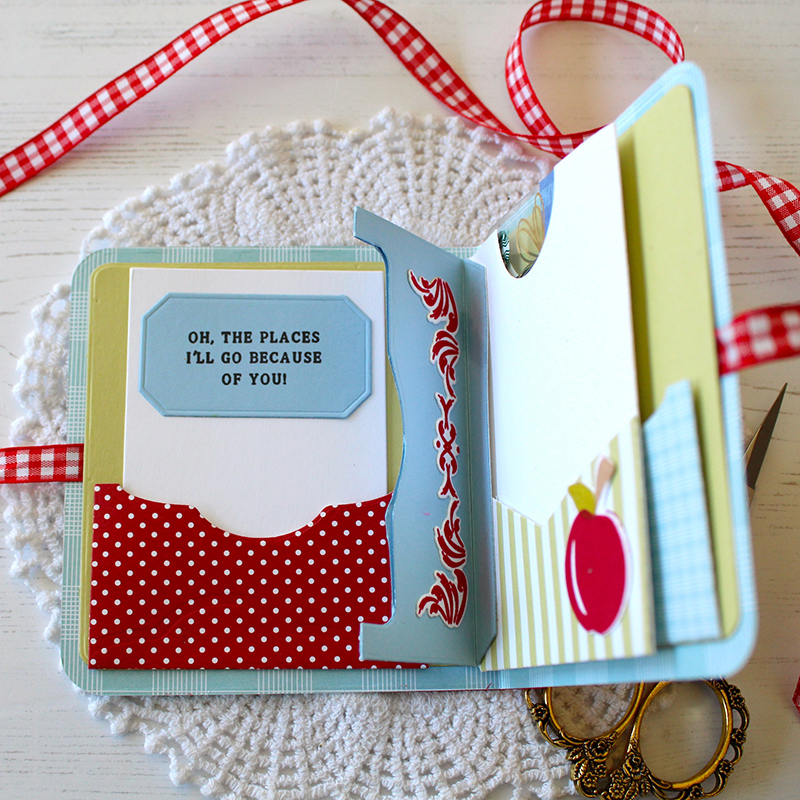
I used the Go-To Gift Card Holder Book to create a sweet package for a friend. The inside contains a couple of sweet pockets to contain a notecard and gift card. You can see the darling Book Scrolls used on the outside of my book to embellish the cover. I love how intricate and detailed they are…right off of a Jane Austen cover! The sentiment is from the Go-To Gift Card Holder: Book stamp set. You’ll love all of different quotes and mix and match sentiments included in this set.

Inside my book you can see the different types of pockets. There are actually many more options to choose from besides those shown here. I love the option of cutting them out of coordinating patterned paper to bring in some personality, don’t you? My inner pocket is where I’ve slipped my gift card chosen just for my favorite book lover. Don’t you think chocolates and books go perfectly well together?

This pocket was cut from fun Bitty Big Mint Julep patterned paper…showing off those fun polka dots. I stenciled the inside of my book cover using Sweet Blush cardstock and Stencil Basics: Dots Stencils. This pocket will hold a notecard for my special friend. I embellished the front of this pocket using more images from the coordinating stamp set and Book Scrolls stamp set.

Fun images and sentiments, huh? Too cute for words!
One of my favorite elements of this fun collection is the Bookmark die. Oh, how I love making handmade bookmarks. They make such a fun gift when sharing a book with a friend. This die set comes with one basic bookmark shape and then three additional elements such as a heart, star, and apple. I matted my heart on a die cut Delicate Doily as this is a die shape I’ve carried throughout my project so everything tied in together perfectly. I wanted the cover, inside pages, and bookmark to undoubtedly look like they belonged together.

I love this quote and adding it to a bookmark was perfection! Wait til you see all of these lovely products in full. You’re mind will be spinning.
Now onto the special things our designers have created using these new products!
Supplies used:
STAMPS: Go-To Gift Card Holder: Book, Book Scrolls
INK: Mint Julep, Vintage Jadeite, Berry Sorbet, Melon Berry, Olive Twist
PAPER: Stamper’s Select White, Sweet Blush, Bitty Big Mint Julep
DIES: Go-To Gift Card Holder: Book, Book Scrolls, Bookmark, Book Pockets, Love to Layer: Scalloped Circles, Delicate Doilies
OTHER: Patterned paper, adhesive gems, Stickles glitter


TIPS:
- Add a number of pockets to your book to hold gift cards and special notes.
- You can add ribbon to tie the book closed if desired.
- Create a gift card holder with the Pocket Dies to fit inside Book Box or add a small gift.
- Cut the book mark die twice and adhere the two die cuts together for added strength.

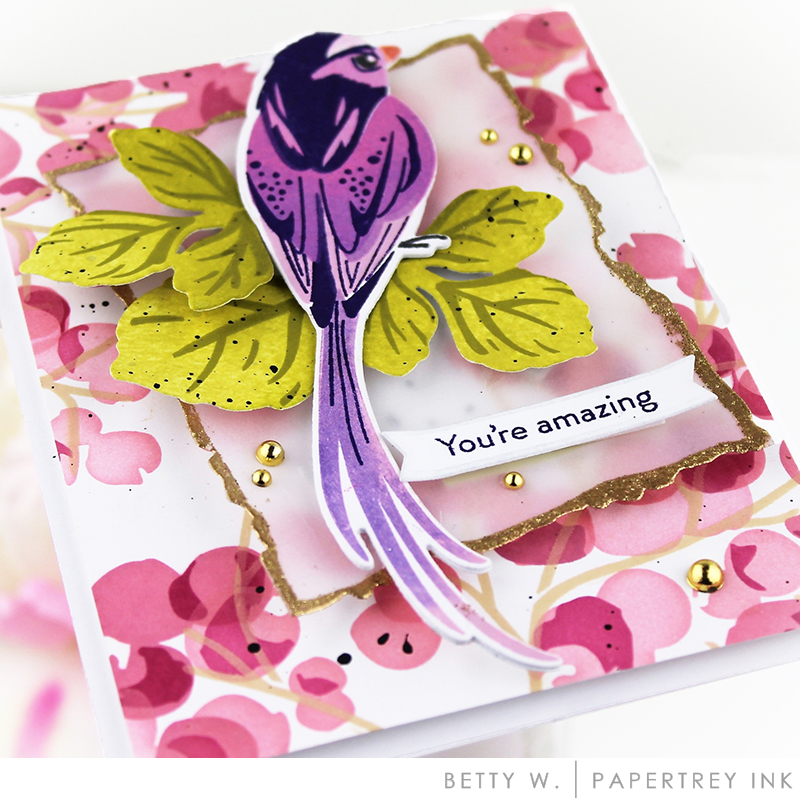
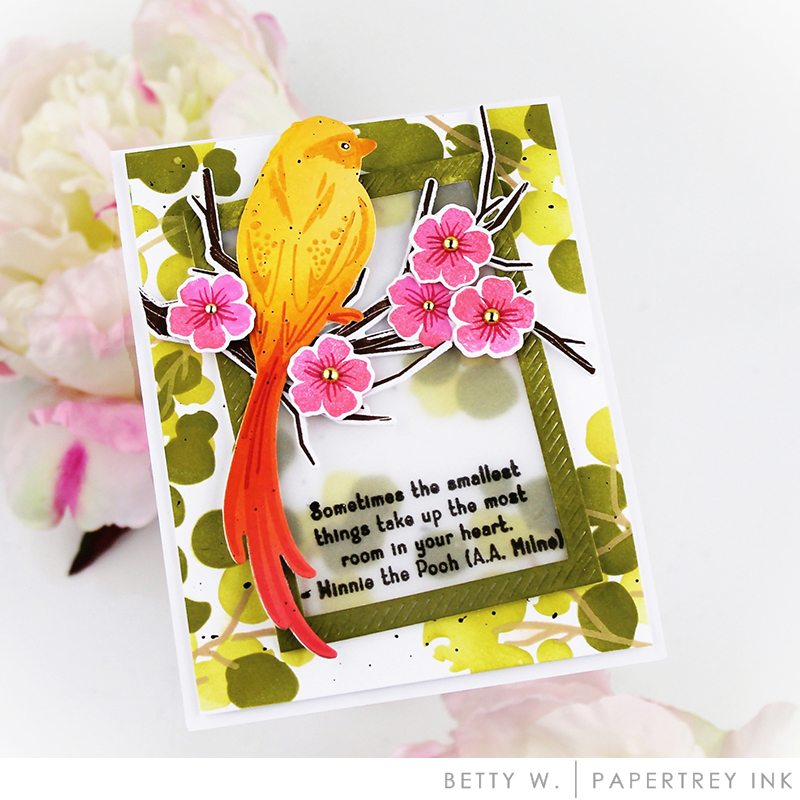
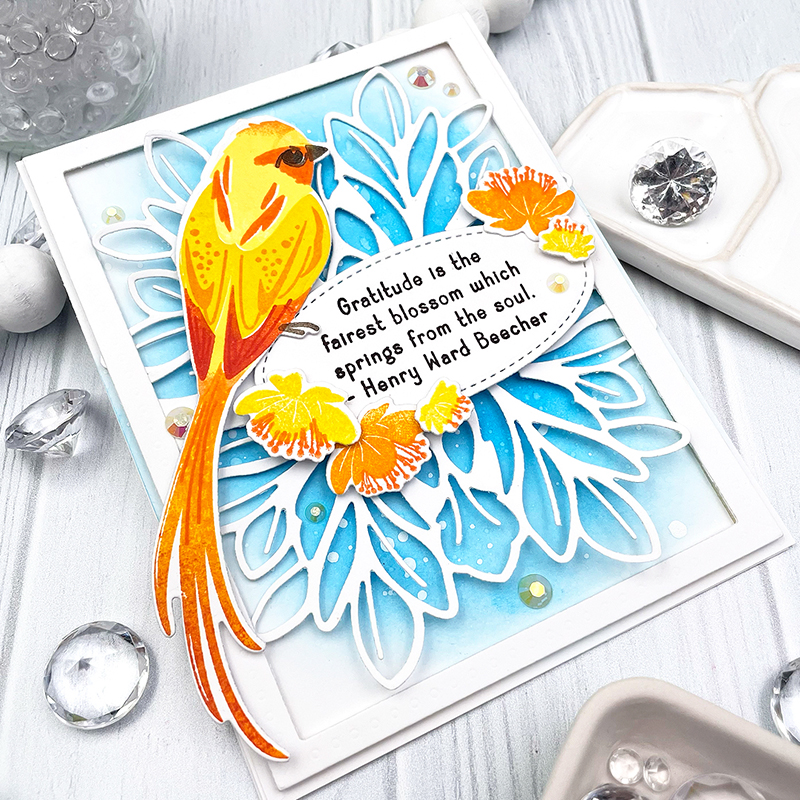
I’m so excited to introduce you to our next Feathered Friend! She’s elegant and classy and oh, so unforgettable, plus she comes with accessories such as a branch and blossoms, which equal complete perfection and playfulness. Introducing the new, Feathered Friends Mini 22 stamp set and dies. And to make this day even more special, we’re introducing the new Elegant Edges: Leaves die, which is completely fabulous and elegant! And, the new Inside Greetings.

Isn’t this a lovely bird? I stamped her in Weathervane, Autumn Rose, Lilac Grace, Lovely Lady, and Melon Berry. I love my layers, so I stamped my bird on a die cut Shape Shifters: Oval 4, which I layered over the new Edges: Leaves. It’s elegant and flowing and perfect for not just feminine cards, but masculine too, as you’ll see with what our designers have created

This Feathered Friend is so easy to line up and layer. I loved watching it come to life with each detailed layer and colors I added. She might just be my newest favorite…could be those gorgeous, flowing tail feathers.

Some of my flowers were stamped directly on my oval while a few were added as die cuts to create a bit of added dimension. At the top of my oval was the perfect space for my sentiment from the Inside Greetings: Everyday stamp set. Don’t you love this quote?
Sit back and enjoy what our designers have been busy creating. I love their amazing creations and know you will too. They are stunning!
Melissa
Supplies used:
STAMPS: Feathered Friends Mini 22, Inside Greetings: Everyday
INK: Weathervane, Autumn Rose, Lilac Grace, Lovely Lady, Melon Berry, Mint Julep, Olive Twist, Honey Nut
PAPER: Stamper’s Select White
DIES: Feathered Friends Mini 22, Elegant Edges: Leaves, Shape Shifters: Oval 4, Border Bling: Tin Stitch
OTHER: Lavender Moon Moonshine sequins, seam binding, patterned paper
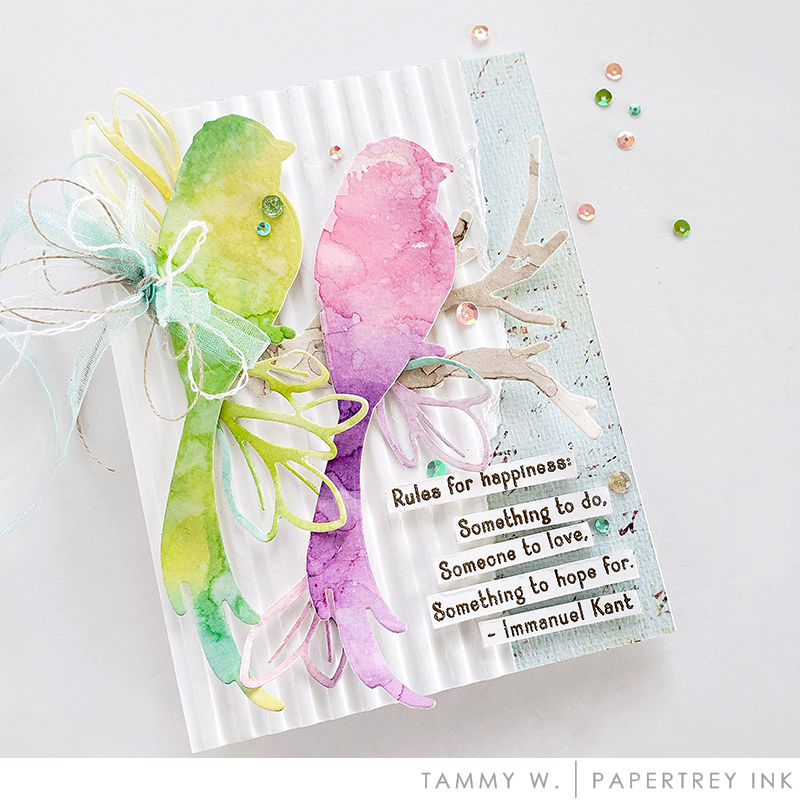
Now onto projects from our amazing designers!


TIPS:
- Flip and turn stencils to create different looks
- Use only one or two of the stencils in a set to create different looks
- Ink blend panels with direct to paper technique, add water and ink splatters. Let panel dry. Stamp the detail portion of stamp and die cut for a different effect.


TIPS:
- Use stencils for something other than intended purpose. I used the berries as leaves.
- Ink blend panels with direct to paper technique and die cut a frame die to create a distress textured frame.
- Ink blend panels and stamp the detail portion of the feathered friend bird to create different looks and effect.
- Tuck in portions of the stamped and die cut branch to create fuller, varied looks.


TIPS:
- Use small stamps to created full backgrounds.
- Use edge die on both sides of a card stock panel to create unique background frames
- Create a template for the edge die to use each time you create for perfect placement of dies
We hope you have enjoyed all the creations that we have shared with you today! We would love to hear your initial thoughts on everything we introduced! Please leave a comment on this post to tell us what you think of the new products, and you will be eligible to win big!

Leave a comment today and you’re automatically entered to win a $50 Papertrey Ink or Ink to Paper gift certificate! You have until 7am ET, April 25th to leave your comment and be eligible to win. Only one comment per person please. One randomly selected winner will be posted on the April Release Winners Page by 10PM ET on April 28th.


Leave a Reply