


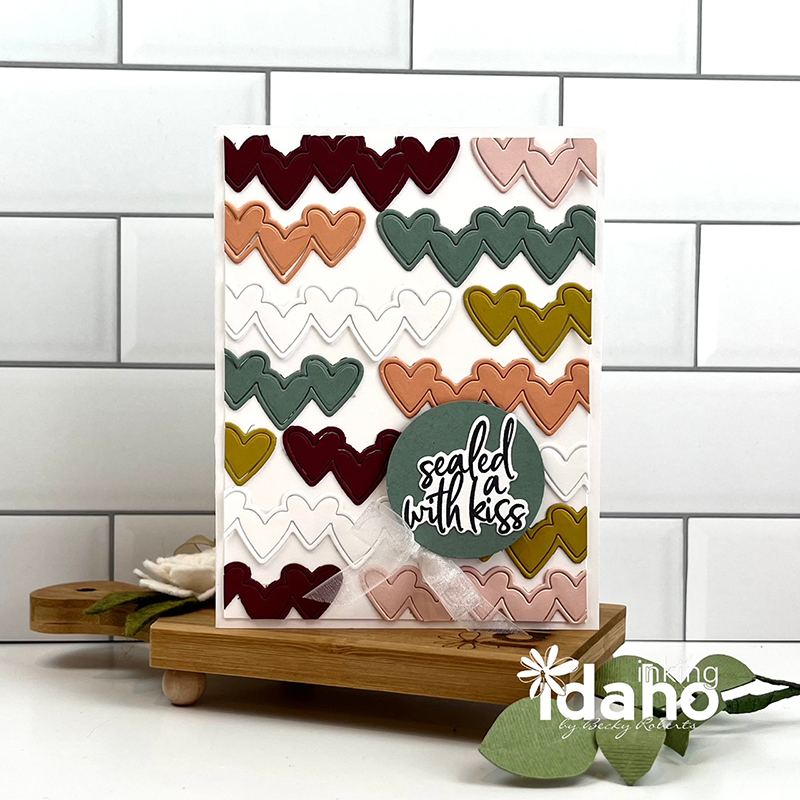
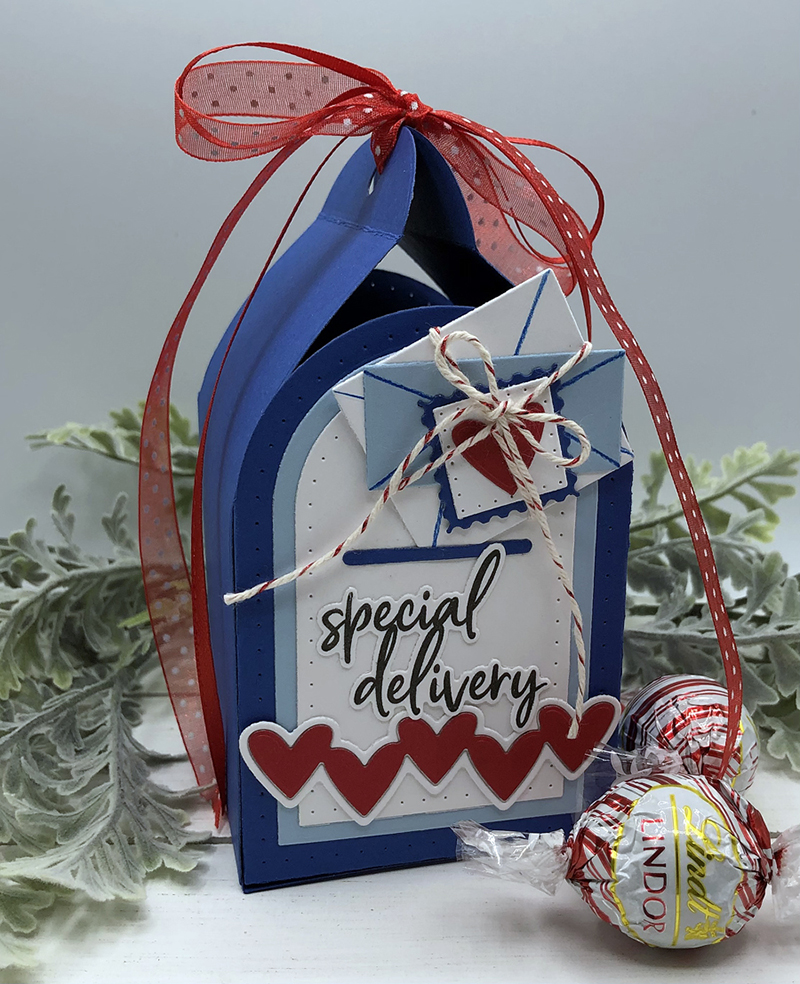
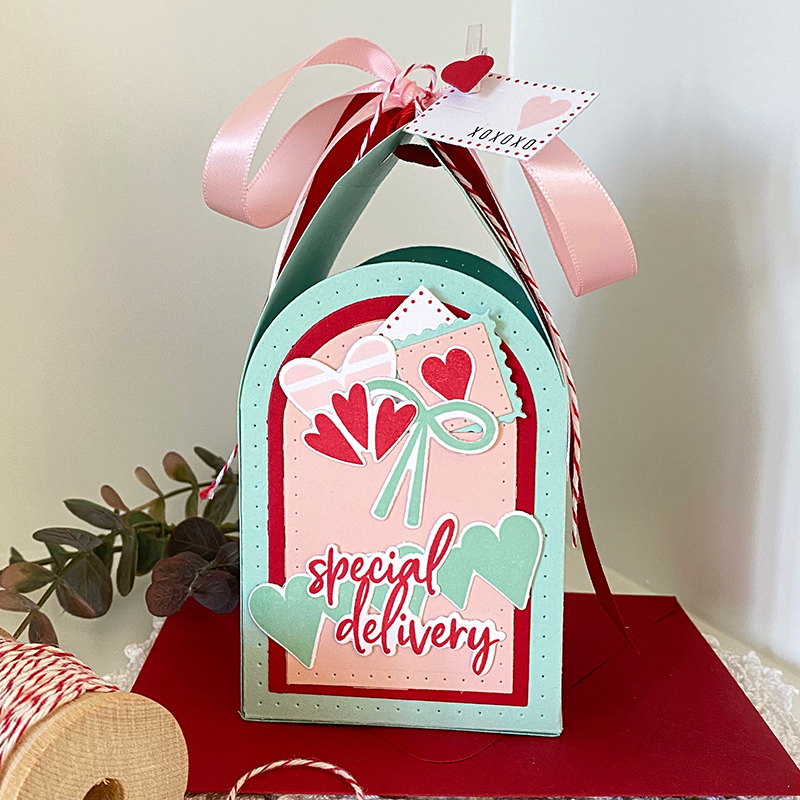
Today might just be my most favorite day of the entire December Release. I’ve always loved all things related to hugs, love, hearts, and all of the fixings and today’s products are all about these delightful things!
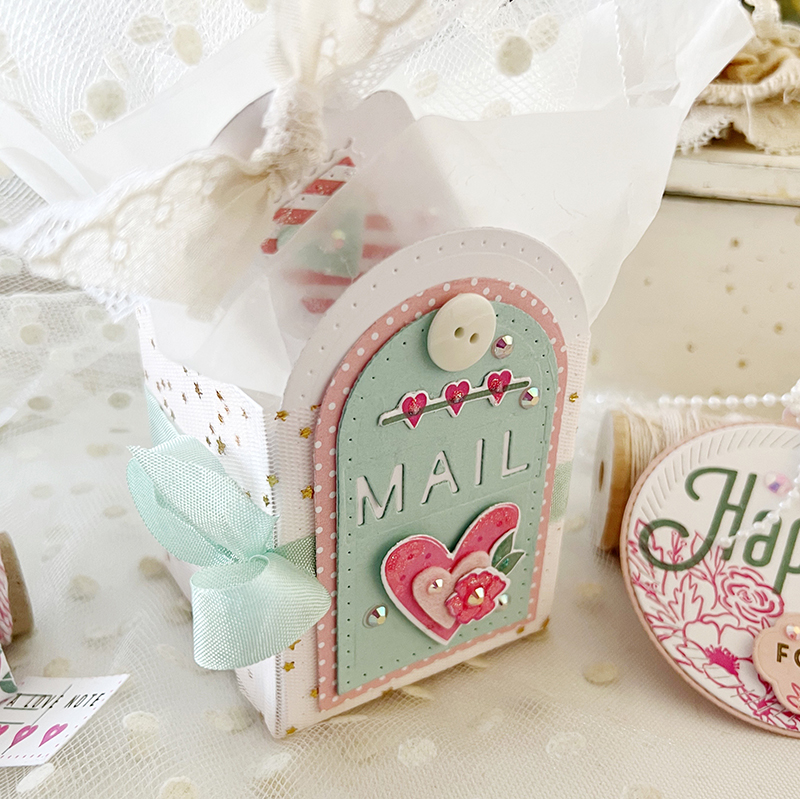
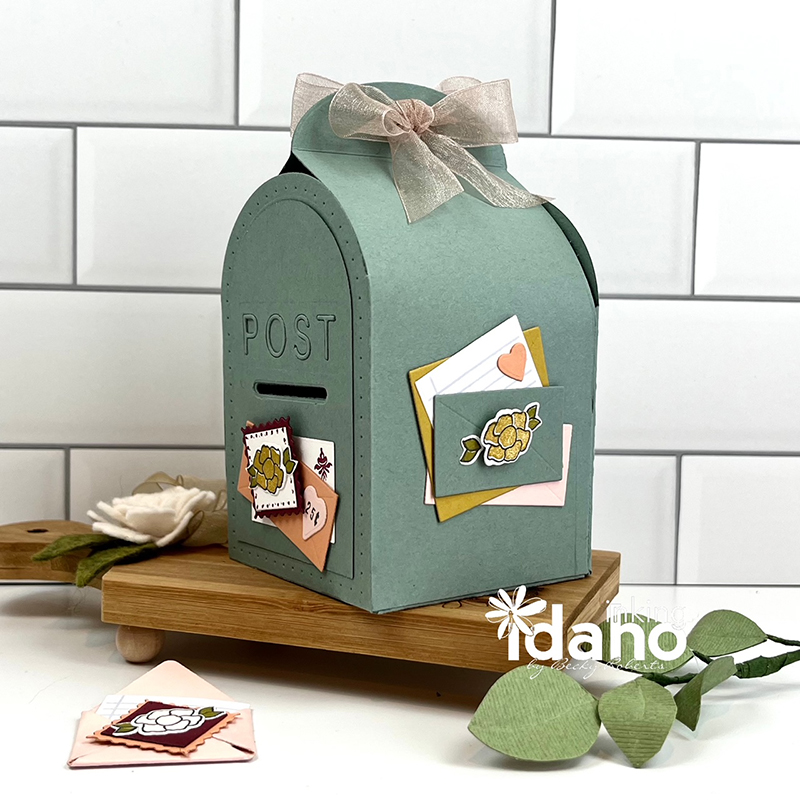
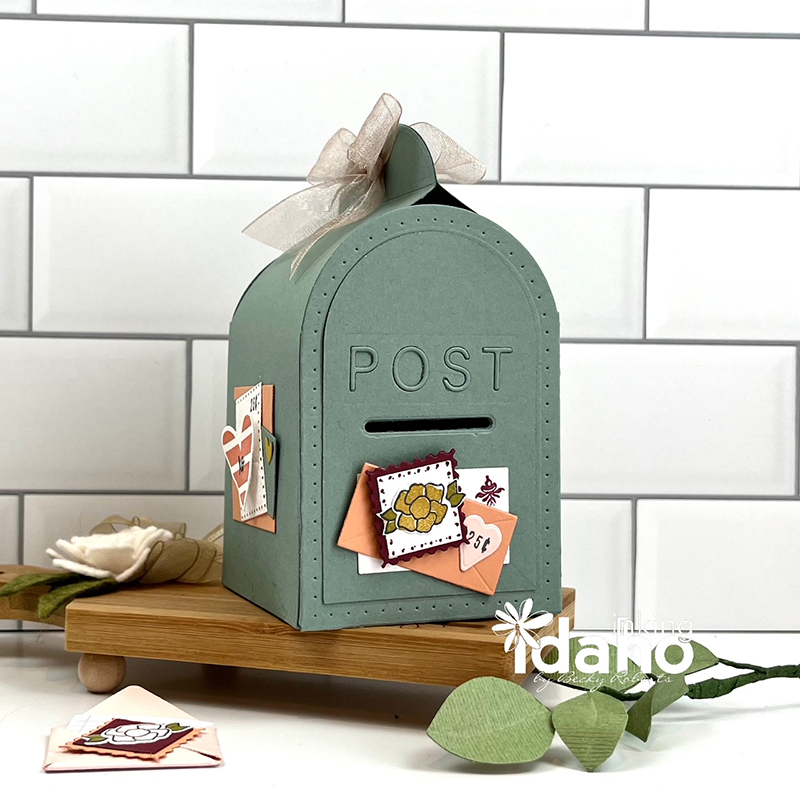
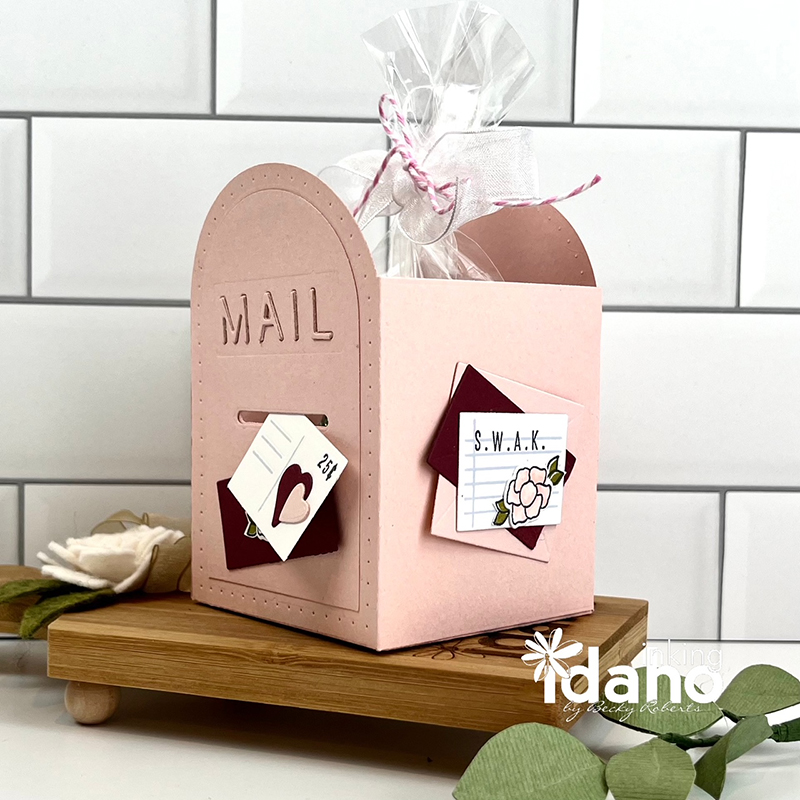
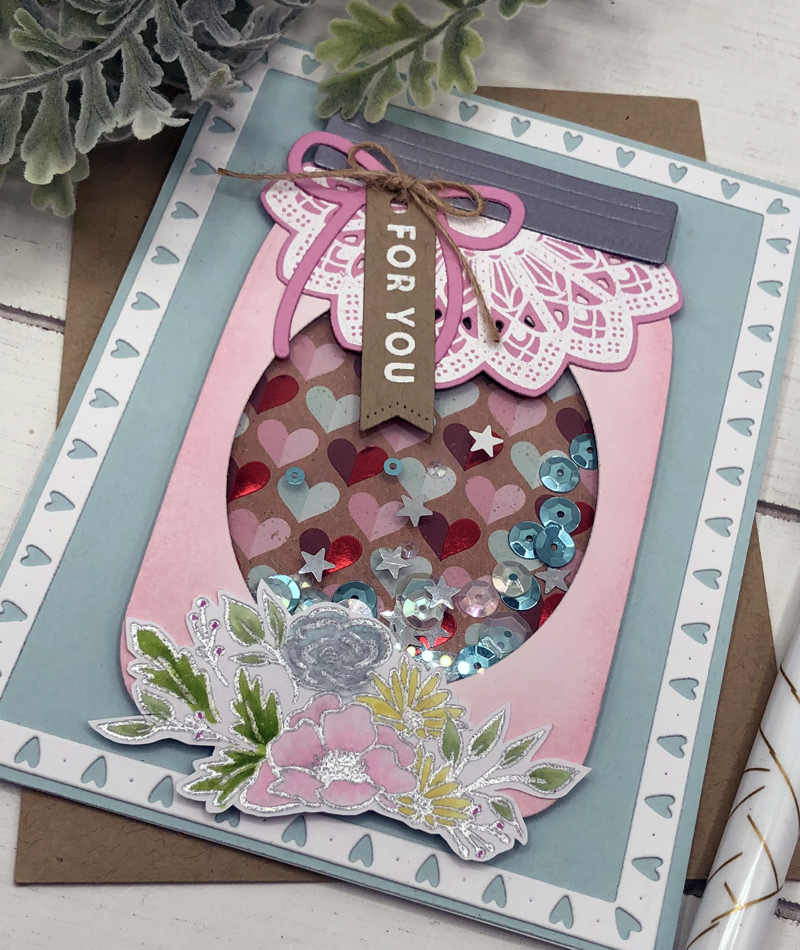
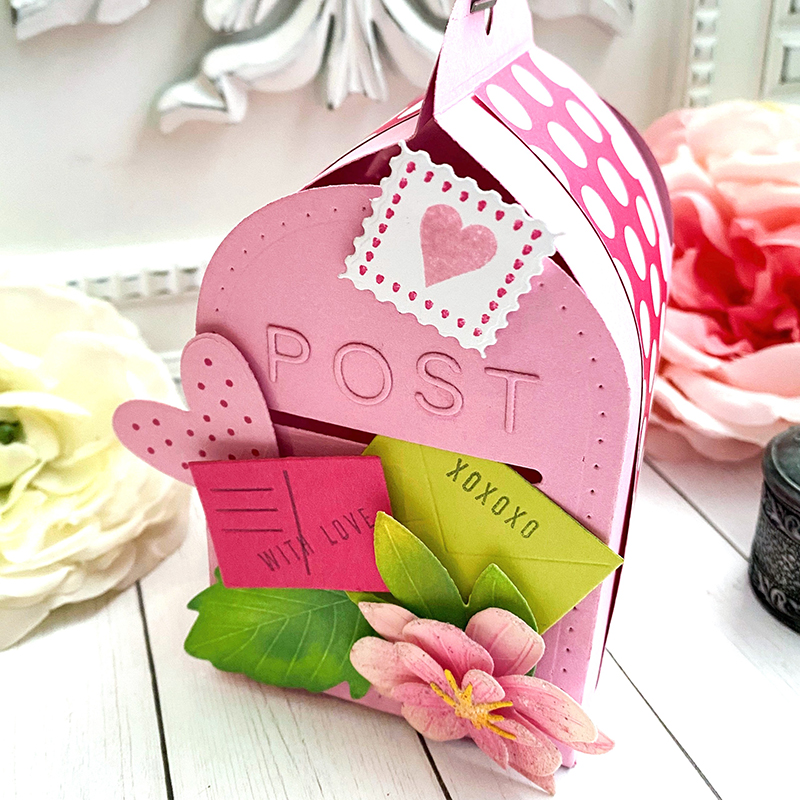
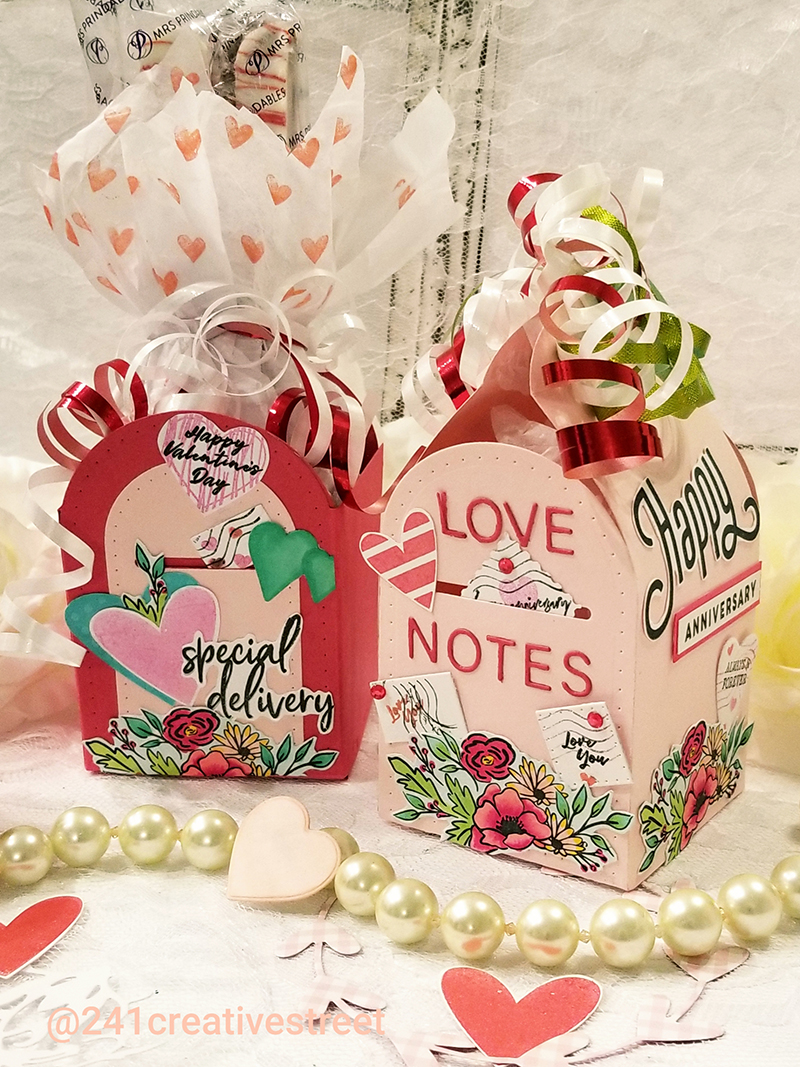
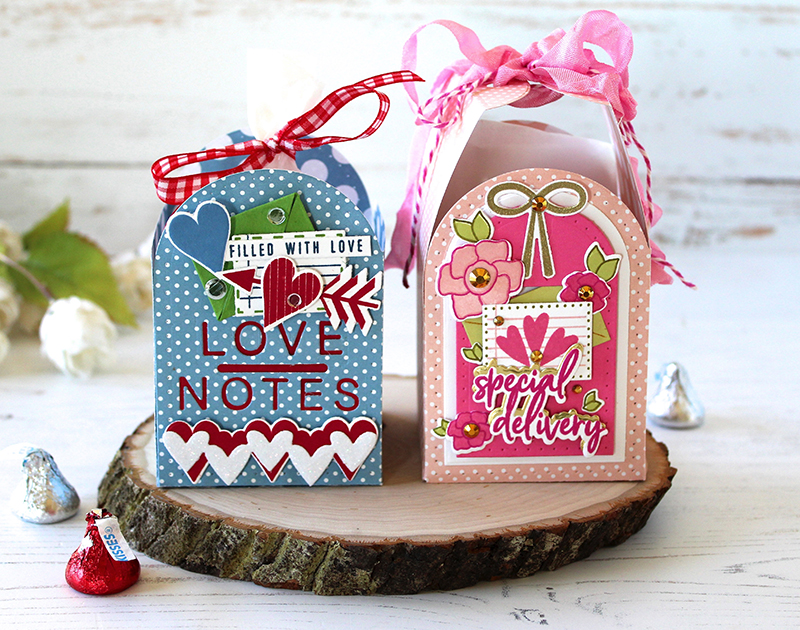
We have two styles of this sweet With Love Mailbox to choose from. I used the dies that remain open at the top for this project. I love the idea of being able to fill it and let the contents show. The inspiration behind these darling gift boxes was the cutest mailbox made from sugar cookies and iced together to form an adorable container to hold heart and envelope shaped cookies. I was smitten and wished for something similar from paper. I love what transpired from that inspiration! You can add layers to the front of your mailbox, cut a slot in the front where you can slip a tiny postcard or envelope, and use the die cut words to create a realistic effect on your handmade mailbox.
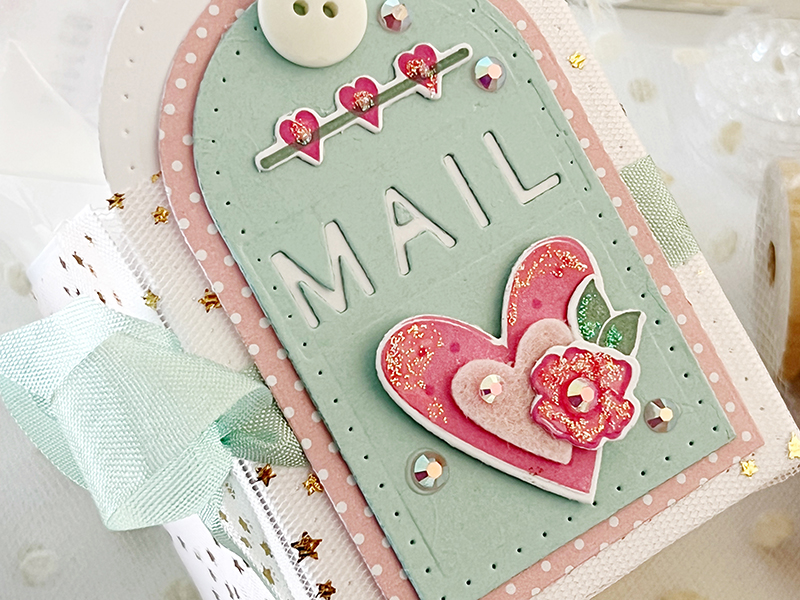
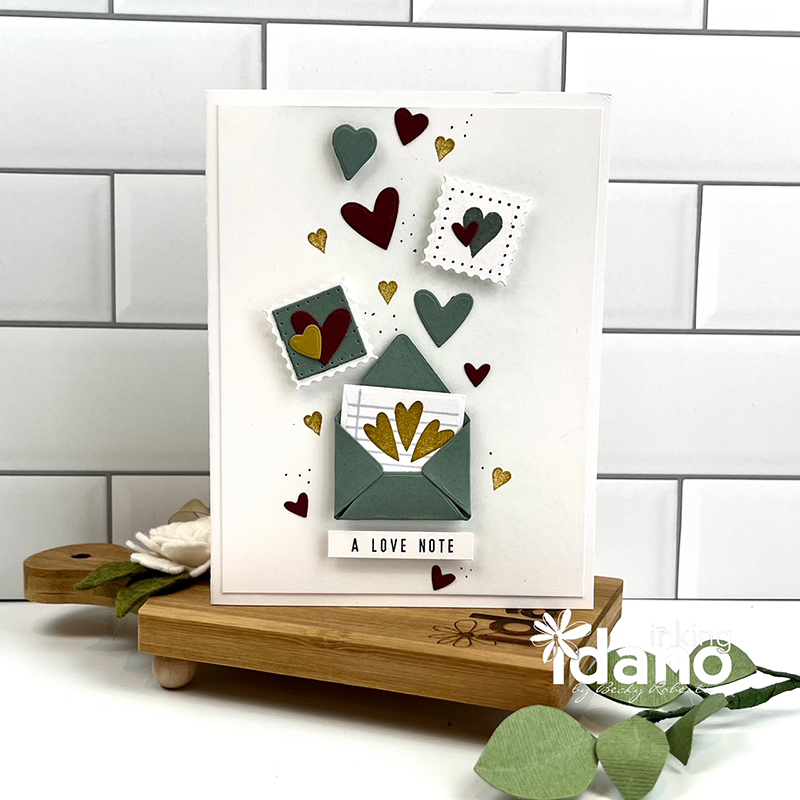
There are so many fun options in the companion With Love stamp and die set. These products allow you to dress up your mailbox in so many different ways. It’s as fun as adding icing and sprinkles on the cookie! You’ll find a variety of different shapes and sizes of hearts, patterns, flowers, an arrow, postcard, mini envelope, and so much more! One of my favorite ways to use the heart dies in the With Love die collection is to cut them from felt. This adds softness and the perfect texture and added dimension.

Aren’t these mini die cut envelopes, notes, and postcards irresistible? I can’t stop making them. They look so cute tucked in the gift box or embellishing the front of a card or tag. With the mail slot you can die cut in the mailbox, you can actually slip these tiny, adorable morsels.
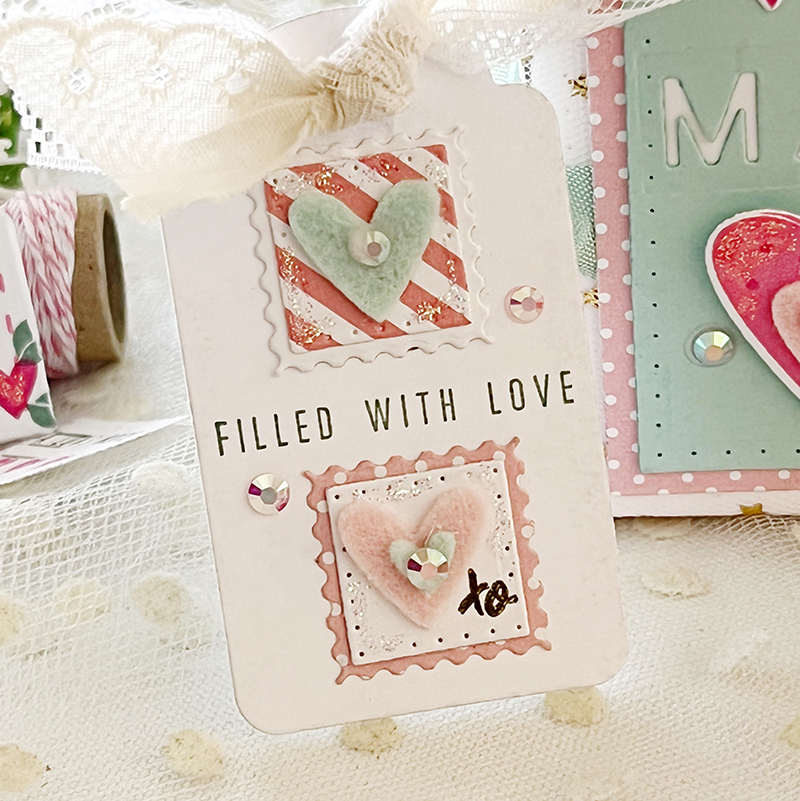
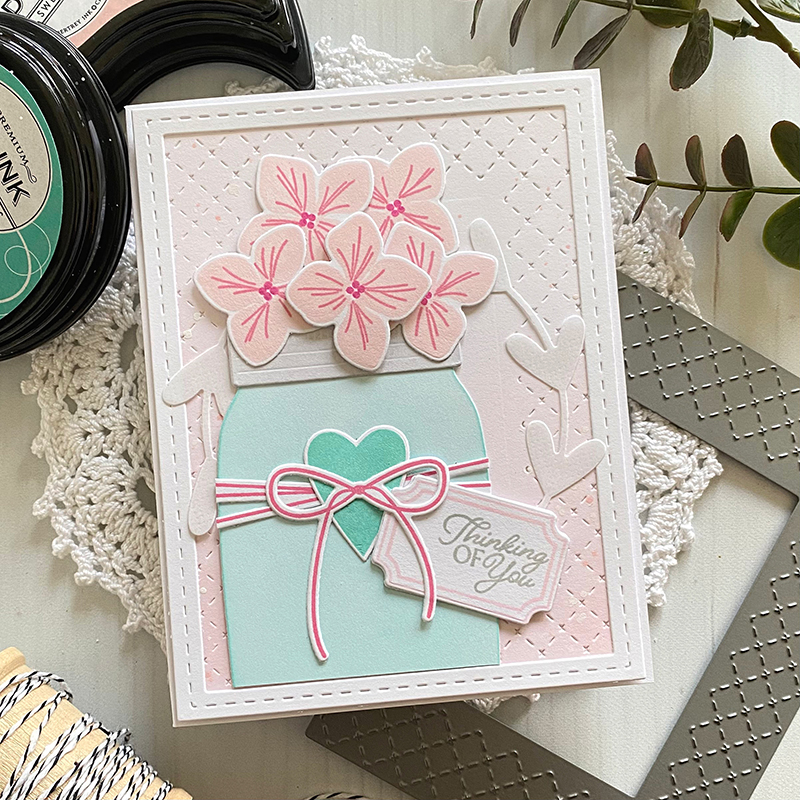
There are even postage stamp dies and stamps included in the With Love stamp and die sets. These are like candy and so much fun to create! Mix and match the top and bottom layer with patterned paper, cardstock, felt, fabric, chipboard, etc. I love them on the front of a gift tag or card. You’ll notice that I’ve also used the new With Love Mini stamp set across the center of my tag. This is a set full of essential words for Valentine’s Day, gift giving, and other fun occasions.
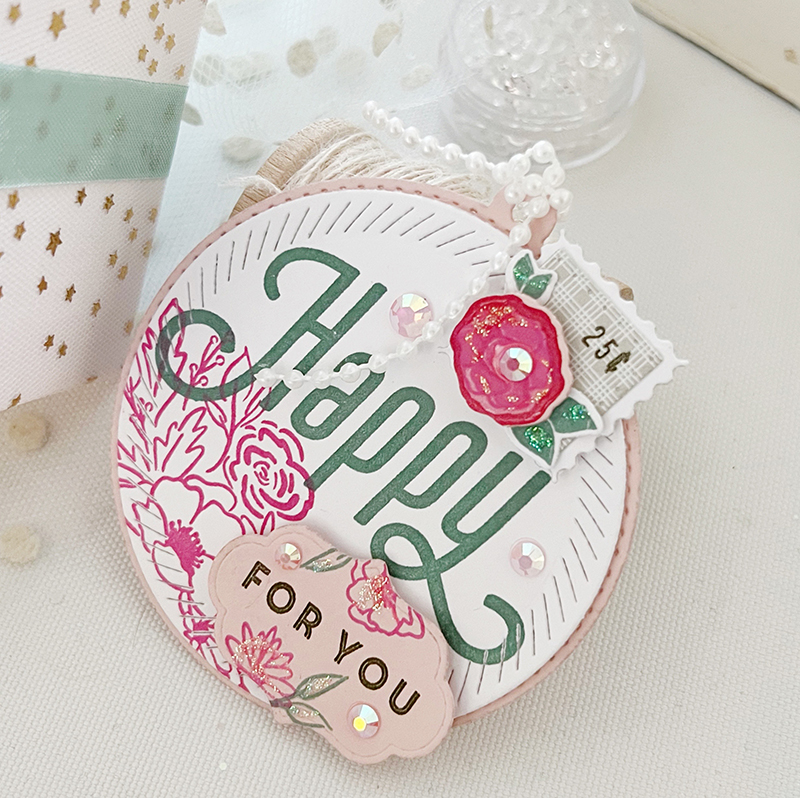
I created this tag to slip inside my mailbox and used the December Freebie set called Happy Sketches. Isn’t it beautiful? This stamp set is free for any order over $80! How fun! I’ve added another tiny die cut stamp at the top of my tag using flowers from the With Love stamp set. There’s so much to love about these delightful, new products!
Supplies Used:
STAMPS: With Love, With Love Mini, Happy Sketches
INK: Raspberry Fizz, Ocean Tides, Hawaiian Shores, Sweet Blush, Olive Twist, Hibiscus Burst
PAPER: Stamper’s Select White, Sweet Blush, Aqua Mist, Bitty Big Soft Stone, Bitty Big Sweet Blush
DIES: With Love Mailbox, With Love, Love to Layer: Scalloped Circles, Tag Creations: Delightful Bunch, Berry Wreath Tag, Tagged & Labeled
OTHER: Sweet Blush felt, Aqua Mist felt, seam binding, trim, tulle, Stickles Crystal glitter, button, adhesive gems


TIP:
- Cut the layer and the mailbox slit at the same time. Raised letters on the MAIL are cut and glued x 4 layers.
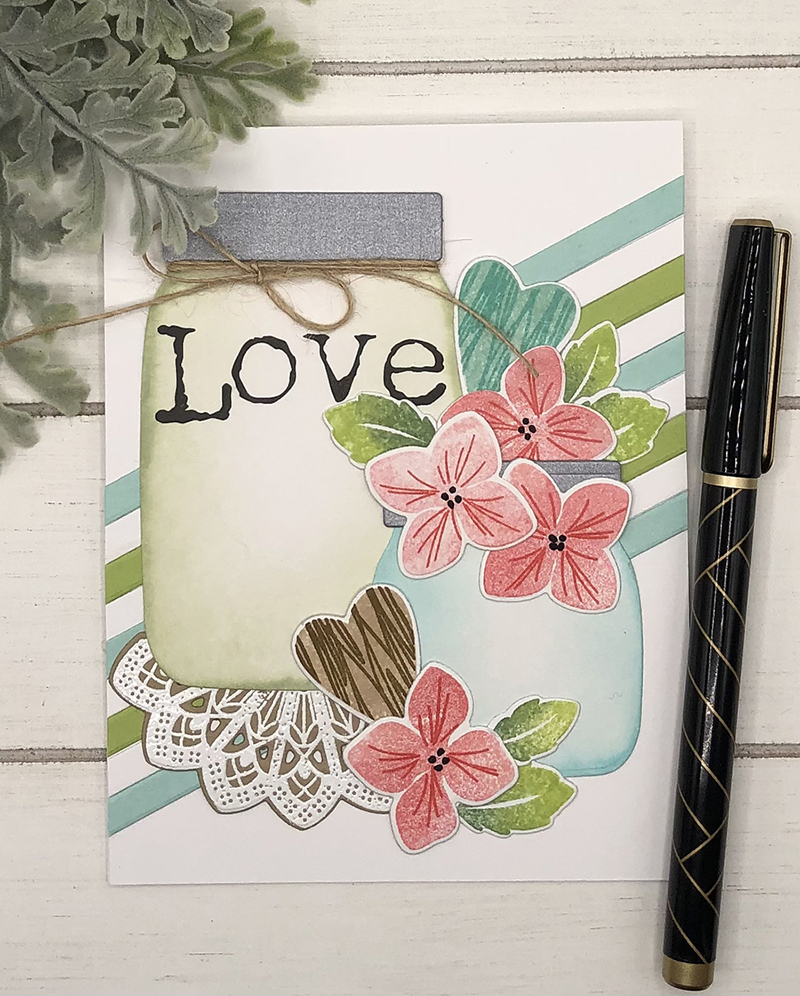
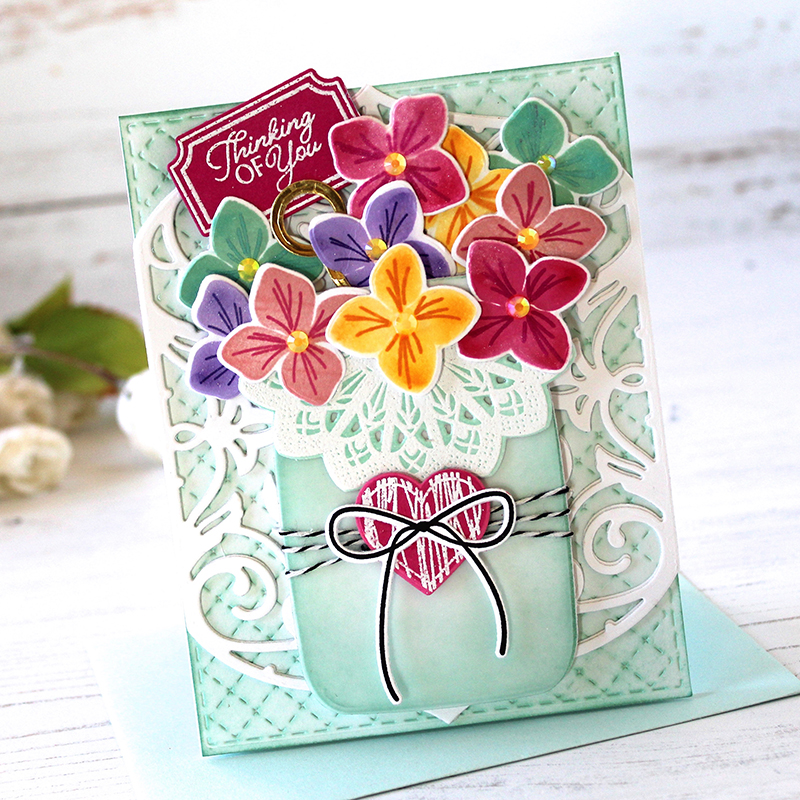
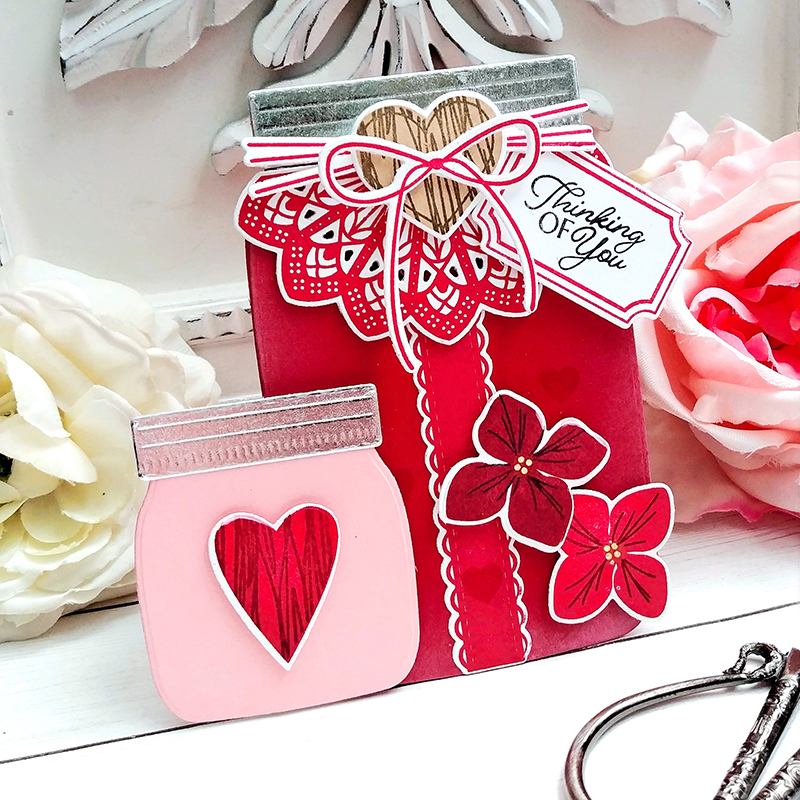
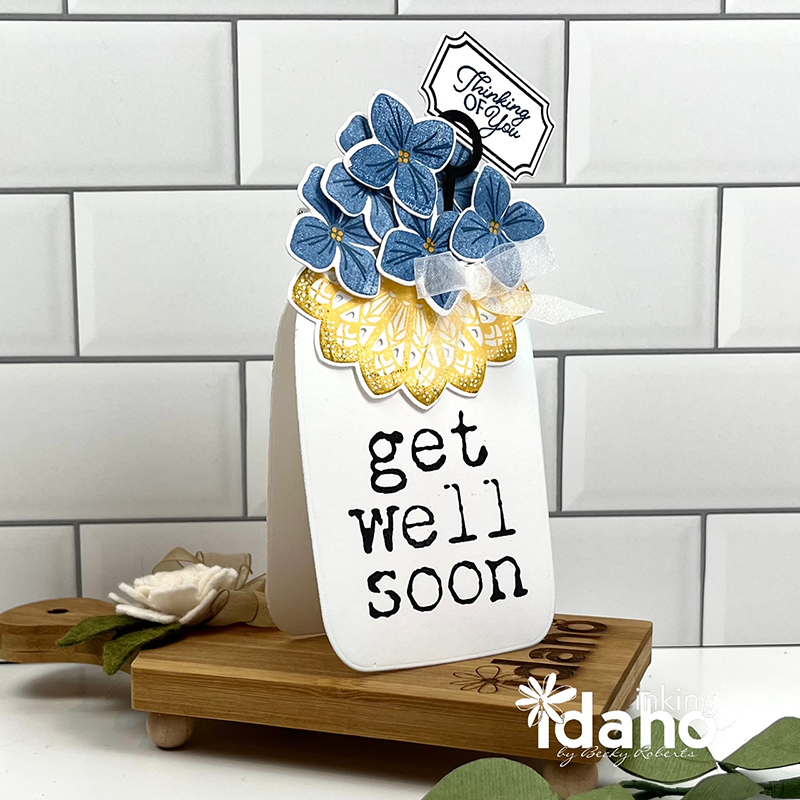
You’re going to love what I have to share with you next! Our Spook-tacular Mason Jars dies are getting a face lift with our new Jar Accessories stamp set and dies.
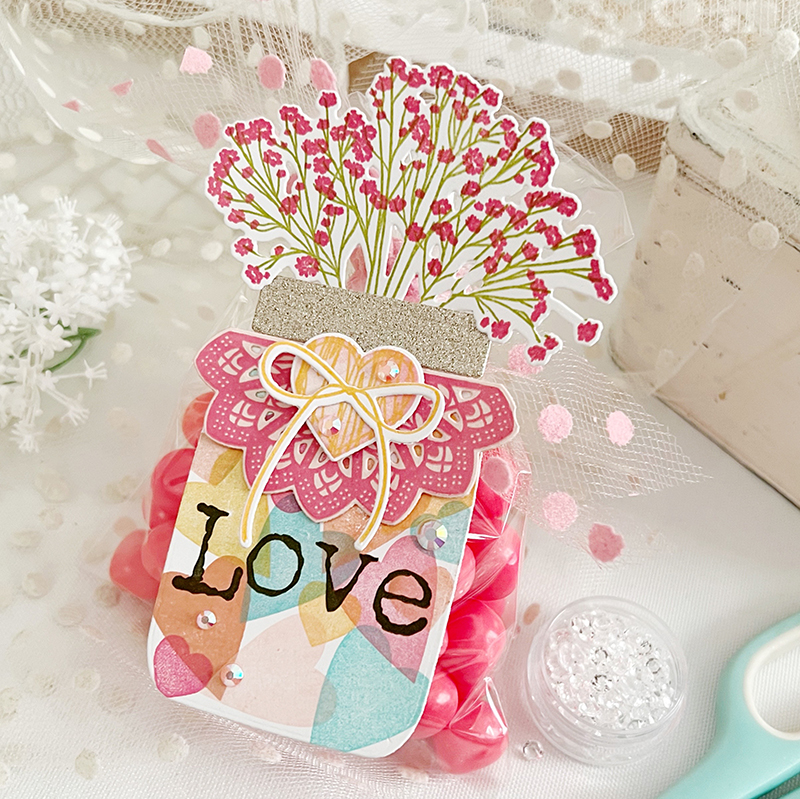
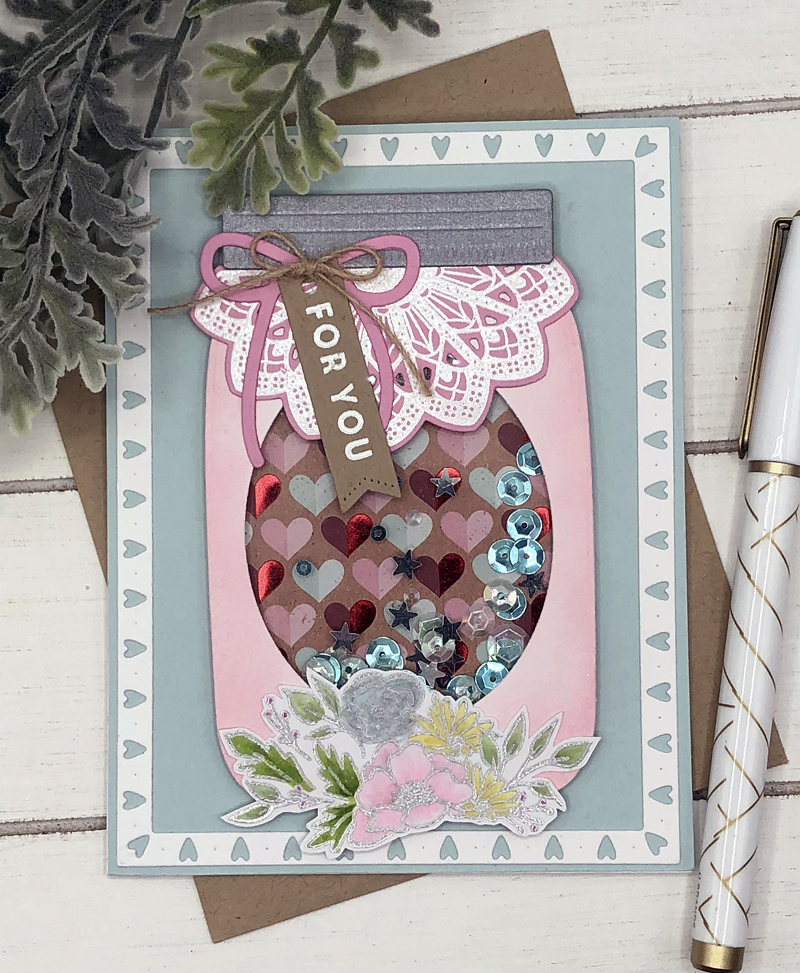
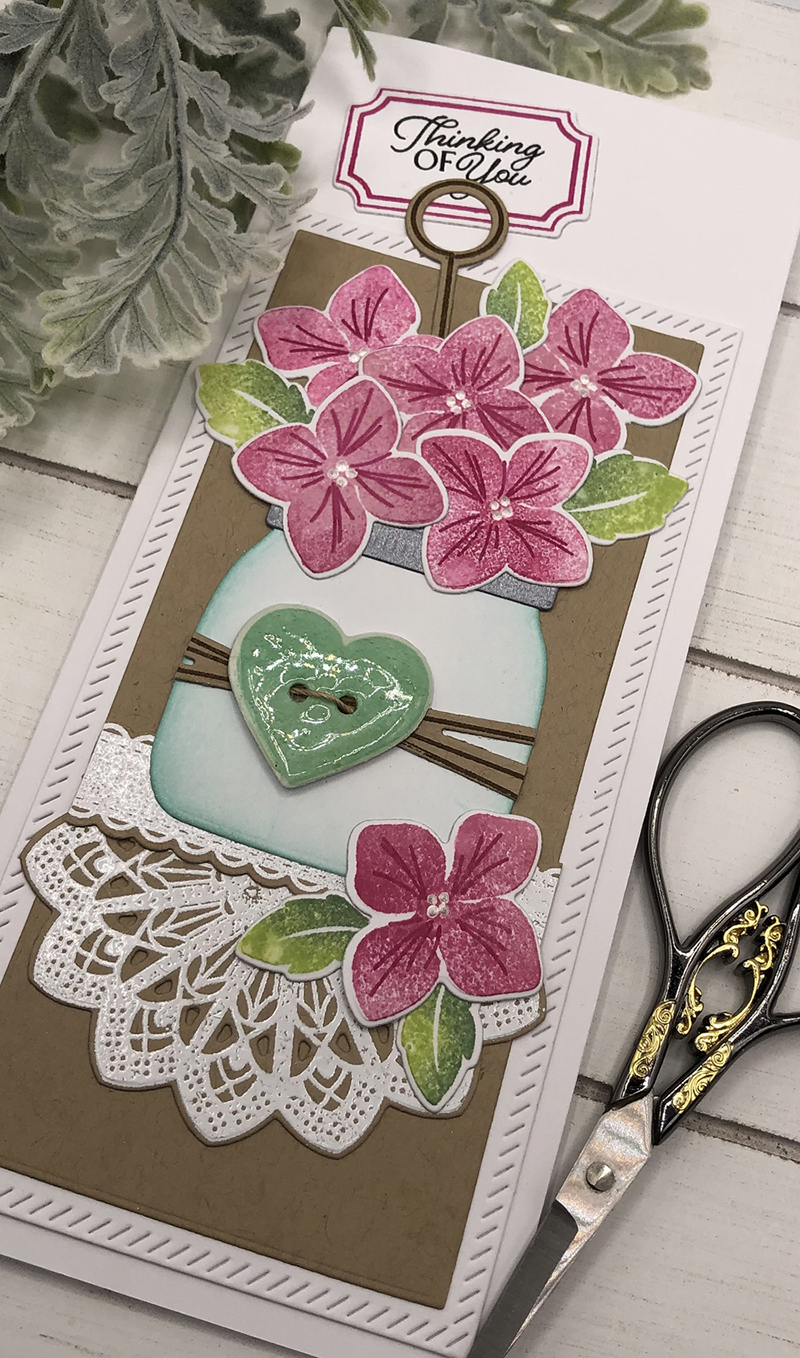
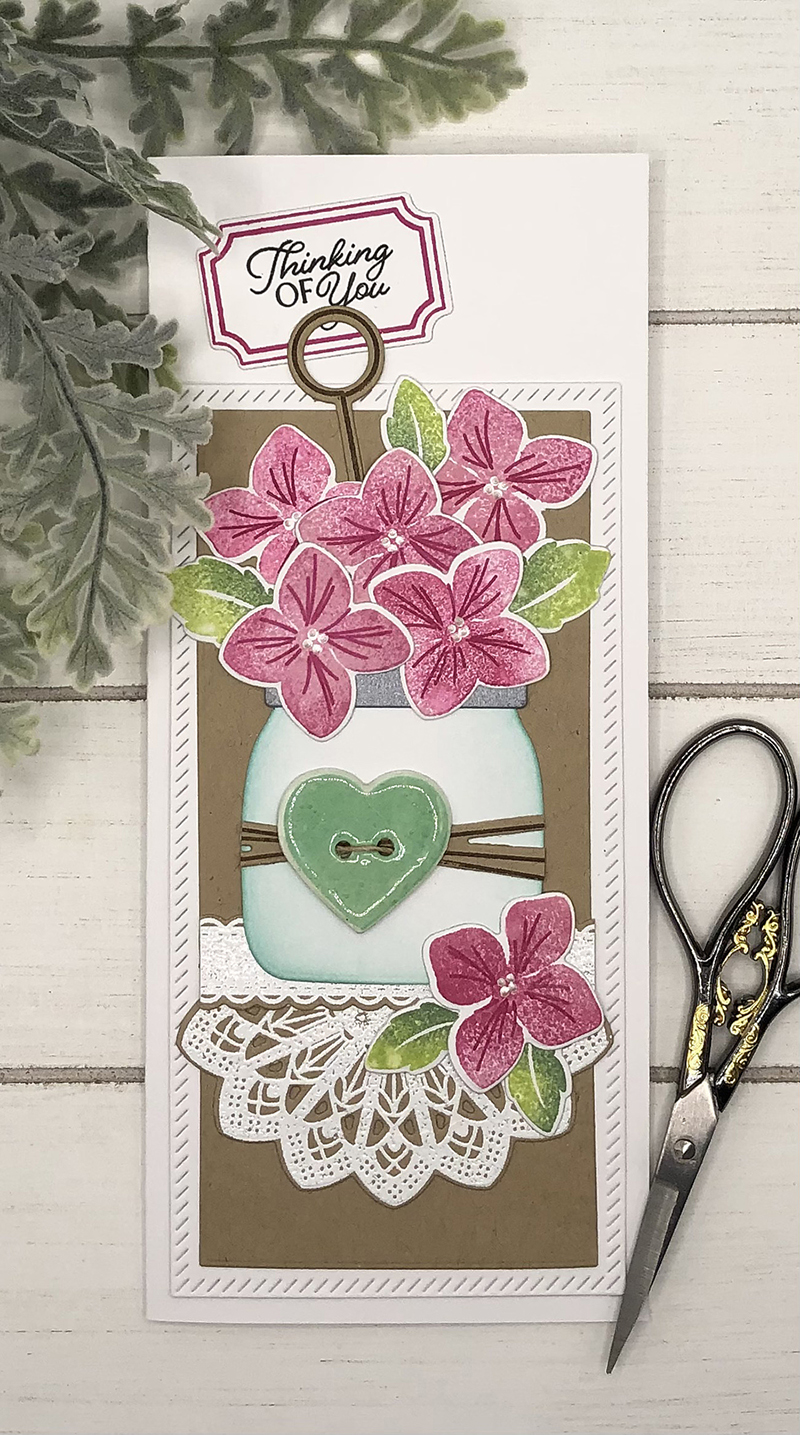
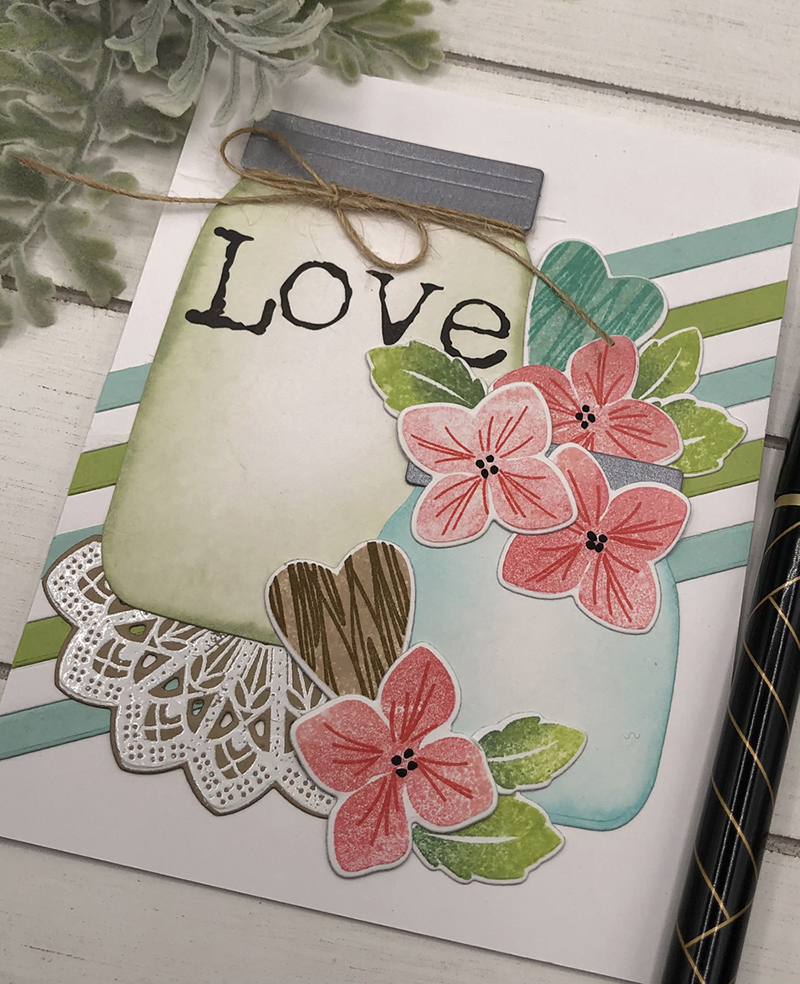
This new stamp and die set are irresistible! I created a tag for my treat bag my using the medium jar die. I used stamps from Jar Accessories stamp set to fill the inside of my jar, stamping in a variety of soft, pastels. I love the translucent look they take on as you add one color over another.
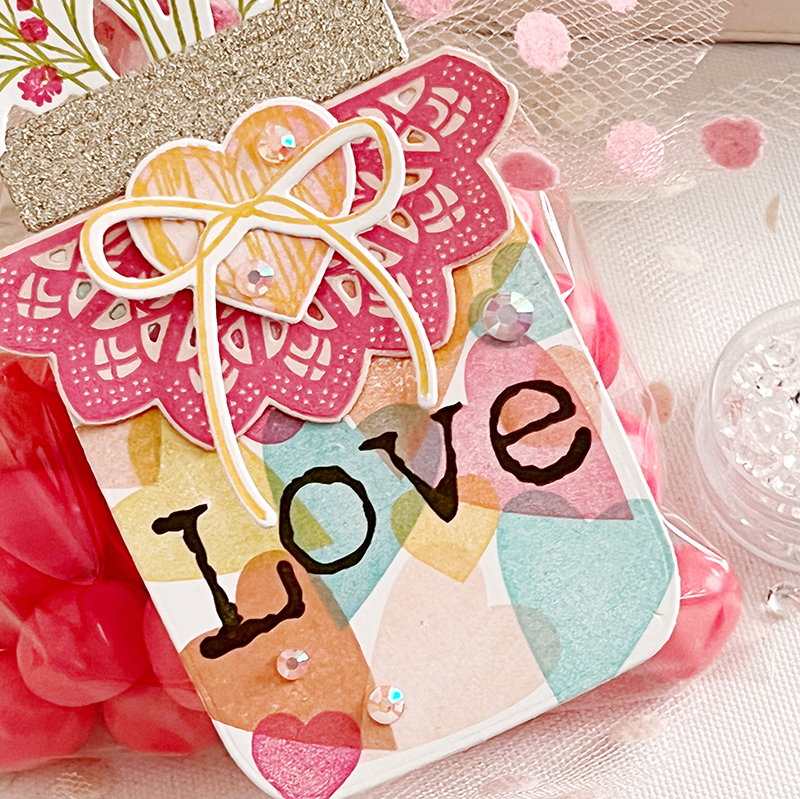
I stamped my word “Love” from the new stamp set across the front of my jar using Olive Twist ink. This font is my favorite ever! It’s old and timeless and a fun added twist. I embellished the neck of my jar using a die cut and stamped doily, heart, and bow. I love the fun, weathered, wooden feel of the heart button. All of these images are included in this set and love every single one of them.

I added flowers to my jar using the Sprigs & Sprays stamp set. I’m very anxious to use the darling flowers in the Jar Accessories set. They remind me of sweet hydrangea blossoms…stay tuned! I can’t quite put these new products down!
You’ll fall head over heels for the all of the cute projects our Design Team created.
Supplies Used:
STAMPS: Jar Accessories, Sprigs & Sprays
INK: Hibiscus Burst, Aqua Mist, Sweet Blush, Melon Berry, Raspberry Fizz, Olive Twist, Hawaiian Shores, Simply Chartreuse
PAPER: Stamper’s Select White, Sweet Blush
DIES: Jar Accessories, Spook-tacular Mason Jars, Sprigs & Sprays
OTHER: Glitter cardstock, adhesive gems

TIPS:
- Happy Hearts is a small freebie stamp set with an $80 purchase at PTI…and it starts with this release!
- When choosing a frame, colors or embellishments for my cards, I take the cue from designer paper.

TIPS:
- Flower centers were highlighted with white Liquid Pearls.
- The heart “button” was given dimension and shine using Glossy Accents.
- Don’t forget the button holes! Weave a tiny piece of jute twine through them for a more realistic look.
TIPS:
- A variety of colored strips lined up together makes a quick, easy and interesting background.
- Lightly blend colors to the edges of the jars using a brush. Start by brushing in a circular motion off the edge of the cardstock then gently come onto the die for subtle coloring.
- A black gel pen was used to highlight the floral centers.
We hope you have enjoyed all the creations that we have shared with you today! We would love to hear your initial thoughts on everything we introduced! Please leave a comment on this post to tell us what you think of the new products and you will be eligible to win big!

Leave a comment today and you’re automatically entered to win a $50 Papertrey Ink or Ink to Paper gift certificate! You have until 7am ET, December 21st to leave your comment and be eligible to win. Only one comment per person please. One randomly selected winner will be posted on the December Release Winners Page by 10PM ET on December 22nd.


Leave a Reply