
Hi everybody, welcome to our new feature What do I do with this? For this challenge our designers will get to try out some of these new tools and share the projects they created using them. We’ve got some fun, new things coming to the Papertrey Ink store and our designers will show you how to use them so you’ll be comfortable incorporating them into your card-making and gift-giving. Stay tuned for exciting and creative things coming your way! We want to share what our designers love with you, and this gives you a first-hand look into their crafty-faves!
Let’s get started!
1. Die cut card panel with Border Bling: Snow die. Ink blend panel with Blueberry Sky ink.
2. Use Border Bling: Skinny Stitched Frame to create frame in the center of the card. Stamp sentiment with the Just Sentiments: Santa stamp set.
3. Stamp and die cut images with the Go To Gift Card Holder: Mitten set. Add glitter to the candy canes, holly and berries.
4. Attached stamped and die cut images to card panel with foam adhesive to add some dimension and depth.
5. Add Moonshine Sequins to snowflakes for some added holiday sparkle.
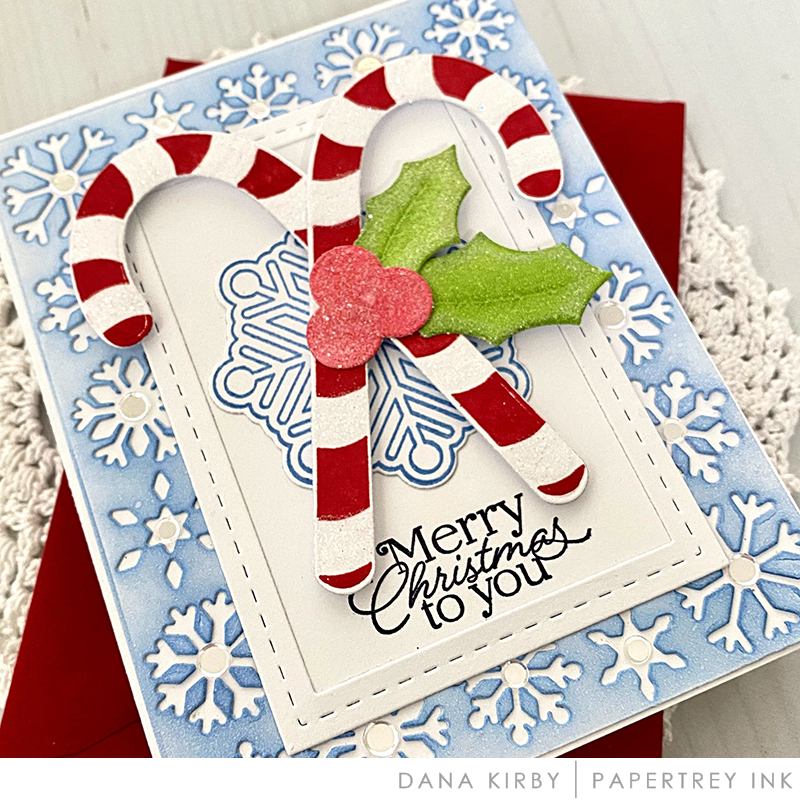

DIES: Border Bling: Snow, Border Bling: Skinny Stitched Frame, Go To Gift Card Holder: Mitten
INK: Pure Poppy, New Leaf, Blueberry Sky
OTHER: Moonshine Sequins, Glitter
To create the background I used the Seeing Stars Stencil Collection, clear embossing, and ink blending. Starting with a white panel I applied Clear Embossing Ink onto it through a stencil, poured Iridescent Clear Embossing Powder and heat set it. After that, I blended the Broken China Distress Ink onto the panel, covering the whole panel. I did light-handed ink blending which made the panel light blue in color. Embossed stars resisted the ink blending, staying white.
Next, I again placed the stencil onto the panel (choosing another placement this time), applied the Clear Embossing Ink onto it, poured Iridescent Clear Embossing Powder, and heat set it. And then I blended the same Broken China Distress Ink onto the panel. Embossed stars resisted the ink blending, but since the cardstock under them had some ink blending these stars stayed of this color.
I kept doing the same a couple more times, adding layers of stars and making the panel darker and darker with each layer.
Finally, I blended the Chipped Sapphire Distress Ink around the panel edges for a more finished look.
For additional texture, I also added water splatters onto the panel, and after the distress ink moved I blotted the panel with a paper towel.
To embellish the background and add some shine to it I applied Icicle Stickles Glitter Glue through the stencil as well as applied the same glue around the panel edges.
All Is Bright sentiment die-cut out of glitter cardstock and several Moonshine Sequins finished off the card.
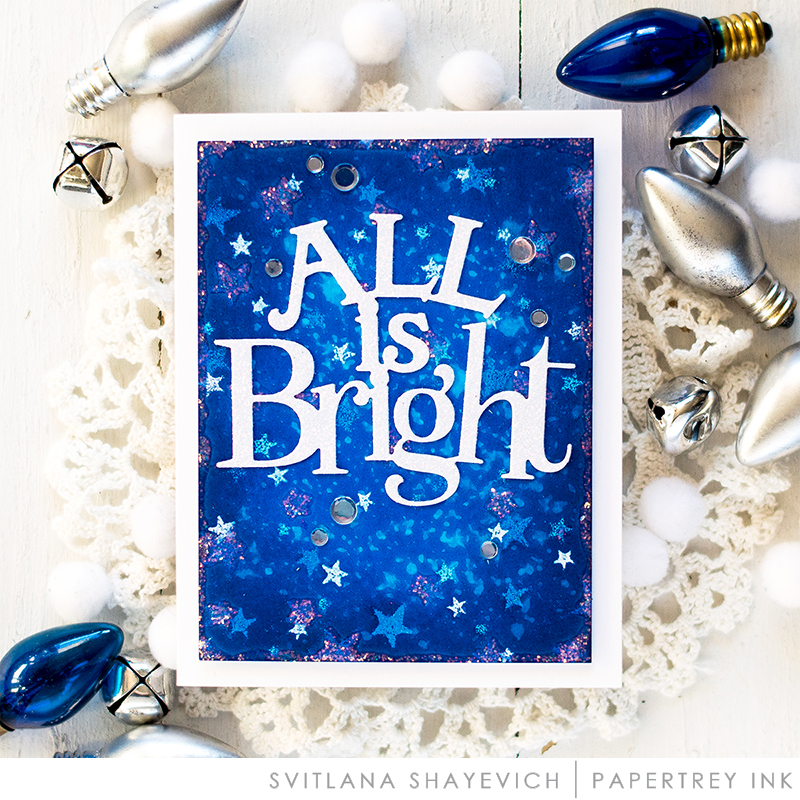

DIES: All Is Bright
OTHER: Distress Inks, Seeing Stars Stencil Collection, Moonshine Sequins, Stickles Glitter Glue Icicle, Clear Embossing Ink, Iridescent Clear Embossing Powder

PRIZE
One winner will be chosen at random to receive a $25 gift certificate.
RULES
To enter, participants are required to create a card using sequins or embossing powder using PTI/Ink to Paper supplies and Dana’s or Svitlana’s technique or your very own. Share your finished project via the link below. We can’t wait to see what you make!
Only one entry per person and the deadline is November 15th at 7 AM. This post will be updated with the randomly selected winner.
CHALLENGE
EDITED TO ADD THE RANDOMLY SELECTED WINNER
Congratulations, Christine Miller! Please send an email to customer service and provide them with your full name and the email address you would like your gift certificate sent to. Thanks so much to everyone for playing along!


Leave a Reply