


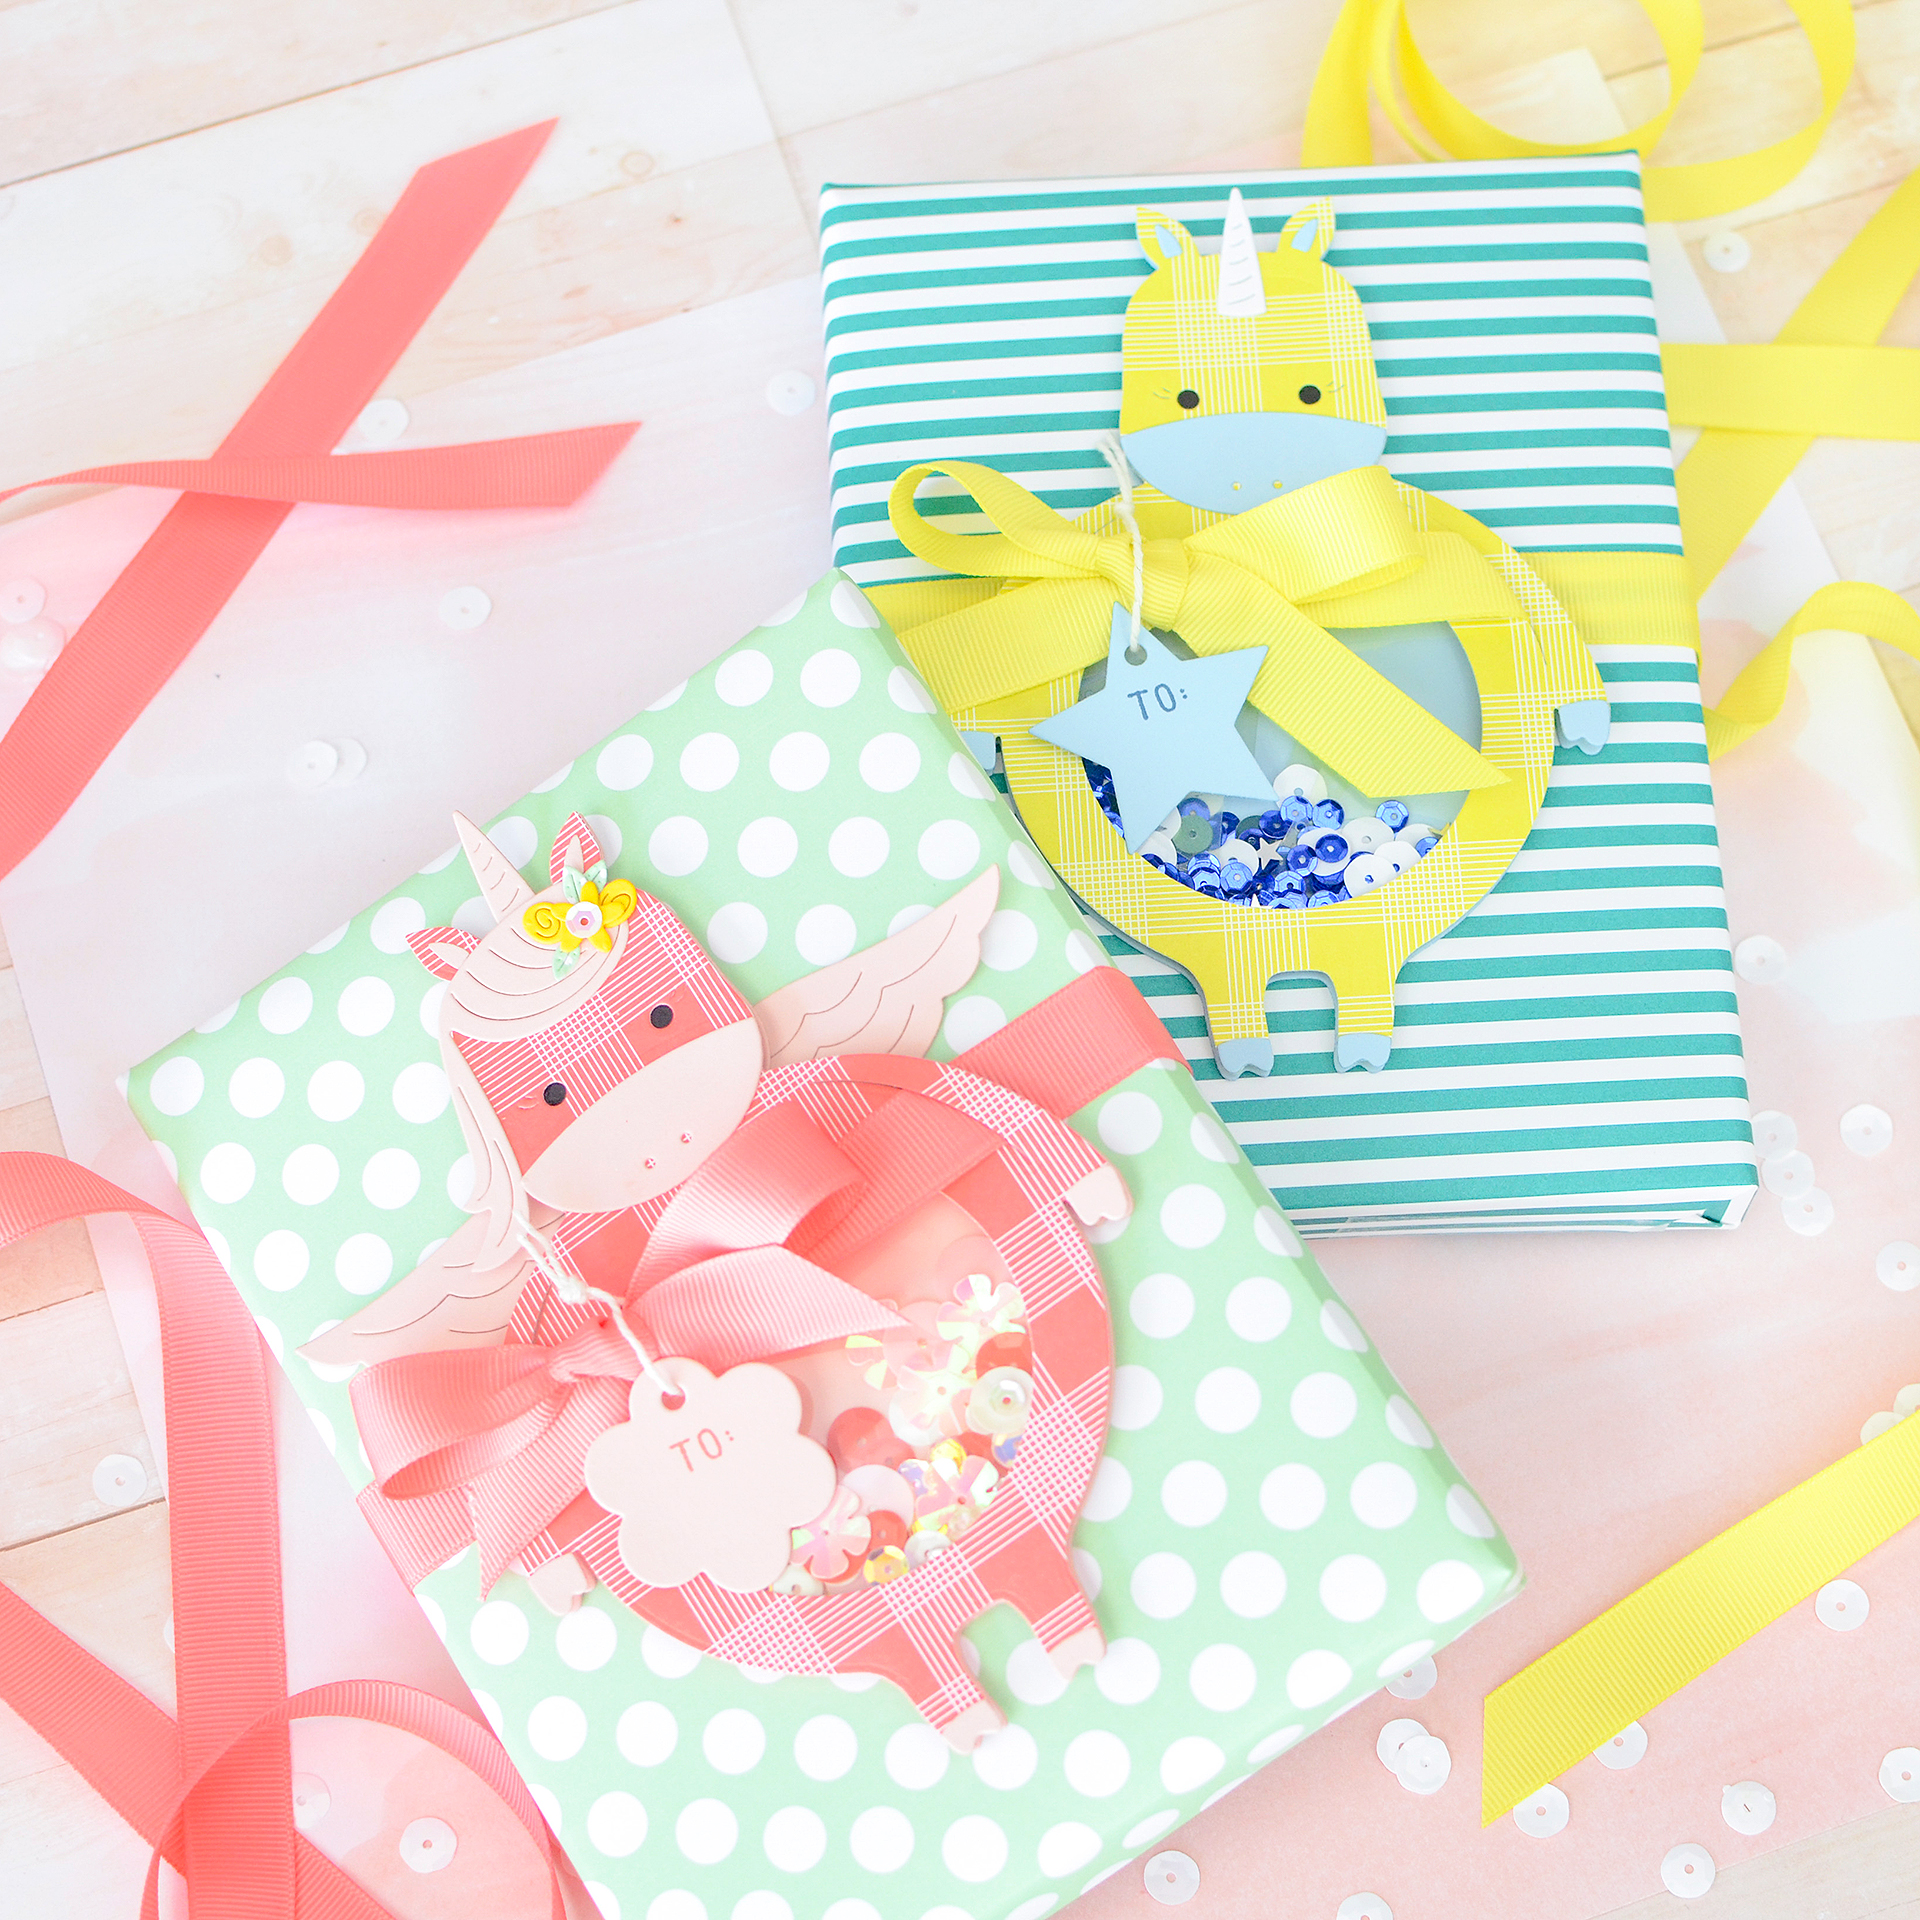
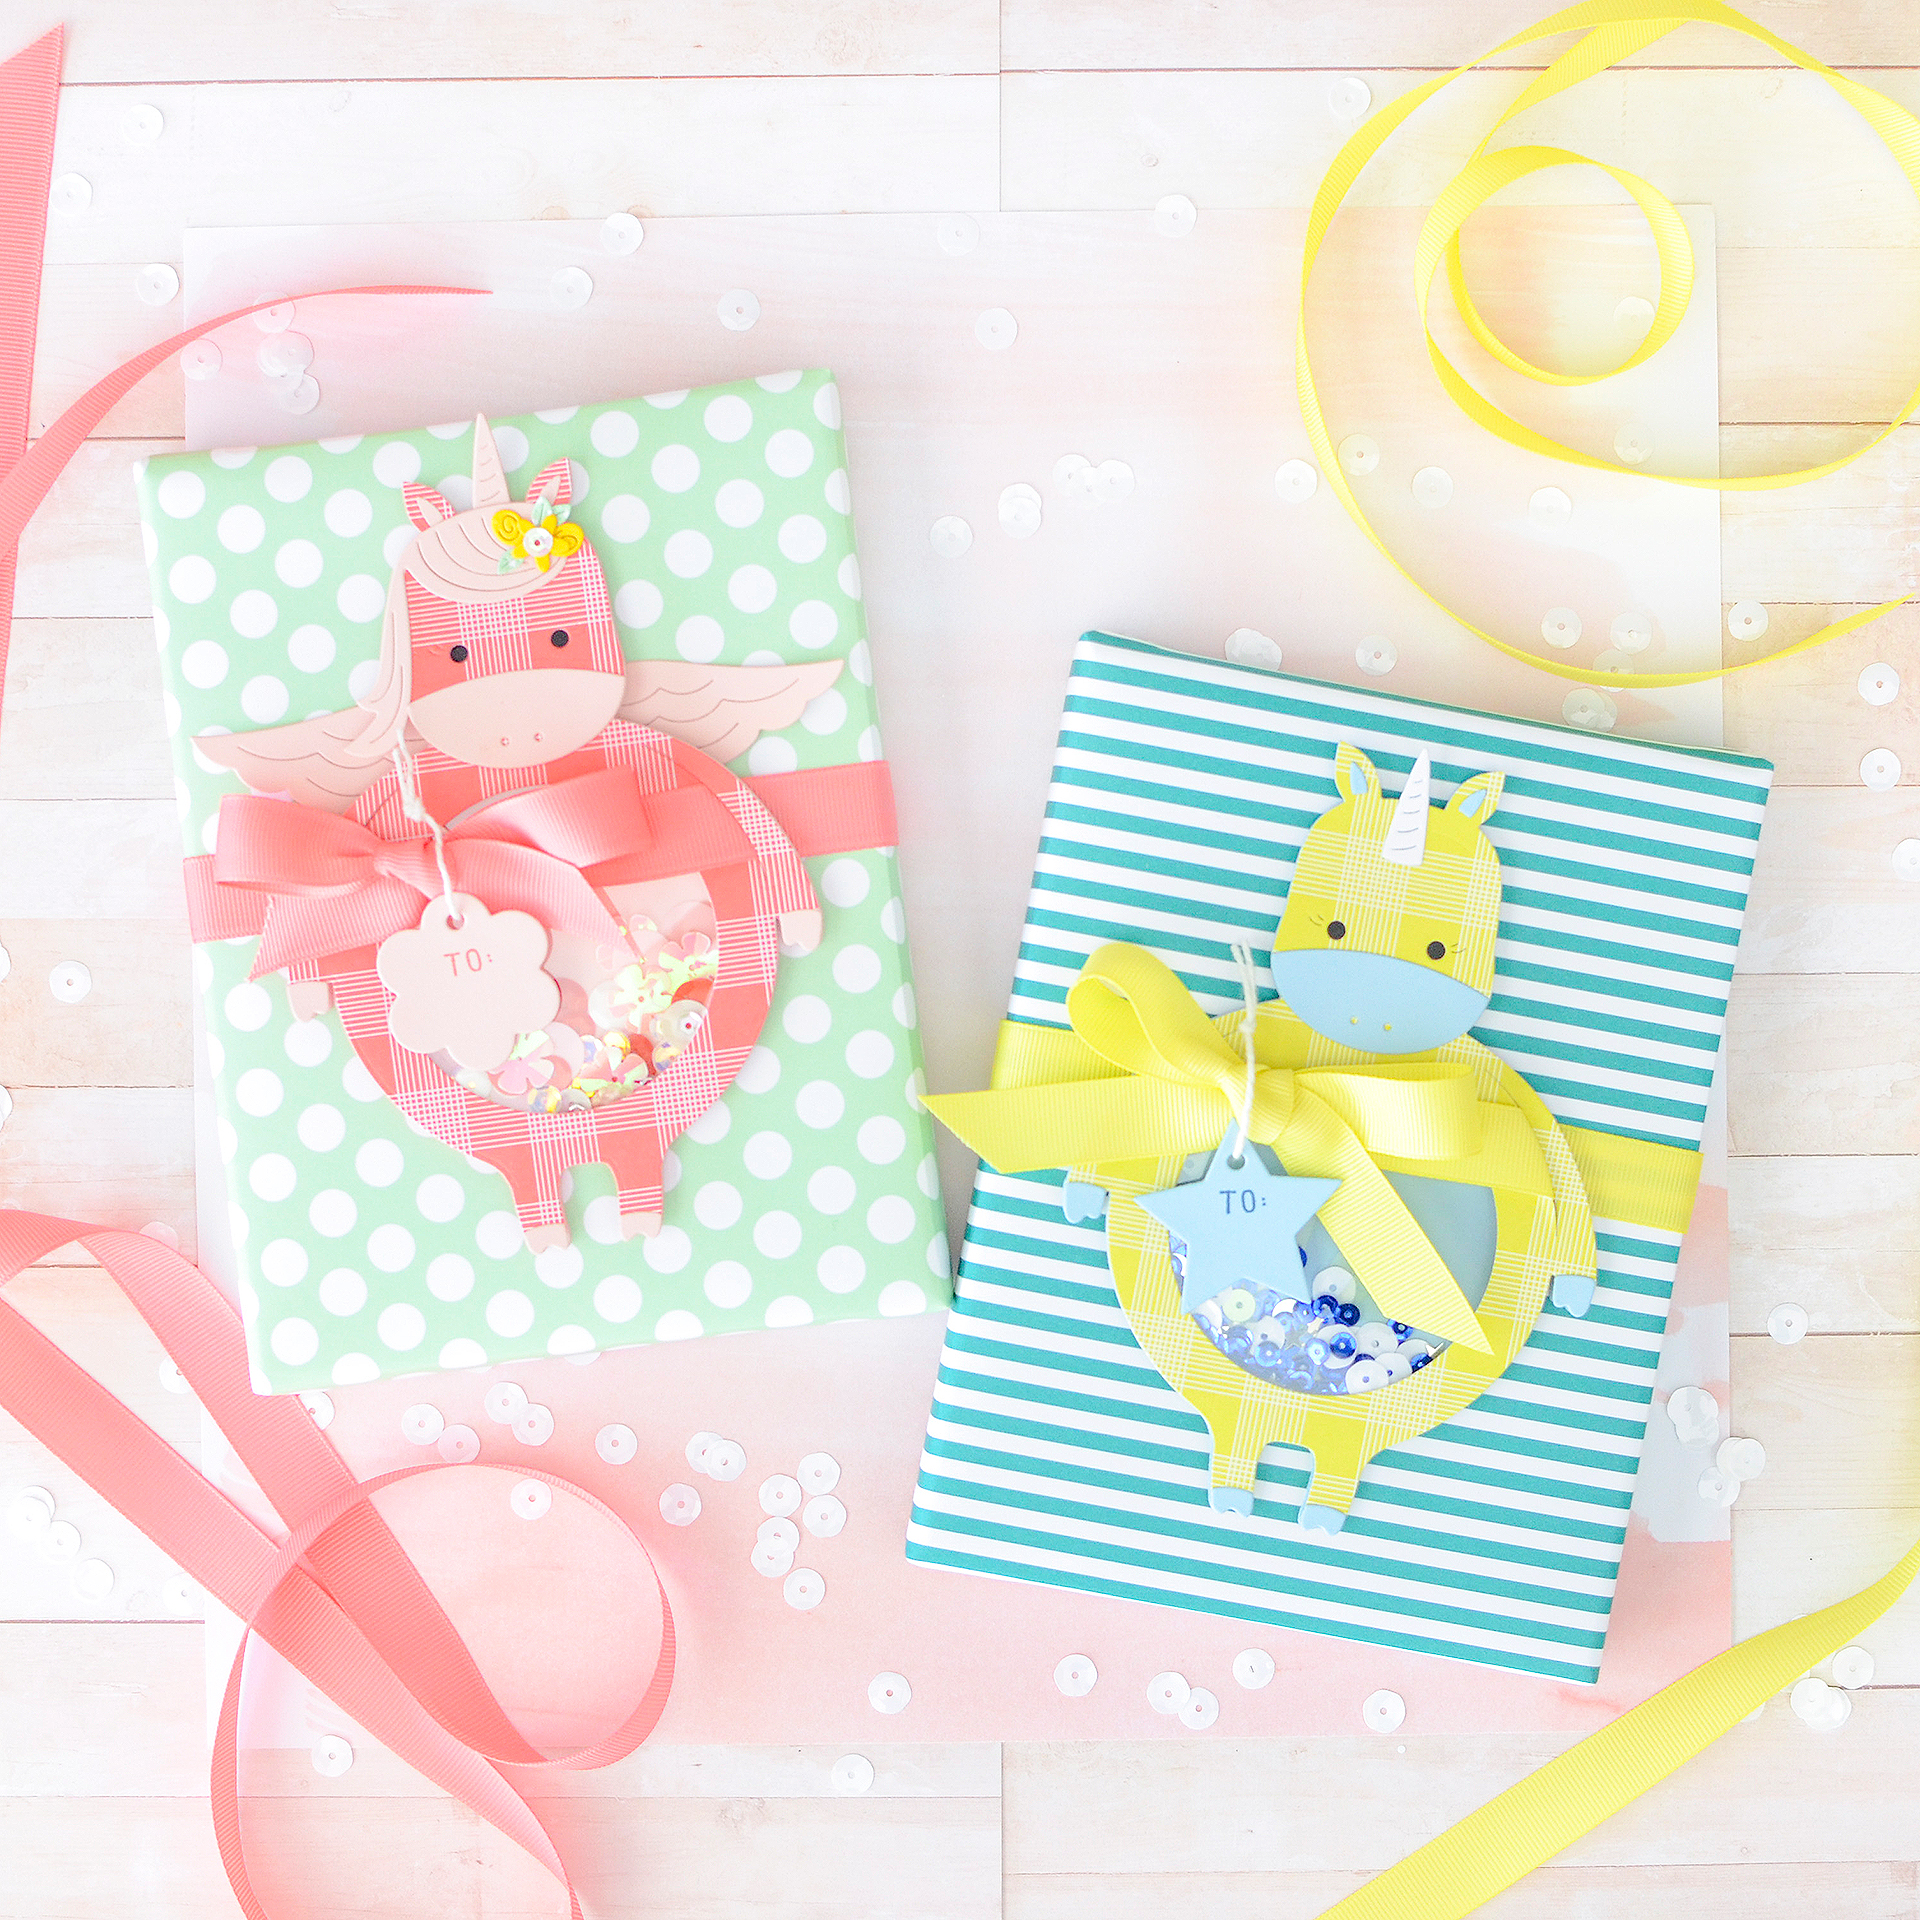
 Hello, friends! I’m so excited for today’s post…I love gift wrapping for kids and babies, so for my project in this month’s edition of Packaging, I’ve turned to the Potbellies series of dies–namely the Unicorn–to create the cutest gift toppers!

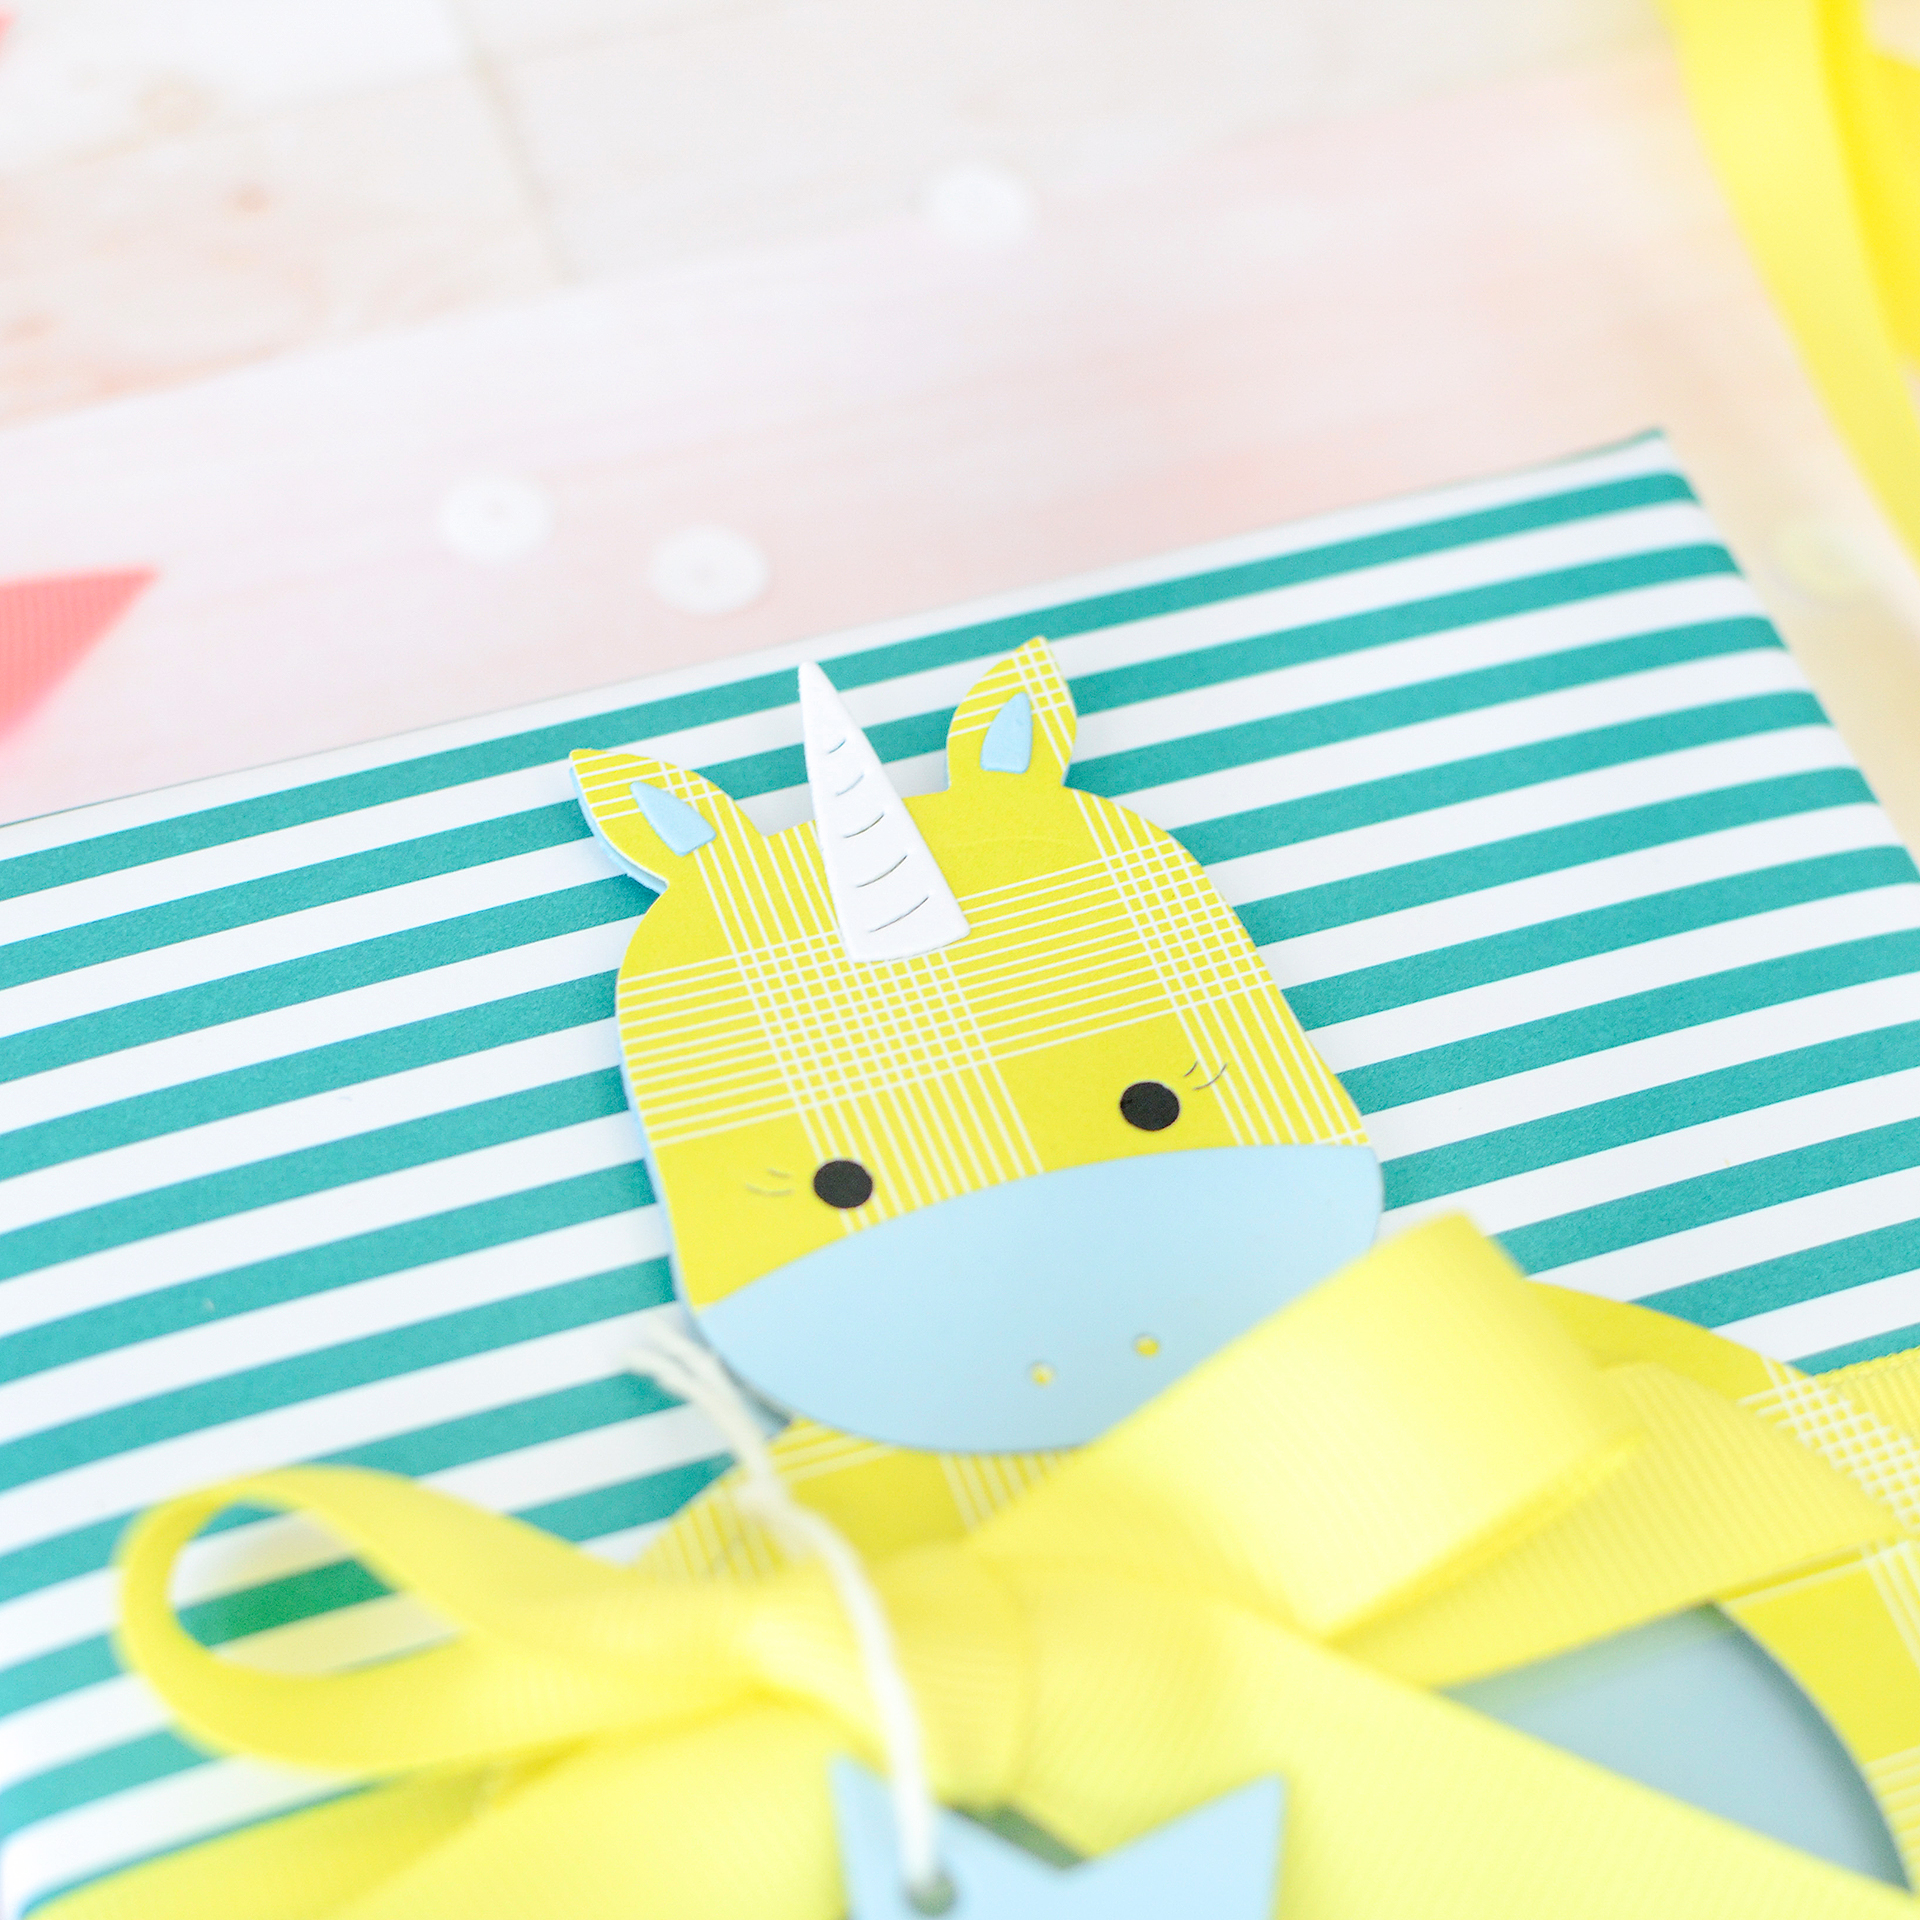
 The Unicorn Potbelly die is incredibly versatile because you can make almost any kind of animal with it. If unicorns and horses aren’t your thing, try a pig, hippo, walrus, puppy, or even a rhino. I even turned one into a scary “character” to appease my 8-year-old son. That one’s up on my personal blog, so after you’re done here, go ahead and check it out, especially if you have similarly aged child who likes scary stuff! Now, choose your desired animal–I went with a unicorn and a rhino–and then get topping!
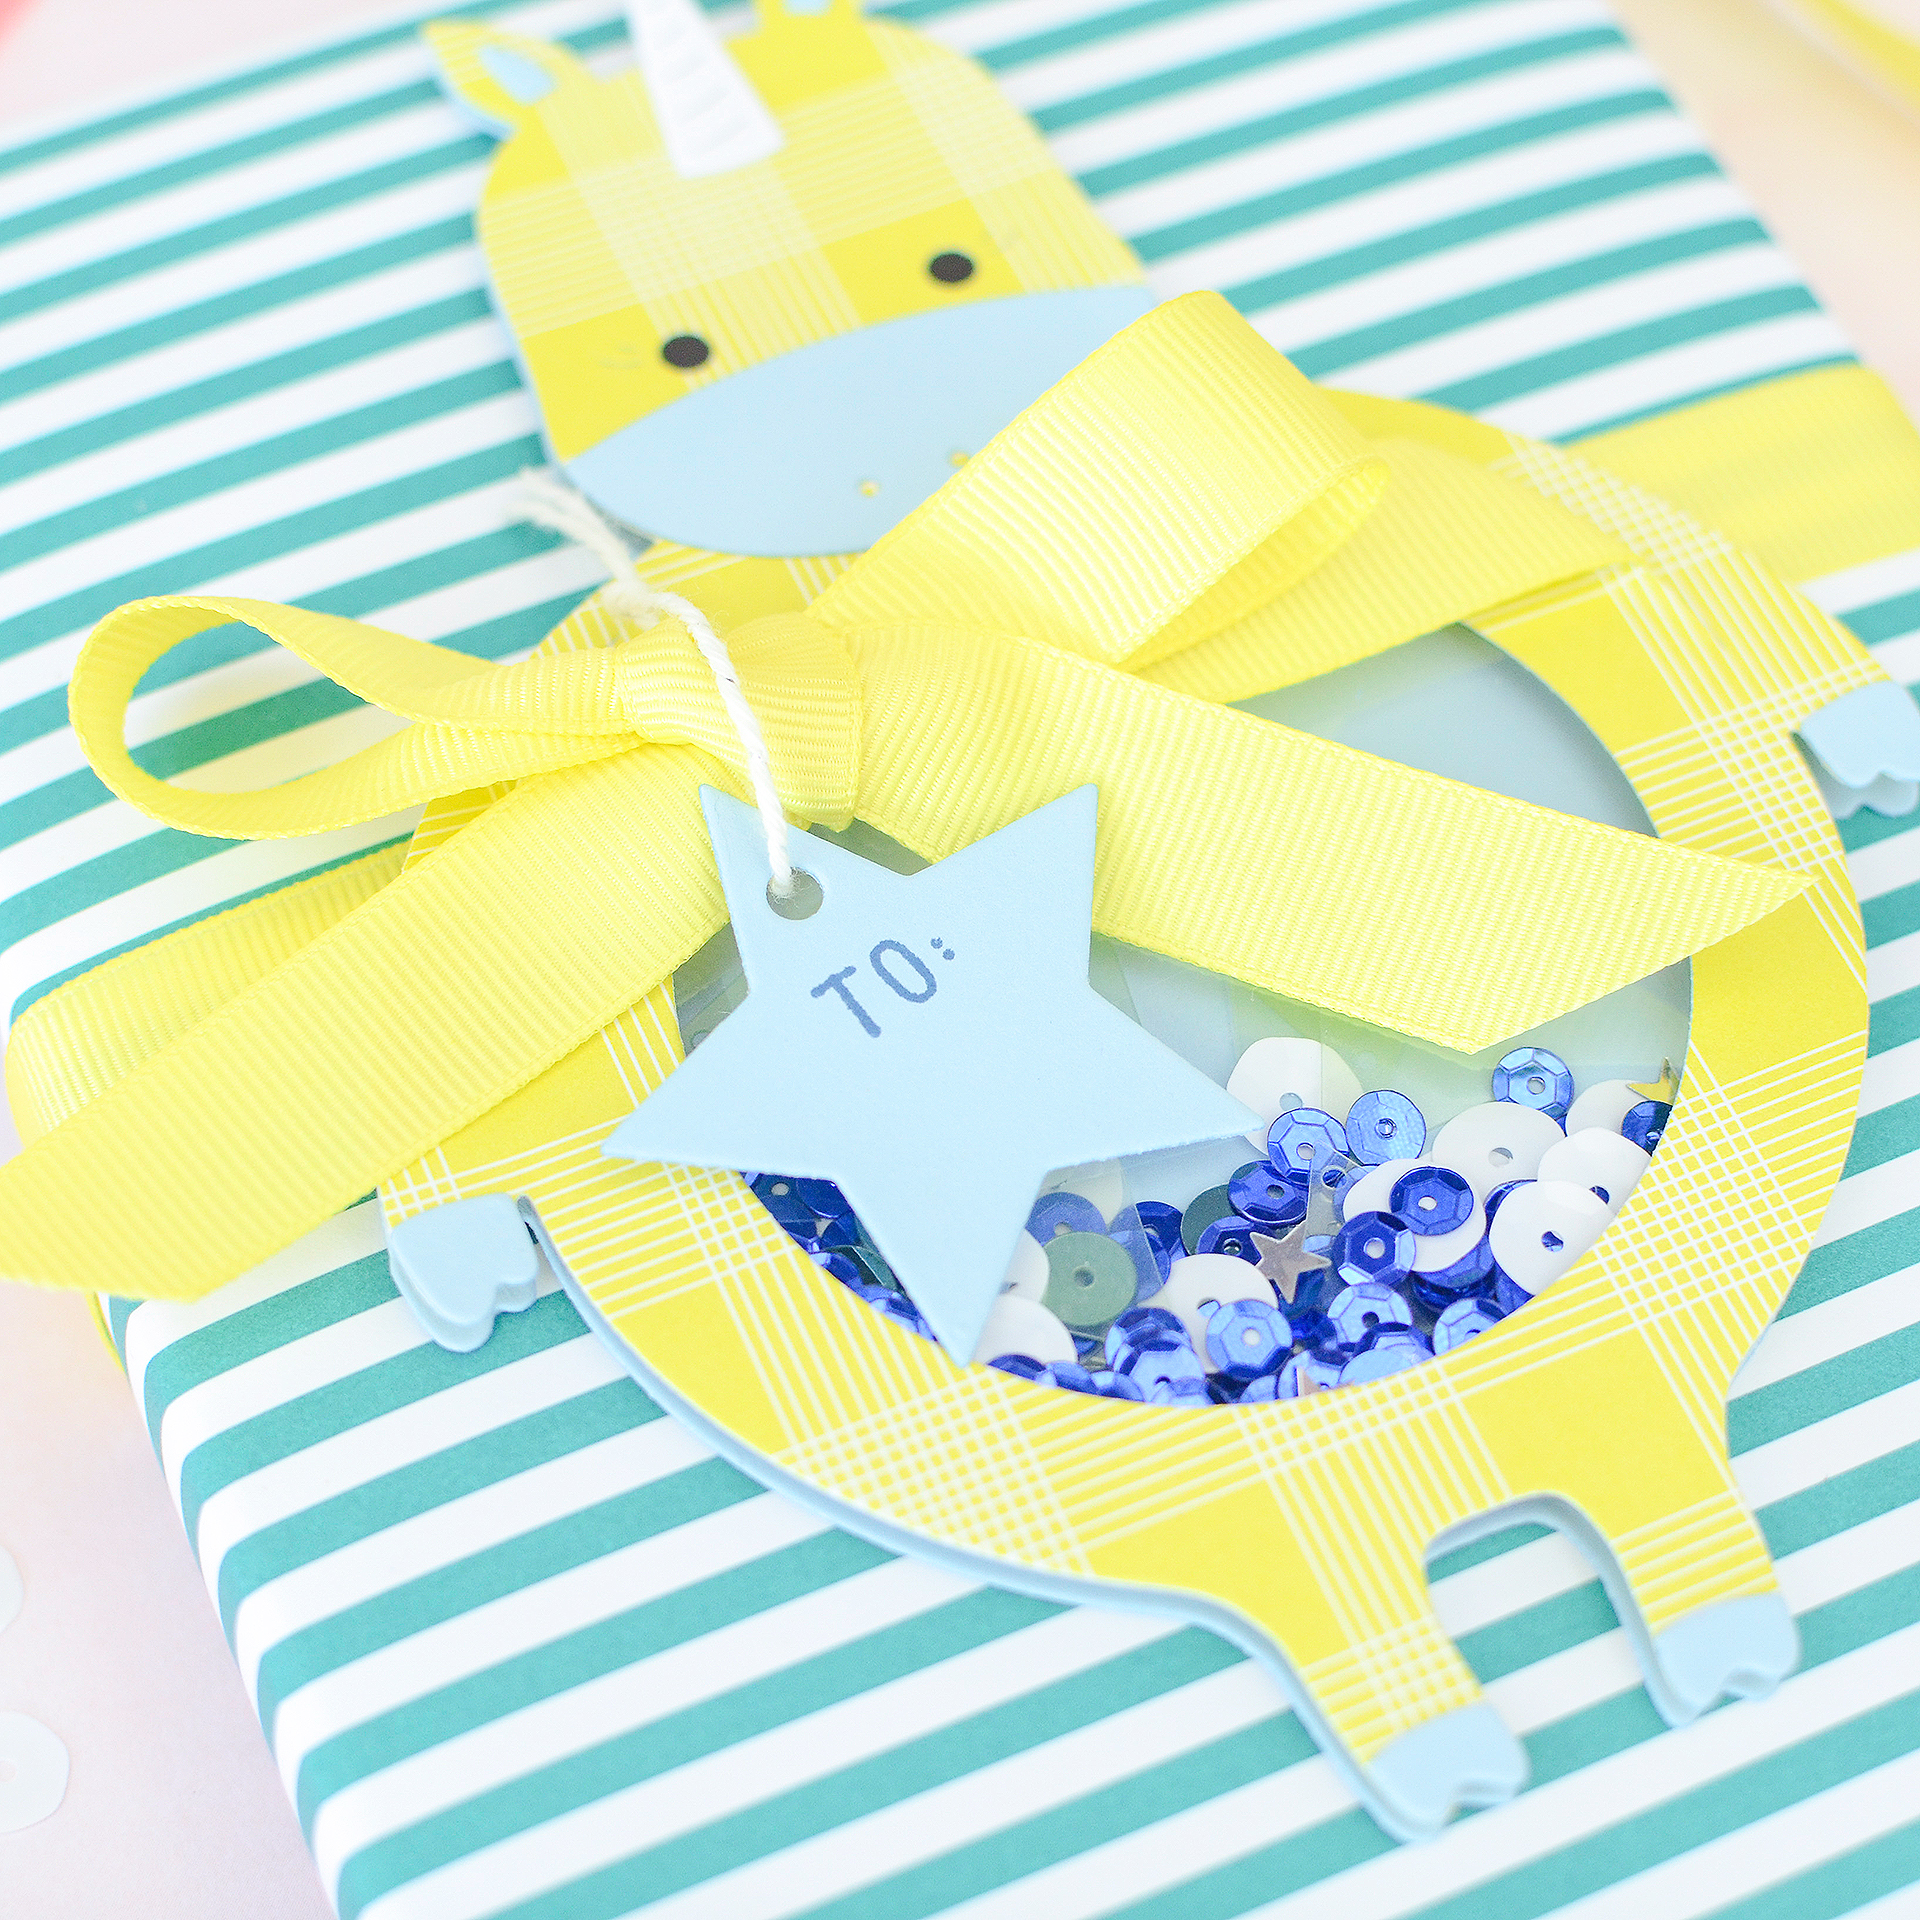
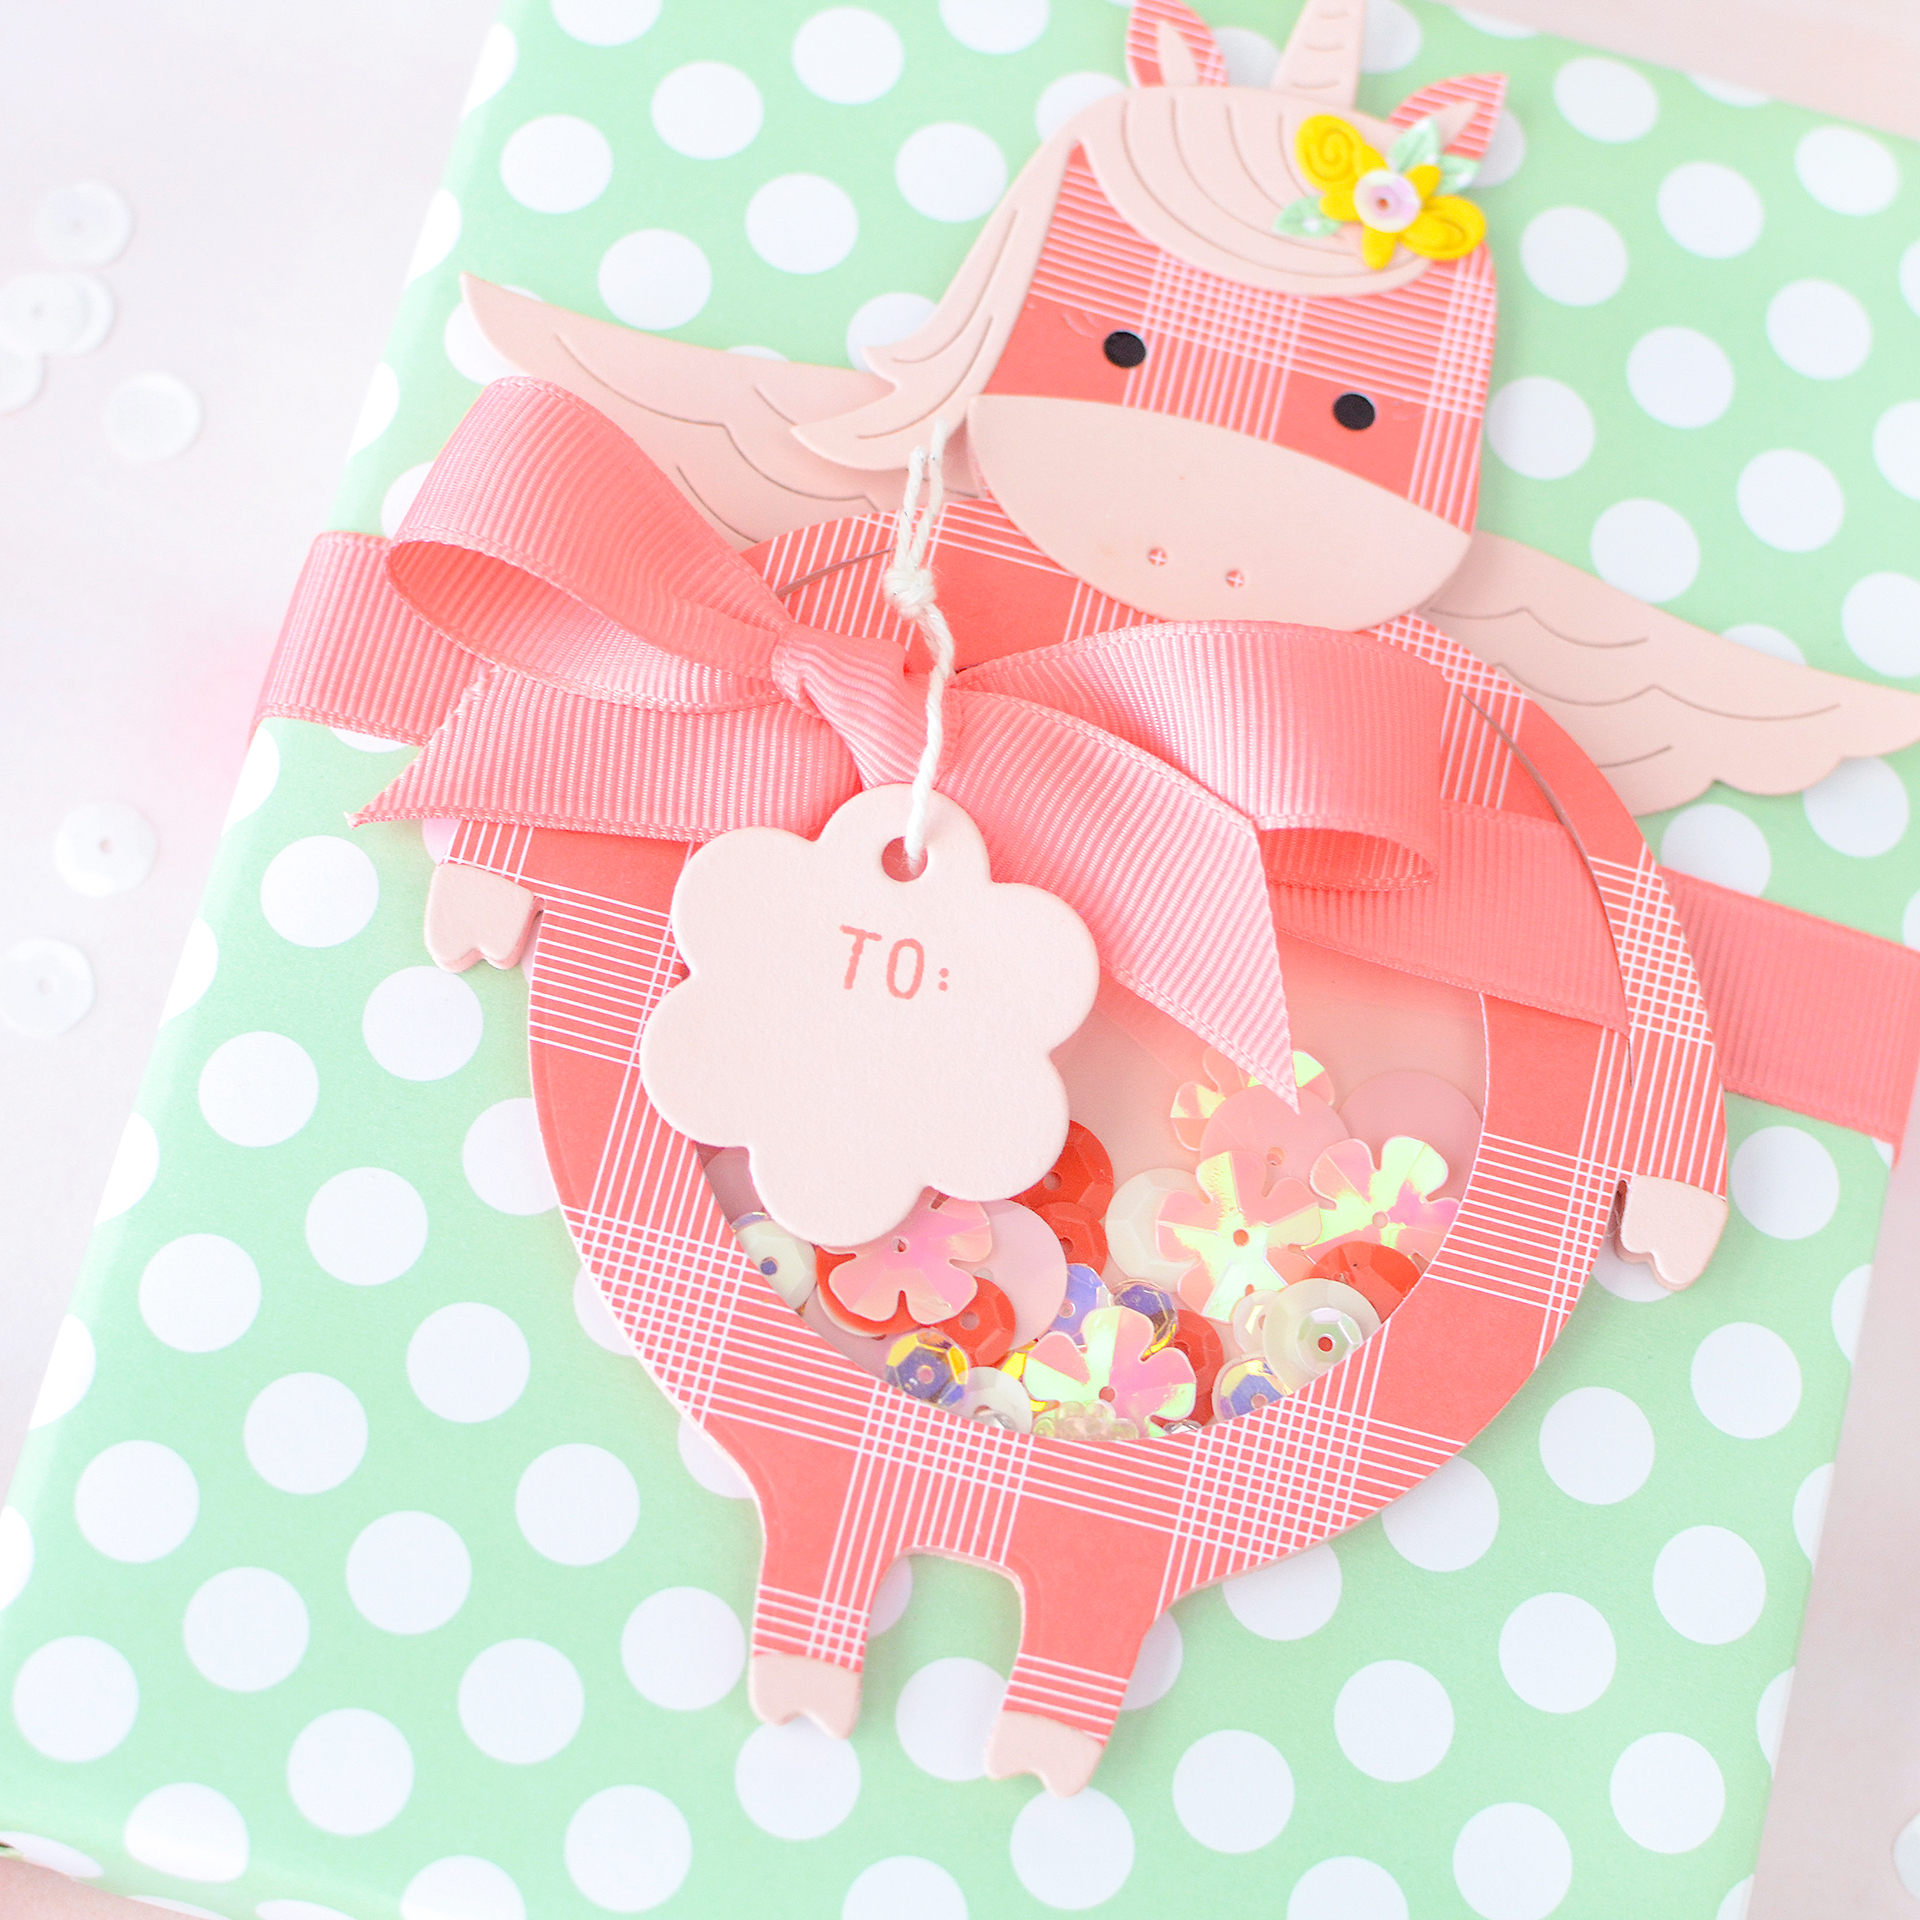
 I deviated slightly from the potbelly plan by not using the clear bubble plastic domes, but instead making them into shakers with clear acetate and sequins. If you’re not sure how to create the shaker part, I’ll give you a quick step-by-step.
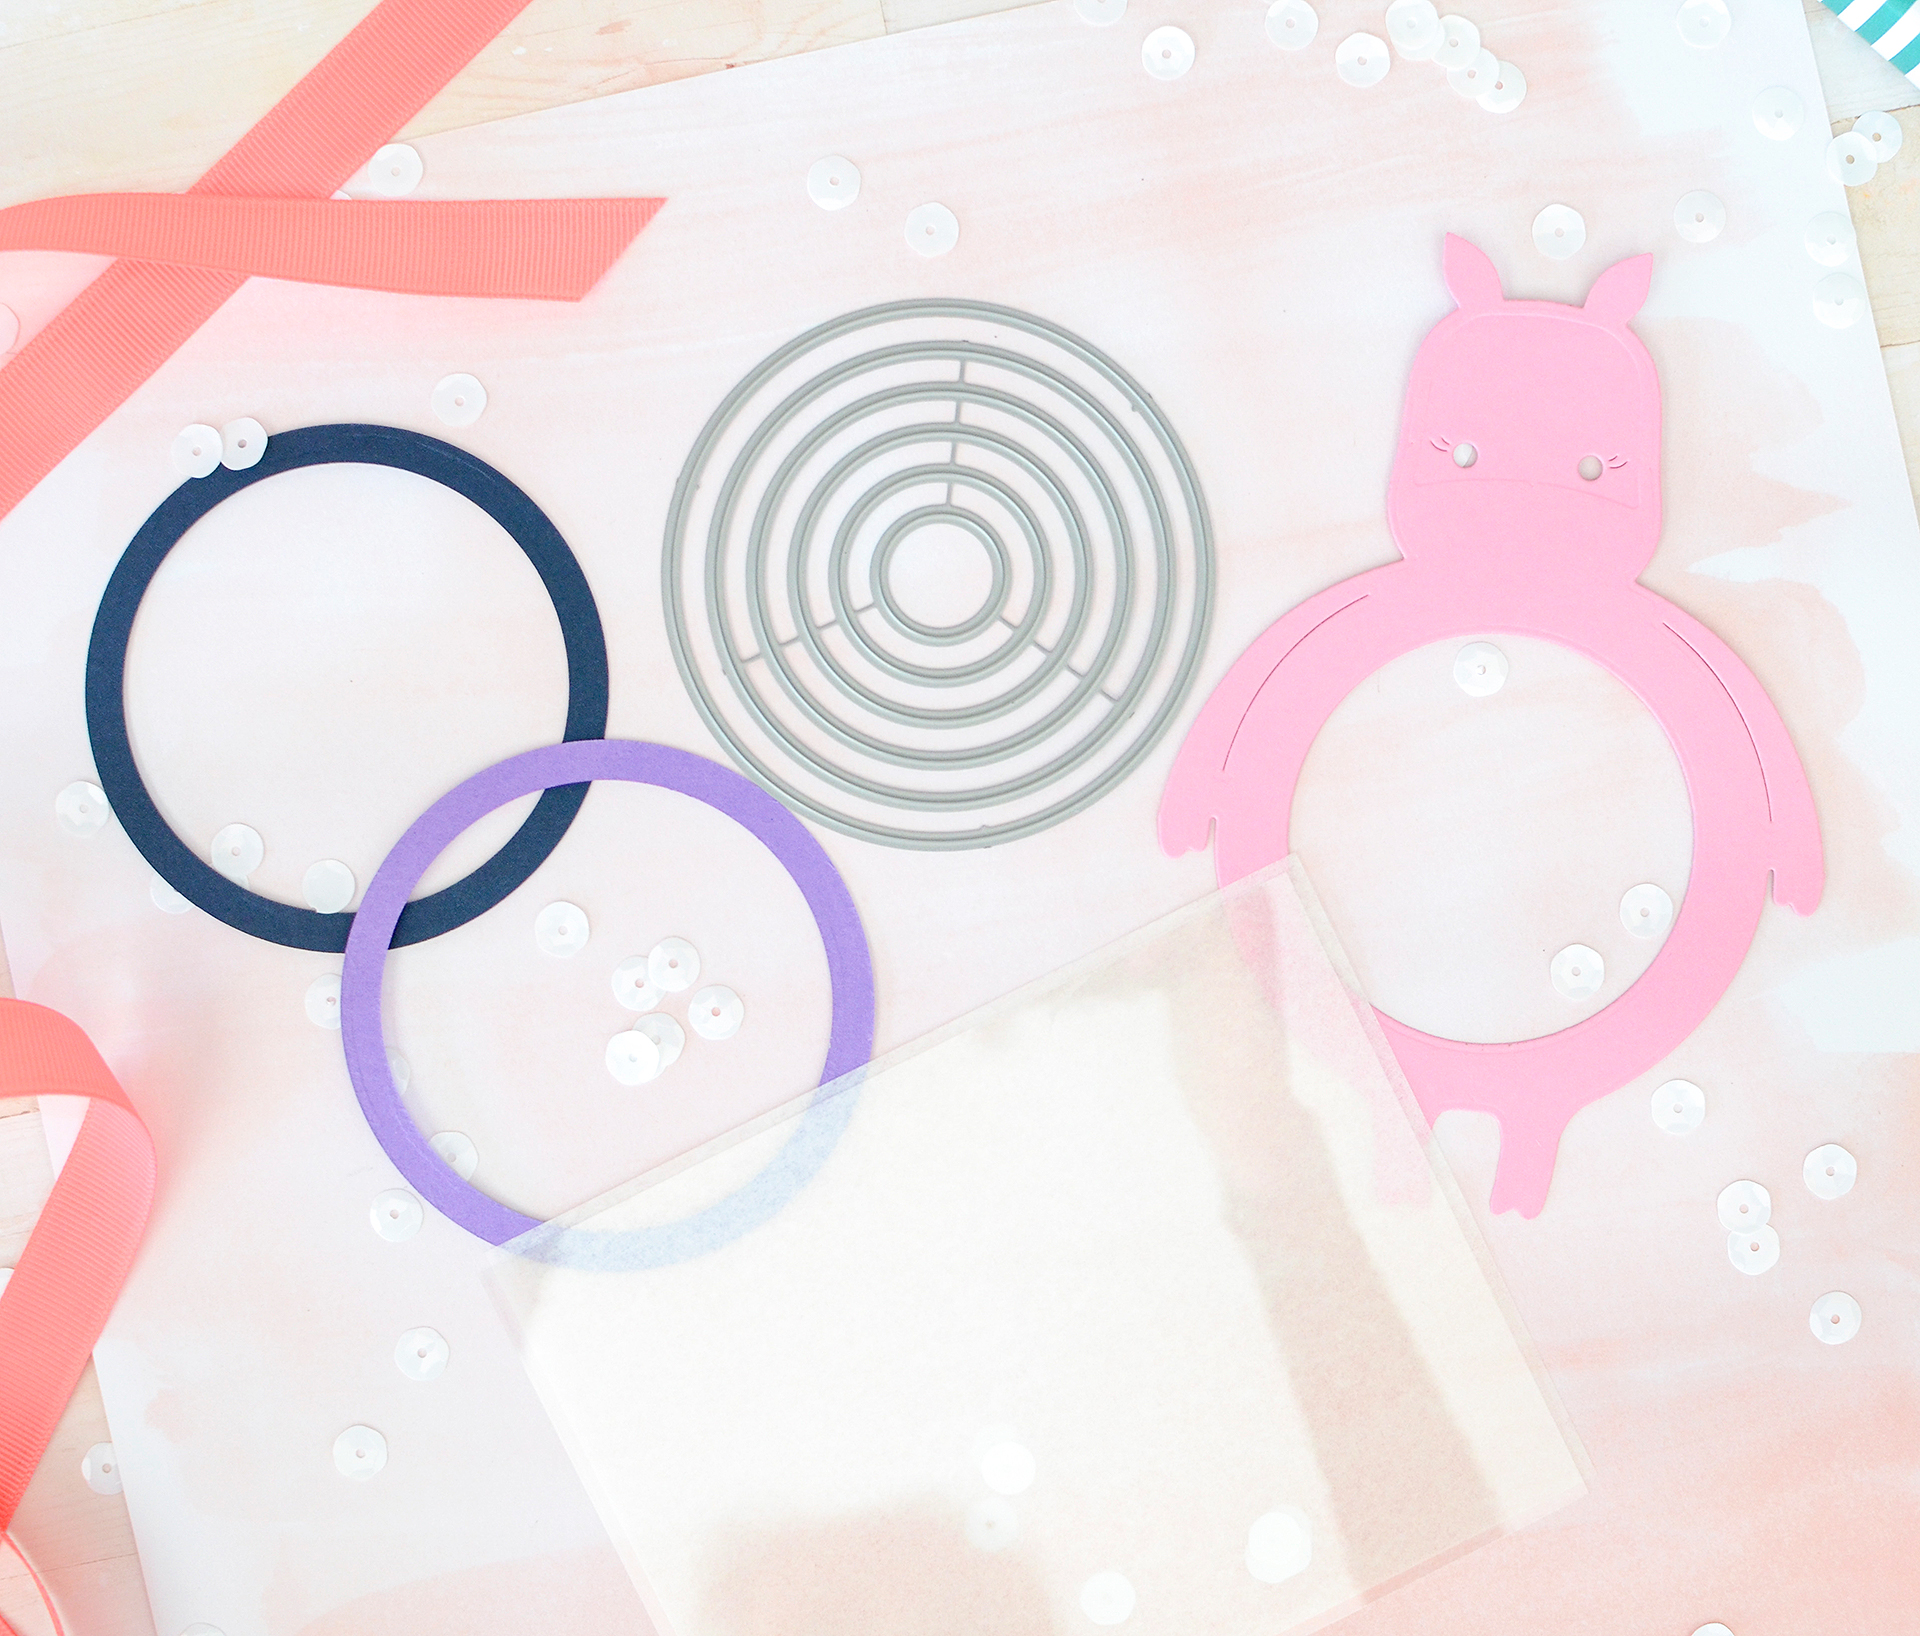 There are a few ways to do it, but I chose this way:
- Start by cutting out 5-7 cardstock rings. To get the ring, I used the Nesting Basics: Circles dies. I’ve kept the majority of my die set wired together, so using the 2 3/4″ nested inside the 3 1/4″ size gave me the perfect sized ring. If you’ve separated your circles, no problem, just use a little repositional tape or magnets to hold them in place while you run them through your cutting machine.
- Adhere the rings one on top of the other until you have a stack.
- Adhere the stack to the bottom layer of your potbelly duo.
- Fill with your preferred mix of shaker materials (sequins, rhinestones, confetti, etc).
- Cut a full circle of clear acetate the same size as your ring stack. In this case it’s a 3 1/4″ circle. (I had to un-nest that size die and separate it from the others at this point.) Adhere the circle to the ring stack to contain your shaker mix.
- When your top layer potbelly has been decorated, go ahead and adhere that over the shaker; don’t forget to cut out the hole in its belly so the insides are visible!
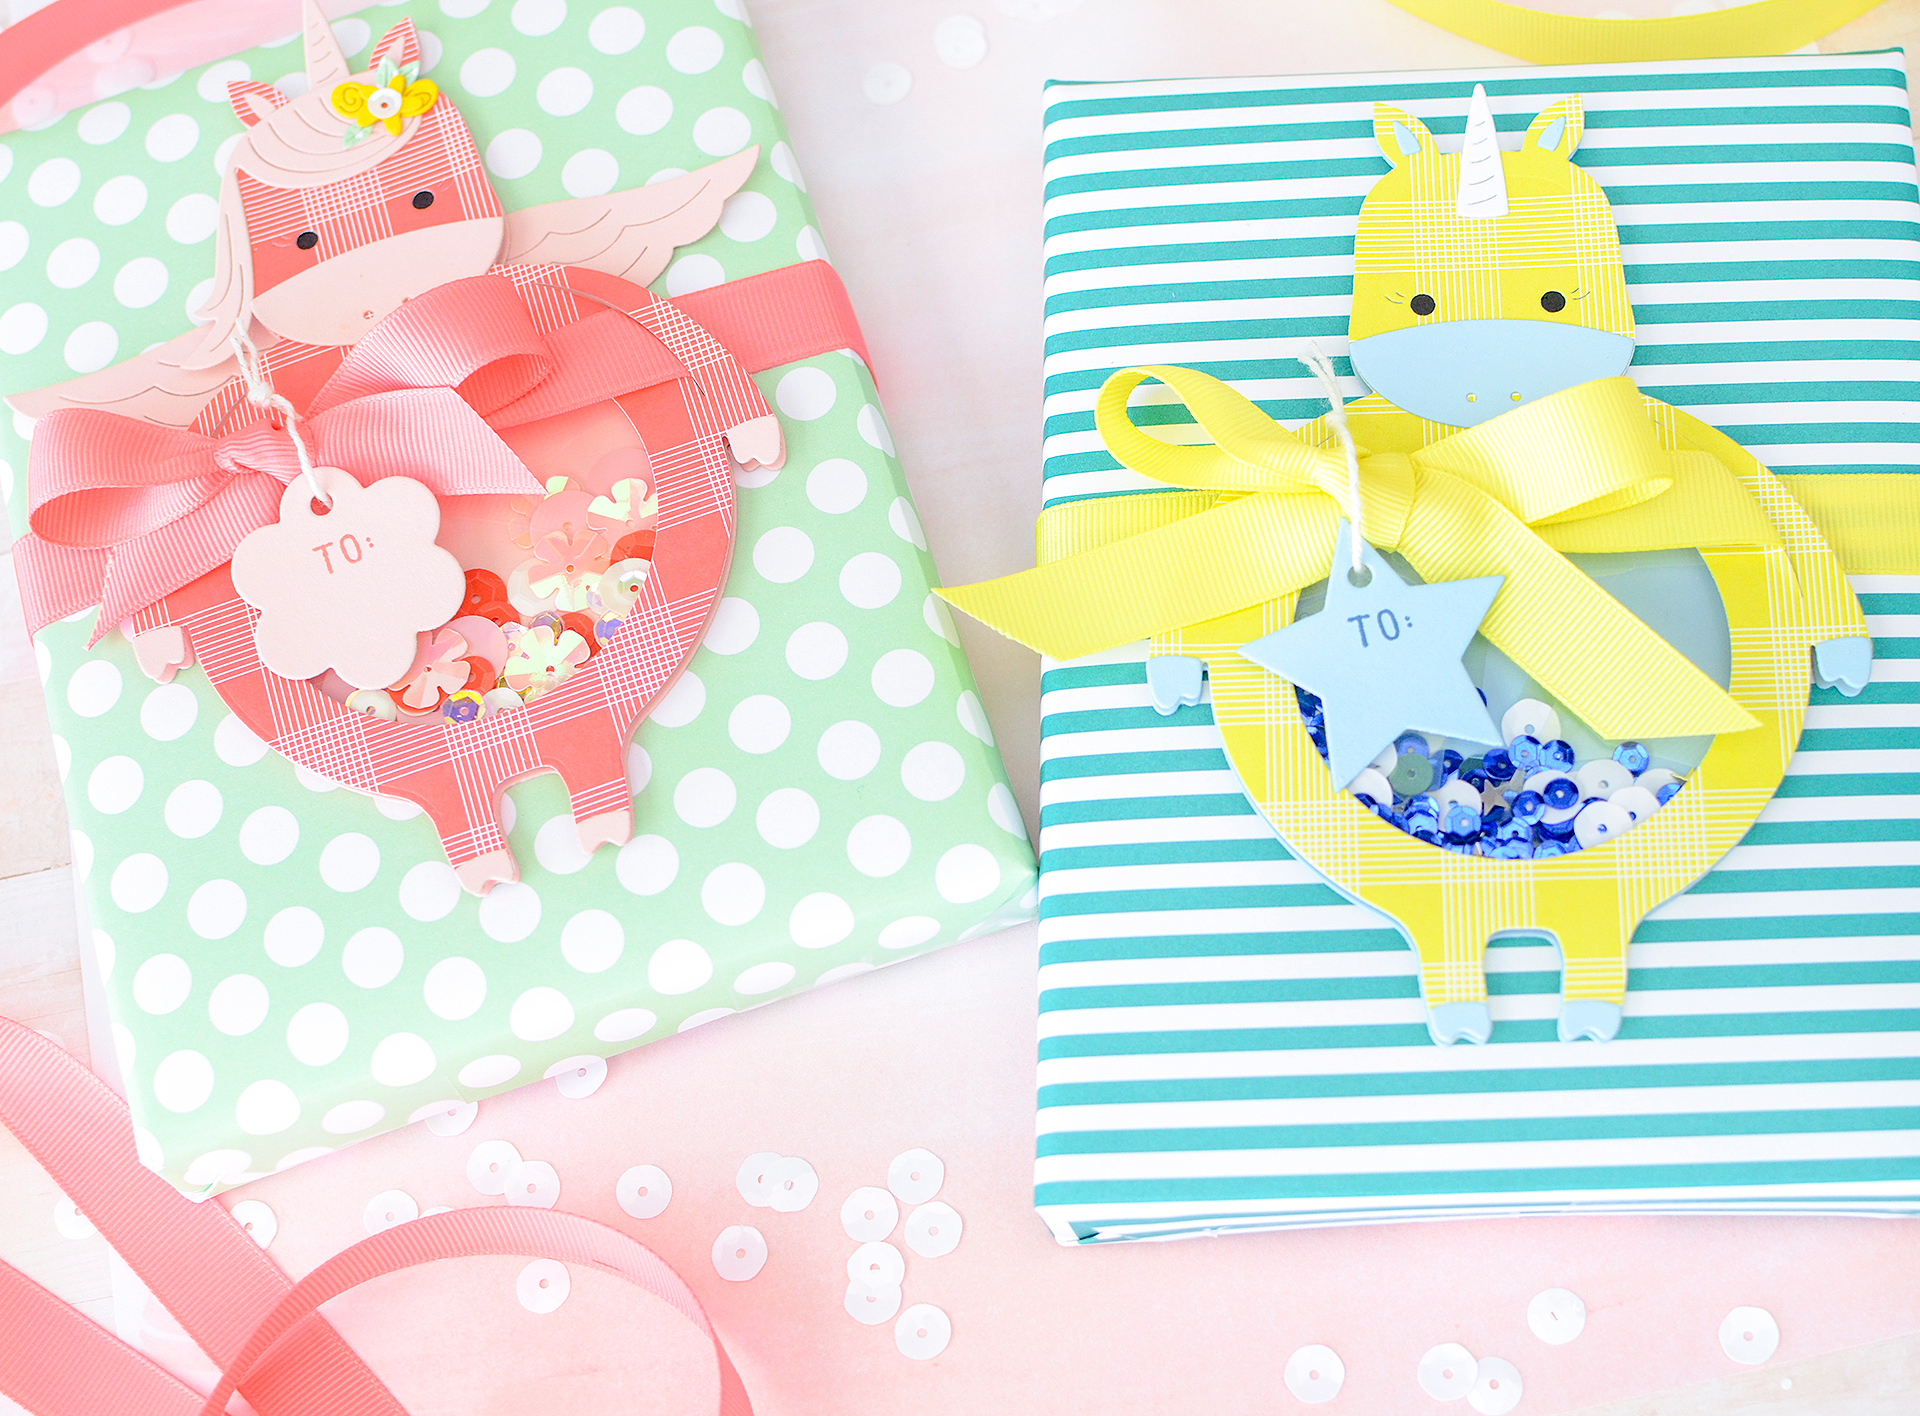
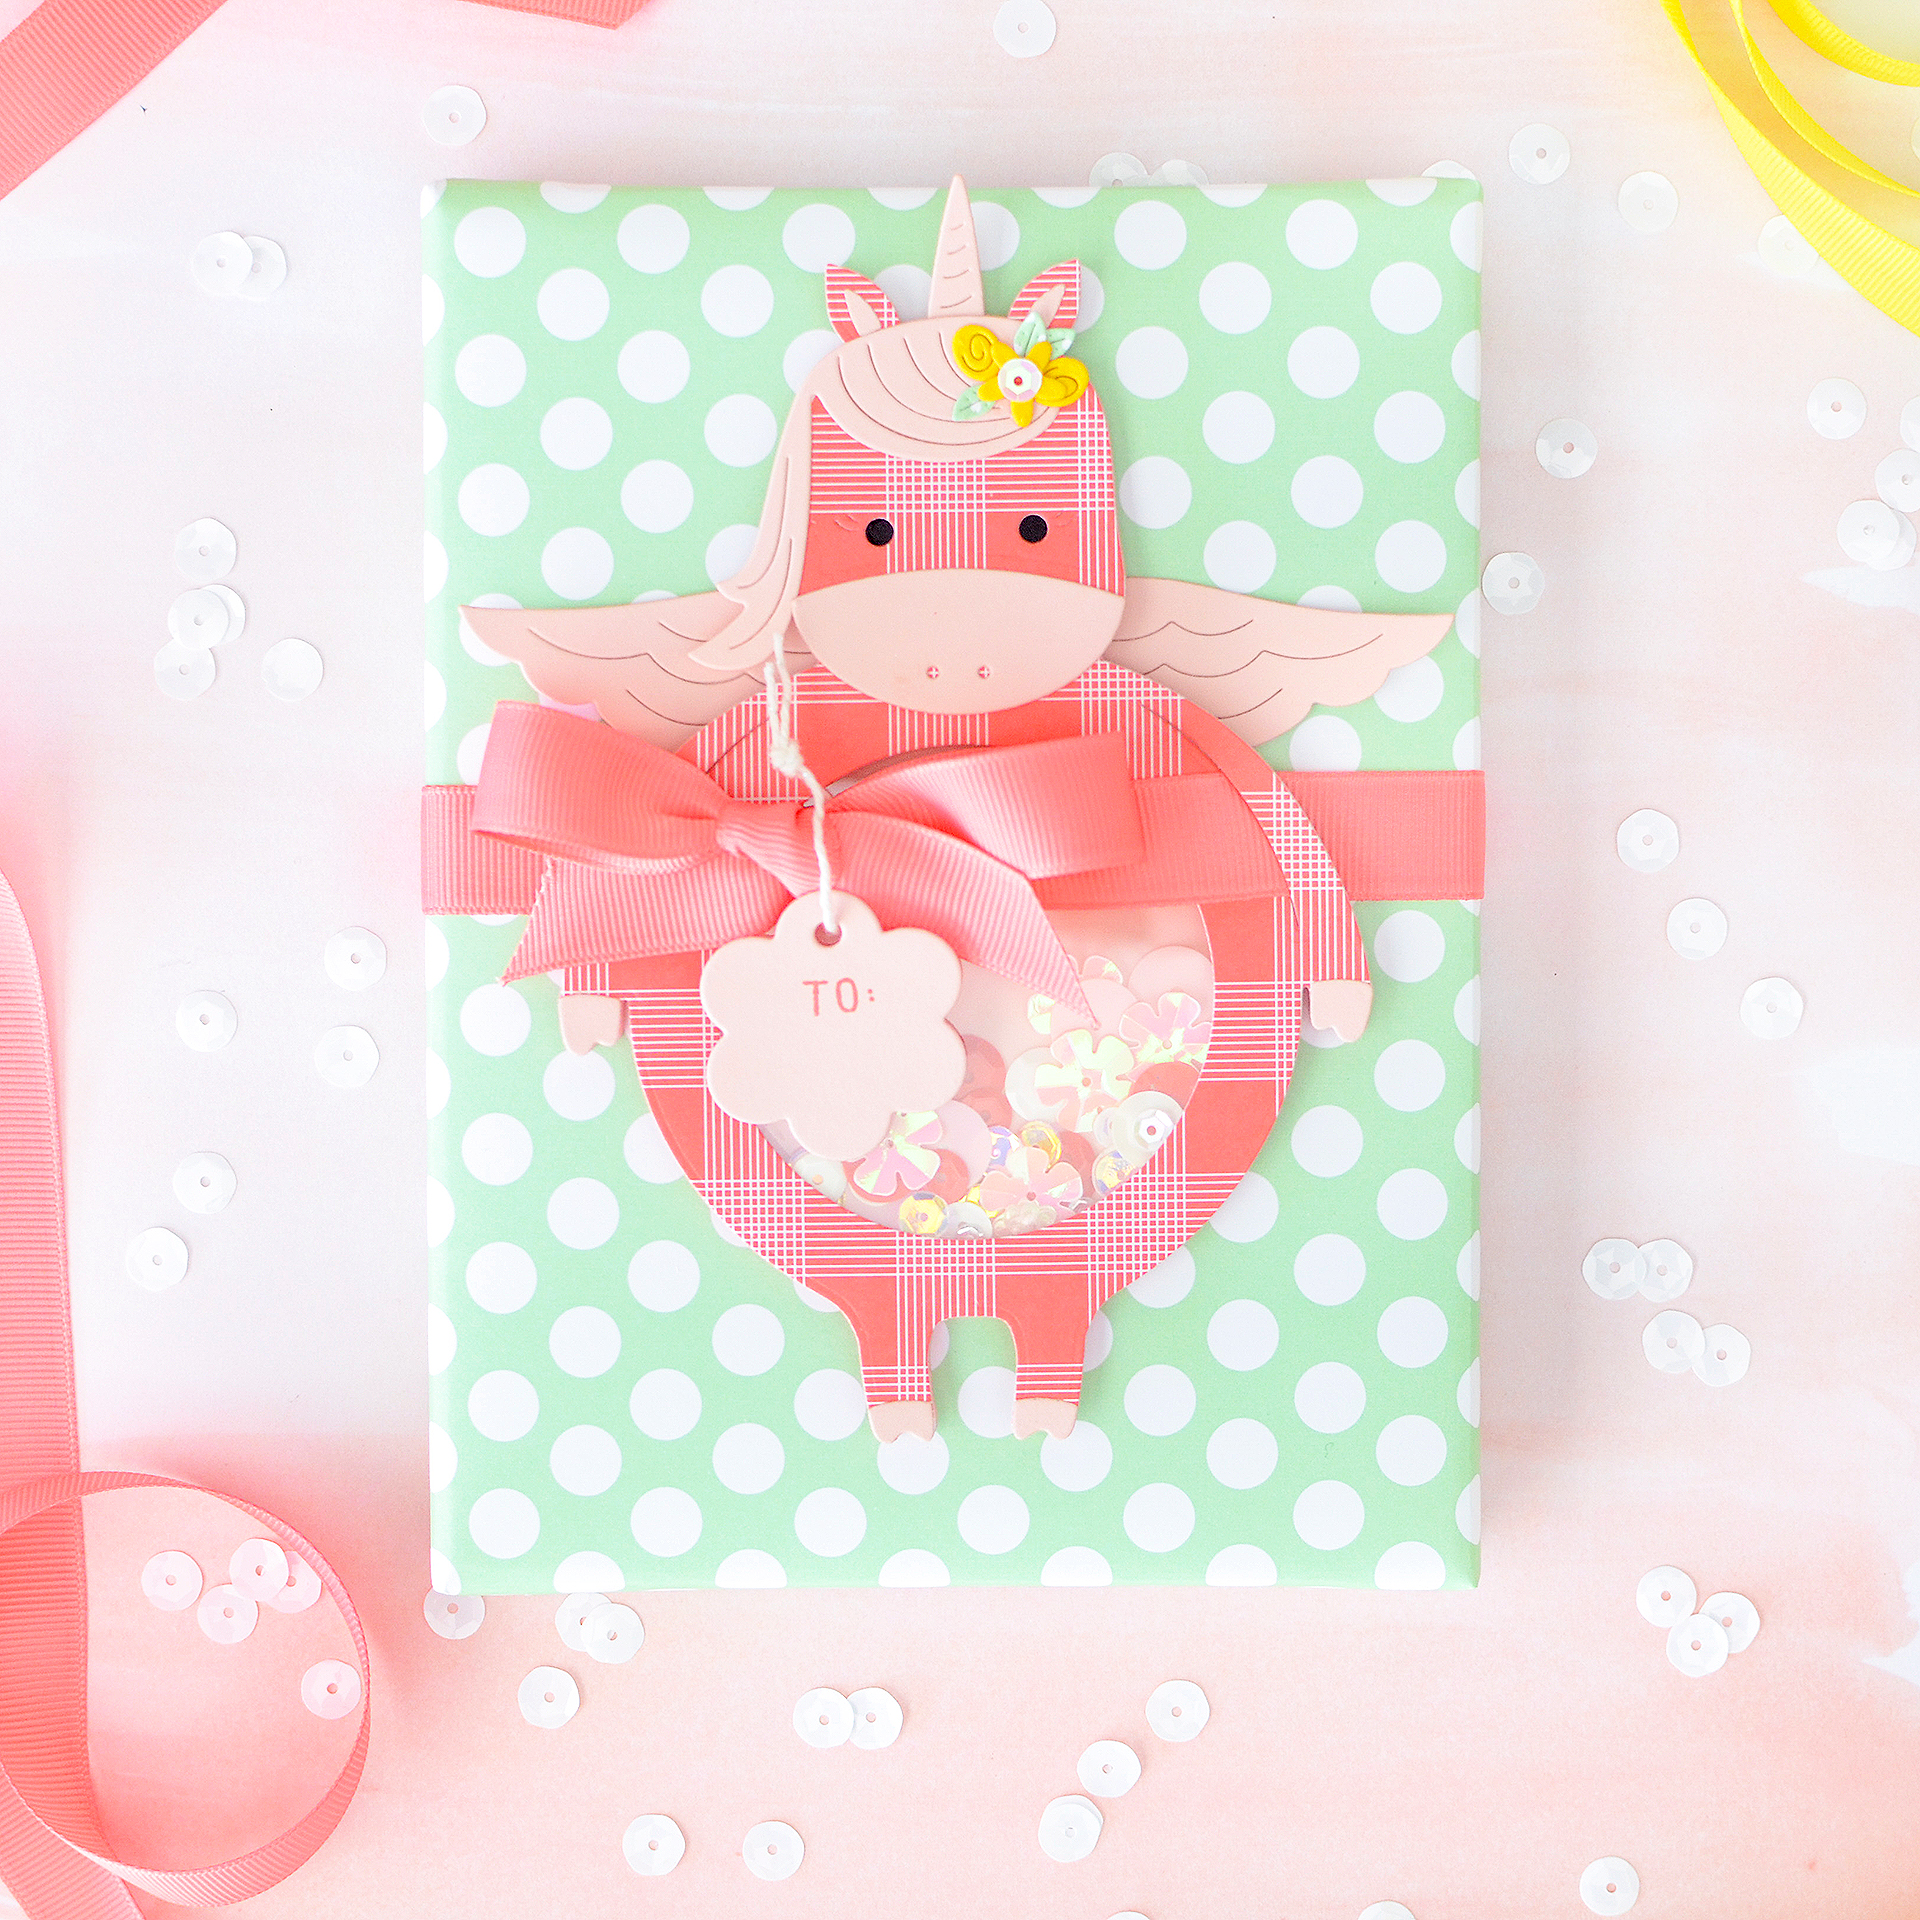
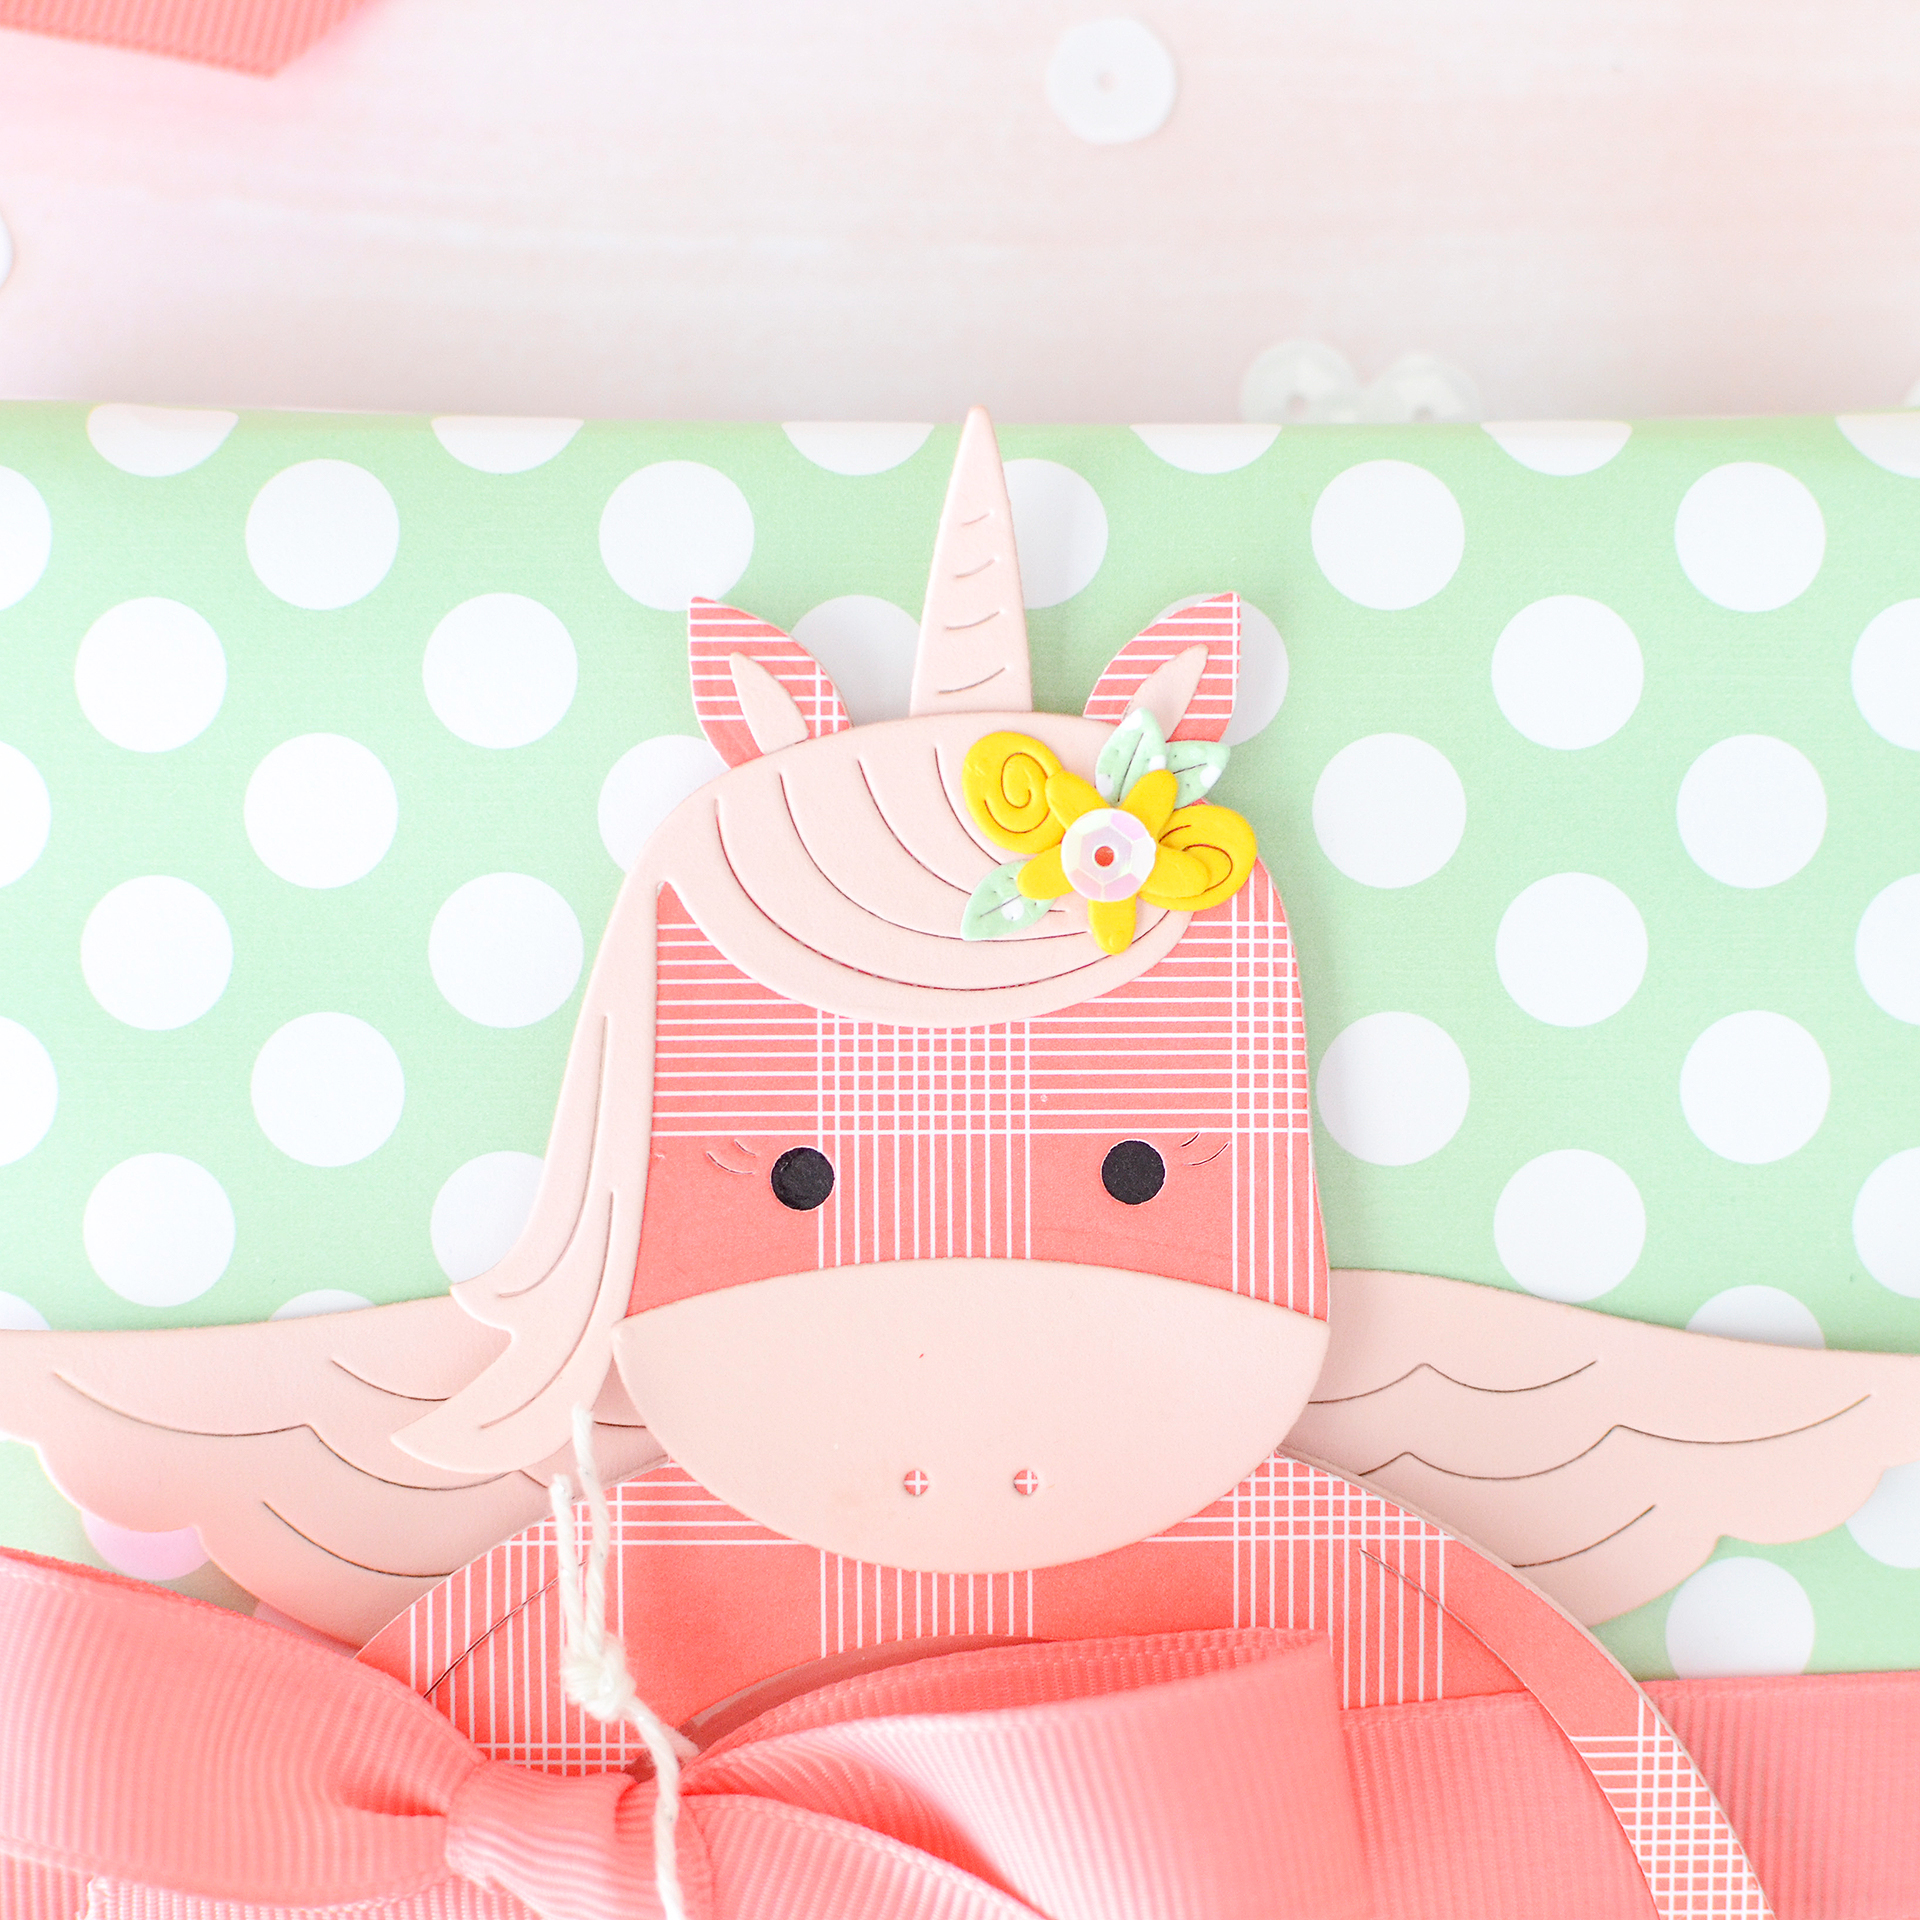
My first animal is a pink unicorn. I created it with Sweet Blush cardstock and Berry Sorbet Bitty Big patterned paper, adding all of the cute little details like hooves, ears, and hair. Of course there are wings and a horn, technically making it an alicorn, according to my 6-year-old daughter.
 The second animal, the rhino, is cut from Spring Rain cardstock and Limeaid Ice Bitty Big paper, with its horn made from white stock. He’s not as fancy as the unicorn, excuse me, alicorn, but he’s just as cute!
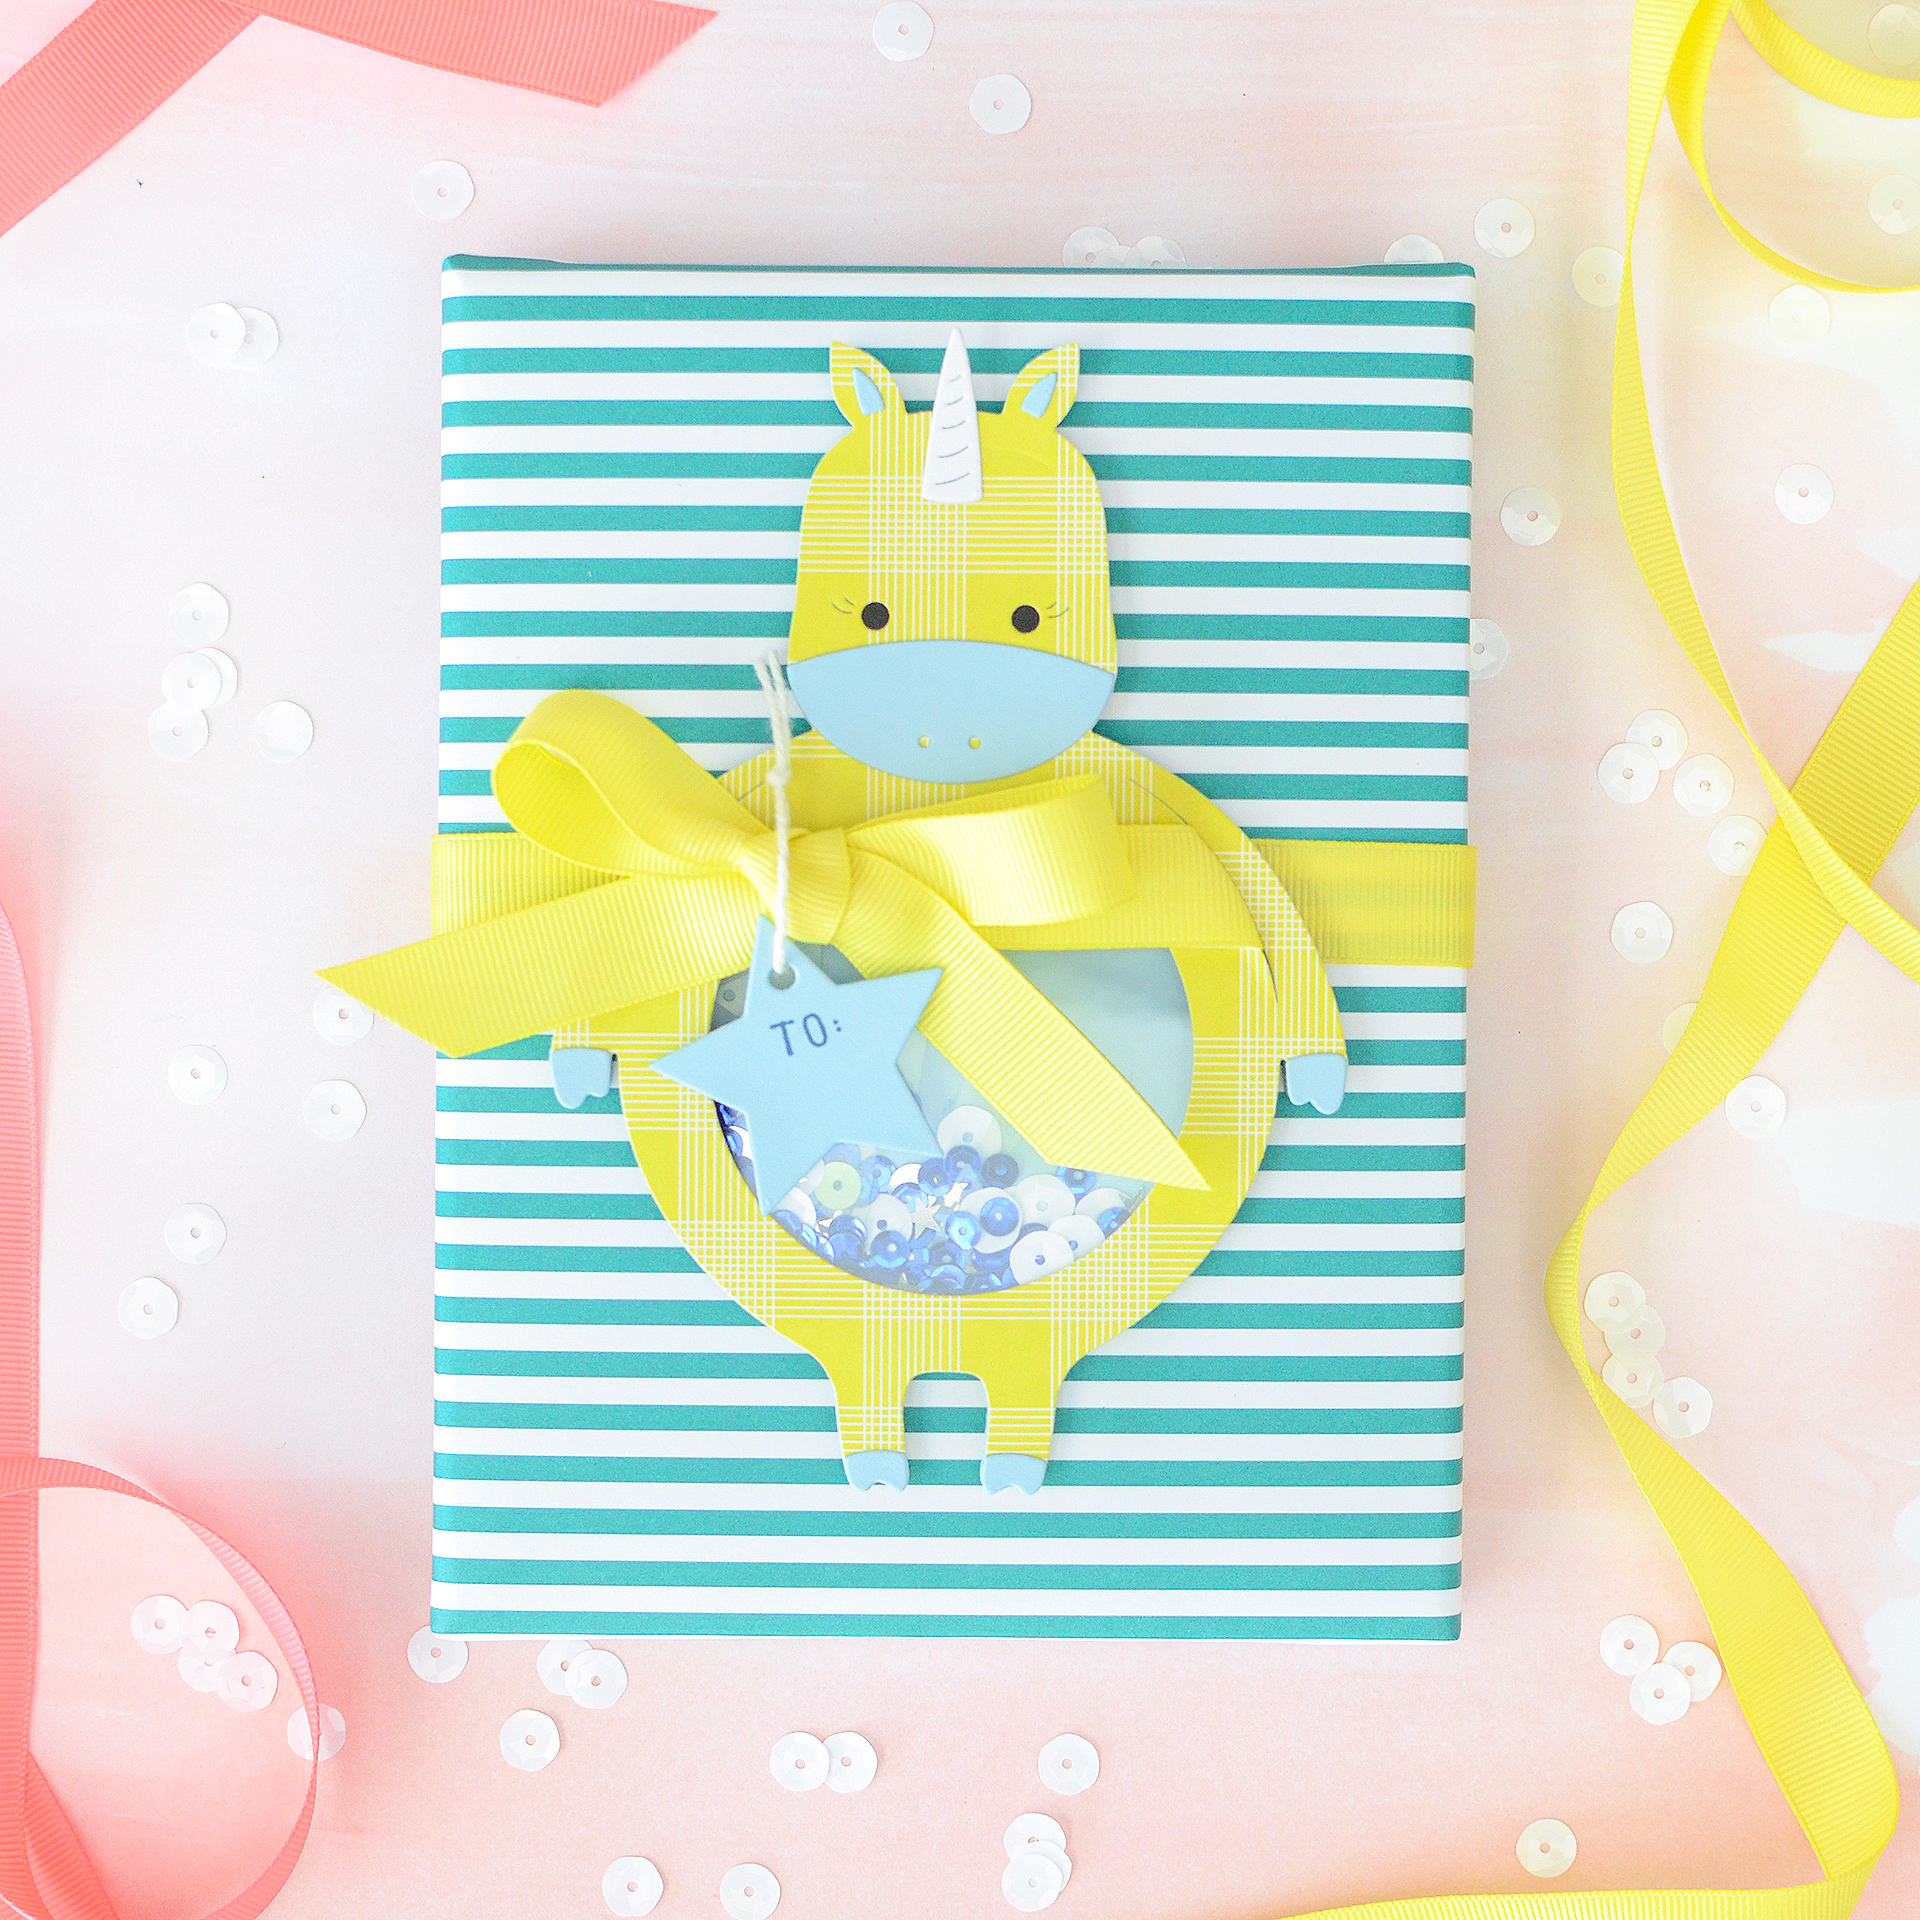
 Now comes the packaging part, which is always my favorite! I wrapped some small boxes in Bitty Big papers–it makes awesome wrapping paper!! I chose Mint Julep for the unicorn and Tropical Teal for the Rhino.
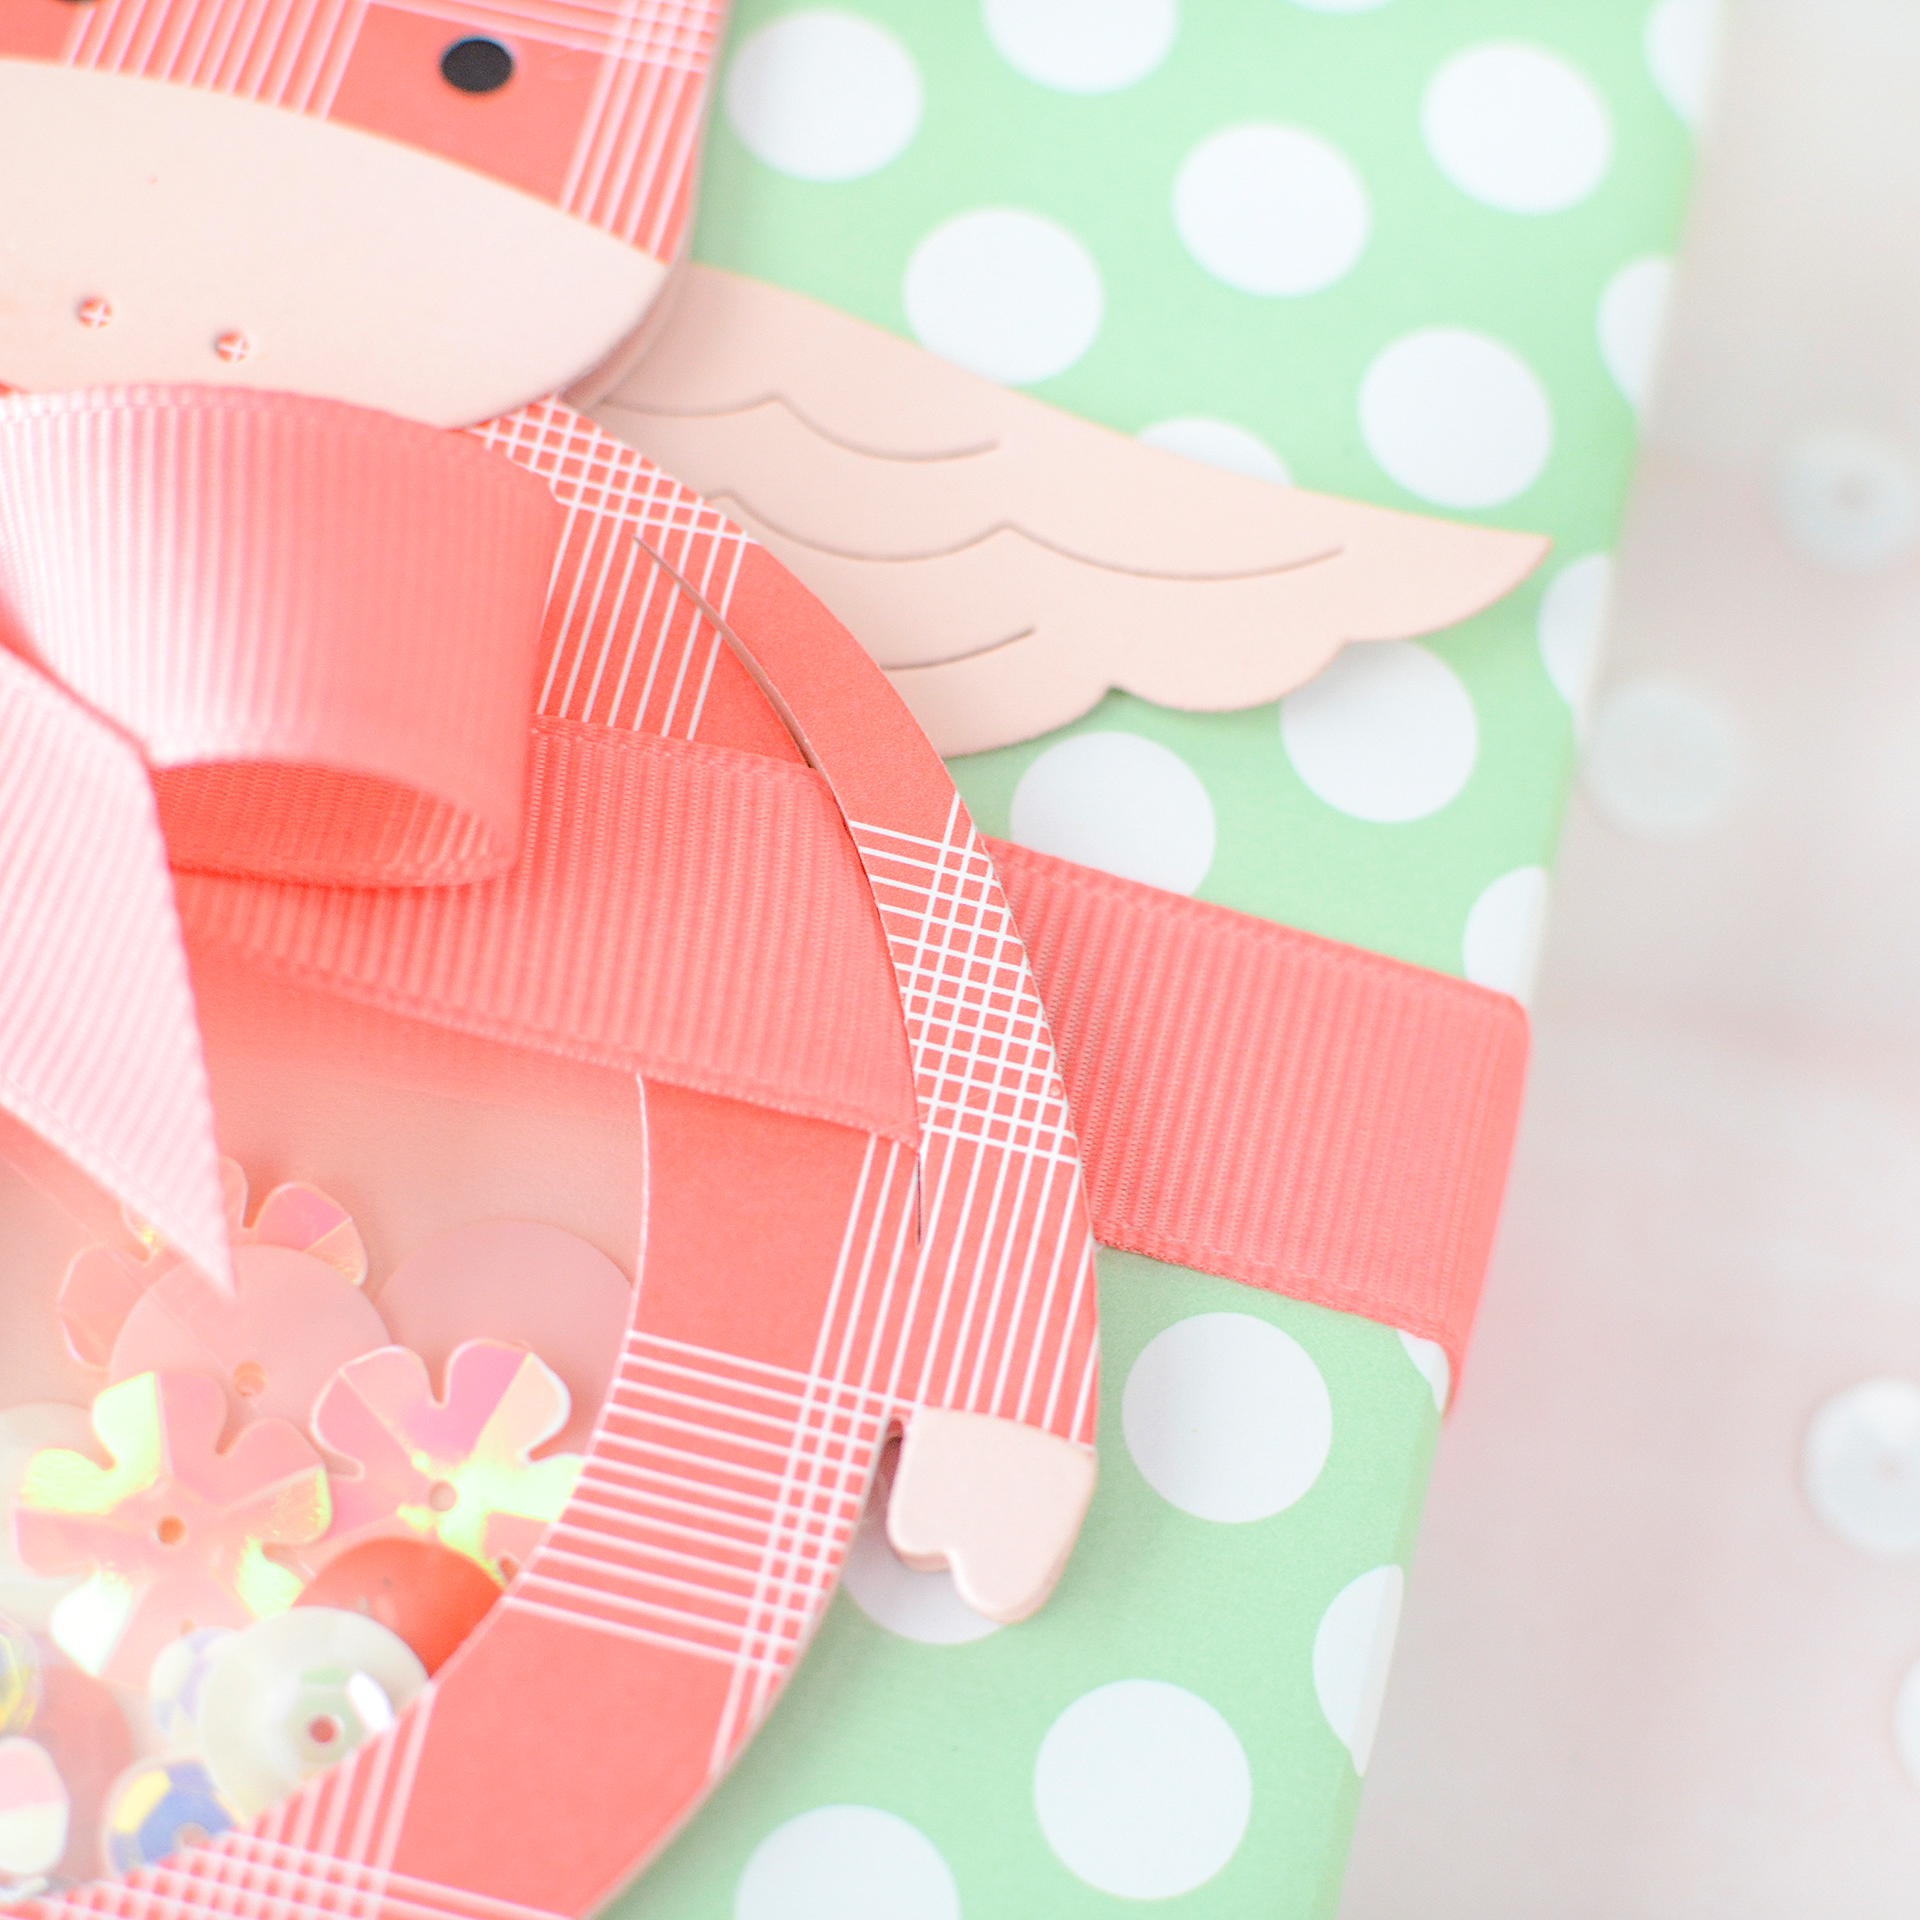 Next, I wove grosgrain ribbon through the slits in the potbelly arms, taking care not to rip or damage them. After that, I tied a bow to secure the potbelly to the ribbon. I added a simple shape tag–a pink flower and a blue star–stamping ‘To:‘ on each of them. With the potbellies being so cute already–and full of fun–I didn’t feel the need to overwhelm the package with a big tag or overly done trims.
Potbellies are so much fun to make, and a little addictive, so if you’ve got kids in your life, they’re going to love receiving a gift topped like one of these. Don’t be afraid to try your own style of animal (or creature), too!
Thank you so much for hanging out with me here today! I always love our May 6th dates and hope you find them inspiring! Don’t forget to make a quick stop by my own blog for a look at the creepy creature my son helped design!
 Stamps: Potbellies Everyday Sentiments
Ink: Berry Sorbet, Enchanted Evening
Paper: Sweet Blush, Bright Buttercup, Spring Rain & White cardstocks; Berry Sorbet, Mint Julep, Tropical Teal & Limeaid Ice Bitty Big
Dies: Potbellies: Unicorn, Nesting Basics: Circles, Tremendous Tags
Other: Berry Sorbet grosgrain ribbon, Limeaid Ice grosgrain ribbon, white twine, sequins, clear acetate sheets
Leave a Reply